Elements - Hi-fi system SONORO - Free user manual and instructions
Find the device manual for free Elements SONORO in PDF.
User questions about Elements SONORO
0 question about this device. Answer the ones you know or ask your own.
Ask a new question about this device
Download the instructions for your Hi-fi system in PDF format for free! Find your manual Elements - SONORO and take your electronic device back in hand. On this page are published all the documents necessary for the use of your device. Elements by SONORO.
USER MANUAL Elements SONORO
The descriptions and features in this manual only serve as general guidelines and do not represent a guarantee. In order to offer you a product of the highest quality, we reserve the right to make possible improvements or changes without prior notification.
For all product descriptions and user instructions, the German version is the ultimately valid reference in the event of possible deviations in other languages.
COPYRIGHT
The contents of this manual may not be reproduced, copied or otherwise duplicated in electronic, mechanical, magnetic, optical, chemical, manual, or any other form without the permission of our company, nor may it be stored in a search engine nor translated into another language.
MANUFACTURER INFORMATION
sonoro audio GmbH
Unter Goldschmied 6
50667 Köln
Deutschland
www.sonoro-audio.com
TABLE OF CONTENTS
- Preliminary notes 3
- Safety information 4
- Cleaning and storage 6
- Scope of delivery 6
- Control elements and connections 7
- Activation 9
Unpacking 9
Activating the battery 9
Connecting the antennas 9
Connecting the electricity 10
- Basic functions 10
Switching the device on 10
Switching the device off 10
Volume 10
- Radio operation 11
Selecting the frequency band 11
Searching for a station 11
Storing a station 12
Selecting a stored station 12
- Aux operation 13
- Settings 13
Time 13
Alarm 14
Equalizer (Bass/Treble) 15
Dimmer 16
Key illumination 16
- Connections 17
Headphones 17
Aux-In 17
Antennas 17
Theft protection 18
Electricity 18
- Technical data 19
- Disposal 20
14.Troubleshooting 21
15.Guarantee 23
1. PRELIMINARY NOTES
Thank you for deciding to purchase the elements by SONOR. In order for you to utilize this device and all its options, we recommend that you read the corresponding instructions in this manual thoroughly before the initial use of the device, even if you're familiar with handling electronic devices. Pay special attention to the chapter "Safety information" on page 4 and 5. Store this manual in a safe location for future reference. If you sell or transfer this device, please be sure to pass along these instructions as well. This is an electronic entertainment device. It may only be used for private and not industrial or commercial purposes. By default, the current product is not intended for use in medical, life-saving or life-sustaining applications. Only those connection cables and external devices may be used that correspond to the current device in respect to safety, electromagnetic compatibility and shielding quality. This device fulfils all relevant standards and guidelines in respect to CE conformity. If the device is altered in a way that has not been coordinated with the manufacturer, the compliance with these standards and guidelines is no longer guaranteed. Use only the accessories specified by the manufacturer. If you don't use the device within the Federal Republic of Germany, you have to observe the regional regulations or laws of the country of use.
2. SAFETY INFORMATION
Please read and observe the following safety information for your own safety!
-
The device may not be opened, modified or repaired by you. If the device has been dropped or if the casing has been damaged, disconnect it from the power supply.
-
Do not give your device, the packaging, and especially the accessories to children. Never let your children use electrical devices without supervision. Children are not always able to recognize potential hazards.
-
Do not use the device in environments with high humidity, large amounts of steam, smoke, or dust. Do not operate the device in the bathroom. The device and the accompanying components may not be exposed to dripping or sprayed water. Additionally, no objects or containers containing liquids, such as vases or glasses, may be placed on top of the device.
-
Do not expose the device to great heat. Don't place it near heat sources such as radiators or ovens. If you set up the device on a shelf, keep a minimum distance of 10cm to other objects or the walls of the shelves.
-
Don't leave the device in locations where the temperature can rise to a large degree (e.g. inside a vehicle). This could damage the casing and interior parts and cause a fire.
-
Only place the device on stable surfaces. Otherwise the device could drop or topple, cause injuries or sustain damage. Don't let the device drop or bump against anything and take great care when using it.
-
Make sure that the display is not exposed to any bumps. This could damage the glass of the display or cause the liquid to leak out. If the liquid gets into the eyes, on the skin or the clothes, it has to be rinsed off immediately with clear water. If the liquid gets into the eyes, consult your physician immediately.
-
Only use the supplied power adapter with the model number VA24B-120200 and connect the power adapter only to a 100-240 V 50 / 60 Hz electrical outlet.
-
Make sure that the electrical outlet is near the device and easily accessible. Immediately pull the power plug from the outlet if there is any damage to the power cable, power adapter, or the device.
-
Place the cables in such a way that no one can stumble over them and make sure that you don't place the cables across edges or bend them while placing them.
-
Pull the power plug of the power adapter from the outlet during lightning. Pull the power adapter from the outlet by the plug. Don't pull on the cable.
- Don't use the device if there are visible damages to the housing, the power adapter or the power cable. Let the repairs on the casing, power adapter and power cable only be carried out by a qualified specialist.
- Don't insert any objects into the device. There is the danger of an electric shock.
- If liquids or foreign objects get into the device, pull the power plug at once. Have the device checked by a specialist before you operate it again.
- CAUTION! Avoid listening with headphones at a continuous high volume. There is the danger of permanent hearing damage! Make especially sure that children don't turn the volume too high.
- CAUTION! There is a danger of explosion if the battery is replaced improperly. Only replace the batteries with batteries of the same type.
- Batteries can be fatal if swallowed. Store the batteries and the remote control outside of the reach of small children. If a battery has been swallowed, consult your physician immediately.
- The enclosed batteries may not be charged or reactivated with any other means, taken apart, thrown into fire, or short circuited. Clean the battery and device contacts before you insert the battery.
- Don't expose the batteries to any extreme temperatures. Leaking battery acid can cause damages. If the battery acid has leaked, avoid contact with the skin, eyes and mucous membranes. If there is contact with the acid, rinse the affected areas immediately with plenty of clear water and consult a physician at once.
- Dispose of your device and the battery in compliance with the legally applicable guideline 2002/96/EC. In particular, the device does not belong into household trash.
3. CLEANING AND STORAGE
Only clean your elements with a dry, soft cloth. Do not use any corrosive or abrasive cleaning agents since these might damage the surfaces of the device.
Only operate your radio in an environment without extreme temperatures and humidity. In particular, your elements is not intended for use outdoors.
If you intend to stop using your device for a long time or want to transport it, please use the protective covering in which the device was shipped.
4. SCOPE OF DELIVERY
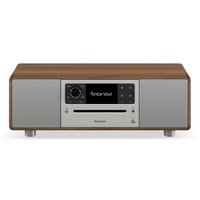
5. CONTROL ELEMENTS AND CONNECTIONS

1. elements
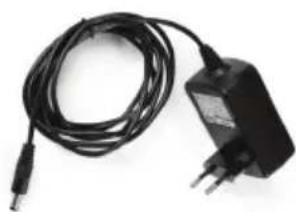
2. Power adapter

3. FM antenna

4. AM antenna
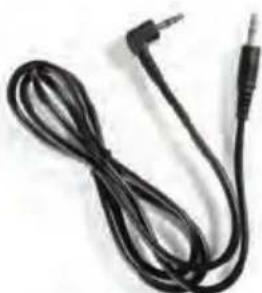
5.AUX cable


6. Manual, gloves and protective cloth
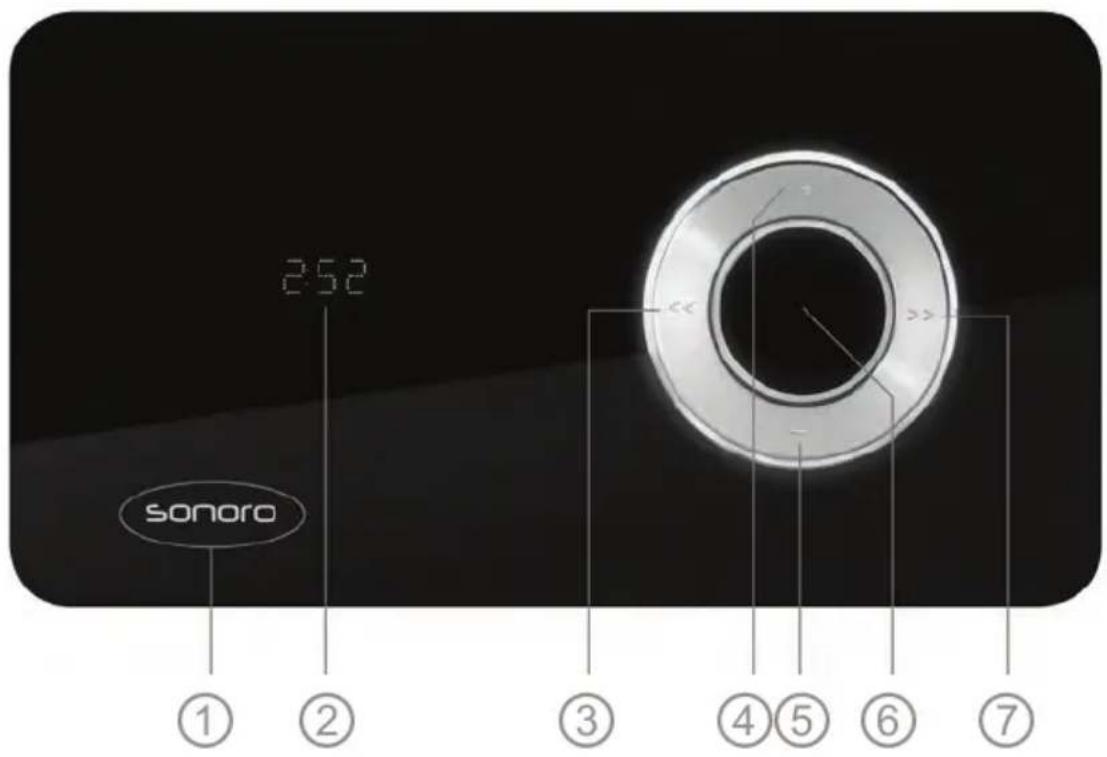
NAME
FUNCTION
① Sonoro Touch sensor: On/Off, FM/AM/AUX-IN
② DISPLAY
③ Station scan, navigation
(4) + Increase volume, increase levels
⑤ Decrease volume, decrease levels
⑥ MENU Activate menu, confirm entries
⑦ Station scan, navigation
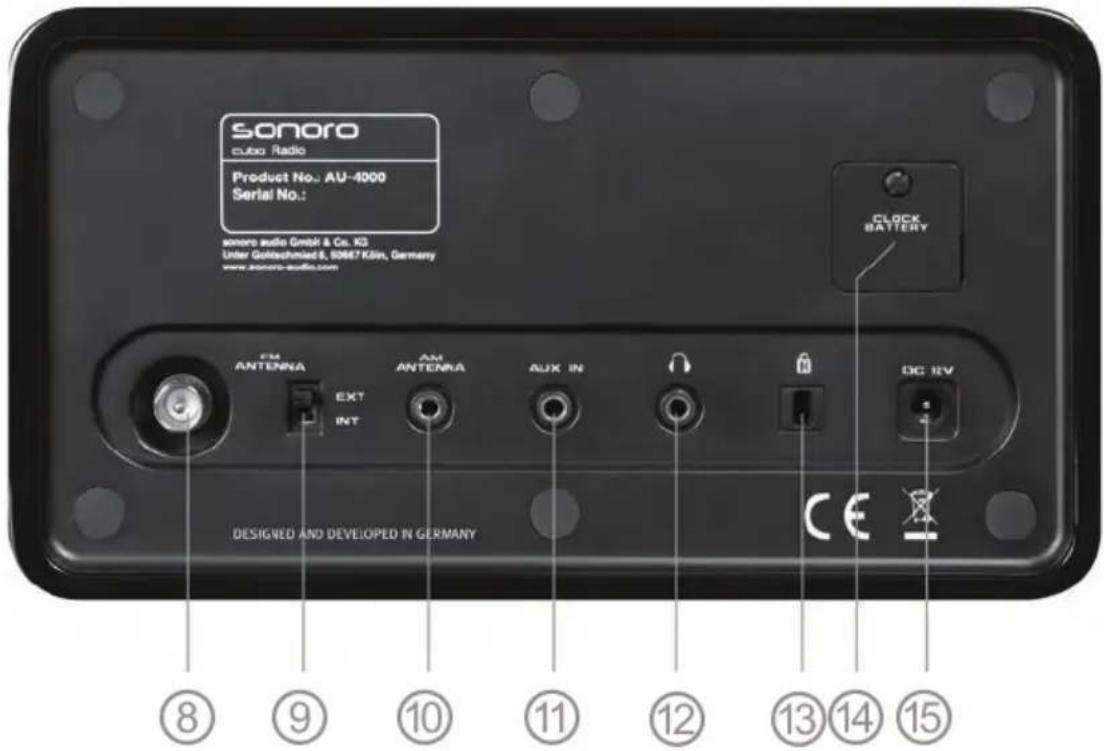
CONNECTION
NAME
FUNCTION
⑧
FM-ANTENNA
Connection for the FM antenna
⑨
FM-ANTENNA
Antenna selection switch
10
AM-ANTENNA
Connection for the AM antenna
⑪
AUX-IN
Connection for external audio devices
⑫

Connection to headphones
13

Connection for theft protection
14
Clock Battery
Battery cover
15
DC 12V
Connection for the power adapter
6. ACTIVATION
UNPACKING
Please unpack your elements with the provided gloves and place it in an easily accessible location. When selecting its location, pay special attention to the safety information on page 4 and 5.
ACTIVATING THE BATTERY
Your elements has an integrated battery ④ to store the time of day in case of a power failure. To guarantee that the lifespan of this battery is as long as possible, the battery has been separated from the electrical circuit with red plastic foil at the factory. Please pull off this foil before the first use of your elements.
CONNECTING THE ANTENNAS
Your elements can receive stations in the FM and AM frequency range. The installed antenna can suffice for the reception of FM stations with good reception conditions. If you would like to use the installed antenna, please set the antenna selection switch ⑨ to „INT".
If you would like to improve the reception, either connect the provided cable antenna to the „FM-Antenna“ connection ⑧ or connect your elements with your house antenna through the same connection ⑧. If you are using an external antenna, please set the antenna selection switch ⑨ to „EXT“.
If you would like to receive stations from the AM frequency range, you have to connect the provided AM antenna. To do this, please plug the 3.5mm jack plug of the antenna into the "AM-Antenna" connection 心 of your elements. Please make sure that you don't confuse the connections 10, 11 and 12 with each other.
CONNECTING THE ELECTRICITY
First please plug the provided power adapter into the electrical outlet and then plug the adaptor plug into the „DC 12V“ connection ⑤ of your elements.
Only use the provided power adapter (model number VA24B-120200) and pay attention to the safety information on page 4 and 5.
7. BASIC FUNCTIONS
SWITCHING THE DEVICE ON
Touch the SONORO lettering ① on the front of the device. Your elements is equipped with a touch sensor here, so that a light touch is sufficient.
After it is switched on, the most recently used music mode (FM RADIO, AM RAOIO, AUX) is activated, the music slowly fades in and the key illumination begins to light up.
You can deactivate the illumination of the key area in the settings of your elements. For more information about this, read p. 16. In addition, your elements can also switch on automatically. You can read about using the alarm function on page 14.
SWITCHING THE DEVICE OFF
Touch and hold the SONORO lettering ① on the front for about two seconds to switch off your device. GOOD BYE will appear on the display, followed by the time, and the illumination of the key area is slowly turned off.
- Your elements can also switch off automatically after a certain time. You can read about using the automatic shutoff function on page 15.
VOLUME
When the device is switched on, you can increase the volume of your elements with the button + ④ and reduce it with the button - ⑤. The display ② will inform you about the selected volume. You can set the volume from VOL MIN (mute) to VOL MAX in 32 steps.
Please don't use your elements at an excessive volume. Longer listening periods at an excessive volume pose a risk to your hearing. Please also pay attention to the safety information on page 4 and 5.
8. RADIO OPERATION
After your elements is switched on, it will start in the most recently selected playback mode. By repeatedly pressing the sonoro lettering ①, you can select between the playback modes (FM RADIO, AM RADIO, AUX).
In the FM RADIO mode, you can receive FM radio stations and in the AM RADIO mode you can receive medium frequency radio stations. For other information about AUX, please continue reading on page 13.
The FM frequency band corresponds to the FM range and lies between 87.5 MHz and 108.0 MHz in the VHF band II. The AM frequency band corresponds to the medium frequency range and lies between 522 kHz and 1620 kHz.
SEARCHING FOR A STATION
If you have selected a frequency range (FM RADIO or AM RADIO), you can search for stations with the buttons << ③ and >> ⑦.
Pressing one of these buttons for a longer time activates an automatic scan in the corresponding direction. If a strong station is found, the automatic scan stops and the radio station is played back.
By briefly pressing the buttons << or >> , you can fine-tune the station frequency in 0,05 MHz or 9 kHz increments.
If you don't change any setting of the station frequency for approx. 10 seconds, the display (2) will show the time of day instead of the station frequency.
STORING A STATION
Your elements can store up to 10 stations per frequency band.
If you have found a station that you would like to store, press the menu button ⑥ to access the menu. Now press the button << or >> until MEM SET appears on the display.
Next, select one of the program memory presets from P0 to P9 with the buttons + and -. The subsequent message FREE or USED will inform you whether the program memory preset is still free or already assigned by you. Already assigned program memory presets can also be newly assigned by you. Confirm your selection with the menu button. The display will indicate P0...9 SAVED.
If you would like to cancel the storage process, just don't press any button for approx. 5 seconds. Your elements will then return from the menu to the regular playback.
- Your elements has an integrated memory so that your stations will remain stored even if you disconnect the device from the power supply.
SELECTING A STORED STATION
Your elements can store up to 10 stations per frequency band.
If you would like to call up a stored station, switch on your elements, select the desired frequency band by pressing the SONORo lettering ① and activate the menu with the menu button ⑥.
Now the function MEM CALL appears on the display and after you have again confirmed with the menu button, you can select one of the program memory presets P 0 bis P 9 with the buttons + and -. The assigned station frequency will be displayed behind the memory preset. If the program memory preset has not been assigned yet, the message FREE will be displayed afterwards.
When you have selected the desired station, your elements will play back the stored station.
If you would like to cancel the selection of a station, just don't press any button for approx. 5 seconds. Your elements will then return from the menu to the regular playback.
9. AUX OPERATION
With the Aux operation, you can enjoy music from another device (such as e.g. an MP3 player) with the excellent sound of your elements.
To do this, plug your external device into the 3.5mm jack socket ⑪ with the connecting cable. Afterwards, switch on your elements and press the SONORO lettering ① repeatedly until AUX appears on the display - now your elements is ready for playback. You can now operate the connected external device as usual.
Based on the many different connection possibilities, it may be possible that the provided Aux cable doesn't fit all devices. The device that you use has to transmit the audio data through a 3.5 mm jack socket. The headphone output of an MP3 player or line output of a computer are suitable for a connection with your elements, for example. Also pay attention to the specifications in the chapter TECHNICAL DATA on page 19.
10. SETTINGS
TIME
If your elements is switched off or if you haven't pressed a button for a longer time during the operation, the time of day will be displayed. You can have this displayed in a 24 hour format (e.g. 21:20) or in a 12 hour format (e.g. 9:20PM).
To set the time of day, please switch off your elements. Press the menu button ⑥ once, select the menu item TIME with the buttons << and >> and confirm your selection with the menu button. Now you have the option of selecting between the 24 hour format (24 HR) and the 12 hour format (12 HR) with the buttons + and -.
After you have confirmed your selection with the menu button, you can switch between the settings of hours and minutes with the buttons << and (the selection will be flashing) and set the appropriate values with the buttons + and - . Afterwards confirm your selection by pressing the menu button again.
ALARM
Your elements can wake you up with a radio station or a pleasant sound. You can set the volume of the alarm and the so-called snooze function.
You can set the alarm when the elements is switched on as well as when the device is switched off. In both cases, press the menu button ⑥, and then navigate with the buttons << and >> until the menu item ALARM appears on the display. Confirm your selection by pressing the menu button.
Now you can activate the alarm (ALM ON) or deactivate it (ALM OFF) with the buttons + and - and confirm them with the menu button. If you select ALM OFF, the setting is now finished. You can recognize an activated alarm by the small alarm symbol on the display.
If you have selected ALM ON, you can now set the wake-up time. This functions with the buttons +/- and <</>> the same way as when the time of day is set. Please confirm your selection with the menu button.
Next, SOURCE will appear on the display and you can decide which signal you want to be woken up with. The frequency areas FM and AM and an alarm tone (BEEP) are available. Make your selection with the buttons << and >> and confirm it with the menu button. If you should decide on a radio station, you can use the stations you have stored in the presets. Select from the 10 program memory presets PRESET 0...9 per frequency band with the + and - buttons.
Now volume will appear on the display and you can select the alarm volume of your signal source with the buttons + and -. As soon as the alarm starts, the volume is slowly increased until it reaches the level you have selected. When you confirm with the menu button, the setting of the alarm is finished. The display will indicate ALARM ON.
You can switch off an activated alarm by pressing the menu button ⑥ for approx. two seconds. The alarm will silence and the small alarm symbol on the display will stop flashing.
If you want to temporarily suppress an activated alarm rather than turning it off, you can use the snooze function. Briefly press the menu button ⑥ once when the alarm is activated. Now SNOOZE will appear on the display and you can use the + and - buttons to set after how many minutes the alarm should be switched on again. The default setting is 10 minutes. Once you have made a selection, please confirm it with the menu button. The small alarm symbol on the display will continue to flash and after the time set by you, the alarm will be activated again. If you would like to break off the snooze function ahead of time, press the menu button for approx. two seconds until the device switches off automatically.
AUTOMATIC SHUTOFF
If you would like to fall asleep to the music of your elements, the device can switch off after a certain time. (sleep timer function)
If you would like to activate this function, please press the menu button ⑥, select the menu item SLEEP with the buttons << and >> and confirm it again with the menu button. The symbol ST will appear on the display. (Sleep Timer)
If the automatic shutoff has already been set, the remaining time will be displayed. You can set the shutoff time in minute increments with the buttons << and . With the buttons + and - you can set the shutoff time in 5 or 15 minute increments. Confirm your selection with the menu button.
You have 1 MIN to 90 MIN available. If you select OFF, the automatic shutoff will be deactivated. Shortly before your elements is switched off, messages about the remaining time will be displayed. One minute before the shutoff, your elements will begin to slowly fade out the playback.
EQUALIZER (BASS/TREBLE)
You can adjust the sound of your elements to your personal taste or your spatial conditions. You can adjust the bass and treble in 7 steps each.
Press the menu button ⑥ on your switched-on elements and then select the menu item BASS or TREBLE with the buttons and >>. Please confirm your selection with the menu button.
Corresponding to the selected menu item, you now have the possibility of changing the bass or treble setting of your elements.
You can select a value between -3 and +3 with the buttons + and -. A positive value means that depending on the selection of BASS or TREBLE, low or high frequencies are increased. A negative value indicates a reduction of the corresponding frequencies.
DIMMER
You can also adjust the brightness of the display to your requirements.
Press the menu button ⑥ on your switched-on elements and then select the menu item DIMMER with the buttons and >>.
You can select between the three brightness levels DIM LO, DIM MI and DIM HI with the buttons + and -. Here DIM LO is the darkest setting and DIM HI the brightest setting.
KEY ILLUMINATION
Your elements has an illumination of the buttons ③ to ⑦ . This is turned on as soon as you switch on your elements and turns off when you switch off your device. You can also completely deactivate the illumination.
In order to change the key illumination, press the menu button ⑥ once while the elements is switched on. Then select the menu item LIGHT with the buttons << and >>.
With the buttons + and - you can now set the brightness of the key illumination of your elements. You have the choice between very bright (HIGH), normal (MID) and weak illumination (LOW). To deactivate the key illumination, select OFF.
11. CONNECTIONS
HEADPHONES
You can connect headphones to the headphone connection ② with a 3.5 jack plug. Make sure that you don't confuse the headphone connection ⑫ with the Aux-In connection ⑪
Avoid listening with headphones at a continuous high volume. There is the danger of permanent hearing damage! Make especially sure that children don't turn the volume too high.
AUX-IN
With the Aux-In connection, you can connect an external device and enjoy music from this device (such as e.g. an MP3 player) with the excellent sound of your elements.
To do this, plug your external device into the 3.5mm jack socket ⑪ with the connecting cable. For more information about the Aux operation, please read page 13. Make sure that you don't confuse the Aux-In connection ⑪ with the headphone output ⑫.
Based on the many different connection possibilities, it may be possible that the provided Aux cable doesn't fit all devices. The device that you use has to transmit the audio data through a 3.5 mm jack socket. The headphone output of an MP3 player or line output of a computer are suitable for a connection with your elements, for example. Also pay attention to the specifications in the chapter TECHNCAI DATA on page 19.
ANTENNAS
Your elements can receive stations in the FM and AM frequency range. The installed antenna can suffice for the reception of FM stations with good reception conditions. If you would like to use the installed antenna, please set the antenna selection switch ⑨ to „INT".
If you would like to improve the reception, either connect the provided cable antenna to the „FM-Antenna“ connection ⑧ or connect your elements with your house antenna through the same connection ⑧ .
If you have a cable connection, you can connect the antenna connection ⑨ of your elements with a customary coaxial cable to your antenna outlet and receive radio through cable in this way. This coaxial cable is not included in the scope of delivery.
If you would like to receive stations from the AM frequency range, you have to connect the provided AM loop antenna. To do this, please plug the 3.5mm jack plug of the antenna into the „AM-Antenna“-connection ⑩ of your elements. Please make sure that you don't confuse the connections ⑩ , ⑪ and ⑫ with each other.
The FM frequency band corresponds to the FM range and lies between 87.5 MHz and 108.0 MHz in the VHF band II. The AM frequency band corresponds to the medium frequency range and lies between 522 kHz and 1620 kHz.
THEFTPROTECTION
To protect your elements from theft, your device has a connection for a Kensington lock ⑬. Here you can connect any lock that is compatible with the connection of a Kensington lock.
This lock is not included in the scope of delivery.
ELECTRICITY
The power supply of your elements is provided by the included power adapter with the model number VA24B-120200. Please plug this into the electrical outlet first and then plug the adapter plug into the „DC 12V“ connection ⑤ of your elements.
Only use the provided power adapter (model number VA24B-120200) and pay attention to the safety information on page 4 and 5.
12. TECHNICAL DATA
| Display | 8 digit VFD display |
| Internal battery supply | 3 V lithium battery (IEC code: CR2032) |
| Power consumption during stand-by operation | approx. 1.5 W |
| Dimensions | approx. 210 x 130 x 120 mm |
| Weight without power adapter | approx. 1600 g |
Aux-In:
| Max. input voltage | 250 mV eff. |
| Input impedance | 22 kOhm |
Power adapter:
| Model number | VA24B-120200 |
| Input | 100-240 V~ AC, 0.7 A, 50-60 Hz |
| Output | 12 V DC, 2.0 A |
| Dimensions | approx. 81.5 x 49.5 x 48.5 mm |
| Weight | approx. 200 g |
13. DISPOSAL
BATTERY
Please consider that you as an end consumer are obligated to return discarded batteries to a distributor or a redemption site intended for this purpose by a public waste management facility.
DEVICE
Please consider that your electronic entertainment device is subject to the European guideline 2002/96/EC for the reduction of electronic waste.
- Therefore please note that you are not permitted to dispose of your device in your household waste.
- You can receive information regarding the disposal of old devices at the municipal administration, the waste disposal administration and the store where you purchased this product.
- You can drop off your device free of charge at communal collection points.
- With the proper disposal of old devices you prevent environmental damage and don't damage your health.

14. TROUBLESHOOTING
Caution! Do not try to repair the device yourself in any event; this will cancel the guarantee claim. Don't open the casing, since there is a danger of electric shock. If there is a malfunction, first check the items listed below before bringing the device in for repair. If you are unable to remedy a defect based on these recommendations, please contact your dealer or our customer service.
The time of day is not stored
If your device loses the set time of day after being disconnected from the power supply, you have either not removed the protruding protective foil of the battery or the integrated battery is empty or incorrectly installed. Please read the section „ACTIVATION" on page 9 or replace the battery.
Replacing the battery
If you replace the battery, please make sure that you use the correct battery type and pay attention to the poles. If there is any doubt, please have your specialist dealer perform the replacement. Batteries do not belong into household trash. Also read the information about battery disposal on page 20.
Bad reception quality
If you are using the internal FM antenna, it can happen that the location of your elements does not permit a better reception quality. In that case you should use the external antenna.
If you use the external antenna, make sure that the antenna selection switch ⑨ is switched to "EXT". Completely unroll the provided cable antenna and, if necessary, change the position of the cable antenna.
You can't hear a sound
If you hear no sound, look for a station and increase the volume. It is possible that a device is connected to the headphones connection ⑫.
The alarm doesn't work
Make sure that the alarm is activated (alarm symbol on the display), that you have selected the right source and the right volume and that no device is connected to the headphones connection ②.
DICIARAZIONI
circa 1600g
250 mV eff.
22 kOhm
VA24B-120200
100-240 V~ AC, 0,7 A, 50-60 Hz
12VDC,2,O A
circa 81,5× 49,5× 48,5mm
circa 200 g