VSZ4GDYRE - Vacuum Cleaner SIEMENS - Free user manual and instructions
Find the device manual for free VSZ4GDYRE SIEMENS in PDF.
User questions about VSZ4GDYRE SIEMENS
0 question about this device. Answer the ones you know or ask your own.
Ask a new question about this device
Download the instructions for your Vacuum Cleaner in PDF format for free! Find your manual VSZ4GDYRE - SIEMENS and take your electronic device back in hand. On this page are published all the documents necessary for the use of your device. VSZ4GDYRE by SIEMENS.
USER MANUAL VSZ4GDYRE SIEMENS
where w = w(x) is the vector of the
1.5% 2.5% 3.5%
1. Hekkema
2. Jusikainen

de Sicherheitshinweise .2 Gebrauchsanleitung. 23
en Safety information .3 Instructions for use .26
fr Consignes de sécurité . 5 Mode d'emploi . 29
nI Veiligheidsvoorschriften .7 Gebruiksaanwijzing .32
da Sikkerhedsanvisninger .8 Brugsanvisning .35
no Sikkerhetsanvisninger 10 Bruksanvisning .38
sv Sakerhetsanvisningar 11 Bruksanvisning .41
fi Turvaohjeet .13 Käytöohje .43
pt Indicações de segurança 14
Manual de instruções .46
es Consejos y advertencias de seguridad .16
Instrucciones de uso .49
el Yno8eiEic aopaaieiac .17 O8nyiec Xpnoq .52
tr Güvenlik bilgileri 29
Kullanma kilavuzu 52
22 1ar 61
de
Please keep this instruction manual. When passing the vacuum cleaner on to a third party, please also pass on this instruction manual.
Intended use
This appliance is intended for domestic use only. This appliance is intended for use up to a maximum height of 2000 metres above sea level. Only use this vacuum cleaner in accordance with the instructions in this instruction manual.
In order to prevent injuries and damage, the vacuum cleaner must not be used for:
Vacuum-cleaning persons or animals
Vacuuming up:
- hazardous, sharp-edged, hot or glowing substances.
-damp or liquid substances. - highly flammable or explosive substances and gases.
- ash, soot from tiled stoves and central heating systems.
- toner dust from printers and copiers.
Spare parts, accessories, dust bags
Our original spare parts, original (special) accessories and original dust bags are designed to work with the features and requirements of our vacuum cleaners. We therefore recommend that you only use our original spare parts, original (special) accessories and original dust bags. This will ensure that your vacuum cleaner has a long service life and that the quality of its cleaning performance will remain consistently high throughout.
Please note:
Using unsuitable or inferior-quality spare parts, (special) accessories and dust bags can damage your vacuum cleaner. Damage caused by the use of such products is not covered by our guarantee.
Safety information
This vacuum cleaner complies with the recognised rules of technology and the relevant safety regulations.
The appliance may be used by children over the age of 8 years and by persons with reduced physical, sensory or mental capacity or by persons with a lack of experience or knowledge if they are supervised or have been instructed on the safe use of the appliance and the have understood the potential dangers of using the appliance.
Children must never play with the appliance.
- Cleaning and user maintenance must never be carried out by children without supervision.
- Plastic bags and films must be kept out of the reach of children before disposal. Risk of suffocation.
Proper use
- Only connect and use the vacuum cleaner in accordance with the specifications on the rating plate.
- Never vacuum without the dust bag or dust container, motor protection or exhaust filter. This may damage the vacuum cleaner.
Always keep the vacuum cleaner away from your head when using nozzles and tubes. This could cause injury! - When vacuuming stairs, the appliance must always be positioned below the user.
- Do not use the power cord or the hose to carry or transport the vacuum cleaner.
For safety reasons, if this appliance's mains power cable becomes damaged, it must be replaced by the manufacturer, their after-sales service department or a similarly qualified person.
If using the appliance for longer than 30 minutes, pull out the power cord completely. - When disconnecting the appliance from the mains, pull on the plug itself to remove it; do not pull on the power cord.
- Do not pull the power cord over sharp edges or allow it to be-come trapped.
- When the cable is being automatically rewound, ensure that the mains plug is not thrown towards persons, body parts, animals or objects.
- Use the mains plug to guide the power cord.
Pull out the mains plug before carrying out any work on the vacuum cleaner. - Do not operate the vacuum cleaner if it is damaged. Unplug the appliance from the mains if a fault is detected.
- For safety reasons, only authorised after-sales service personnel are permitted to carry out repairs and fit replacement parts to the vacuum cleaner.
- Protect the vacuum cleaner from the weather, moisture and sources of heat.
- Do not pour flammable substances or substances containing alcohol onto the filters (dust bag, motor protection filter, exhaust filter, etc.).
The vacuum cleaner is not suitable for use on construction sites. Vacuuming up building rubble could damage the appliance. - When not in use, switch off the appliance and pull out the mains plug.
At the end of its life, the appliance should immediately be rendered unusable, then disposed of in an appropriate manner.
Please note
The mains socket must be protected by at least a 16 amp circuit breaker.
If a circuit breaker is tripped when you switch on the vacuum cleaner, this may be because other electrical appliances which have a high current draw are connected to the same power circuit.
To prevent the circuit breaker from tripping, select the lowest power setting before switching the appliance on, and increase the power only once it is running.
Disposal information
■ Packaging
The packaging is designed to protect the vacuum cleaner from being damaged during transportation. It is made of environmentally friendly materials and can therefore be recycled. Dispose of packaging that is no longer required at an appropriate recycling point.
Old appliance
Old appliances still contain many valuable materials. Therefore, please take appliances that have reached the end of their service life to your retailer or recycling centre so that they can be recycled. For current disposal methods, please enquire at a retailer or your local council.
Disposal of filters and dust bags
Filters and dust bags are manufactured from environmentally friendly materials. Provided they do not contain substances that are not permitted in household waste, you can dispose of them with your normal household waste.
Notes on the energy label
This vacuum cleaner is a general purpose vacuum cleaner with a primary hose.
To achieve the declared energy efficiency and cleaning performance class on carpet and hard floor, please use the interchangeable universal nozzle.
These calculations are based on the Commission Delegated Regulation (EU) No. 665/2013 of 3rd May 2013 supplementing Directive 2010/30/EU.
Unless otherwise stated, all the procedures referred to in these instructions were carried out in accordance with the EN 60312-1:2017* standard.
*As the motor service test is carried out with the dust collector empty, the stated motor service life must be increased by 10% for tests with the dust collector half filled.
fr
aalalalall, aulalal lalal alalal alalal
j_4 = 1
aIyall Jlocg aiaill pll JibJ j
aol jn jn p 1nnll abgiall
1
Lgio JlilgJglio
a1 = 2,an + 1 = 2( an + 1) - 2an
de
Please keep this instruction manual. When passing the vacuum cleaner on to another person, please also hand over this instruction manual.
Fold out the picture pages.
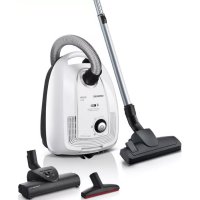
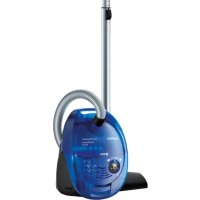
Your vacuum cleaner
1 Adjustable floor tool (with locking collar)
2 Hard-floor brush (with locking collar)
3 Hose hand grip
4 Flexible hose
5 Telescopic tube with sliding switch (and locking collar)
6 Telescopic tube with adjusting sleeve (and locking collar)
7 Power cord
8 Parking aid
9 Locking lever
.0 Exhaust grille
11 Dust bag
12 Exhaust filter
13 Motor protection filter, washable
14 Carrying handle
15 Dust bag compartment lid
16 Dust bag change indicator
17 Storage aid (on underside of appliance)
18 On/off button and power controller
19 Accessories holder for multi-purpose nozzle
20 Multi-purpose nozzle
21 Drill dust nozzle*
Replacement parts and special accessories
A Replacement filter pack
To get the most out of your appliance, we recommend using PowerProtect genuine replacement bags (VZ41FGALL).
Contents:
- 4 dust bags with fasteners
- 1 micro-hygiene filter
We therefore recommend that you only use our original dust bags.
Your appliance is a highly efficient vacuum cleaner that achieves excellent cleaning results when used with high-quality dust bags.
Only by using high-quality dust bags (such as Siemens original dust bags) can you ensure that your vacuum cleaner is working at the energy efficiency class, dust pick-up rate and dust retention capacity listed on its EU energy label.
The use of inferior-quality dust bags (e.g. paper bags) can have a negative effect on the service life and performance of your appliance.
Using unsuitable or inferior-quality dust bags can also damage your vacuum cleaner.
Such damage is not covered by our guarantee." You can find more information about this at www.siemens-home.bsh-group.com/dust-bag. You can order our original vacuum cleaner bags here.
B Hard floor brush VZ123HD
For vacuuming hard floors (parquet, tiles, terracotta, etc.)
Initial use
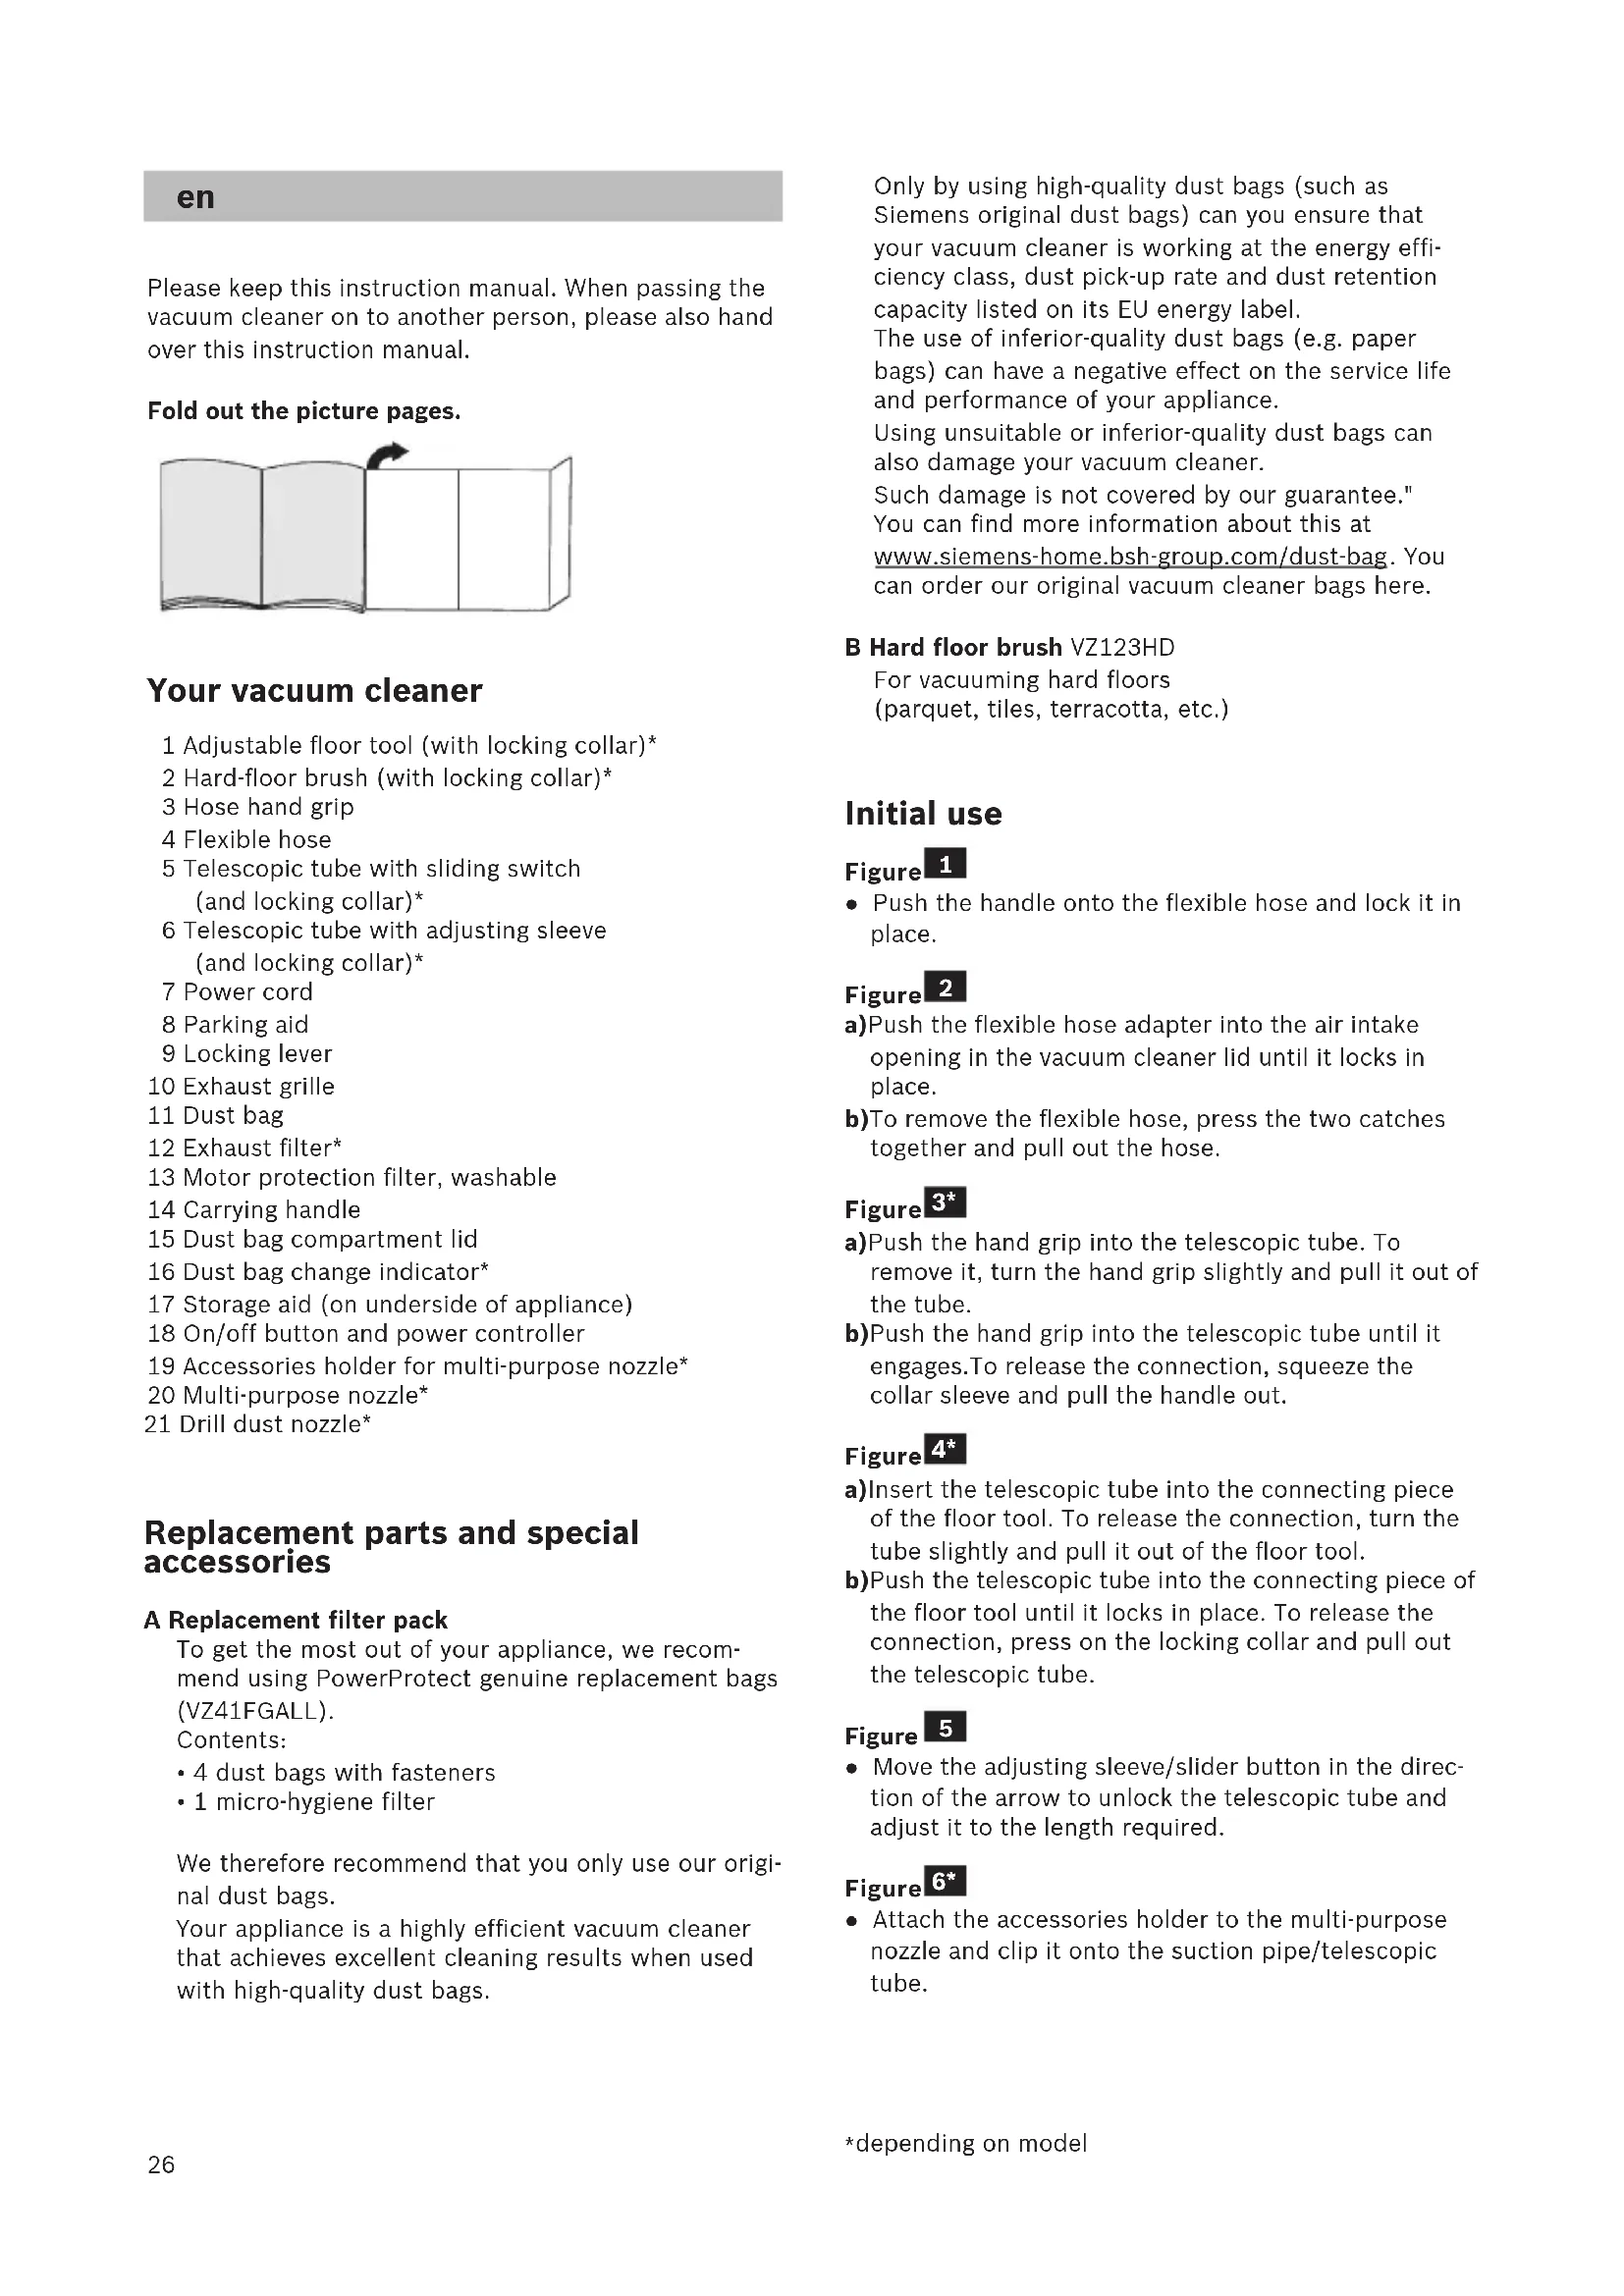
Figure 1
- Push the handle onto the flexible hose and lock it in place.
Figure 2
a)Push the flexible hose adapter into the air intake opening in the vacuum cleaner lid until it locks in place.
b)To remove the flexible hose, press the two catches together and pull out the hose.
Figure 3\*
a)Push the hand grip into the telescopic tube. To remove it, turn the hand grip slightly and pull it out of the tube.
b)Push the hand grip into the telescopic tube until it engages. To release the connection, squeeze the collar sleeve and pull the handle out.
Figure 4\*
a)Insert the telescopic tube into the connecting piece of the floor tool. To release the connection, turn the tube slightly and pull it out of the floor tool.
b)Push the telescopic tube into the connecting piece of the floor tool until it locks in place. To release the connection, press on the locking collar and pull out the telescopic tube.
Figure 5
- Move the adjusting sleeve/slider button in the direction of the arrow to unlock the telescopic tube and adjust it to the length required.
Figure 6\*
- Attach the accessories holder to the multi-purpose nozzle and clip it onto the suction pipe/telescopic tube.
Figure 7
Holding the power cord by the plug, pull out to the required length and insert the plug into the mains socket.
Figure 8 tching on and off
- Press the ON/OFF button in the direction of the arrow to switch your vacuum cleaner on.
Figure 9 trolling the suction level
The suction level can be infinitely adjusted to the level required by turning the control knob in the direction of the arrow.
Low power range

For vacuuming delicate materials, e.g. upholstery, curtains, etc.
Medium power range

For the daily vacuuming of light dirt deposits.
High power range

For vacuuming durable floor coverings, hard floors and heavily soiled surfaces.
Vacuuming
Please note:
- Floor tools are subject to a certain amount of wear, depending on the type of hard floor you have (e.g. rough, rustic tiles). Therefore, you must check the underside of the floor tool at regular intervals. Worn undersides of floor tools may have sharp edges that can damage sensitive hard floors, such as parquet or linoleum. The manufacturer does not accept any responsibility for damage caused by worn floor tools.
Figure 10
Set the adjustable floor tool:
Rugs and carpets

Hard floors

If you are vacuuming up relatively large particles, make sure that you vacuum them up successively and carefully to ensure that the vacuum channel of the floor tool does not become blocked. If necessary, you should raise the nozzle in order to better vacuum up the dirt particles.
Figure 11uuming with accessories
Attach the nozzles to the suction pipe or hand grip as required:
a) Crevice nozzle for vacuuming crevices and corners, etc.
b)Upholstery nozzle for vacuuming upholstered furniture,curtains,etc.
c)Hard-floor tool
For vacuuming hard floor coverings (tiles, parquet flooring, etc.)
- Push the telescopic tube into the connecting piece of the hard floor tool until it locks in place.
- To release the connection, press the locking collar and pull out the telescopic tube.
Figure 12* aning the hard-floor tool
a)Vacuum the tool from below to clean it.
b) Use scissors to cut through threads and hairs wound round the rollers and then vacuum them away.
Drill dust nozzle
Figure 13*
a) Secure the drill dust nozzle to the handle and then place against the wall, so that the nozzle drill hole opening sits directly over the hole to be drilled.
b)Select the lowest power setting and then switch on the vacuum cleaner.
Suction holds the drill dust nozzle in the required position.
c)Depending on the surface of the wall to be drilled it may be necessary to readjust the power to a higher setting to ensure the drill dust nozzle is firmly attached.
Any fine particles are automatically vacuumed up.
Figure 14
You can use the parking aid on the back of the vacuum cleaner if you wish to stop vacuuming for a short time.
- Once you have switched off the appliance, slide the hook on the floor tool into the recess on the rear of the appliance.
Figure 15
To overcome obstacles, e.g. steps, the appliance can also be carried by the handle on the appliance body.
When the work is done
Figure 16
a)Pull out the mains plug.
b) Briefly pull on the power cord and then release it (the power cord retracts automatically).
Figure 17
To store/transport the appliance, you can use the storage aid on the underside of the appliance.
a) Stand the appliance upright on its end.
b)Slide the hook on the floor tool into the recess on the underside of the appliance.
Changing the filter
Please note: Always switch off the appliance before changing the filter.
Replacing the dust bag
Figure 18
- If the dust bag change indicator in the lid is filled completely when the floor tool is lifted from the floor with the highest suction level selected, the dust bag must be changed, even though it may not yet be full. Even if the dust bag is not full, it may still need changing, due to the type of dust which has been vacuumed. First check that the nozzle, suction pipe and flexible hose are not blocked, as this would also lead to the dust bag change indicator being triggered.
Figure 19:ening the lid
a)Unlock the lid by pulling on the locking lever in the direction of the arrow.
b) Open the lid in the direction of the arrow.
Figure 20
a) Close the dust bag by pulling on the locking tab.
b)Take out the dust bag.
cInsert a new dust bag.
d)Push the dust bag fully into the holder.
Please note: the lid will only close if a dust bag has
been inserted.
Cleaning the motor protection filter
The motor protection filter should be cleaned regularly by knocking out the dirt and rinsing.
Figure 21
- Open the dust bag compartment lid. Figure 19
a) Release the motor protection filter from the catch by pulling it sideways, and pull it out in the direction of the arrow.
b)Clean the motor protection filter by tapping out the dirt.
c)If it is very dirty, the motor protection filter should be rinsed.
The filter must then be left to dry for at least 24 hours.
d)After cleaning, refit the motor protection filter into the appliance, lock it in place and close the dust bag compartment lid.
Replacing the exhaust filter
Vacuum cleaner with micro-hygiene filter
This should be replaced with every replacement filter pack
Figure 22*
- Open the dust bag compartment lid. Figure 19
a)Release the filter holder by moving the locking lever in the direction of the arrow.
b)Remove the micro-hygiene filter.
c)The micro-hygiene filter can be rinsed out.
The filter must then be left to dry for at least 24 hours.
d) Remove the micro-hygiene filter. Insert the new micro-hygiene filter into the appliance.
e)Insert the filter holder into the appliance and lock it in place.
Vacuum cleaner with HEPA filter
If your vacuum cleaner is equipped with a HEPA filter, this must be replaced once a year.
Figure 23\*
- Open the dust bag compartment lid. Figure 19
a)Unlock the HEPA filter by moving the locking lever in the direction of the arrow and remove the filter from the appliance.
b)Insert the new HEPA filter and lock it in place.
After vacuuming fine dust particles, clean the motor protection filter and, if necessary, replace the microhygiene filter or HEPA filter.
Care
Always switch off the vacuum cleaner and disconnect it from the mains before cleaning the vacuum cleaner.
The vacuum cleaner and plastic accessories can be cleaned with ordinary plastic cleaner.
Do not use abrasive materials, glass-cleaning
- agents or all-purpose cleaning products. Never immerse the vacuum cleaner in water.
If required, the dust compartment can be vacuumed out with a second vacuum cleaner or simply with a dry duster/ dusting brush.
Subject to technical modifications.
fr
www.siemens-home.bsh-group.com/dust-bag.
Du hittar mer information pa www.siemens-home.bsh-group.com/dust-bag.
aaii jia iiaiia 1jie aaiy
21
19 0j
a
Aaii Dda no aal yao jil 1 (b
1 1 1 1 1 1 1 1 1 1 1 1 1 1 1 1 1 1 1 1 1 1 1 1 1 1 1 1 1 1 1 1 1 1 1
JyIgEeLwYsodjilll jilll
aall jll yall JcSay (c
J 1
aill gall jil, Sall jy jy. gall jil, Sall jzj (d
i 1
Hepa jiey odjgai
Hepa jilb jia 1
23
19 a
paewd aljai jiai 1j i jie biwily Hepa jia jay a (a
iiisall 124 jai
Hepa jie b
iie 1
. Hepa jilil gall jilil gall
a
16
a
(L)
17
iil 10000000000000000000000000000000000000000000
a
gllg lglg gllg llglg (b
jiall
1
jss
18
Lai Lao jil 11 bally jilal y nnnn l 12
jiall gaiy gali ygi jgai alln o
0
aill 1
.
1
19
a
aolil 1000
20
glal yjx jx jy jil 1 (a)
(b)
. 5
Aaill Jdall jll 5 dai (d
aLlal
11
a baaal o rla a la - aalll w - aaiill w
Aa
jlllglc c gacgacgacgacgacgacg
a 1
(c
aall 1 11 1
aal aal yail gla bial al
c l1( x,y,z) = l1( x)
aallll 1
12*
Jawl jw 1y
(1)
13*
g 1
aall
a
puiu jgiua jiei aai all bai
l1l2 = 2
gagall gaaa aai
Jnssnnnns
S = 12
www.siemens-home.bsh-group.com/dust-bag
Cai daili liu ci lglal jia jial
VZ123HD
alldoll
( )
#
1
A
2 0
a b a a a a a a a a a a a a a a a a a a a a a a a a a a a a a a a a a a a a a a a a a a
.
3 S_ G = 12 · PG · GD
jiaai jai aai jai ayiyuyuui yuyuui aai jai
3) gull 10
aalgl Jd y Sswll s gwlall (b
aaiia aaii
4^ *
a
J
a 111111111111111111111111111
C. 1,2,3,4,5,6,·s
jai jai aiai aiai aiai aiai aiai aiai aiai aiai aiai aiai aiai aiai aiai aiai aiai aiai aiai aiai aiai aiai aiai aiai aiai aiai aiai aiai aiai aiai aiai aiai aiai aiai aiai aiai aiai aiai aiai aiai aiai aiai aiai aiai aiai aiai aiai aiai aiai aiai aiai aiai
1
1yall
jg j
1
*yaaayaoa aalll 2
· s · d 与 相等
S OBC = S AOB + S_ BOC
www.siemens-home.bsh-group.com/fi
www.siemens-home.bsh-group.fr
GB Great Britain
BSH Home Appliances Ltd.
Grand Union House
Old Wolverton Road
Wolverton
Milton Keynes MK12 5PT
To arrange an engineer visit, to order spare parts and accessories or for product advice please visit
www.siemens-home.bsh-group.uk
or call Tel.: 0344 892 8999*
*Calls are charged at the basic rate, please check with your telephone service provider for exact charges
GR 3 Greece, EAAAC
BSH Ikiakes Siskeves A.B.E.
Central Branch Service
17 km E.O. Athinon-Lamias &
Potamou 20
14564 Kifisia
IavvAAHvio TnEeWvO:18 182
(Aotikn xpewon)
mailto: nkf-CustomerService@bshg.com
www.siemens-home.bsh-group.com/gr
HK Hong Kong
BSH Home Appliances Limited
Unit 1 & 2, 3rd Floor, North Block,
Skyway House, 3 Sham Mong Road
Tai Kok Tsui, Kowloon
Hong Kong
Tel.: 2565 6151
Fax: 25656681
mailto:siemens.hk.service@bshg.com
www.siemens-home.bsh-group.com/hk
HR Hrvatska, Croatia
BSH kučni urežaji d.o.o.
Kneza Branimira 22
10000 Zagreb
Tel.: 015520999
Fax: 01 640 36 03
mailto:informacije.servis-hr@bshg.com
www.siemens-home.bsh-group.com/hr
HU Magyarorszag, Hungary
www.siemens-home.bsh-group.com/hu
IE Republic of Ireland
BSH Home Appliances Ltd.
Unit F4, Ballymount Drive
Ballymount Industrial Estate
Walkinstown
Dublin 12
Service Requests, Spares and
Accessories
Tel.: 01450 2655*
Fax: 01450 2520
www.siemens-home.bsh-group.ie
*0.03 € per minute at peak.
Off peak 0.0088 € per minute.
IL Israel,
C/S/B/ Home Appliance Ltd.
1, Hamasger St.
North Industrial Park
Lod, 7129801
Tel.: 089777222
Fax: 089777245
mailto:csb-serv@csb-ltd.co.il
www.siemens-home.bsh-group.com/il
IN 3 India, Bharat,
BSH Household Appliances
Mfg. Pvt. Ltd
Arena House,
Main Bldg, 2nd Floor
Plot No. 103, Road No. 12
MIDC, Andheri East
Mumbai 400 093
Toll Free 1800 209 1850*
www.siemens-home.bsh-group.com/in
Mo-Sa: 8.00am to 8.00pm
(exclude public holidays)
IS Iceland
Smith & Norland hf.
Noatuni 4
105 Reykjavik
Tel.: 05203000
Fax: 05203011
www.sminor.is
IT Italia, Italy
www.siemens-home.bsh-group.com/it
KZ 3 Kazakhstan, Ka3aKaCTaH
IP Turebekov Yerzhan Nurmanovich
Jangeldina str. 15
Shimkent 160018
Tel.: 0252 31 00 06
mailto:evrika_kz@mail.ru
LB Lebanon
Tehaco.s.a.r.l
Boulevard Dora 4043 Beyrouth
P.O.Box 90449
Jdeideh, 1202 2040
Tel.: 01 25521
mailto:Info@Teheni-Hana.com
LT Lietuva, Lithuania
Senuku prekybos centras UAB
Jonavos g.62
44192 Kaunas
Tel.: 037 212 146
Fax: 037 212 165
www.senukai.lt
UAB "AG Service"
R. Kalantos q. 32
52494 Kaunas
Tel.: 070055655
Fax: 0373 313 63
mailto:servias@agservice.lt
www.agservice.it
Baltic Continent Ltd.
Luksio g.23
09132 Vilnius
Tel.: 05 274 1788
Fax: 05 274 1722
mailto:info@balticcontinent.It
www.balticcontinent.lt
LU Luxembourg
www.siemens-home.bsh-group.com/lu
LV Latvija, Latvia
SIA "General Serviss"
Bulli iela 70c
1067 Riga
Tel.: 067425232
mailto:info@serviscentrs.lv
www.serviscentrs.lv
Elkor Serviss
Brivibas gatte 201
1039 Riga
Tel.: 067 0705 20; -36
Fax: 067 070 524
mailto:info@elkorserviss.lv
www.elnkorserviss.lv
Sia Elektronika-Serviss
Tadaiku iela 4
1004 Riga
Tel.: 067 717 060
Fax: 067 601 235
mailto:serviss@elektronika.lv
www.elektronika.lv
MD Moldova
S.R.L. "Rialto-Studio"
yn.LyceBa,98
2012 KuniHneB
Tei./ΦaKc:022238180
MKc Macedonia,Makeonna
GORENEC
Jane Sandanski 69 lok.3
1000 Skopje
Tel.: 022454600
Mobil: 070 697 463
mailto:gorenec@yahoo.com
MT Malta
Aplan Limited
The Atrium
Mriehel by Pass
BKR3000 Birkirkara
Tel.: 025 495 122
Fax: 021 480 598
mailto:lapap@aplan.com.mt
NL Nederlande, Netherlands
www.siemens-home.bsh-group.nl
NO Norge, Norway
www.siemens-home.bsh-group.com/no
NZ New Zealand
BSH Home Appliances Ltd.
Unit F 2, 4 Orbit Drive
Mairangi Bay
Auckland 0632
Tel.: 0800 245 700*
Fax: 0800 256 535
mailto:repairaction.nz@bshg.com
Mo-Fr: 8.30am to 4.00pm
(exclude public holidays)
PL Polska, Poland
www.siemens-home.bsh-group.pl
PT Portugal
BSHP Electrodomésticos,
www.siemens-home.bsh-group.com/pt
RO Romania, Romania
BSH Electrocasnice srl.
Sos. Bucuresti-Ploiesti,
nr. 19-21, sect.1
13682 Bucarest
Tel.: 021 203 9748
Fax: 021 203 9733
mailto:service.romania@bshg.com
www.siemens-home.bsh-group.com/ro
RU c Russia, Poccn
OOO“5CXБыТВЯТЕХИКА
CepBnC OT npOn3BODnteTnA
Manay Kanyekka 19/1
119071 MockBa
ten.:4957372962
mailto:mok-kdhl@bshg.com
www.siemens-home.bsh-group.ru
SE Sverige, Sweden
BSH Home Appliances AB
Landsvagen 32
169 29 Solna
Tel.: 0771 11 22 77 local rate
mailto:Siemens-Service-SE@bshg.com
www.siemens-home.bsh-group.com/se
SG Singapore新加坡
BSH Home Appliances Pte. Ltd.
Block 4012, Ang Mo Kio Avenue 10
01-01 Techplace 1
Singapore 569628
Tel.: 6751 5000*
Fax: 6751 5005
mailto:bshsgp.service@bshg.com
- Mo-Fr: 8.30am to 7.00pm, Sa: 8.30am to 5.30pm
(exclude public holidays)
SI Slovenija, Slovenia
BSH Hišni aparati d.o.o.
Litostrojska 48
1000 Ljubljana
Tel.: 015830701
Fax: 015830889
mailto:informacije.servis@bshg.com
www.siemens-home.bsh-group.com/si
SK Slovensko, Slovakia
www.siemens-home.bsh-group.com/sk
TR Türkiye, Turkey
BSH Ev Aletleri Sanayi
ve Ticaret A.S.
Fatih Sultan Mehmet Mahallesi
Balkan Caddesi No: 51
34771 Umraniye, Istanbul
Tel.: 02164446688*
Fax: 0 216 528 9188*
mailto:careline.turkey@bshg.com
www.siemens-home.bsh-group.com/tr
- Cagli merkezini sabit hatlardan
aramanin bedeli sehir icücretlendirme,
Cep Telefonarindan iske kullanlan
TOB "BCX NObyToBa TexHika"
ten.: 044 490 2095
mailto:bsh-service.ua@bshg.com
www.siemens-home.bsh-group.com/ua
US United States of America
BSH Home Appliances Corporation
1901 Main Street, Suite 600
Irvine, CA, 92614
Tel.: 866 447 4363toll-free
Fax: 949 437 7000
mailto:siemens-usa-questions@
bshg.com
www.siemens-home.bsh-group.com/us
KK Kosovo
SERVICE-GENERAL SH.P.K.
Rruga Mag Prishtine-Ferizaj
70000 Ferizaj
Tel.: 0290 321 434
Tel.: 0290 330 723
mailto:a_service@
gama-electronics.com
XS Srbija, Serbia
BSH Kučni aparati d.o.o.
Milutina Milankovica 11a
11070 Novi Beograd
Tel.: 011 353 70 09
Fax: 011 205 23 89
mailto:informacje.servis-sr@bshg.com
www.siemens-home.bsh-group.com/rs
ZA South Africa
BSH Home Appliances (Pty) Ltd.
15th Road Randjespark
Private Bag X36, Randjespark
1685 Midrand-Johannesburg
Tel.: 086 002 6724
Fax:0866171780
mailto:applianceserviceza@bshg.com
www.siemens-home.bsh-group.com/za

de
This appliance is labelled in accordance with European Directive 2012/19/EU concerning used electrical and electronic appliances (waste electrical and electronic equipment - WEEE). The guideline determines the framework for the return and recycling of used appliances as applicable throughout the EU.
fr
GB Conditions of guarantee
For this appliance the guarantee conditions as set out by our representatives in the country of sale apply. Details regarding same may be obtained from the dealer from whom the appliance was purchased. For claims under guarantee the sales receipt must be produced.
FR Conditions de garantie
TANEAAAIKO THAEQNO EYINHPETHZHE NEAATON
Degerli Musterimiz
www.siemens-home.com/tr
www.siemens-yetkiliservisi.com
Bandrol ve Seri No. :
ELEKTRIK SÜPÜRGESI
GARANTI
BELGESI
BSH Group is a Trademark Licensee of Siemens AG
Carl-Wery-StraBe 34
81739 Munchen, GERMANY