
WX041 - Heat gun WORX - Free user manual and instructions
Find the device manual for free WX041 WORX in PDF.
| Product type | Heat gun |
| Brand | Worx |
| Model | WX041 |
| Voltage | 230-240 V ~ 50 Hz |
| Power | 2000 W |
| Temperature range | 50 °C (cold air), 350 °C (medium), 580 °C (max) |
| Airflow | 300 L/min (levels I and II), 500 L/min (level III) |
| Weight | 0.8 kg |
| Double insulation | Yes (class II) |
| Included accessories | Scraper, glass protection nozzle, flat jet nozzle, reflector nozzle, reduction nozzle |
| Main applications | Paint stripping, plastic welding, heat shrink tubing, defrosting, hot forming |
| Switch | 3 positions (I, II, III) with off (O) |
| Thermal protection | Automatic heating cut-off in case of overheating, fan continues |
| Cooling | Use level I (cold air) before turning off or changing nozzle |
| Safety | Do not point at flammable substances, do not leave unattended |
| Maintenance | Clean with a dry cloth, do not use water or solvents |
| Repairability | No user-serviceable parts; replace cord by a professional |
Frequently Asked Questions - WX041 WORX
User questions about WX041 WORX
0 question about this device. Answer the ones you know or ask your own.
Ask a new question about this device
Download the instructions for your Heat gun in PDF format for free! Find your manual WX041 - WORX and take your electronic device back in hand. On this page are published all the documents necessary for the use of your device. WX041 by WORX.
USER MANUAL WX041 WORX
natural_image
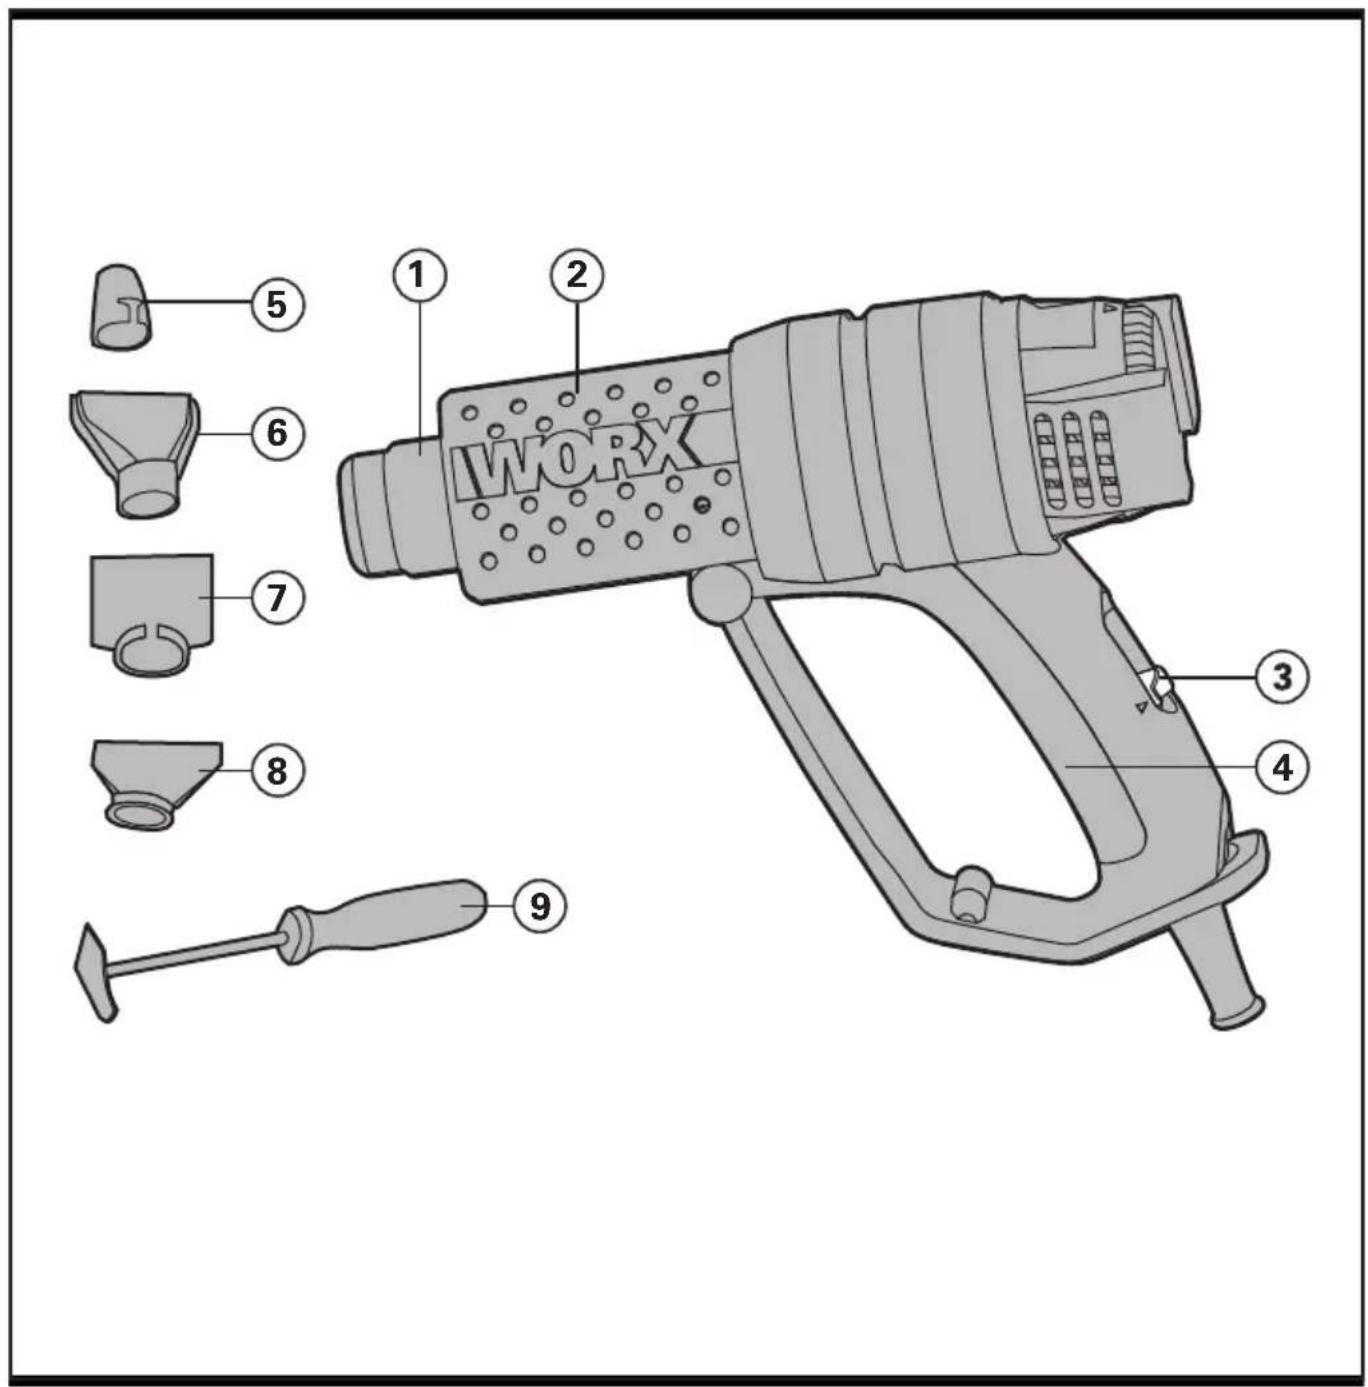
Line drawing of a WORX spray gun with handle and control panel (no text or symbols)| Heat gun | EN | P04 |
| Heißluftpistole | D | P09 |
| Décapeur thermique | F | P14 |
| Pistola termica | I | P19 |
| Pistola de calor | ES | P24 |
| Pistola de ar quente | PT | P29 |
| Hete lucht pistool | NL | P34 |
| Varmepistol | DK | P39 |
| Lämpöpyssy | FIN | P44 |
| Varmepistol | NOR | P49 |
| Värmepistol | SV | P54 |
| Isı/sıcaklık tabancası | TR | P59 |
| Пістóлі өléрмавσης | GR | P64 |
| Тепловой пистолет | RU | P69 |
| Original instructions EN | |
| Originalbetriebsanleitung | |
| Notice originale F | |
| Istruzioni originali | I |
| Manual original ES | |
| Manual original PT | |
| Oorspronkelijke gebruiksaanwijzing NL | |
| Original brugsanvisning DK | |
| Alkuperäiset ohjeet FIN | |
| Original driftsinstruks NOR | |
| Bruksanvisning i original SV | |
| Orijinal isletme talimatı TR | |
| Прштотипо обнүйөв хрήσης GR | |
| Оригинальное руководст-во по эксплуатации RU | |
natural_image
Simple line drawing of a screwdriver with a flat head and handle (no text or symbols)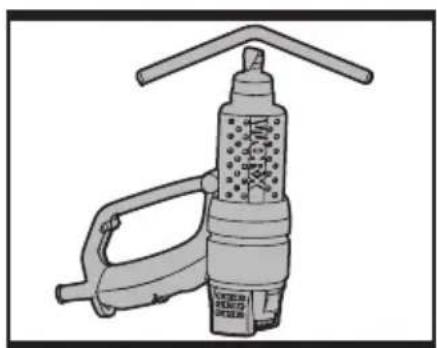
natural_image
Illustration of a handheld industrial tool with a handle and spout, no text or symbols presentABC
-
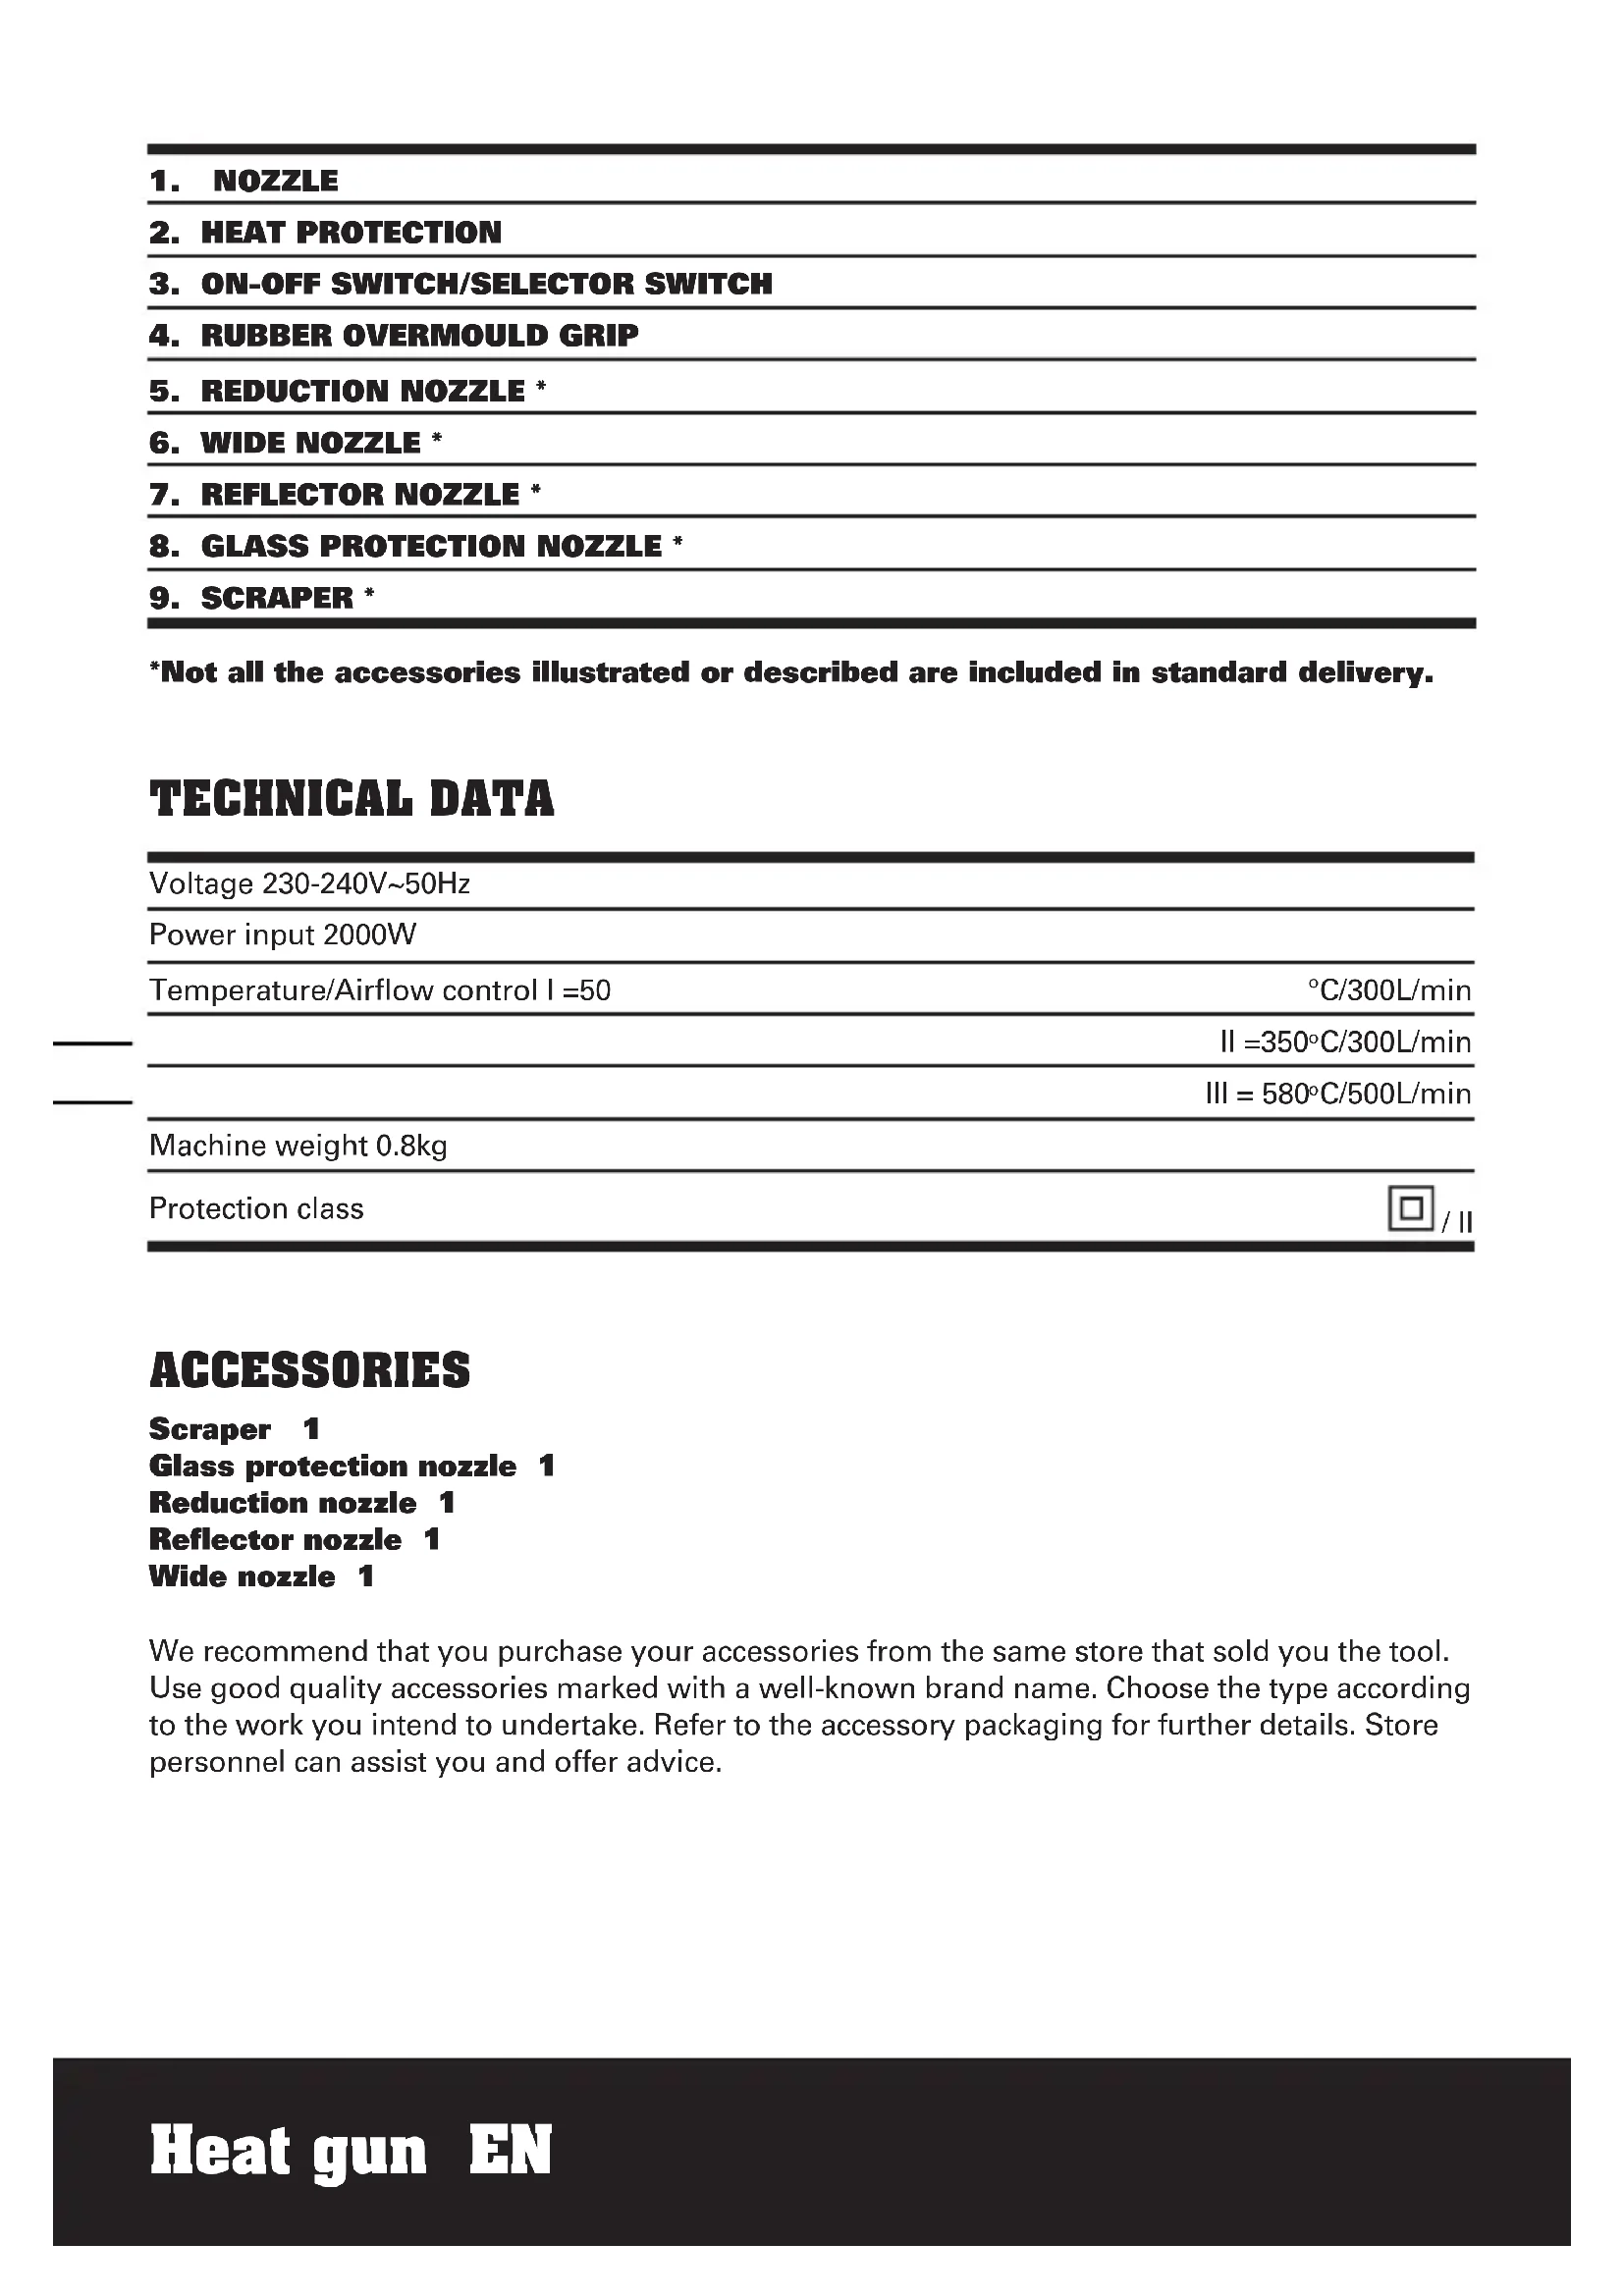
NOZZLE
-
HEAT PROTECTION
-
ON-OFF SWITCH/SELECTOR SWITCH
-
RUBBER OVERMOULD GRIP
-
REDUCTION NOZZLE *
-
WIDE NOZZLE *
-
REFLECTOR NOZZLE *
-
GLASS PROTECTION NOZZLE *
-
SCRAPER *
*Not all the accessories illustrated or described are included in standard delivery.
TECHNICAL DATA
| Voltage 230-240V~50Hz | |
| Power input 2000W | |
| Temperature/Airflow control I =50 | °C/300L/min |
| II =350°C/300L/min | |
| III = 580°C/500L/min | |
| Machine weight 0.8kg | |
| Protection class | ☐ / II |
ACCESSORIES
Scraper 1
Glass protection nozzle 1
Reduction nozzle 1
Reflector nozzle 1
Wide nozzle 1
We recommend that you purchase your accessories from the same store that sold you the tool. Use good quality accessories marked with a well-known brand name. Choose the type according to the work you intend to undertake. Refer to the accessory packaging for further details. Store personnel can assist you and offer advice.
GENERAL POWER TOOL SAFETY WARNINGS

WARNING Read all safety warnings and all instructions. Failure to follow
the warnings and instructions may result in electric shock, fire and/or serious injury.
Save all warnings and instructions for future reference.
- This appliance is not intended for use by persons (including children) with reduced physical, sensory or mental capabilities, or lack of experience and knowledge, unless they have been given supervision or instruction concerning use of the appliance by a person responsible for their safety.
- Children should be supervised to ensure that they do not play with the appliance. If the supply cord is damaged, it must be replaced by the manufacturer, its service agent or similarly qualified persons in order to avoid a hazard.
ADDITIONAL SAFETY INSTRUCTIONS FOR YOUR HEAT GUN
-
A fire may result if the appliance is not used with care, therefore
a) Be careful when using the appliance in place where there are combustible materials or gases, extreme caution must be taken to prevent fire or explosion.
b) Do not apply to the same place for a long time;
c) Do not use in presence of an explosive atmosphere;
d) Be aware that heat may be conducted to combustible materials that are out of sight;
e) Place the appliance on its stand after use and allow it to cool down before storage;
f) Do not leave the appliance unattended when it is switched on. -
Always place the appliance on its stand after use and allow it to cool down before storage and never touch the heat deflector.
SYMBOLS

To reduce the risk of injury, user must read instruction manual

Warning

Double insulation

Wear eye protection

Wear ear protection

Wear dust mask
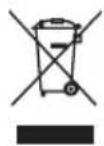
This product has been marked with a symbol relating to removing electric and electronic waste. This means that this product shall not be discarded with household waste but that it shall be returned to a collection system which conforms to the European Directive 2002/96/CE. It will then be recycled or dismantled in order to reduce the impact on the environment. Electric and electronic equipment can be hazardous for the environment and for human health since they contain hazardous substances.
OPERATION

NOTE: Before using the tool, read the instruction book carefully.
INTENDED USE
The unit is intended for the forming and welding of plastic, removal of paint and the warming of heat shrinkable tubing. It is also suitable for soldering and tinning, loosening of adhesive joints and the defrosting of water lines.
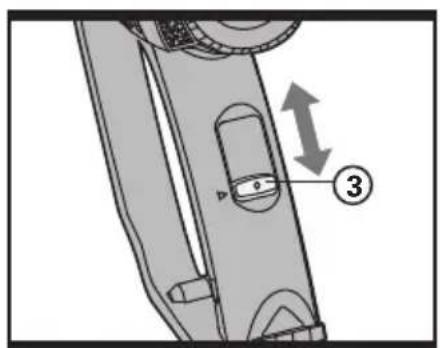
To put into operation, slide the switch (3) to position I, II or III.
Switching off:
To switch off, slide the on/off switch (3) to the stop at position 0.
After working for a longer time with high temperature, allow the unit to cool by running in the cold air setting I before switching off.
2. THERMO-PROTECTION SWITCH-OFF
When the heater is overloaded (e.g. as a result of restricted air flow), the unit switches it off automatically, however, the blower continues to run. When the unit has cooled to operating temperature, the heater is switched on again.
3. SETTING THE AIR FLOW AND TEMPERATURE
The switch (3) can be set to three blower steps. Suitable air flow and temperature combinations can be selected according to the applications.
WX041
| Step temperature Airflow | ||
| I 50 | °C 300L/min | |
| II 350 | °C 300L/min | |
| III 580 | °C 500L/min | |
The cold air setting ■ is suitable for cooling a warmed work piece or for the drying of paint. It is also suitable for cooling the unit before
placing down or the changing of nozzles.
The air setting Ⅲ is suitable for Bending Plastic and heating shrinking plastic.
The air setting ■■■ is suitable for stripping paint and defrosting pipes.
4. WORKING EXAMPLES
Temperature settings given in the application examples are suggested values that, depending on the material characteristics, can deviate. The distance between the nozzle and work piece is dependent on the material to be processed.
The ideal temperature should first be ascertained by performing a test. Therefore, begin with a lower temperature setting.
All application examples (except Removing
Paint from Window Frames) can be performed without accessories. However, the use of the recommended accessory part simplifies the work and significantly improves the quality of the results.
_ Be careful when changing the nozzle, danger of burning! Do not tough the hot nozzle.
Allow the unit to cool. Wear protective gloves.
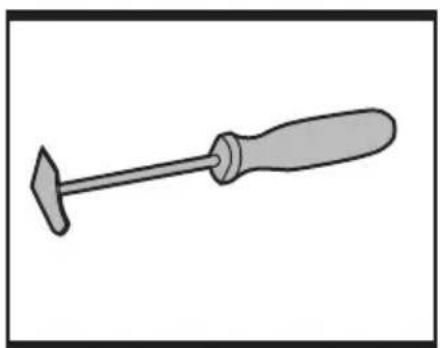
5. SCRAPER (See Fig. B)
The scraper is ideal for stripping paint from flat wooden surface and edges.
Remember to clean the blade after use with wire wool and lightly oil before storing.
6. REMOVING PAINT
Choose the required nozzle and fit onto the heat outlet. Soften the paint using hot air and remove evenly using a spatula. Do not heat the paint for too long since this will burn the paint, making it more difficult to remove.
7. REMOVING PAINT FROM WINDOW FRAMES
Danger of glass breaking!
Use of the glass protection nozzle is essential. On profiled surfaces, paint can be removed using a spatula and brushed off using a soft wire brush.
8. DEFROSTING FROZEN PIPES Water lines often do not differ in appearance from gas lines. Gas lines are not to be heated under any circumstances.
Place on the reflector nozzle. Heat the frozen zone always from the outside to the middle. Warm plastic pipes as well as connections between pipe pieces especially carefully to prevent damage.
9. SHRINK SEATING ELECTRICAL CABLES
Place on the reduction nozzle. Select the diameter of the heat-shrink tubing according to the work piece, for example, a cable lug. Heat the heat-shrinkable sleeve evenly. Many adhesives (e.g. stickers) become softer when heated allowing adhesive bonds to be separated or superfluous adhesive to be removed.
10. WELDING PLASTICS
Place on the reduction nozzle and the welding shoe. The materials to be welded and the welding rod must be made of the same material (e.g. PVC with PVC). The seam must be clean and grease-free. Heat the welding seam until it becomes tacky. Please note that the temperature difference between the tacky and liquid state of a plastic is very small. Then feed in the welding rod and allow to run into the gap so that a uniform bead is produced.
11. BENDING PLASTIC TUBE (See Fig. C)
Choose the hook nozzle and fit over heat outlet. Turn the gun upside down and place on its clip stand so that it is resting on a secure bench with the nozzle pointing upwards, see picture. To avoid buckling or kinking the tube, fill the tube with dry sand and seal at both ends. Heat the tube evenly by moving from side to side and bend to required shape.
MAINTENANCE
Remove the plug from the socket before carrying out any adjustment, servicing or maintenance.
There are no user serviceable parts in your power tool. Never use water or chemical cleaners to clean your power tool. Wipe clean with a dry cloth. Always store your power tool in a dry place. Keep the motor ventilation slots clean. Keep all working controls free of dust. Occasionally you may see sparks through the ventilation slots. This is normal and will not damage your power tool.
If the supply cord is damaged, it must be replaced by the manufacturer, its service agent or similarly qualified persons in order to avoid a hazard.
ENVIRONMENTAL PROTECTION

This product has been marked with a symbol relating to removing electric and electronic waste. This means that this product shall not be discarded with household waste but that it shall be returned to a collection system which conforms to the European Directive 2002/96/CE. It will then be recycled or dismantled in order to reduce the impact on the environment. Electric and electronic equipment can be hazardous for the environment and for human health since they contain hazardous substances.
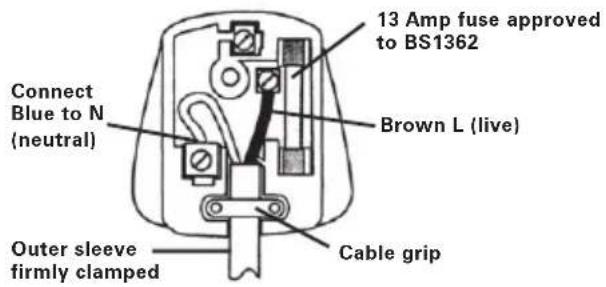
PLUG REPLACEMENT (UK & IRELAND ONLY)
If you need to replace the fitted plug then follow the instructions below.
IMPORTANT
The wires in the mains lead are colored in accordance with the following code:
Blue = Neutral
Brown = Live
As the colors of the wires in the mains lead of this appliance may not correspond with the coloured markings identifying the terminals in your plug, proceed as follows. The wire which is coloured blue must be connected to the terminal which is marked with N. The wire which is coloured brown must be connected to the terminal which is marked with L.

WARNING: Never connect live or neutral wires to the earth terminal of the Only fit an approved BS1363/A plug and correct rated fuse.
NOTE: If a moulded plug is fitted and has to be removed take great care in disposing of the plug and severed cable, it must be destroyed to prevent engaging into a socket.
DECLARATION OF CONFORMITY
We,
POSITEC Germany GmbH
Declare that the product
Description WORX Heat gun
Type WX041
Complies with the following directive:
Machinery directive 2006/42/EC
Electromagnetic compatibility directive
2004/108/EC
RoHS directive 2011/65/EU
Standards conform to
EN 55014-1
EN 55014-2
EN 61000-3-2
EN 61000-3-3
EN 60335-1
EN 60335-2-45
EN 62233


2013/01/11
Leo Yue
POSITEC Quality Manager
DÉCLARATION DE CONFORMITÉ
Nous,
POSITEC Germany GmbH
Directive RoHS 2011/65/EU
Et conforme aux normes
EN 55014-1
EN 55014-2
EN 61000-3-2
EN 61000-3-3
EN 60335-1
EN 60335-2-45
EN 62233
$$ \mathrm {k e o . y u e} \subsetneq $$
2013/01/11
Leo Yue
ALGEMENE VEILIGHEIDSWAARSCHUW INGEN VOOR VERMOGENSMACHINE

3. INDSTIL LUFTMÄNGDEN/ INDSTIL TEMPERATUREN
The triangular shave hook is ideal for stripping paint from flat wooden surface and edges. Remember to clean the blade after use with wire wool and lightly oil before storing.
- ACCESSORIES
- GENERAL POWER TOOL SAFETY WARNINGS
- WARNING Read all safety warnings and all instructions. Failure to follow
- Save all warnings and instructions for future reference.
- ADDITIONAL SAFETY INSTRUCTIONS FOR YOUR HEAT GUN
- SYMBOLS
- OPERATION
- INTENDED USE
- Switching off:
- THERMO-PROTECTION SWITCH-OFF
- SETTING THE AIR FLOW AND TEMPERATURE
- WORKING EXAMPLES
- All application examples (except Removing
- Allow the unit to cool. Wear protective gloves.
- SCRAPER (See Fig. B)
- REMOVING PAINT
- REMOVING PAINT FROM WINDOW FRAMES
- Danger of glass breaking!
- DEFROSTING FROZEN PIPES Water lines often do not differ in appearance from gas lines. Gas lines are not to be heated under any circumstances.
- SHRINK SEATING ELECTRICAL CABLES
- WELDING PLASTICS
- BENDING PLASTIC TUBE (See Fig. C)
- MAINTENANCE
- Remove the plug from the socket before carrying out any adjustment, servicing or maintenance.
- ENVIRONMENTAL PROTECTION
- PLUG REPLACEMENT (UK & IRELAND ONLY)
- IMPORTANT
- DECLARATION OF CONFORMITY
- DÉCLARATION DE CONFORMITÉ
- ALGEMENE VEILIGHEIDSWAARSCHUW INGEN VOOR VERMOGENSMACHINE
- INDSTIL LUFTMÄNGDEN/ INDSTIL TEMPERATUREN
Brand : WORX
Model : WX041
Category : Heat gun