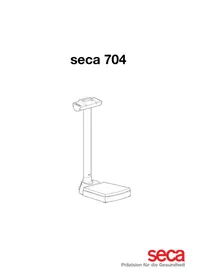
703 - Scale SECA - Free user manual and instructions
Find the device manual for free 703 SECA in PDF.
| Product type | Medical electronic scale |
| Brand | Seca |
| Model | 703 |
| Dimensions (L × W × H) | 520 × 360 × 930 mm |
| Net weight | 17 kg |
| Power supply | 6 AA batteries (1.5 V) or optional power adapter (9 V or 12 V regulated) |
| Power consumption | Approx. 32 mA (without wireless module) / 50 mA (with wireless module) |
| Battery life | Approx. 5,600 minutes (without wireless module) |
| Maximum capacity | 300 kg (two ranges: 150 kg and 300 kg) |
| Minimum load | 2 kg |
| Fine graduation | 50 g / 0.1 lb (150 kg range); 100 g / 0.2 lb (300 kg range) |
| Accuracy | ±100 g (0-70 kg); ±0.15% (70-300 kg) |
| Tare range | 300 kg |
| Operating temperature range | +10°C to +40°C |
| Display digit height | 25 mm |
| Main functions | Weighing, BMI calculation, 2-in-1 function for infants, Hold function, seca 360° wireless transmission, Autohold, audible signals, attenuation, unit selection (kg/lb/st) |
| Wireless transmission | Band 2.433-2.480 GHz, power < 10 mW, range approx. 10 m |
| Standards and classification | CE 0123, protection class II, electromedical device type B, FCC ID, IC |
| Included accessories | 6 AA batteries, user manual |
| Optional accessories | seca 465/466 wireless printer, seca analytics 105 software, 456 wireless USB adapter, seca 220 telescopic measuring rod, mains power adapter |
| Cleaning | Household cleaning product or mild disinfectant; avoid alcohol, benzene, abrasive products |
| Maintenance | Every 3 to 5 years by a certified seca service partner |
| Warranty | 2 years (excluding wear parts such as batteries, cables, power adapters) |
Frequently Asked Questions - 703 SECA
User questions about 703 SECA
0 question about this device. Answer the ones you know or ask your own.
Ask a new question about this device
Download the instructions for your Scale in PDF format for free! Find your manual 703 - SECA and take your electronic device back in hand. On this page are published all the documents necessary for the use of your device. 703 by SECA.
USER MANUAL 703 SECA
Druckoption wahlen (APrt)
1.Description of device .36
1.1 Congratulations! 36
1.2 Intended use 36
- Safety information. 37
2.1 Basic safety precautions. 37
2.2 Safety information in this manual 37
2.3 Handling (rechargeable) batteries 38
- Overview 39
3.1 Controls/Features. 39
3.2 Symbols in display 40
3.3 Information on rating plate . . .40
3.4 Menu structure 42
4.Before you get started. 43
4.1 Installation of column 43
4.2 Create power supply .44 Insert batteries .44 Connect the power supply unit (optional).44
4.3 Set up scales 45
- Operation 45
5.1 Weighing 45
Start weighing. 45
Weigh babies/infants (2 in 1) . .45
Continuous display of measured result (HOLD) 46
Determine and evaluate body mass index (BMI) 47
Calculate and print out BMI automatically. 48
Transmit measured results to a radio receiver 48
Switch off scales. 48
5.2 Additional functions (menu). 49
Navigate in the menu 49
Clear stored values automatically (ACIr) 50
Permanently store additional weight (Pt) 50
Activate Autohold function (Ahold) 51
Activate acoustic signals (BEEP) 52
Select attenuation (Fil). 52
Switch weight unit (Unit) 52
Restore factory settings (RESET) 53
6.seca 360^ wireless Network. 54
6.1 Introduction 54
seca wireless groups 54
Channels 54
Detection of equipment devices 55
6.2 Operate scales in a wireless group (menu) 55
Activate wireless module (SYS) . 56
Set up wireless group (Lrn) . . . . 56
Activate automatic transmission (ASend). 58
Select print option (APrt) 58
Set time (Time) 58
- Cleaning. 59
8.What to do if...? 60 - Maintenance. 61
9.1 Information about maintenance 61
- Technical data 62
- Accessories 63
12.Disposal. 64
12.1 Disposal of device 64
12.2 Batteries (including rechargeables) 64
13.Warranty 64
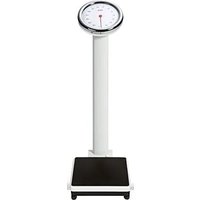
1.DESCRIPTION OF DEVICE
1.1 Congratulations!
By purchasing the electronic personal scales seca 703 you are now in possession of an extremely accurate device that is also robust at the same time.
seca has put its experience at the service of health care for over 170 years and as a market leader in many countries, is constantly setting new standards with its innovative developments for weighing and measurement.
1.2 Intended use
The electronic personal scales seca 703 are mainly used in hospitals, doctors' surgeries and inpatient care facilities in accordance with national regulations.
Some versions of these scales allow you to switch the weight display between kilos (kg), pounds (lbs) and stones (sts). The result of weighing is available within a few seconds.
Besides conventional weight measurement the seca 703 also features a function to calculate the body mass index. The keypad is used to enter the height, and this is followed by automatic calculation of the body mass index from the weighing value.
The seca 360^ wireless network allows the measured results to be transmitted wirelessly to a seca wireless printer or a PC equipped with the seca analytics 105 software and the
seca 360^ wireless USB adapter 456.
The seca 703 is provided with rollers to allow it to be moved about and thanks to its low power consumption, it will offer hours of battery operation for mobile applications.
2. SAFETY INFORMATION
2.1 Basic safety precautions
- Please take note of the information in this user manual.
- Keep the user manual with the declaration of conformity in a safe place.
- Make sure that the scales are positioned securely on a flat and stable surface.
- Make sure you do not drop the scales. Protect the scales from violent impacts.
- When using the scales with a power supply unit, make sure you route the mains cable so that no-one can trip over it.
- Have the scales serviced regularly see "Maintenance" on page 61.
- Make sure that maintenance and repair are only carried out by an authorised service partner. You can find your local service partner at www.seca.com or just send an e-mail to service@seca.com.
- Make sure you only use genuine seca accessories and spare parts. Otherwise the warranty provided by seca will become null and void.
- Make sure RF equipment such as mobile phones is kept at a minimum distance of approx. 1 metre to prevent incorrect measurements or interference with radio transmission.
2.2 Safety information in this manual

DANGER!
Used to identify an extremely hazardous situation. If you fail to take note of this information, serious irreversible or fatal injuries will result.

WARNING!
Used to identify an extremely hazardous situation. If you fail to take note of this information, serious irreversible or fatal injuries may result.

CAUTION!
Used to identify a hazardous situation. If you fail to take note of this information, minor to moderate injuries may result.
ATTENTION!
Used to identify possible incorrect usage of device. If you fail to take note of this information, you may damage the device or the measured results may be incorrect.
NOTE:
Includes additional information about use of the device.
2.3 Handling (rechargeable) batteries
The device is supplied with 6 batteries, type AA (Mignon). This type of battery is not rechargeable. Please take note of the following safety information.

WARNING!
Personal injury with improper handling
Batteries contain harmful substances which may explode if not handled properly.
- Do not try to recharge such batteries.
- Do not expose (rechargeable) batteries to heat.
- Do not burn (rechargeable) batteries.
- If acid is leaking out, avoid contact with the skin, eyes and mucous membranes. Rinse affected areas with plenty of clean water and seek medical help at once.
ATTENTION!
Damage to device and malfunctions with improper handling
- Only use the type of (rechargeable) battery specified see "Insert batteries" on page 44.
- When replacing (rechargeable) batteries, always replace a complete set at a time.
- Do not short-circuit (rechargeable) batteries.
- If you do not use the device for a long period of time, remove the batteries (incl. rechargeables). This will prevent acid from leaking into the device.
3. OVERVIEW
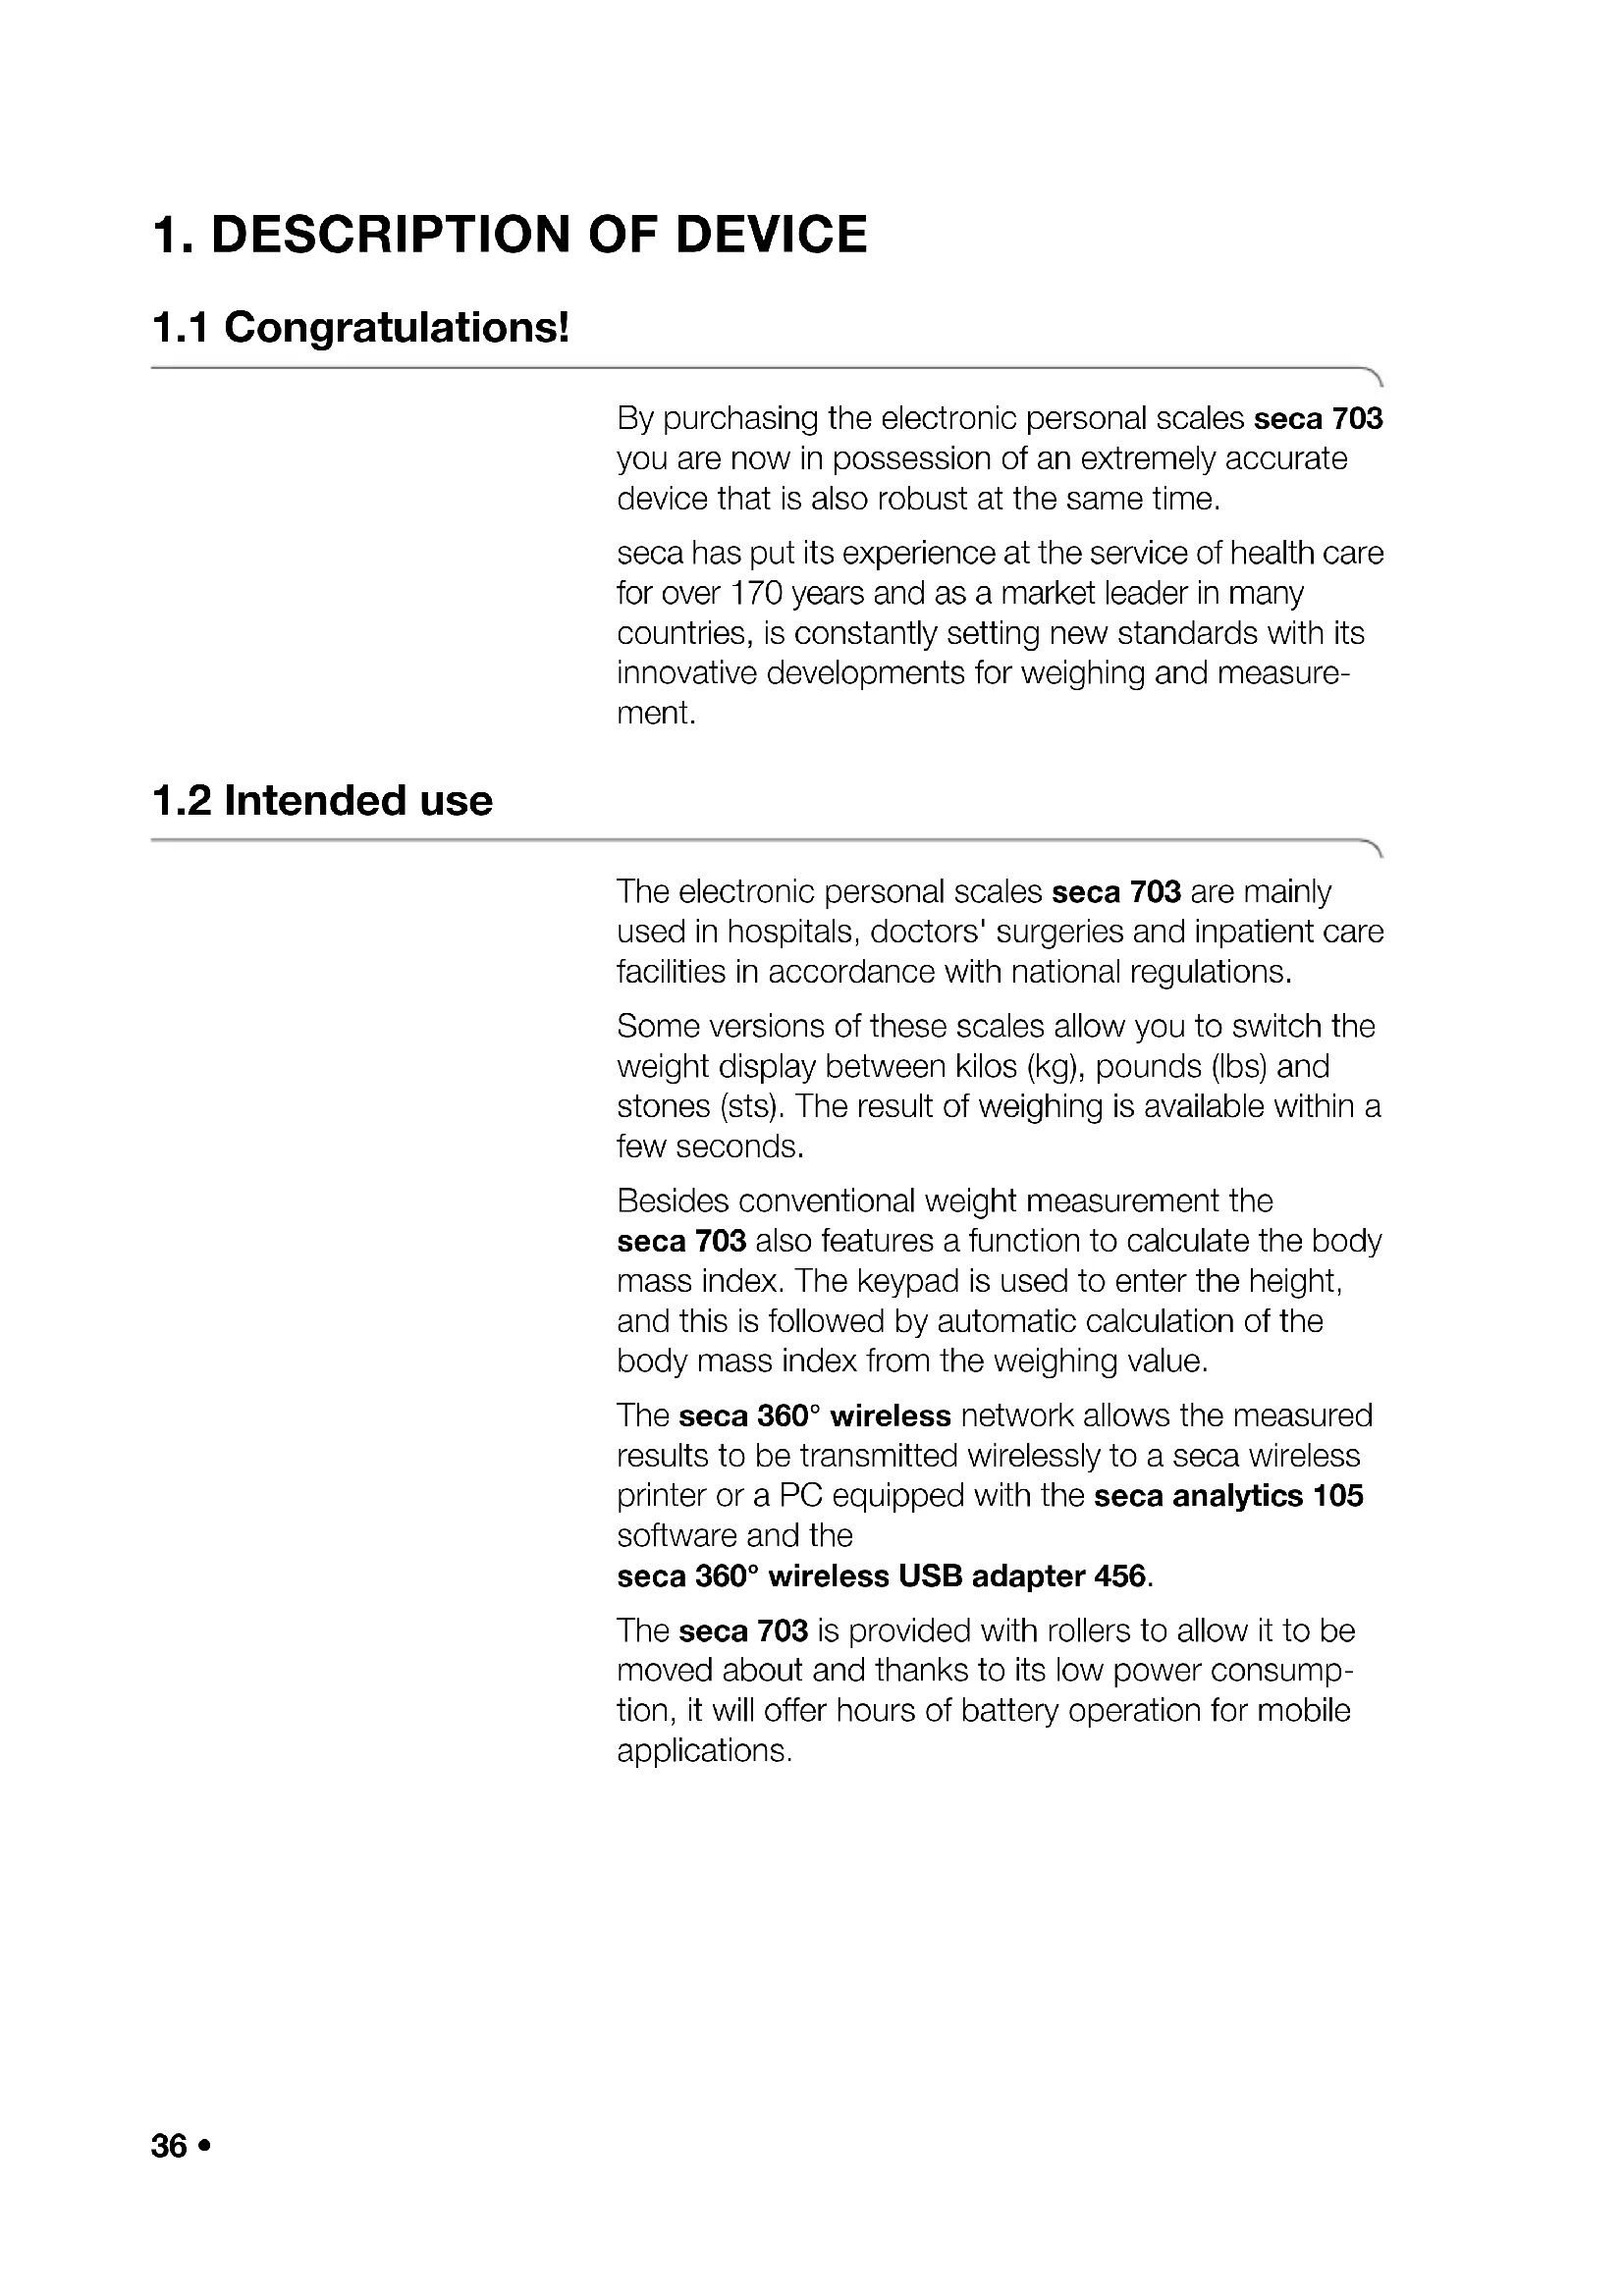
3.1 Controls/Features
| No. Control/Feature Function | ||
| 1 | To switch scales off and on | |
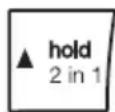
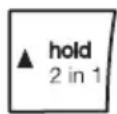
| 2 | Arrow key • During weighing: - Press briefly: Activate Hold function - Hold down: Activate 2 in 1 function • In menu: - Select submenu, select menu item - Increase value | |
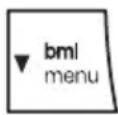
| 3 | Arrow key • During weighing: - Press briefly: Activate BMI function - Hold down: Call up menu • In menu: - Select submenu, select menu item - Reduce value | |
| 4 | Enter key • During weighing (if wireless network is set up): - Press briefly: Send measured result to receive-ready equipment (PC with USB wireless module) - Hold down: Print out measured result (wireless printer) • In menu: - Confirm menu item selected - Store set value | |
| 5 | Display | Display element for measured results and for device configuration |
| 6 | Battery compartment | Designed to take 6 batteries, type AA (Mignon), 1.5 V |
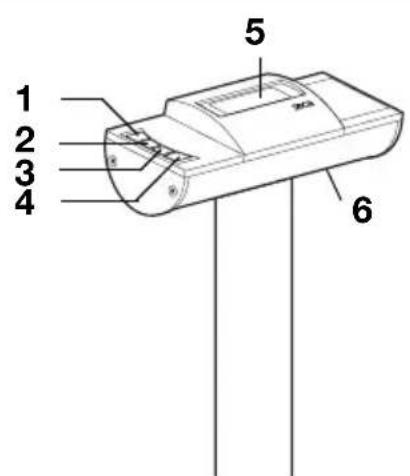
| No. | Control/Feature Function | |
| 7 | Power connec-tion | Used to connect an optional power supply unit |
| 8 | Transport rollers | The scales can be moved about with these rollers |
| 9 | Foot screw 4 | screws, for precise alignment of device |
3.2 Symbols in display
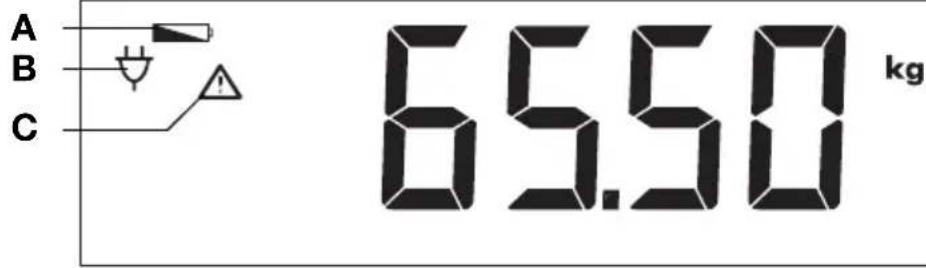
| Symbol Meaning | ||
| A | Batteries are weak | |
| B | Operation with power supply unit | |
| C | Non-calibratable function active | |
3.3 Information on rating plate
| Text/Symbol Meaning | |
| Model Model number | |
| Type Type designation | |
| Ser. No. Serial number | |
| i | Refer to user manual |
| Type B electromedical device | |
| Class II totally insulated appliance | |
| FCC ID | For USA: Device licensing number issued by US authority FCC (Federal Communications Commission) |
| IC | For Canada: Device licensing number issued by authority Industry Canada |
| CE 0123 | Device complies with EC standards and directives. |
| FC | Symbol for FCC (USA) |
| +--- | Only operate device with DC |
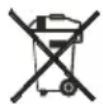
| X | Do not discard with household waste |
3.4 Menu structure
Other functions are available in the menu of the device. This enables you to configure the device perfectly to suit the conditions in which you use it (details from page 49).

4.1 Installation of column

The column with the LCD display can be fitted in two positions, so allowing you to determine the direction in which the display is legible - facing either towards or away from the platform.
- Fit the column cover to the column.
- Place the column in the recess, facing it in the desired direction.
- Screw the column to the weighing platform from
underneath. If necessary, lay the scales down carefully on their side to tighten up the screws. - On the underside of the weighing platform connect the plugs of the display cable as shown in the diagram.
ATTENTION!
Malfunction with any error in installation
If cables are strained during fitting, e.g. bent tight or with plugs kinked, this may result in malfunctions and failure of the display.
- Make sure that all cables are laid so as to prevent them from being bent too tight or the plugs kinked.
-
Ensure strain relief by laying all cables in the relevant holders.
-
Secure cables in their holders.
- Then place the scales upright again.
- Slide the column cover right down until it engages on the weighing platform.
4.2 Create power supply
Insert batteries
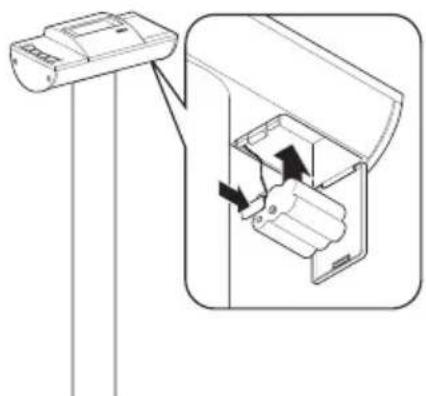
Connect the power supply unit (optional)
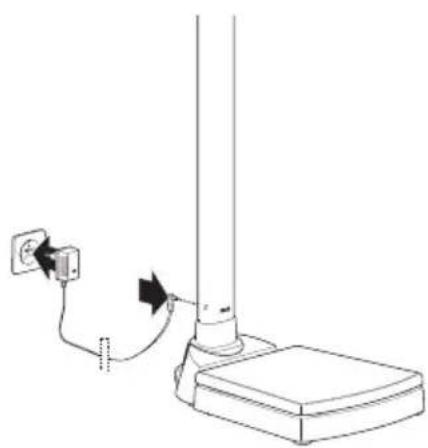
Power is supplied to the scales either using batteries or with a power supply unit available as an accessory.
You need 6 batteries, type AA (Mignon), 1.5V (included in scope of supply).
- Press on latch of battery compartment.
- Move down lid of battery compartment.
- Remove battery holder.
- Insert batteries in holder.
NOTE:
Observe correct polarity of batteries (markings on battery holder). Should the display read bRtE, you have inserted one of the batteries incorrectly or they are flat.
- Replace the holder with the batteries in the battery compartment.
- Close the battery compartment.
The scales can be operated with a power supply unit available as an accessory.

WARNING!
Personal injury and damage to device if incorrect power supply unit is used
The voltage provided by standard power supply units may be higher than their indicated rating. This may cause the scales to overheat, catch fire, melt or short-circuit.
-
Only use genuine seca plug-in power supply units with 9V or a controlled 12 V output voltage.
-
Insert the power plug necessary for your power supply in the power supply unit.
- Insert the connector plug of the power supply unit in the connecting socket of the scales.
- Plug the power supply unit into a mains socket.
4.3 Set up scales
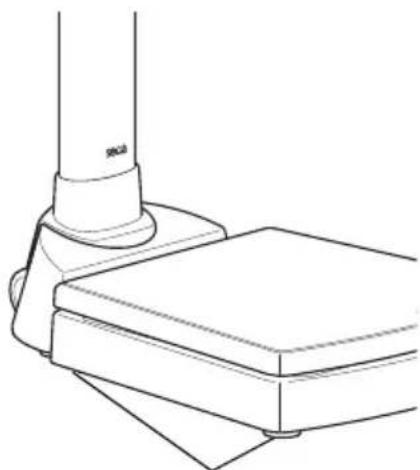
Foot screws
ATTENTION!
Incorrect measurement with force shunt
If the housing of the scales is resting on something, e.g. a towel, the weight measurement will not be correct.
-
When setting up the scales, ensure that they only make contact with the ground via the foot screws.
-
Place the scales on a flat, stable surface.
- Align the scales by turning the foot screws.
5. OPERATION
5.1 Weighing
Start weighing
- Check that there is no load on the scales.
- Press the Start key.
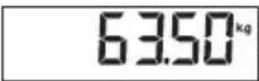
The display will read SECA and then quickly run through all elements of the display.
The scales are ready for operation when the display reads 000.
If the device is being operated with a power supply unit, the symbol will appear in the display.
- Step onto the scales and try not to move.
- Read off the measured result.
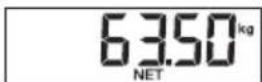
Weigh babies/infants (2 in 1)
You can use the 2 in 1 function to weigh babies and infants. Here the child is held by an adult during weighing. Proceed as follows:
- Check that there is no load on the scales.
- Ask the adult to step onto the scales.
- Read off the measured result.
- Hold down the arrow key (hold/2 in 1) until NET appears in the display.
The weight is stored.
0.00 appears in the display.
ATTENTION!
Incorrect measurement due to change in initial weight
If the child is weighed with a different initial weight, the child's weight will not be calculated correctly.
- Make sure that the child is always weighed with the adult used to determine the initial weight..
- Check that the weight of this adult does not change, e.g. by taking off a garment.
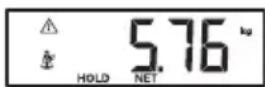
- Ask the adult to step onto the scales with the child. The child's weight is displayed.
The symbol, the symbol and the messages "HOLD" and "NET" are displayed.
- Ask the adult to step off the scales with the child.
- To disable the 2 in 1 function, press the arrow key
(hold/2 in 1) until the symbol, the symbol and and the messages "HOLD" and "NET" are no longer displayed or switch the scales off.
Continuous display of measured result (HOLD)
If you activate the HOLD function, the weighing value will continue to be displayed after the load has been removed. This allows you to attend to the patient before noting down the weight.

- Check that there is no load on the scales.
- Ask the patient to step onto the scales.
- Briefly press the arrow key (hold/2 in 1).
The display will flash until a stable weight is measured. The weighing value will then be displayed continuously. The symbol (non-calibratable function) and the message "HOLD" will be displayed.
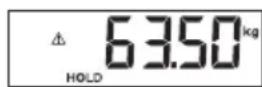
- To disable the HOLD function, briefly press the arrow key (hold/2 in 1).
The symbol and the message "HOLD" will no longer be displayed.
NOTE:
If the Autohold function is activated, continuous display of the weighing value will take place automatically. see "Activate Autohold function (Ahold)" on page 51.
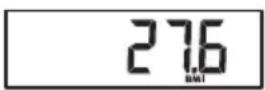
Determine and evaluate body mass index (BMI)
The body mass index compares height and weight, so resulting in more accurate figures than with Broca's formula for ideal weight. It includes a tolerance range which is considered ideal in health terms.
- Check that there is no load on the scales.
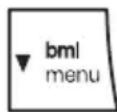
- Briefly press the arrow key (bm i/menu). The message "BMI" appears.
Arrows can be seen flashing in the display.
The height last entered is displayed.
- You can either accept this height or select another value using the arrow keys.
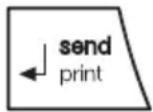
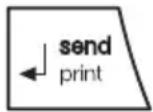
- Confirm your selection with the Enter key (send/ print).
- Ask the patient to step onto the scales and try not to move.
- Read off the BMI and compare it with the categories given below.
- To disable the BMI function, briefly press the Enter key (send/print).
| BMI Evaluation | |
| Under 18.5 | The patient is underweight. There might be a tendency to anorexia. It is advisable that the patient puts on weight to improve well-being and performance. If in doubt, a medical specialist should be consulted. |
| Between 18.5 and 24.9 | The patient's weight is normal. No change is necessary. |
| Between 25 and 30 (pre-obesity) | The patient is slightly to moderately overweight and should lose weight if already suffering from disease (e.g. diabetes, high blood pressure, gout, disorders of the fat metabolism). |
| Over 30 | The patient urgently needs to lose weight as this is putting a strain on the metabolism, circulation and skeleton. The recommendation is for careful adherence to a diet, plenty of exercise and behavioural training. If in doubt, a medical specialist should be consulted. |
Calculate and print out BMI automatically
If you use these scales with a wireless printer and a length measuring device from the seca 360^ wireless system, you can calculate and print out the BMI automatically.
NOTE:
The prerequisite for this function is that the equipment devices are logged into a wireless group (see "seca 360^ wireless Network" on page 54).
- Carry out weighing.
- Briefly press the Enter key (send/print) on the scales.
The measured value is sent to the wireless printer but not printed out.
- Measure the height.
- Hold down the Enter key (send/print) on the length measuring device.
The measured value is sent to the wireless printer.
The BMI is calculated.
The height, weight and BMI will be printed out.
Transmit measured results to a radio receiver

If the scales are integrated in a seca 360^ wireless network, you can transmit the measured results to receive-ready equipment (wireless printer, PC with wireless USB module) at the touch of a button.
Press the Enter key (send/print).
- Press key briefly: Send measured results to all receive-ready equipment
- Hold down: Print out measured result using wireless printer
Switch off scales

Press the Start key.
NOTE:
When in battery mode, the scales will switch off automatically after a short period if no load is placed on them.
5.2 Additional functions (menu)
Additional functions are available in the menu for the scales. This allows you to configure the scales perfectly to your own needs.
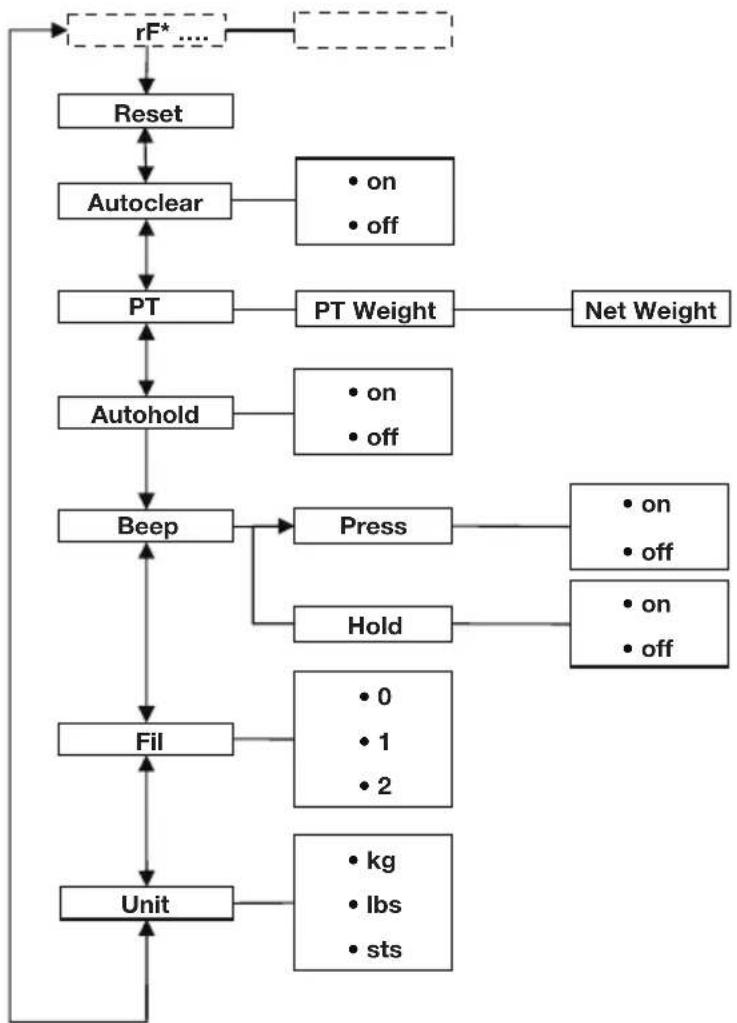
- The menu item "rF" is described in section "Operate scales in a wireless group (menu)" on page 55.
Navigate in the menu 1. Switch on the scales.


-
Hold down the arrow key (bm i/menu) until the menu is called up. The last menu item selected is shown in the display (here: Autohold "Ahold").
-
Keep pressing one of the arrow keys until the required menu item appears in the display (here: attenuation "Fil").
- Confirm your selection with the Enter key (send/ print).
The current selection for the menu item or a submenu is displayed (here level "0").
-
To change your selection or call up another submenu, keep pressing one of the arrow keys until the required selection is displayed (here: level "2").
-
Confirm the selection with the Enter key (send/ print).
You will leave the menu automatically.
- To make further selections, call up the menu again and proceed as described above.
NOTE:
If no key is pressed for approx. 24 seconds, you will leave the menu automatically.
Clear stored values automatically (AClr)
To avoid storing obsolete measured results in the device memory and so calculating the BMI incorrectly, you can set the scales to ensure measured values are automatically cleared after 5 minutes.
NOTE:
With certain models this function is already activated at the factory. If required, you can disable this function.
ACLR
On
Permanently store additional weight (Pt)
-
Select the item "ACIr" in the menu.
-
Confirm the selection.
-
Select the setting you require:
-
On
-Off -
Confirm the selection.
You will leave the menu automatically.
You can use the Pre-Tare function to permanently store an additional weight and automatically deduct it from the measured result. You can for example store a flat-rate figure as the weight of shoes and clothing and then always deduct it from the measured result when a patient is weighed fully dressed.
Pb
- Select the item "Pt" in the menu.
The message "Pt" appears.
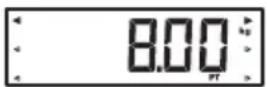
- Confirm your selection. Arrows can be seen flashing in the display. The additional weight last stored is displayed.
- You can accept the stored value or adjust it using the arrow keys.
NOTE:
If you enter the value "0", the function will be switched off. The message "Pt" will no longer be displayed.
- Confirm your selection.
- Ask the patient to step onto the scales.
The patient's weight is displayed.
The additional weight stored has been automatically deducted.
- To disable this function, select the item "Pt" in the menu again.
- Confirm your selection.
The function is disabled.
You will leave the menu automatically.
Activate Autohold function (Ahold)
If you activate the Autohold function, the measured result for each weighing operation will continue to be displayed after the load has been removed. This means you no longer have to manually activate the Hold function for every weighing operation.
NOTE:
- With certain models this function is already activated at the factory. If required, you can disable this function.
- Whatever selection is made here, in the 2 in 1 function the child's weight is always determined with Autohold.

- Select the item "Ahold" in the menu.
- Confirm the selection.
The current selection is displayed.
-
Select the setting you require:
-
On
-
Off
-
Confirm your selection.
You will leave the menu automatically.
Activate acoustic signals (BEEP)
You can select whether an acoustic signal is to be emitted whenever a key is pressed or a stable weighing value has been attained. The latter is relevant for the Hold/Autohold function.
NOTE:
The function "Acoustic signal with stable weighing value" is activated at the factory. If required, you can disable this function.
bEEP
PreSS
On
-
Select the item "BEEP" in the menu.
-
Confirm the selection.
-
Select a menu item:
-
Press: Acoustic signal whenever a key is pressed
-
Hold: Acoustic signal with a stable weighing value.
-
Confirm your selection.
The current selection is displayed.
-
Select the setting you require:
-
On
-Off -
Confirm your selection.
You will leave the menu automatically.
- If you also wish to activate the acoustic signal for the second function, repeat this procedure.
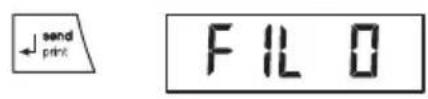
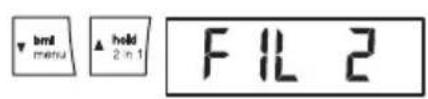
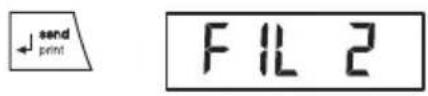
Select attenuation (Fil)
FIL
FIL0
FIL2
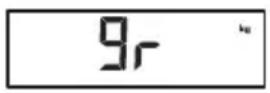
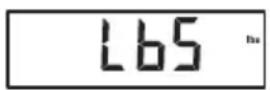
Switch weight unit (Unit)
Unlt
You can use attenuation (Fil = filter) to reduce any interference during weighing (e.g. caused by patient moving).
-
Select the item "Fil" in the menu.
-
Confirm the selection.
The current selection is displayed.
-
Select an attenuation level.
-
0: low attenuation
- 1: moderate attenuation
-
2: high attenuation
-
Confirm the selection.
You will leave the menu automatically.
With uncalibrated scales you can select the unit you wish to use for displaying the weight.
- Select the item "Unit" in the menu.
- Confirm the selection.
The current selection is displayed.
Select the unit you wish to use for displaying the weight:
-
kilos (kg)
-ounds (Ibs)
-stones (sts) -
Confirm the selection.
You will leave the menu automatically.
Restore factory settings (RESET)
You can restore the factory settings for the following functions:
| Function Factory setting | |
| Autohold (Ahold) | depending on model |
| Acoustic signal (Press) off | |
| Acoustic signal (Hold) on | |
| Attenuation (Fil) 0 | |
| Autoclear (Aclear) | depending on model |
| Pre-Tare (Pt) 0 kg | |
| Height for body mass index (BMI) | 170 cm |
| Weight unit kg | |
| Wireless module (SYS) off | |
| Autosend (ASend) off | |
| Autoprint (APrt) off | |
NOTE:
The wireless module is switched off when restoring the factory settings. Data for existing wireless groups remains in the memory. These groups do not need to be set up again.
RESET
- Select the item "Reset" in the menu.
- Confirm the selection.
You will leave the menu automatically.
- Switch the scales off.
The factory settings are restored and will be available when the scales are next switched on.
6. SECA 360^ WIRELESS NETWORK
6.1 Introduction
This device is equipped with a wireless module. The wireless module allows measured results to be transmitted wirelessly for analysis and documentation. Data can be transmitted to the following equipment devices:
- seca wireless printer
- PC with seca USB wireless module
seca wireless groups
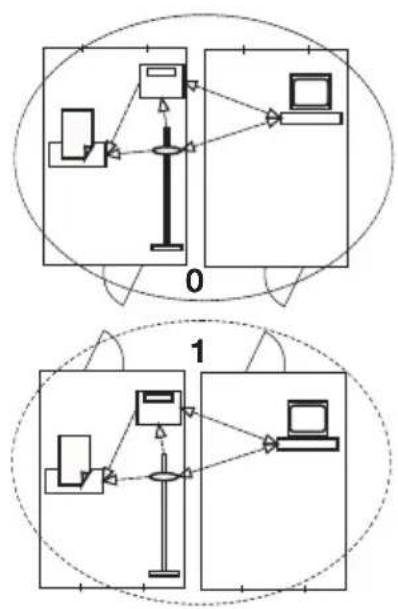
The seca 360^ wireless network operates with wireless groups. A wireless group is a virtual group of transmitters and receivers. If you wish to operate several transmitters and receivers of the same type, up to 3 wireless groups (0, 1, 2) can be set up with this device.
The set-up of several wireless groups ensures the reliable transmission of measured values with the correct address when using more than one examination room each with similar equipment.
The maximum distance between transmitters and receivers is approx. 10 metres. This range may be reduced under certain local conditions, e.g. thickness and type of wall partitions.
The following combination of devices is possible per wireless group:
- 1 set of baby scales
1 set of personal scales - 1 length measuring device
- 1 seca wireless printer
- 1 PC with seca USB wireless module
Channels
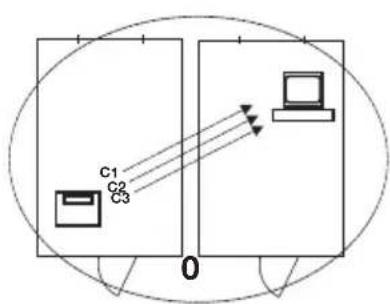
The devices communicate with each other within each wireless group via three channels (C1, C2, C3). This ensures reliable, troublefree data transmission.
When you set up a wireless group with the scales, the device will suggest three channels guaranteeing optimum data transmission. We recommend accepting the channel numbers suggested.
You can also select the channel numbers (0 - 99) manually, for example if you want to set up more than one wireless group.
The channels must be sufficiently far apart to ensure troublefree data transmission. We recommend a spacing of at least 30. Each channel number may only be used for one channel.
Example of configuration; channel numbers when setting up 3 wireless groups within one surgery:
- Wireless group 0: C1=0, C2=30, C3=60
- Wireless group 1: C1=10, C2=40, C3=70
- Wireless group 2: C1=20, C2=50, C3=80
Detection of equipment devices
If you wish to set up a wireless group with the scales, they will search for other active devices from the seca 360^ wireless system. The devices detected are shown as modules in the display on the scales (e.g. MO 3). The meaning of the numbers is as follows:
1: Personal scales
- 2: Length measuring device
3: Wireless printer
- 4: PC with seca USB wireless module
- 7: Baby scales
- 5, 6 and 8-12: Reserved for system expansion
6.2 Operate scales in a wireless group (menu)
All functions required to operate the device in a seca wireless group can be found in the submenu "rF". Information how to navigate in the menu can be found on page 49.
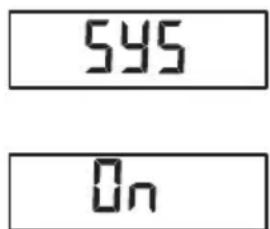
Activate wireless module (SYS)
The device is supplied with the wireless module disabled. It has to be activated before you can set up a wireless group.
NOTE:
When the wireless module is activated, the power consumption of the device will increase. We recommend using a power supply unit when operating the device in a wireless network.
595
- Switch the device on.
- Select the menu item "SYS" in the "rf" submenu.
- Confirm the selection.
- Select "on".
- Confirm the selection.
You will leave the menu automatically.
Set up wireless group (Lrn)
F
Lrn
Id I
10
[230
To set up a wireless group proceed as follows:
- Switch the device on.
- Call up the menu.
- Select the item "rF" in the menu.
- Confirm the selection.
- Select the menu item "lrm" (learn) in the "rf" submenu.
- Confirm the selection.
The wireless group currently selected (here: wireless group 0 "ID 0") is displayed.
If the wireless group "0" already exists and you wish to set up another wireless group with this device, use the arrow keys to select another ID (here: wireless group 1 "ID 1").
- Confirm your selection for the wireless group.
The device will suggest a channel number for channel 1 (here C1 "0").
You can either accept the channel number suggested or select another channel number using the arrow keys.
- Confirm your selection for channel 1.
The device will suggest a channel number for channel 2 (here C2 "30").
You can either accept the channel number suggested or select another channel number using the arrow keys.
[360
SEOP
NOTE:
Two-digit channel numbers are displayed without a space. The display "C230" means: channel "2", channel number "30".
- Confirm your selection for channel 2.
The device will suggest a channel number for channel 3 (here C3 "60").
You can either accept the channel number suggested or select another channel number using the arrow keys.
- Confirm your selection for channel 3.
The message STOP appears in the display.
The device is waiting for signals from other equipment devices with radio transmission capability within its range.
NOTE:
With certain devices a special switch-on procedure has to be followed if they are to be integrated in a wireless group. Consult the user manual for each device.
- Switch on the equipment device you wish to integrate in the wireless group, e.g. wireless printer.
A beep will be heard when the wireless printer is detected.
NOTE:
As soon as you have integrated a wireless printer in the wireless group, you have to select a print option (menu\rf\APrt) and set the time (menu\rf\time).
-
Repeat step 11. for all equipment devices you wish to integrate in the wireless group.
-
Press the Enter key to end the search.
-
Press one of the arrow keys to see which devices have been detected (here: Mo 3 for a wireless printer).
Once you have integrated several devices in the wireless group, press the arrow keys several times to check that all equipment has been detected by the scales.
- Press the Enter key to leave the menu or wait until you leave the menu automatically.
Activate automatic transmission (ASend)
You can configure the device so that the measured results are automatically transmitted to all receivers that are ready to receive and logged into the same wireless group (e.g.: wireless printer, PC with USB wireless module).
NOTE:
If you are using a wireless printer, ensure that "off" is not set as a print option (see "Select print option (APrt)" on page 58).
A5End
- Switch the device on.
0n
- Select the menu item "ASend" in the "rf" submenu and confirm your selection.
Select print option (APrt)
- Select "on" and confirm your selection. You will leave the menu automatically.
You can configure the device so that measured results are automatically printed out by a wireless printer logged into the wireless group.
NOTE:
This function is only available if the "learn" function has been used to integrate a seca wireless printer in the wireless group.
APrt
- Switch the device on.
- Select the menu item "APrt" in the "rf" submenu and confirm your selection.
-
Make the appropriate selection for your combination of devices:
-
HI: Measured results from length measuring devices
- MA: Measured results from scales
- HI_MA: Measured results from length measuring devices and scales
-
off: No automatic printout, printout only if Enter key is held down during weighing.
-
Confirm your selection.
You will leave the menu automatically.
Set time (Time)
You can configure the system so that the wireless printer automatically adds the date and time to the measured results. To do so, you have to set the date and time once on the device and transmit this to the wireless printer's internal clock.
EINE
NOTE:
This function is only available if the "learn" function has been used to integrate a seca wireless printer in the wireless group.
- Switch the device on.
- Select the menu item "Time" in the "rf" submenu.
- Confirm the selection.
The current selection for the year (Year) is displayed.
YER10
- Select the correct year.
- Confirm the selection.
- Repeat steps 3. and 4. as appropriate for the month (day (day), hour (hour) and minute (in).
- Confirm your selection each time.
After confirming your selection for Minute you will leave the menu automatically.
These selections will be automatically transmitted to the wireless printer.
The wireless printer automatically adds the date and time to every printout.
NOTE:
For further operation of the wireless printer see its user manual.
7. CLEANING
To clean the covering and housing use a household detergent or standard disinfectant as required. Take note of the instructions provided by the manufacturer.
Do not use scouring or caustic cleaning products, spirit, petrol or similar substances for cleaning under any circumstances. Such products may damage the high-quality finishes.
8. WHAT TO DO IF ...?
| Malfunction Cause/Remedy | |
| ... no weight is displayed during weighing? | The scales are not connected to the power supply - Check the scales are switched on - Check batteries are inserted |
| ... 000 does not appear before weighing? | A load was placed on the scales before being switched on. - Remove load - Switch scales off and back on again |
| ... a segment lights up continuously or not at all? | There is a fault at that point. - Notify maintenance service. |
| ... is displayed? | Battery voltage is falling off. - Insert new batteries as soon as possible |
| ... bAT is displayed? | Batteries are flat. - Insert new batteries |
| ... STOP is displayed? | The maximum load has been exceeded. - Reduce load |
| ... tENP is displayed? | The ambient temperature of the scales is too high or too low. - Set up scales in an ambient temperature between +10 °C and +40 °C - Wait approx. 15 minutes until scales have adjusted to ambient temperature |
| ... if after switch-on, measured results are transmitted for the first time and two acoustic signals are heard? | · The device was unable to send measured results to the radio receiver (seca wireless printer or PC with seca USB wireless module). - Check that the scales are integrated in the wireless network. - Check that the receiver is switched on. · Nearby RF equipment (e.g. mobile phones) are interfering with reception. - Make sure that RF equipment is kept at least 1 metre away from transmitters and receivers in the seca wireless network. NOTE: If such interference is not eliminated, no further acoustic warning will be given with subsequent attempts at transmission. |
| ... only the item "SYS" is visible in the rf menu? | ·The wireless module is disabled. - Activate wireless module (see "Activate wireless module (SYS)" on page 56). |
| ... only the items "SYS" and "Irn" are visible in the rf menu? | ·The wireless module is activated but no wireless group set up. - Set up wireless group (see "Set up wireless group (Lrn)" on page 56). |
| ... the items "APrt" and "Time" are not visible in the rf menu? | ·No wireless printer is logged into the wireless group. - Use menu item "Irn" to log the wireless printer into the wireless group(see "Set up wireless group (Lrn)" on page 56). |
| ... Er:H:11 is displayed? | The scales are too high, or too great a load is applied at one point. - Reduce load on scales or distribute weight-more evenly - Restart scales |
| ... Er:H:12 is displayed? | The scales have been switched on with too great a load. - Reduce load on scales - Restart scales |
| ... Er:H:15 is displayed? | Oscillation of the scales has occurred, preventing determination of the zero point. - Restart scales |
| ... when the Enter key (send/print) is pressed and Er:H:71 is displayed? | Data transmission not possible, wireless module is disabled. - Activate wireless module (see "Activate wireless module (SYS)" on page 56). |
| ... when the Enter key (send/print) is pressed and Er:H:72 is displayed? | Data transmission not possible, no wireless group set up. - Set up wireless group (see "Set up wireless group (Lrn)" on page 56). |
9. MAINTENANCE
9.1 Information about maintenance
Your seca scales leave the factory with an accuracy greater than ± 0,15% . To preserve this level of accuracy the product must be set up carefully and serviced regularly. We recommend having it serviced every 3 to 5 years depending on how often the scales are used.
ATTENTION!
Incorrect measurement due to improper maintenance
-
Make sure that maintenance and repair are only carried out by an authorised service partner.
-
You can find your local service partner at www.seca.com or just send an e-mail to service@seca.com.
10.TECHNICAL DATA
| Technical data for seca 703 | |
| Dimensions • D e p t h • W i d t h • H e i g h t | 520 mm 360 mm 930 mm |
| Weight 17 kg | |
| Temperature range +10°C to +40°C | |
| Height of figures 25 mm | |
| Power supply | Battery Power supply unit (optional) |
| Power consumption • with wireless module disabled • with wireless module activated | approx. 32 mA approx. 50 mA |
| Maximum runtime in battery mode • with wireless module disabled • with wireless module activated | approx. 5.600 minutes Power supply unit recommended |
| EN 60 601-1: • Class II totally insulated appliance: • Type B electromedical device: | ☐ 大 |
| Maximum load • Partial weighing range 1 • Partial weighing range 2 | 150 kg / 330 lbs / 24 sts 300 kg / 660 lbs / 47 sts |
| Minimum load 2 kg | |
| Graduations • Partial weighing range 1 • Partial weighing range 2 | 50 g / 0.1 lbs 100 g / 0.2 lbs |
| Tare range 300 kg | |
| Accuracy | |
| • 0 to 70 kg | ±100 g |
| • 70 kg to maximum load | ±0,15% |
| • 0 to 150 lbs | ±0.2 lbs |
| • 150 lbs to maximum load | ±0,15% |
| • 0 to 11 sts | ±0.2 lbs |
| • 11 sts to maximum load | ±0.2 lbs |
| Radio transmission | |
| • Frequency band | 2,433 GHz - 2,480 GHz |
| • Transmission power | < 10 mW |
| • Observed standards | EN 30028, EN 301 489-1, -17 |
11.Accessories
| Accessory Article number | |
| seca wireless network seca 360° wireless: • Wireless printer - seca 360° wireless printer 465 - seca 360° wireless printer advanced 466 • PC software - seca analytics 105 • USB wireless module seca 360° wireless USB adapter 456 | country-specific variants country-specific variants application-specific licence packages |
| 456-00-00-009 | |
| Power supply: • Plug-in power supply unit, Euro: 230V~ / 50Hz / 12V= / 150mA • Switch-mode power supply unit: 100-240V~ / 50-60Hz / 12V= / 0.5A | 68-32-10-252 68-32-10-265 |
| Additional accessories • seca 220 telescopic measuring rod, measuring range: 890 - 2000 mm, graduations: 1 mm, material: hard-anodised aluminium, slide with latchable measuring tongue • seca 220 telescopic measuring rod (double-graduations), measuring range: 890 - 2000 mm and 35" - 78 3/4", graduations: 1 mm and 1/8", material: hard-anodised aluminium, slide with latchable measuring tongue | 220-17-14-004 220-18-14-004 |
12.DISPOSAL
12.1 Disposal of device
Do not discard with household waste. The device must be disposed of properly as electronic waste. Comply with the national provisions applicable in your country.
For further information contact our service department at:
service@seca.com
12.2 Batteries (including rechargeables)
Spent (rechargeable) batteries should not be discarded with household waste, regardless of whether they contain harmful substances or not. As a consumer you are obliged by law to dispose of (rechargeable) batteries via the collection points set up by the municipal authorities or the retail sector. Only discard (rechargeable) batteries when fully discharged.
13.WARRANTY
We offer a two-year warranty from the date of delivery for defects attributable to faulty material or poor workmanship. This excludes all moveable parts such as (rechargeable) batteries, cables, power supply units, etc. Defects which are covered by the warranty shall be rectified free of charge for customers on production of the sales receipt. No further claims can be accepted. The costs of shipment in both directions shall be borne by the customer where the device is not located at the customer's premises. In the event of any damage during shipment warranty claims can only be asserted where the complete original packaging was used for shipment and the scales were secured inside in the same manner as in the original packaging. You should therefore keep all packaging.
The warranty shall become null and void where the device is opened by persons not expressly authorised to do so by seca.
We ask customers based abroad to contact their local sales agent direct in the case of warranty claims.
TABLE DES MATIÈRES
- Confirmez la selection.
1.1 Sentiti compliment!
This device complies with Part 15 of the FCC Rules and with RSS-210 of Industry Canada. Operation is subject to the following two conditions. (1) this device may not cause harmful interference, and (2) this device must accept any interference received, including interference that may cause undesired operation.
NOTE:
This device complies with Part 15 of the FCC Rules and with RSS-210 of Industry Canada. Operation is subject to the following two conditions:
- This device may not cause harmful interference.
- This device must accept any interference received, including interference that may cause undesired operation.
NOTE:
Changes or modifications made to this equipment not expressly approved by seca may void the FCC authorization to operate this equipment.
NOTE:
Radiofrequency radiation exposure Information: This equipment complies with FCC radiation exposure limits set forth for an uncontrolled environment. This equipment should be installed and operated with minimum distance of 1m between the radiator and your body. This transmitter must not be co-located or operating in conjunction with any other antenna or transmitter.
CE
Konformitätserklärung
Declaration of conformity
Certificat de conformité
Dichiarazione di conformità
Declarazione de conformidad
Overensstemmelsesattest
Försakran om überensstämmlse
Konformitetserklæring
Vaatimuksenmukaisuusvakuutus
Verklaring van overeenkomst
Declaração de conformidade
Δήλωση Σιμβατότητας
Prohlášení o shodě
Vastavusdeklaratsion
Megfelelośégi nyilatkozat
Atitikties patvirtinimas
Atbilstības apliecinājums
Deklaracja zgodnosci
Izjava o skladnosti
Vyhlásenie o zhode
Onay belgesi
The non-automatic personal scales
...meets the fundamental requirements of directive 2004/108/EC governing electromagnetic compatibility and standards EN 300 328 and EN 301 489 governing electromagnetic compatibility and radio spectrum matters.
If temporary interference and/or inaccurate weighing should nevertheless occur when the scale is used in the vicinity of intensive electromagnetic radiation sources such as microwave appliances, mobile telephones, walkie-talkies and the like, please move the scale away from the interference source or switch off the interference source and repeat the weighing operation.

Hamburg: September 2015

Frederik Vogel