USER MANUAL MeteoClock SM1960 LEXIBOOK
SM1960IM size : 110mm W x 105mm H
LEXIBOOK®
Français 1 - 22
English 23-44
Español 45 - 66
Português 67 - 88
Italiano 89 - 110
Deutsch 111-132
- 9 piles de type LR6/AA (non incluses)
- 10 via (includes)
Copyright © 2006 LEXIBOOK®
SM1960IM size : 110mm W x 105mm H

Meteoclock® Pro SM1960 + ASM20 - Instruction Manual
INTRODUCTION
Congratulations on your purchase of this weather station, MeteoClock® Pro SM1960. Please take the time to read and understand this manual so you can begin to enjoy the convenience and features this product has to offer.
What exactly is a Weather Station?
Lexbook digital stations measure not only the time in progress – thanks to their built-in-clock but also the actual and upcoming weather.
The MeteoClock® Pro SM1960 incorporates the following functions:
- Thermometer:
The temperature is displayed in real time to the nearest tenth of a degree Celsius. Thanks to its wireless sensor, the weather station can select from a distance the outdoor temperature or the temperature of another room.
^* 本说明仅供参考。
Outdoor or indoor hygrometry is expressed in percentage of humidity in the ambient air. The ideal 'Comfort Zone' for the human body ranges from 35 to 65% hygrometry for a given temperature between 100 and 240°C.
- Barometer:
The station also monitors the atmospheric pressure in real time. It displays the weather forecast by means of animated icons (sun, clouds, rain...) and for the next 8 to 12 hours.
- Anemometer:
The wind speed and direction is measured by the anemometer sensor and transmitted to the main unit. The direction of the wind is displayed on a digital compass and the speed is given in km/h and mph.
- Pluviometer
The rainfall is measured and recorded in the pluvometer; it can be displayed in mm or in inches by the main unit. A total record of the rainfall, for the last hour, for the day and for the day before can be displayed.


LAYOUT
Main unit layout
2017
See image A
- MODE: to scroll through clock, alarm, attitude and temperature alarm (high & low) setting modes.
- HOUR#: to view the rainfall history; adjust clock, alarm, date & year, attitude and temperature alarm values.
S. MINUTE/- to change the rainfall & wind speed unit, to adjust the clock, alarm, date, altitude & year and temperature alarm values.
-
CHN: to scroll through remote channels Outside 1, Outside 2 and Outside 3; to scroll through local and remote channels (Outside 1, Outside 2 and Outside 3) in (high & low) temperature alarm mode; to activate the learning procedure. To change the weekday setting in alarm mode and to toggle between C° and F° temperature display.
-
to activate the backlight; to show Min and Max records; to toggle between 12 and 24 hour format, to turn the alarm on and off; to disable (reset) high & low temperature alarms; to scoze the alarm; to set the altitude unit.
-
DCF/MSF RCC Switch
-
Wall-mount holder
B. Tilted island
- Antenna
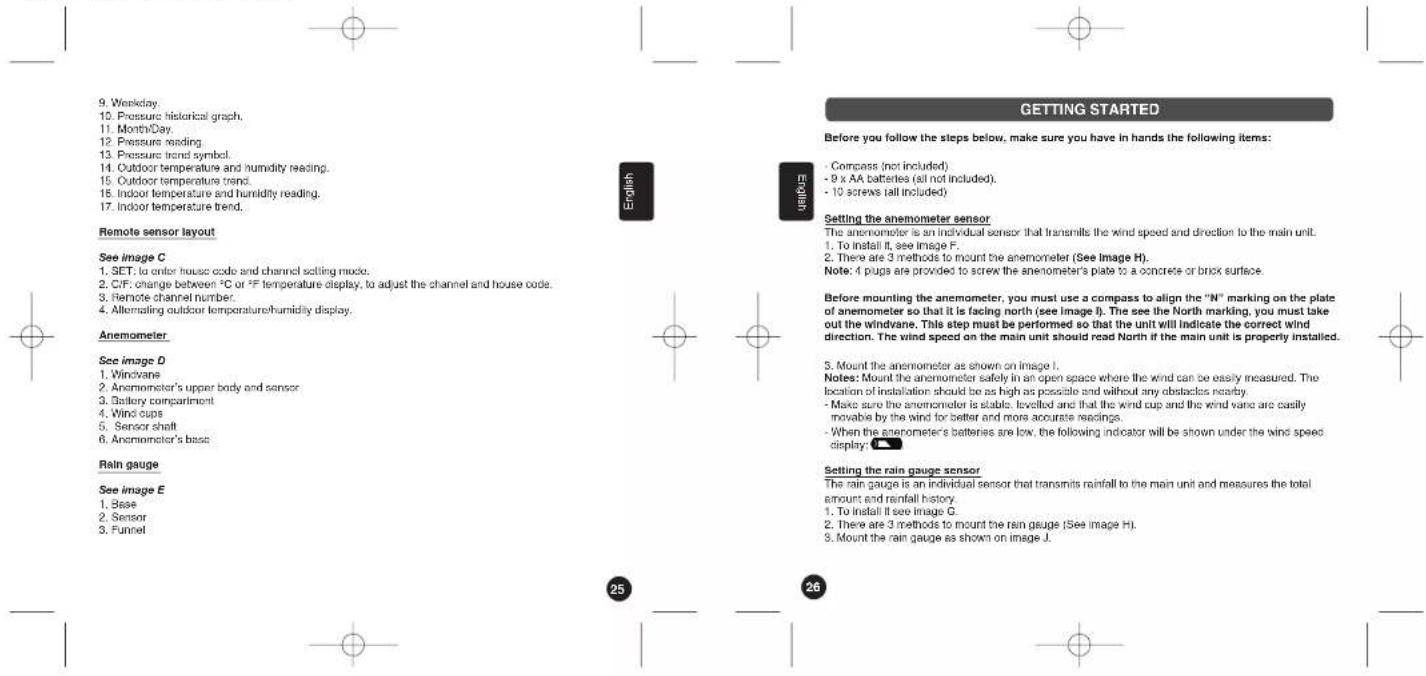
Main unit display layout
See image B
- Rain fall records in mm inches
- Wind speed in km/h or mph
S. Wind direction
- Animated weather forecast symbols
- Clock (HH MM)
- Alarm on noise
- A##H ## 1954.
- C#s#t ###
- Hado control clock 10h.

SM1960IM size : 110mm W x 105mm H
GETTING STARTED
Before you follow the steps below, make sure you have in hands the following items:
- Compass (not included)
- 9 x AA batteries (all not included).
- 10 screws (all included)
Setting the anemometer sensor
The anemometer is an individual sensor that transmills the wind speed and direction to the main unit.
1. To install it, see Image F.
2. There are 3 methods to mount the anemometer (See Image H).
Note: 4 pugs are provided to screw the anemometer's plate to a concrete or brick surface.
Before mounting the anemometer, you must use a compass to align the "N" marking on the plate of anemometer so that it is facing north (see image I). The see the North marking, you must take out the windvane. This step must be performed so that the unit will indicate the correct wind direction. The wind speed on the main unit should read North if the main unit is properly installed.
- Mount the anemometer as shown on image I.
Notes: Mount the anemometer safety in an open space where the wind can be easily measured. The location of installation should be as high as possible and without any obstacles nearby.
- Make sure the anemometer is stable, levelled and that the wind cup and the wind vane are easily movable by the wind for better and more accurate readings.
- When the anemometer's batteries are low, the following indicator will be shown under the wind speed display:
Setting the rain gauge sensor
The rain gauge is an individual sensor that transmits rainfall to the main unit and measures the total amount and rainfall history.
- To install it see image G.
- There are 3 methods to mount the rain gauge (See image H).
- Mount the rain gauge as shown on image J.
SM1960IM size : 110mm W x 105mm H
Notes: The rain gauge measures the rainfall but does not collect any rain. So remember to put it in a location where the water can flow easily. To obtain accurate rain fall readings, there should be no obstacles (walls, trees, etc.) in the proximity of the rain gauge.
When the rain gauge's batteries are low, the following indicator will be shown under the rain fall display:
Setting the remote sensor
- Pull off the detachable cover at the back of the remote sensor. Use a screwdriver to open the battery door located at the back of the remote sensor unit. Insert 2 AA batteries according to the polarity. Close back the battery compartment and tighten the screw. The remote sensor will now display the outdoor temperature and humidity alternatively.
To toggle between ^ or ^ temperature display, press the ^ / ^ key [2].
The SM1980 comes with one remote sensor. If you have not purchased additional sensors, you do not need any additional settings aside from inserting the batteries. Proceed to the next section. If you wish to set your main unit to more than one sensor or experience interference during the settings, please refer to section 'Multiple sensor use'.
Interference
The house code is the frequency signal sent by the remote sensor to the receiver. If your weather station detects other signals from neighbouring sources, you need to set the remote sensor to a different house code (default setting = 1).
After inserting the batteries, the house code will flash for 8 seconds. Select a house code (1-15) by pressing ^1 C ^2 F [11] and then press SET [10]. The house code is the frequency signal sent by the remote sensor to the receiver. The remote sensors for each receiver must be set to the same house code.
Multiple sensor use
If you have purchased several remote sensors, you must set each of them to a different channel. The channel function allows the receiver to identify each remote sensor. Each receiver can receive up to 3 different remote channels.
The channel will flash for 8 seconds after setting the house code. Select a channel (1-3) by pressing "C"F [11] and then press SET [10]. Channel 1 is used for collecting data from outdoor and activating the weather forecast symbols.
Low battery indication: If the batteries of the sensor are low, the indicator will be displayed on the main unit below the outdoor temperature display. Note: If the sensor is exposed to very low temperatures for an extended period of time, the batteries may lose power which may cause the transmission range to be limited. High temperatures also reduce the battery performance.


Setting the main unit
Use your finger to lift the battery door located at the back of the main unit, if it proves difficult, use a flat screwdriver to lift it. Then, insert 3 AA batteries according to the polarity. Close box the battery compartment. The SM1960 is designed to automatically synchronize its calendar clock once it is brought within the reception range of a radio signal. If the clock is within the range of both the DCF77 and MSF radio signals, you can toggle between the 2 signals by sliding the DCF/MSF RCC key at the back of the unit, inside the battery compartment (6).
The main unit will display the outdoor temperature and humidity data transmitted from the sensor. If this is not the case, there might be interference in your neighbourhood. Please refer the paragraph above (interference).
The main unit will also display the data collected from the anemometer and the rain gauge sensors. You are now ready to use your new weather station.
Note: this step will take several minutes.
LOW BATTERY INDICATION: If the batteries of the main unit are low, the following indicator will be displayed on the screen of the main unit below the inside temperature. When the main unit's LCD display becomes dim, it indicates that the batteries are low and need to be changed.
SETUP
Automatic Learning Function
-
After batteries have been inserted in the remote sensor, rain gauge, anancimeter and in the main unit, the learning function is launched automatically and runs for approximately 3 minutes.
-
Within these 3 minutes, the main unit (receiver) picks up the temperature & humidity signals from the remote sensor and displays the readings.
Manual-Learning (Searching for Remote Signals)
If a new remote sensor is added or if the signal is lost (outdoor display blinking), the learning function must be executed again.
-
Press and hold CHN [4] for 3 seconds to start
-
A beep sound indicates that the learning function has started.
-
The 'arrow' symbol inside the outside temperature trend box will flash, and unit will beep as each remote sensor is detected.
-
Temperature & humidity readings of the remote sensor and wind direction, wind speed & rainfall readings are displayed on the main unit.
Note: Auto/Manual Learn will not operate while the radio controlled clock is receiving DCF77 or MSF signals.

SM1960IM size : 110mm W x 105mm H
Fixing your remote sensor and your receiver
The receiver (main unit) has a wall mount holder and a tiltable stand. To use it with the stand, just put the main unit and the stand together by 'cicking' the ball in the hole at the bottom of the unit, then put it anywhere you want on a flat and stable surface. To ensure a good transmission, the receiver should not be installed on, or near, a large metal surface. To fix the receiver on a wall, you need first to remove the stand, for that gently pull it, and then you can put it on a hook or nail on a wall.
The remote sensor has a detachable cover with both a wall mount holder and a stand. To fix it on a wall, make sure the stand is not pulled out and fix the holder on a hook or nail. To put the remote sensor on a shelf or table, simply pull the stand out and make sure it is well secured and stable. To ensure a good transmission, the remote sensor should not be installed on, or near, a large metal surface. Before choosing the location of the remote sensor, test that the receiver can receive the signals. It is also recommended that the remote sensor is placed as close as possible to the receiver to eliminate any interference.
Backlight
The default state of the backlight is ON. To turn the backlight on, press ☐. It will stay on for about 6 seconds.
CLOCK AND DATE SETTINGS
RADIO CONTROL CLOCK (RCC)
The SM1960 is designed to automatically synchronize its calendar clock once it is brought within the reception range of a radio signal.
There are 2 different random signals:
- DCF77 signal, for GMT +1 (France, Spain, Italy, Germany);
- MSF signal, for GMT (UK, Ireland, Portugal).
The DCF77 signal will be received if the main unit is within 1500 km of the Frankfurt atomic clock. Your main unit will be automatically synchronised with the MSF signal if located within the UK radio signal range.
-
If the clock is within the range of both the DCF77 and MSF radio signals, you can toggle between the 2 signals by sliding the DCF/MSF RCC key at the back of the unit, inside the battery compartment [6].
-
The clock automatically starts scanning the RF 433MHz signal approximately 7 minutes after new batteries are inserted in the main unit. Hence, it will begin after the learning process (see previous section). When receiving radio signal, the Radio Tower symbol starts to blink. A complete reception

generally takes about 10 minutes, depending on the strength of the radio signal. During the reception of the RCC signal, the main unit will no longer update the data received from the outdoor remote sensor, the anemometer and the rain gauge.
- The scan can also be triggered manually by holding the MINUTE key [3] for 3 seconds.
- When the reception is complete, the Radio Tower symbol will stop blinking and remain solid. The clock automatically scans the time signal at 02:07 everyday to maintain accurate timing.
Notes:
• For an optimal reception, place the weather station away from metal objects and electrical appliances (i.e. television, computer, monitor, etc.) to minimize interference.
MANUAL CLOCK SETTING
Clock setting
-
Press and hold MODE [1] for 3 seconds to enter clock setting mode (the time will flash).
-
Press HOUR/+ [2] to set the hour and MINUTE/- [3] to set the minutes.
-
Press [5] during the clock settings to alternate between the 12 and 24 hour display.
-
Once the clock is set, press MODE [1] to accept the lime settings. Upon pressing mode, the month and date will flash.
-
Press the HOUR/+ [2] to set the month.
-
Press the MINUTE/ [3] to set the date.
- Press MODE [1]. the year will flash. Press the HOUR/+ [2] to move the year upwards and MINUTE/ [3] to move the year downwards. Press MODE [1] to confirm all your settings.
Notes:
- If you do not press any key for one minute, the clock will accept the last settings entered.
- February will have either 28 or 29 days. Your weather station will display the 29th day on biosextile years.


SM1960IM size : 110mm W x 105mm H

ALTITUDE SETTING
Setting the height from sea level
Once the synchronization process is complete and the time and date are set, you must enter the height (in metres) of the weather station from sea level:
-
Press MODE [1] until the attitude flashes
-
Use the HOUR- [2] and MINUTE- [3] keys to increase and decrease the altitude.
-
Use the □ key [☐] to select the altitude 'm 8 fact' units in altitude setting mode
-
Use the key [5] to select Press MODE [1] to confirm.
Note: Since the default altitude is zero (ses. level), after reset pressure display shows absolute pressure. To see the relative pressure, enter the altitude for your current location.
ALARM SETTING
Alarm Setting
Scroll to alarm mode using MODE [1]
-
Press HOUR/+ [2] to set the hour.
-
Press MINUTE- [3] to set the minutes.
-
Press [5] to toggle alarm on ( is displayed) and off
-
Press CHN [4] to toggle between the activation day, it can be a particular day or a series of days.
-
When the alarm is set ON, the bell symbol will flash.
When Alarm Sounds
a. will flesh
b. Press (5) to repeat the alarm in 5 minutes. After that the alarm will sound again.
c. Press ANY other key to turn the alarm sound off. If not manually interrupted, the alarm sound will automatically stop after one minute.

31
32
MOON PHASES
Throughout the 28 days of the lunar month, the aspect of the moon changes. Indeed, the moon, being spherical, is always half lightened up by the sun. As the moon rotates around the Earth, the appearance of its lightened side changes continuously. This phenomenon creates moon phases. The moon phase on your MeteorClock® is automatically updated according to the year/monthday.
Moon Phase Display
-
New Moon
-
Young Crescent
-
First Quarter
-
Waxing Gliebous
-
Full Moon
-
Waning Gibbons
-
Last Quarter
-
Old Crescent

TEMPERATURE & HUMIDITY DISPLAY
Checking Outside Temperature & Humidity
- Press CHN [4] to toggle between the data of your various remote sensors: Outside 1 (channel 1), Outside 2 (channel 2) and Outside 3 (channel 3). Temperature and humidity readings will alternate on the receiver.
Note: if you do not have any additional sensors, please disregard this function.
SM1960IM size : 110mm W x 105mm H
Min and Max Temperature & Humidity
Press [5] in clock mode to toggle between: maximum wind speed, maximum temperature, minimum temperature; maximum humidity record and minimum humidity record.
Display HI & LO
^1 Hi ^+ and ^2 Lo ^+ displayed onscreen mean that the temperature or humidity is outside the range of specification.
| Inside/ Outside Temperature Humidity Display | |
| Inside >+55°C >95% HI | | |
| Inside < -20°C < 15% LO | | |
| Outside >+70°C >95% HI | | |
| Outside < -30°C <15% LO | | |
TEMPERATURE & HUMIDITY TREND
The trend indicator shows the trend of temperature & humidity determined by the particular sensor in the past half hour interval.
| Arrow Indicator | | | |
| Trend Rising Steady | Falling | | |
TEMPERATURE ALARM
You can set high temperature or low temperature alarms for one local channel and for one remote channel.
Inside temperature alarm
- Scroll to temperature inside alarm mode by pressing MODE [1] 3 times repeatedly.
- The default value 14°C or existing preset will flash.
- Press HOUR/+ [2] or MINUTE/- [3] keys to set the temperature limit value.


- Press [icon] key continuously to scroll and select the high temperature alarm →, low temperature alarm → or disable the alarm functioning (blank).
- Press MODE [1] to save your settings
Outside temperature alarm
- Scroll to temperature outside alarm mode by pressing MODE [1] 4 times repeatedly.
- Press CHN [4] to select the channel of the desired transmitter.
- The default value 14°C or existing preset will flash.
- Press HOUR/+ [2] or MINUTE/- [3] keys to set the temperature limit value.
- Press [5] key continuously to scroll and select the high temperature alarm →, low temperature
alarm → or disable the alarm function (blank).
- Press MODE [1] to save your settings.
When the temperature alarm sounds
The icon of signals that the temperature has exceeded the preset temperature limit.
a. Press any key to stop temperature alarm.
b. If no key is pressed, the temperature alarm will automatically stop itself after one minute
WIND SPEED/DIRECTION DISPLAY
Derived from the Greek word "anemesis" (wind), an anemometer is a device measuring the velocity of the wind. The SM1960 anemometer also indicates the wind direction. The Beaufort Wind Scale is the international standard to measure wind speed. Sir Francis Beaufort of the British navy introduced this scale in the early 19th century by using the speed of a fully rigged sailing vessel to describe the wind speed. The table below illustrates the relationship between the Beaufort force and wind speed:


SM1960IM size : 110mm W x 105mm H
| Beaufort Force
(KmPH) (MPH) used in
forecasts | Wind Speed Wind Speed Terms
used in | | Indicators | |
| 0 0-2 0-1 Calm Calm; smoke rises vertically.
The sea is mirror-like. | | |
| 1 2-5 1-3 Light Smoke drift indicates wind
direction. | | |
| 2 6-12 4-7 Light Wind felt on face, leaves rustle.
down. | | |
| 5 13-20 8-12 Gentle Leaves and small twigs in
constant motion. | | |
| 4 21-29 13-18 Moderate Raising dust, waves and loose
paper; small branches move.
At sea, small waves 1-4ft.
(up to 1.2ft) toxic form. | | |
| 5 30-39 19-24 Fresh Small trees in leaf begin to
away; crossed wavelets form
on inland waters. At sea, 4-8ft
(1 to 2.5ft) waves. | | |
| 6 40-50 25-31 Strong Large branches in motion;
whistling heard in vires;
umbrellas used with difficulty.
At sea, 8-15ft (2.5-4ft) waves. | | |
| 7 51-61 32-38 Strong Whole trees in motion;
inconvenience felt while
walking against the wind.
At sea, 13-20ft (4-6ft) waves. | | |


| 8 62-74generally impodes progress. | 39-16 | Gale Breaks twigs off trees; | |
| 9 75-87 47-54roofing dislodged, largerbranched break off. High waves(20ft/5m), reduced visibility atsea. | Gale | Slight structural damage, | |
| 10 trees uproofed; considerablestructural damage occurs.At sea. 20-30ft (8-9m) waves. | 88-101 | 55-63 | Storm |
| 11 accompanied by widespreaddamage. Exceptionally highwaves 30-45ft (9-14m). | 102-116 | 64-72 | Storm |
| 12 accompanied by widespreaddamage. At sea, waves over45ft/14m, visibility greatlyreduced. | 117 or more | 73 or more | Hurricane |


SM1960IM size : 110mm W x 105mm H

Wind direction [3]:
The long arrow (with arrow lip) indicates the current wind direction.
The short arrow indicates the last wind direction.
Changing the display unit:
The wind speed can be displayed in km/h or in mph.
Press MINUTE/ [3] to toggle between wind speed in mph with rain fall in inches and wind speed in km/h with rain fall in mm.
Notes: - Data on the wind direction and speed is transmitted to the main unit every minute.
- The wind direction may not be accurate in extreme weather (during tornadoes or other extreme conditions in which the wind is changing direction every few seconds).
RAIN FALL DISPLAY
A rain gauge is a type of instrument which gathers and measures the amount of liquid or solid (snow, sleet, hail) precipitation over a set period of time.
Having a rain gauge at home is extremely useful. For example, it can help you keep track of the amount of water your garden is getting or estimate what time of the year it is more likely to rain. Also, the amount of precipitation varies so much locally that your area might get a different level of rainfall than the one recorded at your local weather observatory.
- The rainfall can be displayed in mm or inches, moreover it can show the rainfall record in total, at last hour, today, and yesterday.
Change the display unit:
Press Minute—[3] to toggle between wind speed in mph with rain fall in Inches and wind speed in km/h with rain fall in mm.
Display the rainfall record:
To display the last hour, today and yesterday's accumulated rainfall:
Press HOUB/+ [2] repeatedly to change the rainfall record.
Press [5] during 3 seconds to set the accumulated rainfall values back to 0.

37
38
WEATHER FORECAST & DISPLAY
| Sunny | Cloudy | Raining | Snowing | Freeze Warning | Storm Alert |
| | | | | |
Animated weather forecast symbols
This weather station is capable of detecting barometric pressure changes, and based on the data collected, can predict the weather for the next 12 to 24 hours. The effective range covers an area of 50 - 50km.
Storm Alert
* The storm symbol will flash to warn of a thunderstorm.
* It is activated when pressure falls/rises and temperature plunges.
About Snow and Freeze Warning
* The snow symbol will flash to warn that it might snow
* Activated when the temperature of Channel 1 is between -1.9 °C & +2.9 °C
* The snow symbol will appear solid when the temperature of channel 1 falls below - 1.9 °C, and it is freezing.
REMARKS:
- The remote sensor set at channel 1 displays the weather forecast icons (as well as the trend
(indication). Please place it outdoors
- After having completed the settings of your weather station, please discard the readings of the weather forecast for the next 12-24 hours. This will allow sufficient time for the Weather Station SM1960 to operate at a constant altitude and therefore result in a more accurate forecast.
- Absolute accuracy cannot be guaranteed regarding weather forecasting. The weather forecasting feature is estimated to have an accuracy level of about 75% due to the varying area the Weather Station has been designed to be used in.
SM1960IM size : 110mm W x 105mm H
ATMOSPHERIC PRESSURE DISPLAY
Your weather station displays the existing atmospheric pressure in hoctopascal (hPa). It is commonly acknowledged that a value of 1015 hPa is the limit between an anticyclone (good weather > 1015 hPa) and a low-pressure area (bad weather < 1015 hPa).
Pressure trend
The trend pointer displayed indicates the trend of the barometric pressure.

Indicates that the barometric pressure trend is increasing.
Indicates that the barometric pressure trend is steady.
Indicates the barometric pressure trend is decreasing.
PRESSURE HISTORICAL BAR GRAPH
The bar graph lets you see the pressure trend over a period of 12 hours.
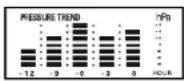
Pressure Trend


TROUBLESHOOTING
Problem:
- The main unit cannot receive radio control DCF-77 or MSF signals to update the clock.
- The temperature measurements of the remote sensor and receiver do not match.
- Temperature reading of outdoor remote sensor seems too high.
- Receiver is no longer receiving remote sensor signals or display.
- An abnormal operation has been observed and certain functions do not work
- The anemometer does not display the correct wind direction
Solution:
- Place the clock away from metal objects or electrical appliances such as TVs, computers, monitors,
etc. Trigger the scan manually by holding the MINUTE/- key [3] for 3 seconds.
- Wait for about 1-2 minutes to ensure the remote sensor and receivers are in phase. Otherwise,
re-synchronize receiver by holding CHN [4] for 3 seconds until a beep is heard. Make sure that no
Battery is low.
- Ensure the remote sensor is out of direct sunlight, and away from sources of heat.
- Hepeal the learning procedures.
- Temperature may be below -30°C.
- Batteries in remote sensor may need charging.
- Moun ramping sparger slamps in the receiving
- Make sure remote sensor is away from sources of electrical disturbance.
- Reset the unit by replacing the batteries in both the transmitters and receivers.
- Make sure you have aligned the north marking underneath the anemometer's windvane with the
real North.


SM1960IM size : 110mm W x 105mm H

ACCESSORIES
Additional sensors:
Measure temperature and hygrometry in other places
- Upstairs
- In baby's bedroom
- In the basement
- In the garden
In another room
To order, phone the Lexbook office located in your country or browse www.lexbook.com


SPECIFICATIONS
Weather Station Receiver SM1960
Battery Type: 3 X1.5V AA batteries
Temp. Range: -20 C to +55 C
Measurement Accuracy: +/- 1 C (Within measuring range of 0 to -40 C)
Resolution: 0.1 C
Humidity Range: 15% to 95%
Measurement Accuracy: +/- 5%
Resolution: 1%
Weather Station Transmitter ASM20
Battery Type: 2 X1.5V AA battery
Temp. Range: -30 C to +70 C
Humidity Range: 15% to 95%
Transmission Frequency: 433.92MHz
Transmission Range. Up to 40 meters in open area.
Weather Station rain gauge transmitter
Battery Type: 2 X1.5V AA battery
Rain Volume Resolution: -0.2mm
Weather Station anemometer transmitter
Battery Type: 2 X1.5V AA batteries
Transmission Frequency: 433.92MHz
Transmission Range: Up to 40 meters in open area.
Wind Speed Range: 0km/h-127.5km/h
Wind Speed Resolution: 0.5 km/h
41
42
SM1960IM size : 110mm W x 105mm H

MAINTENANCE
In order to clean the unit, use only a soft cloth moistened with water; do not use any detergent product. Do not dismantle or drop the unit. Remove the batteries if the unit is not going to be used for an extended period of time.
WARRANTY
NOTE: Please keep this instruction manual, it contains important information.
This product is covered by our two-year warranty.
To make use of the warranty or the after-sales service, please contact your retailer and supply proof of purchase. Our warranty covers material or installation-related defects attributable to the manufacturer, with the exception of wear caused by failure to respect the instructions for use or any unauthorised work on the equipment (such as dismantling, exposure to heat or damp, etc.).
Lexibook UK Limited
Unit 10 Petersfield Industrial Estate
Bedford Road, Petersfield
Hampshire, GUS2 3QA
United Kingdom
For technical assistance call 0909 100 3015
Web: http://www.lexibcok.com

Environmental Protection
Unwanted electrical appliances can be recycled and should not be discarded along with regular household waste! Please actively support the conservation of resources and help protect the environment by returning this appliance to a collection centre (if available).

43
We, LEXIBOOK
2, Av de Scandinavie,
91953 Courtaboeuf Cedex

Declare under our sole responsibility that the product
Kind of product: Weather station MeteoClock® Pro
Type number: SM1960
To which this declaration refers, complies with the essential requirements and any other provisions stated in Appendix 1.1.15 (1986/55C) for all that applies to:
stated in Directive HATTE (1999/5EC) for all that applies to.
RADIOEREQUENCY: EN 300220.1/V1.2.1.2020.09; EN300220.8/V1.1.1.2020.09
HADIO-FREGUENO-1, EN 300220-1 (V1.5.1 2000-08), EN300220-3 (V1.1.1 2000-08), CEM (Electromagnetic compatibility): EN 301489-1 (V1.4.1 2002-08), EN301489-3 (V1.4.1 2002-08)
Additional information:
Certified laboratory being consulted: CETECOM
Technical report available from:
Lexibook. 2 avenue de Scandinavie, 91953 Courlabceul cedex
Dated the 29th of March 2006 is suitable for use within the European Union member states.
Denis Mauduit
Quality Manager

C€0682
Copyright © 2006 LEXIBOOK®
SM1960IM size : 110mm W x 105mm H

Meteoclock® Pro
- Bojiula (no, includa)
Copyright © 2006 LEXIBOOK®
SM1960IM size : 110mm W x 105mm H

Copyright © 2006 LEXIBOOK®
SM1960IM size : 110mm W x 105mm H

- Bussole (non incluse)
• 2016: A 4.3.2017 in the April of
Copyright © 2006 LEXIBOOK®
SM1960IM size : 110mm W x 105mm H

Meteoclock® Pro SM1960 + ASM20 - Bedienungsanleitung
EINLEITUNG
The following described text is:
Copyright © 2006 LEXIBOOK®
SM1960IM size : 110mm W x 105mm H
Meteoclock® Pro
b. SREX B, [5] B: Text with a 3-inclusion to Hennusch. Norion 261 bel alarm locus stecon
Copyright © 2006 LEXIBOOK®
SM1960IM0326
153