
RecMic II RM4010P - Hi-fi system OLYMPUS - Free user manual and instructions
Find the device manual for free RecMic II RM4010P OLYMPUS in PDF.
| Product Type | Dictaphone / Dictation Microphone |
| Brand | Olympus |
| Model | RecMic II RM4010P |
| Dimensions (approx.) | 150 x 50 x 30 mm |
| Weight (approx.) | 100 g |
| Power Supply | USB |
| Microphone | Dual microphone (front and rear) with noise cancellation |
| Recommended Recording Distance | 5 to 10 cm from mouth |
| Noise Analyzer | Built-in, checks ambient noise level for voice recognition |
| Recording Modes | 3 modes: Quiet Environment (default), Noisy for Voice Recognition, Noisy for Classic Dictation |
| LED Indicator | Colors: Blue (quiet mode), Green (noisy VR mode), Red (noisy dictation mode) |
| Preset Keys | F1 (Olympus), F2 (Custom), F3 (Dragon), F4 (Windows) |
| Compatible Software | Dragon NaturallySpeaking (Nuance), Windows Speech Recognition |
| Configuration Tool | RecMic Configuration Tool (free, downloadable online) |
| Download Sites | Europe: olympus.eu/sds-downloads; Americas: olympusamericaprodictation.com |
| Maintenance | Clean with a soft, dry cloth; do not use liquids |
| Safety | Do not block the rear microphone openings; avoid shocks |
| Additional Features | HID keyboard mode, mouse settings, firmware update |
| Warranty | 2 years (subject to manufacturer's conditions) |
| Included Accessories | USB cable, quick start guide (depending on country) |
Frequently Asked Questions - RecMic II RM4010P OLYMPUS
User questions about RecMic II RM4010P OLYMPUS
0 question about this device. Answer the ones you know or ask your own.
Ask a new question about this device
Download the instructions for your Hi-fi system in PDF format for free! Find your manual RecMic II RM4010P - OLYMPUS and take your electronic device back in hand. On this page are published all the documents necessary for the use of your device. RecMic II RM4010P by OLYMPUS.
USER MANUAL RecMic II RM4010P OLYMPUS
natural_image
Black Olympus 3D device with control buttons and a cord, no visible text or symbols on the device body.ENGLISH....2
ČEŠTINA 6
DANSK......10
DEUTSCH......14
ESPAÑOL......18
SUOMI ......22
FRANÇAIS......26
ITALIANO......30
LIETUVIŲ ...... 34
LATVIEŠU 38
NEDERLANDS......42
POLSKI 46
РУССКИЙ......50
SVENSKA......54
1. How to achieve the best recording result
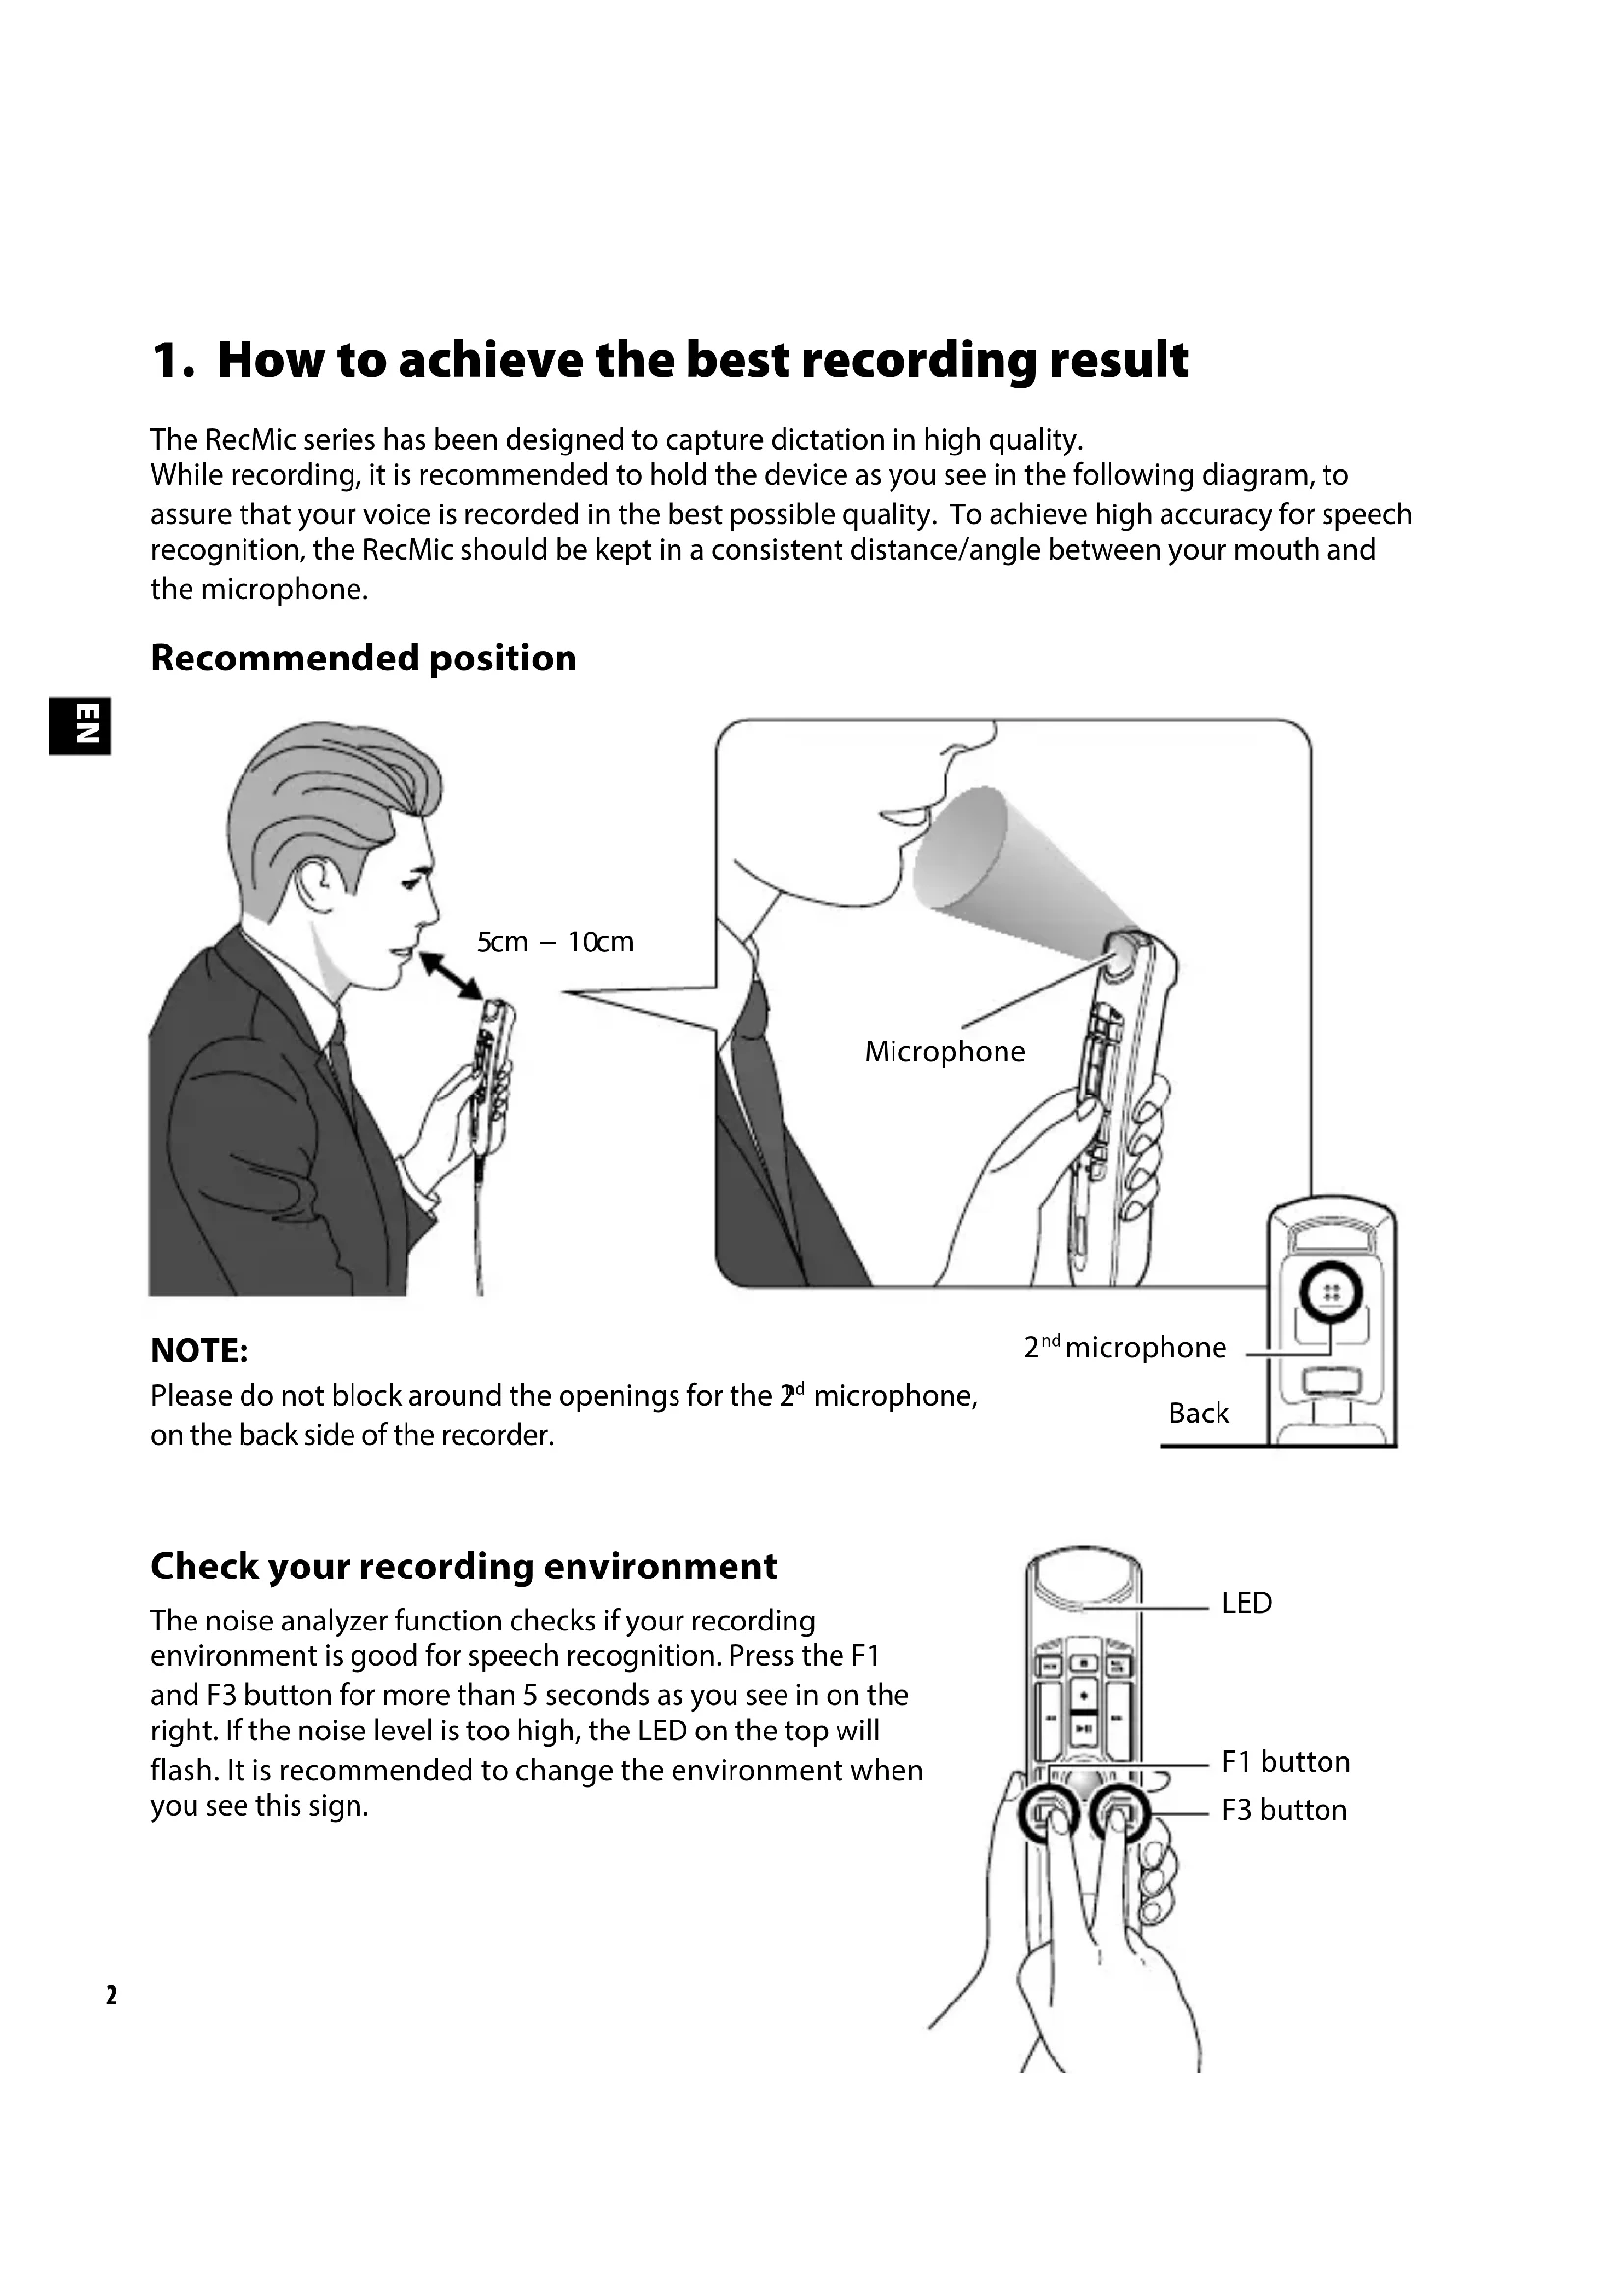
The RecMic series has been designed to capture dictation in high quality.
While recording, it is recommended to hold the device as you see in the following diagram, to assure that your voice is recorded in the best possible quality. To achieve high accuracy for speech recognition, the RecMic should be kept in a consistent distance/angle between your mouth and the microphone.
Recommended position


Check your recording environment
The noise analyzer function checks if your recording environment is good for speech recognition. Press the F1 and F3 button for more than 5 seconds as you see in on the right. If the noise level is too high, the LED on the top will flash. It is recommended to change the environment when you see this sign.

2. Choose the recording mode which best match the use scene
In order to achieve good recording quality and speech recognition results, it is important that you select the preset recording mode which matches to your environment. The recording mode controls the directionality and the noise reduction level during recording. Especially during speech recognition, the background noise should be kept at a minimum level.
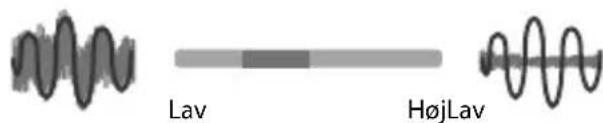
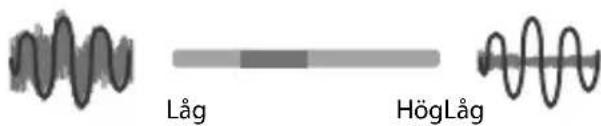
Directionality: Noise cancellation:

Recording Modes
| LED Color Recording Mode | Settings | |
| Directionality Noise | Cancellation | |
| Blue Quiet Environment (Default) OFF OFF | ||
| Green | Noisy Environment for Speech Recognition | HIGH |
| Red Noisy Environment for Classic Dictation HIGH HIGH | ||
How to change the modes
Press the F1 and INSERT button for more than 5 seconds as you see in on the right. By repeating this operation, it will toggle between the modes. You can confirm the recording modes by the color of the LEDs.

3. Preset button modes for speech recognition software
The RecMic series comes with preset button modes which are configured for Dragon Software and Windows Speech Recognition. For the button settings, please refer to page 59.
| Position | Preset Button Modes | Description |
| F1 Olympus Mode Default Setting used for Olympus Software. | ||
| F2 * Custom Mode | Custom setting is offered via the RecMic Configuration Tool. (Refer to the next page) | |
| F3 * Dragon Mode Button setting is optimized for Dragon Software from Nuance. | ||
| F4 * Windows Mode Button setting is optimized for Windows Speech Recognition. | ||
*These modes are HID Keyboard Mode.
How to change the modes
Press the NEW and INSERT button as you see in on the right. LEDs from F1 to F4 will flash for 15 seconds. During this time, choose your preferred preset button modes from F1 to F4.

4. RecMic Configuration Tool
The RecMic can be further configured with the RecMic Configuration Tool. The application is free and can be downloaded from each local Olympus Websites.
The tool supports the following features
● Device Configuration
• Recording Mode Setting
- Mouse Control Setting
- Custom Keyboard Setting
- Firmware Update
• Other General Setting
● Application Control
- Edit Command
- Keyboard Template

In order to download the tool, please access the website in your respective region.
http://www.olympus.eu/sds-downloads/
(Europe, Middle east and Africa)
http://www.olympusamericaprodictation.com/products/
(The Americas)
https://www.olympus.com.au/support/
(Oceania)
natural_image
Three grayscale illustrations of electronic components: a dome-shaped lamp, a horizontal bar, and a triangular pointer (no text or symbols)
https://www.olympus.com.au/support/
(Oceánie)

natural_image
Three abstract mechanical components with no visible text or symbolsStøjannullering:

Optagetilstande
https://www.olympus.com.au/support/
(Oceanien)
natural_image
Three abstract geometric shapes: a dome, a horizontal bar, and a triangular prism (no text or symbols)https://www.olympus.com.au/support/
(Ozeanien)
Modos de grabación
https://www.olympus.com.au/support/
(Oceanía)
natural_image
Three abstract mechanical components with no visible text or symbolsKohinanvaimennus

https://www.olympus.com.au/support/
(Oseania)

natural_image
Three mechanical components: a dome-shaped umbrella, a horizontal bar, and a vertical cylindrical device with a pointed tip (no text or symbols)

https://www.olympus.com.au/support/
(Océanie)
https://www.olympus.com.au/support/
(Oceania)

natural_image
Three grayscale illustrations of electronic components: a dome-shaped lamp, a horizontal bar, and a triangular pointer (no text or symbols)

Irašymo režimai
https://www.olympus.com.au/support/
(Okeanija)

natural_image
Three abstract mechanical components with no visible text or symbolsRuisonderdrukking:

Opnamemodi
https://www.olympus.com.au/support/
Oceanië

https://www.olympus.com.au/support/
(Oceania)

natural_image
Three abstract mechanical components with no visible text or symbolsШумоподавление:

https://www.olympus.com.au/support/
(Океания)
natural_image
Three abstract mechanical components with no visible text or symbolsBrusreducing:


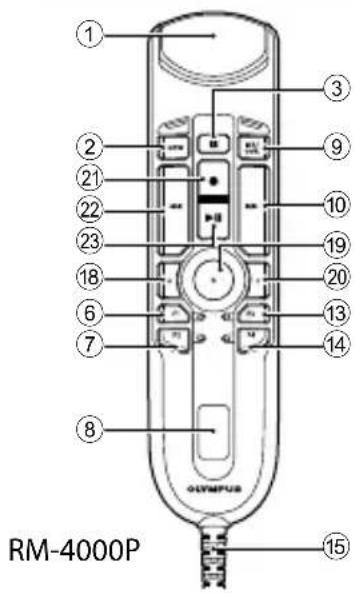
① Main microphone
② NEW button
③ i button
④ Slide switch (●: Record / ■: Stop / ▶: Play / ◀◀◀: Review)
⑤ Mouse L
⑥ F1 (Function 1) button
⑦ F2 (Function 2) button
⑧ Speaker
⑨ INS/OVR button
⑩ ▶▶ (Fast Forward) button
⑪ Trackball
⑫ Mouse R
⑬ F3 (Function 3) button
⑭ F4 (Function 4) button
⑮ USB cable
⑯ 2 ^nd microphone
⑰ Back button
⑱ a (Function a) button
⑲ b (Function b) button
⑳ c (Function c) button
②1 ● (Record) button
⑳ (Rewind) button
②3 ▶II (Play/Pause) button
6. Button modes for Dragon and Windows speech recognition
Dragon mode
| Button/Switch Command Shortcut (PC keyboard) Model (RM) | |||
| NEW | Tab backwards | {shift+Tab} | 4110S, 4100S, 4010P, 4015P, 4000P |
| i | Mark backwards {Ctrl+Shift+Left} 4110S, 4100S | ||
| Show dictation box {Ctrl+Shift+D} 4010P, 4015P, 4000P | |||
| INS/OVR | Tab forward | {Tab} | 4110S, 4100S, 4010P, 4015P, 4000P |
| ◀◀ | — | — | 4110S, 4100S |
| Mark backwards {Ctrl+Shift+Left} 4010P, 4015P, 4000P | |||
| ● | Dragon microphone on/off | {Numkey+} | 4110S, 4100S, 4010P, 4015P, 4000P |
| ■ | — | — | 4110S, 4100S, 4010P, 4015P, 4000P |
| ▶II / ▶ | — | — | 4110S, 4100S |
| Enter | {Enter} | 4010P, 4015P, 4000P | |
| ▶▶ | Next field | {Ctrl+Shift+N} | 4110S, 4100S, 4010P, 4015P, 4000P |
| F1 | Force command recognition | {Ctrl} | 4110S, 4100S, 4010P, 4015P, 4000P |
| F2 | Transfer text | {Ctrl+Shift+T} | 4110S, 4100S, 4010P, 4015P, 4000P |
| F3 | Force dictation recognition | {Shift} | 4110S, 4100S, 4010P, 4015P, 4000P |
| F4 | Show dictation box {Ctrl+Shift+D} 4110S | ||
| — | — | 4100S, 4010P, 4015P, 4000P | |
| Mouse L | — | — | 4110S, 4010P, 4015P |
| a Show dictation box {Ctrl+Shift+D} 4100S, 4000P | |||
| Track ball & CenterClick | — | — | 4110S, 4010P, 4015P |
| b | Transfer text | {Ctrl+Shift+T} | 4100S, 4000P |
| Mouse R | — | — | 4110S, 4010P, 4015P |
| c | Hidden dictation box | {Ctrl+Shift+H} | 4100S, 4000P |
Windows Speech Recognition mode
| Button/Switch Command Shortcut (PC keyboard) Model (RM) | |||
| NEW | Skip backwards | {Ctrl+Left} | 4110S, 4100S, 4010P, 4015P, 4000P |
| i | Mark backwards {Ctrl+Shift+Left} 4110S, 4100S | ||
| Tab forward | {Tab} | 4010P, 4015P, 4000P | |
| INS/OVR | Skip forward | {Ctrl+Right} | 4110S, 4100S, 4010P, 4015P, 4000P |
| ◀◀ | — | — | 4110S, 4100S |
| Mark backwards {Ctrl+Shift+Left} 4010P, 4015P, 4000P | |||
| ● | Windows microphone on/off | {Ctrl+Windows} | 4110S, 4100S, 4010P, 4015P, 4000P |
| ■ | — | — | 4110S, 4100S, 4010P, 4015P, 4000P |
| ▶II / ▶ | — | — | 4110S, 4100S, |
| Enter | {Enter} | 4010P, 4015P, 4000P | |
| ▶▶ | Mark forwards | {Ctrl+Shift+Right} | 4110S, 4100S, 4010P, 4015P, 4000P |
| F1 | Copy | {Ctrl+C} | 4110S, 4100S, 4010P, 4015P, 4000P |
| F2 | Maximize current Window | {Windows+Up} | 4110S, 4100S, 4010P, 4015P, 4000P |
| F3 | Paste | {Ctrl+V} | 4110S, 4100S, 4010P, 4015P, 4000P |
| F4 | Close Application | {Alt+F4} | 4110S, 4100S, 4010P, 4015P, 4000P |
| Mouse L | — | — | 4110S, 4010P, 4015P |
| a | Page Up | {Page Up} | 4100S, 4000P |
| Track ball & CenterClick | — | — | 4110S, 4010P, 4015P |
| b | Open Cortana | {Windows+C} | 4100S, 4000P |
| Mouse R | — | — | 4110S, 4010P, 4015P |
| c | Page Down | {Page Down} | 4100S, 4000P |
- How to achieve the best recording result
- Check your recording environment
- Choose the recording mode which best match the use scene
- How to change the modes
- Preset button modes for speech recognition software
- RecMic Configuration Tool
- The tool supports the following features
- Irašymo režimai
- Button modes for Dragon and Windows speech recognition
Brand : OLYMPUS
Model : RecMic II RM4010P
Category : Hi-fi system