
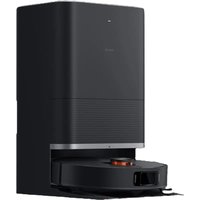
Mi Robot VacuumMop P - Robot vacuum Xiaomi - Free user manual and instructions
Find the device manual for free Mi Robot VacuumMop P Xiaomi in PDF.
| Product type | Robot vacuum mop |
| Brand | Xiaomi |
| Model | Mi Robot VacuumMop P (STYTJ02YM) |
| Dimensions | 350 × 94.5 mm |
| Net weight | 3.6 kg |
| Rated input voltage | 20 V == |
| Rated current | 1.2 A |
| Rated power | 33 W |
| Battery type | Lithium-ion |
| Battery capacity | 3200 mAh |
| Battery voltage | 14.8 V |
| Connectivity | Wi-Fi 2.4 GHz (IEEE 802.11 b/g/n) |
| Cleaning modes | Silent, Standard, Medium, Turbo |
| Main functions | Suction, mopping, smart mapping, restricted zones, scheduled cleaning, cleaning resume |
| Included accessories | Charging dock, side brush (x2), dust bin, 2-in-1 bin (dust + water), mop and bracket |
| Maintenance | Regular cleaning of dust bin, filter, brushes, and sensors |
| Filter replacement | Every 3 to 6 months |
| Brush replacement | Every 6 to 12 months |
| Side brush replacement | Every 3 to 6 months |
| Safety | Use by children aged 8 and above under supervision; do not use on carpets; unplug before maintenance |
| Operating environment | Home indoor, temperature 0-35°C |
Frequently Asked Questions - Mi Robot VacuumMop P Xiaomi
User questions about Mi Robot VacuumMop P Xiaomi
0 question about this device. Answer the ones you know or ask your own.
Ask a new question about this device
Download the instructions for your Robot vacuum in PDF format for free! Find your manual Mi Robot VacuumMop P - Xiaomi and take your electronic device back in hand. On this page are published all the documents necessary for the use of your device. Mi Robot VacuumMop P by Xiaomi.
USER MANUAL Mi Robot VacuumMop P Xiaomi
Mi Robot Vacuum-Mop P User Manual · 01
- This appliance can be used by children aged from 8 years and above and persons with reduced physical, sensory or mental capabilities or lack of experience and knowledge if they have been given supervision or instruction concerning use of the appliance in a safe way and understand the hazards involved. Children shall not play with the appliance. Cleaning and user maintenance shall not be made by children without supervision.
•The appliance is only to be used with the power supply unit provided with the appliance. - This appliance contains batteries that are only replaceable by skilled persons.
- Please keep the cleaning brush out of reach of children.
- Keep hair, loose clothing, fingers, and all parts of body away from openings and moving parts.
- Do not use the vacuum-mop to clean any burning substances.
- Do not pick up the vacuum-mop by its laser radar cover.
- Make sure the vacuum-mop is turned off and the charging dock is unplugged before cleaning or performing maintenance.
- This vacuum-mop is only intended to clean floors in a home environment. Please do not use it outdoors such as on an open balcony or on a surface that is not a floor like a sofa, or in a commercial or industrial setting.
- Do not use the vacuum-mop in an area suspended above ground level, such as a loft, open balcony, or on top of furniture, unless a protective barrier is present.
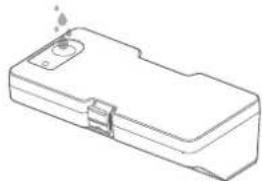
- Do not use the vacuum-mop at an ambient temperature above 35^ or below 0^ or on a floor with liquids or sticky substances.
- Pick up any cables from the floor before using the vacuum-mop to prevent it from dragging them while cleaning.
- Pick up any fragile or loose items from the floor, such as vases or plastic bags, to prevent the vacuum-mop from being obstructed or bumping into them and causing damage.
-
Do not place children, pets, or any item on top of the vacuum-mop while it is stationary or moving.
-
Do not use the vacuum-mop to clean the carpet.
- Do not allow the vacuum-mop to pick up hard or sharp objects such as building materials, glass, or nails.
- Do not spray any liquid into the vacuum-mop (make sure the dust compartment is thoroughly dry before its reinstalling).
- Do not place the vacuum-mop upside down (laser radar housing should never touch the ground).
- Only use this product as directed in the user manual or quick start guide. Users are responsible for any loss or damage arising from improper use of this product.
EAC C€
Hereby, Foshan Viomi Electrical Technology Co., Ltd., declares that the radio equipment type STYTJ02YM is in compliance with Directive 2014/53/EU. The full text of the EU declaration of conformity is available at the following internet address:
http://www.mi.com/global/service/support/declaration.html For detailed e-manual, please go to www.mi.com/global/service/userguide
Batteries and Charging
- WARNING: For the purposes of recharging the battery, only use the detachable supply unit provided with this appliance.
- Do not use any third-party battery, charger, or charging dock. Use only with
supply unit.
• The appliance must be disconnected from the supply mains when
removing the battery. - Do not place the charging dock near a heat source, such as a radiator.
- Do not wipe any part of the vacuum-mop with a wet cloth or other liquid.
- Do not improperly dispose of old batteries. Before discarding the vacuum-mop, make sure the vacuum-mop is unplugged and the battery must be removed and disposed of in an environmentally safe manner.
- Make sure the vacuum-mop is turned off when being transported and kept in its original packaging if possible.
- If the vacuum-mop will not be used for an extended period, fully charge it, then turn it off and store it in a cool, dry place. Recharge the vacuum-mop at least once a month to prevent battery damage.
This product's laser radar meets the IEC 60825-1:2014 Standard for Class 1 laser product safety and does not produce laser radiation hazardous to the human body.
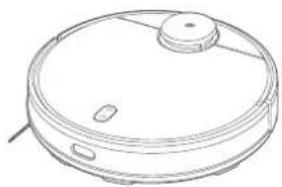
Product Overview
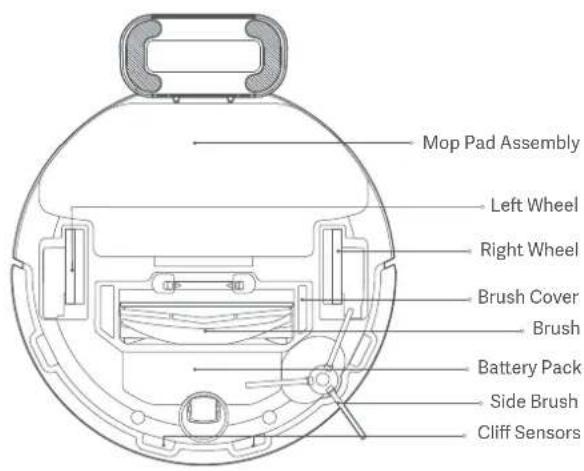
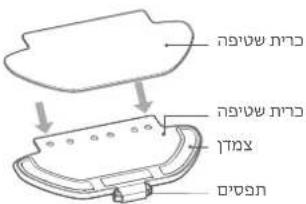
Product & Accessories List
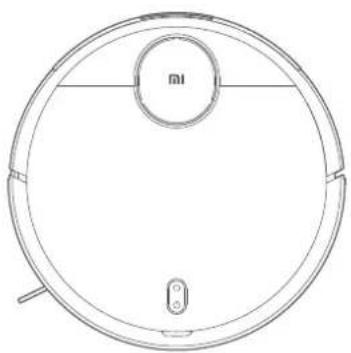
natural_image
Top-down line drawing of a robotic vacuum cleaner (no text or symbols)Vacuum-Mop
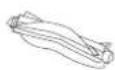
Vacuum-Mop Accessories
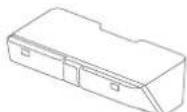
Dust Compartment (for cleanup mode)

Cleaning Brush Brush
Brush Cover
Accessory Box Contents
2-in-1 Dust Compartment with Water Tank (for vacuuming and mopping modes)
Side Brush (×2)
Charging Dock
Power Adapter
Wet Mop PadMop Pad HolderMoist Mop Pad
User Manual
Note: Illustrations of product, accessories, and user interface in the user manual are for reference purposes only. Actual product and functions may vary due to product enhancements.


Dock
Press to send vacuum-mop back to charging dock.

Power/Cleanup Button
Press to start or pause cleaning. Press and hold for 3 seconds to turn the vacuum-mop on or off.

Indicator Status
| Slowly blinking yellow | Returning to dock to charge/Low battery | Blinking white | Wi-Fi not connected |
| Breathing yellow Charging | Slowly blinking white | Waiting for the network configuration | |
| Blinking red Error | Breathing white | Turing on/Updating firmware | |
| White | Turned on/Working normally/Fully charged/Wi-Fi Connected | ||
Installation
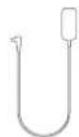
- Connect the charging dock to the power outlet.
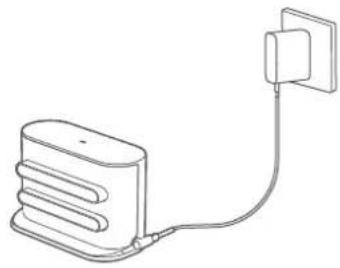
natural_image
Line drawing of a connected device with a cable and a wall-mounted power outlet (no text or symbols)- Install the side brush on the upper-left corner of the vacuum-mop, as shown in the figure. An extra side brush in the package is provided as a spare and does not need to be installed.
natural_image
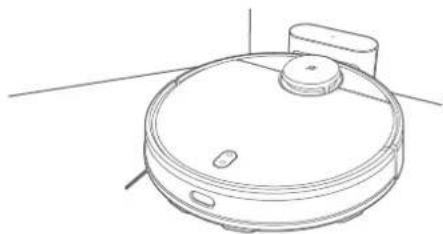
Line drawing of a hand inserting a component into a circular device (no text or symbols)- Place the charging dock on a level ground against a wall.
- When using the vacuum-mop for the first time, press and hold the button ☐ for 3 seconds to turn on the vacuum-mop. Once the indicator lights up, manually place the vacuum-mop onto the charging dock to charge. Then just press the button ☐ when the vacuum-mop is cleaning, it will automatically go to the charging dock to recharge.
natural_image
Line drawing of a circular vacuum cleaner with lid and mounting bracket (no text or symbols)White: Turned on/Working normally/Fully charged/Wi-Fi Connected Breathing yellow: Charging Blinking red: Error
Installing Accessories for Desired Mode
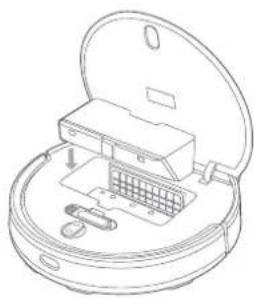
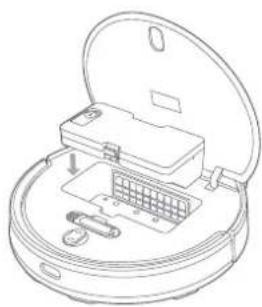
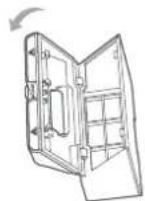
Cleanup mode: Install the dust compartment or 2-in-1 dust compartment with water tank.
natural_image
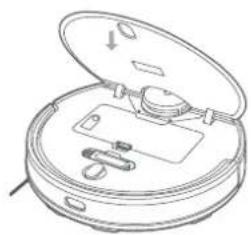
Line drawing of an open cylindrical device with internal components and a grid-like structure (no text or symbols)- Open the cover of the vacuum-mop and place the dust compartment or 2-in-1 dust compartment with water tank in the direction shown until it locks into place.
natural_image
Line drawing of a circular robotic vacuum cleaner with a knob and control buttons (no text or symbols)- Turn on the vacuum-mop. It is now ready to start cleaning.
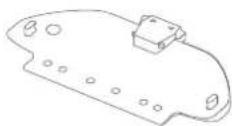
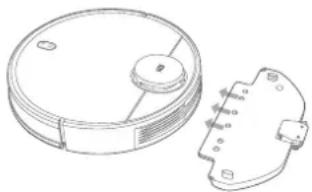
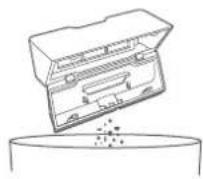
Vacuuming and mopping mode: Install 2-in-1 dust compartment with water tank, mop pad holder, and mop pad.
natural_image
Line drawing of a rectangular electronic device with a small component and mounting holes (no text or symbols)- Open the 2-in-1 dust compartment with water tank lid, fill up the tank, then reattach the lid.
natural_image
Line drawing of an open circular device with internal components (no text or symbols)- Install the 2-in-1 dust compartment with water tank into the vacuum-mop until it locks into place.
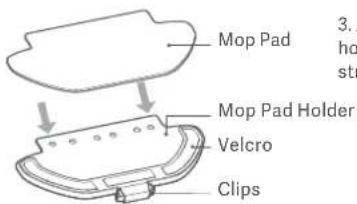
- Attach the mop pad to the holder and press the velcro strips firmly together.
natural_image
Technical line drawing of a circular device with a small circular component and a separate mechanical part (no text or symbols)- Pinch the clips, install the mop pad holder horizontally into the bottom of the vacuum-mop, as illustrated.

natural_image
Line drawing of a circular robotic vacuum cleaner with a knob and control buttons (no text or symbols)- Turn on the vacuum-mop. It is now ready to start vacuuming and mopping.
Precautions:
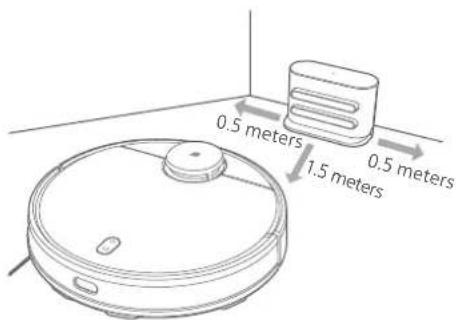
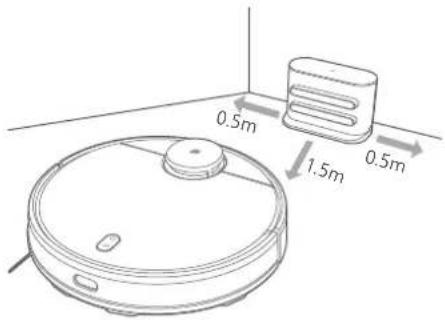
- Do not place the charging dock in an area with direct sunlight.
- Make sure there are 0.5 meters or more of open space on either side of the charging dock and more than 1.5 meters in front.
- If the vacuum-mop is unable to turn on due to low battery, place it directly onto the charging dock to recharge.
- The vacuum-mop will automatically turn on when it is on the charging dock.
- The vacuum-mop cannot be turned off when it is on the charging dock.
- Remove the 2-in-1 dust compartment with water tank and mop pad holder when the vacuum-mop is charging or not in use.
- Use the virtual wall or set restricted areas for carpeted areas to prevent the vacuum-mop from getting caught on the carpet.
- Regularly clean the dust compartment to prevent excess dirt accumulation. This can avoid reducing the cleaning performance of the vacuum-mop.
- In cleanup mode, the vacuum-mop can do the cleaning with either the dust compartment or 2-in-1 dust compartment with water tank installed.
How to Use
Turning On/Off
When the vacuum-mop is on the charging dock, it will automatically turn on and cannot be turned off.
To manually turn on the vacuum-mop, press and hold the button until the indicator lights up. When the vacuum-mop is in standby mode and not on the charging dock, press and hold the button turn it off.
Cleaning
Turn the vacuum-mop on, then press the button ⚙Depending on the accessory installed, the vacuum-mop will automatically begin vacuuming or mopping.
Recharging
Turn the vacuum-mop on, then press the button to send the vacuum-mop to the dock to recharge. When the vacuum-mop completes the cleaning task, it will automatically return to the dock for recharging, and the indicator is blinking yellow. If the vacuum-mop starts running low battery during a cleaning task, it will automatically return to the charging dock to recharge. Once the vacuum-mop is fully charged, it will resume cleanup where it left off. If the vacuum-mop automatically shuts down due to low battery, manually place it onto the charging dock, and make sure the charging terminals have a good contact.
Pausing
While the vacuum-mop is running, press any button to pause it, then press the button 🔍 to resume cleaning. Pressing the button ⏱ will end the current cleaning task and send the vacuum-mop back to the charging dock.
Sleep Mode
The vacuum-mop will automatically enter sleep mode after 5 minutes of inactivity. To wake it up, press any button or use the app.
- The vacuum-mop will not enter sleep mode while on the charging dock.
- The vacuum-mop will automatically turn off after being in sleep mode for 12 hours.
Fault Status
If the vacuum-mop encounters an error during operation, the indicator will blink red and you will hear a voice alert. To check for a solution, please refer to the Troubleshooting section.
If no action is taken within 5 minutes, the vacuum-mop will automatically enter sleep mode.
Adding Water or Cleaning Mop Pad During Cleaning
If you need to add more water to the vacuum-mop or clean the mop pad during a cleaning task, press any button to pause the vacuum-mop, then remove the 2-in-1 dust compartment with water tank. After adding water or cleaning the mop pad, reinstall the 2-in-1 dust compartment with water tank and mop pad, then press the button ⏻ to resume the cleaning task.
Cleaning Preferences
Four suction modes are available in the Mi Home/Xiaomi Home app: Silent, Standard, Medium, and Turbo. The default mode is Standard.
Do Not Disturb Mode
In the Do Not Disturb mode, the vacuum-mop will not resume cleanup, perform scheduled cleanup, or issue voice alerts.
Do Not Disturb Mode is enabled by default and can be disabled via the app.
Resuming Cleanup
The vacuum-mop has a feature of resuming cleanup. If the vacuum-mop starts running low battery during a cleaning task, it will automatically return to the charging dock to recharge. Once the vacuum-mop is fully charged, it will resume cleanup where it left off. If the cleaning task is manually ended while the vacuum-mop is charging, cleanup will not be resumed.
Zoned Area
You can use the app to set up the zoned area, then the vacuum-mop will clean up within the zoned area you selected.
Clean There
You can set a specified area on the map via the app, then the vacuum-mop will automatically navigate to the area and clean a square-shaped area of 2 × 2 meters.
Scheduled Cleanup
You can schedule cleaning times in the app. The vacuum-mop will automatically start cleaning at the scheduled times, then return to the charging dock after the cleaning is completed.
Note: The vacuum-mop will not do the scheduled cleanup during the Do Not Disturb period if Do Not Disturb mode is enabled.
Virtual Walls/Restricted Areas
You can set up virtual walls and restricted areas in the app to prevent the vacuum-mop from entering areas you wish not to clean.
Smart Mapping
You can use the app to enable smart mapping. This allows the vacuum-mop to automatically update its map after completing a cleaning task and recharging.
Connect with Mi Home/Xiaomi Home App
This product works with Mi Home/Xiaomi Home app *. Control your device, and interact it and other smart home devices with Mi Home/Xiaomi Home app.

Scan the QR code to download and install the app. You will be directed to the connection setup page if the app is installed already. Or search "Mi Home/Xiaomi Home" in the app Store to download and install it.
Open Mi Home/Xiaomi Home app, tap "+" on the upper right, and then follow prompts to add your device.
* The app is referred to as Xiaomi Home app in Europe (except for Russia). The name of the app displayed on your device should be taken as the default. Note:
The version of the app might have been updated, please follow the instructions based on the current app version.
Resetting Wi-Fi
When switching to a new router or changing your Wi-Fi password, you will need to reset the vacuum-mop's Wi-Fi connection. Turn on the vacuum-mop, then simultaneously press and hold the buttons and for 3 seconds until you hear a voice saying "Waiting for the network configuration". Once the Wi-Fi connection is successfully reset, you can reconnect the vacuum-mop.
Note: Only 2.4 GHz Wi-Fi networks are supported.
Restoring Factory Settings
Press and hold the button 📋 for 5 seconds. When you hear a voice saying "Factory settings will be restored", press and hold the button 📋 again for 5 seconds until it says "Restoring factory settings". When the settings are successfully restored, all user data will be cleared, and you will hear a voice saying "Factory settings restored successfully".
Care & Maintenance
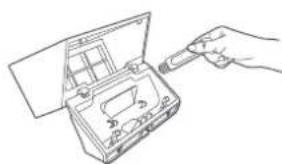
Dust Compartment
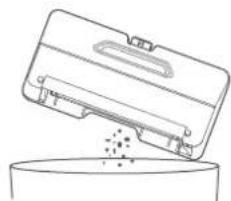
- Open the cover of the vacuum-mop, remove the dust compartment, then open the lid as shown in the figure.
- Empty the contents of the dust compartment.
natural_image
Line drawing of a hand inserting a plug into an open device (no text or symbols)- Clean the dust compartment using the included cleaning brush.
natural_image
Line drawing of a mechanical device with a handle and internal components (no text or symbols)- Reinstall the dust compartment into the vacuum-mop until it clicks into place, then close the cover of the vacuum-mop.
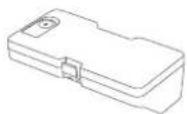
2-in-1 Dust Compartment with Water Tank

natural_image
Technical line drawing of a mechanical component with internal structure and motion arrow (no text or symbols)- Open the cover of vacuum-mop, remove the 2-in-1 dust compartment with water tank, then remove the filter as shown in the figure.
natural_image
Line drawing of a container with liquid being poured into a bowl (no text or symbols)- Empty the contents of the dust compartment. Clean the compartment using the cleaning brush, then align and reinstall the filter.
natural_image
Line drawing of a closed appliance with open lid and internal components (no text or symbols)- Reinstall the 2-in-1 dust compartment with water tank into the vacuum-mop until it clicks into place, then close the cover of the vacuum-mop.
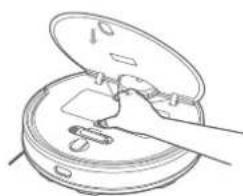
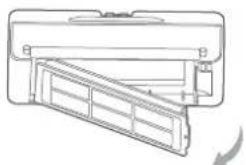
Filter
natural_image
Technical line drawing of a mechanical component with a curved arrow indicating rotation (no text or symbols)To clean the filter in the dust compartment and 2-in-1 dust compartment with water tank, remove it as indicated in the diagram.
- After rinsing the filter with water, make sure it is thoroughly dry when reinstalling the filter into the dust compartment or 2-in-1 dust compartment with water tank.
• To prevent the filter from becoming clogged, it is recommended to regularly clean the filter using the cleaning brush.
- It is recommended to replace the filter every 3 to 6 months.
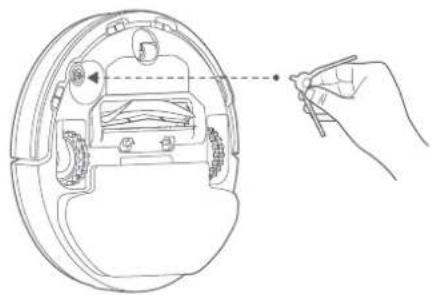
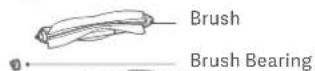
Brush

natural_image
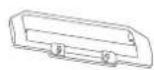
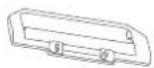
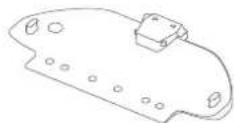
Technical line drawing of a circular mechanical component with internal brackets and a protruding rod (no text or symbols)- Flip the vacuum-mop over and pinch the clips to remove the brush cover.
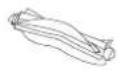
- Remove the brush and the brush bearing.
- Use the cleaning brush to clean the brush.
- Reinstall the brush and its bearing, then put back and press down the brush cover until it locks into place.
Note: It is recommended to replace the brush every 6–12 months for optimal cleaning effectiveness.
Side Brush
Periodically remove and clean the side brush. It is recommended to replace the side brush every 3–6 months for optimal cleaning effectiveness.

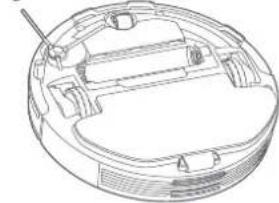
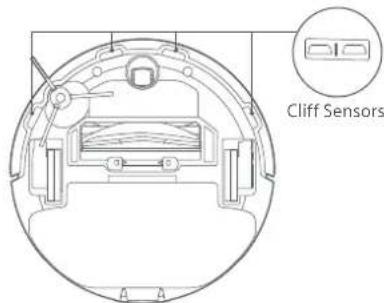
natural_image
Line drawing of a mechanical component with a hand holding a tool, showing internal structure and alignment (no text or symbols)Cliff Sensors
Clean the cliff sensors every three months using a soft cloth.
FAQ
| Fault Possible Causes | |
| Vacuum-mop does not turn on | 1. The battery level is low. Recharge the vacuum-mop, then try again.2. The ambient temperature is too low (below 0°C) or too high (above 35°C). |
| Vacuum-mop does not start cleaning | The battery level is low. Recharge the vacuum-mop, then try again. |
| Vacuum-mop does not return to charging dock | 1. There are too many obstructions around the charging dock. Place the charging dock in a more open area.2. The vacuum-mop is too far away from the charging dock. Move it nearer to the charging dock and try again. |
| Vacuum-mop is malfunctioning | Turn off the vacuum-mop, then turn it on again. |
| Vacuum-mop makes a strange noise | A foreign object might be caught in the brush, side brush, or the left/right wheel. Turn off the vacuum-mop and remove any debris. |
| Vacuum-mop no longer cleans efficiently, or leaves dust behind | 1. The dust compartment is full. Please empty the contents.2. The filter is blocked. Please clean it.3. A foreign object is caught in the brush. Please clean it. |
| Vacuum-mop cannot connect to Wi-Fi | 1. Wi-Fi signal is weak. Make sure the vacuum-mop is in an area with good Wi-Fi coverage.2. There is something wrong with the Wi-Fi connection. Reset the Wi-Fi and download the latest version of the app, then try reconnecting. |
| Fault Possible Causes | |
| Vacuum-mop does not resume cleanup | 1. Make sure the vacuum-mop is not in Do Not Disturb mode, which will prevent it from resuming cleaning.2. The vacuum-mop will not resume cleaning if it is manually recharged or placed onto the charging dock. |
| Vacuum-mop does not return to charging dock after being moved | Moving the vacuum-mop a considerable distance may cause it to re-map its surroundings. If the vacuum-mop is too far from the charging dock, it might not be able to automatically return on its own, in which case you will need to manually place the vacuum-mop onto the charging dock. |
| Vacuum-mop does not recharge | Make sure there is enough open space around the charging dock and its charging contacts are free of dust and other debris. |
| Vacuum-mop does not perform scheduled cleanup | Make sure the vacuum-mop is connected to the network, otherwise it will be unable to sync with the app and perform scheduled cleanups. |
| Vacuum-mop keeps going offline | Make sure the vacuum-mop is connected to the network and stays in range of Wi-Fi at all times. |
| Vacuum-mop cannot be connected with "viomi-vacuum-v8_miapXXXX" in the app | Make sure the charging dock and vacuum-mop are in the range of Wi-Fi and have a good signal. Follow the instructions in the user manual to reset the Wi-Fi connection and pair the vacuum-mop again. |
Troubleshooting
Fault Solution Fault Solution
| Error 1: Make sure that the laser distance sensor is not obstructed. | Clear any foreign objects which may block or obstruct the laser distance sensor, or move the vacuum-mop to a new location and reactivate it. |
| Error 2: Wipe the cliff sensor clean, move the vacuum-mop to a new location, and reactivate it. | Part of the vacuum-mop may be off the ground, re-position the vacuum-mop and reactivate it. The cliff sensor is dirty, wipe off the dirt from the cliff sensor. |
| Error 3: Strong magnetic field detected. Reactivate the vacuum-mop away from any virtual walls. | The vacuum-mop may be too close to a virtual wall. Move the vacuum-mop to a new location and reactivate it. |
| Error 4: Clear the collision sensor of any foreign objects. | The collision sensor may be stuck. Gently tap it several times to remove any foreign objects. If nothing falls out, move the vacuum-mop to a different location and reactivate it. |
| Error 5: Vacuum-mop is operating at an abnormal temperature. | The operating temperature of the vacuum-mop is too high or too low. Wait until the temperature normalizes, then try again. |
| Error 6: Charging error. Try cleaning the charging contacts. | Wipe the charging contacts both on the charging dock and the vacuum-mop with a dry cloth. |
| Error 7: Place the vacuum-mop on level ground and reactivate it. | The vacuum-mop is tilted at startup. Move the vacuum-mop to a level surface and reactivate it. You can also reset the level of vacuum-mop in the app, then reactivate it. |
| Error 8: Reinstall the dust compartment and filter. | Make sure the dust compartment and filter are installed correctly. If the error persists, try replacing the filter. |
| Error 9: Move the vacuum-mop to a new location and reactivate it. | A wheel may be off the ground. Re-position the vacuum-mop and reactivate it. |
| Error 10: Clear any obstacles around the vacuum-mop. | The vacuum-mop may be caught or stuck. Clear away any obstructions around it. |
| Error 11: Make sure the 2-in-1 dust compartment with water tank is installed properly. | Make sure the 2-in-1 dust compartment with water tank is securely installed. |
| Error 12: Make sure the mop pad is installed properly. | Make sure the mop pad holder and mop pad are securely installed. |
| Error 13: Unable to return to the charging dock. | Place the vacuum-mop onto the charging dock. |
| Error 14: Low battery. Please recharge. | Place the vacuum-mop onto the charging dock, then reactivate it after it is fully charged. |
| Error 15: Remove the mop pad. | Remove the mop pad and holder, then reactivate the vacuum-mop. |
Specifications
Vacuum-Mop
| Name Mi Robot Vacuum-Mop P | (Smart Vacuum) |
| STYTJ02YMModel | |
| Dimensions 350 × 94.5 mm | |
| Rated Input Voltage 20 V | == |
| 1.2 ARated Input Current | |
| 33 WRated Power | |
| 3200 mAhBattery Capacity | |
| 14.8 VRated Voltage | |
| 3.6 kgNet Weight | |
| Wireless Connectivity | Wi-Fi IEEE 802.11b/g/n 2.4 GHz |
| Operation Frequency | 2412-2472 MHz |
| Maximum Output Power | <20dBm |
Charging Dock
| Model STYTJ02YM | |
| Rated Output Voltage | 20 V== |
| 1.2 ARated Output Current | |
| Dimensions 152 × 74.6 × 99.5 mm | |
Power Adapter
| Information published UnitValue and precision | ||
| Manufacturer | Zhongshan Baolijin Electronic Co.,Ltd. | - |
| Model identifier | BLJ24W200120P-V | - |
| Input Voltage | 100 - 240 V~ | |
| Input Current 0.8 A | ||
| Input AC Frequency | 50/60 | Hz |
| Output Voltage | 20.0 | V= |
| Output Current | 1.2 A | |
| Output Power | 24.0 | W |
| Average Active Efficiency | 86.2 | % |
| Efficiency at Low Load (10%) | 81.5 | % |
| No-load Power Consumption | 0.10 | W |
Under normal use of condition, this equipment should be kept a separation distance of at least 20cm between the antenna and the body of the user.
Electrical Diagram
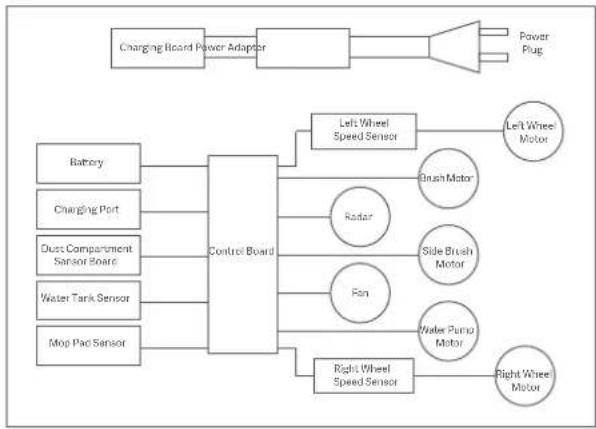
flowchart
graph LR
    A["Changing Board Power Adapter"] --> B["Control Board"]
    B --> C["Left Wheel Speed Sensor"]
    B --> D["Radar"]
    B --> E["Fan"]
    B --> F["Right Wheel Speed Sensor"]
    C --> G["Brush Motor"]
    D --> H["Side Brush Motor"]
    E --> I["Water Pump Motor"]
    F --> J["Right Wheel Motor"]
    K["Battery"] --> B
    L["Charging Port"] --> B
    M["Dust Compartment Sensor Board"] --> B
    N["Water Tank Sensor"] --> B
    O["Mop Pad Sensor"] --> B
    P["Power Plug"] --> B
WEEE Information
All products bearing this symbol are waste electrical and electronic equipment (WEEE as in directive 2012/19/EU) which should not be mixed with unsorted household waste. Instead, you should protect human health and the environment by handing over your waste equipment to a designated collection point for the recycling of waste electrical and electronic equipment, appointed by the government or local authorities. Correct disposal and recycling will help prevent potential negative consequences to the environment and human health. Please contact the installer or local authorities for more information about the location as well as terms and conditions of such collection points.

User Manual Version: V1.3
Precauciones
natural_image
Top-down line drawing of a robotic vacuum cleaner (no text or symbols)natural_image
Line drawing of a battery connected to a wall-mounted power outlet (no text or symbols)natural_image
Line drawing of a hand inserting a component into a circular device (no text or symbols)natural_image
Line drawing of a circular vacuum cleaner with lid and mounting bracket (no text or symbols)natural_image
Line drawing of an open cylindrical device with internal components (no text or symbols)natural_image
Line drawing of a circular robotic vacuum cleaner with a lid and mounting base (no text or symbols)natural_image
Line drawing of a rectangular electronic device casing with a handle and indicator lights (no text or symbols)natural_image
Line drawing of an open cylindrical device with internal components (no text or symbols)natural_image
Technical line drawing of a circular device with a small circular component and a separate irregular mechanical part (no text or symbols)natural_image
Line drawing of a circular robotic vacuum cleaner with a knob and control buttons (no text or symbols)natural_image
Line drawing of a hand inserting a plug into a device with an open lid (no text or symbols)natural_image
Line drawing of a mechanical component with a handle and internal parts (no text or symbols)natural_image
Technical line drawing of a mechanical component with internal structure and rotation arrow (no text or symbols)natural_image
Line drawing of a container with liquid being poured into a bowl (no text or symbols)natural_image
Line drawing of a closed mechanical device with open lid and internal components (no text or symbols)natural_image
Line drawing of a mechanical device with a handle and internal panel (no text or symbols)natural_image
Line drawing of a mechanical component with a hand holding a tool, showing internal parts and alignment (no text or symbols)Sensores de altura
Batteries and Charging
natural_image
Top-down line drawing of a robotic vacuum cleaner (no text or symbols)Vacuum-Mop
natural_image
Line drawing of a connected device with a cable and power outlet (no text or symbols)natural_image
Line drawing of a hand inserting a component into a circular device (no text or symbols)natural_image
Line drawing of a robotic vacuum cleaner (no text or symbols)natural_image
Line drawing of an open cylindrical device with internal components and a grid-like structure (no text or symbols)natural_image
Line drawing of a circular robotic vacuum cleaner with a handle and control buttons (no text or symbols)natural_image
Line drawing of a mechanical device with a handle and mounting bracket (no text or symbols)natural_image
Line drawing of a vacuum cleaner with open casing and internal components (no text or symbols)natural_image
Diagram showing a mechanical component with a curved base and two downward arrows indicating direction (no text or symbols)Panno lavapavimenti
natural_image
Technical line drawing of a circular device with a lid and a separate mechanical component (no text or symbols)natural_image
Line drawing of a circular robotic vacuum cleaner with a handle and control knob (no text or symbols)natural_image
Line drawing of a hand using a tool to adjust or install electronic components on a device (no text or symbols visible)natural_image
Line drawing of a mechanical device with a handle inserted into a housing (no text or symbols)natural_image
Technical line drawing of a mechanical component with no visible text or symbolsnatural_image
Line drawing of a container with liquid being poured into it (no text or symbols)natural_image
Line drawing of a closed mechanical device with open lid and internal components (no text or symbols)natural_image
Line drawing of a mechanical device with a handle and internal panel (no text or symbols)natural_image
Technical line drawing of a circular device with labeled component 'Cuscinet' (no other text or symbols)natural_image
Line drawing of a mechanical component with a hand holding a tool, showing internal parts and alignment (no text or symbols)natural_image
Top-down line drawing of a circular robotic vacuum cleaner (no text or symbols)natural_image
Line drawing of a battery connected to a wall-mounted power outlet (no text or symbols)natural_image
Line drawing of a hand inserting a component into a circular device (no text or symbols)natural_image
Line drawing of a circular vacuum cleaner with lid and ventilation slots (no text or symbols)natural_image
Line drawing of an open cylindrical device with internal components (no text or symbols)natural_image
Line drawing of a circular robotic vacuum cleaner with a lid and mounting points (no text or symbols)natural_image
Line drawing of a rectangular electronic device with a small component and a label emitting smoke (no text or symbols present)natural_image
Line drawing of an open cylindrical device with internal components (no text or symbols)natural_image
Diagram showing a mechanical component with an open lid and a base plate, no text or symbols present.Serpillière
Support de la serpillière
Velcro
Clips
natural_image
Technical line drawing of a circular device with a separate mechanical component (no text or symbols)natural_image
Line drawing of a circular robotic device with a knob and two ports (no text or symbols)natural_image
Line drawing of a hand using a tool to adjust or install an open electrical device (no text or symbols visible)natural_image
Line drawing of a mechanical component with a handle and internal parts (no text or symbols)natural_image
Line drawing of a container with liquid being poured into it (no text or symbols)natural_image
Line drawing of a closed mechanical device with open lid and internal components (no text or symbols)natural_image
Technical line drawing of a mechanical component with internal structure and directional arrow (no text or symbols)natural_image
Line drawing of a mechanical component with a hand pointing to a detail (no text or symbols)Détecteurs de vide
natural_image
Top-down line drawing of a Xiaomi robotic vacuum cleaner (no text or symbols)Staubsauger-Wischer
natural_image
Line drawing of a battery connected to a wall-mounted power outlet (no text or symbols)natural_image
Line drawing of a hand inserting a component into a circular device (no text or symbols)natural_image
Line drawing of a robotic vacuum cleaner (no text or symbols)natural_image
Line drawing of an open circular device with internal components (no text or symbols)natural_image
Line drawing of a circular robotic vacuum cleaner with a knob and mounting points (no text or symbols)natural_image
Line drawing of a rectangular electronic device casing with a handle and indicator lights (no text or symbols)natural_image
Line drawing of an open cylindrical device with internal components (no text or symbols)natural_image
Diagram showing a mechanical component with a base and a top part, no text or symbols presentWischer
natural_image
Technical line drawing of a circular device with internal components and a separate irregular component (no text or symbols)natural_image
Line drawing of a circular robotic vacuum cleaner with a knob and control buttons (no text or symbols)natural_image
Line drawing of a hand inserting a plug into an open electronic device (no text or symbols)natural_image
Line drawing of a mechanical device with an open lid and internal components (no text or symbols)natural_image
Technical line drawing of a mechanical component with internal structure and rotation arrow (no text or symbols)natural_image
Line drawing of a container with a lid and spilling particles into a container (no text or symbols)natural_image
Line drawing of a closed appliance with open lid and internal components (no text or symbols)natural_image
Technical line drawing of a mechanical component with internal structure and rotation arrow (no text or symbols)natural_image
Line drawing of a mechanical component with a hand holding a tool, showing internal parts and alignment (no text or symbols)Klippensensor
natural_image
Top-down line drawing of a robotic vacuum cleaner (no text or symbols)natural_image
Line drawing of a connected device with a cable and power outlet (no text or symbols)natural_image
Line drawing of a hand inserting a component into a circular device (no text or symbols)natural_image
Line drawing of a circular vacuum cleaner with a lid and mounting base (no text or symbols)natural_image
Line drawing of an open robotic vacuum cleaner with internal components (no text or symbols)natural_image
Line drawing of a circular robotic vacuum cleaner with a knob and handle (no text or symbols)natural_image
Line drawing of a rectangular electronic device with a handle and indicator lights (no text or symbols)natural_image
Line drawing of an open robotic vacuum cleaner with internal components (no text or symbols)natural_image
Diagram showing a mechanical component with an open lid and a base plate, no text or symbols present.Губка
natural_image
Technical line drawing of a circular device with a separate mechanical component (no text or symbols)natural_image
Line drawing of a circular robotic vacuum cleaner with a knob and control buttons (no text or symbols)natural_image
Line drawing of a hand using a tool to adjust or install an open electrical device (no text or symbols visible)natural_image
Line drawing of a mechanical device with an open lid and internal components (no text or symbols)natural_image
Line drawing of a mechanical air conditioner unit with a side panel and cooling mechanism indicated by an arrow (no text or symbols)natural_image
Line drawing of a container with liquid being poured into it (no text or symbols)natural_image
Line drawing of a closed mechanical device with open lid and internal components (no text or symbols)natural_image
Line drawing of a mechanical component with a curved arrow indicating rotation or motion (no text or symbols)natural_image
Line drawing of a hand holding a pen, showing internal components and a dashed line indicating a measurement or alignment (no text or symbols present)Датчики падения
natural_image
Top-down line drawing of a robotic vacuum cleaner (no text or symbols)본체
본체에 설치하는 부품:
더스트 박스
(청소 모드 시 사용)

청소용 브러시 메인 브러시
메인 브러시 커버
부품함 부품:
natural_image
Line drawing of a battery connected to a wall-mounted power outlet (no text or symbols)- 사이드 브러시 설치
natural_image
Line drawing of a hand holding a pen inserted into a device casing (no text or symbols)- 충전 단자는 벽에 붙여 설치합니다.
- 전원 켜기 및 충전
natural_image
Line drawing of a circular vacuum cleaner with a lid and mounting bracket (no text or symbols)natural_image
Line drawing of an open robotic vacuum cleaner with internal components (no text or symbols)natural_image
Line drawing of a circular robotic vacuum cleaner with a knob and handle (no text or symbols)natural_image
Line drawing of a rectangular electronic device casing with a small component and a flame symbol (no text or labels)natural_image
Line drawing of an open cylindrical device with internal components (no text or symbols)natural_image
Technical line drawing of a circular device with a small component and a separate irregular mechanical part (no text or symbols)natural_image
Line drawing of a circular robotic vacuum cleaner with a lid and mounting features (no text or symbols)natural_image
Line drawing of a hand inserting a plug into an open electrical device (no text or symbols)natural_image
Line drawing of a mechanical device with an open lid and internal components (no text or symbols)natural_image
Technical line drawing of a mechanical component with internal structure and mounting bracket (no text or symbols)natural_image
Line drawing of a briefcase pouring granular material into a container (no text or symbols)natural_image
Line drawing of a closed mechanical device with open lid and internal components (no text or symbols)natural_image
Technical line drawing of a mechanical component with internal structure and directional arrow (no text or symbols)natural_image
Line drawing of a hand inserting a component into a circular device (no text or symbols)절벽 센서
natural_image
Top-down line drawing of a circular robotic vacuum cleaner with a central logo and handle (no text or symbols)Odkurzacz z mopem
natural_image
Line drawing of a connected device with a cable and a separate wall-mounted unit (no text or symbols)natural_image
Line drawing of a hand inserting a component into a circular device (no text or symbols)natural_image
Line drawing of a robotic vacuum cleaner (no text or symbols)natural_image
Line drawing of a closed robotic vacuum cleaner with open lid and internal components (no text or symbols)natural_image
Line drawing of a circular robotic vacuum cleaner with a lid and mounting base (no text or symbols)natural_image
Line drawing of a rectangular electronic device with a small circular component on top (no text or symbols)natural_image
Line drawing of a robotic vacuum cleaner with open casing, internal compartments, and accessories (no text or symbols)natural_image
Diagram showing a mechanical component with a base and a top part, no text or symbols presentWkład myjący
natural_image
Technical line drawing of a circular device with a small component and a separate irregular mechanical part (no text or symbols)natural_image
Line drawing of a circular robotic device with a knob and two ports (no text or symbols)natural_image
Line drawing of a hand using a tool to adjust or install an open electrical device (no text or symbols visible)natural_image
Line drawing of a closed mechanical device with a handle inserted, showing internal components (no text or symbols)natural_image
Technical line drawing of a mechanical component with a grid-like structure and an arrow indicating rotation (no text or symbols)natural_image
Line drawing of a container pouring liquid into a bowl (no text or symbols)natural_image
Line drawing of a closed mechanical device with open lid and internal components (no text or symbols)natural_image
Technical line drawing of a mechanical component with no visible text or symbolsnatural_image
Technical line drawing of a circular device with internal components and a pointer (no text or symbols)Łożysko szczotki
natural_image
Line drawing of a mechanical component with a hand holding a tool, showing internal parts and alignment (no text or symbols)Czujniki upadku
www.mi.com/global/service/userguide
قيود استخدام
natural_image
Top-down line drawing of a robotic vacuum cleaner (no text or symbols)natural_image
Line drawing of a circular vacuum cleaner with lid and mounting bracket (no text or symbols)natural_image
Line drawing of a battery connected to a wall-mounted power outlet (no text or symbols)natural_image
Line drawing of a hand inserting a component into a circular device (no text or symbols)natural_image
Line drawing of a mechanical device casing with a handle and mounting bracket (no text or symbols)natural_image
Line drawing of an open cylindrical device with internal components (no text or symbols)natural_image
Line drawing of an open cylindrical device with internal components (no text or symbols)natural_image
Line drawing of a circular robotic vacuum cleaner (no text or symbols)natural_image
Technical line drawing of a circular device with internal components and a separate irregular component (no text or symbols)natural_image
Line drawing of a robotic vacuum cleaner (no text or symbols)natural_image
Technical line drawing of a mechanical component with a rotating arrow indicating rotation (no text or symbols)natural_image
Line drawing of a container with liquid being poured into a bowl (no text or symbols)natural_image
Line drawing of a closed pocket device with open lid and internal components (no text or symbols)natural_image
Line drawing of a hand using a tool to adjust or install a small electronic device into an open case (no text or symbols)natural_image
Line drawing of a hand inserting a small object into a circular container (no text or symbols)natural_image
Line drawing of a hand holding a pen inserted into a circular device component (no text or symbols)مستشعرات المنحدرات
natural_image
Technical line drawing of a mechanical component with internal structure and rotation arrow (no text or symbols)natural_image
Top-down line drawing of a robotic vacuum cleaner (no text or symbols)Temizlik Robotu
natural_image
Line drawing of a device connected to a wall-mounted power outlet (no text or symbols)natural_image
Line drawing of a mechanical component with a hand holding a tool, showing internal parts and alignment (no text or symbols)natural_image
Line drawing of a circular vacuum cleaner with lid and mounting bracket (no text or symbols)natural_image
Line drawing of an open cylindrical device with internal components and a grid-patterned box (no text or symbols)natural_image
Line drawing of a circular robotic vacuum cleaner with a knob and handle (no text or symbols)natural_image
Line drawing of a rectangular electronic device with a small component and mounting holes (no text or symbols)natural_image
Line drawing of an open circular device with internal components (no text or symbols)natural_image
Diagram showing a mechanical component with a base and top view, no text or symbols presentPaspas Pedi
natural_image
Technical line drawing of a circular device with a small component and a separate irregular mechanical part (no text or symbols)natural_image
Line drawing of a circular robotic vacuum cleaner with a handle and control buttons (no text or symbols)natural_image
Line drawing of a hand using a tool to adjust or install electronic components (no text or symbols visible)natural_image
Line drawing of a mechanical component with an open lid and internal components (no text or symbols)natural_image
Technical line drawing of a mechanical component with a clamping mechanism (no text or symbols)natural_image
Line drawing of a container with liquid being poured into it (no text or symbols)natural_image
Line drawing of a closed mechanical device with open lid and internal components (no text or symbols)natural_image
Technical line drawing of a mechanical component with a curved arrow indicating rotation (no text or symbols)natural_image
Technical line drawing of a circular mechanical component with internal brackets and mounting holes (no text or symbols)natural_image
Line drawing of a hand holding a pen inserted into a circular device (no text or symbols)Uçurum Sensörleri
natural_image
Top-down line drawing of a robotic vacuum cleaner (no text or symbols)natural_image
Line drawing of a battery connected to a wall-mounted power outlet (no text or symbols)natural_image
Line drawing of a hand inserting a component into a circular device (no text or symbols)natural_image
Line drawing of a robotic vacuum cleaner (no text or symbols)natural_image
Line drawing of an open cylindrical device with internal components (no text or symbols)natural_image
Line drawing of a circular robotic vacuum cleaner with a lid and mounting base (no text or symbols)natural_image
Line drawing of a rectangular electronic device with a small component and a label (no text or symbols present)natural_image
Line drawing of an open circular device with internal components (no text or symbols)natural_image
Technical line drawing of a circular device with a small component and a separate mechanical part (no text or symbols)natural_image
Line drawing of a circular robotic vacuum cleaner with a handle and control knob (no text or symbols)natural_image
Line drawing of a hand inserting a plug into an open electronic device (no text or symbols)natural_image
Line drawing of a mechanical device with an open lid and internal components (no text or symbols)natural_image
Technical line drawing of a mechanical component with internal structure and mounting bracket (no text or symbols)natural_image
Line drawing of a container with a lid and spilling particles from a bowl (no text or symbols)natural_image
Line drawing of a closed mechanical device with open lid and internal components (no text or symbols)natural_image
Technical line drawing of a mechanical component with internal structure and rotation arrow (no text or symbols)natural_image
Technical line drawing of a robotic vacuum cleaner (no text or symbols visible)Підшипник щітки
natural_image
Line drawing of a mechanical component with a hand holding a tool, showing internal parts and alignment (no text or symbols)Датчики падіння
natural_image
Top-down line drawing of a Xiaomi robotic vacuum cleaner (no text or symbols)Vysavač s mopem
natural_image
Line drawing of a device connected to a wall-mounted power outlet (no text or symbols)natural_image
Line drawing of a hand inserting a device into a circular housing (no text or symbols)natural_image
Line drawing of a robotic vacuum cleaner (no text or symbols)natural_image
Line drawing of an open cylindrical device with internal components (no text or symbols)natural_image
Line drawing of a circular robotic vacuum cleaner with a lid and mounting points (no text or symbols)natural_image
Line drawing of a rectangular electronic device with a handle and indicator lights (no text or symbols)natural_image
Line drawing of an open circular device with internal components (no text or symbols)natural_image
Technical line drawing of a circular device with a small component and a separate irregular mechanical part (no text or symbols)natural_image
Line drawing of a circular robotic vacuum cleaner with a handle and control buttons (no text or symbols)natural_image
Line drawing of a hand inserting a plug into an open electrical switch (no text or symbols)natural_image
Line drawing of a mechanical device with an open lid and internal components (no text or symbols)natural_image
Technical line drawing of a mechanical component with internal structure and mounting bracket (no text or symbols)natural_image
Line drawing of a briefcase pouring liquid into a container (no text or symbols)natural_image
Line drawing of a closed mechanical device with open lid and internal components (no text or symbols)natural_image
Line drawing of a mechanical device with a handle and internal panel (no text or symbols)natural_image
Technical line drawing of a circular mechanical component with internal components and a labeled part (no text or symbols beyond label)Ložisko kartáče
natural_image
Line drawing of a mechanical component with a hand holding a tool, showing internal parts and alignment (no text or symbols)Senzory srázu
natural_image
Top-down line drawing of a circular robotic vacuum cleaner (no text or symbols)Aspirator și mop
natural_image
Line drawing of a battery connected to a wall-mounted power outlet (no text or symbols)natural_image
Line drawing of a hand inserting a component into a circular device (no text or symbols)natural_image
Line drawing of a robotic vacuum cleaner (no text or symbols)natural_image
Line drawing of an open cylindrical device with internal components (no text or symbols)natural_image
Line drawing of a circular robotic vacuum cleaner with a lid and mounting points (no text or symbols)natural_image
Line drawing of a rectangular electronic device with a small circular component and a flame symbol (no text or labels)natural_image
Line drawing of a closed robotic vacuum cleaner with internal components (no text or symbols)natural_image
Diagram showing a mechanical component with a curved base and two downward arrows indicating direction (no text or symbols)Tampon de mop
natural_image
Technical line drawing of a circular device with a small circular component and a separate irregular mechanical part (no text or symbols)natural_image
Line drawing of a circular robotic vacuum cleaner with a lid and mounting points (no text or symbols)natural_image
Line drawing of a hand using a tool to adjust or install an open electrical device (no text or symbols visible)natural_image
Line drawing of a mechanical device with an open lid and internal components (no text or symbols)natural_image
Technical line drawing of a mechanical component with a folded panel and mounting bracket (no text or symbols)natural_image
Line drawing of a container with a lid and spilling particles into a bowl (no text or symbols)natural_image
Line drawing of a closed mechanical device with open lid and internal components (no text or symbols)natural_image
Technical line drawing of a mechanical component with internal structure and directional arrow (no text or symbols)natural_image
Technical line drawing of a circular mechanical component with internal cavities and mounting holes (no text or symbols)natural_image
Line drawing of a hand inserting a pen into a device casing (no text or symbols)Senzori de colt
Para consultar o manual detalhado online, visite www.mi.com/global/service/userguide
natural_image
Top-down line drawing of a circular robotic vacuum cleaner with a central logo and handle (no text or symbols)Aspirador com mopa
natural_image
Line drawing of a battery connected to a wall-mounted power outlet (no text or symbols)natural_image
Line drawing of a hand inserting a component into a circular device (no text or symbols)natural_image
Line drawing of a circular vacuum cleaner with lid and mounting bracket (no text or symbols)natural_image
Line drawing of an open cylindrical device with internal components (no text or symbols)natural_image
Line drawing of a circular robotic vacuum cleaner with a knob and control buttons (no text or symbols)natural_image
Line drawing of a rectangular electronic device with a small component and a label emitting smoke (no text or symbols present)natural_image
Line drawing of an open cylindrical device with internal components (no text or symbols)natural_image
Diagram showing a mechanical component with a curved top and a base, no text or symbols presentPano mopa
natural_image
Technical line drawings of three circular electronic devices with mounting holes and a separate mechanical component (no text or symbols)natural_image
Line drawing of a hand using a tool to adjust or install an open electrical device (no text or symbols visible)natural_image
Line drawing of a mechanical device with an open lid and internal components (no text or symbols)natural_image
Technical line drawing of a mechanical component with internal structure and dimension annotation (no text or symbols)natural_image
Line drawing of a container with a lid and spilling particles from a tray (no text or symbols)natural_image
Line drawing of a closed mechanical device with open lid and internal components (no text or symbols)natural_image
Technical line drawing of a mechanical component with internal structure and mounting bracket (no text or symbols)natural_image
Line drawing of a hand inserting a pen into a device casing (no text or symbols)Sensores de profundidade
Foshan Viomi Electrical Technology Co.,
STYTJ02YM
http://www.mi.com/global/service/support/declaration.html
http://www.mi.com/global/service/support/userguide/il.
natural_image
Top-down line drawing of a robotic vacuum cleaner (no text or symbols)בְרָא-בְרָא
תְקַרָה בְּרָה
תְרָה בַרִי אַעֹן.2
תְבָרִי אַלְהָם.

בִרְשָׁה בַרְשָׁה
natural_image
Line drawing of a circular vacuum cleaner with lid and mounting bracket (no text or symbols)natural_image
Line drawing of a battery connected to a wall-mounted power outlet (no text or symbols)natural_image
Line drawing of a hand inserting a device into a circular device (no text or symbols)natural_image
Line drawing of a mechanical device casing with a handle and mounting bracket (no text or symbols)natural_image
Line drawing of an open circular device with internal components (no text or symbols)הכלה 1-2הכלה 2
natural_image
Line drawing of an open circular device with internal components (no text or symbols)natural_image
Line drawing of a circular robotic vacuum cleaner with a lid and mounting base (no text or symbols).הכלההוּרָהוּרָהוּרָהוּרָהוּרָהוּרָהוּרָהוּרָהוּרָהוּרָהוּרָהוּרָהוּרָהוּרָהוּרָה
•
natural_image
Technical line drawing of a circular device with a separate irregular component (no text or symbols)הכלהה, כרְבָרִי, 4
natural_image
Line drawing of a circular robotic device with a knob and two side buttons (no text or symbols)natural_image
Technical line drawing of a mechanical component with internal structure and rotation arrow (no text or symbols)natural_image
Line drawing of a container with a lid and spilling particles from a bowl (no text or symbols)natural_image
Line drawing of a closed open pocket device with internal components (no text or symbols)natural_image
Line drawing of a hand using a tool to adjust or install a small electronic device into an open case (no text or symbols)natural_image
Line drawing of a hand inserting a small object into a container (no text or symbols)natural_image
Line drawing of a hand inserting a component into a circular device (no text or symbols)תְרָה בַרִיָה
natural_image
Technical line drawing of a mechanical component with internal structure and motion arrow (no text or symbols)For further information, please go to www.mi.com
Manufactured for: Xiaomi Communications Co., Ltd.
Manufactured by: Foshan VIOMI Electrical Technology Co., Ltd.
(a Mi Ecosystem company)
Address: 2nd Floor, No. 1 Building And 4th Floor of No. 7 Building, North of Four Xinxi Street, Xiashi Village, Lunjiao Town, Shunde District, Foshan City, Guangdong Province, China
Dirección: 2nd Floor, No. 1 Building And 4th Floor of No. 7 Building, North of Four Xinxi
Street, Xiashi Village, Lunjiao Town, Shunde District, Foshan City, Guangdong
Province, China
Indirizzo: 2nd Floor, No. 1 Building And 4th Floor of No. 7 Building, North of Four Xinxi
Street, Xiashi Village, Lunjiao Town, Shunde District, Foshan City, Guangdong
Province, Cina
Adresse: 2nd Floor, No. 1 Building And 4th Floor of No. 7 Building, North of Four Xinxi
Street, Xiashi Village, Lunjiao Town, Shunde District, Foshan City, Guangdong
Province, Chine
Adresse: 2nd Floor, No. 1 Building And 4th Floor of No. 7 Building, North of Four Xinxi
Street, Xiashi Village, Lunjiao Town, Shunde District, Foshan City, Guangdong
Province, China
Адрес: 2nd Floor, No. 1 Building And 4th Floor of No. 7 Building, North of Four Xinxi
Street, Xiashi Village, Lunjiao Town, Shunde District, Foshan City, Guangdong
의뢰업체: Xiaomi Communications Co., Ltd.
제조업체: Foshan VIOMI Electrical Technology Co., Ltd.
(Mi 에코시스템 컴퍼니)
주소: 2nd Floor, No. 1 Building And 4th Floor of No. 7 Building, North of
Four Xinxi Street, Xiashi Village, Lunjiao Town, Shunde District, Foshan City,
Guangdong Province, China
Adres: 2nd Floor, No. 1 Building And 4th Floor of No. 7 Building, North of Four Xinxi
Street, Xiashi Village, Lunjiao Town, Shunde District, Foshan City, Guangdong
Province, Chiny
2nd Floor, No. 1 Building And 4th Floor of No. 7 Building, North of Four Xinxi:
Street, Xiashi Village, Lunjiao Town, Shunde District, Foshan City, Guangdong
, précيّة قوتغذونغ، الصين Province
Adres: 2nd Floor, No. 1 Building And 4th Floor of No. 7 Building, North of Four Xinxi
Street, Xiashi Village, Lunjiao Town, Shunde District, Foshan City, Guangdong
Province, Çin
Адреса: 2nd Floor, No. 1 Building And 4th Floor of No. 7 Building, North of Four Xinxi
Street, Xiashi Village, Lunjiao Town, Shunde District, Foshan City, Guangdong
Province, Китай
Adresa: 2nd Floor, No. 1 Building And 4th Floor of No. 7 Building, North of Four Xinxi
Street, Xiashi Village, Lunjiao Town, Shunde District, Foshan City, Guangdong
Province, China
Adresă: 2nd Floor, No. 1 Building And 4th Floor of No. 7 Building, North of Four Xinxi
Street, Xiashi Village, Lunjiao Town, Shunde District, Foshan City, Guangdong
Province, China
Morada: 2nd Floor, No. 1 Building And 4th Floor of No. 7 Building, North of Four Xinxi
Street, Xiashi Village, Lunjiao Town, Shunde District, Foshan City, Guangdong
Province, China
Foshan VIOMI Electrical Technology Co., Ltd.
(Mi Ecosystem-הכלה)
2nd Floor, No. 1 Building And 4th Floor of No. 7 Building, North of Four Xinxi Street,
Xiashi Village, Lunjiao Town, Shunde District, Foshan City, Guangdong Province, China


- Batteries and Charging
- Product Overview
- Dock
- Power/Cleanup Button
- Installation
- Installing Accessories for Desired Mode
- Precautions:
- How to Use
- Turning On/Off
- Cleaning
- Recharging
- Pausing
- Sleep Mode
- Fault Status
- Adding Water or Cleaning Mop Pad During Cleaning
- Cleaning Preferences
- Do Not Disturb Mode
- Resuming Cleanup
- Zoned Area
- Clean There
- Scheduled Cleanup
- Virtual Walls/Restricted Areas
- Smart Mapping
- Connect with Mi Home/Xiaomi Home App
- Resetting Wi-Fi
- Restoring Factory Settings
- Care & Maintenance
- Dust Compartment
- 2-in-1 Dust Compartment with Water Tank
- Filter
- Brush
- Side Brush
- Cliff Sensors
- FAQ
- Troubleshooting
- Specifications
- Electrical Diagram
- WEEE Information
- Precauciones
- Sensores de altura
- Détecteurs de vide
- Klippensensor
- Датчики падения
- 절벽 센서
- Czujniki upadku
- مستشعرات المنحدرات
- Uçurum Sensörleri
- Датчики падіння
- Senzory srázu
- Senzori de colt
- Sensores de profundidade
- תְרָה בַרִיָה
Brand : Xiaomi
Model : Mi Robot VacuumMop P
Category : Robot vacuum