LFW205TWC - Safe Master Lock - Free user manual and instructions
Find the device manual for free LFW205TWC Master Lock in PDF.
| Title | Description |
|---|---|
| Product type | Digital safe |
| External dimensions | Specific dimensions not provided |
| Storage capacity | Specific capacity not provided |
| Power supply | Operates with batteries |
| Locking system | Electronic lock with code |
| Usage | Ideal for secure storage of valuables |
| Maintenance | Regularly check batteries and electronic system operation |
| Security | Fire and water resistant |
| General information | Limited warranty, consult the manual for usage instructions |
Frequently Asked Questions - LFW205TWC Master Lock
User questions about LFW205TWC Master Lock
0 question about this device. Answer the ones you know or ask your own.
Ask a new question about this device
Download the instructions for your Safe in PDF format for free! Find your manual LFW205TWC - Master Lock and take your electronic device back in hand. On this page are published all the documents necessary for the use of your device. LFW205TWC by Master Lock.
USER MANUAL LFW205TWC Master Lock
text_image
Master Lock.GB INSTRUCTIONS FOR USE 2
FR MODE D'EMPLOI....5
DE GEBRAUCHSANWEISUNG......8
NL GEBRUIKSAANWIJZING 11
ES INSTRUCCIONES DE USO 14
IT ISTRUZIONI PER L'USO 17
PT INSTRUÇÕES DE UTILIZAÇÃO 20
GR OΔΗΓΙΕΣ ΧΡΗΣΗΣ 23
NW BRUKSANVISNING 26
DK BRUGSANVISNING 29
FN KÄYTTÖOHJE 32
SW BRUKSANVISNING....35
PL INSTRUKCJA UŻYCIA 38
HU HASZNÁLATI ÚTMUTATÓ....41
RO MOD DE UTILIZARE 44
CZ NÁVOD K POUŽITÍ......47
RU ИНСТРУКЦИЯ ПО ПРИМЕНЕНИЮ.... 50
TK KULLANIM TALİMATI....53
JP 使用説明書....56
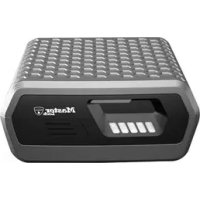
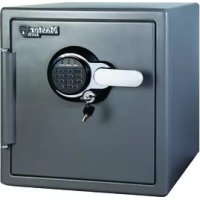
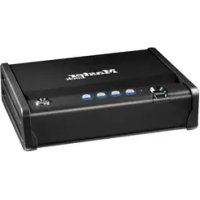
Water/Fire Resistant Alarm Safe
Thank you for choosing Master Lock to store all your important documents and valuables.
We hope that this product will help you stay organized and provide you with the peace-of-mind of knowing the things most important to you are protected.
Your Master Lock Product
Your Master Lock product has a number of features to keep your important documents and valuables protected including:

Water Protection UL Classified

Fire Protection

Digital Media Protection

Loud Audible Alarm
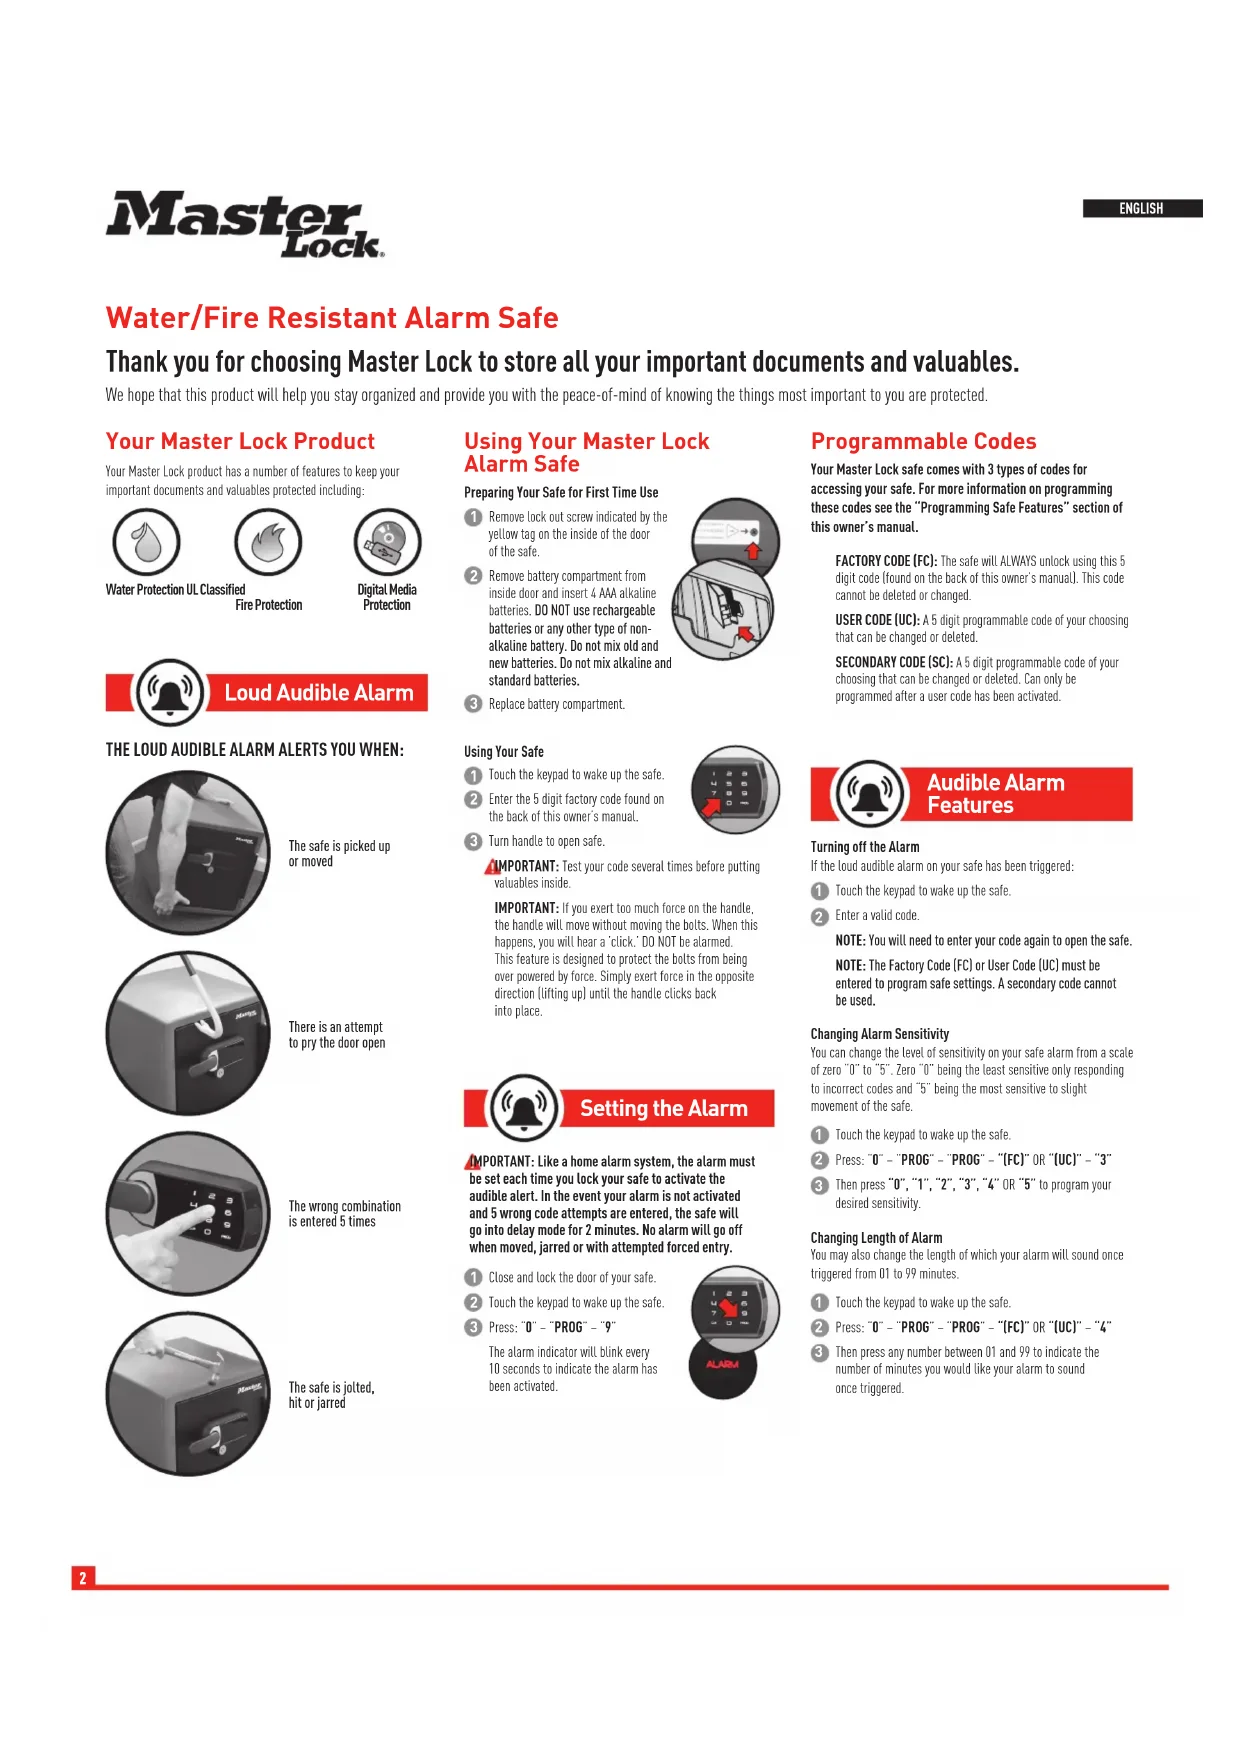
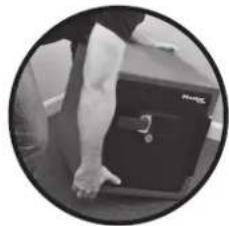
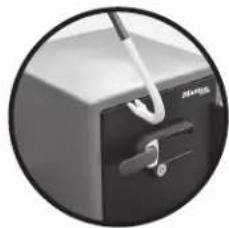
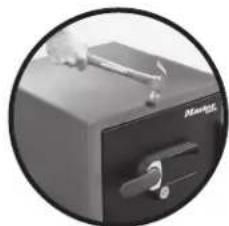
THE LOUD AUDIBLE ALARM ALERTS YOU WHEN:
natural_image
Close-up of a person's leg and hand holding a black box, no visible text or symbolsThe safe is picked up or moved
natural_image
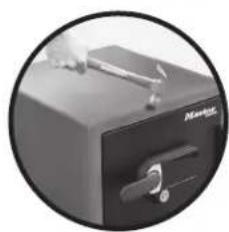
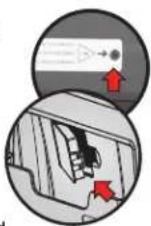
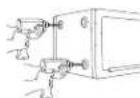
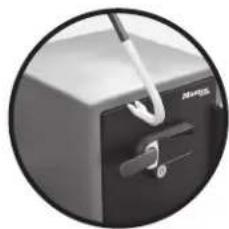
Close-up of a mechanical device with a handle and lever (no visible text or symbols)There is an attempt to pry the door open

natural_image
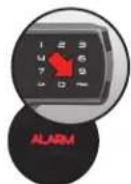
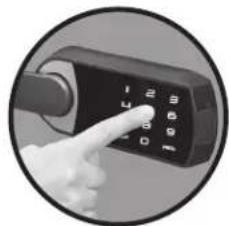
Close-up of a hand pointing at a black handheld device with a keypad (no visible text or symbols)The wrong combination is entered 5 times
natural_image
Close-up of a black mechanical device with a handle and lever, enclosed in a circular frame (no visible text or symbols)The safe is jolted, hit or jarred
Using Your Master Lock Alarm Safe
Preparing Your Safe for First Time Use
1 Remove lock out screw indicated by the yellow tag on the inside of the door of the safe.
2 Remove battery compartment from inside door and insert 4 AAA alkaline batteries. DO NOT use rechargeable batteries or any other type of non-alkaline battery. Do not mix old and new batteries. Do not mix alkaline and standard batteries.
3 Replace battery compartment.
Using Your Safe
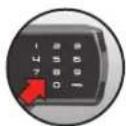
1 Touch the keypad to wake up the safe.
② Enter the 5 digit factory code found on the back of this owner's manual.
3 Turn handle to open safe.
IMPORTANT: Test your code several times before putting valuables inside.
IMPORTANT: If you exert too much force on the handle, the handle will move without moving the bolts. When this happens, you will hear a 'click.' DO NOT be alarmed. This feature is designed to protect the bolts from being over powered by force. Simply exert force in the opposite direction (lifting up) until the handle clicks back into place.

Setting the Alarm
IMPORTANT: Like a home alarm system, the alarm must be set each time you lock your safe to activate the audible alert. In the event your alarm is not activated and 5 wrong code attempts are entered, the safe will go into delay mode for 2 minutes. No alarm will go off when moved, jarred or with attempted forced entry.
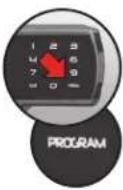
1 Close and lock the door of your safe.
2 Touch the keypad to wake up the safe.
3 Press: "0" - "PROG" - "9"
The alarm indicator will blink every 10 seconds to indicate the alarm has been activated.
Programmable Codes
Your Master Lock safe comes with 3 types of codes for accessing your safe. For more information on programming these codes see the "Programming Safe Features" section of this owner's manual.
FACTORY CODE (FC): The safe will ALWAYS unlock using this 5 digit code [found on the back of this owner's manual]. This code cannot be deleted or changed.
USER CODE (UC): A 5 digit programmable code of your choosing that can be changed or deleted.
SECONDARY CODE (SC): A 5 digit programmable code of your choosing that can be changed or deleted. Can only be programmed after a user code has been activated.

Audible Alarm Features
Turning off the Alarm
If the loud audible alarm on your safe has been triggered:
1 Touch the keypad to wake up the safe.
2 Enter a valid code.
NOTE: You will need to enter your code again to open the safe.
NOTE: The Factory Code (FC) or User Code (UC) must be entered to program safe settings. A secondary code cannot be used.
Changing Alarm Sensitivity
You can change the level of sensitivity on your safe alarm from a scale of zero "0" to "5". Zero "0" being the least sensitive only responding to incorrect codes and "5" being the most sensitive to slight movement of the safe.
1 Touch the keypad to wake up the safe.
2 Press: "0" - "PROG" - "PROG" - "(FC)" OR "(UC)" - "3"
3 Then press "0", "1", "2", "3", "4" OR "5" to program your desired sensitivity.
Changing Length of Alarm
You may also change the length of which your alarm will sound once triggered from 01 to 99 minutes.
1 Touch the keypad to wake up the safe.
2 Press: "0" - "PROG" - "PROG" - "(FC)" OR "(UC)" - "4"
3 Then press any number between 01 and 99 to indicate the number of minutes you would like your alarm to sound once triggered.
Programming Safe Features YOUR DIGITAL LOCK
Programming the User Code (UC)
Only 1 user code can be programmed at a time.
1 Touch the keypad to wake up the safe.
2 Press: "PROG" - "FACTORY CODE (FC)" (found on the back of this owner's manual).
3 The Program indicator light will blink.
4 Press the five digit user code you have chosen for your safe.
Deleting a User Code
1 Touch the keypad to wake up the safe.
2 Press: "PROG" – "FACTORY CODE (FC)" (found on the back of this owner's manual).
3 The Program indicator light will blink.
4 Press: "0" - "0" - "0" - "0" - "0"
NOTE: The electronic lock will NOT indicate that it has deleted the user code—please test code to make sure it has been deleted.
Programming the Secondary Code (SC)
Only 1 user code can be programmed at a time.
1 Touch the keypad to wake up the safe.
2 Press: "PROG" - "PROG" - "PROGRAMMED USER CODE (UC)"
3 The Program indicator light will blink.
4 Press the five digit secondary code you have chosen for this safe.
Deleting a Secondary Code
1 Touch the keypad to wake up the safe.
2 Press: "PROG" - "PROG" - "PROGRAMMED USER CODE (UC)"
3 The Program indicator light will blink.
4 Press: "0" - "0" - "0" - "0" - "0"
NOTE: The electronic lock will NOT indicate that it has deleted the user code—please test code to make sure it has been deleted.
Programming Safe Features BATTERY AUXILIARY OVERRIDE
If battery power in the safe is running low and cannot operate the safe, you will need to use the Battery Auxiliary Override feature to open the safe.
IMPORTANT: This should not be used as a primary means to gain entry into the safe.
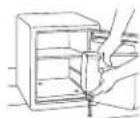
1 Open the silicone cap found on the side of the lock.
2 Insert a 9 volt battery into this slot.
3 Touch the keypad to wake up the safe.
4 Enter your five digit code.
5 Turn handle to open safe.
DO NOT use rechargeable batteries or any other type of non-alkaline battery.

Programming Safe Features OTHER PROGRAMMABLE SAFE FEATURES
Length of Interior Light
NOTE: The Factory Code (FC) or User Code (UC) must be entered to program safe settings. A secondary code cannot be used.
1 Touch the keypad to wake up the safe.
2 Press: "0" - "PROG" - "PROG" - "(FC)" OR "(UC)" - "2"
3 Press: "0" to program to turn off "1" to program for 30 seconds "2" to program for 60 seconds
Digital Keypad Sound On/Off
1 Touch the keypad to wake up the safe.
2 Press: "0" - "PROG" - "PROG" - "(FC)" OR "(UC)" - "1"
3 Press: "1" to turn on the digital keypad sound or Press: "0" to turn off the digital keypad sound
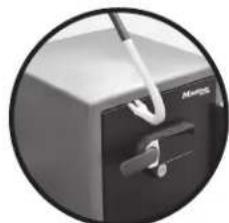
Cleaning Your Keypad
Use a soft cloth or microfiber cloth to wipe the surface of your lock to remove fingerprints.
Bolt-down instructions
WARNING: Product is not water resistant once it is bolted down. The ETL verified water resistance claim applies to product prior to the application of a bolt-down kit.
Bolt-down kit contents (in select models only):
- 2 lag screws
- 2 washers
- 2 masonry anchors
Tools needed to bolt safe to the floor:
- Drill
- Wrench
- 7/16" (11 mm) drill bit - for drilling into the safe
- 9/32" (7.2 mm) drill bit - for drilling into a wood floor
- 3/8" (9.5 mm) drill bit - for drilling into a masonry floor
Warning:
• DO NOT drill from any location inside the safe.
• DO NOT bolt through the walls.
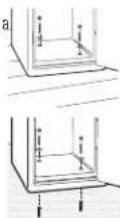
1 Tip the safe onto its right side (door hinges horizontal with the floor).
② Unlock the safe and open the door.
Look to the bottom of the safe for two indentations on the feet in opposite corners. Using the 7/16" (11 mm) bit; drill a hole through each indentation
perpendicular to the bottom of the safe. DO NOT drill from any location inside the safe.
3 Tip the safe upright, place the safe in the desired location and open the door.
4 Use a screw or pencil to mark the floor through both holes.
5 Move the safe aside to clear both marked spots for drilling.
6 Drill into the floor:
- For wood: Using the 9/32" drill bit, drill a hole 21/2" [64 mm] deep in each marked spot.
- For masonry: Using the 38" drill bit, drill a hole 21/2" [64 mm] deep in each marked spot. Install a masonry a
7 Replace the safe in the desired position, with the holes in the safe aligned with those in the floor.
8 Securing the safe:
- For wood: Pass each lag screw through a washer, then through the safe and into a hole. Tighten with the wrench.
- For masonry: Pass each lag screw through a washer, then through the safe and into a masonry anchor. Tighten with the wrench. Place masonry anchors into the holes in the floor.
NOTE:
- The safe should not be bolted to a wall, this will compromise the fire rating. Drill holes through the feet only. DO NOT drill through the back or sides.
- Bolting/unbolting the unit is at the consumer's expense and discretion.
- Master Lock is not responsible for any costs incurred if the unit is to be replaced.
Not all Master Lock products come with a bolt-down kit.

Safe Warnings and Important Information

- This product is not intended for the secure storage of all materials. Items such as firearms, other weapons, combustible materials and medication should not be stored in this unit.
- DO NOT store delicate items directly in your safe.
- In order to protect your valuables from potential threats of flood, your safe is equipped with an airtight gasket. Because of this gasket, moisture in the air could potentially be locked inside your safe and accumulate inside your safe.
- The desiccant bag included in your safe during shipment should be left inside your safe. DO NOT DISCARD IT. It is intended to help absorb moisture. Replace or recharge your
desiccant bag every 6 months for optimum performance.
- If you choose to store delicate items such as jewelry with working parts, watches, stamps or photos in your safe, we recommend putting them in an air-tight container prior to placing in the safe for storage.
- NOTE: Master Lock will not be responsible for any damage or loss of items placed in the unit due to moisture.
- DO NOT store pearls in this safe unit. In the event of a fire, the interior of your safe may reach up to 350^ . While this temperature is safe for your paper documents, digital media and other valuables, pearls can be damaged at much lower temperatures.
- DO NOT store any film based technology or media in this safe.
- This product is not intended to protect computer floppy disks or diskettes, film cartridges, tapes, audio/video cassettes or photo negatives.
- Your safe is only part of your total security protection.
- Master Lock recommends that you store your safe in closets, offices, basements, bedrooms and any other locations that are convenient for you but out of direct line of sight from prying eyes. The location of the safe does not affect the safe's ability to protect your valuables inside.
Troubleshooting
| THE PROBLEM: WHY IT IS HAPPENING: THE SOLUTION: | ||
| The door will not lock. 1. Shipping screw is in place. | 2. Confirm that there is no obstruction in the door. | 1. Remove the screw on the back inside of the door.2. Remove all items and accessories from inside the safe.If this resolves the issue, re-set the accessories and organize items to properly fit. |
| The handle is not in the horizontal position when the safe is locked. | The clutch mechanism has been engaged. Rotate the handle up or down until it clicks into the horizontal position. | |
| Cannot open door after inputting the electronic code. | 1. Safe doors equipped with a water-resistant gasket may initially be tight.2. Key lock is in the locked position (select models only).3. Battery power is low. | 1. Hold the handle up while inputting the code and then pull down on the handle.2. If your safe is equipped with a key lock ensure that the key is in the unlocked position (select models only).3. Use auxiliary battery connection to gain access to your safe and replace main batteries. |
| Red indicator light blinks three times and there are three beeps. | An incorrect code has been entered. | Verify code and re-enter. If the programmable code you are using doesn't work then use the factory code. If successful re-program your programmable code. |
| Red indicator light blinks five times and there are five beeps. | Keypad communication error. Please call our Customer Service center. | |
| Red indicator light blinks once and there is one beep. | Program button is pressed out of sequence. Start over. | |
| Yellow "low battery" light is blinking. Battery power is low. Replace batteries. | ||
| Cannot open door after inputting code and yellow "low battery" light is on. | Battery power is low. Lock may not function properly. | Use auxiliary battery connection to gain access to your safe and replace main batteries. |
| Alarm is triggered. | Safe has been moved, jarred or an incorrect code has been entered 5 times. | Wake up the safe and enter a programmed code or factory code. |
| Red alarm and red error light are blinking. | Alarm was triggered. | Wake up the safe and enter a programmed code or factory code. |
| Alarm frequently goes off. | Alarm programmed too sensitive. | Change sensitivity by following directions under "Audible Alarm Features" in this owner's manual. |
Customer Care
Master Lock.
Got a question?
If you ever have any questions regarding your Master Lock product, please visit our website masterlock.eu/safes.
Registration
masterlock.eu/safes
By registering your Master Lock product you can easily retrieve forgotten codes, combinations or order new keys should they be lost. Registering also ensures the best customer service should you have a question or concern regarding your Master Lock product. By registering your Master Lock product you can also be sure that in the unfortunate circumstance of a fire you will be guaranteed your replacement safe (provided official paperwork).
Lifetime After-Fire Replacement Guarantee
If your Master Lock product is in a fire it will be sealed shut making it necessary for it to be pried open. To help your family begin again, Master Lock will ship a replacement free of charge. To be eligible for the After-Fire Replacement Guarantee you (the original owner) must register your product by visiting masterlock.eu/safes.
natural_image
Close-up of a person's leg and arm holding a black box, enclosed in a circular frame (no visible text or symbols)natural_image
Close-up of a black hard drive with a metallic clip and lever (no visible text or symbols)natural_image
Close-up of a hand pointing at a black handheld device with a numeric keypad (no visible text or symbols)natural_image
Close-up of a black office desk with a handle and a small lock, enclosed in a circular frame (no visible text or symbols)natural_image
Close-up of a person's legs and feet holding a black box, no visible text or symbolsnatural_image
Close-up of a mechanical device with a lever and handle (no visible text or symbols)natural_image
Close-up of a hand pointing at a digital phone with keypad (no visible text or symbols)natural_image
Close-up of a black electronic device with a handle and control knob, no visible text or symbols.natural_image
Close-up of a person's leg and arm holding a black box, no visible text or symbolsnatural_image
Close-up of a mechanical device with a handle and lever mechanism (no visible text or symbols)natural_image
Close-up of a hand pointing at a black handheld device with a keypad (no visible text or symbols)natural_image
Close-up of a black box with a handle and a metallic knob, enclosed in a circular frame (no visible text or symbols)natural_image
Close-up of a person's leg and foot wearing a black box, viewed through a circular frame (no text or symbols visible)natural_image
Close-up of a black office desk with a white scroll wheel and handle, no visible text or symbolsnatural_image
Close-up of a hand pointing at a black handheld device with a keypad (no visible text or symbols)natural_image
Close-up of a black office case with a handle and control knob, no visible text or symbolsnatural_image
Close-up of a person's leg and arm holding a black box, no visible text or symbolsnatural_image
Close-up of a black office desk with a white scroll wheel and handle (no visible text or symbols)natural_image
Close-up of a hand pressing down on a black handheld device with a keypad (no visible text or symbols)natural_image
Close-up of a black industrial machine with handle and control knob (no visible text or symbols)natural_image
Circular cropped photo of a person's leg and arm holding a black box, no visible text or symbolsnatural_image
Close-up of a mechanical device with a lever and handle (no visible text or symbols)natural_image
Close-up of a hand pressing down on a black handheld device with a keypad (no visible text or symbols)natural_image
Close-up of a black mechanical device with a handle and lever, no visible text or symbolsnatural_image
Black-and-white circular photo of a person standing beside a dark object with a small symbol, possibly a device or container (no visible text or symbols)natural_image
Close-up of a black office desk with a hand inserting a cable (no visible text or symbols)natural_image
Hand pointing at a black handheld device with a keypad (no visible text or symbols)natural_image
Close-up of a black office drawer with a handle and a small lock, no visible text or symbolsnatural_image
Close-up of a person's leg and hand holding a black box, no visible text or symbolsSafen er dirket opp eller flyttet
natural_image
Close-up of a black office desk with a hand inserting a pen to its side (no visible text or symbols)natural_image
Close-up of a hand pointing at a black handheld device with a keypad (no visible text or symbols)Feil kode tastes 5 ganger

natural_image
Close-up of a black office desk with a hand resting on top and a handle, enclosed in a circular frame (no visible text or symbols)Safen dyttes, slås eller ristes
natural_image
Close-up of a person's leg and arm holding a black box, no visible text or symbolsnatural_image
Close-up of a black office desk with a hand inserting a cable (no visible text or symbols)natural_image
Close-up of a hand pointing at a black handheld device with a keypad (no visible text or symbols)natural_image
Close-up of a black box with a handle and a metallic clip, enclosed in a circular frame (no visible text or symbols)natural_image
Black-and-white circular photo of a person's leg and arm holding a black box (no visible text or symbols)natural_image
Close-up of a black office desk with a hand holding a paper airplane (no visible text or symbols)natural_image
Hand pointing at a black handheld device with a numeric keypad (no visible text or symbols)natural_image
Close-up of a black office drawer with a hand holding a tool, no visible text or symbolsnatural_image
Close-up of a person's leg and arm holding a briefcase, enclosed in a circular frame (no visible text or symbols)natural_image
Close-up of a mechanical device with a handle and lever (no visible text or symbols)natural_image
Close-up of a hand pointing at a black handheld device with a keypad (no visible text or symbols)natural_image
Close-up of a black office case with a handle and lever, enclosed in a circular frame (no visible text or symbols)natural_image
Close-up of a person's arm holding a black box, no visible text or symbolsnatural_image
Close-up of a black office desk with a handle and scroll, no visible text or symbolsnatural_image
Close-up of a hand pointing at a black handheld device with a keypad (no visible text or symbols)natural_image
Close-up of a black office desk with a handle and a small object on top (no visible text or symbols)natural_image
Close-up of a person's leg and arm holding a black box, no visible text or symbolsnatural_image
Close-up of a mechanical device with a handle and lever mechanism (no visible text or symbols)natural_image
Close-up of a hand pointing at a black handheld device with a keypad (no visible text or symbols)natural_image
Close-up of a black electronic device with a handle and control knob, enclosed in a circular frame (no visible text or symbols)natural_image
Close-up of a person's arm and legs holding a black box, enclosed in a circular frame (no visible text or symbols)natural_image
Close-up of a black box with a white handle and a metallic clip, no visible text or symbolsnatural_image
Close-up of a hand pointing at a black handheld device with a keypad (no visible text or symbols)natural_image
Close-up of a mechanical device with a handle and lever, enclosed in a circular frame (no visible text or symbols)Seiful este zdruncinat sau lovit
natural_image
Close-up of a person's leg and arm holding a dark box, no visible text or symbolsnatural_image
Close-up of a mechanical device with a lever and handle (no visible text or symbols)natural_image
Close-up of a hand pointing at a black handheld device with a keypad (no visible text or symbols)natural_image
Close-up of a black office desk with a handle and a small object on top (no visible text or symbols)natural_image
Close-up of a person's arm holding a dark object, possibly a device or container (no visible text or symbols)natural_image
Close-up of a black office desk with a hand inserting a cable (no visible text or symbols)natural_image
Close-up of a hand pressing down on a black handheld device with a keypad (no visible text or symbols)natural_image
Close-up of a black office desk with a handle and a 'Newage' label, no visible text or symbols beyond the label.natural_image
Close-up of a person's leg and foot wearing a box, viewed through a circular frame (no visible text or symbols)natural_image
Close-up of a mechanical device with a lever and handle (no visible text or symbols)natural_image
Close-up of a hand pointing at a black handheld device with a keypad (no visible text or symbols)natural_image
Close-up of a black mechanical device with a handle and lever, no visible text or symbolsnatural_image
Close-up of a person's arm holding a black box, no visible text or symbols金庫を持ち上げたり 移動したとき
natural_image
Close-up of a mechanical device with a handle and lever (no visible text or symbols)ドアをこじ開けようとしたとき
natural_image
Close-up of a hand pointing at a black handheld device with a keypad (no visible text or symbols)誤ったコードが5回 入力されたとき