
SDMHS95D - Monitor SONY - Free user manual and instructions
Find the device manual for free SDMHS95D SONY in PDF.
| Product Type | 19-inch color LCD monitor |
| Brand | Sony |
| Model | SDM-HS95D |
| Display Technology | a-Si TFT active matrix |
| Screen Size (Diagonal) | 19 inches (48.3 cm) |
| Maximum Resolution | 1280 x 1024 pixels |
| Horizontal Frequency (Analog) | 28 - 80 kHz |
| Vertical Frequency (Analog) | 48 - 75 Hz |
| Video Inputs | 1x DVI-D (digital), 1x HD15 (analog) |
| Power Consumption (Max.) | 50 W |
| Power Consumption (Standby) | 1.0 W (max.) |
| Power Supply | 100-240 V AC, 50/60 Hz |
| Dimensions (W x H x D) | Approx. 435 x 418 x 146 mm |
| Weight | Approx. 6 kg |
| Tilt Adjustment | Yes, adjustable angle |
| On-Screen Features | Brightness, contrast, gamma, color temperature, sharpness, image position adjustment |
| On-Screen Display (OSD) | Multilingual (French included) |
| Power Saving Mode | VESA DPMS, DMPS |
| Security | Kensington lock (security slot) |
| Maintenance | Soft cloth, non-abrasive cleaner |
| Supplied Accessories | Power cable, HD15 and DVI-D video cables, cable tie, CD-ROM, quick start guide |
Frequently Asked Questions - SDMHS95D SONY
User questions about SDMHS95D SONY
0 question about this device. Answer the ones you know or ask your own.
Ask a new question about this device
Download the instructions for your Monitor in PDF format for free! Find your manual SDMHS95D - SONY and take your electronic device back in hand. On this page are published all the documents necessary for the use of your device. SDMHS95D by SONY.
USER MANUAL SDMHS95D SONY
This display is designed for use in Japan only and cannot be used in any other country.
主女仕樣
SDM-HS75D
Operating Instructions
GB
SDM-HS75D
SDM-HS95D
Owner's Record
The model and serial numbers are located at the rear of the unit. Record these numbers in the spaces provided below. Refer to them whenever you call upon your dealer regarding this product. Model No. __ Serial No. ____
WARNING
To reduce the risk of fire or electric shock, do not expose this apparatus to rain or moisture.
Dangerously high voltages are present inside the unit. Do not open the cabinet. Refer servicing to qualified personnel only.
FCC Notice
This equipment has been tested and found to comply with the limits for a Class B digital device, pursuant to Part 15 of the FCC Rules. These limits are designed to provide reasonable protection against harmful interference in a residential installation. This equipment generates, uses, and can radiate radio frequency energy and, if not installed and used in accordance with the instructions, may cause harmful interference to radio communications. However, there is no guarantee that interference will not occur in a particular installation. If this equipment does cause harmful interference to radio or television reception, which can be determined by turning the equipment off and on, the user is encouraged to try to correct the interference by one or more of the following measures:
- Reorient or relocate the receiving antenna.
- Increase the separation between the equipment and receiver.
- Connect the equipment into an outlet on a circuit different from that to which the receiver is connected.
- Consult the dealer or an experienced radio/TV technician for help. You are cautioned that any changes or modifications not expressly approved in this manual could void your authority to operate this equipment.
IMPORTANT
If you have any questions about this product, you may call; Sony Customer Information Services Center 1-800-222-7669 or http://www.roy.com/
Declaration of Conformity
Trade Name:SONY
Model: SDM-HS75D
SDM-HS95D
Responsible Party: Sony Electronics Inc.
Address: 16530 Via Esprillo, San Diego,
CA 92127 U.S.A.
Telephone Number: 858-942-2230
This device complies with part 15 of the FCC rules. Operation is subject to the following two conditions: (1) This device may not cause harmful interference, and (2) this device must accept any interference received, including interference that may cause undesired operation.
NOTICE
This notice is applicable for USA/Canada only.
If shipped to USA/Canada, install only a UL LISTED/CSA
LABELLED power supply cord meeting the following
specifications:
SPECIFICATIONS
Plug Type Nema-Plug 5-15p
Cord Type SVT or SJT, minimum 3 × 18 AWG
Length Maximum 15 feet
Rating Minimum 7 A, 125 V
NOTICE
As an ENERGY STAR Partner, Sony Corporation has determined that this product meets the ENERGY STAR guidelines for energy efficiency.
Table of Contents
Precautions. 4
Identifying parts and controls 5
Setup. 7
Step 1: Open the stand .7
Step 2: Connect the display to your computer . 7
Step 3: Connect the power cord. 8
Step 4: Secure the cords and replace the back cover .8
Step 5: Turn on the monitor and computer 8
Adjusting the tilt 9
Selecting the input signal (INPUT button). 9
Customizing Your Monitor 10
Adjusting to the desired brightness. 10
Navigating the menu. 10
Adjusting the backlight (BACKLIGHT) 11
Adjusting the contrast (CONTRAST) 12
Adjusting the black level of an image (BRIGHTNESS). 12
Adjusting the picture's sharpness and centering (SCREEN) (analog RGB signal only) 12
Adjusting the color temperature (COLOR) 13
Changing the gamma setting (GAMMA). 14
Adjusting the sharpness (SHARPNESS) 14
Changing the menu's position (MENU POSITION) 14
Changing the input automatically (INPUT SENSING) 14
Selecting the on-screen menu language (LANGUAGE). 15
Additional settings. 15
Technical Features 16
Power saving function. 16
Reducing the power consumption (mode) 16
Automatic picture quality adjustment function
(analog RGB signal only) 16
Troubleshooting. 17
On-screen messages 17
Trouble symptoms and remedies 18
Specifications. 20
-
Macintosh is a trademark licensed to Apple Computer, Inc., registered in the U.S.A. and other countries.
-
Windows® and MS-DOS are registered trademarks of Microsoft Corporation in the United States and other countries.
- IBM PC/AT and VGA are registered trademarks of IBM Corporation of the U.S.A.
VESA and DDC are trademarks of the Video Electronics Standards Association. - ENERGY STAR is a U.S. registered mark.
- Adobe and Acrobat are trademarks of Adobe Systems Incorporated.
- All other product names mentioned herein may be the trademarks or registered trademarks of their respective companies.
- Furthermore, "TM" and "8" are not mentioned in each case in this manual.
Precautions
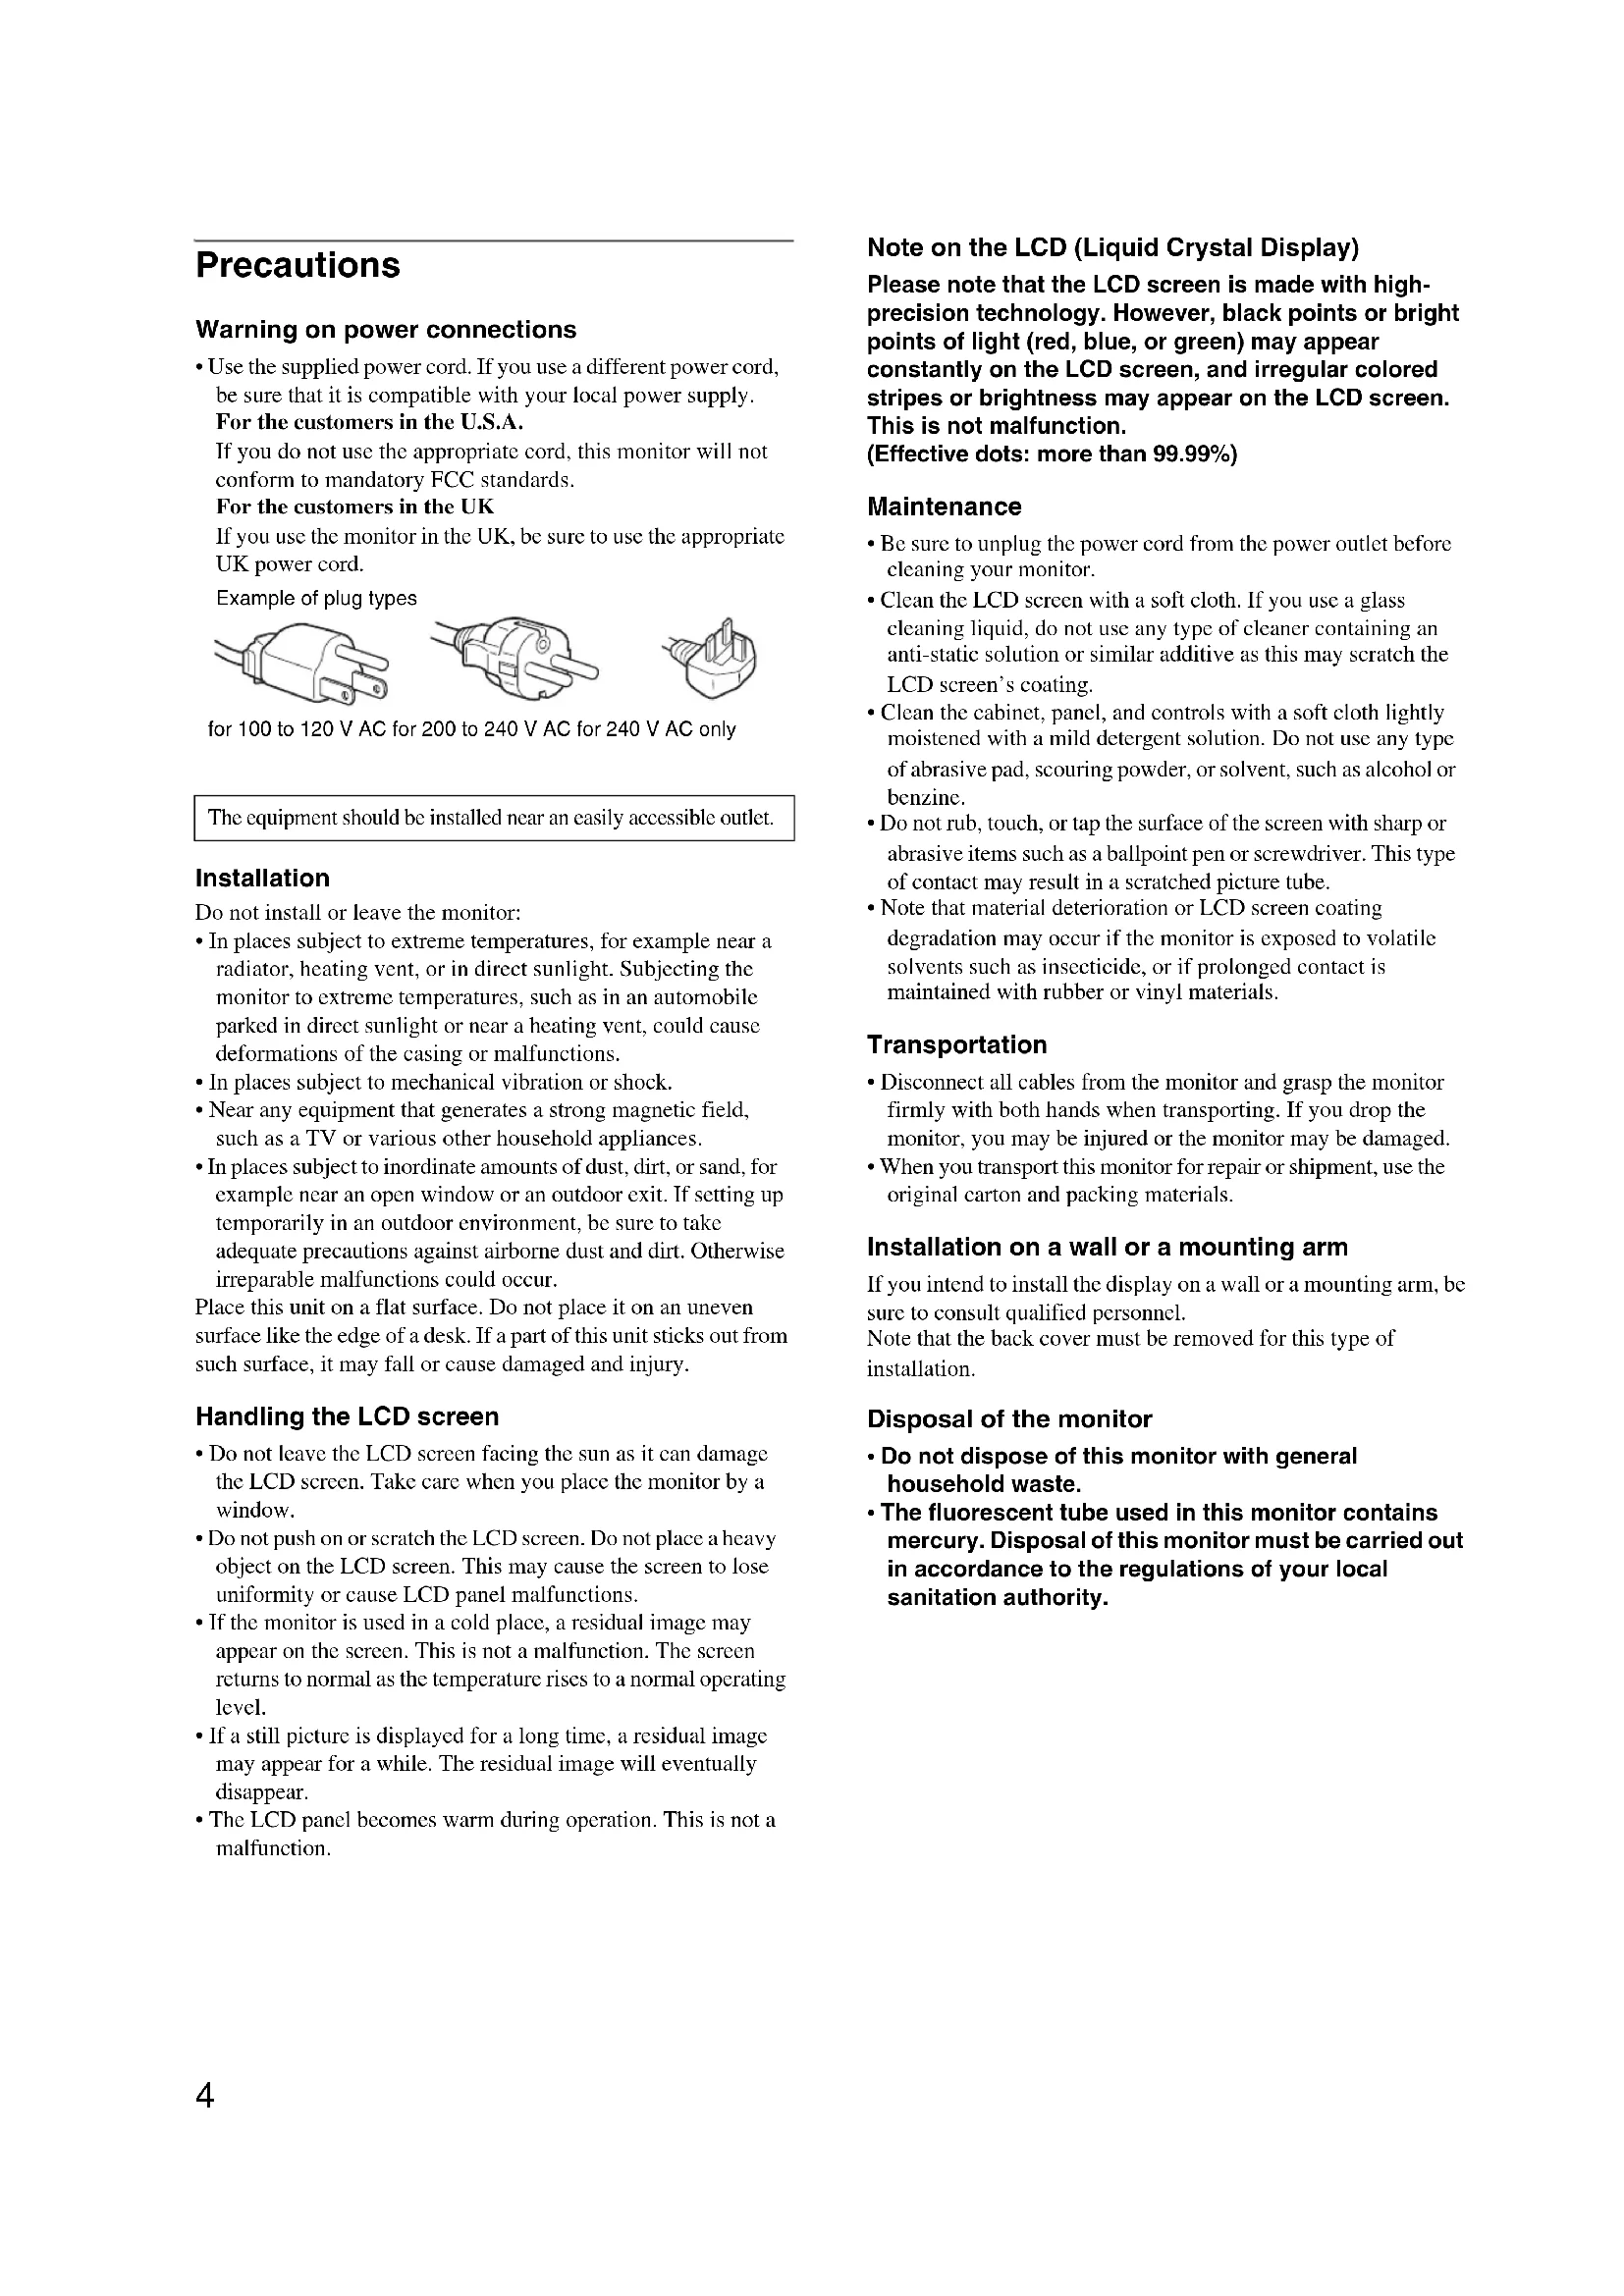
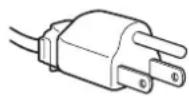
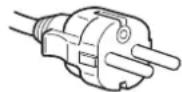
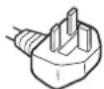
Warning on power connections
- Use the supplied power cord. If you use a different power cord, be sure that it is compatible with your local power supply.
For the customers in the U.S.A.
If you do not use the appropriate cord, this monitor will not conform to mandatory FCC standards.
For the customers in the UK
If you use the monitor in the UK, be sure to use the appropriate UK power cord.
Example of plug types

for 100 to 120V AC for 200 to 240V AC for 240V AC only
The equipment should be installed near an easily accessible outlet.
Installation
Do not install or leave the monitor:
- In places subject to extreme temperatures, for example near a radiator, heating vent, or in direct sunlight. Subjecting the monitor to extreme temperatures, such as in an automobile parked in direct sunlight or near a heating vent, could cause deformations of the casing or malfunctions.
- In places subject to mechanical vibration or shock.
- Near any equipment that generates a strong magnetic field, such as a TV or various other household appliances.
- In places subject to inordinate amounts of dust, dirt, or sand, for example near an open window or an outdoor exit. If setting up temporarily in an outdoor environment, be sure to take adequate precautions against airborne dust and dirt. Otherwise irreparable malfunctions could occur.
Place this unit on a flat surface. Do not place it on an uneven surface like the edge of a desk. If a part of this unit sticks out from such surface, it may fall or cause damaged and injury.
Handling the LCD screen
- Do not leave the LCD screen facing the sun as it can damage the LCD screen. Take care when you place the monitor by a window.
- Do not push on or scratch the LCD screen. Do not place a heavy object on the LCD screen. This may cause the screen to lose uniformity or cause LCD panel malfunctions.
- If the monitor is used in a cold place, a residual image may appear on the screen. This is not a malfunction. The screen returns to normal as the temperature rises to a normal operating level.
- If a still picture is displayed for a long time, a residual image may appear for a while. The residual image will eventually disappear.
- The LCD panel becomes warm during operation. This is not a malfunction.
Note on the LCD (Liquid Crystal Display)
Please note that the LCD screen is made with high-precision technology. However, black points or bright points of light (red, blue, or green) may appear constantly on the LCD screen, and irregular colored stripes or brightness may appear on the LCD screen. This is not malfunction.
(Effective dots: more than 99.99% )
Maintenance
- Be sure to unplug the power cord from the power outlet before cleaning your monitor.
- Clean the LCD screen with a soft cloth. If you use a glass cleaning liquid, do not use any type of cleaner containing an anti-static solution or similar additive as this may scratch the LCD screen's coating.
- Clean the cabinet, panel, and controls with a soft cloth lightly moistened with a mild detergent solution. Do not use any type of abrasive pad, scouring powder, or solvent, such as alcohol or benzine.
- Do not rub, touch, or tap the surface of the screen with sharp or abrasive items such as a ballpoint pen or screwdriver. This type of contact may result in a scratched picture tube.
- Note that material deterioration or LCD screen coating degradation may occur if the monitor is exposed to volatile solvents such as insecticide, or if prolonged contact is maintained with rubber or vinyl materials.
Transportation
- Disconnect all cables from the monitor and grasp the monitor firmly with both hands when transporting. If you drop the monitor, you may be injured or the monitor may be damaged.
- When you transport this monitor for repair or shipment, use the original carton and packing materials.
Installation on a wall or a mounting arm
If you intend to install the display on a wall or a mounting arm, be sure to consult qualified personnel.
Note that the back cover must be removed for this type of installation.
Disposal of the monitor
- Do not dispose of this monitor with general household waste.
- The fluorescent tube used in this monitor contains mercury. Disposal of this monitor must be carried out in accordance to the regulations of your local sanitation authority.
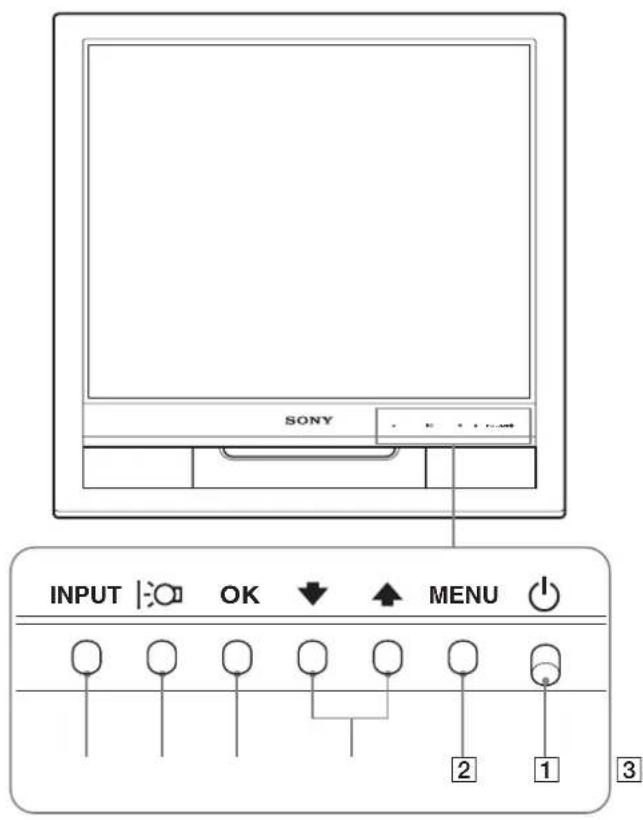
Identifying parts and controls
See the pages in parentheses for further details.
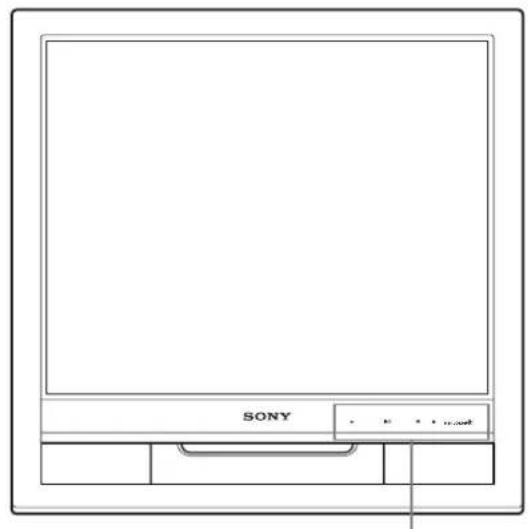
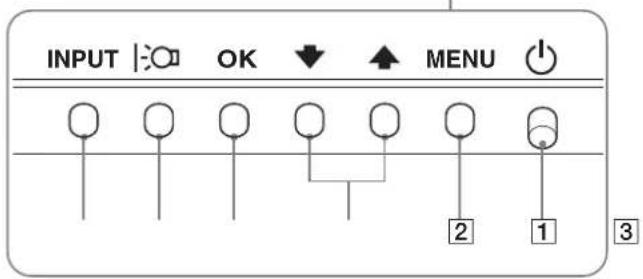
The (power) switch and the control buttons are on the lower right part of the front of the monitor.
Front of the display
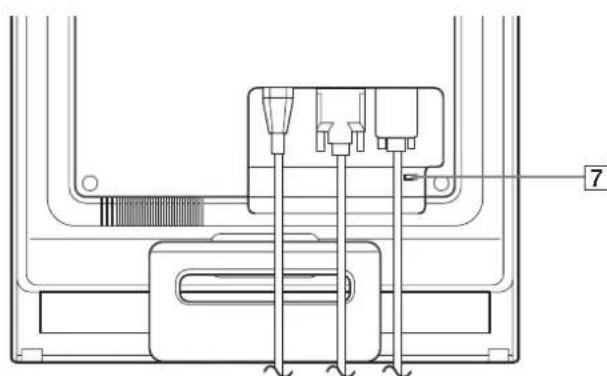
Rear of the display
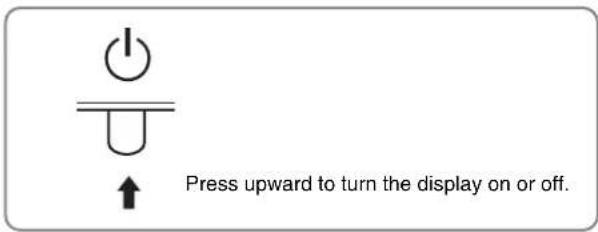
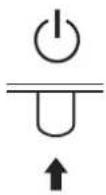
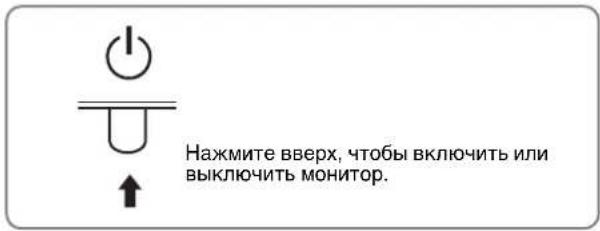
1 (Power) switch and indicator (pages 8, 16)
To turn the display on or off, press the (power) switch upward.
The power indicator lights up in green when the display is turned on, and lights up in orange when the monitor is in power saving mode.
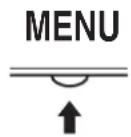
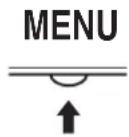
2 MENU button (pages 10, 11)
This button displays or closes the main menu.
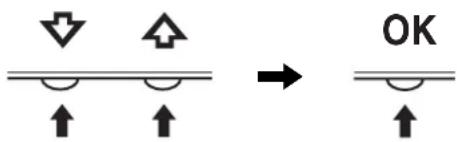
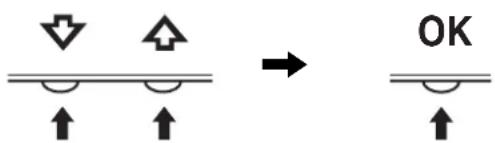
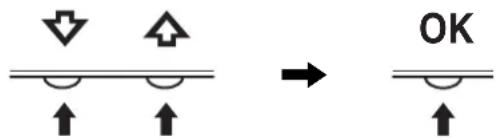
3 ↓/↑ buttons (page 11)
These buttons function as the / buttons when selecting the menu items and making adjustments.
4 OK button (page 11)
This button selects the item or executes the settings in the menu.
5:Button (page 10)
This button is used to change the brightness of the screen.
6 INPUT button (page 9)
This button switches the video input signal between INPUT1 and INPUT2 when two computers are connected to the
monit 6
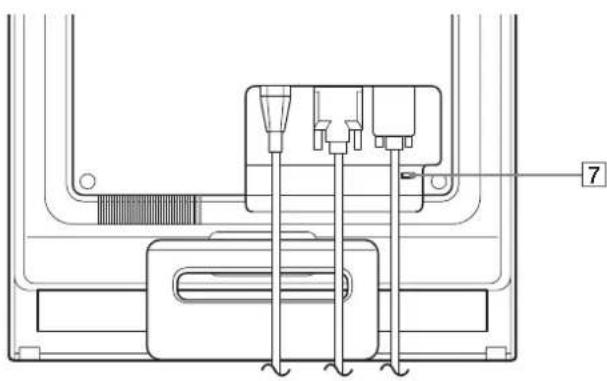
7 Security Lock Hole
The security lock hole should be applied with the Kensington Micro Saver Security System.
Micro Saver Security System is a trademark of Kensington.
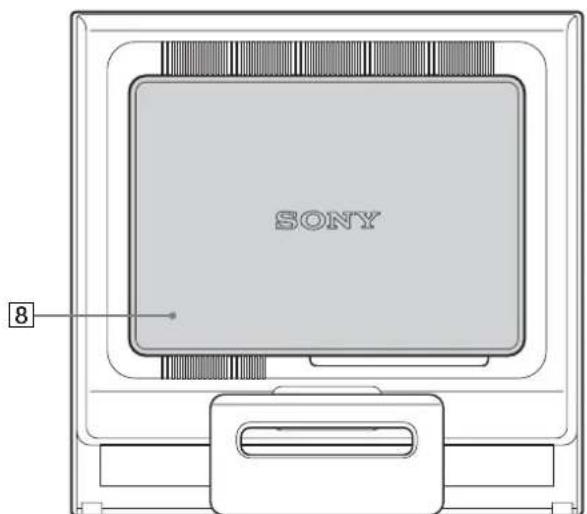
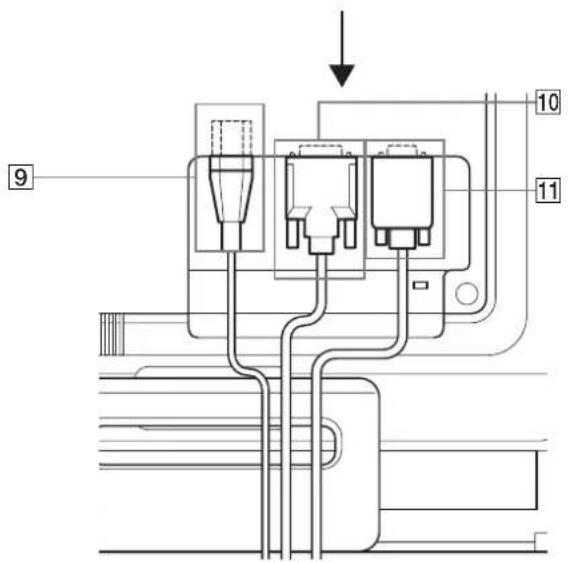
Rear of the display
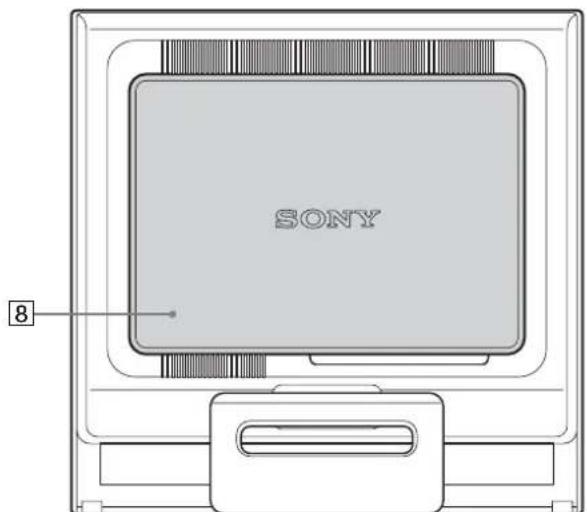
Remove the back cover.
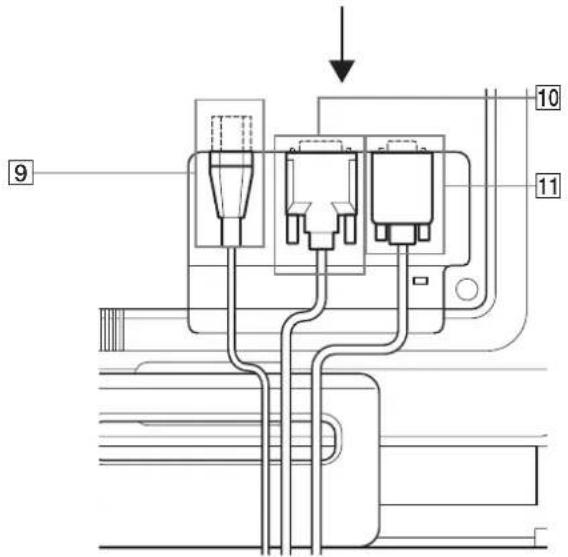
Back cover (page 8)
Remove this cover when you connect/disconnect cables or cords.
9 AC IN connector (page 8)
Connect the power cord (supplied).
DVI-D input connector (digital RGB) for INPUT1 (page 7)
This connector inputs digital RGB video signals that comply with DVI Rev.1.0.
11 HD15 input connector (analog RGB) (page 7)
This connector inputs analog RGB video signals (0.7 Vp-p, positive) and SYNC signals.
Setup
Before using your monitor, check that the following items are included in your carton:
- LCD display
Power cord
HD15-HD15 video signal cable (analog RGB)
DVI-D video signal cable (digital RGB)
Cord strap - CD-ROM (utility software for Windows/Macintosh, Operating Instructions, etc.)
Warranty card - Quick Setup Guide
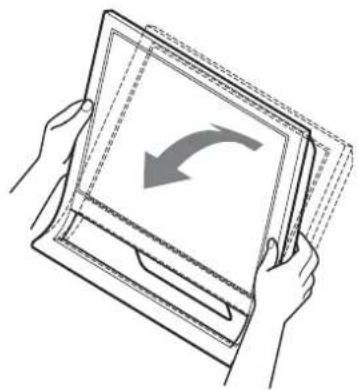
Step 1:Open the stand
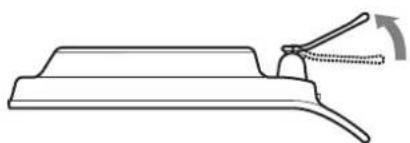
Note
The stand is folded at the factory. Be sure not to place the display vertically with the stand as it is. Otherwise, the display may topple over.
Step 2:Connect the display to your computer
Turn off the monitor and computer before connecting.
Notes
- Do not touch the pins of the video signal cable connector as this might bend the pins.
- Check the alignment of the HD15 connector to prevent bending the pins of the video signal cable connector.
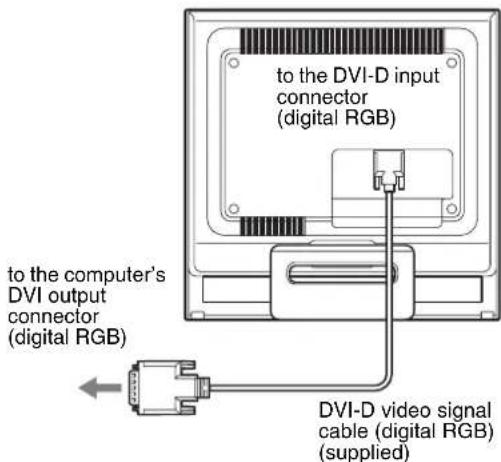
Connect a computer equipped with a DVI output connector (digital RGB)
Using the supplied DVI-D video signal cable (digital RGB), connect the computer to the monitor's DVI-D input connector (digital RGB)
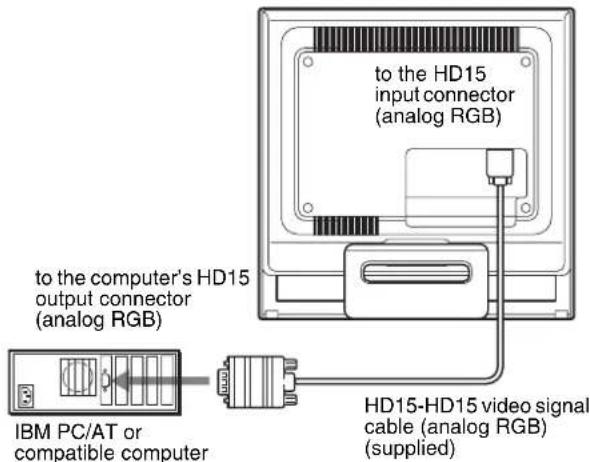
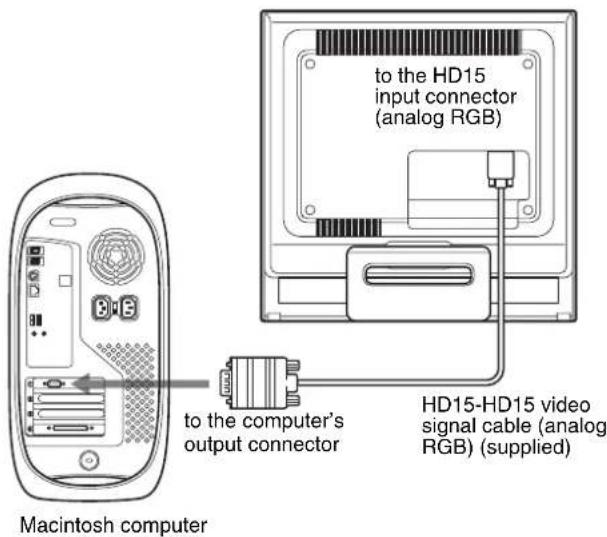
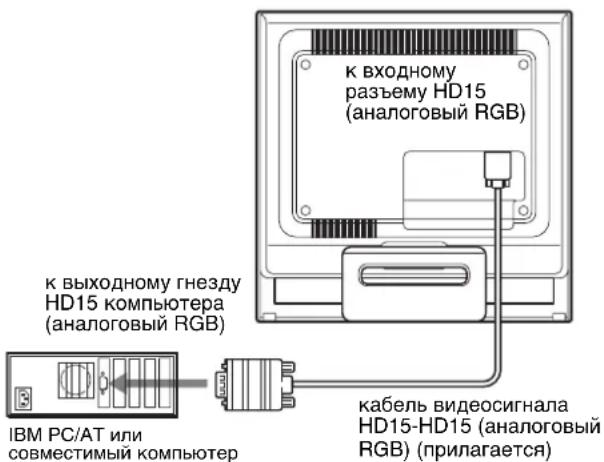
Connect a computer equipped with an HD15 output connector (analog RGB)
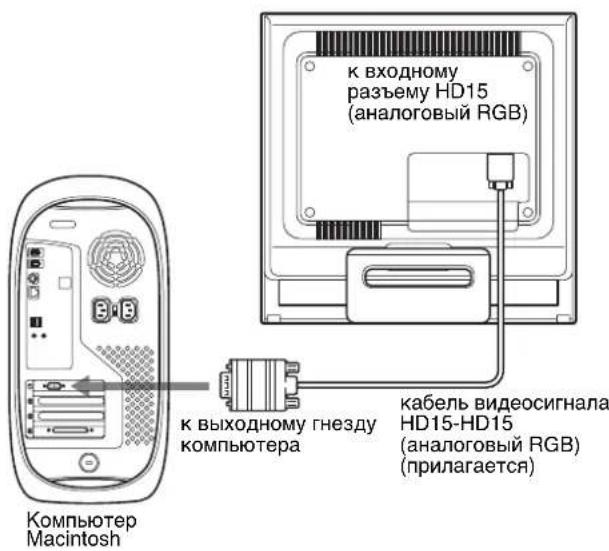
Using the supplied HD15-HD15 video signal cable (analog RGB), connect the computer to the monitor's HD15 input connector (analog RGB).
Connect the computer according to the following illustrations.
- Connecting to an IBM PC/AT or compatible computer
- Connecting to a Macintosh computer
When connecting this monitor to a Macintosh computer, use the Macintosh adapter (not supplied) if necessary. Connect the Macintosh adapter to the computer before connecting the cable.
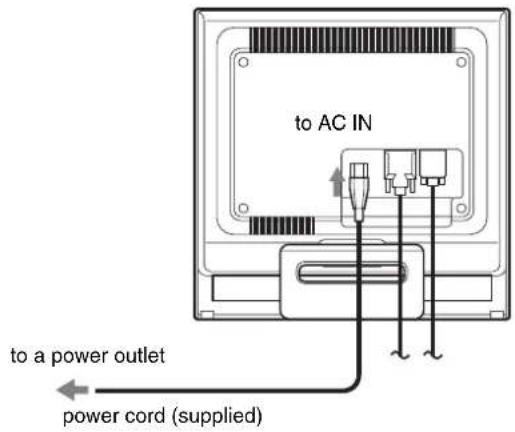
Step 3:Connect the power cord
With the monitor and computer switched off, first connect the power cord to the monitor, then connect it to a power outlet.
Step 4: Secure the cords and replace the back cover
1 Bundle the cables and cords.
Using the supplied cord strap, bundle the cables and cords.
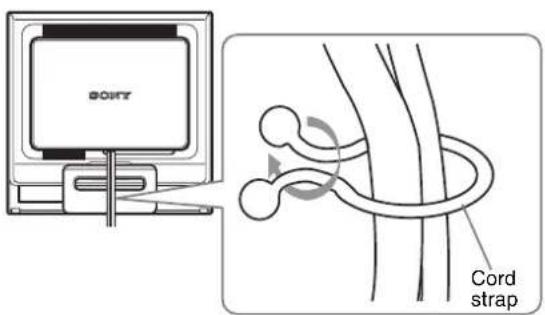
The illustration of the back of the monitor shown here is that of the SDM-HS75D.
The same applies for the other models.
2 Replace the back cover.
Step 5:Turn on the monitor and computer
1 Press the (power) switch upward.
The 心 (power) indicator of the monitor lights up in green.
2 Turn on the computer.
The installation of your monitor is complete. If necessary, use the monitor's controls to adjust the picture.
If no picture appears on your screen
- Check that the power cord and the video signal cable are properly connected.
- If NO INPUT SIGNAL appears on the screen:
The computer is in the power saving mode. Try pressing any key on the keyboard or moving the mouse.
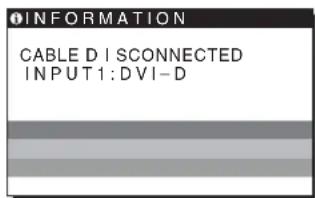
- If CABLE DISCONNECTED appears on the screen:
Check that the video signal cable is properly connected.
- If OUT OF RANGE appears on the screen:
Reconnect the old monitor. Then adjust the computer's graphics board within the following ranges.
| Analog RGB Digital RGB | |
| Horizontal frequency | 28-80 kHz 28-64 kHz |
| Vertical frequency | 48-75 Hz 60 Hz |
| Resolution | 1280 × 1024 or less 1280 × 1024 or less |
For more information about the on-screen messages, see "Trouble symptoms and remedies" on page 18.
No need for specific drivers
The monitor complies with the "DDC" Plug & Play standard and automatically detects all the monitor's information. No specific driver needs to be installed to the computer.
The first time you turn on your computer after connecting the monitor, the setup Wizard may appear on the screen. In this case, follow the on-screen instructions. The Plug & Play monitor is automatically selected so that you can use this monitor.
The vertical frequency turns to 60Hz
Since flickers are unobtrusive on the monitor, you can use it as it is. You do not need to set the vertical frequency to any particular high value.
Adjusting the tilt
This display can be adjusted within the angles shown below.
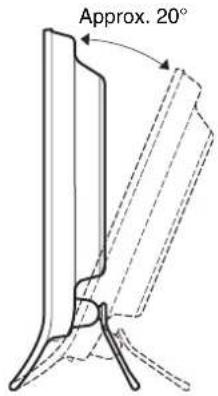
Grasp the lower sides of the LCD panel, then adjust screen tilt.
To use the display comfortably
This display is designed so that you can set it up at a comfortable viewing angle. Adjust the viewing angle of your display according to the height of the desk and chair, and so that light is not reflected from the screen to your eyes.
Note
When adjusting the screen tilt, make sure not to knock or drop the display off the desk.
Selecting the input signal (INPUT button)
Press the INPUT button.
The input signal change each time you press this button.
| INPUT | |
| On-screen message | Input signal configuration |
| (Appears about 5 seconds on the upper left corner.) | |
| INPUT1: DVI-D DVI-D input connector (digital RGB) for INPUT1 | |
| INPUT2: HD15 HD15 input connector (analog RGB) for INPUT2 | |
Customizing Your Monitor
Before making adjustments
Connect the monitor and the computer, and turn them on. Wait for at least 30 minutes before making adjustments for the best result.
You can make numerous adjustments to your monitor using the on-screen menu.
Adjusting to the desired brightness
Pressing the button, you can change the brightness of the screen. Each time you press the button, the changes as follows.
USER HIGH MIDDLE LOW USER ...
The brightness of the screen will decrease as the mode setting changes from HIGH to LOW.
If you select USER, you can adjust the backlight level by pressing the / buttons, the same as when you select BACKLIGHT using the menu.
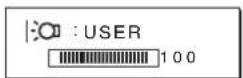
Only while the mode is set to USER, are the BACKLIGHT, CONTRAST, and BRIGHTNESS items of the menu available (page 11).
If you select LOW, the power consumption is reduced (page 16).
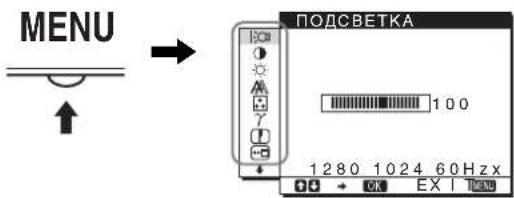
Navigating the menu
Press the MENU button to display the main menu on your screen. See page 11 for more information on using the MENU button.
Use the / and OK buttons to select the icons in the above main menu illustration. The following 1 to 10 menu appears. Keep pressing to scroll down until the icons in menu 9 and 10 appear. See page 11 for more information on using the / and OK buttons.
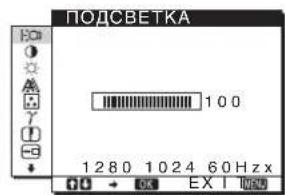
1 BACKLIGHTCQ (page 11)
Select the BACKLIGHT menu to adjust the brightness of the backlight.
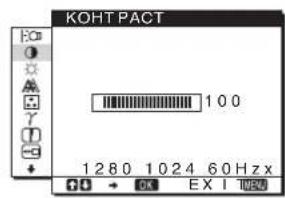
2 CONTRAST (page 12)
Select the CONTRAST menu to adjust the picture contrast.
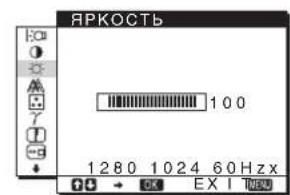
BRIGHTNESS (page 12)
Select the BRIGHTNESS menu to adjust the picture brightness (black level).
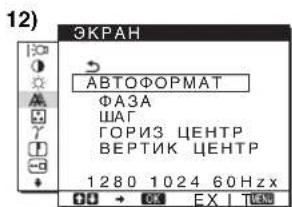
4 SCREEN
Select the SCREEN menu to adjust the picture's sharpness (phase/pitch) or its centering (horizontal/vertical position).
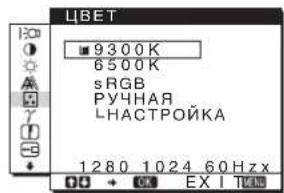
5 COLOR
Select the COLOR menu to adjust the color temperature of the picture. This adjusts the tone of the screen. While COLOR is set to sRGB, you cannot adjust CONTRAST, BRIGHTNESS or GAMMA.
(13)
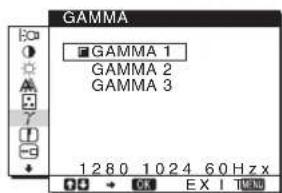
6 GAMMA
Select the GAMMA menu to change the picture's color shade setting.
14)
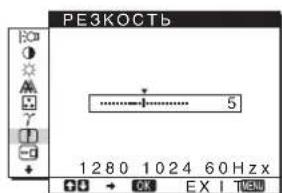
7 SHARPNESS (page 14)
Select the SHARPNESS menu to adjust to sharpen the edge of images.
8 MENU POSITION-3 (page 14)
Select the MENU POSITION to change the onscreen menu position.

9 INPUT SENSING (page 14)
The monitor automatically detects an input signal to an input terminal, and changes the input automatically before the monitor goes into the power saving mode.
10 LANGUAGEAG (page
Select LANGUAGE to change the language used on menus or messages.
11 Other menus (page 15)
Set the following menu items.
- RESET
MENULONCK
Using the MENU, / , and OK buttons
1 Display the main menu.
Press the MENU button to display the main menu on your screen.
2 Select the menu you want to adjust.
Press the / buttons to display the desired menu. Press the OK button to select the menu item.
3 Adjust the menu.
Press the / buttons to make the adjustment, then press the OK button.
When you press the OK button, the setting is stored, then the display returns to the previous menu.
4 Close the menu.
Press the MENU button once to return to normal viewing. If no buttons are pressed, the menu closes automatically after about 45 seconds.
Resetting the adjustments
You can reset the adjustments using the RESET menu. See page 15 for more information on resetting the adjustments.
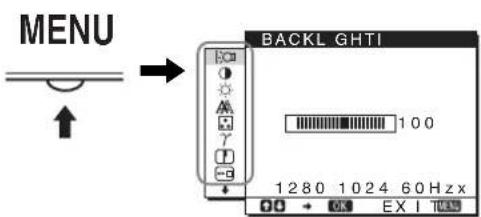
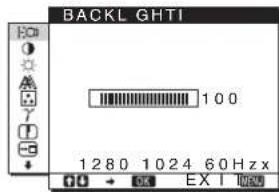
Adjusting the backlight (BACKLIGHT)
If the screen is too bright, adjust the backlight and make the screen easier to see.
Note
The backlight cannot be adjusted when the mode is set to HIGH, MIDDLE, or LOW (page 10).
1 Press the MENU button.
The main menu appears on the screen.
2 Press the / buttons to select (BACKLIGHT) and press the OK button.
The BACKLIGHT menu appears on the screen.
3 Press the / buttons to adjust the light level and press the OK button.
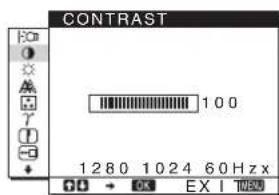
Adjusting the contrast (CONTRAST)
Adjust the picture contrast.
Note
The contrast cannot be adjusted when the mode is set to HIGH, MIDDLE, or LOW (page 10).
1 Press the MENU button.
The main menu appears on the screen.
2 Press the / buttons to select ① (CONTRAST) and press the OK button.
The CONTRAST menu appears on the screen.
3 Press the / buttons to adjust the contrast and press the OK button.
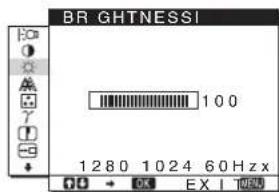
Adjusting the black level of an image (BRIGHTNESS)
Adjust the picture brightness (black level).
Note
The brightness cannot be adjusted when the mode is set to HIGH, MIDDLE, or LOW (page 10).
1 Press the MENU button.
The main menu appears on the screen.
2 Press the / buttons to select (BRIGHTNESS) and press the OK button.
The BRIGHTNESS menu appears on the screen.
3 Press the / buttons to adjust the brightness and press the OK button.
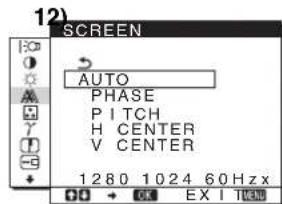
Adjusting the picture's sharpness and centering (SCREEN) (analog RGB signal only)
Automatic picture quality adjustment function
When the monitor receives an input signal, it automatically adjusts the picture's position and sharpness (phase/pitch), and ensures that a clear picture appears on the screen (page 16).
Note
While the automatic picture quality adjustment function is activated, only the (power) switch will operate.
If the automatic picture quality adjustment function of this monitor seems to not completely adjust the picture
You can make further automatic adjustment of the picture quality for the current input signal. (See AUTO below.)
If you still need to make further adjustments to the picture quality
You can manually adjust the picture's sharpness (phase/pitch) and position (horizontal/vertical position).
These adjustments are stored in memory and automatically recalled when the display receives the same input signal.
These settings may have to be repeated if you change the input signal after reconnecting your computer.
Make further automatic adjustments to the picture quality for the current input signal (AUTO)
1 Press the MENU button.
The main menu appears on the screen.
2 Press the / buttons to select (SCREEN) and press the OK button.
The SCREEN menu appears on the screen.
3 Press the / buttons to select AUTO and press the OK button.
Make the appropriate adjustments of the screen's phase, pitch and horizontal/vertical position for the current input signal and store them.
4 Press the / buttons to select and press the OK button.
Return to the menu screen.
Adjust the picture's sharpness manually (PHASE/PITCH)
You can adjust the picture's sharpness as follows.
1 Set the resolution to 1280 × 1024 on the computer.
2 Load the CD-ROM.
3 Start the CD-ROM, select the region and model, and display the test pattern.
For Windows
Click [Utility] [Windows]/[Win Utility.exe].
For Macintosh
Click [Utility] [Mac]/[Mac Utility].
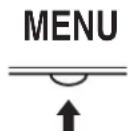
4 Press the MENU button.
The main menu appears on the screen.
5 Press the / buttons to select (SCREEN) and press the OK button.
The SCREEN menu appears on the screen.
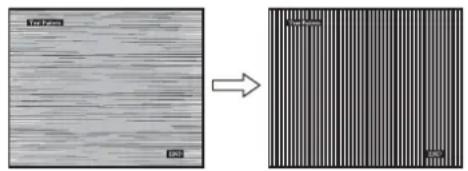
6 Press the / buttons to select PHASE and press the OK button.
The PHASE menu appears on the screen.
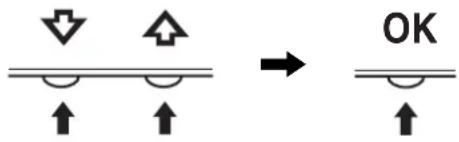
7 Press the / buttons until the horizontal stripes are at a minimum.
Adjust so that the horizontal stripes are at a minimum.
8 Press the OK button.
Return to the SCREEN menu.
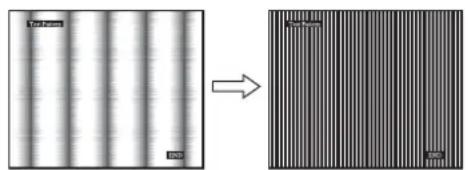
If vertical stripes are observed over the entire screen, adjust pitch by the following steps.
9 Press the / buttons to select PITCH and press the OK button.
The PITCH menu appears on the screen.
10 Press the / buttons until the vertical stripes disappear.
Adjust so that the vertical stripes disappear.
11 Click END on the screen to turn off the test pattern.
12 Press the OK button.
Return to the SCREEN menu.
13 Press the / buttons to select and press the OK button.
Return to the menu screen.
Adjust the picture's position manually (H CENTER/V CENTER)
If the picture is not in the center of the screen, adjust the picture's centering as follows.
1 Set the resolution to 1280 × 1024 on the computer.
2 Load the CD-ROM.
3 Start the CD-ROM, select the region and model, and display the test pattern.
For Windows
Click [Utility] [Windows]/[Win Utility.exe].
For Macintosh
Click [Utility] [Mac]/[Mac Utility].
4 Press the MENU button.
The main menu appears on the screen.
5 Press the / buttons to select (SCREEN) and press the OK button.
The SCREEN menu appears on the screen.
6 Press the / buttons to select H CENTER or V CENTER and press the OK button.
The H CENTER or V CENTER menu appears on the screen.
7 Press the / buttons to center the test pattern in the screen.
8 Click END on the screen to turn off the test pattern.
9 Press the OK button.
Return to the SCREEN menu.
10 Press the / buttons to select and press the OK button.
Return to the menu screen.
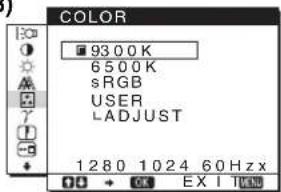
Adjusting the color temperature (COLOR)
You can select the color level of the picture's white color field from the default color temperature settings.
Also, if necessary, you can fine tune the color temperature.
You can set the desired color temperature for each mode of the brightness of screen.
1 Press the MENU button.
The main menu appears on the screen.
2 Press the / buttons to select (COLOR) and press the OK button.
The COLOR menu appears on the screen.
3 Press the / buttons to select the desired color temperature and press the OK button.
Whites will change from a bluish hue to reddish hue as the temperature is lowered from 9300K (default setting) to 6500K.
While "USER" is selected for the brightness of screen, you can set the color temperature to "sRGB."
When you select "sRGB," the colors adjust to the sRGB profile. (The sRGB color setting is an industry-standard color space protocol designed for computer products.) If you select "sRGB," the color settings of your computer must be set to the sRGB profile.
Notes
- If a connected computer or other equipment is not sRGB-compliant, color cannot be adjusted to the sRGB profile.
- While COLOR is set to sRGB, you cannot adjust CONTRAST, BRIGHTNESS or GAMMA.
Fine tuning the color temperature (USER ADJUSTMENT)
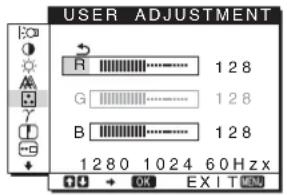
1 Press the / buttons to select ADJUST and press the OK button.
The USER ADJUSTMENT menu appears on the screen.
2 Press the / buttons to select R (Red) or B (Blue) and press the OK button. Then press the / buttons to adjust the color temperature and press the OK button.
Since this adjustment changes the color temperature by increasing or decreasing the R and B components with respect to G (green), the G component is fixed.
3 Press the / buttons to select , then press the OK button.
The new color setting is stored in memory for USER and automatically recalled whenever USER is selected.
The main menu appears on the screen.
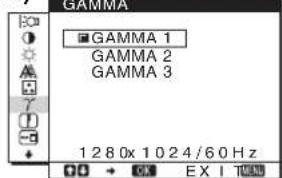
Changing the gamma setting (GAMMA)
You can associate the picture's color shade on the screen with the picture's original color shade.
1 Press the MENU button.
The main menu appears on the screen.
2 Press the / buttons to select (GAMMA) and press the OK button.
The GAMMA menu appears on the screen.
3 Press the / buttons to select the desired mode and press the OK button.
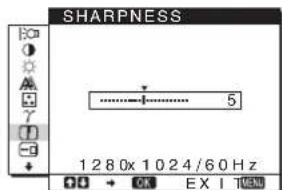
Adjusting the sharpness (SHARPNESS)
Adjust to sharpen the edge of images, etc.
1 Press the MENU button.
The main menu appears on the screen.
2 Press the / buttons to select (SHARPNESS) and press the OK button.
The SHARPNESS menu appears on the screen.
3 Press the / buttons to adjust the sharpness and press the OK button.
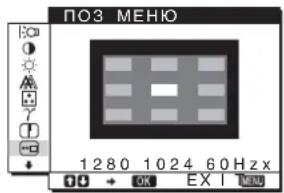
Changing the menu's position (MENU POSITION)
You can change the menu position if it is blocking an image on the screen.
1 Press the MENU button.
The main menu appears on the screen.
2 Press the / buttons to select (MENU POSITION) and press the OK button.
The MENU POSITION menu appears on the screen.
3 Press the / buttons to select the desired position and press the OK button.
There are three positions each for the top, center and bottom of the screen.
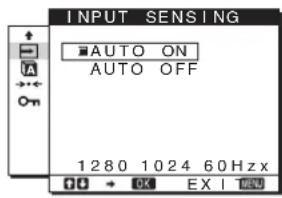
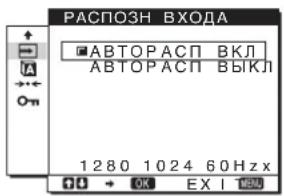
Changing the input automatically (INPUT SENSING)
When you select AUTO ON in the INPUT SENSING menu, the monitor automatically detects an input signal to an input terminal, and changes the input automatically before the monitor goes into the power saving mode.
1 Press the MENU button.
The main menu appears on the screen.
2 Press the / buttons to select (INPUT SENSING) and press the OK button.
The INPUT SENSING menu appears on the screen.
3 Press the / buttons to select the desired mode and press the OK button.
-
AUTO ON: When the selected input terminal has no input signal, or when you select an input terminal by the INPUT button on the monitor and the terminal has no input signal, the on-screen message appears (page 17) and the monitor checks the input signal to another input terminal automatically to change the input. When the input is changed, the selected input terminal is displayed on the left upper of the screen. When there is no input signal, the monitor goes into the power saving mode automatically.
-
AUTO OFF: The input is not changed automatically. Press the INPUT button to change the input.
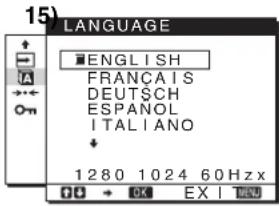
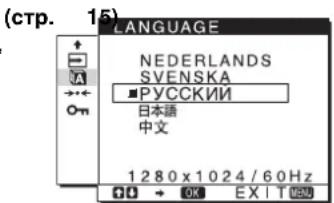
Selecting the on-screen menu language (LANGUAGE)
You can change the language used on menus or messages displayed on this monitor.
1 Press the MENU button.
The main menu appears on the screen.
2 Keep pressing the button until the icon of the desired option item appears.
3 Press the / buttons to select (LANGUAGE) and press the OK button.
The LANGUAGE menu appears on the screen.
4 Press the / buttons to select a language and press the OK button.
- ENGLISH
FRANÇAIS: French - DEUTSCH: German
- ESPANOL: Spanish
ITALIANO: Italian - NEDERLANDS: Dutch
SVENSKA: Swedish
:RvSiKu
·曲本蕴ese
·中文: C h i n e s e
Additional settings
You can adjust the following options:
- RESET
-MENU LOCK
1 Press the MENU button.
The main menu appears on the screen.
2 Keep pressing the button until the icon of the desired option item appears.
3 Press the / buttons to select the desired option item and press the OK button.
Adjust the selected option item according to the following instructions.
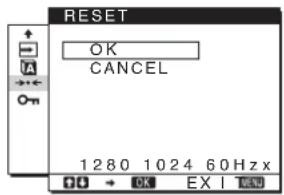
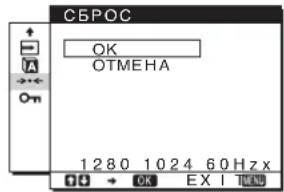
Resetting the adjustment data to the defaults
You can reset the adjustments to the default settings.
1 Press the / buttons to select (RESET) and press the OK button.
The RESET menu appears on the screen.
2 Press the / buttons to select the desired mode and press the OK button.
- OK: To reset all of the adjustment data to the default settings. Note that the LANGUAGE) setting is not reset by this method.
- CANCEL: To cancel resetting and return to the menu screen.
Locking the menus and controls
You can lock the control of buttons to prevent accidental adjustments or resetting.
1 Press the / buttons to select ON (MENU LOCK) and press the OK button.
The MENU LOCK menu appears on the screen.
2 Press the / buttons to select ON or OFF and press the OK button.
- ON: Only the (power) switch will operate. If you attempt any other operation, the OMENU LOCK icon appears on the screen.
- OFF:Set MENU LOCK) to OFF. If you set the (MENU LOCK) item to ON, only this menu item can be selected.
Technical Features
Power saving function
This monitor meets the power-saving guidelines set by VESA, ENERGY STAR, and NUTEK. If the monitor is connected to a computer or video graphics board that is DPMS (Display Power Management Standard) for Analog input/DMPM (DVI Digital Monitor Power Management) for Digital input compliant, the monitor will automatically reduce power consumption as shown below.
SDM-HS75D
| Power mode Power consumption (power) indicator | |
| normal operation | 45 W (max.) green |
| active off* (deep sleep)** | 1.0 W (max.) orange |
| power off 1.0 W (max.) off | |
SDM-HS95D
| Power mode Power consumption | ( power) indicator | |
| normal operation | 50 W (max.) green | |
| active off* (deep sleep)** | 1.0 W (max.) | orange |
| power off 1.0 W (max.) | off | |
- When your computer enters the "active off" mode, the input signal is cut and NO INPUT SIGNAL appears on the screen. After 5 seconds, the monitor enters the power saving mode.
** "deep sleep" is the power saving mode defined by the Environmental Protection Agency.
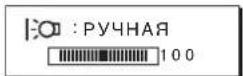
Reducing the power consumption
(m o d e)
If you set the mode to LOW by pressing the button on the front of the monitor, the backlight level is reduced and the power consumption is reduced, too.
Press the button several times until LOW appears.
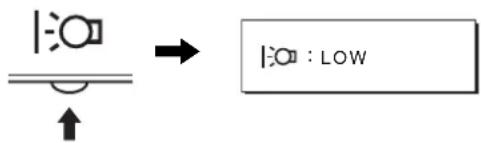
LOW appears on the screen and the backlight level is reduced. LOW automatically disappears after about 5 seconds.
Automatic picture quality adjustment function (analog RGB signal only)
When the monitor receives an input signal, it automatically adjusts the picture's position and sharpness (phase/pitch), and ensures that a clear picture appears on the screen.
The factory preset mode
When the monitor receives an input signal, it automatically matches the signal to one of the factory preset modes stored in the monitor's memory to provide a high quality picture at the center of the screen. If the input signal matches the factory preset mode, the picture appears on the screen automatically with the appropriate default adjustments.
If input signals do not match one of the factory preset modes
When the monitor receives an input signal that does not match one of the factory preset modes, the automatic picture quality adjustment function of this monitor is activated to ensure that a clear picture always appears on the screen (within the following monitor frequency ranges):
Horizontal frequency: 28 - 80kHz
Vertical frequency: 48 - 75Hz
Consequently, the first time the monitor receives input signals that do not match one of the factory preset modes, the monitor may take a longer time than normal to display the picture on the screen. This adjustment data is automatically stored in memory so that next time, the monitor will function in the same way as when the monitor receives the signals that match one of the factory preset modes.
Note
There is no need to adjust the digital RGB signals of the DVI-D input connector for INPUT1.
If you adjust the phase, pitch, and picture position manually
For some input signals, the automatic picture quality adjustment function of this monitor may not completely adjust the picture position, phase, and pitch. In this case, you can set these adjustments manually (page 12). If you set these adjustments manually, they are stored in memory as user modes and automatically recalled whenever the monitor receives the same input signals.
Note
While the automatic picture quality adjustment function is activated, only the (power) switch will operate.
Troubleshooting
Before contacting technical support, refer to this section.
On-screen messages
If there is something wrong with the input signal, one of the following messages appears on the screen. To solve the problem, see "Trouble symptoms and remedies" on page 18.
If OUT OF RANGE appears on the screen
This indicates that the input signal is not supported by the monitor's specifications. Check the following items.
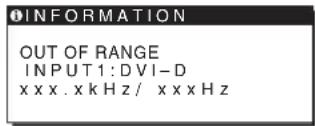
If "xxx.x kHz/xxx Hz" is displayed
This indicates that either the horizontal or vertical frequency is not supported by the monitor's specifications.
The figures indicate the horizontal and vertical frequencies of the current input signal.
If "RESOLUTION >1280× 1024 " is displayed
This indicates that the resolution is not supported by the monitor's specifications (1280 × 1024 or less).
If NO INPUT SIGNAL appears on the screen
This indicates that no signal is being input.
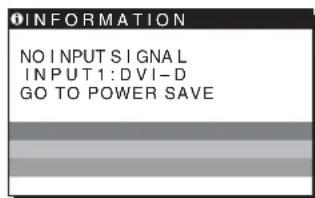
GO TO POWER SAVE
The monitor will enter the power saving mode after about 5 seconds from the time the message is displayed.
If CABLE DISCONNECTED appears on the screen
This indicates that the video signal cable has been disconnected.
Trouble symptoms and remedies
If a problem is caused by the connected computer or other equipment, please refer to the connected equipment's instruction manual.
| Symptom Check these items | |
| No picture | |
| If the (power) indicator is not lit, or if the (power) indicator will not light up when the (power) switch is pressed, | Check that the power cord is properly connected. |
| If CABLE DISCONNECTED appears on the screen, | Check that the video signal cable is properly connected and all plugs are firmly seated in their sockets (page 7).Check that the video input connector's pins are not bent or pushed in.A non-supplied video signal cable is connected. If you connect a non-supplied video signal cable, CABLE DISCONNECTED may appear on the screen before entering the power saving mode. This is not a malfunction. |
| If NO INPUT SIGNAL appears on the screen, or the (power) indicator is orange, | Check that the video signal cable is properly connected and all plugs are firmly seated in their sockets (page 7).Check that the video input connector's pins are not bent or pushed in.Problems caused by a computer or other equipment connected, and not caused by the monitorThe computer is in the power saving mode. Try pressing any key on the keyboard or moving the mouseCHECK that your graphics board is installed properly.Check that the computer's power is on.Restart the computer. |
| If OUT OF RANGE appears on the screen, | Problems caused by a computer or other equipment connected, and not caused by the monitorCheck that the video frequency range is within that specified for the monitor. If you replaced an old monitor with this monitor, reconnect the old monitor and adjust the computer's graphics board within the following ranges:Horizontal: 28-80 kHz (analog RGB), 28-64 kHz (digital RGB)Vertical: 48-75 Hz (analog RGB), 60 Hz (digital RGB)Resolution: 1280 x 1024 or less |
| If you are using Windows and replaced an old monitor with this monitor, | If you replaced an old monitor with this monitor, reconnect the old monitor and do the following. Select "SONY" from the "Manufacturers" list and select "SDM-HS75D" or "SDM-HS95D" from the "Models" list in the Windows device selection screen. If the model name of this monitor does not appear in the "Models" list, try "Plug & Play." |
| If using a Macintosh system, | If you use the Macintosh adapter (not supplied), check that the Macintosh adapter and the video signal cable are properly connected (page 7). |
| Picture flickers, bounces, oscillates, or is scrambled | Adjust the pitch and phase (page 12).Try plugging the monitor into a different AC outlet, preferably on a different circuit.Problems caused by a computer or other equipment connected, and not caused by the monitorCheck your graphics board manual for the proper monitor setting Confirm that the graphics mode (VESA, Macintosh 19" Color, etc.) and the frequency of the input signal are supported by this monitor. Even if the frequency is within the proper range, some graphics boards may have a sync pulse that is too narrow for the monitor to sync correctly.Adjust the computer's refresh rate (vertical frequency) to obtain the best possible picture. |
| Picture is fuzzy · Adjust the brightness and contrast (page 12). · Adjust the pitch and phase (page 12). ■ Problems caused by a computer or other equipment connected, and not caused by the monitor · Set the resolution to 1280 × 1024 on your computer. | |
| Picture is ghosting | · Eliminate the use of video cable extensions and/or video switch boxes. · Check that all plugs are firmly seated in their sockets. |
| Picture is not centered or sized properly | · Adjust the pitch and phase (page 12). · Adjust the picture position (page 13). Note that some video modes do not fill the screen to the edges. |
| Picture is too small | ■ Problems caused by a computer or other equipment connected, and not caused by the monitor · Set the resolution to 1280 × 1024 on your computer. |
| Picture is dark | · Adjust the brightness using the BRIGHTNESS menu (page 12). · Adjust the backlight (page 11). · Adjust the brightness using the button (page 10). · It takes a few minutes for the display to become bright after turning on the monitor. |
| Wavy or elliptical pattern (moire) is visible | · Adjust the pitch and phase (page 12). |
| Color is not uniform · Adjust the pitch and phase (page 12). | |
| White does not look white · Adjust the color temperature (page 13). | |
| Monitor buttons do not operate (appears on the screen) | · If the menu lock is set to ON, set it to OFF (page 15). |
| The monitor turns off after a while | ■ Problems caused by a computer or other equipment connected, and not caused by the monitor · Set the computer's power saving setting to off. |
| Resolution displayed on the menu screen is incorrect | · Depending on the graphics board setting, the resolution displayed on the menu screen may not coincide with the one set on the computer. |
GB
If any problem persists, call your authorized Sony dealer and give the following information:
Model name: SDM-HS75D or SDM-HS95D
- Serial number
- Detailed description of the problem
- Date of purchase
- Name and specifications of your computer and graphics board
Specifications
SDM-HS75D
LCD panel Panel type: a-Si TFT Active Matrix
Picture size: 17.0 inch
Input signal format RGB operating frequency*
Horizontal: 28 - 80kHz (analog RGB)
28-64 kHz (digital RGB)
Vertical: 48 - 75Hz (analog RGB)
60Hz (digital RGB)
Resolution Horizontal: Max.1280 dots
Vertical: Max.1024 lines
Input signal levels Analog RGB video signal
0.7 Vp-p, 75 Ω, positive
SYNC signal
TTL level, 2.2k
positive or negative
(Separate horizontal and vertical)
Digital RGB (DVI) signal: TMDS
(Single link)
Power requirements 100-240 V, 50-60 Hz
Max. 1.0 A
Power consumption Max. 45 W
Operating temperature 5-35 C
Dimensions (width/height/depth)
Display (upright):
Approx. 388× 382.5× 139.2mm
(15^1 / 4 × 15 × 5^1 / 2 inches)
Mass Approx. 5kg (11 lb).
3/8 oz.)
Plug & Play DDC2B
Accessories See page 7.
SDM-HS95D
LCD panel Panel type: a-Si TFT Active Matrix
Picture size: 19.0 inch
Input signal format RGB operating frequency*
Horizontal: 28 - 80kHz (analog RGB)
28-64 kHz (digital RGB)
Vertical: 48 - 75Hz (analog RGB)
60Hz (digital RGB)
Resolution Horizontal: Max.1280 dots
Vertical: Max.1024 lines
Input signal levels Analog RGB video signal
0.7 Vp-p, 75 Ω, positive
SYNC signal
TTL level, 2.2k
positive or negative
(Separate horizontal and vertical)
Digital RGB (DVI) signal: TMDS
(Single link)
Power requirements 100-240 V, 50-60 Hz
Max. 1.0 A
Power consumption Max. 50 W
Operating temperature 5-35 ^ C
Dimensions (width/height/depth)
Display (upright):
Approx. 435× 418× 146mm
(17^1 / 8 × 16^1 / 2 × 5^3 / 4 inches)
Mass Approx. 6kg (13 lb. 3
5/8 oz.)
Plug & Play DDC2B
Accessories See page 7.
- Recommended horizontal and vertical timing condition
Horizontal sync width duty should be more than 4.8% of total horizontal time or 0.8~ s whichever is larger.
Horizontal blanking width should be more than 2.5 sec
Vertical blanking width should be more than 450~ sec
Design and specifications are subject to change without notice.
TFTLCDColor ComputerDisplay
Mode d'emploi_
FR
SDM-HS75D
SDM-HS95D
Owner's Record
The model and serial numbers are located at the rear of the unit. Record these numbers in the spaces provided below. Refer to them whenever you call upon your dealer regarding this product. Model No. __ Serial No. ____
WARNING
To reduce the risk of fire or electric shock, do not expose this apparatus to rain or moisture.
Dangerously high voltages are present inside the unit. Do not open the cabinet. Refer servicing to qualified personnel only.
FCC Notice
This equipment has been tested and found to comply with the limits for a Class B digital device, pursuant to Part 15 of the FCC Rules. These limits are designed to provide reasonable protection against harmful interference in a residential installation. This equipment generates, uses, and can radiate radio frequency energy and, if not installed and used in accordance with the instructions, may cause harmful interference to radio communications. However, there is no guarantee that interference will not occur in a particular installation. If this equipment does cause harmful interference to radio or television reception, which can be determined by turning the equipment off and on, the user is encouraged to try to correct the interference by one or more of the following measures:
- Reorient or relocate the receiving antenna.
- Increase the separation between the equipment and receiver.
- Connect the equipment into an outlet on a circuit different from that to which the receiver is connected.
- Consult the dealer or an experienced radio/TV technician for help. You are cautioned that any changes or modifications not expressly approved in this manual could void your authority to operate this equipment.
IMPORTANT
If you have any questions about this product, you may call; Sony Customer Information Services Center 1-800-222-7669 or http://www.sony.com/
Declaration of Conformity
Trade Name:SONY
Model: SDM-HS75D
SDM-HS95D
Responsible Party: Sony Electronics Inc.
Address: 16530 Via Esprillo, San Diego
CA 92127 U.S.A.
Telephone Number: 858-942-2230
This device complies with part 15 of the FCC rules. Operation is subject to the following two conditions: (1) This device may not cause harmful interference, and (2) this device must accept any interference received, including interference that may cause undesired operation.
NOTICE
This notice is applicable for USA/Canada only.
If shipped to USA/Canada, install only a UL LISTED/CSA
LABELLED power supply cord meeting the following
specifications:
SPECIFICATIONS
Plug Type Nema-Plug 5-15p
Cord Type SVT or SJT, minimum 3 × 18 AWG
Length Maximum 15 feet
Rating Minimum 7 A, 125 V
NOTICE
As an ENERGY STAR Partner, Sony Corporation has determined that this product meets the ENERGY STAR guidelines for energy efficiency.
Table des matieres
Precautions. 4
Specifications techniques
Consummation electrique Max. 45 W
Consummation electrode Max. 50 W
The model and serial numbers are located at the rear of the unit. Record these numbers in the spaces provided below. Refer to them whenever you call upon your dealer regarding this product. Model No. __ Serial No. ____
WARNING
To reduce the risk of fire or electric shock, do not expose this apparatus to rain or moisture.
Dangerously high voltages are present inside the unit. Do not open the cabinet. Refer servicing to qualified personnel only.
FCC Notice
This equipment has been tested and found to comply with the limits for a Class B digital device, pursuant to Part 15 of the FCC Rules. These limits are designed to provide reasonable protection against harmful interference in a residential installation. This equipment generates, uses, and can radiate radio frequency energy and, if not installed and used in accordance with the instructions, may cause harmful interference to radio communications. However, there is no guarantee that interference will not occur in a particular installation. If this equipment does cause harmful interference to radio or television reception, which can be determined by turning the equipment off and on, the user is encouraged to try to correct the interference by one or more of the following measures:
- Reorient or relocate the receiving antenna.
- Increase the separation between the equipment and receiver.
- Connect the equipment into an outlet on a circuit different from that to which the receiver is connected.
- Consult the dealer or an experienced radio/TV technician for help. You are cautioned that any changes or modifications not expressly approved in this manual could void your authority to operate this equipment.
IMPORTANT
If you have any questions about this product, you may call; Sony Customer Information Services Center 1-800-222-7669 or http://www.roy.com/
Declaration of Conformity
Trade Name:SONY
Model:SDM-HS75D
SDM-HS95D
Responsible Party: Sony Electronics Inc.
Address: 16530 Via Esprillo, San Diego,
CA 92127 U.S.A.
Telephone Number: 858-942-2230
This device complies with part 15 of the FCC rules. Operation is subject to the following two conditions: (1) This device may not cause harmful interference, and (2) this device must accept any interference received, including interference that may cause undesired operation.
NOTICE
This notice is applicable for USA/Canada only.
If shipped to USA/Canada, install only a UL LISTED/CSA
LABELLED power supply cord meeting the following
specifications:
SPECIFICATIONS
Plug Type Nema-Plug 5-15p
Cord Type SVT or SJT, minimum 3 × 18 AWG
Length Maximum 15 feet
Rating Minimum 7 A, 125 V
NOTICE
As an ENERGY STAR Partner, Sony Corporation has determined that this product meets the ENERGY STAR guidelines for energy efficiency.
Inhalt
The model and serial numbers are located at the rear of the unit. Record these numbers in the spaces provided below. Refer to them whenever you call upon your dealer regarding this product. Model No. __ Serial No. ____
WARNING
To reduce the risk of fire or electric shock, do not expose this apparatus to rain or moisture.
Dangerously high voltages are present inside the unit. Do not open the cabinet. Refer servicing to qualified personnel only.
FCC Notice
This equipment has been tested and found to comply with the limits for a Class B digital device, pursuant to Part 15 of the FCC Rules. These limits are designed to provide reasonable protection against harmful interference in a residential installation. This equipment generates, uses, and can radiate radio frequency energy and, if not installed and used in accordance with the instructions, may cause harmful interference to radio communications. However, there is no guarantee that interference will not occur in a particular installation. If this equipment does cause harmful interference to radio or television reception, which can be determined by turning the equipment off and on, the user is encouraged to try to correct the interference by one or more of the following measures:
- Reorient or relocate the receiving antenna.
- Increase the separation between the equipment and receiver.
- Connect the equipment into an outlet on a circuit different from that to which the receiver is connected.
- Consult the dealer or an experienced radio/TV technician for help. You are cautioned that any changes or modifications not expressly approved in this manual could void your authority to operate this equipment.
IMPORTANT
If you have any questions about this product, you may call; Sony Customer Information Services Center 1-800-222-7669 or http://www.roy.com/
Declaration of Conformity
Trade Name:SONY
Model:SDM-HS75D
SDM-HS95D
Responsible Party: Sony Electronics Inc.
Address: 16530 Via Esprillo, San Diego,
CA 92127 U.S.A.
Telephone Number: 858-942-2230
This device complies with part 15 of the FCC rules. Operation is subject to the following two conditions: (1) This device may not cause harmful interference, and (2) this device must accept any interference received, including interference that may cause undesired operation.
NOTICE
This notice is applicable for USA/Canada only.
If shipped to USA/Canada, install only a UL LISTED/CSA
LABELLED power supply cord meeting the following specifications:
SPECIFICATIONS
Plug Type Nema-Plug 5-15p
Cord Type SVT or SJT, minimum 3 × 18 AWG
Length Maximum 15 feet
Rating Minimum 7 A, 125 V
NOTICE
As an ENERGY STAR Partner, Sony Corporation has determined that this product meets the ENERGY STAR guidelines for energy efficiency.
Índice
Precauciones 4
(Horizontal y vertical
independiente)
(Horizontal y vertical
independiente)
TTL (logica de transistor a transistor)
The model and serial numbers are located at the rear of the unit. Record these numbers in the spaces provided below. Refer to them whenever you call upon your dealer regarding this product. Model No. __ Serial No. ____
WARNING
To reduce the risk of fire or electric shock, do not expose this apparatus to rain or moisture.
Dangerously high voltages are present inside the unit. Do not open the cabinet. Refer servicing to qualified personnel only.
FCC Notice
This equipment has been tested and found to comply with the limits for a Class B digital device, pursuant to Part 15 of the FCC Rules. These limits are designed to provide reasonable protection against harmful interference in a residential installation. This equipment generates, uses, and can radiate radio frequency energy and, if not installed and used in accordance with the instructions, may cause harmful interference to radio communications. However, there is no guarantee that interference will not occur in a particular installation. If this equipment does cause harmful interference to radio or television reception, which can be determined by turning the equipment off and on, the user is encouraged to try to correct the interference by one or more of the following measures:
- Reorient or relocate the receiving antenna.
- Increase the separation between the equipment and receiver.
- Connect the equipment into an outlet on a circuit different from that to which the receiver is connected.
- Consult the dealer or an experienced radio/TV technician for help. You are cautioned that any changes or modifications not expressly approved in this manual could void your authority to operate this equipment.
IMPORTANT
If you have any questions about this product, you may call; Sony Customer Information Services Center 1-800-222-7669 or http://www.roy.com/
Declaration of Conformity
Trade Name:SONY
Model:SDM-HS75D
SDM-HS95D
Responsible Party: Sony Electronics Inc.
Address: 16530 Via Esprillo, San Diego,
CA 92127 U.S.A.
Telephone Number: 858-942-2230
This device complies with part 15 of the FCC rules. Operation is subject to the following two conditions: (1) This device may not cause harmful interference, and (2) this device must accept any interference received, including interference that may cause undesired operation.
NOTICE
This notice is applicable for USA/Canada only.
If shipped to USA/Canada, install only a UL LISTED/CSA
LABELLED power supply cord meeting the following
specifications:
SPECIFICATIONS
Plug Type Nema-Plug 5-15p
Cord Type SVT or SJT, minimum 3 × 18 AWG
Length Maximum 15 feet
Rating Minimum 7 A, 125 V
NOTICE
As an ENERGY STAR Partner, Sony Corporation has determined that this product meets the ENERGY STAR guidelines for energy efficiency.
Indice
Precauzioni 4
The model and serial numbers are located at the rear of the unit. Record these numbers in the spaces provided below. Refer to them whenever you call upon your dealer regarding this product. Model No. __ Serial No. ____
WARNING
To reduce the risk of fire or electric shock, do not expose this apparatus to rain or moisture.
Dangerously high voltages are present inside the unit. Do not open the cabinet. Refer servicing to qualified personnel only.
FCC Notice
This equipment has been tested and found to comply with the limits for a Class B digital device, pursuant to Part 15 of the FCC Rules. These limits are designed to provide reasonable protection against harmful interference in a residential installation. This equipment generates, uses, and can radiate radio frequency energy and, if not installed and used in accordance with the instructions, may cause harmful interference to radio communications. However, there is no guarantee that interference will not occur in a particular installation. If this equipment does cause harmful interference to radio or television reception, which can be determined by turning the equipment off and on, the user is encouraged to try to correct the interference by one or more of the following measures:
- Reorient or relocate the receiving antenna.
- Increase the separation between the equipment and receiver.
- Connect the equipment into an outlet on a circuit different from that to which the receiver is connected.
- Consult the dealer or an experienced radio/TV technician for help. You are cautioned that any changes or modifications not expressly approved in this manual could void your authority to operate this equipment.
IMPORTANT
If you have any questions about this product, you may call; Sony Customer Information Services Center 1-800-222-7669 or http://www.roy.com/
Declaration of Conformity
Trade Name:SONY
Model: SDM-HS75D
SDM-HS95D
Responsible Party: Sony Electronics Inc.
Address: 16530 Via Esprillo, San Diego,
CA 92127 U.S.A.
Telephone Number: 858-942-2230
This device complies with part 15 of the FCC rules. Operation is subject to the following two conditions: (1) This device may not cause harmful interference, and (2) this device must accept any interference received, including interference that may cause undesired operation.
NOTICE
This notice is applicable for USA/Canada only.
If shipped to USA/Canada, install only a UL LISTED/CSA
LABELLED power supply cord meeting the following
specifications:
SPECIFICATIONS
Plug Type Nema-Plug 5-15p
Cord Type SVT or SJT, minimum 3 × 18 AWG
Length Maximum 15 feet
Rating Minimum 7 A, 125 V
NOTICE
As an ENERGY STAR Partner, Sony Corporation has determined that this product meets the ENERGY STAR guidelines for energy efficiency.
Indices
Precauções 4
Regular a nitidez (SHARPNESS) 14
Alterar a posicao do menu (MENU POSITION) 14
Alterar automaticamente a entrada (INPUT SENSING) 14
SeLECTIONAROidioma do menu no ecrA(LANGUAGE) 15
Regular a nitidez (SHARPNESS)
Regular para augmentar a nitidez do contorno das imagens, etc.
1 Prima o botao MENU.
Surge no cera o menu principal.
Resolucao Horizontal: Max.1280 pontos
The model and serial numbers are located at the rear of the unit. Record these numbers in the spaces provided below. Refer to them whenever you call upon your dealer regarding this product. Model No. __ Serial No. ____
WARNING
To reduce the risk of fire or electric shock, do not expose this apparatus to rain or moisture.
Dangerously high voltages are present inside the unit. Do not open the cabinet. Refer servicing to qualified personnel only.
FCC Notice
This equipment has been tested and found to comply with the limits for a Class B digital device, pursuant to Part 15 of the FCC Rules. These limits are designed to provide reasonable protection against harmful interference in a residential installation. This equipment generates, uses, and can radiate radio frequency energy and, if not installed and used in accordance with the instructions, may cause harmful interference to radio communications. However, there is no guarantee that interference will not occur in a particular installation. If this equipment does cause harmful interference to radio or television reception, which can be determined by turning the equipment off and on, the user is encouraged to try to correct the interference by one or more of the following measures:
- Reorient or relocate the receiving antenna.
- Increase the separation between the equipment and receiver.
- Connect the equipment into an outlet on a circuit different from that to which the receiver is connected.
- Consult the dealer or an experienced radio/TV technician for help. You are cautioned that any changes or modifications not expressly approved in this manual could void your authority to operate this equipment.
IMPORTANT
If you have any questions about this product, you may call; Sony Customer Information Services Center 1-800-222-7669 or http://www.roy.com/
Declaration of Conformity
Trade Name:SONY
Model:SDM-HS75D
SDM-HS95D
Responsible Party: Sony Electronics Inc.
Address: 16530 Via Esprillo, San Diego,
CA 92127 U.S.A.
Telephone Number: 858-942-2230
This device complies with part 15 of the FCC rules. Operation is subject to the following two conditions: (1) This device may not cause harmful interference, and (2) this device must accept any interference received, including interference that may cause undesired operation.

BZ03
I3ROBtJIb:COHKnKopnopeuH AApEc:6-7-35KntaunHaRaba,
UHHaraba-Ky, Tokno 141-0001, RnOH
CtpanaH-npou3BODHTeIb:KtTae
NOTICE
This notice is applicable for USA/Canada only. If shipped to USA/Canada, install only a UL LISTED/CSA LABELLED power supply cord meeting the following specifications: SPECIFICATIONS Plug Type Nema-Plug 5-15p Cord Type SVT or SJT, minimum 3× 18 AWG Length Maximum 15 feet Rating Minimum 7 A, 125 V
NOTICE
As an ENERGY STAR Partner, Sony Corporation has determined that this product meets the ENERGY STAR guidelines for energy efficiency.
Copepknne
Mepbl npedocTopoxhoctn. 4
IeHTnФkaHn DeTaneu n opraHOynpaBneHn. 5
IoproToBka K pa6oTe. 7
IoproToBka Kpa6oTe 1: PaKpoIe noCTaBky .7
IoproToBka K pa6oTe 2: IopKIOUHTe DnCnJIe K KOMNbIoTepy 7
IoproTOBka K pa6oTe 3: IopKIOUHTe Ka6eNb NtAHN 8
IoproTOBka Kpa6oTe 4:3aKpeHJIeHne Ka6eNe u yCTaHOBka 3aJHei KpbIuKN Ha MeCTO. 8
Iodrotobka K pa6ote 5: BkJIIOueHne MOHITopa n KOMNbIOTepa . 8
PerynilpoBka HaKloHa 9
Bb6op BxoDHoro cHnHaJa (KhOnKa INPUT). 9
CmPTOMbI HeNoJaOK I DeiCTBnI NO IN yCTpaHeHIO 18
Texnueckne xapaKTepcntuKn 20
MepblnpedoctoPOXHOCn
MepblpeoTOPOXHOCTn npn NOKJIIOHcHm K ceTN 3JKeKTpOHTaHH
- IVcnoIb3yIte Ka6eIb NITaHnI, NOCTaBJIeMbI C MOHTOpOM.
Pn IVcnoIb3OBAHnI DpyrOro Ka6eIb NITaHnI y6eIITecb B TOM, YTO OH NIOxOJNT IINr IVcnoIb3OBAHnI B MecTHOH CeTI.
DnIy nOKynatenei B CUSA
Pn IVcnoIb3OBAHnI HECOOTBETCTBYIOUeRO Ka6eIb NITaHnI MOHTOp He 6yJeT OTBeHATb 06raTeNbHbIM CTaHdaptam FCC.
DnIy nOKynatenei B BenNKo6pTaHnn
Pn IVcnoIb3OBAHnI MOHTopA B BenNKo6pTaHnn
NOJIb3yIITecb COOTBTCTBYIOUm Ka6eIeM NITaHn IINr BENIKo6pTaHnn.
PpMepbCteBbX BNOK
ДА 100-120В
ПЕМЕСHERGOТOKA
Дам 200-240В
ПЕмЕМОНТOKA
Tobko DnB 240 B nepeMeHHoro ToKa
CetBaP03eTkaDOnJHaHaxOuNTbcBJeRKOoCTyTHOM MeTe B6n3nOT np6opa.
YCTaHOBka
He yctaHaBnBaIte n He octaBnTe MOHTOP:
B MecTax, NOBVerpeHbIX BO3DeIcTBIO BbICOKNX TemnepaTyp, HApnpMep, PdOM C 6aTapeRMN, HarpeBaTeJIbHbIMN BO3DyXOBoDAmN, INN B MeCtAX, rDe BO3MOxHO NOnaDaHne npMaOro COJIHeYHO RCBeTa. Pa3MeueHHe MOHTopa B MecTax, NOBpeRkeHHbIX BO3DeIcTBIO BbICOKNX TemnPaTy, HApnpMep, B ABTomO6nIaX, npInapKOBaHbIX B COJIHeYHO MecTax INN pAdOM C HarpeBaTeJIbHbIMN BO3DyXOBoDAmN, MoKeT INPBeCTN K DeOpMaun KOpNyCa INN K HenCnPaBHOCTM.
B MeCTax, rIe npCyTcByet Bn6paunr nn pe3Kne MExaHueckne BO3dienCTBnR.
PdOM CIO6bIM O6pOuBaHHeM, KOTope N3NyAeT CNJbHOe MaHHTHOe NOne, HAnpImep, TeNeBn3OpAMN INI DpyrMMDOMaHnMMn Pnp6opAMn.
B MecTaX, Tde MoKet cKaIINBaTbCm MHOrO PbIIN, rP3N NII necka, HAnpIMep, PdOM COTKpbITbIM OKHOM NIN BbIXoDM N3 NOMEeHN. EcN yCTpoiCTBO nepeHocNTcNo yNtce, 063aTeJIbHO npIMITE COOTBeTCTBYIOUne MEPbI pEdoCTOpOXHOCn IpOTNB CyueCTByIOUe B Bo3dyXe PbIIN rP3N. B IpOTNBOM Cnyae yCTpoiCTBO MoKet 6bITb 6e3BO3BpaTHo NOBpeJxDeHO.
YcTaHOBnTe CnCTeMy HaPoBHyIO NobEpxHocTb.He
yCTaHaBnBaIte ee Ha HepOBHoi NOBepxHocTn:HaPnMep,
Ha KpaO CToJa.Ecn YacTb CnCTeMb I BbCTynaET 3a KpaN IOBepxHocTn,Ha KOtOpOI OHa YcTaHOBJIeHa,3TO MOKeT CTAb
npuHHo NpAdeHnR, TpaMbI INI NIONMKYcTPOIcTba.
06cnyxmbaHneKpaHa KKd
He octabnIte 3KpaH KKД B MeCTax, rIe Ha Hero naJaET COJIHue, TaK KaK 3TO MOKeT pINBecT N K erO NOBpeXDeHIO. Co6IIOaIte ocTopoXHOCTb npn pa3MeueHm MoHToPA y OKHa.
He ToIkaTne H He capanaTne 3kpan KKHe KnaTe TAAKeIbe npEmdetb Ha 3kpan KK.3To MoKet npBecTu K NCKpNBEnHIO 3kpaHa HnHnCnpabHOCTn NaHeJN KKd.
- EcJIN MOHITOP INCNOJb3yETcB XOIOJHOM MeCTe,TO Ha 3KpaHE MoKET NORBNTCR OCTaTOUHOe N3O6paXeHne.3To He RBAJIeTc HEnOnaIKOJ.3KpaH BO3BpauaTecR K O6bIHyOMy BOCPonu3BeDeHIO,KAK TOnbko TempePaTypa CTAHOBNTcH HopMaJIbHoI.
- EcIn B TeueHne DoIrO BoPemHeN OTo6paXaETCa HEnoDbXnHOe N3o6paXeHne, To Ha 3KpaHe MoKeT HeHaDoIro NoBnTBcR OCTaTOOHoe N3o6paXeHne. OCTaTOHoe N3o6paXeHne CO BpEmHeM IChe3HET.
- NaHeJIb KKД HarpeBaETcBO Bpemr pa60TbI. 3TO He ABnAeTc HenoJaKoI.
PnmeaHne no KKd (KndkoKpncTaJIInueckomy dncnleio)
06patnte BnmaHne Ha To, 4TO 3KpaH KKД n3rotobJeH NO BBICOKOTOOH TexHONORIN. ODAHO HA 3KpaH KKД MORYT NOCTOHH NOBJIATbC HEPbIe NIN CBETlbIE TOKn (kpachIbe, rony6bIe NIN 3eJIeHbIe), a TAKKe HENpabNtBbIe UBeTHbIe NIOcbl IIN JPKHe PNTHa. 3To HE RBLNETCH HEnOnaADKoI.
(3ΦΦeKTHBHOe YnCNo ToeK: 60nee 99,99%)
yxog
-Пелегд УСТКОМ MOHITOPA OБЯЗATEЛьно OTKЛIOUHTe Ka6eJIb NITAHIN 3 pO3eTKN.
- PpOtpaIte 3KpaH KKD MmKoT KAnbI. PpN NcNoB3OBaHN XmMueCkX CpeCTB DnA UcTKn CTekNa He npImeHrIte KxIDKOCTN, COepKaunne aHTNCaTNUeCKNe INn aHaONuHbIe Do6aKn, TAK KaOH MOrY T NOpeDntb NOKpbITne 3KpaHa KKd.
- PpOtpaIte KOpNc, naHeIb n OpraHb ynpAbeHnMaRkoT KaHbIO, CnerKa cmoeHHoB Cna6om pactBope MoUoero CpeDCTBa. He noJIb3yItecB rpy6bIMu UeTKaMn, a6pa3uHBbIMn NaCTaMn IIN TaKIMn pactBopHTenAMn, KaK CnIPT INI bEHNH.
- He cne dyet npikacatbca K dncnneio, ckpeTn nn CTyata b No Hemy octpbIM nnn IeepwaBbIMn PpeMeTaMn (wapNKOBO pyko, OTBePTKo). 3TO MOKET npNBecT N K NOBJIENIO capanIH Ha nobepxHocTn 3IKeKTpoHO-NyueBO Tpy6kn.
- 06paTne BHHMaHHe, YTO o6pa6oTKa MOHITopa TaKIMN HeTyUHMn paCTBOpNTeLAMN, KAK INHCEKTNUIbI, IIN erO DInTeJIbHbIK KOHTaKT C pe3INHOBbIMN IIN BHNIOBbIMN MaTePnaIaMn, MoKeT PnIBeCTN K yXyDWeHIO MaTePnaIIOB IIN CTapeHIO NOKpblTn 3kpaHa KKД.
TpaHcnOpTuPoBka
- OTCoeHInTe OT MOHTopa BCE Ka6eHN N KpeNko 0xbatnte erO o6eHMn pykam. Ecnm MOHTop ynaTe, Bbl MOxete nOlyuHb NOBpeKdEHe nnn 6yDet NOBpeKdEH cAm MOHTop.
-ПипгьбоЗke MOHITOPа ИИн erO DoCTaBKe BpeMOHTHyIO MacTePcKyo NOIb3yIteCb 3aBOJcKO JApTOHHO Kopo6KoI yIpaKOBOuHbIMMaTePnAnamN.
MONTAX Ha CTHe HnHa HeCyUeMpIyAre
Ecnn BbCobnpaTeB 3akpenntb MOHITOp Ha CTHe nn yCTaHOBT bero Ha Hecyuem pbyare, PpeDbapNTbHo npOKOHcyIbTnpyuTECb KBAJIINpCuPObAHbIMn cneuaNtam.
POMHHTe, YTO DnY yCTaHOBKn TAKORO TINa Heo6xOIMo CHrTb 3aDHIIO NaHeIb.
YTNIN3aUNMOHNTopa
He BbIbpaBbAaTe 3TOT MOHHTOp BmecTe C dpyrMM6bITOBbIMN OTXoAMn.
-Флуоресentнаялама,установпеньв 3Tom MOHHTOpe, codepkn ptyb. YTNIN3aUNA DAHHORO MOHHTOPA DOJXHa npoBOIDTBcB CCOOTBeTCTBmC NHCTpyKUAMM MEChtbix caHITapHbIX opraHOB.
IdeHTnФkaZna DeTaJIeN OpraHOv ynpaBHeHn
CM. cTpaHnBCKo6kax dna noJyueHn noDpo6hix CBeHeH.
BbIKIOHATen (NITaHne) IN KHOKNynpaBHeHH HAXOJTCBHN3Y Cnpaba Ha nepeDHe NAHEN MOHTOPA.
BvD cpeepn Ha dncnn
Budc3aHa dncnne
1 BbIKHOaTeJIb HnHdNKaTOp (NTaHne) (CTp.8,16) 4TO6bl BKIOHTb INI BbIKIOHTb INCINe, HAXMITE BbIKIOHTeJIb (NTaHne) BBepx. Korda DnCIIeB KIOUeH, INDkaTOp rOpi3eNEbIM, a Korda MOHITOp BpeXmE 3KOHOMN 3HePIM, OH rOpiT opAHKeBBIM.
2 KhoNka MEHIO (cTp. 10, 11) Θa KhoNka oTo6paKaet nIIN 3aKpbBaet rnaBHOe MeHO.
3 KhoNKn / (ctp.11) 3TN KhoNKn paOtaIOT, KaK KhoNKn / , npn BbI6ope 3NeMeHTOB MeHIO BBINOJIHeHIN HAcTpoKN.
4 Khonka OK (cTp. 11) Θa KHONKa BbIbpaET 3JEMeHT INN pIMMeHReT HAcTpOy B MeHO.
5 KhoNkaC (cTp. 10) Θa KhoNka IcNoIb3yeTcra Ira N3MeHeHRA RpkocTn 9KpaHa.
6 KhoNka INPUT (ctp.9) C NOMOUsbHO 3ToH KhoNk MOxHo NepeKlIOHaTb BXoHOB BHeOeCnHAn MeJy INPUT1 n INPUT2, Korda Dba KOMMbIOTepa NOKJIIOUHeBik MOHITopy.
7 OTBepTne 3aunTHo6JIOKnpOBKn
OTBEPTE 3aHTHOJ6LOKINPOBKN Heo6xOIMO
MCNOHBOBATI INCTEM 6e3ONACHOCTN Kensington
Micro Saver Security System.
Micro Saver Security System - 3apernctpnpobAHbI TOBAPbI 3hak Kensington.
Budc3aHa ducnnei
CHMNMe 3aHIOKpbIky.
8 3aHnKpbuKa(cTp.8)
CHIMITE 3Ty KpbIaKy npn NOdkNIOueHm/OTKIOueHm Ka6enei.
9 The3o AC IN (ctp. 8)
Poioknoute Kaebnb nataHna (npnaraetcra).
10 BxOaHoe rHe3do DVI-D (uΦpOBoR RGB) dIa BXoI (CTp.7)
Yepe3 3TO rHe3IO noDAIOCTC uDpOBoBie BnDEOCnHbI RGB, COOTBeTCTByIOUne DVI Rev.1.0.
11 Bxodhoe rhe3do HD15 (aHaNoorOBbR RGB) (cTp.7)
Yepe3 3TO rHe3do nOdaOTcA anaIorOBb BnDEoCnHnBnRGB (0,7 Vp-p, noNoXnT.) n CnHaNbl CNHXPOHn3aunn.
Pojrotobka pa6oTe
IpeepncnojboaHm MOHTopa npOBepbTe haJIyue B Kopo6ke cneyuux npHaJnxHocTei:
-ДиспелжКД
Ka6eIb nTuHaN
Ka6eIb BnDeocnHaHd15-HD15 (aHaIorOBbR RGB)
- Ka6eIb BnIeOcnHana DVI-D (uIcIpPoBn RGB)
XomyTДЯкавел徳
- CD-ROM (nporpammbi DnWindows n Macintosh, nHCTpyKuIN NO 3Kcnnyataunn T.D.)
-「apaHTnHbT TaHO
PykoBoDCTBO no 6bIcTpo yctaHOBKe
I OndKJIoueHne K KomnbTepy IBM PC/AT nnn COBmecTUMOMY C HMM
IpoKJIIOUeHHe K KOMNbIOTepy Macintosh
PnnoKIOHcHm 3TOO MOHITOPa KOMMbTepy Macintosh nNoB3yIe npn Heo6xoDMOCTHnpuNaraEmb aanTep dMaicintosh (He BxOHT B KOMNKeT). IpeXoHNK dnaMacintosh Heo6xoDIMO noKIOHcA Tb K KombTepy do NoKIOUeHHKa6EJI.
2 yCTAHOBNTe 3aHIOKpbIiKy Ha MeCTO.
Peped BbInoJIHeHnEM peryIInpoBOK
IIOcOeINHInTe MOHInTop K KOMNbIOTepy, a 3aTeM BKIOUHTe INX.
IIOOJXITHe MeHHee 30 MNHyT NepeBbInOpHEHEmperyNipOBOK nAn nonyehnHaunnyuNX pe3yNbTaTOB.
BolbawaracbHAcTpoekMOHTopa npOn3BOJNTCA NOMOsbIO 3KpaHHORo MeHO.
Hac troponka Heo6xOdmoI npKocTn
HaKMa KONky MoXHO N3MeHHTb RpKoCTb 3KpaHa.
Pn KaKdOM HaxaTN KONKu 3KMM 3N3FeTcra
CneyUOUM 6pa3OM.
PYHAR→RPKAR→CPEHRA→TEMHA→PYHAR...
Pn n3MeHn npaMeTpapeXnMa I RPKA K
TEMHAr pKocTB 3kpaHa CHXKaETcR.
Pn BbIbope PYHAR MOxHO n3MeHArb yPoBeHb NOcBETKn,
Haxmam KHONK TAK Xe, KaK npn BbIbope
IOCBETKA c NOMOuMo MeHO.
Tolko KOrda nna pexnma cTaHOBneHO 3NaueHne PYHAR,6ydy TocTyHbI NyHKtbl MeHIO NOCBETKA KOHTPACTn RPKOCTb (cTp.11). PnBbOppe 3NaueHn TEmHAn Notpe6NeHne 3Heprn cnXkaetc (cTp.16).
IepemeueHne no 3kpaHHOMy MeHIO
Haxmte KhONky MEHIO nOTo6paKeHNHa 3KpaHe rnaBHoro MeHIO (MENU).Cm. cTp.11 dNnNoyehnnoDpO6bIx CBeDeHN O KHOnKe MEHIO.
C nOMOJIbKO HONOK / n OK BbIbepnTe 3HaKU, yKa3aHHbIe Ha pncyHke rnaBHoro MeHIO. Ha 3KpaHe nOBnAEtCh OAnO n3 CneIyoIux MeHIO: c 1 no 10. YdEpxkBaJ HaxaToJ KHOky ,npOKpyTInTe MeHIO, nOK He nOBRTc3HaKn B MeHIO c 9 no 10.Cm. cTp. 11 dJa nOnyehnJ dOnonHntBJhIx CBeHeHn o6 nCnoJIb3OBAHN KONOK / n OK.
1 NODCBETKA (cTp.11) Bb6epnte MeHIO NOCBETKA,HTo6bl OTperynpoBaTbApKocTbN NOCDBETKY.
2 KOHTPACT (ctp.12) BbI6epnte MeHIO KOHTPACT, yTo6bl HAcTpOuTB KoHTpactHOCTb 306paKeHnA.
3 RPKOCTb (ctp.12) Bbl6epnte MeH0 RPKOCTb, yTo6bI OTpeYnipoBaTb RPKoCTb N3o6paKeHn (ypoBeh cepHoro Ubeta).
4 3KPAH (cTp. BbI6epHTe MeHIO 3KPAH, T06bI OTperyInpOBA Tb pe3KoCTb (pa3a/War) n noJoxHeNe (no Ropn30HTan/No BEPTnKaJI) n306paXeHNA.
5 UBEc (cTp.13) BbIbepHTe MeHIO LBT, YTO6bI OTpeyINPOBaT bETOBYIO TEMNEpaTyP yIO6paXKeH.N.Pn 3ToM HAcTpaNBAOTc RbETOBBIE TOHa Ha 3KpaHe.KoJaB MEHO LBT BbIpaH npaMeTp sRGB, HeNb3a BblOJIHbT HacTpoKy npaMeTPOB MeHO KOHTPACT, RPKOCTb INI GAMMA.
6 GAMMA (cTp. 14) BbIbepHTe MeHIO GAMMA, UTObI IN3MeHHTb LBeTobOu OTTeHOK N3O6paXKeHnA.
7 PE3KOCTb (ctp.14) Bbl6epnte MeHIO PE3KoCTb nIa perynipOBn pe3KocTn KpOMOK n306paJxehn.
8 IO3 MEHIOcTp.14) BbIepeNTe MeHIO IO3 MEHIO, YTO6bI N3MeHHTb NOJOKeHHe MeHIO Ha 3KpaHe.
9 PACNO3H BXODA (ctp.14) MoHTOp aBTOMaTnueckn 06HapKbBaET BxOdHoi CnHaC BxOdHoro pa3bemaI nepeKIOuAeTCa Ha Hero, npexJe cem MOHTOp npeiDeT B peKIM 3KOHOmN 3Heprn.
10 LANGUAGB BbIepeNTe LanguAge, 4TO6bI N3MeHHTb 83bIK, INcNoJIb3yEmbl DnI OTo6paXeHn MeHIO n coo6uHen.
11 Dpyne MeHIO (ctp. 15) HactpoTte cneDyUoUe 3JIeMeHTbI MeHIO. C6POC -EJIOKIPOBKA MEHIO
IcnoIb3ObaHne KhoNOK MEHIO, / n OK
1 OTo6paXeHne rJaBHoro MeHIO (MENU). HaxmTe KhoNky MEHIO nIra OTo6paXeHnHa 3KpaHe rJaBHoro MeHIO (MENU).
2 Bb6epnte MeHIO, B KOTOPOM Heo6xOJMO BbINOJHHTb noctpoKy. HaxMITE KHOKN / OTo6paKeHHaHyKHOMeHIO HaxMITE KHOKN OK dNBA bIb6opa 3nemeHTa MeHIO.
3 BbINOHNHe NOcTpOy MeHIO. HaxMMTe KHOKN /↑ nIaB bINONHeHn HaCTpoKn, 3aTEM HaxMMTe KHOKN OK. Pn HaxKaTm N KO hAcTPOKn COxpaHIOrTa, a DnCnJIe BO3BpaaeTcK npdebldyMeMy MeHIO.
4 3akpoTe MeHIO. Haxmnte KhoNky MEHIO oINH pa3 dIra Bo3BpaTa B HopMaJIbHbI peXIM npocMToPa.EcII KhoNk He 6bln HaKaTbI,TO 3KpaHHoe MeHIO ABtOMaTHueeCKn Ncye3aet np6Ibn3nteJbHO yepe3 45 cekyHd.
C6poc HacTpoek
C6pocntb HacTpoKIMoXHc NOMOaBIO MeHO CBPOC CM. cTp.15nIPOyEHNIOpO6hIX CBeDeHNO BbINOJIHeHN c6poca HAcTpoE.K.
Peru npobka noocbETkn (POnCBETKA)
Ecn 3KpaH CnWkOM Apkn, HAcTpoTe NoCBeKy, YTo6bIC Hm 6blno ydo6hee pa6oTaB.
PpmeHne IIOcBETky HeIb3HaHCTponTb, KOrJa dIrapeXIMa;TaHOBNeHO 3NaueHne RPKAR, CPEDHAR mN TEMHAr (ctp.10).
1 HaxmTe KhoNky MEHIO. Ha 3KpaHe NOBnTCr IaBHOe MEHIO.
2 Haxmte KhoNkN / Bb6opa:O (IOCBETKA) Haxmte KhoNky OK. Ha 3KpaHe NOBNTcM EMHIO NOCBETKA.
3 Haxmte KONKn / ,YTO6bI OTpynpoBaTb ypoBeH nOcBETKn, Haxmte KONky OK.
PerylnpoBka KOHTpactHOCTN (KOHTPACT)
HaCtpoTe KOHTpAcTHOCTb N3O6paKeHnA.
PnmeaHne
KoHTpactHocTB HeJIb3HaCtponTb, KOrda nIpeXnma1yCTaHOBHeNo 3NaHeHne RPKAR, CPEHRA nn TEMHAR (ctp. 10).
1 HaxmTe KhONky MEHIO.
Ha 3KpaHne NOBHTCraJABHOe MeHIO.
2 HaxMnte KhoNkI / IaBb6opa (KOHTPACT) n HaxMnte KhoNky OK.
Ha 3KpaHe nOABNTcMaHIO KOHTPACT.
3 HaKMnTe KHONKn / ,YTO6bI OTPeryNIpOBA Tb KOHTpactHOCTb,HaKMnTe KHONKy OK.
Perylnpobka ypOBHЯ chehoro zBeta n3o6paXeHnA (APKOCTb)
HactpoTe npKocTb n06paXeHHa (ypoBeHb YepHoro).
PpmeaHne
Rpkocb HnB3HaCtpoTb, KOrdaIpyeKmA- TAtHOBNEHO 3NaueHne RPKAR, CPEHRA nn TEMHAr (ctp.10).
1 HaxmTe KhONky MEHIO.
Ha 3KpaHe NOABNTCA rnaBHOe MeHIO.
2 HaxMnte KhoNk / dIaBbIbOpa (RPKoCTb) n HaxMnte KhoNky OK.
Ha 3KpaHe NORBNTcMHeIO RPKOCTb.
3 HaxMNTe KONKn / , YTO6bI OTpeyInpObaTb RPKoCTb, HaxMNTe KONky OK.
PerynpoBka pe3Koctn u ceHTpOBKn n3o6paXeHn (3KPAH) (ToIbKO aHaIorOBbI cnHaI RGB)
Функца ABTomaTnueckoPerylnpOBKn KauectBa n306paXeHn
Pn npneMe BxOndoro CnHaJa MoHntOp
aBtOMaTHueCKn peYInpyET NOIOKeHne n
pe3KocTb N3o6paXeHn (Fa3a/la) n
oBeCneuBaet YEtKoe N3o6paXeHne Ha 3KpaHe
(cTp.16).
Ppmeuahne
EcnnakTNBn3NPOBaHaФyHKnAABTOMaTHeCKo peryNpO8Kn KaueCTBa n3O6paKeHnA, pa6OtaeT TOnbKO BbIKNoHouaTeNb (NTNAHHe.
Ecnn npn nCnoB3OBAHnn FyHKcnn ABTomatueckoeperynnpOBKn KaeeCTBa N3O6paXeHH 3TOro MOHTopaN3O6paXeHHne HAcTpoEHO He NoIHOCTbIO
MoxHO BbINONHtB daIbHeNHyO ABTomAtueckyHO HAcTpoiKy KaueCTBa N3o6paXeHnI Ia TeKyuIero BXOHDoro cnHaHa. (Cm. onncahne fynkun ABTOΦOPMAT nHexe.)
Ecnn Tpe6yeTc BbINOHNHTb DonoJHnTeNbHyOp perynipOBky KaecTba N3o6paKeHHa
MoxHO BpyHryO OTPeYnnpOBaTb pe3KocTb (pa3a/la) n noJoxHeHne (no rOpnsOHTaN/no BepTnKaA) n3o6paxHeHn.
3TN HAcTpoKn COxpaHrOToC B NAmTn N aBtOMaTnueckN Bbl3bIAoTcR KaKdbI pa3, KOrDa dncnne IOnyuaet TaKo JKe BXoHDNo CmHaJ.
Bo3MOxH0, 3Tu NaCTpoKn npuDeTcN NOBTOMb, ecn N3MeHeH BXoDHO CNHaI NocNe NOBTOpHOrO NOkLIOueHnA KOMNbToTepa.
Дальнше abTomatnueckne HabtpoIGN KauectBa n306paXeHnЯ dIЯ TeKyujo BxOdHoro cnHaJa (ABTOΦOPMAT)
1 Haxmte KhoNky MEHIO.
Ha 3KpaHnOBaTc rJaBHOe MeHIO.
2 HaxMMTe KONKn / nla BbIbopa (3KPAH) HaxMMTe KONKy OK.
Ha 3KpaHe NOABNTCA MeHIO 3KPAH.
3 HaxMMTe KHONK↓/↑ДЯ Bbl6opa ABTOΦOPMAT n HaxMMTe KHONKY OK.
BbINOHNHTe COoTBcTcByIOUne HacTPOKn Fa3bl 3KpaHa, WaI N NOLOXeHn IO TOpN3OHTaJIb/BePtNKaJIIN DJIa TeKyuero BxOdhoro CnHana I CoXpAHnte IX.
4 HaxMNTe KHOKN / ДЯ BbIbOpa 乌HaxMNTe KhoNky OK.
CHOBA NOBHTCA 3KpaH MeHIO.
PerynnpOBka pe3KocTn 3o6paXeHnBpyHyIO (A3A/UA)
Pe3KocTb H3o6paXeHnM OxHnO TpeRyIIpOBaTb CneDyUoMM o6pa30m.
1 YctaHOBHTe pa3peSeHne 1280 × 1024 Ha KOMNbTepe.
2 BCTaBbTe KOMnAkr-ДИСК.
3 3anyctnTE KOMnAKT-DnCK, yKaXnTe perNoH MmOeJIb n OTo6pa3nTe TectOBbI mAs6nOH. DnA Windows
BbIbepeTe [Utility] [Windows]/[Win Utility.exe].
ДЯ Macintosh
BbIepeNTe [Utility] [Mac]/[Mac Utility].
4 HaxmTe KhoNky MEHO.
Ha 3KpaHne NOABNTcraIaBHOe MeHIO.
5 HaxMnte KhoNkI / dIaBbIbopa (3KPAH) n HaxMnte KhoNky OK.
Ha 3KpaHne NOBHTcMeHIO 3KPAH.
6 HaxMnte KONKn / dnn BbIbopa A3A n HaxMnte KONky OK.
Ha 3KpaHe NOBuTcMaHIO A3A.
7 HaxnmaTe KhONK / , noka ropn3oHTaIbHbie NOLOcBi He cTAHyT MUNHmAbHbIMN.
Otperynpyte TaKIM o6pa3OM, qTo6bl rOpu3oHTaIbHbie noIocbl 6blMNHMmaNbHbIMN.
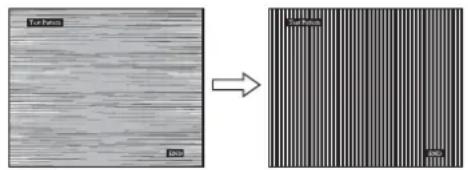
8 Haxmte KhoNky OK.
BepHntecb MeHIO 3KPAH.
EcHnHaBcEM3KpaHe BnDhBbBepTnKaIbHbIeNolocbl, OtperyInpyTe war,BblOnlHbCneDyIOuue deiCTBna.
9 HaXMMTe KONKn / nBbIbopa IaI n HaxMMTe KONky OK.
Ha 3KpaHe NOBNTcMeHIOU
10 HaxmMaTe KONKn / nOKa He Ncye3HyT BepTKKaJbHbe NOIOcbI.
Otperynpyte TaKIM 6pa3OM, YTO6bI BepTKaJIbHbIe noJocblcye3nn.
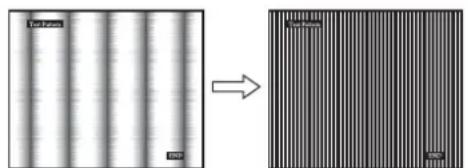
11 Haxmte KONky ENHa 3KpaHe, YTO6bI OTKIOHHTb TECTOBbI WAbJIOH.
12 Haxmte KhoNky OK.
BepHTecb B MeHIO 3KPAH.
13 HaxmTe KhoNkN / nBb6opa n HaxmTe KhoNky OK.
CHOBA NORBNTCA 3KpaH MeHIO.
PyuHa peryInpOBka noLoXeHn H3o6paXeHn (TOPI3 LHTP/BEPTIK LHTHP)
EcInn 306paXeHne paCnoLoXeHo He no ceHTpy 3KpaHa, OtperyIpyTe ceHTpObKy n3o6paXeHna cNeDyUcIM o6pa30M.
1 YcTaHOBnTe pa3peSeHne 1280 × 1024 Ha KOMnbTepe.
2 BCTaBbTe KOMnAaKT-DnCK.
3 3anyctnte KOMnakT-DnCK, yKaxnTe pernoH Mmoelb n OTo6pa3nte TectObbl W6NoH.
DnWindows
BbIbepeTe [Utility] [Windows]/[Win Utility.exe].
MaTosh
BbIepeNTe [Utility] [Mac]/[Mac Utility].
4 HaXMMTe KhoNky MEHIO.
Ha 3Kpahe NOBHTCA TnaBHOE MeHIO.
5 HaxMnte KONKn / nA BbIbopa (3KPAH) n HaxMnte KONky OK.
Ha 3KpaHne NOBHTcMaHIO 3KPAH.
6 HaxMMTe KHOJIKI / BbBb6opa TOPN3 CEHTP nn BEPTNK CEHTP n HaxMMTe KhoNky OK. Ha 3KpaHe NoRbNTcMaHIO TOPN3 CEHTP nn BEPTNK CEHTP.
7 HaxMMTE KHOKNI / nIepeMeueHnTecTOBOO 1a6JHOHa B ceHTp 3KpaHa.
8 Haxmte KONky [END] Ha 3KpaHe, YTo6bl OTKnIOHTb TECTOBbl WAp6JIOH.
9 HaXMMTe KhoNky OK.
BepHntecb MeHIO 3KPAH.
10 HaxMHTe KhoNkN / nBb6opa n HaxMHTe KhoNky OK.
CHOBA NOABNTCA 3KpaH MeHIO.
Подстponka CBeTOBOI Tempepatypbl (LBT)
Moxho Bb6paTb ypoBeHb CBeTa 6eIoro nOJI N3o6paKeHHn I3 CNeIyUOxN HAcTpoE KCBETOBON TempeaTypbI NO yMOJUHaHHIO.
Takke npn Heo6xOIMOCtM MoXHO ToHOb HAcTpOnTb UBeToBvIO TempepaTyP.
1 HaxmTe KhONky MEHIO.
Ha 3KpaHne nOBuTcra TaBHOe MeHIO.
2 HaxMnte KONKn / nBb6opa (LBT) n HaxMnte KONky OK.
Ha 3kpAne noBntc MeHIO LBT.
3 HaxmTe KhoNKn 12 nBb6opa Heo6xOaMOn ΚBeTOBOI TemnepaTypbl, a 3aTeM HaxmTe KhoNky OK.
Pn yMeHbWeHH TEmnepaTpyb c 9300K (HaCtpoKa no yMOnuHaHIO) Do 6500K CInHeBaTbIe OTTeHN B 6eNOM ZBeTe 6yDyT CmEHATbCA KpaCHOBaTbIMN.
Korda nna napameTpapkocTu Ha 3KpaHe BbIbpaHO 3NaueHne "PYHAR", MoXHo BbIbpaTb UBeTObyo TemnepaType "sRGB."
При Вьборе napametpa "sRGB" Habстpoиka ueBaTe 6удетВьнолпена corlacho npocpuiio sRGB. (MодьсмeшеницьETOB sRGB (kpachn-3eileHbI-NCHIN) ABJIeTcN CTaHdapThbIM npomblIeHHbIM npOTOKoIOMДЯ ONICAHN CBeta N3O6paXeHIN B KOMlbIOTepHOnnpOdykuzin.) EcnB bIbpan napametpr "sRGB", cBeTobIeHacstpoiKOMmbIOtepa DoJxKhIy cTaHaBnBaTbCB A COOTBETCTBn C npocpuiem sRGB.
PpmeaHn
- Ecni noCooeaHHeHH KOMnBtoper Nnn KaKoe-NiOo Dpyroe oobopyoBaHne He aRbIaTcOBMeCTmblc npoDfne mSRGB, Ubet He ydaTcHACHTponb B COOTETCBN C npOoHne sRGB.
Korda B MeHO LIBET BbI6paH npaAMet sRGB, HEnb3a BbINOnHnTb HacptpoKy npaAMetpoB MeHO KOHTPACT, RPKOCTb INI GAMMA.
ToHnHa HAcTpoKa UBeTOBOI TempeaTypbI (PYHAR HACTP)
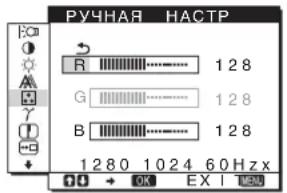
1 HaxMnte KhoNk n/↑ nIa BbIbopa HACTPOIKA n HaxMnte KhoNky OK.
Ha 3kpaHne noBnTc MeHIO PYHAR HACTP.
2 HaxMHTe KHONK / ,YTO6bI Bb16paTb R (KpachbI) NnB (CnH),a 3aTEM HAXMHTe KHONKY OK.3aTEM HAXMHTe KHONK / dNHaCTpoiKN UBeTOBOI TEMNEpatpybl, a NOTOM HAXMHTe KHONKY OK.
NockoIbky 3Ta HacTpoKa CBeTobO Tempeatypbl N3MeHHeTcra NyTem yBEnuYeHn nn yMeHbWeHn COCTaBnaIOxR n B OTHocTeJIbHO G (3eJeHb), COCTaBnaIOuaG octAetcHn3MeHnO.
3 HaxMnte KONKn / dnn Bb16opa 3nemeHt a 3aTEM HaxMnte KONky OK.
Hobar hactpoika zBeTa coxpaHTcB namrN dna 3nementa PYHAR n6ydet Bbl3bBaTcBn3 namrN kaxdbi pa3 npn Bbl6ope 3nementa PYHAR. Ha 3kpane noBHTc rnaBHOe MeHO.
N3MeHeHne HacTpoKn rAMMbI (GAMMA)
Moxho CONOCTaBt bZeTOBoI OTteHOK n3o6paXeHnHa 3KpaHe C ZeTObBIM OTteHKOM n3o6paXeHnOprInHa.
1 HaxmTe KhoNky MEHIO.
Ha 3KpaHe nOBuTcra INaBHOe MeHIO.
2 HaxMHTe KONKn / nBbIbopa (GAMMA) n HaxMHTe KONky OK.
Ha 3KpaHe NOBITcMeHIO GAMMA.
3 HaxMMTe KhoNk / ,YTo6bI Bbl6paTb HyXHbIpeXMM, HaxMMTe KhoNky OK.
PereynipoBka pe3KocTn (PE3KOCTb)
PeryInpOBKa BbINOJIHReTc dЯ yBeJIuYeHnpe3KocTn KpOMOK n3o6paJKeHn n T.d.
1 HaxmTe KhONky MEHIO.
Ha 3KpaHe NOBnTcraJnABHOe MeHIO.
2 HaxMnte KONKn / dIa Bb6opa 3JeMeHTa (PE3KoCTb) n HaxMnte KOnKy OK.
Ha 3KpaHe NOBHTcMeHIO PE3KOCTb.
3 HaKMnTe KHONKn / ,YTO6bI OTPeryJnHPOBaTb pe3KOcTB, HauKMnTe KHONKy OK.
I3MeHeHne IIOJKeHn 3KpaHHOro MeHIO (IO3 MEHIO)
Moxho n3MeHnTb noLoKeHne MeHIO, ecn oHO 3aropaxuBaet 136paXeHne Ha 3KpAhe.
1 HaXmTe KhoNky MEHIO.
Ha 3KpaHnOBBnTc rnaBHOe MeHIO.
2 HaxMMTe KHONK↓/↑ДЯ BbI6opa (ПОЗ MEHIO) И HAXMMTe KHONky OK.
Ha 3KpaHe IOBNTCA MeHIO IO3 MEHIO.
3 HaxMMTe KONKn / DnBb6opa Heo6xOuMOro nIOJoxEHHa, a 3aTeHaxMMTe KONky OK.
IMeetc TpN NOnOKeHnI dIe BepXHe, cpeHne I HxHe yactn 3KpaHa COOTBeTCTBeHHO.
A B T O M A T N U C E K O E N epeKJI U O Y e H N e B X O D a (PACN03H BXODA)
Ecnn Bb6paTb 3NaueHne ABTOPACn BKn B MeHIO PACNO3H BXODA, MOHTOP aBOMaTHNeCKn O6hApYKNT BXoHOH CnHaC BxOJHO rpoa3bema NpeKeKNUOTcHa Hero, npexJeem MOHTOp nepeeIET B pexm 3KOHOMN 3Heprnn.
1 Haxmte KhoNky MENU.
Ha 3KpaHe NOBuTcra TnaBHOe MeHIO.
2 HaXMMTe KONKky ,HTO6bl BbIb6paTb (PACIO3H BXODA), 3aTEM HaXMMTe KONKky OK. Ha 3kpaHe NOABJIeTc MeHIO PACIO3H BXODA.
3 HaxMnte KONKn / ,YTO6bI Bb6paTb HyXhBi peKm, n HaxMnte KONky OK.
- ABTOPACJI BKJI:
EcHnHa BbIbpaHHOM BxOdHOM pa3bEmoCTByET BXOHOH CnHAn IINecnBxOHOH pa3bEM BbIbPaETcC NOMOsbKHOKN INPUT Ha MoHTope H a 3TOMpa3bEmoCTByET BXOHOH CnHAn,Ha3KpAne NOBHTcCOo6eHne (CTp.17)MOHTopaBTOMaTNeCKnPPOBepNT HANuHEBXOHOr CnHAnla Ha DpynX BxOdHbIXpa3bEmax N 3MeHNT BXOD.
PnN3MeHmBxOda BbIbpaHHbBxOHO pa3bEm OTo6paxaETcB IeBOM Bepxhem yrny 3kpaHa.
PnOTCYCTBmBXODHORO CnHaJAMoHITOp aBTOMaTHeCKN NepexoDNT BpeXm 3KOHOMN 3Heprnn.
- ABTOPACJI BblKI:
AbTomatueeKoe n3MeHeHne BxOda He BbIIOJIHReTc.HaxMITE KHOJky INPUT n3MeHeHHn BXoHOro pa3bema.
BbI6Op Ra3bIka B 3KpaHHOM MeHIO (LANGUAGE)
Moxho N3MeHbTb3bK, NcNoJIb3yeMbI dJa OTo6paKeHn MeHIO N COO6eHn Ha 3Tom MOHTope.
1 HaxmTe KhoNky MEHIO.
Ha 3KpaHne NOABNTcra JnaBHOe MeHIO.
2 DePKnTe KONky HaxKaToI Do noABJeHn8 3HaUKa Heo6xOuMOro napaMeTpa.
3 HaxMMTe KONKn / DnBb6opa (LANGUAGE) n HaxMMTe KONky OK.
Ha 3KpaHe NOBHTcMHeIO LANGUAGE.
4 HaXMMTe KONKn / , YTO6bI Bbl6paTb Ra3bIK, HxMMTe KONKy OK.
- ENGLISH: Aŋrπηικκη
- FRANÇAIS: Φρaúʒεκnǐ
- DEUTSCH: Hemeukn
- ESPACOL: ИсторICAL
ITALIANO:ITaJIbAHHCKM - NEDERLANDS: Голладский
SVENSKA: Shevelds
-PyCCKN
图HCKN
中Kntaickn
EcnBxOndhie CnHbI He COOTBeTCTBYOT HN ODHOMY N3 PpeDbapntelbHO yCTaHOBJIeHHbIX Ha 3aBOde peKIMMOB
Pn npneMoHITOpOM BxOJHO RnHa, He COOTBETCTBYUeRO HN ODHOMY N3 PpeDbapNTbHo yCTaHOBJEHbIX Ha 3aBOe peKIMOB, AKTNb3npyETcA yHKu aBTOMaTNUeCKo peyINpOBKn KaeeCTBa n36paXeHH MoHTOPa, KOtOpA ObecneHuBaET NOCTORHH QeTKoe n36paXeHHe Ha 3kPaHe (B CNeDyUux DmAna3OHax qACTOT CnHXPOHN3auM MoHTOpA):
Yactota ropu3oHTaIbHOn pa3BepTkN:
28-80KΓ
YactotaBepTkaJIbHOpa3BepTkn:
48-75
T
I03OMy, KOrda Ha MoHITOp NepBbI pa3 NoCTyNaET BxOHOcHnHaJI, He COOTBeTCTByUoNHI ONDMOY I3 npeDbapntelbHO yCTaHOBJIeHHbIX Ha 3aBODe peXIMOB, dIa OTobpaKeHHaI3o6paKeHHaI Tpe6yEtCA BoJIbe BPemEH, Yem OBiHuHO. DaHbIe 3TOI HAcTPOIKN ABTomATuYeCKN CoXPaHrHTCBA NaMrtN, PO3OMy B CNeDyUoNII pa3 MOHITOp 6yDet pa6oTaTB TaK, KaK pRn PpMe CnHAIOB, COOTBeTCTByUoNIX ONDMOY I3 npeDbapntelbHO yCTaHOBJIeHHbIX Ha 3aBODe peXIMOB.
PpmeaHne
HactpanBaTb unpboBOn CnHaN RGB c BxOdnoro pa3beMa DVI-D nBXA0DA1 HET Heo6xOIMOCTN.
B cnyae perynipobkn pa3bl, wara n noLoKeHHn 3o6paxhen BpyHyIO
ДЯ HeKOTOpbIX BXoDHbIX CnHAnOBФyHKUINABTomATuCeCKOpeRyIIpOBKn KaeCTBa I3o6paKeHN 3TOOMOHITOPa MOKeT He Do KOHua HAcTPOINb NOLOKeHneI3o6paKeHN, p43y u WAr. B 3ToM cNyae 3Tu HAcTPOIKyMOxHO BbINONHtB BpyHyIO (cTp.12).EcIn HAcTPOKNycTaHOBJIeHb BYpHuO, OHn COxPahHOTcB NAmATn KaKNoJb3OBAteJIbckNe peXkIMbl N ABtomATuCeCKN BbJ3bIBaOTcKaKdIb pa3, KOrDa Ha MOHTOp NoCTyNaOT TaKne XeBXoDHbIE CnHAnbl.
PpmeaHne
EcniakTNBnIPoBaHaФyHKaABTOMaTHeCKOpeRyIpOBKn KaecTBaN306paXeHn,pa6oTaETToIbKO BblKIOuOteIb(NTaHne)
YcTpaHHeH HenCnpaBHOCTeI
PpeKJe Yem ObaTnTbC B Cnyk6y TexHnuecko NODepKKn, O3HaKOBtEcB C daHHbIM pa3dEnOM.
3KpaHbIe coo6ueHnIa
EcHTo-To He B NopAKe Co BXOHN CnHAnOM,Ha 3KpaHe NOBnEaTc OAno H3 CneIyUOnx COO6eHn. Dnay yCTpaHEnHnOJaKn CM. pa3dE "CmNTombI HenOJaDOK n DeiCTBnNo Ix YCTpaHEnHIO" Ha cTp.18.
EcnHa 3KpaHne NOBJIaETc COo6ueHHe HEDONYCT PAPPEKIM
3To yka3bibaet Ha To, YTO BXOHN CINHAN He COOTBETCTBYET XapaKTePncTnKAM MOHITopa. PpOBepbTe cNeDyIOUee.
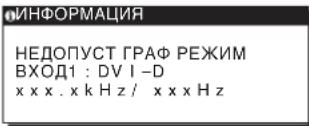
EcnHa 3KpaHe OTo6pKaaeTcH“xxx.xkHz/ xxxHz"
3To yka3bIbaet Ha To, YTO JIN6O YaCTota Ropn3oHTaJIbHOJ
pa3BepTKn, JIO6 YaCTota BepnKaJIbHOJ pa3BepTKn He COOTBeTCTByeT XapaKTePncTnKaM MOHITopa.
Unpbl O3HaJaOT YaCTObl Ropn3oHTaJIbHOJ
BepnKaJIbHOJ pa3BepTKn TeKyueero BXoHOrO CnHaJa.
EcnHa3KpaHe OTo6paxaetc“PA3PEUHEHNE>1280 ×1024
3To yka3bIbaeT Ha To, 3To 3To pa3peWeHne He COOTBeTCTByeT XapaKTePncTnKaM MoHtOpa (1280×1024 nnn HnKe).
EcnHa 3kpane noBnTc coo6ueHne HET CnHAlA
3To yka3bIbaET Ha TO, YTO B HAcTOraMIM MOMENT CINHaJ He noJaETcA.
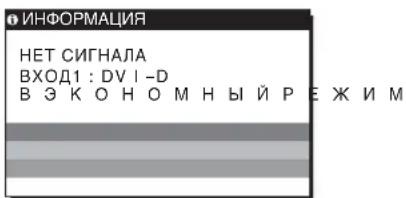
B 3KOHOMHbI PEXKIM
PpimepnoYepe3 5cekynd nocne OTo6paXeHncoo6ueHn MOHTOP nepeiDeT B pexm 3KOHOMn3Heprnn.
EcnHa 3kpane OTo6paxaetc coo6ueHne KABELb HE NOdkIIOUey
To yka3bIbaeHa To, 4To Ka6enb BnDeocirHana OTKnIOueH.
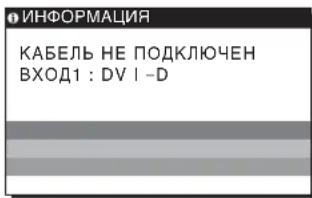
Cnmtombi Henoiaok n DeicTBna NO uX ycTpaHeHIO
Ecn HnnoJa B03HkaetBpe3yIbTaTe NoKIOUeHHMOHTopa K Komblotepy JIN dpyromy 6opuydoBaHIO, obaTneCk HCTpyKuN no 3Kcnnyaataun daHHoro 6opuydoBaHn.
Pa3mepn06paXkEHa:19,0
IIOHMOB
ΦopMaT BXOДHOrO CnHana
Paboya yactota RGB*
No ropnzohtani:
28-80K(aHaIIOBbRGB)
28-64K(uΦpOBoR RGB)
NoBepTnKaIa:
Pa3peuHHe NTo rOpun3oHTaJIM:MaKc.1280
TOUeK
ItoBepTikann:MaKc.1024
CTPOKU
YPOBHN BXOHOHOro CnH
AhaIorOBbBnDeocnHaN RGB
0,7Vp-p,75Ω,
NOIOXKHTeBHyB
CnHnA CNHXPOHn3aun
ypoBeHbTTL,2,2KΩ,
NIOOKHTeHbHbI INN
OTPNUaTeJIbHbI
OTDeIbHaNo TOpu3OHTaII
И ВERTIKAKJI
LudpobovcunHanRGB(DVI):
TMDS (OДно coeДинeHne)
Tpe6oBaHnK nICTOUHnky nITaHn
100-240B,50-60T
MAKC.1,0A
Iotppe6nemam MoHOCtB
MAKC.50BT
Paboya temepaTypa
5-35°C
Pa3mepbI (uipnHa/BbICota/rny6nHa)
DcnnneBepnKaJIbHbI
Pn6J.435×418×146MM
Mcca Pnp6J.6 Kr
Plug & Play DDC2B
PpHaJnEeKHOCTn CM. cTp.7.
-
PeKOMeHnyembI peXIM cINxpoHn3aUIn NoTROPUN3OHTaII N BepTNkaJI
-
UmpnHa Hmnybca ropn30HTaNbHO CnHxpoH3aUnn DOnJXHa 6bTb 6oNbue 4,8% o6uero nepnoDa rOpn30HTaNbHO pa3BepTK nN 0,8 MKC,B 3aBNCIMOCTN OT TORO, KOTopa N3 HNX 6oNbue.
- INHTepBaI MExJy CnHraIaMn RopN3OHTaJIbHO pa3BepTKI DOnJKeH 6bITb 60JIbe 2,5 MKC.
ИHTepBaI MekJy CnHaIaMn BepTkaJIbHoi pa3BepTKn DOnKeH 6bItb 6OJIbe 450 MKC.
KoHCTpykunn H xapaKTepnCTnK MOnyT n3MeHrTBcA 6e3 npEbpntbHorO yBeDOMHeHn.
TFTLCDColor ComputerDisplay
Bruksanvisning.
SE
SDM-HS75D
SDM-HS95D
Owner's Record
The model and serial numbers are located at the rear of the unit. Record these numbers in the spaces provided below. Refer to them whenever you call upon your dealer regarding this product. Model No. __ Serial No. ____
WARNING
To reduce the risk of fire or electric shock, do not expose this apparatus to rain or moisture.
Dangerously high voltages are present inside the unit. Do not open the cabinet. Refer servicing to qualified personnel only.
FCC Notice
This equipment has been tested and found to comply with the limits for a Class B digital device, pursuant to Part 15 of the FCC Rules. These limits are designed to provide reasonable protection against harmful interference in a residential installation. This equipment generates, uses, and can radiate radio frequency energy and, if not installed and used in accordance with the instructions, may cause harmful interference to radio communications. However, there is no guarantee that interference will not occur in a particular installation. If this equipment does cause harmful interference to radio or television reception, which can be determined by turning the equipment off and on, the user is encouraged to try to correct the interference by one or more of the following measures:
- Reorient or relocate the receiving antenna.
- Increase the separation between the equipment and receiver.
- Connect the equipment into an outlet on a circuit different from that to which the receiver is connected.
- Consult the dealer or an experienced radio/TV technician for help. You are cautioned that any changes or modifications not expressly approved in this manual could void your authority to operate this equipment.
IMPORTANT
If you have any questions about this product, you may call; Sony Customer Information Services Center 1-800-222-7669 or http://www.roy.com/
Declaration of Conformity
Trade Name:SONY
Model: SDM-HS75D
SDM-HS95D
Responsible Party: Sony Electronics Inc.
Address: 16530 Via Esprillo, San Diego,
CA 92127 U.S.A.
Telephone Number: 858-942-2230
This device complies with part 15 of the FCC rules. Operation is subject to the following two conditions: (1) This device may not cause harmful interference, and (2) this device must accept any interference received, including interference that may cause undesired operation.
NOTICE
This notice is applicable for USA/Canada only.
If shipped to USA/Canada, install only a UL LISTED/CSA
LABELLED power supply cord meeting the following
specifications:
SPECIFICATIONS
Plug Type Nema-Plug 5-15p
Cord Type SVT or SJT, minimum 3 × 18 AWG
Length Maximum 15 feet
Rating Minimum 7 A, 125 V
NOTICE
As an ENERGY STAR Partner, Sony Corporation has determined that this product meets the ENERGY STAR guidelines for energy efficiency.
8 Bakre panel (sid. 8)
Klicka pa [Utility] [Windows]/[Win Utility.exe].
For Macintosh
Klicka pã [Utility] [Mac]/[Mac Utility].
4 Tryck på MENU-knappen.
Digital RGB-signal (DV1):
TMDS (Enkelänk)
-240V,50-60Hz
Max. 1,0 A
Digital RGB-signal (DVI):
TMDS (Enkel lang)
Stromforsorjning 100
-240 V, 50-60 Hz,
Max. 1,0 A
The model and serial numbers are located at the rear of the unit. Record these numbers in the spaces provided below. Refer to them whenever you call upon your dealer regarding this product. Model No. __ Serial No. ____
WARNING
To reduce the risk of fire or electric shock, do not expose this apparatus to rain or moisture.
Dangerously high voltages are present inside the unit. Do not open the cabinet. Refer servicing to qualified personnel only.
FCC Notice
This equipment has been tested and found to comply with the limits for a Class B digital device, pursuant to Part 15 of the FCC Rules. These limits are designed to provide reasonable protection against harmful interference in a residential installation. This equipment generates, uses, and can radiate radio frequency energy and, if not installed and used in accordance with the instructions, may cause harmful interference to radio communications. However, there is no guarantee that interference will not occur in a particular installation. If this equipment does cause harmful interference to radio or television reception, which can be determined by turning the equipment off and on, the user is encouraged to try to correct the interference by one or more of the following measures:
- Reorient or relocate the receiving antenna.
- Increase the separation between the equipment and receiver.
- Connect the equipment into an outlet on a circuit different from that to which the receiver is connected.
- Consult the dealer or an experienced radio/TV technician for help. You are cautioned that any changes or modifications not expressly approved in this manual could void your authority to operate this equipment.
IMPORTANT
If you have any questions about this product, you may call; Sony Customer Information Services Center 1-800-222-7669 or http://www.roy.com/
Declaration of Conformity
Trade Name:SONY
Model:SDM-HS75D
SDM-HS95D
Responsible Party: Sony Electronics Inc.
Address: 16530 Via Esprillo, San Diego,
CA 92127 U.S.A.
Telephone Number: 858-942-2230
This device complies with part 15 of the FCC rules. Operation is subject to the following two conditions: (1) This device may not cause harmful interference, and (2) this device must accept any interference received, including interference that may cause undesired operation.
NOTICE
This notice is applicable for USA/Canada only.
If shipped to USA/Canada, install only a UL LISTED/CSA
LABELLED power supply cord meeting the following specifications:
SPECIFICATIONS
Plug Type Nema-Plug 5-15p
Cord Type SVT or SJT, minimum 3 × 18 AWG
Length Maximum 15 feet
Rating Minimum 7 A, 125 V
NOTICE
As an ENERGY STAR Partner, Sony Corporation has determined that this product meets the ENERGY STAR guidelines for energy efficiency.
Inhoudsopgave
The model and serial numbers are located at the rear of the unit. Record these numbers in the spaces provided below. Refer to them whenever you call upon your dealer regarding this product. Model No. __ Serial No. ____
WARNING
To reduce the risk of fire or electric shock, do not expose this apparatus to rain or moisture.
Dangerously high voltages are present inside the unit. Do not open the cabinet. Refer servicing to qualified personnel only.
FCC Notice
This equipment has been tested and found to comply with the limits for a Class B digital device, pursuant to Part 15 of the FCC Rules. These limits are designed to provide reasonable protection against harmful interference in a residential installation. This equipment generates, uses, and can radiate radio frequency energy and, if not installed and used in accordance with the instructions, may cause harmful interference to radio communications. However, there is no guarantee that interference will not occur in a particular installation. If this equipment does cause harmful interference to radio or television reception, which can be determined by turning the equipment off and on, the user is encouraged to try to correct the interference by one or more of the following measures:
- Reorient or relocate the receiving antenna.
- Increase the separation between the equipment and receiver.
- Connect the equipment into an outlet on a circuit different from that to which the receiver is connected.
- Consult the dealer or an experienced radio/TV technician for help. You are cautioned that any changes or modifications not expressly approved in this manual could void your authority to operate this equipment.
IMPORTANT
If you have any questions about this product, you may call; Sony Customer Information Services Center 1-800-222-7669 or http://www.roy.com/
Declaration of Conformity
Trade Name:SONY
Model: SDM-HS75D
SDM-HS95D
Responsible Party: Sony Electronics Inc.
Address: 16530 Via Esprillo, San Diego,
CA 92127 U.S.A.
Telephone Number: 858-942-2230
This device complies with part 15 of the FCC rules. Operation is subject to the following two conditions: (1) This device may not cause harmful interference, and (2) this device must accept any interference received, including interference that may cause undesired operation.
NOTICE
This notice is applicable for USA/Canada only.
If shipped to USA/Canada, install only a UL LISTED/CSA
LABELLED power supply cord meeting the following specifications:
SPECIFICATIONS
Plug Type Nema-Plug 5-15p
Cord Type SVT or SJT, minimum 3 × 18 AWG
Length Maximum 15 feet
Rating Minimum 7 A, 125 V
NOTICE
As an ENERGY STAR Partner, Sony Corporation has determined that this product meets the ENERGY STAR guidelines for energy efficiency.
Obsah
The model and serial numbers are located at the rear of the unit. Record these numbers in the spaces provided below. Refer to them whenever you call upon your dealer regarding this product. Model No. __ Serial No. ____
WARNING
To reduce the risk of fire or electric shock, do not expose this apparatus to rain or moisture.
Dangerously high voltages are present inside the unit. Do not open the cabinet. Refer servicing to qualified personnel only.
FCC Notice
This equipment has been tested and found to comply with the limits for a Class B digital device, pursuant to Part 15 of the FCC Rules. These limits are designed to provide reasonable protection against harmful interference in a residential installation. This equipment generates, uses, and can radiate radio frequency energy and, if not installed and used in accordance with the instructions, may cause harmful interference to radio communications. However, there is no guarantee that interference will not occur in a particular installation. If this equipment does cause harmful interference to radio or television reception, which can be determined by turning the equipment off and on, the user is encouraged to try to correct the interference by one or more of the following measures:
- Reorient or relocate the receiving antenna.
- Increase the separation between the equipment and receiver.
- Connect the equipment into an outlet on a circuit different from that to which the receiver is connected.
- Consult the dealer or an experienced radio/TV technician for help. You are cautioned that any changes or modifications not expressly approved in this manual could void your authority to operate this equipment.
IMPORTANT
If you have any questions about this product, you may call; Sony Customer Information Services Center 1-800-222-7669 or http://www.roy.com/
Declaration of Conformity
Trade Name:SONY
Model: SDM-HS75D
SDM-HS95D
Responsible Party: Sony Electronics Inc.
Address: 16530 Via Esprillo, San Diego,
CA 92127 U.S.A.
Telephone Number: 858-942-2230
This device complies with part 15 of the FCC rules. Operation is subject to the following two conditions: (1) This device may not cause harmful interference, and (2) this device must accept any interference received, including interference that may cause undesired operation.
NOTICE
This notice is applicable for USA/Canada only.
If shipped to USA/Canada, install only a UL LISTED/CSA
LABELLED power supply cord meeting the following
specifications:
SPECIFICATIONS
Plug Type Nema-Plug 5-15p
Cord Type SVT or SJT, minimum 3 × 18 AWG
Length Maximum 15 feet
Rating Minimum 7 A, 125 V
NOTICE
As an ENERGY STAR Partner, Sony Corporation has determined that this product meets the ENERGY STAR guidelines for energy efficiency.
Tartalomjegyzék
Ovintezkedesek 4
Alkatreszek es kezeloelemek 5
Uzembe helyezés. 6
The model and serial numbers are located at the rear of the unit. Record these numbers in the spaces provided below. Refer to them whenever you call upon your dealer regarding this product. Model No. __ Serial No. ____
WARNING
To reduce the risk of fire or electric shock, do not expose this apparatus to rain or moisture.
Dangerously high voltages are present inside the unit. Do not open the cabinet. Refer servicing to qualified personnel only.
FCC Notice
This equipment has been tested and found to comply with the limits for a Class B digital device, pursuant to Part 15 of the FCC Rules. These limits are designed to provide reasonable protection against harmful interference in a residential installation. This equipment generates, uses, and can radiate radio frequency energy and, if not installed and used in accordance with the instructions, may cause harmful interference to radio communications. However, there is no guarantee that interference will not occur in a particular installation. If this equipment does cause harmful interference to radio or television reception, which can be determined by turning the equipment off and on, the user is encouraged to try to correct the interference by one or more of the following measures:
- Reorient or relocate the receiving antenna.
- Increase the separation between the equipment and receiver.
- Connect the equipment into an outlet on a circuit different from that to which the receiver is connected.
- Consult the dealer or an experienced radio/TV technician for help. You are cautioned that any changes or modifications not expressly approved in this manual could void your authority to operate this equipment.
IMPORTANT
If you have any questions about this product, you may call; Sony Customer Information Services Center 1-800-222-7669 or http://www.roy.com/
Declaration of Conformity
Trade Name:SONY
Model: SDM-HS75D
SDM-HS95D
Responsible Party: Sony Electronics Inc.
Address: 16530 Via Esprillo, San Diego,
CA 92127 U.S.A.
Telephone Number: 858-942-2230
This device complies with part 15 of the FCC rules. Operation is subject to the following two conditions: (1) This device may not cause harmful interference, and (2) this device must accept any interference received, including interference that may cause undesired operation.
NOTICE
This notice is applicable for USA/Canada only.
If shipped to USA/Canada, install only a UL LISTED/CSA
LABELLED power supply cord meeting the following specifications:
SPECIFICATIONS
Plug Type Nema-Plug 5-15p
Cord Type SVT or SJT, minimum 3 × 18 AWG
Length Maximum 15 feet
Rating Minimum 7 A, 125 V
NOTICE
As an ENERGY STAR Partner, Sony Corporation has determined that this product meets the ENERGY STAR guidelines for energy efficiency.
Spistresci
The model and serial numbers are located at the rear of the unit. Record these numbers in the spaces provided below. Refer to them whenever you call upon your dealer regarding this product. Model No. __ Serial No. ____
WARNING
To reduce the risk of fire or electric shock, do not expose this apparatus to rain or moisture.
Dangerously high voltages are present inside the unit. Do not open the cabinet. Refer servicing to qualified personnel only.
FCC Notice
This equipment has been tested and found to comply with the limits for a Class B digital device, pursuant to Part 15 of the FCC Rules. These limits are designed to provide reasonable protection against harmful interference in a residential installation. This equipment generates, uses, and can radiate radio frequency energy and, if not installed and used in accordance with the instructions, may cause harmful interference to radio communications. However, there is no guarantee that interference will not occur in a particular installation. If this equipment does cause harmful interference to radio or television reception, which can be determined by turning the equipment off and on, the user is encouraged to try to correct the interference by one or more of the following measures:
- Reorient or relocate the receiving antenna.
- Increase the separation between the equipment and receiver.
- Connect the equipment into an outlet on a circuit different from that to which the receiver is connected.
- Consult the dealer or an experienced radio/TV technician for help. You are cautioned that any changes or modifications not expressly approved in this manual could void your authority to operate this equipment.
IMPORTANT
If you have any questions about this product, you may call; Sony Customer Information Services Center 1-800-222-7669 or http://www.roy.com/
Declaration of Conformity
Trade Name:SONY
Model: SDM-HS75D
SDM-HS95D
Responsible Party: Sony Electronics Inc.
Address: 16530 Via Esprillo, San Diego,
CA 92127 U.S.A.
Telephone Number: 858-942-2230
This device complies with part 15 of the FCC rules. Operation is subject to the following two conditions: (1) This device may not cause harmful interference, and (2) this device must accept any interference received, including interference that may cause undesired operation.
NOTICE
This notice is applicable for USA/Canada only.
If shipped to USA/Canada, install only a UL LISTED/CSA
LABELLED power supply cord meeting the following specifications:
SPECIFICATIONS
Plug Type Nema-Plug 5-15p
Cord Type SVT or SJT, minimum 3 × 18 AWG
Length Maximum 15 feet
Rating Minimum 7 A, 125 V
NOTICE
As an ENERGY STAR Partner, Sony Corporation has determined that this product meets the ENERGY STAR guidelines for energy efficiency.
Kazalo
Pozor 4
Del monitorja in elementi za nastavljanje. 5
Nastavitev. 7
Pritisnite INPUT gumb.
Kliknite [Utility] [Windows]/[Win Utility.exe].
Za Macintosh
Kliknite [Utility] [Mac]/[Mac Utility].
4 Pritisnite tipko MENU.
Na zaslonu se prikaze glavni meni.
5 Pritisnite tipki / za izbiro (SCREEN) in pritisnite tipko OK.
Na zaslonu se prikaze meni SCREEN.
6 Pritisnite tipki / , da izberete PHASE in pritisnite tipko OK.
Na zasloun se prikaze meni PHASE.
7 Pritisnite tipki / , dokler niso vodoravni pasovi minimalni.
Nastavljaje tolikoČasa,da so vodoravni pasovi minimalni.
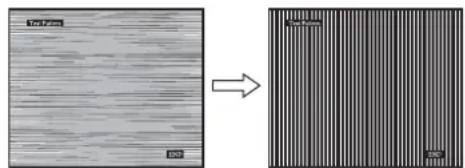
8 Pritisnite tipko OK.
Vrinite se v meni SCREEN.
Kliknite [Utility] [Windows]/[Win Utility.exe].
Za Macintosh
Kliknite [Utility] [Mac]/[Mac Utility].
4 Pritisnite tipko MENU.
Na zaslonu se prikaze glavni meni.
5 Pritisnite tipki / za izbiro (SCREEN) in pritisnite tipko OK.
Na zaslonu se prikaze meni SCREEN.
6 Pritisnite tipki / , da izberete H CENTER ali V CENTER in pritisnite tipko OK.
Na zaslonu se pojavimi H CENTER ali meni V CENTER.
7 Pritisnite tipki / , da središno poravnate preizkusni vzorec na zaslonu.
8 Kliknite [END] na zaslonu za izklop preizkusnega vzorca.
9 Pritisnite tipko OK.
Vrnite se v meni SCREEN.
10 Pritisnite tipki / , da izberete in pritisnite tipko OK.
Vrnite se vzaslon meni.
Nastavitev temperature barve (COLOR)
LCD panel Vrsta panel:
a-Si TFT z.aktivno matrico
Velikost slike: 19,0
Oblika vhdnegaf Delovna frekvenca RGB*
signala
Horizontalna: 28 - 80kHz (analogni
RGB)
28-64kHz
(digitalni RGB)
Vertikalna: 48 - 75Hz (analogni
RGB)
60 Hz (digitaln RGB)
The model and serial numbers are located at the rear of the unit. Record these numbers in the spaces provided below. Refer to them whenever you call upon your dealer regarding this product. Model No. __ Serial No. ____
WARNING
To reduce the risk of fire or electric shock, do not expose this apparatus to rain or moisture.
Dangerously high voltages are present inside the unit. Do not open the cabinet. Refer servicing to qualified personnel only.
FCC Notice
This equipment has been tested and found to comply with the limits for a Class B digital device, pursuant to Part 15 of the FCC Rules. These limits are designed to provide reasonable protection against harmful interference in a residential installation. This equipment generates, uses, and can radiate radio frequency energy and, if not installed and used in accordance with the instructions, may cause harmful interference to radio communications. However, there is no guarantee that interference will not occur in a particular installation. If this equipment does cause harmful interference to radio or television reception, which can be determined by turning the equipment off and on, the user is encouraged to try to correct the interference by one or more of the following measures:
- Reorient or relocate the receiving antenna.
- Increase the separation between the equipment and receiver.
- Connect the equipment into an outlet on a circuit different from that to which the receiver is connected.
- Consult the dealer or an experienced radio/TV technician for help. You are cautioned that any changes or modifications not expressly approved in this manual could void your authority to operate this equipment.
IMPORTANT
If you have any questions about this product, you may call; Sony Customer Information Services Center
1-800-222-7669 or http://www.roy.com/
Declaration of Conformity
Trade Name:SONY
Model: SDM-HS75D
SDM-HS95D
Responsible Party: Sony Electronics Inc.
Address: 16530 Via Esprillo, San Diego,
CA 92127 U.S.A.
Telephone Number: 858-942-2230
This device complies with part 15 of the FCC rules. Operation is subject to the following two conditions: (1) This device may not cause harmful interference, and (2) this device must accept any interference received, including interference that may cause undesired operation.
NOTICE
This notice is applicable for USA/Canada only.
If shipped to USA/Canada, install only a UL LISTED/CSA
LABELLED power supply cord meeting the following
specifications:
SPECIFICATIONS
Plug Type Nema-Plug 5-15p
Cord Type SVT or SJT, minimum 3 × 18 AWG
Length Maximum 15 feet
Rating Minimum 7 A, 125 V
NOTICE
As an ENERGY STAR Partner, Sony Corporation has determined that this product meets the ENERGY STAR guidelines for energy efficiency.
Içindekiler
Uyarilar 4
Girisinyalini seeme (INPUTdugmesi) 9
Monitörun kullaniciya baglı ayari. 10
Istenilen parlakliga ayarlama. 10
Menuyu kullanma 10
Arka isigi ayarlama (BACKLIGHT). 11
Kontrasti ayarlama (CONTRAST) 12
The model and serial numbers are located at the rear of the unit. Record these numbers in the spaces provided below. Refer to them whenever you call upon your dealer regarding this product. Model No. __ Serial No. ____
WARNING
To reduce the risk of fire or electric shock, do not expose this apparatus to rain or moisture.
Dangerously high voltages are present inside the unit. Do not open the cabinet. Refer servicing to qualified personnel only.
FCC Notice
This equipment has been tested and found to comply with the limits for a Class B digital device, pursuant to Part 15 of the FCC Rules. These limits are designed to provide reasonable protection against harmful interference in a residential installation. This equipment generates, uses, and can radiate radio frequency energy and, if not installed and used in accordance with the instructions, may cause harmful interference to radio communications. However, there is no guarantee that interference will not occur in a particular installation. If this equipment does cause harmful interference to radio or television reception, which can be determined by turning the equipment off and on, the user is encouraged to try to correct the interference by one or more of the following measures:
- Reorient or relocate the receiving antenna.
- Increase the separation between the equipment and receiver.
- Connect the equipment into an outlet on a circuit different from that to which the receiver is connected.
- Consult the dealer or an experienced radio/TV technician for help. You are cautioned that any changes or modifications not expressly approved in this manual could void your authority to operate this equipment.
IMPORTANT
If you have any questions about this product, you may call; Sony Customer Information Services Center 1-800-222-7669 or http://www.sony.com/
Declaration of Conformity
Trade Name:SONY
Model: SDM-HS75D
SDM-HS95D
Responsible Party: Sony Electronics Inc.
Address: 16530 Via Esprillo, San Diego, CA
92127 U.S.A.
Telephone Number: 858-942-2230
This device complies with part 15 of the FCC rules. Operation is subject to the following two conditions: (1) This device may not cause harmful interference, and (2) this device must accept any interference received, including interference that may cause undesired operation.
NOTICE
This notice is applicable for USA/Canada only.
If shipped to USA/Canada, install only a UL LISTED/CSA
LABELLED power supply cord meeting the following specifications:
SPECIFICATIONS
Plug Type Nema-Plug 5-15p
Cord Type SVT or SJT, minimum 3 × 18 AWG
Length Maximum 15 feet
Rating Minimum 7 A, 125 V
NOTICE
As an ENERGY STAR Partner, Sony Corporation has determined that this product meets the ENERGY STAR guidelines for energy efficiency.
目录
使用前须知注意事项 4
识别部件和控制钮 5
安装 7
步骤1:打开支架 7
步骤2:将监视器连接到计算机 7
步骤3:连接电源线 8
步骤4:捆扎好电线并关闭后盖 8
步骤5:打开监视器和计算机电源 8
调整倾斜 9
选择输入信号(INPUT按钮) 9
设定监视器 9
调至所需的亮度 9
导航菜单 9
调整背光(背光) 11
调整对比度(对比度) 11
调整图像的黑色电平(亮度) 11