
EAP330 - Access Point TP-LINK - Free user manual and instructions
Find the device manual for free EAP330 TP-LINK in PDF.
| Product Type | Access Point |
| Brand | TP-Link |
| Model | EAP330 |
| Dimensions (L x W x H) | 200 x 200 x 35 mm (estimated) |
| Weight | Approximately 500 g |
| Power Supply | PoE (802.3af/at) or 12V DC power adapter (not included) |
| Network Port | 1 x Gigabit Ethernet (RJ-45) |
| Wi-Fi Standards | IEEE 802.11a/b/g/n/ac |
| Frequency Bands | 2.4 GHz and 5 GHz |
| Max Speed | 450 Mbps (2.4 GHz) + 1300 Mbps (5 GHz) = AC1750 |
| Antennas | Integrated (non-removable) |
| Mounting | Ceiling (T-rail, tile) or wall |
| Operating Temperature | 0°C to 40°C |
| Operating Humidity | 10% to 90% (non-condensing) |
| Wi-Fi Security | WPA/WPA2, WPA-PSK, WPA2-PSK |
| Management | EAP Controller (software), integrated web interface |
| LED Indicators | Power, Wi-Fi, Ethernet |
| Certifications | CE, FCC (estimated) |
| Package Contents | EAP330, mounting bracket, screw kit, installation guide |
| Warranty | TP-Link limited warranty (varies by country) |
| Care and Cleaning | Wipe with a soft, dry cloth. Do not use liquids. |
| Spare Parts and Repairability | Not user-serviceable. Contact TP-Link support. |
Frequently Asked Questions - EAP330 TP-LINK
User questions about EAP330 TP-LINK
0 question about this device. Answer the ones you know or ask your own.
Ask a new question about this device
Download the instructions for your Access Point in PDF format for free! Find your manual EAP330 - TP-LINK and take your electronic device back in hand. On this page are published all the documents necessary for the use of your device. EAP330 by TP-LINK.
USER MANUAL EAP330 TP-LINK
South Buildingfloors 1,3,4,5) and 28floors 1-4), Central Science & Technology Park, Shennan Rd,
Nanshan, Shenzhen, China
Unit 2 & 3 Riverview (142-144), Cardiff Road, Reading, RG1 8EW
TP-LINK Italia S.r.l.
Marathonodromou 77, Marousi 151 24, Greece
NWS.TP-LINK Portugal, Unipessoal, Lda.
Specifications are subject to change without notice. TP-LINK is a registered trademark of
TP-LINK TECHNOLOGIES CO., LTD. Other brands and product names are trademarks or registered trademarks of their respective holders.
No part of the specifications may be reproduced in any form or by any means or used to make any derivative
such as translation, transformation, or adaptation without permission from
TP-LINK TECHNOLOGIES CO., LTD. Copyright © 2016 TP-LINK TECHNOLOGIES CO., LTD. All rights reserved.
www.tp-link.com
Installation Guide
Ceiling Mount Access Point
7106506379REV1.00
Contents
Deutsch 1
English. 7
Espanol. 13
Elambdavikα 19
Francais. 25
Italiano 31
Portugues 37
Suomi 43
Nederlands 49
Svenska. 55
Norsk. 61
Dansk 67
Türkce. 73
Hardwareinstallation
Option 1: Deckenmontage
Note: The image may differ from the actual product.
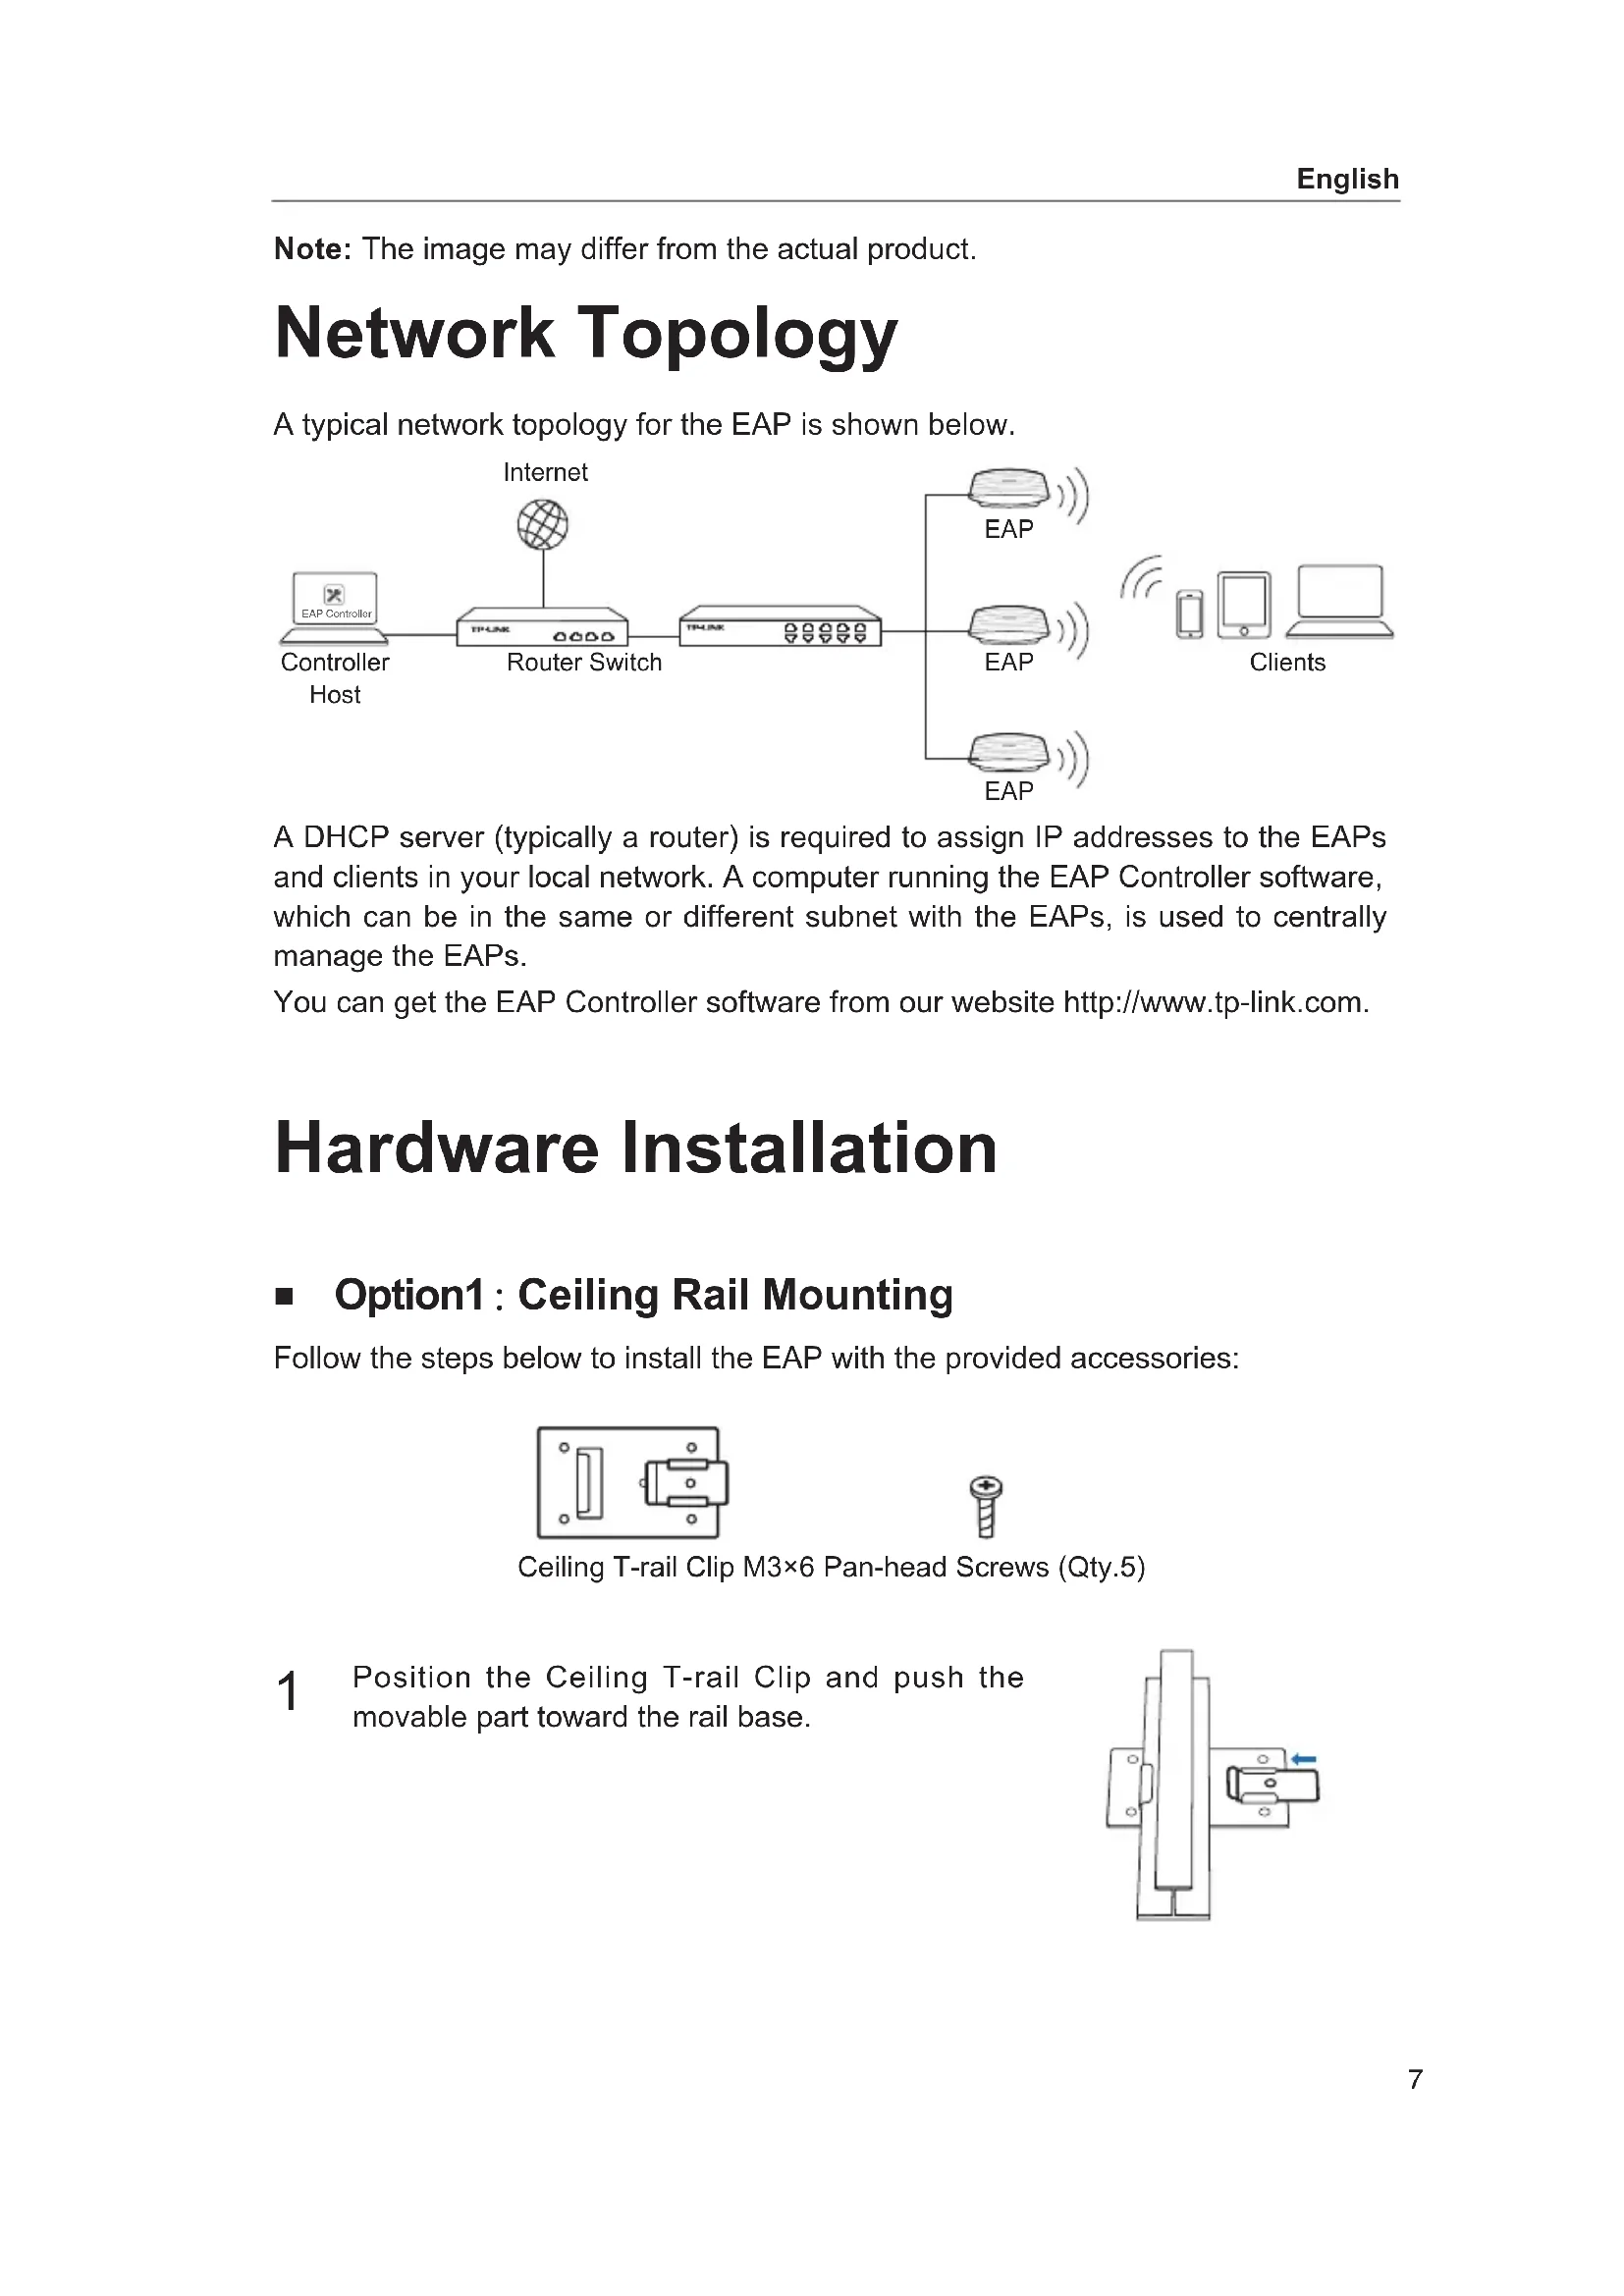
Network Topology
A typical network topology for the EAP is shown below.
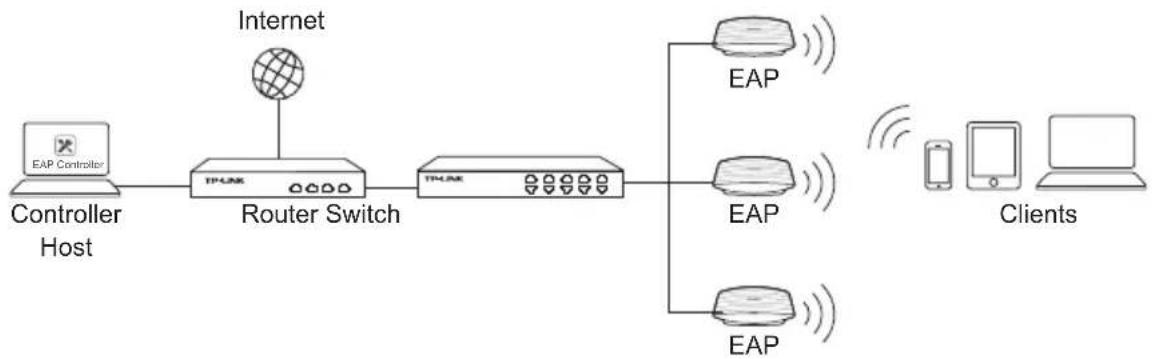
A DHCP server (typically a router) is required to assign IP addresses to the EAPs and clients in your local network. A computer running the EAP Controller software, which can be in the same or different subnet with the EAPs, is used to centrally manage the EAPs.
You can get the EAP Controller software from our website http://www.tp-link.com.
Hardware Installation
Option1: Ceiling Rail Mounting
Follow the steps below to install the EAP with the provided accessories:
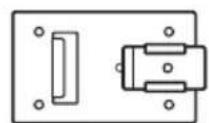

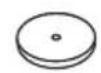
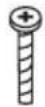
Ceiling T-rail Clip M3×6 Pan-head Screws (Qty.5)
1 Position the Ceiling T-rail Clip and push the movable part toward the rail base.
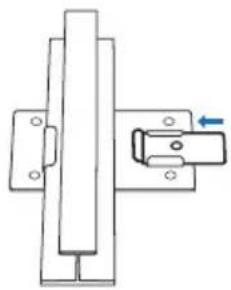
2 Use an M3×6 pan-head screw to secure the T-rail. Clip onto the ceiling rail.
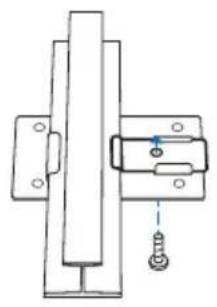
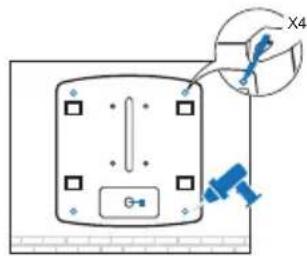
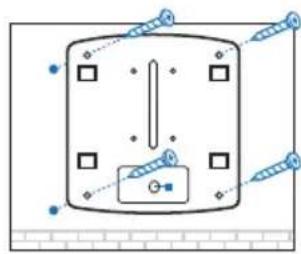
3 Attach the mounting bracket to the Ceiling T-rail Clip using four M3x6 pan-head screws.
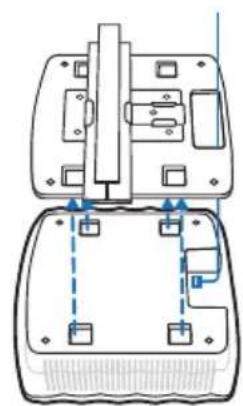
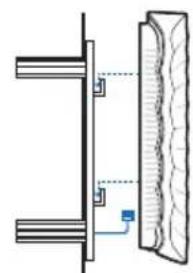
4 Make the Ethernet Cable pass through the fixing hole of the mounting bracket. Connect the cable to the ETHERNET port and attach the EAP to the bracket.
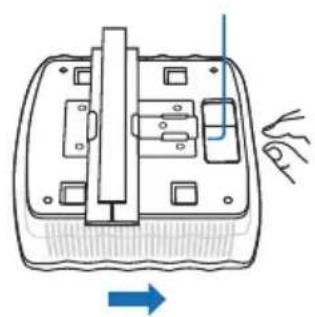
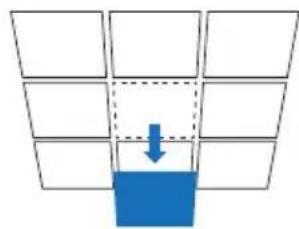
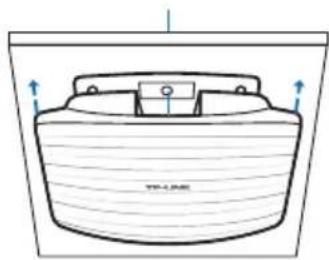
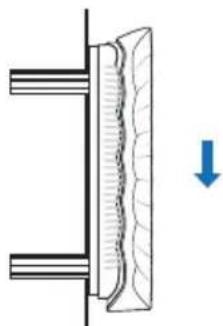
5 Push the EAP along the direction of arrows until it locks into place. Then adjust the cable to make the exposed part hidden behind the EAP.
Option2: Ceiling Mounting
Follow the steps below to install the EAP with the provided accessories:
Washers (Qty.4)
M3×30 Pan-head Screws (Qty.4)

Wing Nuts (Qty.4)
1 Remove the ceiling tile.
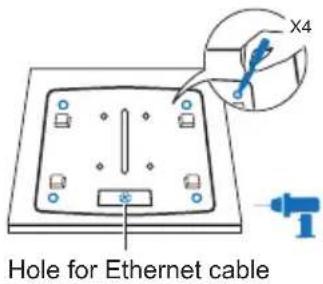
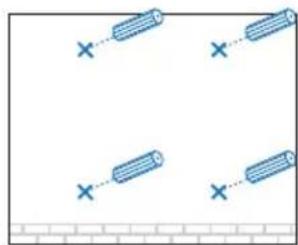
2 Place the mounting bracket in the center of the ceiling tile. Mark the four positions of the screw holes and a hole for the Ethernet cable to feed through. Drill four 4mm holes for the screws and a 10mm hole for the Ethernet cable.
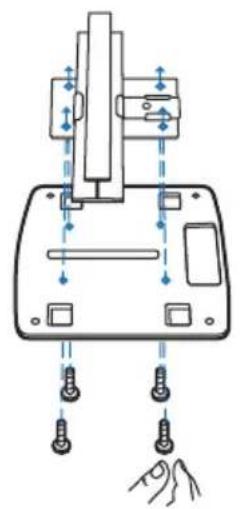
3 Secure the mounting bracket to the ceiling tile using four M3x30 pan-head screws, washers and wing nuts.

4 Feed the Ethernet cable through the hole. Then set the ceiling tile back into place.
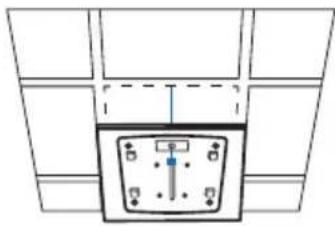
5 Connect the Ethernet cable to the ETHERNET port and push the EAP along the direction of arrows until it locks into place. Then adjust the cable to make the exposed part hidden behind the EAP.
Option3: Wall Mounting
Follow the steps below to install the EAP with the provided accessories:
Note: We do not recommend you to install the EAP with the Ethernet port upward.

M3×28 Plastic Wall Anchors (Qty.4)
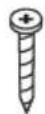
M3×20 Self-tapping Screws (Qty.4)
If your Ethernet cable feeds through the wall, you can position the mounting bracket to make the cable through the fixing hole. Mark the four positions of the screw holes and then drill four 6mm holes.
2 Insert the plastic wall anchors into the 6mm holes.
3 Secure the mounting bracket to the wall by driving the self-tapping screws into the anchors. Make sure that the shoulders of the mounting bracket are on the outside.
4 Connect the Ethernet cable to the ETHERNET port on the EAP and attach the EAP to the mounting bracket.
5 Push the EAP along the direction of arrows until it locks into place, and then adjust the cable to make the exposed part hidden behind the EAP.
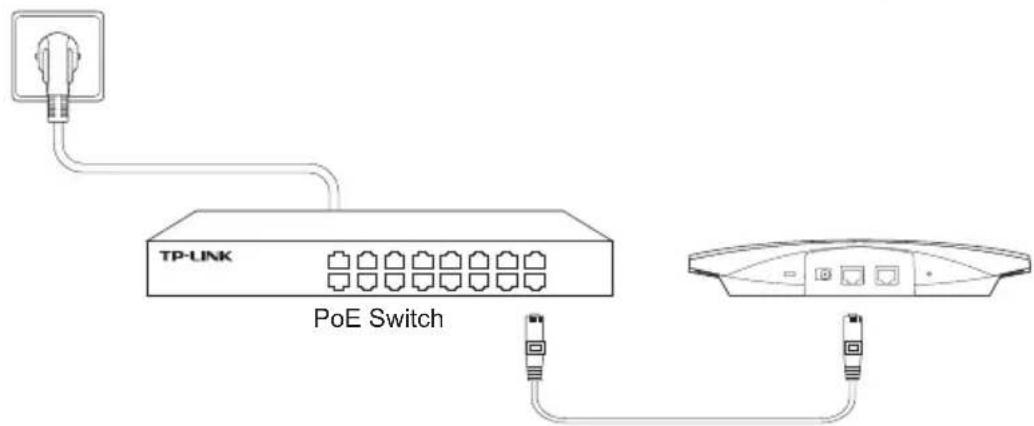
Power Supply
EAP can be powered via a PSE device (such as a PoE switch) or a power adapter.
Via PoE Switch
Connect the Ethernet cable from the PoE switch to the ETHERNET port.
Via Power Adapter
Plug one end of the provided power adapter into the POWER port of the EAP and the other end to a standard electrical wall outlet.

Alternative 1: Takskena
Hardwareinstallation
- When a product has a power on/off button, the power on/off button is one way to turn-off the product. For products without the on/off button, the only way to completely turn-off the product is to disconnect the product or the power adapter from the power source. The disconnected device shall remain readily operable.
- Do not open this product or attempt to service it; it may expose you to dangerous high voltage or other risks. Opening a sealed component or sealed product/s will void the warranty. For product servicing, please contact us.
- Do not operate this product near water.
TP-LINK Limited Product Warranty
For TP-LINK Branded Products Only.
THIS WARRANTY GIVES YOU SPECIFIC LEGAL RIGHTS, AND YOU MAY HAVE OTHER RIGHTS THAT VARY FROM STATE TO STATE (OR BY COUNTRY OR PROVINCE).
TO THE EXTENT ALLOWED BY LOCAL LAW, THIS WARRANTY AND THE REMEDIES SET FORTH ARE EXCLUSIVE AND IN LIEU OF ALL OTHER WARRANTYES, REMEDIES AND CONDITIONS.
TP-LINK warrants the TP-LINK branded hardware product contained in the original packaging against defects in materials and workmanship when used normally in according with TP-LINK's guidelines for some period which depends on the local service from the date of original retail purchase by the end-user purchaser.
Espanol

- Installation Guide
- Contents
- Hardwareinstallation
- Option 1: Deckenmontage
- Network Topology
- Hardware Installation
- Option1: Ceiling Rail Mounting
- Option2: Ceiling Mounting
- Option3: Wall Mounting
- Power Supply
- Via PoE Switch
- Via Power Adapter
- Alternative 1: Takskena
- TP-LINK Limited Product Warranty
- Espanol
Brand : TP-LINK
Model : EAP330
Category : Access Point