USER MANUAL PSFS1A Tacklife
text_image
TACK LIFE
User Manual
1/4 Sheet Finish Sander
natural_image
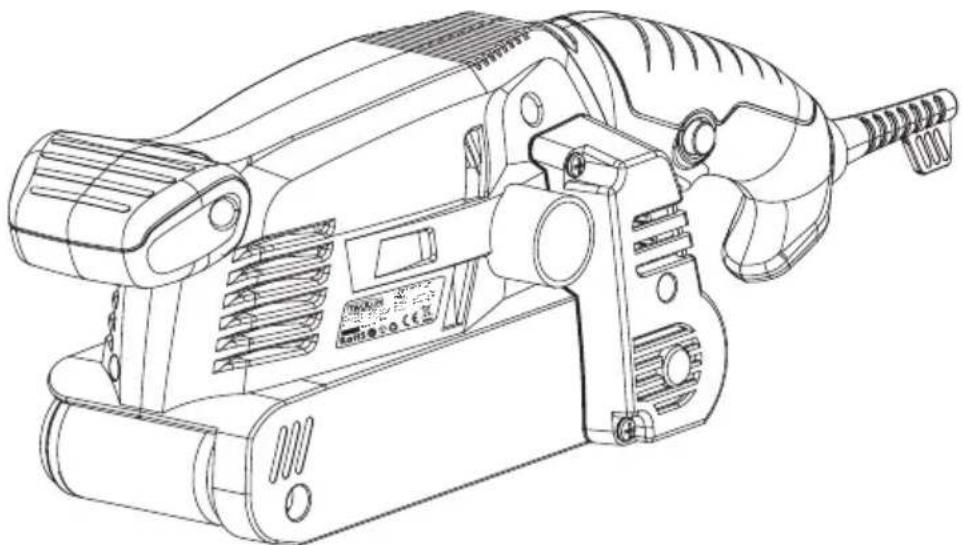
Technical line drawing of a mechanical power tool with no visible text or symbols
PSFS1A
Contents
English 01\~09
Français 10\~18
Deutsch 19\~27
Español 28\~36
Italiano 37\~45
日本語 46\~53
Introduction
Congratulations on the purchase of your new appliance.. You have selected a high-quality product. The operating instructions are part of this product. They contain important information on safety, usage and disposal. Before using the product, please familiarise yourself with all operating and safety instructions.
Use the product only as described and for the specified areas of application. Please also pass on these operating instructions to any future owner.
Intended use
The belt sander is designed for dry surface sanding of wood, plastic, metal and plaster and painted surfaces depending on the sandpaper used. The appliance may only be used for dry sanding. Please note that you need to use appropriate sandpapers with different grains for working different materials, and that the machine speed must also be adapted to the material.. The appliance is not intended for commercial use. Any other uses of or modification to the machine is deemed to be improper and carries the risk of serious personal injury. The manufacturer accepts no responsibility for damage(s) attributable to misuse.
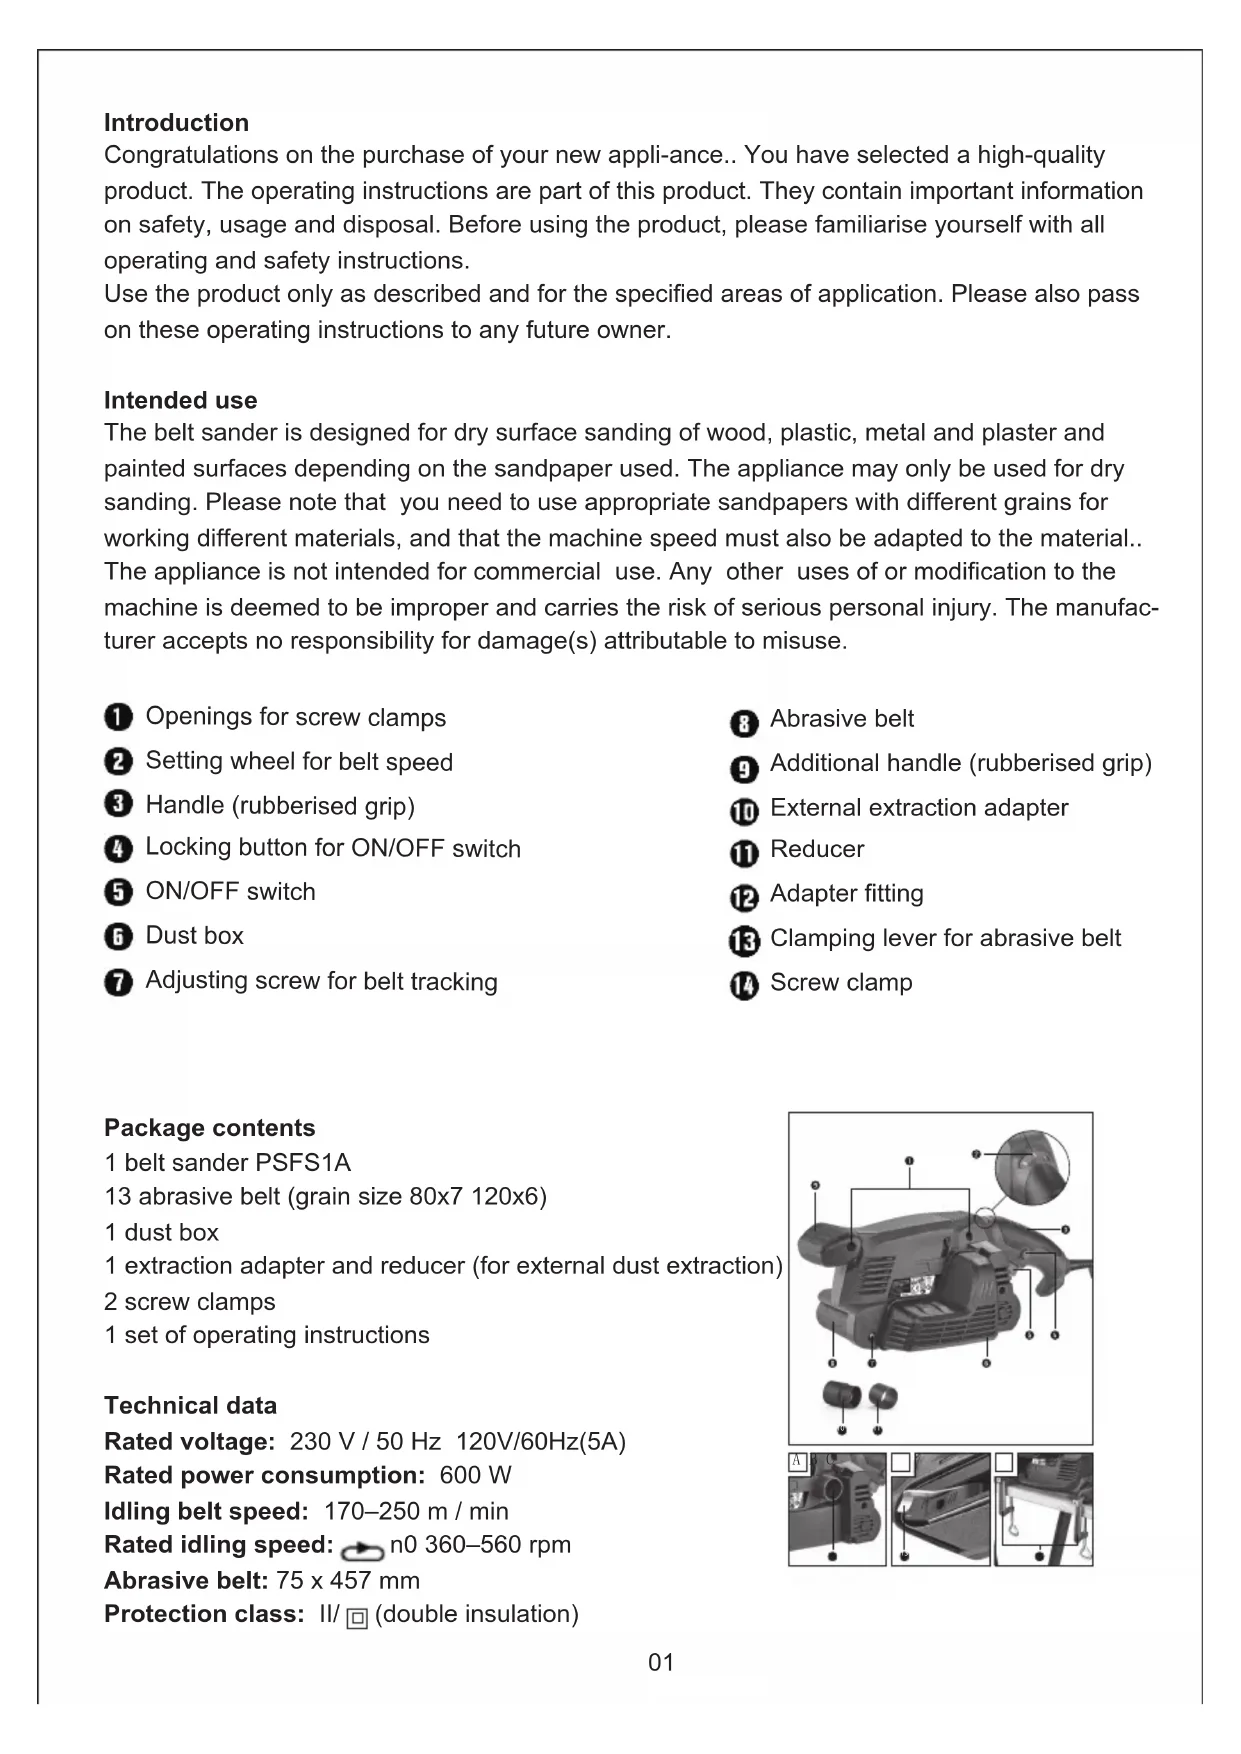
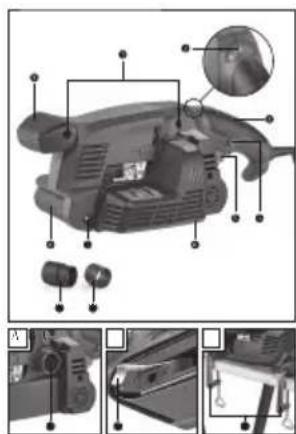
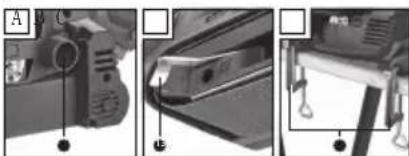
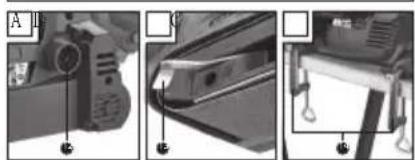
① Openings for screw clamps
② Setting wheel for belt speed
3 Handle (rubberised grip)
4 Locking button for ON/OFF switch
5 ON/OFF switch
6 Dust box
⑦ Adjusting screw for belt tracking
8 Abrasive belt
9 Additional handle (rubberised grip)
10 External extraction adapter
11 Reducer
12 Adapter fitting
13 Clamping lever for abrasive belt
14 Screw clamp
Package contents
1 belt sander PSFS1A
13 abrasive belt (grain size 80x7 120x6)
1 dust box
1 extraction adapter and reducer (for external dust extraction)
2 screw clamps
1 set of operating instructions
Technical data
Rated voltage: 230 V / 50 Hz 120V/60Hz(5A)
Rated power consumption: 600 W
Idling belt speed: 170–250 m / min
Rated idling speed: n0 360–560 rpm
Abrasive belt: 75 x 457 mm
Protection class: II/☐ (double insulation)

text_image
Technical diagram of a mechanical device with numbered components and an inset close-up view highlighting a specific part.
Noise emission value:
Noise measurement value determined in accord-ance with EN 60745.. The A-rated noise level of the power tool is typically as follows:
Sound pressure level: LpA = 87..29 dB (A)
Uncertainty: KpA = 3 dB
Sound power level: LWA = 98..29 dB (A)
Uncertainty: KWA = 3 dB
Wear hearing protection!
Total vibration value:
Total vibration values (vector total of three direc-tions) determined in accordance with EN 60745: Vibration emission value: ah = 1.901 m/s2 Uncertainty K = 1.5 m/s2
NOTE
▶ The vibration level specified in these instructions has been measured in accordance with measuring procedure specified in EN 60745 and can be used to make equipment comparisons. The specified vibration emission value can also be used to make an initial exposure estimate. The vibration emission level varies depending on the use of the power tool and may be higher than the value specified in these instructions in some cases. Regular use of the electric tool in such a way may cause the user to underestimate the vibration.

WARNING!
▶▶ For an accurate estimate of the vibration load during a specific working period, the periods during which the appliance is switched off or is running but not actually being used must also be taken into consideration. This can significantly reduce the vibration load over the total working period.


Safety Warnings

WARNING!
▶▶ Read all safety warnings and all instructions.
Failure to follow the warnings and instructions may result in electric shock, fire and/or serious injury.
Save all warnings and instructions for future reference.
The term "power tool" in the warnings refers to your mains-operated (corded) power tool or battery-operated (cordless) power tool.
1.. Work area safety
a) Keep work area clean and well lit. Cluttered or dark areas invite accidents.
b) Do not operate power tools in explosive atmo-spheres, such as in the presence of flammable liquids, gases or dust. Power tools create sparks which may ignite the dust or fumes.
c) Keep children and bystanders away while operating a power tool. Distractions can cause you to lose control.
2.. Electrical safety
a) Power tool plugs must match the outlet. Never modify the plug in any way. Do not use any adapter plugs with earthed (grounded) power tools. Unmodified plugs and matching outlets will reduce risk of electric shock.
b) Avoid body contact with earthed or grounded surfaces, such as pipes, radiators, ranges and refrigerators. There is an increased risk of elec-tric shock if your body is earthed or grounded.
c) Do not expose power tools to rain or wet conditions. Water entering a power tool will increase the risk of electric shock..
d) Do not abuse the cord. Never use the cord for carrying, pulling or unplugging the power tool. Keep cord away from heat, oil, sharp edges or moving parts Damaged or entangled cords increase the risk of electric shock.
e) When operating a power tool outdoors, use an extension cord suitable for outdoor use. Use of a cord suitable for outdoor use reduces the risk of electric shock.
f) If operating a power tool in a damp location is unavoidable, use a residual current device (RCD) protected supply. Use of an RCD reduces the risk of electric shock.
3.. Personal safety
a) Stay alert, watch what you are doing and use common sense when operating a power tool. Do not use a power tool while you are tired or under the influence of drugs, alcohol or medication. A moment of inattention while operating power tools may result in serious personal injury.
b) Use personal protective equipment. Always wear eye protection. Protective equipment such as dust mask, non-skid safety shoes, hard hat, or hearing protection used for appropriate conditions will reduce personal injuries.
c) Prevent unintentional starting. Ensure the switch is in the off-position before connecting to power source and/or battery pack, picking up or carrying the tool. Carrying power tools with your finger on the switch or energising power tools that have the switch on invites accidents.
d) Remove any adjusting key or wrench before turning the power tool on. A wrench or a key left attached to a rotating part of the power tool may result in personal injury.
e) Do not overreach. Keep proper footing and balance at all times. This enables better control of the power tool in unexpected situations.
f) Dress properly. Do not wear loose clothing or jewellery. Keep your hair, clothing and gloves away from moving parts. Loose clothes, jew-ellery or long hair can be caught in moving parts.
g) If devices are provided for the connection of dust extraction and collection facilities, ensure these are connected and properly used. Use of dust collection can reduce dust-related hazards.
a) Do not force the power tool. Use the correct power tool for your application. The correct power tool will do the job better and safer at the rate for which it was designed.
b) Do not use the power tool if the switch does not turn it on and off. Any power tool that can-not be controlled with the switch is dangerous and must be repaired.
c) Disconnect the plug from the power source and/or the battery pack from the power tool before making any adjustments, changing accessories, or storing power tools. Such prevent-ive safety measures reduce the risk of starting the power tool accidentally.
d) Store idle power tools out of the reach of children and do not allow persons unfamiliar with the power tool or these instructions to operate the power tool. Power tools are dangerous in the hands of untrained users.
e) Maintain power tools. Check for misalignment or binding of moving parts, breakage of parts and any other condition that may affect the power tool's operation. If damaged, have the power tool repaired before use. Many acci-dents are caused by poorly maintained power tools.
f) Keep cutting tools sharp and clean. Properly maintained cutting tools with sharp cutting edges are less likely to bind and are easier to control.
g) Use the power tool, accessories and tool bits etc. in accordance with these instructions, taking into account the working conditions and the work to be performed. Use of the power tool for operations different from those intended could result in a hazardous situation.
5. Service
a) Have your power tool serviced by a qualified repair person using only identical replace-ment parts. This will ensure that the safety of the power tool is maintained.
Appliance-specific safety instructions for sanders
■ Only hold the appliance using the insulated handle surfaces, as the abrasive belt an damage its own power cable. Contact with a live wire may apply voltage to exposed metal parts of the power tool and could give the oper-ator an electric shock.

WARNING!
■■ Dusts from materials such as leaded paint, some types of wood and metal can be harmful to your health.
■Contact with or inhalation of these dusts can represent a health hazard for the person operating the appliance and other people in the vicinity.
■■ Wear safety goggles and a protective dust mask!
Operation
Tensioning/replacing the abrasive belt

WARNING – RISK OF INJURY!
■■ Always remove the power plug from the wall socket before carrying out any work.
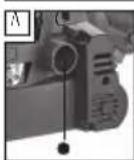
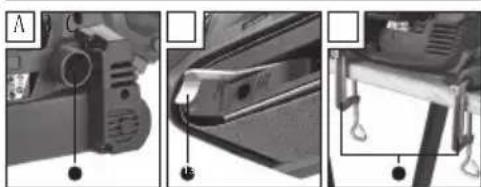
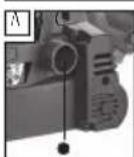
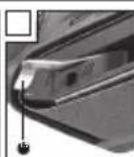
- Loosen the clamping appliance for the abrasive belt by swivelling the clamping lever ^13 completely out (see Fig.. B).. The abrasive belt ^8 can now be removed.
-
Now attach a new abrasive belt ⑧ or one suitable for another material or with a different grain size.
IMPORTANT: The direction of the arrows on the inside of the abrasive belt ⑧ and on the appliance housing must match..
-
Push the clamping lever 13 back to its original position.
Manually adjusting the abrasive belt 8 :
If the abrasive belt does not run centrally after switching on, you will have to adjust the belt tracking manually.
◆ To do this, turn the adjusting screw ⑦ on the front roller until the abrasive belt ⑧ runs centrally. IMPORTANT: It is imperative to ensure that the abrasive belt ⑧ does not rub against the housing.. Check the belt tracking regularly, and readjust it using the adjusting screw ⑦ if necessary.
Working procedures
A lower sanding pressure is sufficient:
■■ apply minimal sanding pressure when working. The own weight of the belt sander own weight is sufficient for good sanding performance.. This method further allows you to reduce wear on the abrasive belt ⑧, and the surface of your work-piece will be smoother.
Removal and surface:
■ The abrasive performance and the surface quality are determined by the belt speed and the grain size of the abrasive belt ⑧ (see also Section "Selecting speed and abrasive belt").
Sanding process:
■■ Switch the appliance on, place it on the work-piece and work with a moderate forward movement. Run the sander in parallel and overlapping sanding motions over the workpiece.. Only sand in the direction of the grain to avoid transverse scratches. After completing the task, lift the appliance from the workpiece and then switch it off.
NOTE
▶▶ Always hold the appliance firmly with two hands while working..
WARNING! EXPLOSION HAZARD!
■ In environments with an explosive dust / air mixture, please use a specially-designed extraction appliance.
RISK OF FIRE DUE TO FLYING SPARKS! When sanding metals do not use dust extraction (dust box ⑥ or vacuum cleaner).
■ Materials containing asbestos may not be pro-cessed.. Asbestos is a known carcinogen.
WARNING! RISK OF FIRE!
■■ Working with power tools that have a dust collection box or can be connected to a vacuum cleaner via the vacuum cleaner adapter causes a risk of fire! In unfavourable conditions, e.g. when sparks are flying while sanding metal or metal residues in wood, wood dust in the dust box (or in the vacuum cleaner dust bag) can spontaneously ignite. This is a particular risk if the wood dust is mixed with paint residues or other chemicals and the workpiece has become hot after being worked for a long time.. Therefore, do not allow the workpiece to overheat and always empty the dust box or the dust bag of the vacuum cleaner before taking a break from work.
■■ Ensure that your workplace is adequately ventilated.
■ Observe the regulations applicable in your country regarding the materials to be worked.
■■ Wear a dust mask.
◆◆ Press the dust box ⑥ into the notch provided for this purpose on the side of the appliance with the adapter fitting ⑫.
Dismantling / removing the dust box 6 :
◆◆ Pull the dust box 6 off the appliance.
Connect the external extraction adapter 10 (with reducer 11):
♦♦ Push the external extraction adapter 10 onto the adapter fitting 12 .
If necessary, use the reducer ⑪ by pushing it onto the external extraction adapter ⑩.
♦ Push the hose from a suitable dust extraction device (e.g. a workshop vacuum cleaner) onto the external extraction adapter ⑩ (with the reducer ⑪ if necessary).
Removal:
◆◆ Pull the vacuum cleaner hose off the reducer.
◆◆ Pull the external extraction adapter 10 (with the reducer 11 if necessary) off.
Operation
Switching on and off
During operation, you can choose between instant-aneous and continuous operation.
Switching to instantaneous operation:
◆◆ Press the ON/OFF switch 5
Switching off instantaneous operation:
◆◆ Release the ON/OFF switch 5
Switching to continuous operation:
◆◆ Press the ON/OFF switch 5, keep it pressed in and then press the locking button 5.
Switching off continuous operation:
◆◆ Press the ON/OFF switch 5 and release it.
Selecting speed and abrasive belt
You can use the setting wheel for belt speed ^2 to select the speed even if the appliance is running. The optimum belt speed is dependent on the work-piece or material to be processed.. Determine the correct speed by carrying out practical tests. The table below contains recommended values to help you with your investigations.
Stationary work
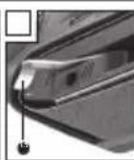
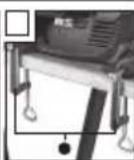
♦ Turn the power tool over as shown in Figure C and place it on a stable worktop.
| Workpiece / sector Softwood | |
| Coarse sanding (grain) 60 | |
| Fine sanding (grain) 240 | |
| Rotation speed | high (5–6) |
| preselection | |
| Workpiece / sector Hardwood |
| Coarse sanding (grain) 60 | |
| Fine sanding (grain) 180 | |
| Rotation speed | high (5–6) |
| preselection | |
| Workpiece / sector Chipboard | |
| Coarse sanding (grain) 60 | |
| Fine sanding (grain) 150 | |
| Rotation speed | high (5–6) |
| preselection | |
| Workpiece / sector | Removing paint / varnish |
| Coarse sanding (grain) | 60 |
| Fine sanding (grain) | — |
| Rotation speed | high (5–6) |
| preselection | |
| Workpiece / sector Whetting paints |
| Coarse sanding (grain) 150 | |
| Fine sanding (grain) 320 | |
| Rotation speed | low (1–2) |
| preselection | |
| Workpiece / sector | De-rusting steel |
| Coarse sanding (grain) | 40 |
| Fine sanding (grain) | 120 |
| Rotation speed | medium / high (3–4) |
| preselection | |
| Workpiece / sector | Plastics | |
| Coarse sanding (grain) | 120 | |
| Fine sanding (grain) | 240 | |
| Rotation speed | | low / medium (2–3) |
| preselection | | |
| Workpiece / sector | Nonferrous metals (e.g. aluminium) |
| Coarse sanding (grain) | 80 |
| Fine sanding (grain) | 150 |
| Rotation speed | |
| preselection | |
◆ Insert two screw clamps ⬆ into the opening is provided ⏻ and use them to clamp the power tool tight.
Tips and tricks
■■ Never work on wood and metal using the same abrasive belt ⑧.
■■ Ripped or torn abrasive belts can damage the workpiece.. For this reason, replace abrasive belts regularly.
■ Only store abrasive belts in a hanging position since they are made unusable by creases etc..
Maintenance and cleaning
⚠ WARNING! RISK OF INJURY! Switch the appliance off and remove the power plug before starting any work on the appliance.
The belt sander is maintenance-free.
■■ Always clean the appliance directly after finishing work.
■ For cleaning the housing use a dry cloth, under no circumstances should you use deter-
gents, solvents or abrasive cleaners.
Emptying / cleaning the dust box ⑥ :
◆◆ Pull the dust box ⑥ off the appliance..
◆ First, open the dust box ⑥ by removing the lid.. Empty the dust box completely by tapping it and then replace the dust box ⑥ on the appli-ance again.
◆◆ Ensure ventilation openings are always free.
◆ Remove any adhering swarf with a brush.
Disposal
The packaging is made from environment-ally friendly material and can be disposed of at your local recycling plant..
Do not dispose of power tools in your normal household waste!
European Directive 2012/19/EU requires that worn-out power tools be collected separately and recycled in an environmentally compatible manner.
Your local community or municipal authorities can provide information on how to dispose of the worn-out appliance.
Warranty
This appliance is provided with a 3-year warranty valid from the date of purchase.. The appliance has been manufactured with care and inspected meticu-iously prior to delivery.
Please retain your receipt as proof of purchase.. In the event of a warranty claim, please contact your Customer Service unit by telephone. This is the only way to guarantee free return of your goods.
NOTE
▶ The warranty only covers claims for material and manufacturing defects, not for transport damage, worn parts or damage to fragile components such as buttons or rechargeable batteries.
This appliance is intended solely for private use and not for commercial purposes. The warranty shall be deemed void in cases of misuse or improper hand-ling, use of force and modifications/repairs which have not been carried out by one of our authorised Service centres.
Your statutory rights are not restricted by this warranty. The warranty period is not prolonged by re-pairs effected under the warranty.. This also applies to replaced and repaired components.
Any damage and defects present at the time of purchase must be reported immediately after un-packing, but no later than two days after the date of purchase.
Repairs carried out after expiry of the warranty period shall be subject to charge.
Service
WARNING!
■■ Have the power tool repaired by the Service centre or a qualified electrician and only using genuine replacement parts. This will ensure that the safety of the appliance is maintained.
WARNING!
■■ Always ensure that the power plug or the mains cable is replaced only by the manu-facturer of the appliance or by an approved customer service provider. This will ensure that the safety of the appliance is maintained.
Introduction
Classe de protection: II/□ (double insulation)
text_image
Technical diagram of a handheld device with labeled parts and exploded views showing internal components
Incertitude: KpA = 3 dB
Incertitude: KWA = 3 dB
Removal and surface:
Switching on and off
text_image
Labeled diagram of a mechanical device with numbered parts and an inset magnified view showing internal components.
natural_image
Three-panel technical diagram showing mechanical components with no visible text or symbols
⚠️ WARNUNG! EXPLOSIONSGEFAHR!
⚠️ WARNUNG! BRANDGEFAHR!
text_image
Labeled diagram of a mechanical device showing internal components and parts with numbered annotations

text_image
Labeled diagram of a mechanical device showing internal components and parts with numbered annotations
natural_image
Three-panel photo showing mechanical components with labeled parts (no readable text or symbols)
text_image
Labeled diagram of a mechanical device with numbered components and an inset magnified view showing internal structure.
natural_image
Three-panel technical diagram showing mechanical components with labeled parts (no readable text or symbols)
ADD: No.B714, Niulanqian Building, Minzhi Road,
Longhua District, Shenzhen, Guangdong, China 518000


text_image
CE
P S
E
RoHS