USER MANUAL AGK31AC Tacklife
Wheel Guard Installation
WARNING Use wheel guard with disc grinding wheels. Always close the latch to secure the guard. Keep the guard between you the wheel. Do not direct guard pening toward your body.
The position of the guard can be adjusted to accommodate the operation being performed.
To attach wheel guard DISCONNECT tool from power source.
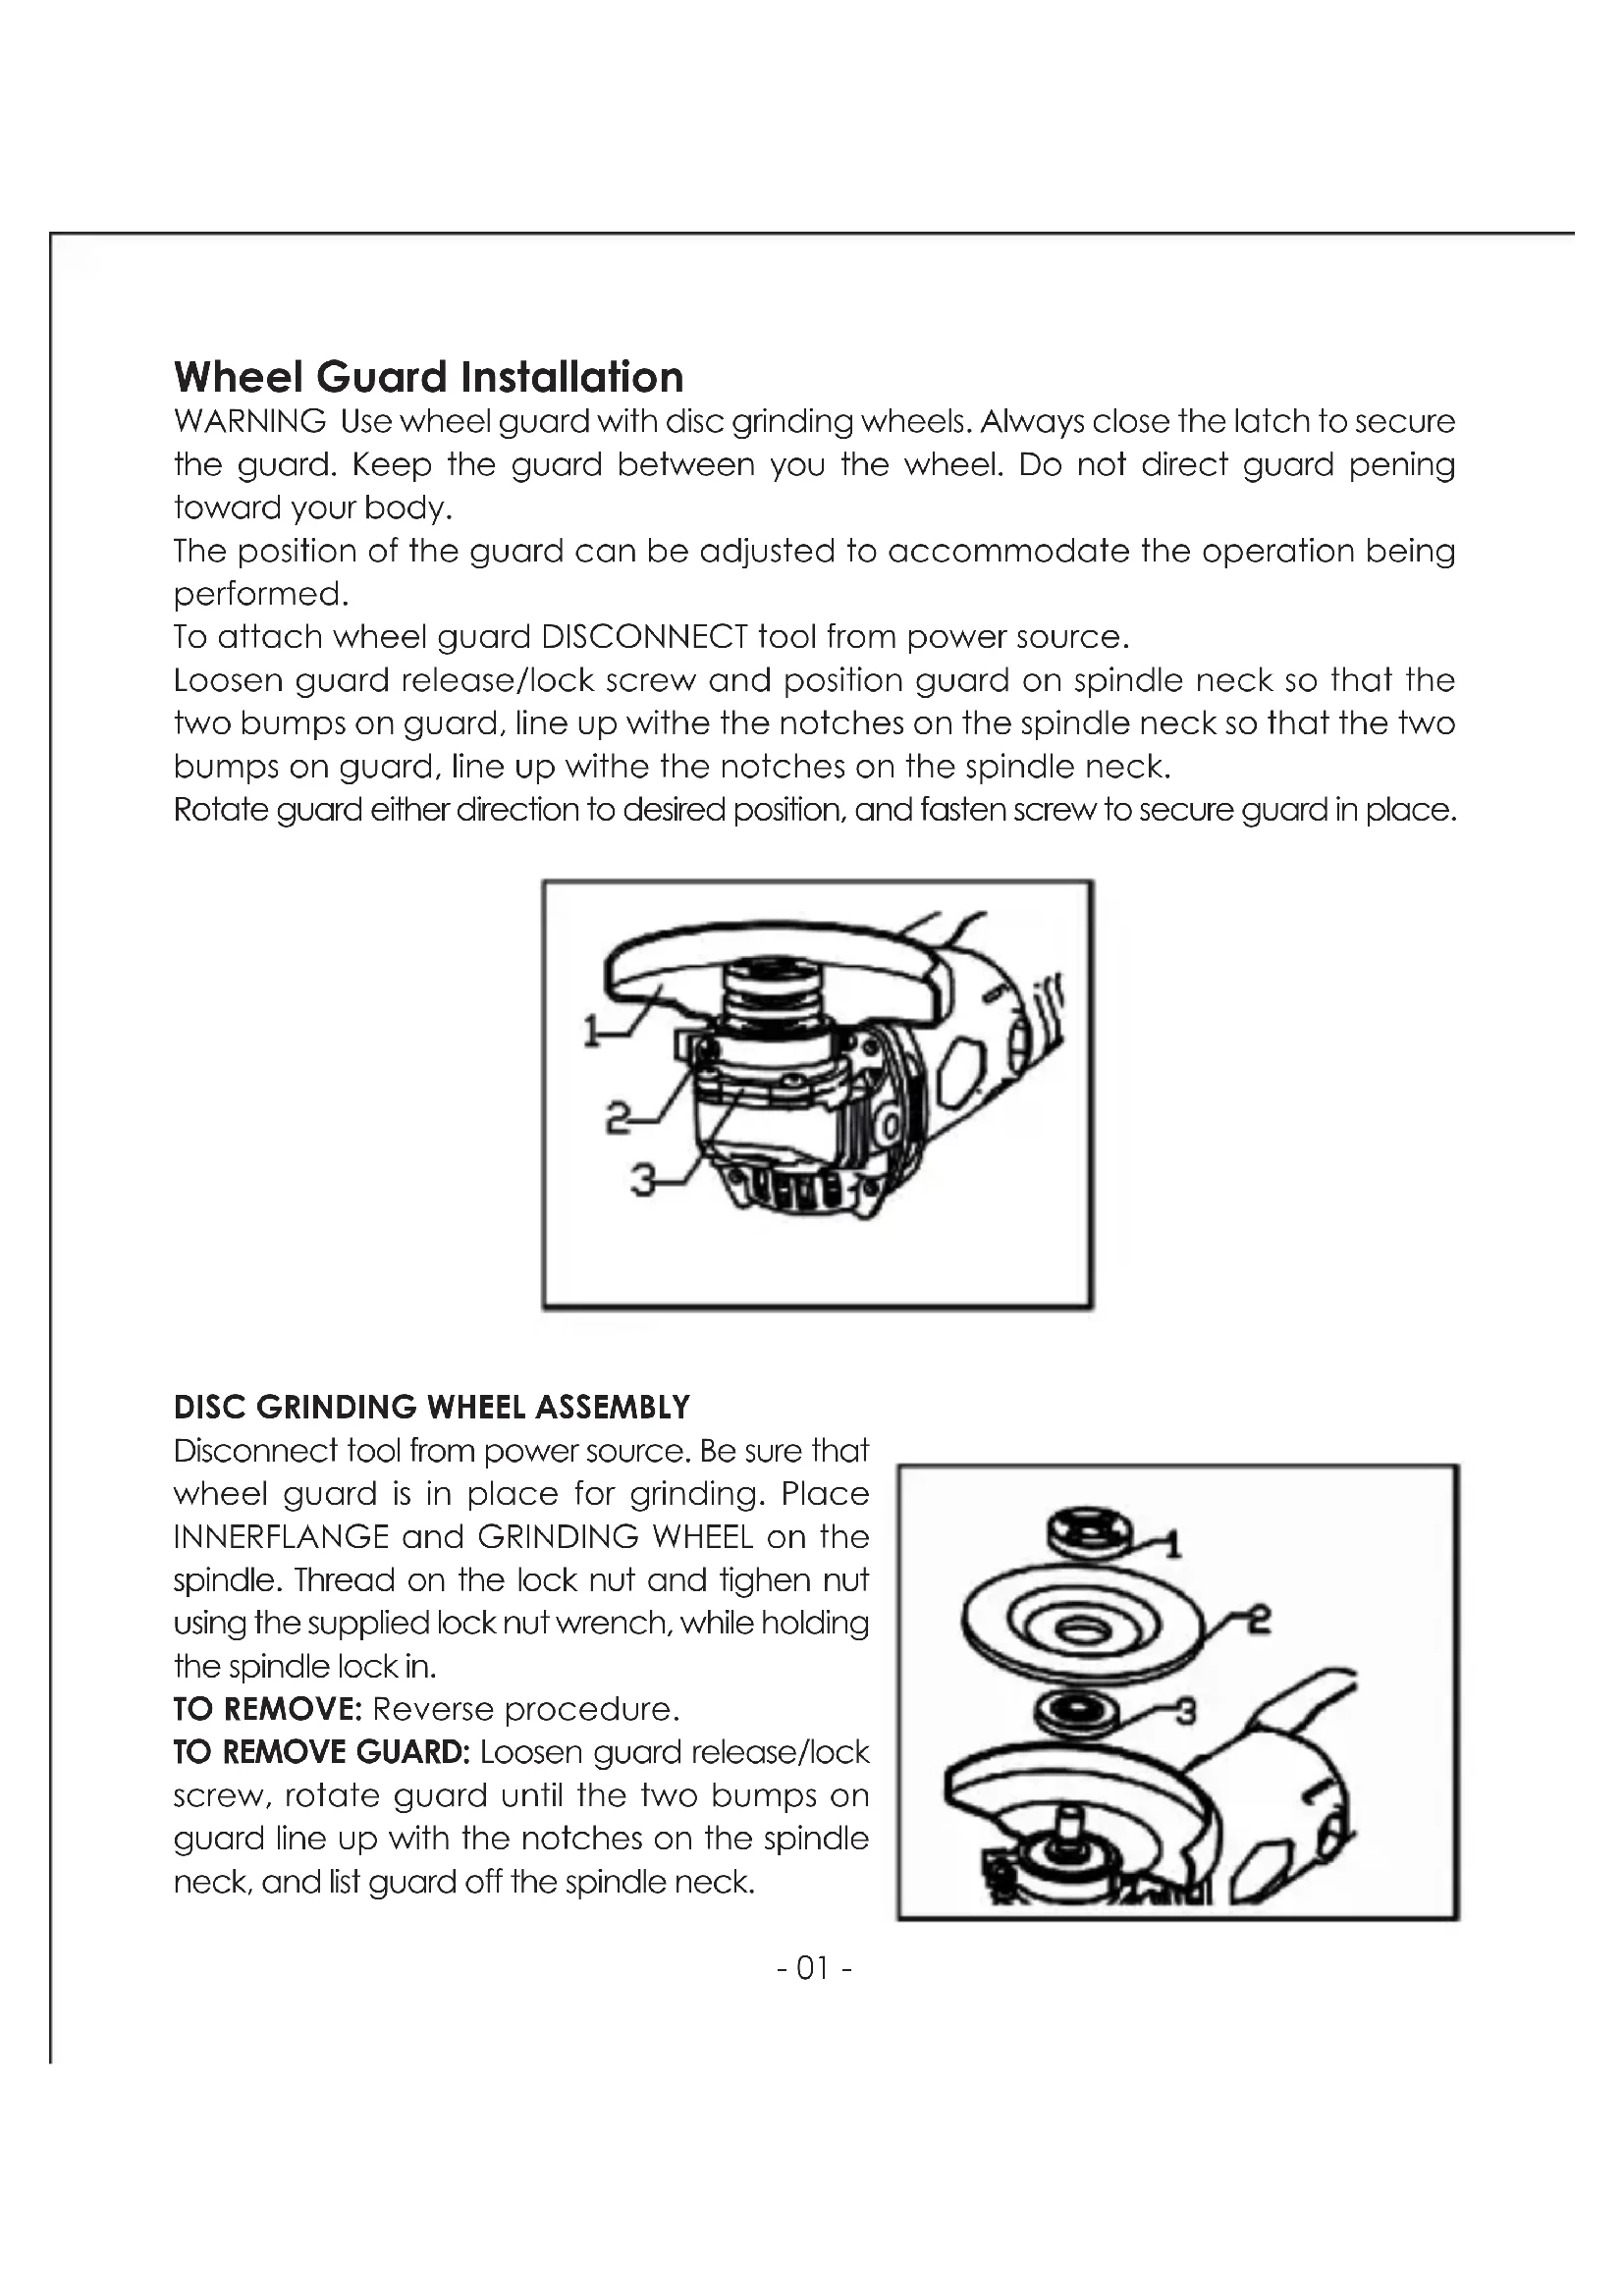
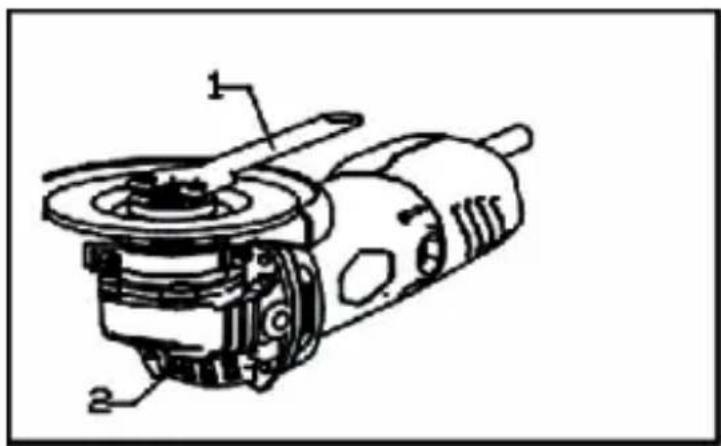
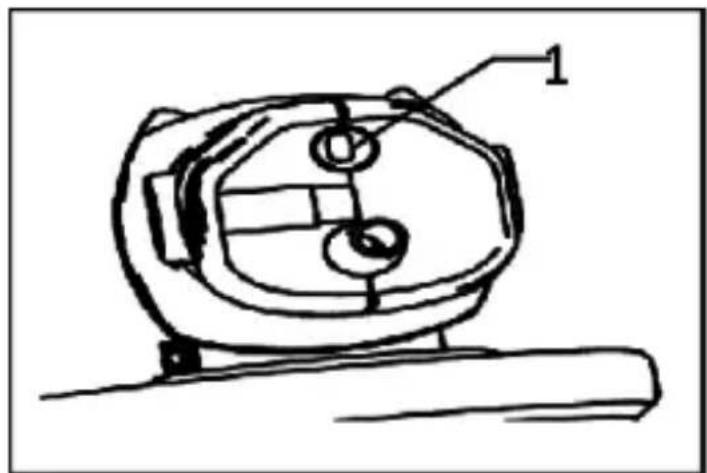
Loosen guard release/lock screw and position guard on spindle neck so that the two bumps on guard, line up withe the notches on the spindle neck so that the two bumps on guard, line up withe the notches on the spindle neck.
Rotate guard either direction to desired position, and fasten screw to secure guard in place.

DISC GRINDING WHEEL ASSEMBLY
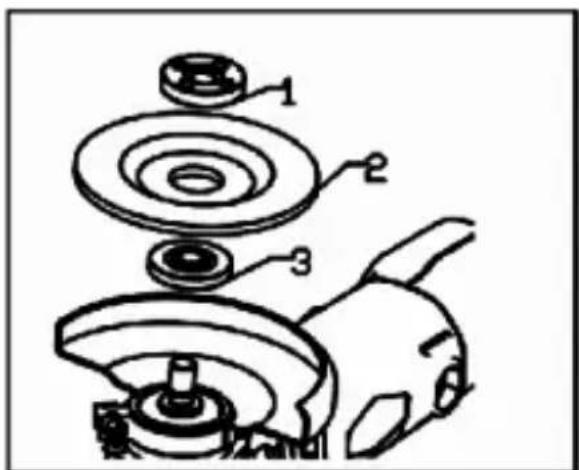
Disconnect tool from power source. Be sure that wheel guard is in place for grinding. Place INNERFLANGE and GRINDING WHEEL on the spindle. Thread on the lock nut and fighen nut using the supplied lock nut wrench, while holding the spindle lock in.
TO REMOVE: Reverse procedure.
TO REMOVE GUARD: Loosen guard release/lock screw, rotate guard until the two bumps on guard line up with the notches on the spindle neck, and list guard off the spindle neck.
LOCK NUT AND INNER FLANGE
Your tool is equipped with a threaded spindle for mounting accessories. Always use the supplied lock nut (and backing flange) that has same thread size as spindle.
SIDE HANDLE
The side handle used to guide and balance the tool can be threaded into the front housing on either side of the tool, depending on personal preference and comfort. Use the side handle for safe control and ease of operation.
Operating Instructions ON/OFF TOGGLE SIWTCH
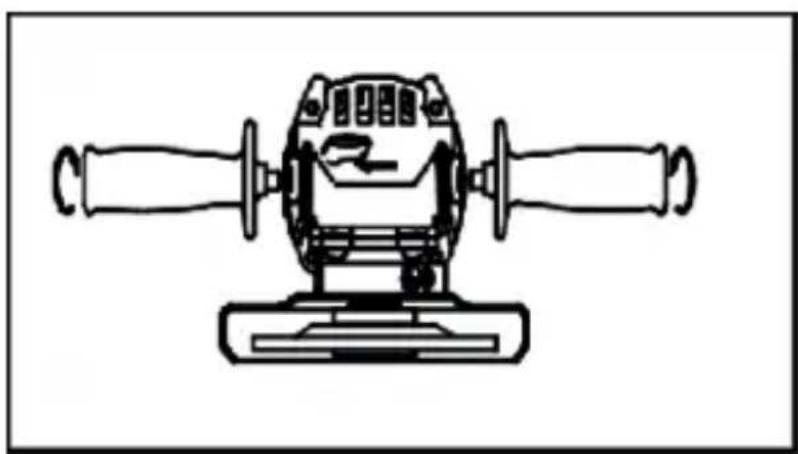
The tool is switched by "on" or "off" by the toogle bar located in the rear handle. TO TURN THE TOOL "ON", push the toogle bar to the side of marked "I". TO TURN THE TOOL "OFF", push the toogle bar to the side of marked "O".
WARNING
Hold the tool with both tools, since torque from the motor can cause the tool to twist. Start the tool before applying to work and let the tool come to full speed before contacting the workpiece. Lift the tool from the work before releasing the switch. DO NOT turn the switch "ON" and "OFF" while the tool is under load; this will greatly decrease the switch life.
Grinding Operations
SELECTING GRINDING WHEELS
WARNING
Before using a gringding wheel, be certain that its maximum safe operating speed is not exceeded by the nameplate speed of the grinder. Do not exceed the recommended wheel diameter.
DISC GRINDING WHEELS
Grinding wheels should be carefully selected in order to use the grinder most efficiently. Wheels vary in type of abrasive, bond, hardness, grit size and structure. The correct type of wheel to use is determined by the job. Use disc grinding wheels for fast grinding of structural steel, heavy weld beads, steel casting, stainless steel and other ferrous metals.
GRINDING TIPS
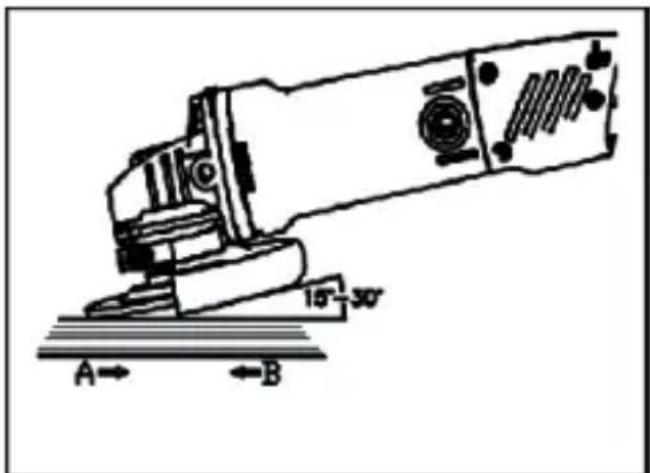
Efficient grinding is achieved by controlling the pressure and keeping the angle between wheel and workpiece at 15^ to 30^ . If the wheel is flatthe tool is difficult to control. If the angle is too steep, the pressure is concentrated on a small area causing burning to the work surface.
WARNING
Excessive or sudden pressure on the wheel will slow grinding action and put dangerous stresses on the wheel.
When grinding with a new wheel be certain to grind while pulling tool backwards until wheel becomes rounded on its edge. New wheels have sharp corners which tend to: bite or cut into workpiece when pushing forward.
Sanding operations
SELECTING DANDING DISC
Sanding discs are made of extremely hard and sharp aluminum oxide grits, phenolresin bonded to a sturdy fiber packing for fast heavy-duty service and long life.
The discs vary as to size and spacing of the abrasive grits. OPEN COAT(type H)-used for soft materials and on paint of varnish. CLOSED COAT (type k)-used for matel, hardwood, stone, marble and tother materials.
Sanding discs range in grip from 16(very coarse) to 180(very fine). To obtain best results, select sanding discs carefully. Many jobs require the use of several grit sizes and at times both "open coat and closed coat" discs are required to get the job done faster. See chart for application examples.
Carbon Brush Replacement
WARNING
When any service or inspection applying to the tool, please confirm the tool is switched OFF and plug out.
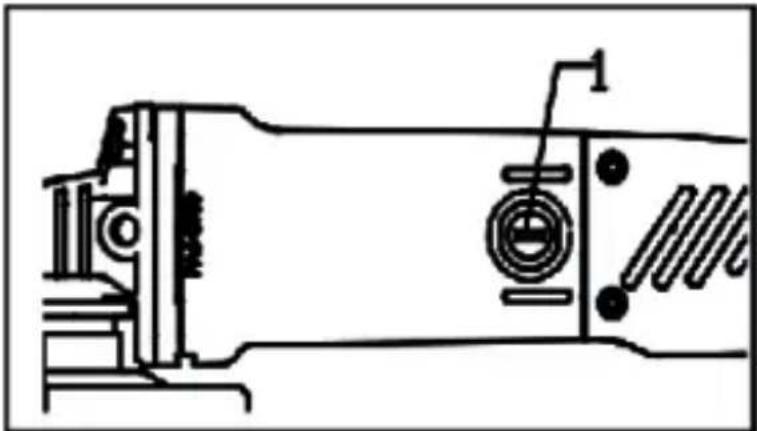
Brush Cap
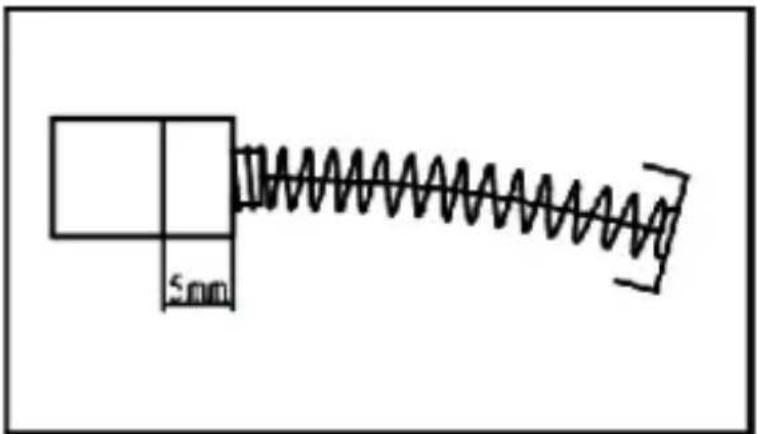
Check carbon brushes regularly. Carbon brushes should be replaced when they wore out only 5mm.
Dispart the Brush Cap out by slot screwdriver. Take the carbon brush out, and put the new carbon brush in, the tighten bursh cap again.
NOTE: Try the carbon brushes out and in the brush holders smoothly before screw in the brush cap. And both of carbon brushes should be replaced together.
Maintenance Service
WARING
Preventive maintenance performed by unauthorized personnel may result in misplacing of internal wires and components which could cause serious hazard. We recommend that all tool service be performed by a Factory Authorized Service Station.
Your tool has been properly lubricated and is ready to use. It is recommended that tools with gears be regreased with a special gear lubricant at every brush change .
Carbon Brushes
The brushes and commutator in your tool have been engineered for many hours of dependable service. To maintain peak efficiency of the motor, we recommend every 50 hours of operation the brushes be examined. Only genuine replacement brushes specially designed for your tool should be used.
Bearings
After about 50 hours of operation, of at every second brush change, the bearings should be replaced at Factory Authorized Service Station. Bearings which become noisy (due to heavy load or very abrasive material cutting) should be replaced at once to avoid overheating or motor failure.
Cleaning
WARNING
To avoid accidents always disconnect the tool from the power supply cleaning or performing any maintenance. The tool may be cleaned most effectively with compressed dry air. Always wear safety goggles when cleaning tools with compressed air. Ventilation openings and switch levers must be kept clean and free of foreign matter. Do not attempt to clean by inserting pointed objects through openings.
CAUTION
Certain cleaning agents and solvents damage plastic parts. Some of these are: gasoline, carbon tetrachloride, chlorinated cleaning solvents, ammonia and household detergents that contain ammonia.
Shenzhen Temie Technology Co. Ltd.
Web: www.tacklifetools.com
E-mail: support@tacklife.net
ADD:No.31, Qing Linxi Road, Longgang District, Shenzhen, Guangdong, China 518172


MADE IN CHINA