
PCD05D - Screwdriver Tacklife - Free user manual and instructions
Find the device manual for free PCD05D Tacklife in PDF.
| Brand | Tacklife |
| Model | PCD05D |
| Product Type | Cordless Screwdriver |
| Rated Voltage | DC 18 V |
| No-Load Speed | 0-350 rpm (low) / 0-1300 rpm (high) |
| Chuck Capacity | 10 mm |
| Max Drilling Capacity (Steel) | Ø 6 mm |
| Max Drilling Capacity (Wood) | Ø 18 mm |
| Battery Type | Li-ion 2.0 Ah |
| Battery Voltage | DC 18 V |
| Charger – Input Voltage | 220-240 V AC, 50-60 Hz |
| Charger – Output Voltage | DC 18 V |
| Charger – Output Current | 2200 mA |
| Charging Time | 1 hour |
| Sound Pressure Level (LPA) | 66.13 dB(A) |
| Sound Power Level (LWA) | 77.13 dB(A) |
| Vibration (No Load) | 1.349 m/s² |
| Vibration (Drilling) | 1.142 m/s² |
| Protection Class | II (Double Insulation) |
| Battery Charge Indicator | Yes (LED) |
| Integrated Light | Yes (LED) |
| Belt Clip | Yes |
| Rotation Direction | Reversible (forward/reverse) |
| Speed Selector | 2 speeds |
| Maintenance | Clean with soft cloth, periodic lubrication |
Frequently Asked Questions - PCD05D Tacklife
User questions about PCD05D Tacklife
0 question about this device. Answer the ones you know or ask your own.
Ask a new question about this device
Download the instructions for your Screwdriver in PDF format for free! Find your manual PCD05D - Tacklife and take your electronic device back in hand. On this page are published all the documents necessary for the use of your device. PCD05D by Tacklife.
USER MANUAL PCD05D Tacklife
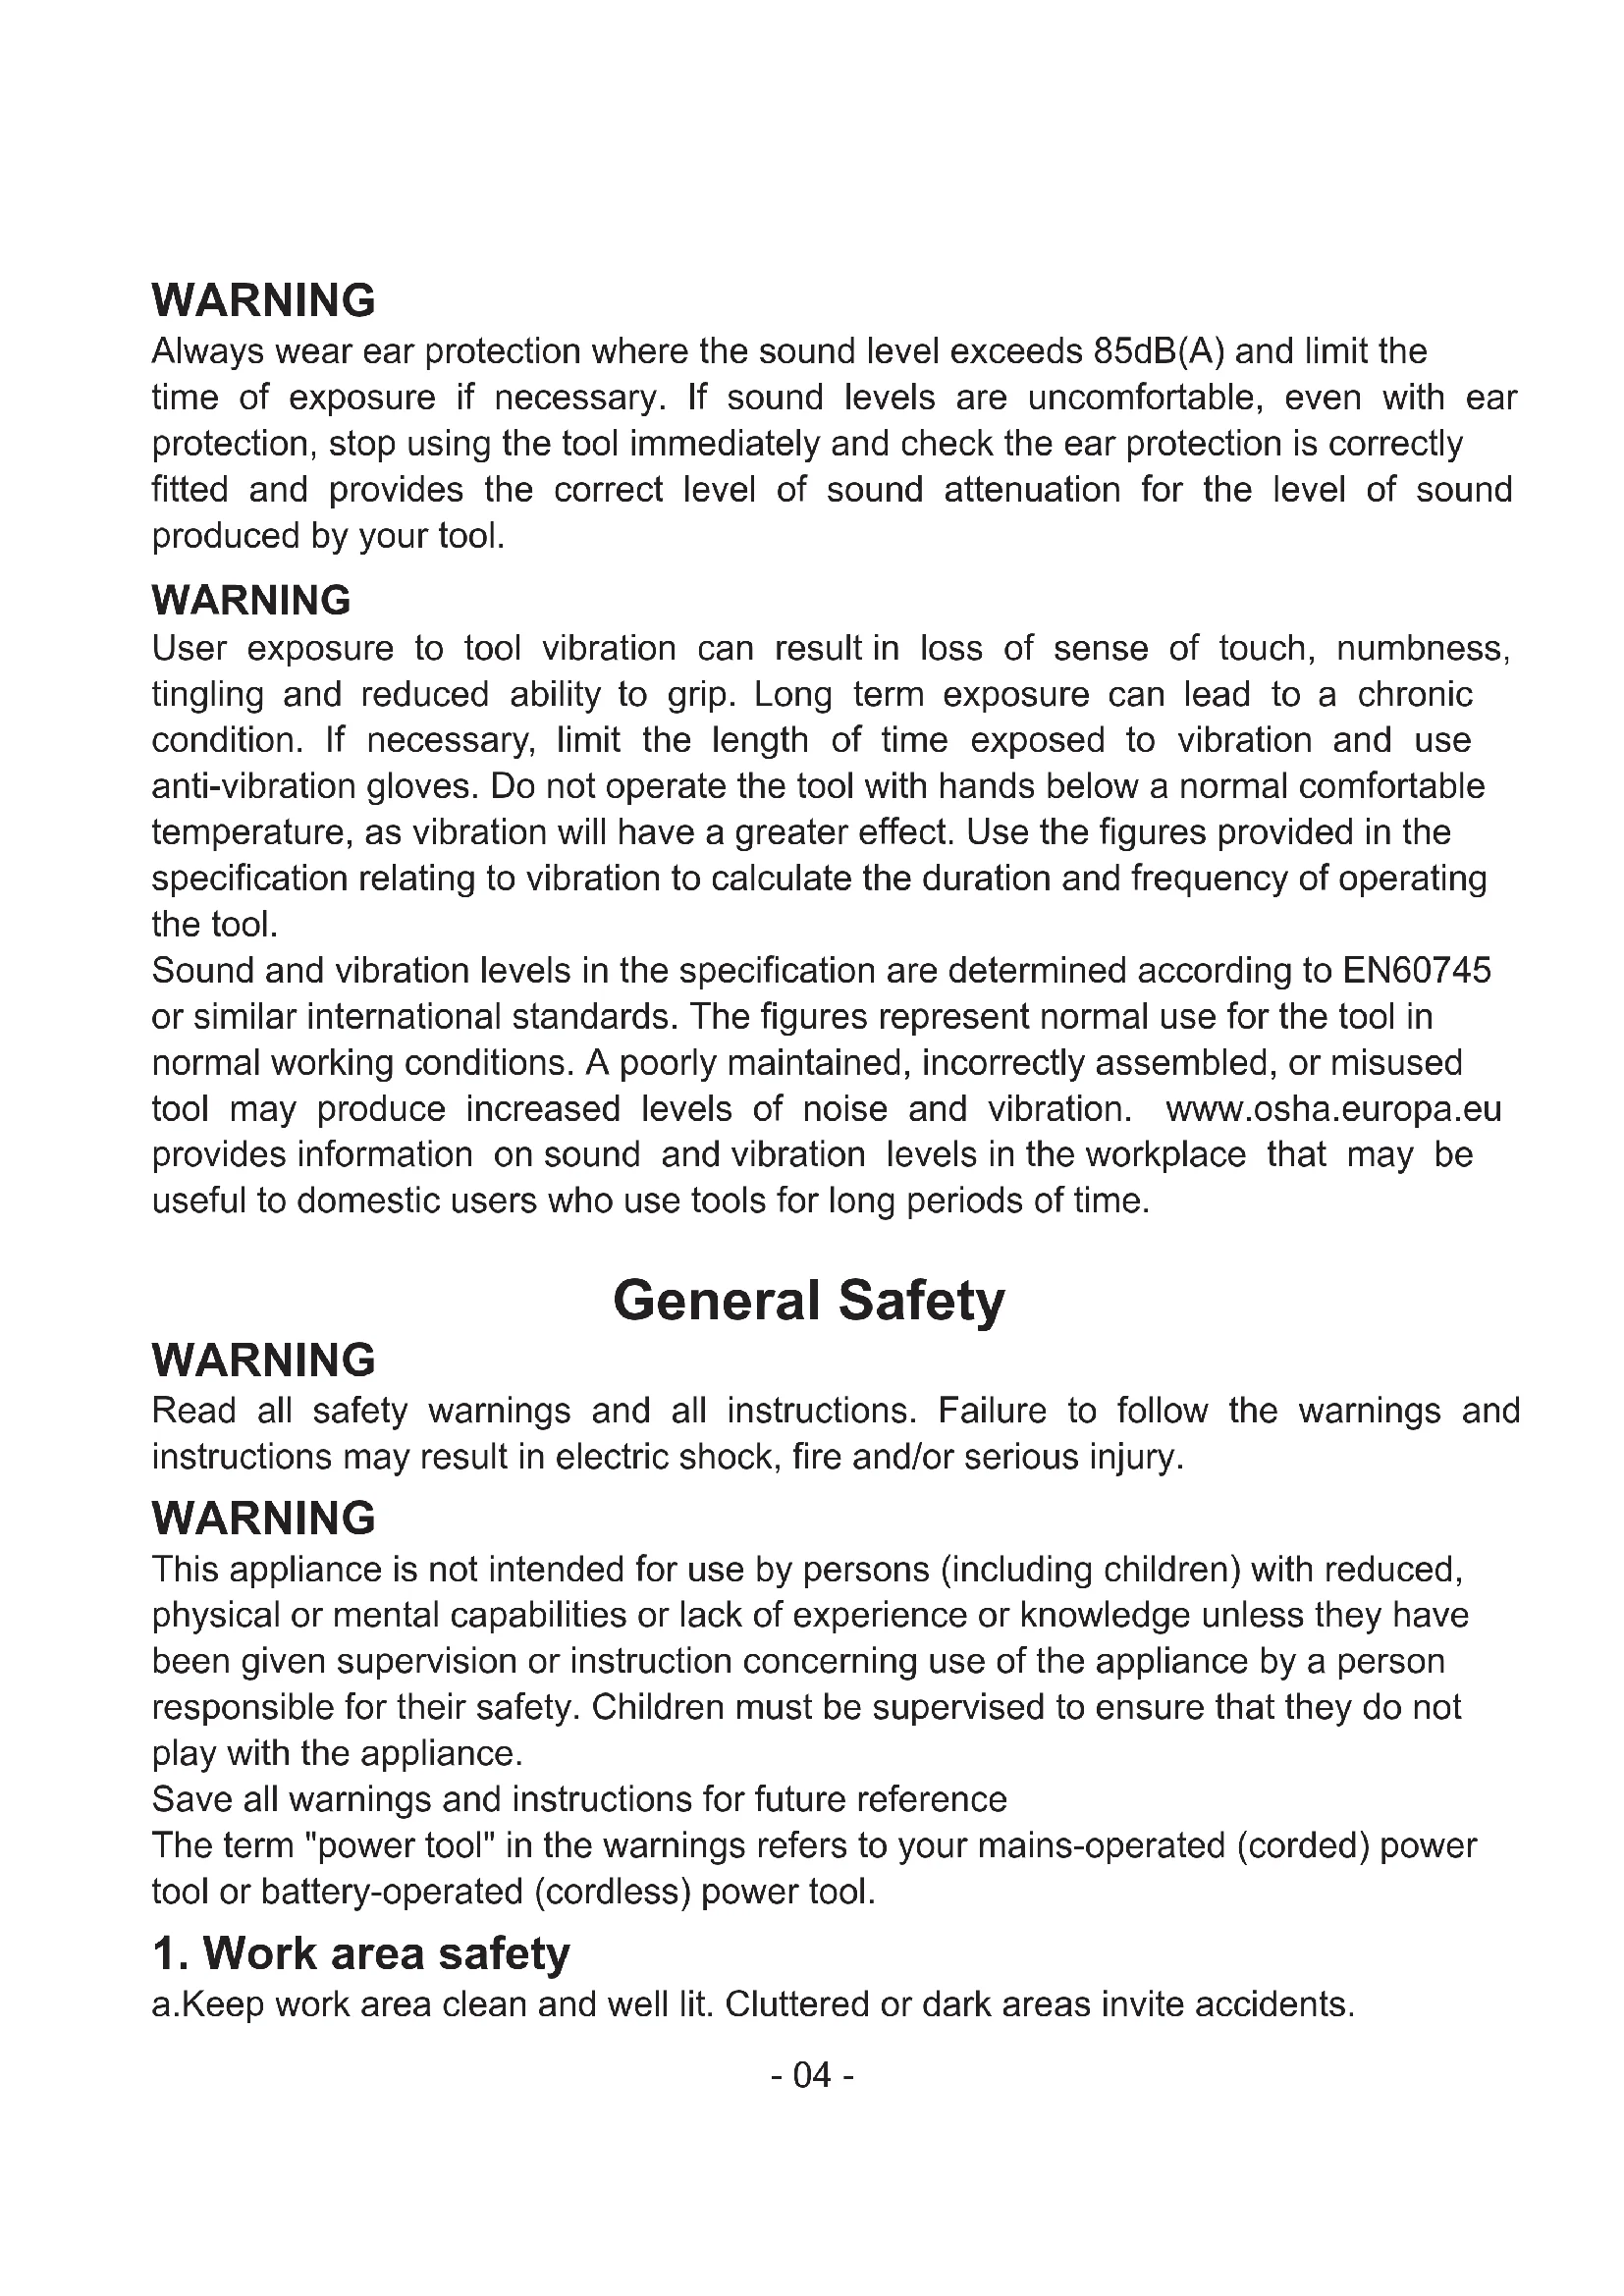
Cordless Drill/Driver
Model: PCD05B
Contents
English 01~15
Deutsch 16~32
33~48
Espanol 49~65
Italiano 66~81
日本語 82~95
Original Instructions
Description of Symbols
The rating plate on your tool may show symbols. These represent important information about the product or instructions on its use.

Wear hearing protection
Wear eye protection
Wear breathing protection
Wear head protection

Wear hand protection

Read instruction manual

DO NOT incinerate batteries!

Caution!

For indoors use only!

Internal time lag fuse with a maximum current of 3.15A.

Class II construction

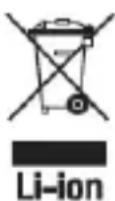
Li-ion
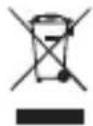
Environmental Protection Waste electrical products should not be disposed of with household waste. Please recycle where facilities exist.
Check with your local authority or retailer for recycling advice.

Conforms to relevant legislation and safety standards.

Li-ion
Li-ion battery cells are recyclable and should not be disposed of with household waste. Please recycle where facilities exist. Check with your local authority or retailer for recycling advice
Specification
| Rated Voltage | DC 18 V (MAX 20V) |
| No-load Speed | 0-350/0-1300 rpm |
| Chuck Capacity | 10 mm |
| Max. Drilling Capacity | Steel: Ø 6 mm |
| Wood: Ø18 mm | |
| Battery pack Voltage | DC 18 V (MAX 20V) |
| -Battery cell | Li-ion 2.0 Ah |
| Charger | |
| -Rated Voltage | 220-240V AC(UK)/120V AC (US), 50-60Hz |
| -Output Voltage | DC 18V(MAX 20V) |
| -Rated output current | 2200 mA |
| -Charging Time | 1 hr |
| Protection class | ☐ |
| Sound and Vibration Data | |
| Sound pressure LPA | 66.13 dB(A) |
| Sound power LWA | 77.13 dB(A) |
| Uncertainty K: | 3 dB(A) |
| Vibration (No load) | 1.349 m/s² |
| Vibration (Drilling) | 1.142 m/s² |
| Uncertainty K: | 1.5 m/s² |
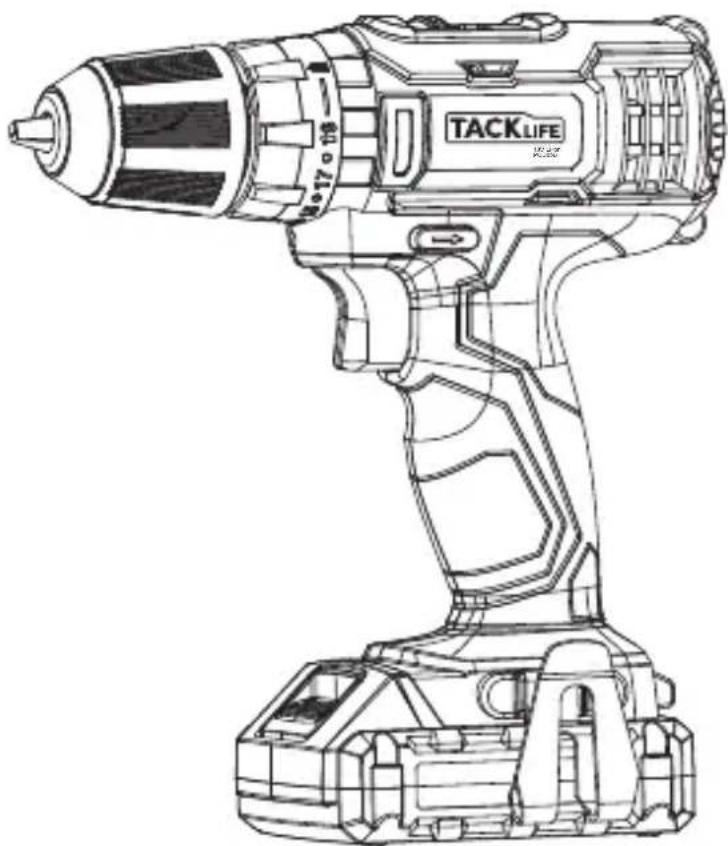
Product Features
- Chuck Jaws
- Torque Selector
- Motor Vents
- Trigger Switch
- Work Light
- Battery Charge Indicator
-
Belt Clip
-
Chuck Collar
- Gear Switch
- Forward / Reverse Switch
- Hand Grip
- Battery
- Battery Release
- Charger

WARNING
Always wear ear protection where the sound level exceeds 85dB(A) and limit the time of exposure if necessary. If sound levels are uncomfortable, even with ear protection, stop using the tool immediately and check the ear protection is correctly fitted and provides the correct level of sound attenuation for the level of sound produced by your tool.
WARNING
User exposure to tool vibration can result in loss of sense of touch, numbness, tingling and reduced ability to grip. Long term exposure can lead to a chronic condition. If necessary, limit the length of time exposed to vibration and use anti-vibration gloves. Do not operate the tool with hands below a normal comfortable temperature, as vibration will have a greater effect. Use the figures provided in the specification relating to vibration to calculate the duration and frequency of operating the tool.
Sound and vibration levels in the specification are determined according to EN60745 or similar international standards. The figures represent normal use for the tool in normal working conditions. A poorly maintained, incorrectly assembled, or misused tool may produce increased levels of noise and vibration. www.osha.europa.eu provides information on sound and vibration levels in the workplace that may be useful to domestic users who use tools for long periods of time.
General Safety
WARNING
Read all safety warnings and all instructions. Failure to follow the warnings and instructions may result in electric shock, fire and/or serious injury.
WARNING
This appliance is not intended for use by persons (including children) with reduced, physical or mental capabilities or lack of experience or knowledge unless they have been given supervision or instruction concerning use of the appliance by a person responsible for their safety. Children must be supervised to ensure that they do not play with the appliance.
Save all warnings and instructions for future reference
The term "power tool" in the warnings refers to your mains-operated (corded) power tool or battery-operated (cordless) power tool.
1. Work area safety
a.Keep work area clean and well lit. Cluttered or dark areas invite accidents.
b. Do not operate power tools in explosive atmospheres, such as in the presence of flammable liquids, gases or dust. Power tools create sparks which may ignite the dust or fumes.
c. Keep children and bystanders away while operating a power tool. Distractions can cause you to lose control.
2. Electrical safety
a. Power tool plugs must match the outlet. Never modify the plug in any way. Do not use any adapter plugs with earthed (grounded) power tools. Unmodified plugs and matching outlets will reduce risk of electric shock.
b. Avoid body contact with earthed or grounded surfaces, such as pipes, radiators, ranges and refrigerators. There is an increased risk of electric shock if your body is earthed or grounded.
c. Do not expose power tools to rain or wet conditions. Water entering a power tool will increase the risk of electric shock.
d. Do not abuse the cord. Never use the cord for carrying, pulling or unplugging the power tool. Keep cord away from heat, oil, sharp edges or moving parts. Damaged or entangled cords increase the risk of electric shock.
e. When operating a power tool outdoors, use an extension cord suitable for outdoor use. Use of a cord suitable for outdoor use reduces the risk of electric shock.
f. If operating a power tool in a damp location is unavoidable, use a residual current device (RCD) protected supply. Use of an RCD reduces the risk of electric shock.
3. Personal safety
a. Stay alert, watch what you are doing and use common sense when operating a power tool. Do not use a power tool while you are tired or under the influence of drugs, alcohol or medication. A moment of inattention while operating power tools may result in serious personal injury.
b. Use personal protective equipment. Always wear eye protection. Protective equipment such as dust mask, non-skid safety shoes, hard hat, or hearing protection used for appropriate conditions will reduce personal injuries.
c. Prevent unintentional starting. Ensure the switch is in the off-position before connecting to power source and/or battery pack, picking up or carrying the tool. Carrying power tools with your finger on the switch or energising power tools that have the switch on invites accidents.
d. Remove any adjusting key or wrench before turning the power tool on. A wrench or a key left attached to a rotating part of the power tool may result in personal injury.
e. Do not overreach. Keep proper footing and balance at all times. This enables better control of the power tool in unexpected situations
f. Dress properly. Do not wear loose clothing or jewellery. Keep your hair, clothing and gloves away from moving parts. Loose clothes, jewellery or long hair can be caught in moving parts.
g. If devices are provided for the connection of dust extraction and collection facilities, ensure these are connected and properly used. Use of dust collection can reduce dust-related hazards.
4. Power tool use and care
a. Do not force the power tool. Use the correct power tool for your application. The correct power tool will do the job better and safer at the rate for which it was designed.
b. Do not use the power tool if the switch does not turn it on and off. Any power tool that cannot be controlled with the switch is dangerous and must be repaired.
c. Disconnect the plug from the power source and/or the battery pack from the power tool before making any adjustments, changing accessories, or storing power tools. Such preventive safety measures reduce the risk of starting the power tool accidentally.
d. Store idle power tools out of the reach of children and do not allow persons unfamiliar with the power tool or these instructions to operate the power tool. Power tools are dangerous in the hands of untrained users.
e. Maintain power tools. Check for misalignment or binding of moving parts, breakage of parts and any other condition that may affect the power tool's operation. If damaged, have the power tool repaired before use. Many accidents are caused by poorly maintained power tools.
f. Keep cutting tools sharp and clean. Properly maintained cutting tools with sharp cutting edges are less likely to bind and are easier to control.
g. Use the power tool, accessories and tool bits etc. in accordance with these instructions, taking into account the working conditions and the work to be performed. Use of the power tool for operations different from those intended could result in a hazardous situation.
WARNING: When used in Australia or New Zealand, it is recommended that this tool is ALWAYS supplied via Residual Current Device (RCD) with a rated residual current of 30mA or less
5. Battery tool use and care
a. Recharge only with the charger specified by the manufacturer. A charger that is suitable for one type of battery pack may create a risk of fire when used with another battery pack
b. Use power tools only with specifically designated battery packs. Use of any other battery packs may create a risk of injury and fire. When battery pack is not in use, keep it away from other metal objects, like paper clips, coins, keys, nails, screws or other small metal objects that can make a connection from one terminal to another. Shorting the battery terminals together may cause burns or a fire.
d. If liquid contacts eyes, additionally seek medical help. Liquid ejected from the battery may cause irritation or burns.
e. Under abusive conditions, liquid may be ejected from the battery; avoid contact. If contact occurs, flush with water. If liquid contacts eyes, additionally seek medical help. Liquid ejected from the battery may cause irritation or burns.
6. Service
a. Have your power tool serviced by a qualified repair person using only identical replacement parts. This will ensure that the safety of the power tool is maintained.
Additional Safety for Battery-Operated Drills WARNING
Important: It is imperative to follow all national safety regulations concerning installation, operation and maintenance.
a. DO NOT allow anyone under the age of 18 years to use this tool, and ensure that operators are qualified and familiar with the operating and safety instructions
b. Battery chargers are for indoors use only. Ensure that the power supply and charger are protected against moisture at all times.
c. When using the drill, use safety equipment including safety glasses or shield, ear defenders, and protective clothing including safety gloves. Wear respiratory protection suitable for the work being undertaken. A minimum rating of FFP2 is recommended. If operating the tool causes discomfort in any way, stop immediately and review your method of use.
d. Use metal and voltage detectors to locate concealed electric, water or gas lines. Avoid touching live components or conductors.
e. Ensure that the lighting is adequate.
f. Ensure that the drill bit is securely fixed in the chuck. Insecure drill bits can be ejected from the machine causing a hazard
g. Ensure that the drill bit is not in contact with the workpiece prior to starting up the tool.
h. Before drilling, check that there is sufficient clearance for the drill bit under the workpiece.
i. DO NOT exert pressure on to the tool. To do so would shorten its service life.
j. Drill bits get hot during operation, allow to cool prior to handling them.
k. NEVER use your hands to remove sawdust, chips or waste close by the bit.
I. If you are interrupted when operating the drill, complete the process and switch off before looking up.
m.Where possible, use clamps or a vice to hold your work.
n. Examine the chuck regularly for signs of wear or damage. Have damaged parts repaired by a qualified service centre) ALWAYS wait until the drill has com.
o. ALWAYS wait until the drill has come to a complete stop before putting it down.
p. Periodically check all nuts, bolts and other fixings and tighten where necessary.
Battery Safety

WARNING
Li-ion batteries, if incorrectly used, stored or charged are a fire, burn and explosion hazard.
- Keep the battery out of reach of children.
- ONLY charge Li-Ion batteries using the charger provided or designed specifically for your product.
- ONLY use Li-lon batteries provided with a product or specifically designed to be compatible.
- Allow batteries to cool for 15 minutes after charging or heavy use. Failure to follow these instructions may cause overheating or fire
- When not in use batteries should be stored at room temperature (approximately 20^ ).
- Ensure that battery contacts cannot accidentally short in storage. Keep batteries clean; foreign objects or dirt may cause a short. Keep away from other metal objects, for example, paperclips, coins, keys, nails and screws.
- Under abusive conditions, liquid may be ejected from the battery. This liquid may cause skin irritation or burns. Avoid contact. If contact accidentally occurs, flush with water. If liquid contacts eyes, seek medical help.
- DO NOT open, disassemble, crush, heat above 60^ or incinerate. Do not dispose of in fire or similar.
Battery Charger Safety
Use the battery charger correctly
- Refer to the section of this manual relating to use of the battery charger before attempting to charge the battery.
- Do not attempt to use the charger with any batteries other than those supplied.
- Keep your battery charger clean; foreign objects or dirt may cause a short or block
air vents. Failure to follow these instructions may cause overheating or fire.
- If the supply cord is damaged, it must be replaced by the manufacturer, its service agent or similarly qualified persons in order to avoid a hazard.
WARNING
DO NOT attempt to recharge non-rechargeable batteries.
Before Use
Removing a battery
Remove the Battery from the tool by pressing the Battery Release, then slide the Battery out of the Battery Slot.
WARNING
DO NOT try to remove the Battery without pressing the Battery Release button. The tool or Battery could be damaged.
Fitting a battery
- Fit a battery by sliding it on to the Battery Slot of the tool until it clicks and locks into position.
Note
Make sure the Battery and tool are lined up correctly. If the Battery does not slide into the tool easily, do not force it. Instead, slide the Battery out of the tool again, check the top of Battery and the tool battery slot are clean and undamaged and that the contacts are not bent.
Setting up the battery charger
- If fitted, remove any Battery from the Battery Charger.
- Insert the Battery Charger mains plug into a suitable mains socket.
Note
The RED LED on the Charger base will on to indicate that the charger is ready to charge the battery.
WARNING
Use this charger ONLY to charge the supplied battery or additional purchased batteries that are specifically designed for this tool.
WARNING
The charger is designed for indoor use only, and MUST NOT be used in damp or wet conditions.
Charging the battery
WARNING
Failure to follow the correct procedure when charging batteries will result in permanent damage.
Note
Normal charging time is approximately 3-5hr for a recently discharged 1.5Ah capacity battery. However, if the Battery has been left in a discharged state for some time, it may take additional time to charge.
- Slide a fully or partially discharged Battery on to the Battery Charger .
Note
Make sure the Battery and Battery Charger are lined up correctly. If the Battery does not slide on to the Battery Charger easily, don't force it. Instead, remove the Battery, check the top of Battery and the Battery Charger slot are clean and undamaged and that the contacts are not bent.
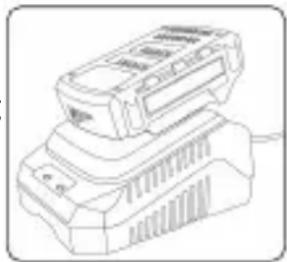
- Once charging commences, the Red LED will on
- When the Battery is fully charged, the Red LED will off and Green LED will on.
Battery Charge Level
The Battery has a built-in Battery Charge Indicator.
Pressing on the button to the right will indicate the charge level. The right LED indicates a high charge level and the left a low charge level that will mean the battery pack will require charging soon.
MPORTANT
When a low charge level is indicated, the tool may stop operating while in use, which is dangerous when operating a circular saw. Always ensure the battery pack has a good charge level.
Note
about battery charging:
- The battery should be charged at ambient temperatures between 10 and 40^ (ideally around 20^ ).
- After charging, allow 15 minutes for the battery to cool before use.
- Ensure that the charger is disconnected from the mains supply after use, and is stored correctly.
- DO NOT leave batteries on charge for extended periods and NEVER store batteries on charge.
- The Battery Charger monitors battery temperature and voltage while charging.
Remove the Battery once charging is complete to maximise charge cycles of the battery and not waste power.
- Batteries can become faulty over time, individual cells in the battery can fail and the battery could short. The charger will not charge faulty batteries. Use another battery, if possible, to check correct functionality of the charger and purchase a replacement battery if a faulty battery is indicated.
- DO NOT store lithium-ion battery packs in a discharged state over a long period as this can damage the lithium-ion cells. For long-term storage, store batteries in a high charge state disconnected from the power tool.
- The capacity of batteries will reduce over time. After 100 charge cycles, the battery's operation time and the maximum torque performance of the driver will slightly reduce. This decline will continue until the battery has minimal capacity after 500 charge cycles. This is normal and not a fault with the battery pack.
Fitting drill bits and accessories
WARNING
ALWAYS remove the Battery from the drill before attaching, adjusting or removing accessories.
WARNING
DO NOT attempt to tighten drill bits (or any other accessory) by gripping the front part of the chuck and switching the tool on. This can lead to personal injury and can cause damage to the chuck
WARNING
NEVER fit any accessory or bit with a maximum speed lower than the no load speed of he power tool.
- Open the Chuck Jaws (1) by rotating the Chuck Collar (2) anti-clockwise.
- Place the drill bit or accessory centrally into the chuck.
- Tighten the Chuck Jaws by rotating the Chuck Collar clockwise.
- When the drill bit or accessory is securely fastened, carefully run the machine to test that it is running centrally, smoothly and evenly. If the bit is 'wobbling' or not running centrally, release the chuck, check the accessory for damage, correct its position, retighten and test again.
Operation
Direction control
WARNING
NEVER change the direction of rotation while the tool is running. This may cause permanent damage to the tool.
- The direction of rotation can be set using the Forward/Reverse Switch (6).
- For anti-clockwise rotation, push the switch to the right.
- For clockwise rotation, push the switch to the left.
Note
When the Forward/Reverse Switch is in the central position, the drill is locked and cannot be switched on. Use this setting as a safety feature to prevent the drill from being switched on accidentally.
Torque control
Note
This cordless drill is equipped with a torque control clutch allowing the machine to be set to the correct torque for the individual application.
- The clutch settings are indicated by the symbols on the Torque Selector (3)
- Rotate the Torque Selector to select the desired setting: the higher the number displayed on the torque ring, the higher the torque produced by the too.
Gear selection
- Select gear 1 on the Gear Switch (4) for the higher torque. A lower speed gear is generally more suitable for driving screws and fasteners
- Select gear 2 on the Gear Switch for the lower torque. A higher speed gear is for drilling and must not be used for driving screws and fasteners.
Note
ALWAYS read the documentation provided with drill bits and accessories for the recommended or maximum speed setting and use the most appropriate gear. See 'Specification' for the maximum no load speed of each gear.
Switching on/off
WARNING
ALWAYS wear adequate personal protection equipment when setting up and operating this machine.
- To start the drill, squeeze the Trigger Switch (7).
- The built-in Work Light (9) will illuminate when the Trigger Switch is squeezed.
Note
If the Trigger Switch cannot be pressed down, check that the Forward/Reverse Switch (6) is not set to its middle position, which locks the device (see 'Direction control').
3. The speed of the drill is controlled by the movement of the trigger: the further the Trigger Switch is pressed down, the faster the drill will run.
4. Release the Trigger Switch to stop the machine.
Screwdriver use
Note
Always use a universal bit holder when working with screwdriver bits. Do not mount screwdriver bits directly into the chuck.
- Select gear 1 using the Gear Switch (4).
- Rotate the Mode Selector (3) to Drive.
-
Adjust the drill to the appropriate torque setting (see 'Torque control').
-
When driving screws NEVER use the machine in drill mode.
Note
If in doubt which torque setting best suits the application, start with a low setting and increase, should more torque be required (e.g. if the screw is not being driven far enough into the workpiece).
WARNING
The drill bit, especially the tip, will become very hot when drilling masonry and concrete. DO NOT touch the bit and never allow it to come into contact with combustible materials.
WARNING
DO NOT inhale masonry dust. Wear adequate breathing protection. Dust from masonry, concrete and similar substances is harmful and may be toxic.
Drilling wood
- Select the appropriate gear using the Gear Switch (4).
-
Rotate the Mode Selector (3) to the drill position.
-
Ensure that drill bits are suitable for wood, and are within the maximum capacity of this machine (see 'Specification')
WARNING
DO NOT inhale wood dust. Wear adequate breathing protection. Some wood dusts
may be toxic.
Drilling meta
- Select the appropriate gear using the Gear Switch (4).
-
Rotate the Mode Selector (3) to the drill position.
-
Ensure that drill bits are suitable for the grade of metal being drilled, and are within the maximum capacity of the machine (see 'Specification')
- To ensure accuracy, mark the intended hole position using a hammer and centre punch.
WARNING
The drill bit and the workpiece will become very hot when drilling metal. DO NOT touch the bit and never allow it to come into contact with combustible materials when hot. Always use a suitable lubricant or cutting fluid, and drill at appropriate speeds.
- ONLY apply moderate pressure to the drill bit, ensuring efficient cutting and prolonged drill bit life.
- Use a countersink bit to remove sharp burrs from the hole, preventing cuts and other kinds of injury.
WARNING
If the power tool gets excessively hot in use, stop using the tool immediately and allow to cool before continuing work. The cooling period can be reduced by operating the drill at maximum speed with no load. Always make sure the Motor Vents (5) are not blocked and do not allow dust to enter the body of the tool through the Motor Vents; dust, especially metallic dust, may damage or destroy the tool.
Maintenance
WARNING
ALWAYS disconnect from the mains power supply, before carrying out any maintenance/ cleaning of the charger. Remove the battery before carrying out any maintenance/cleaning of the drill.
Note
Both the drill and the charger contain no user-serviceable parts. If the device does not perform as outlined in this manual, return it to an authorised GMC service centre for repair
General inspection
- Regularly check that all the fixing screws are tight
- Inspect the supply cord of the tool, prior to each use, for damage or wear. Repairs should be carried out by an authorised service centre. This advice also applies to extension cords used with this too.
Cleaning
- Keep your tool clean at all times. Dirt and dust will cause internal parts to wear quickly, and shorten the machine's service life. Clean the body of your machine with a soft brush, or dry cloth. If available, use clean, dry, compressed air to blow through the ventilation holes
- Clean the tool casing with a soft damp cloth using a mild detergent. Do not use alcohol, petrol or strong cleaning agents
- Never use caustic agents to clean plastic parts
Lubrication
Slightly lubricate all moving parts at regular intervals with a suitable spray lubricant
Storage
Store this tool carefully in a secure, dry place out of the reach of children
Disposal
Always adhere to national regulations when disposing of power tools that are no longer functional and are not viable for repair.
Do not dispose of power tools, or other waste electrical and electronic equipment (WEEE), with household waste
Contact your local waste disposal authority for information on the correct way to dispose of power tools
Originalanweisungen
This one is a double layer. It has 10 layers of double layer.
了機械を正いトルクに設定するこが生態。
ADD: No.B714, Niulanqian Building, Minzhi Road,
Longhua District, Shenzhen, Guangdong, China 518000
Made in China
C∈RoHS


- Cordless Drill/Driver
- Contents
- Original Instructions
- Description of Symbols
- Specification
- Product Features
- WARNING
- General Safety
- Work area safety
- Electrical safety
- Personal safety
- Power tool use and care
- Battery tool use and care
- Service
- Additional Safety for Battery-Operated Drills WARNING
- Battery Safety
- Battery Charger Safety
- Use the battery charger correctly
- Before Use
- Removing a battery
- Fitting a battery
- Note
- Setting up the battery charger
- Charging the battery
- Battery Charge Level
- MPORTANT
- Fitting drill bits and accessories
- Operation
- Direction control
- Torque control
- Gear selection
- Switching on/off
- Screwdriver use
- Drilling wood
- Drilling meta
- Maintenance
- Cleaning
- Lubrication
- Storage
- Disposal
- Originalanweisungen
Brand : Tacklife
Model : PCD05D
Category : Screwdriver