
PCD01B - Screwdriver Tacklife - Free user manual and instructions
Find the device manual for free PCD01B Tacklife in PDF.
| Product Type | Cordless Screwdriver |
| Brand | Tacklife |
| Model | PCD01B |
| Power Source | Rechargeable lithium-ion battery with included charger |
| Chuck | Keyless |
| Speeds | 2 mechanical speeds (selector) |
| Torque | Adjustable by collar (multiple positions) |
| Variable speed | Yes, by trigger |
| Forward/Reverse | Yes, three-position lever |
| Lighting | Built-in LED |
| Battery indicator | Yes, two lights on charger |
| Weight (estimated) | Approximately 1.5 kg |
| Included accessories | Jack charger, charging adapter, charging stand |
| Safety | Wear gloves when changing bits |
| Maintenance | Clean with a dry cloth, avoid chemicals |
| Main functions | Drilling, screwing, adjustable torque, variable speed |
Frequently Asked Questions - PCD01B Tacklife
User questions about PCD01B Tacklife
0 question about this device. Answer the ones you know or ask your own.
Ask a new question about this device
Download the instructions for your Screwdriver in PDF format for free! Find your manual PCD01B - Tacklife and take your electronic device back in hand. On this page are published all the documents necessary for the use of your device. PCD01B by Tacklife.
USER MANUAL PCD01B Tacklife
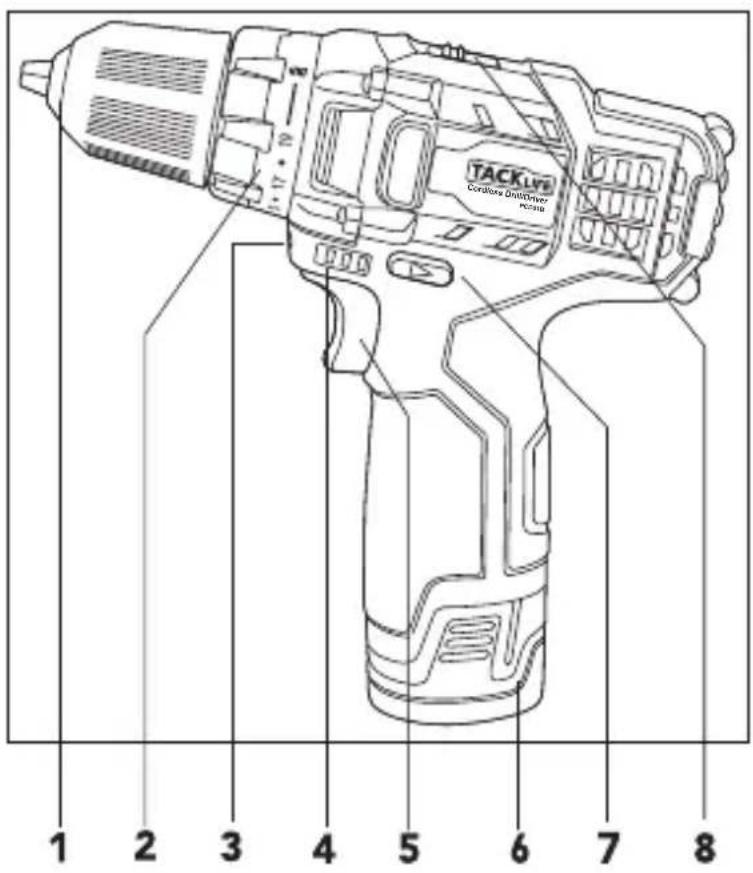
Cordless Drill / Driver

natural_image
Line drawing of a TACK Life electric drill (no text or symbols on the diagram itself)Model: PCD01B
Contents
English 01\~07
Deutsch 08\~14
Français 15\~21
Españo 22\~28
Italiano 29\~35
日本語 36\~42
1 Keyless Chuck
5 Variable Speed Trigger
2 Torque Adjustment Collar
6 Battery
3 LED Light
7 Forward/ Reverse Lever
4 Battery Indicator
8 Gear Selector
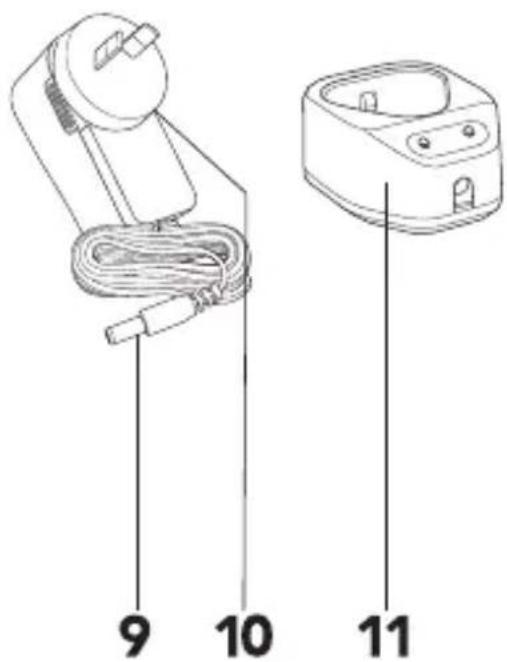
ACCESSORIES
9 Charging Jack
10 Charging Adaptor
11 Charging Cradle
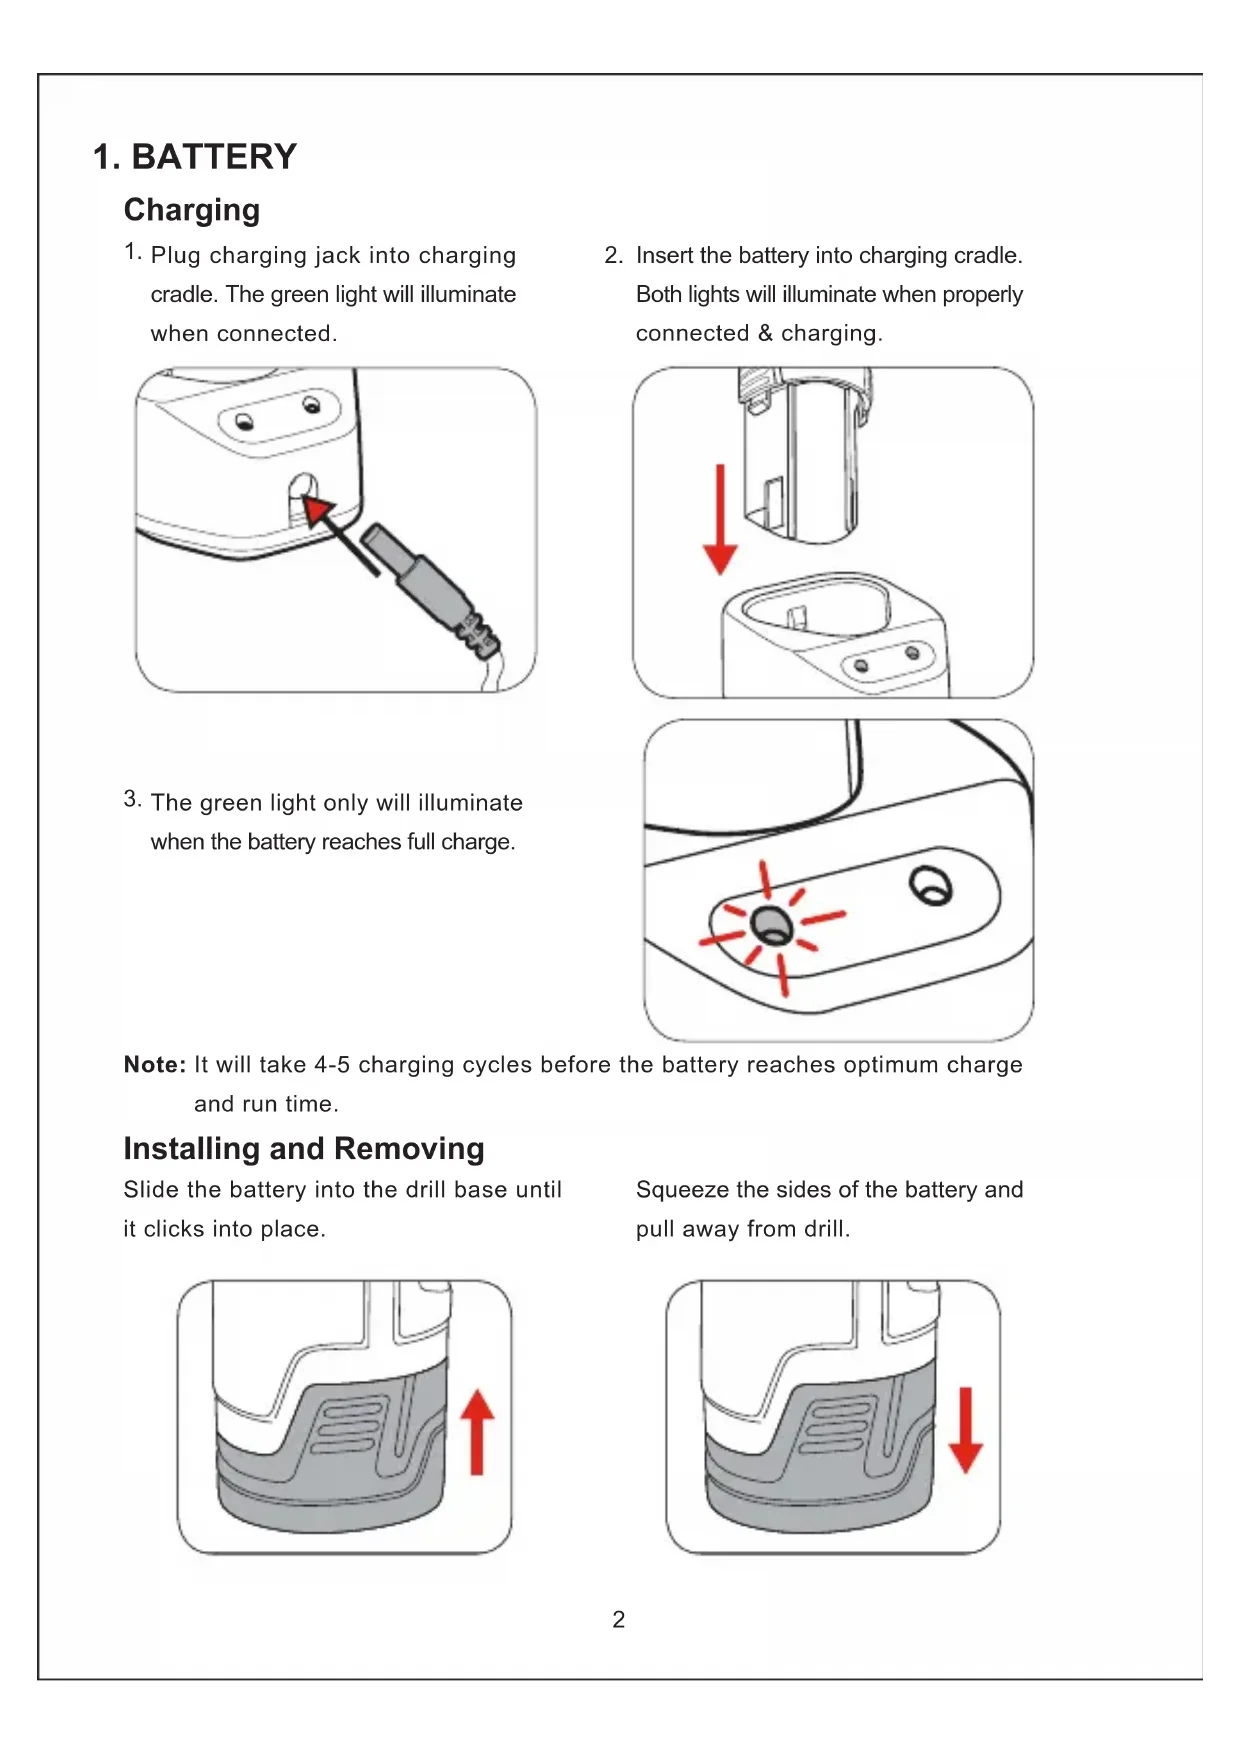
1. BATTERY
Charging
- Plug charging jack into charging cradle. The green light will illuminate when connected.

natural_image
Illustration of a hairdryer with a black cable inserted, showing a red arrow pointing to the tip of the outlet (no text or symbols present)-
The green light only will illuminate when the battery reaches full charge.
-
Insert the battery into charging cradle. Both lights will illuminate when properly connected & charging.

natural_image
Diagram showing a device with a downward arrow pointing to a sink, no text or symbols present
natural_image
Simple line drawing of a device handle with two circular ports and red laser lines (no text or symbols)Note: It will take 4-5 charging cycles before the battery reaches optimum charge and run time.
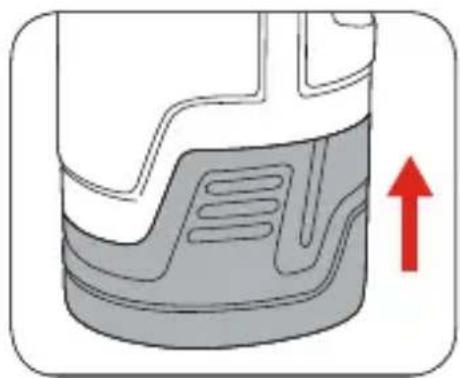
Installing and Removing
Slide the battery into the drill base until it clicks into place.
natural_image
Cross-sectional diagram of a mechanical component with a red upward arrow indicating motion or force (no text or symbols)Squeeze the sides of the battery and pull away from drill.

natural_image
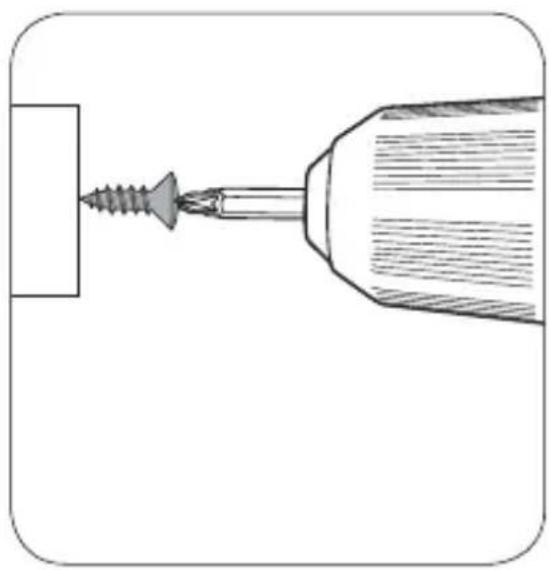
Diagram of a mechanical component with a red arrow indicating downward motion (no text or symbols present)2. KEYLESS CHUCK Installing Drill Bit
Caution: Do not handle drill bits or other accessories without gloves as they are sharp and can become hot after use, potentially causing personal injury.
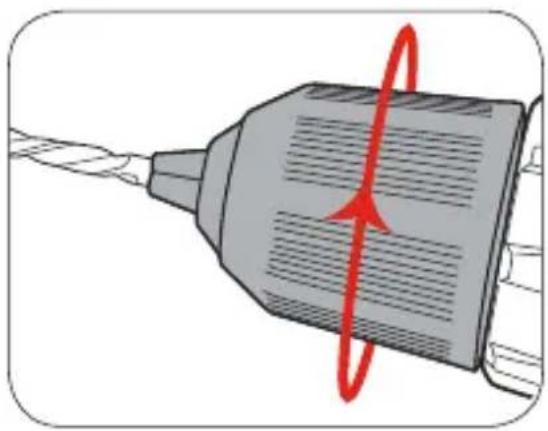
- Open the chuck jaws.
natural_image
Diagram of a mechanical component with a red circular arrow indicating rotation or motion, no text or symbols present.- Insert the drill bit, making sure it is centred in the jaws.
natural_image
Illustration of a drill bit being reduced by a red arrow, next to a geometric object (no text or symbols)- Tighten the chuck jaws.
natural_image
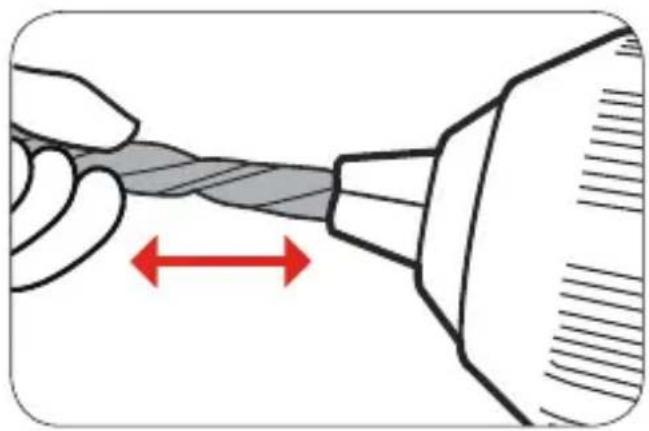
Illustration of a mechanical component with a red circular arrow indicating rotation or motion (no text or symbols)- Pull on the bit to ensure it is firmly secured.
natural_image
Illustration of a hand holding a twisted cable with a red double-headed arrow indicating compression (no text or symbols)Removing Drill Bit
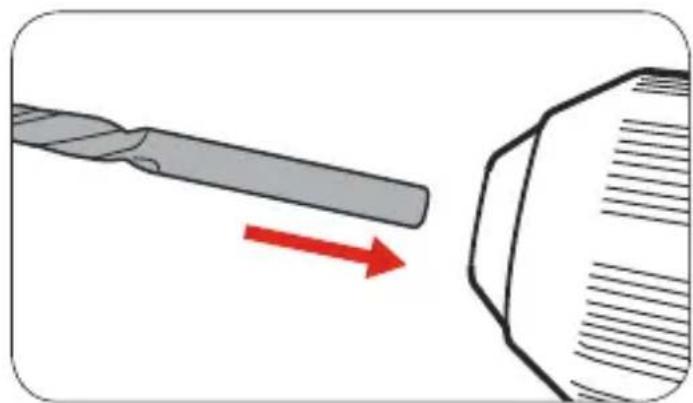
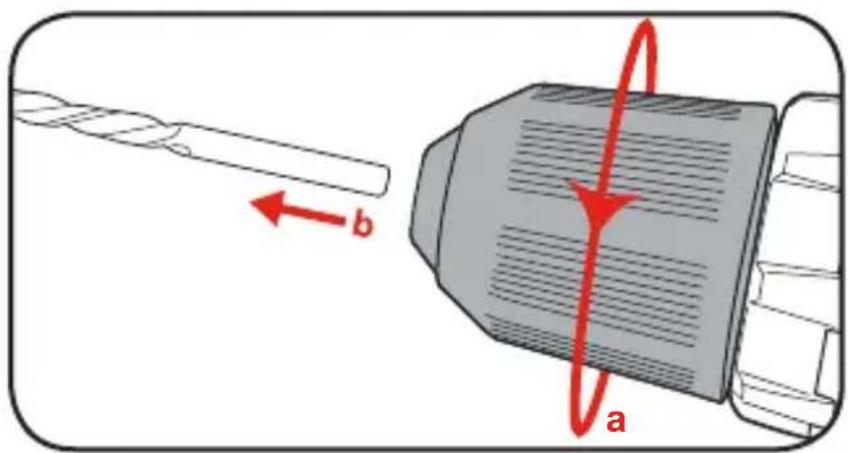
- Fully open the chuck jaws then pull out drill bit.
3. CONTROLS
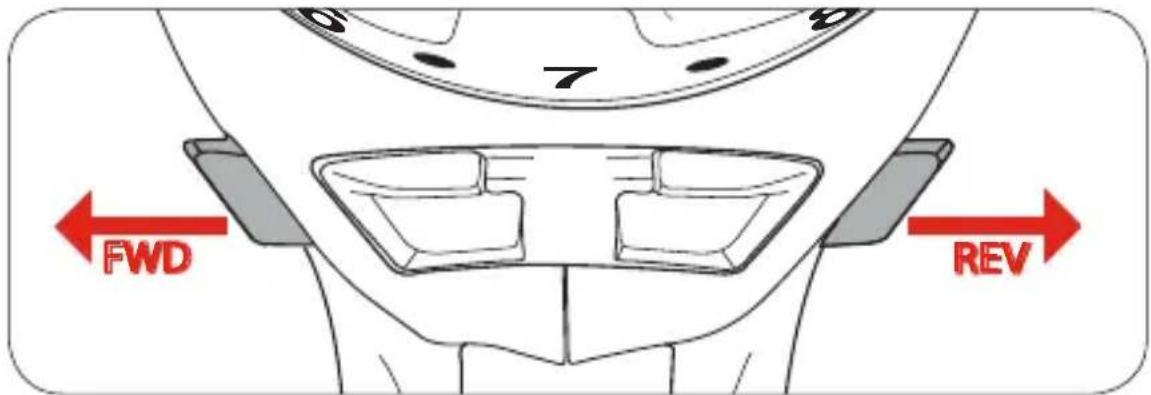
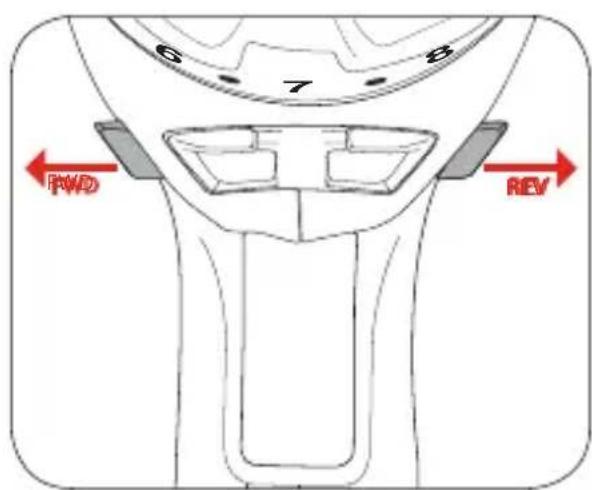
Forward/ Reverse Lever
- For forward rotation, push the fwd/rev lever hard left. For reverse rotation push fwd/rev lever to the right.
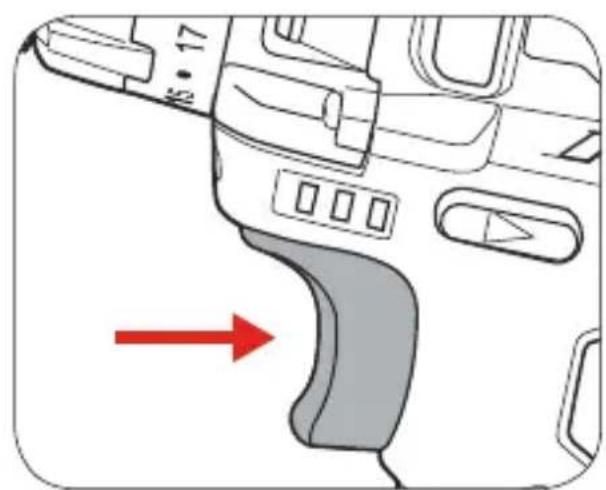
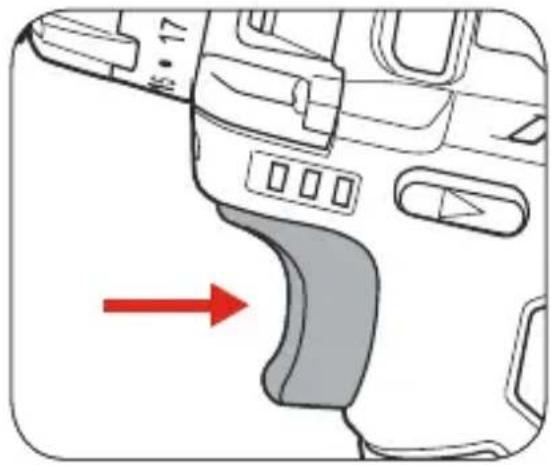
Variable Speed Trigger
-
To start drilling squeeze the variable speed trigger.
-
To stop drilling release the trigger.
natural_image
Diagram of a vehicle's dashboard and steering wheel (no text or symbols)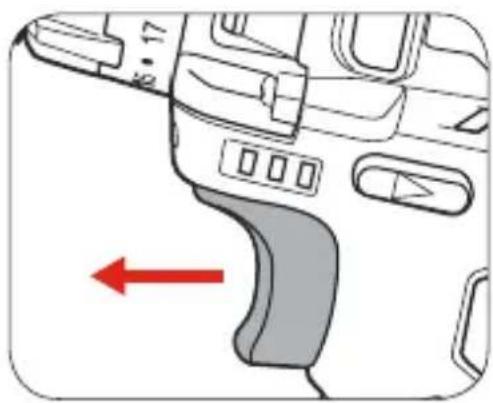
natural_image
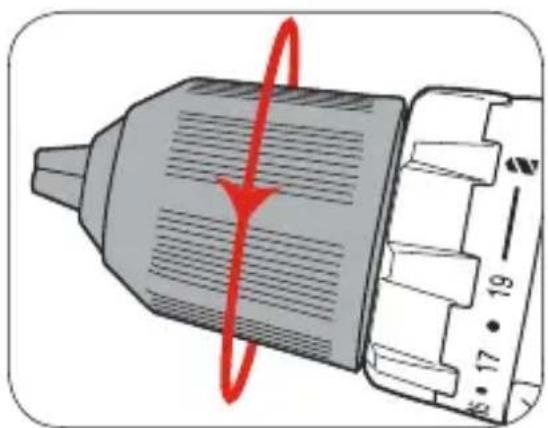
Diagram of a device interior with a red arrow pointing to a curved component (no text or symbols present)Adjusting Torque
Turn torque ring to the desired setting. Refer to Helpful Tips for determining desired setting.
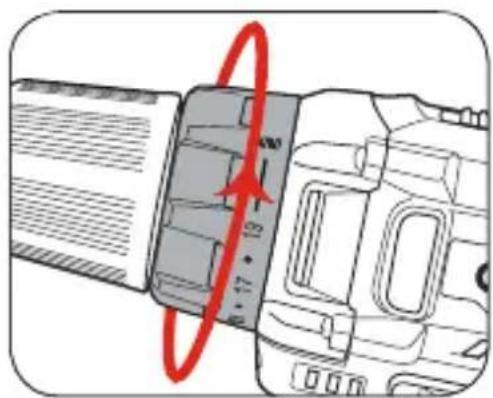
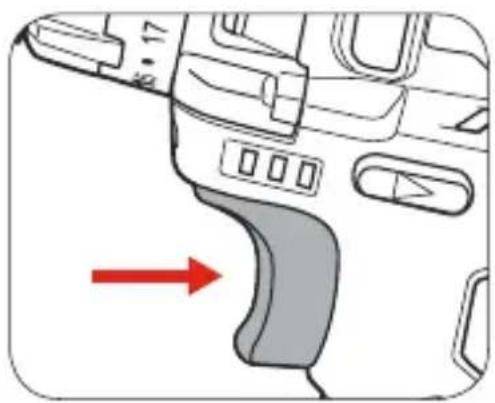
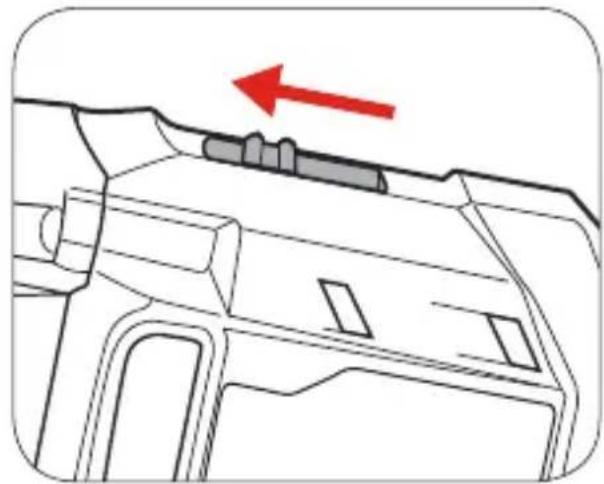
Speed Control
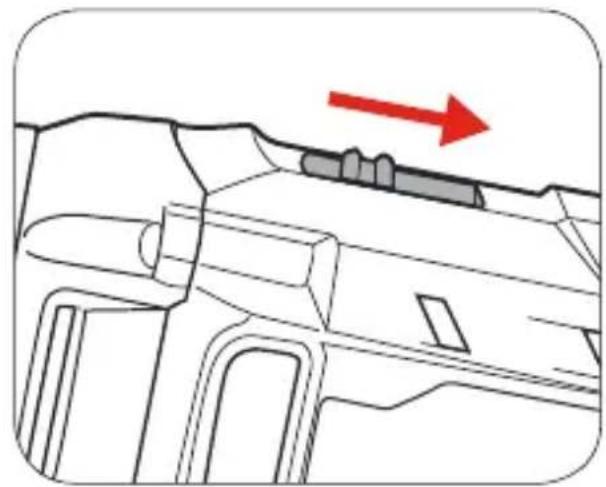
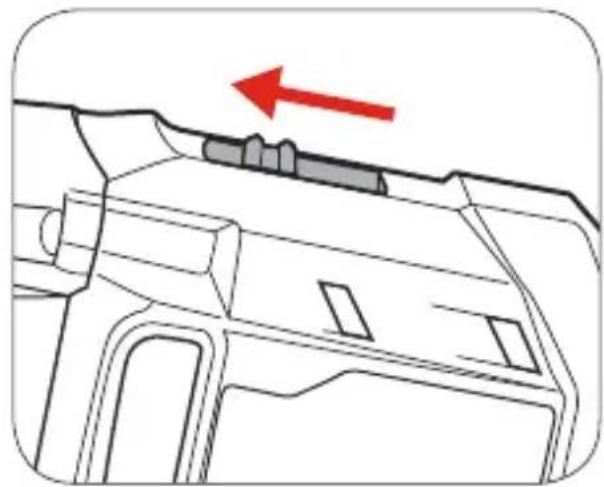
The gear selector controls the speed of the drill. First gear allows slower drilling with more torque, while second gear is suitable when less torque but higher speed is required.
- Slide the switch backward to select first gear.
natural_image
Technical line drawing of a mechanical component with a red arrow indicating direction (no text or symbols)- Slide the switch forward to select second gear.
natural_image
Technical line drawing of a mechanical component with a red arrow indicating direction (no text or symbols)4. DRILLING
Before starting to drill, perform a few simple checks.
- Depress and release the variable speed trigger to ensure it is not locked on.
natural_image
Diagram of a car interior showing dashboard and steering wheel (no text or symbols)2 Check the forward / reverse lever is on desired setting.
3 Secure the material to be drilled in a vice or clamp to stop it turning whilstdrilling.

natural_image
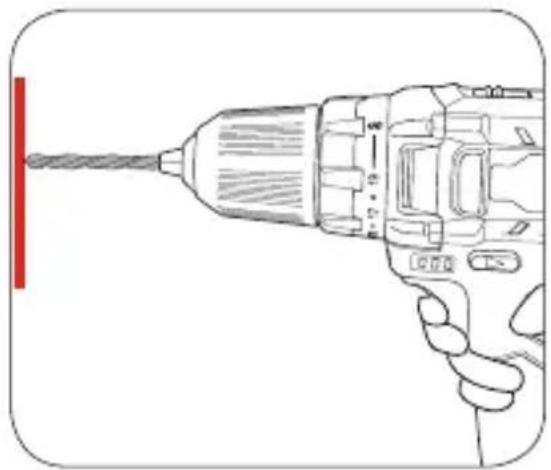
Illustration of a C-shaped clamp with a screw and handle (no text or symbols)- Hold the drill firmly and place the bit at the point to be drilled.
natural_image
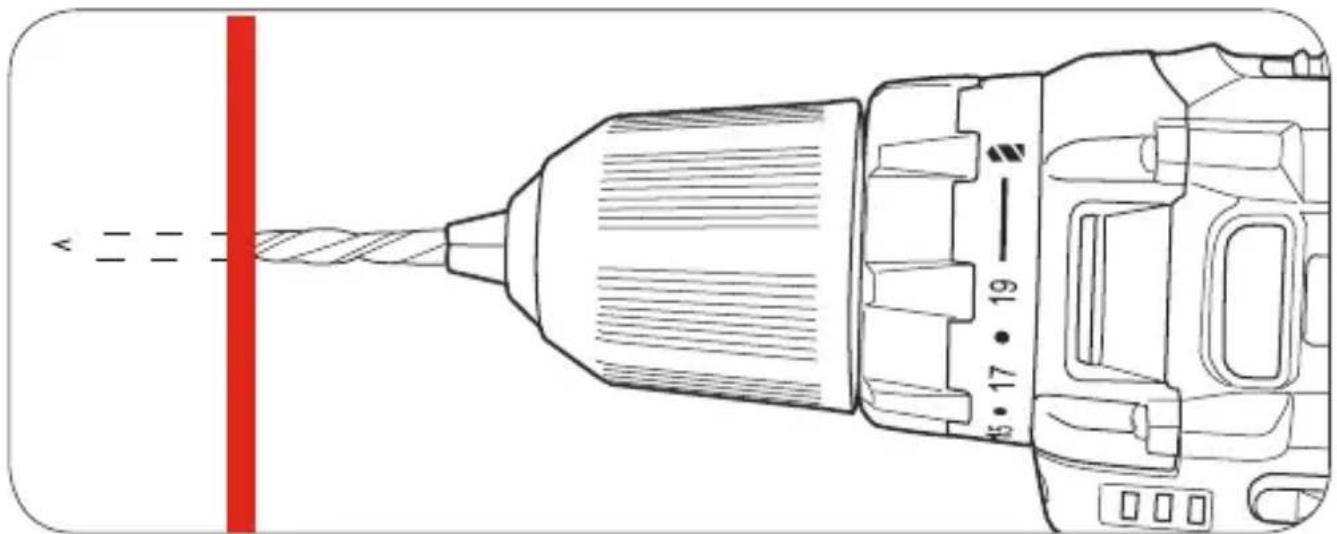
Line drawing of a hand holding a drill bit with a red vertical line on the left (no text or symbols)- Depress the variable speed trigger to start the drill.
natural_image
Diagram of a car interior showing dashboard and steering wheel (no text or symbols)- Move the drill bit into the workpiece.
natural_image
Technical line drawing of a drill bit with a red vertical line and dimension annotations (no text or symbols)Note: Do not force the drill or apply side pressure to elongate the hole. Let the drill do the work.
5. HELPFUL TIPS
Drilling to a pre-set depth - Torque Settings
Torque settings can alter the depth to which you can drill or drive into a surface. To determine the torque setting required to drive a screw perfectly flush to the work surface, follow the below stepts.
-
Set the torque collar to lowest setting and tighten the first screw.
-
If the clutch rachets and makes a clicking sound before ccrew is flush, increase the collar setting and continue tightening.
natural_image
Diagram of a screwdriver inserted into a cylindrical tool, showing tip and base (no text or symbols)
natural_image
Diagram of a screwdriver inserted into a drill bit with a red circular motion indicator (no text or symbols)- Repeat until you reach the correct setting / screw depth. Use this setting for the remaining screws.

natural_image
Technical illustration of a screw and its tip (no text or symbols)When drilling hard, smooth surfaces, use a centre punch to mark the desired hole location. This measure will prevent the drill bit from slipping off centre as you start the hole. However, the variable speed feature allows you to start holes without centre punching. To accomplish this, operate the drill at a low speed until you start the hole.
When drilling metals, use light oil on the drill bit to keep it from overheating. The oil will prolong the life of the bit and increase drilling action.
If the bit jams in the work piece or if the drill stalls, stop the tool immediately. Remove the bit from the work piece and determine the reason for jamming.
KABELLOSER BOHRSCHRAUBER
natural_image
Illustration of a hairdryer with a plug inserted into the air gap, showing no text or symbolsnatural_image
Diagram showing a device with a downward arrow pointing to a sink, no text or symbols present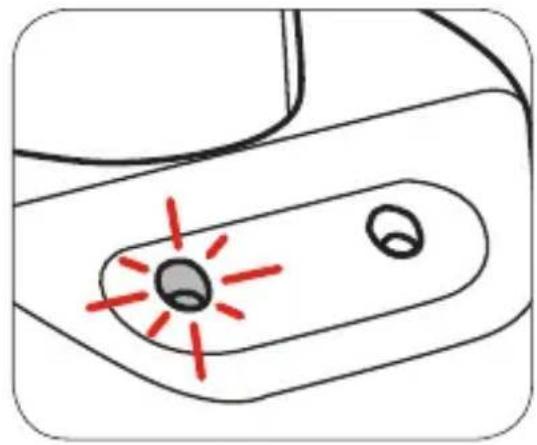
natural_image
Simple line drawing of a device with a central button and two circular ports, no text or symbols present.natural_image
Cross-sectional diagram of a mechanical component with a red upward arrow indicating a specific feature (no text or symbols present)natural_image
Cross-sectional diagram of a mechanical component with a red arrow indicating a downward motion (no text or symbols present)natural_image
Diagram of a mechanical component with a red circular arrow indicating rotation or motion, no text or symbols present.natural_image
Illustration of a mechanical component with a red circular arrow indicating rotational motion (no text or symbols)natural_image
Illustration of a drill bit being reduced by a red arrow, next to a hexagonal object (no text or symbols)natural_image
Illustration of a hand holding a twisted cable with a red double-headed arrow indicating compression (no text or symbols)Bohrer Entfernung
3. BEDIENELEMENTE
natural_image
Diagram of a car interior showing dashboard and steering wheel (no text or symbols)
natural_image
Diagram of a device's internal components with a red arrow pointing to a curved area (no text or symbols)natural_image
Diagram of a camera lens with red annotation arrows indicating measurement or direction (no text or symbols present)natural_image
Technical line drawing of a mechanical component with a red arrow indicating direction (no text or symbols)- Slide the switch forward to select second gear.
natural_image
Technical line drawing of a mechanical component with a red arrow indicating direction (no text or symbols)4. BOHREN
natural_image
Diagram of a device's handle and grip with a red arrow pointing to a curved component (no text or symbols)natural_image
Illustration of a C-shaped tool with a threaded base and clamped spring (no text or symbols)natural_image
Line drawing of a hand holding a drill bit with a red vertical line on the left (no text or symbols)natural_image
Technical line drawing of a drill bit with a red vertical line and dimension annotations (no text or symbols)natural_image
Diagram of a screwdriver inserted into a cylindrical component, showing tip and base (no text or symbols)natural_image
Diagram of a screwdriver with a red-handled tool, showing the working principle (no text or symbols present)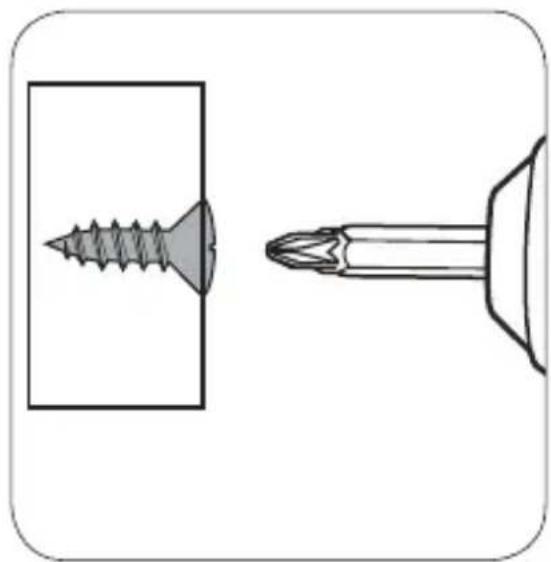
natural_image
Technical illustration of a screw and its tip (no text or symbols)natural_image
Illustration of a hairdryer with a plug inserted into the air gap, showing no text or symbols.natural_image
Diagram showing a device with a red arrow pointing to a sink, no text or symbols present
natural_image
Simple line drawing of a device with two circular components and red starburst marks (no text or symbols)natural_image
Cross-sectional diagram of a mechanical component with a red upward arrow indicating motion or force (no text or symbols)natural_image
Cross-sectional diagram of a mechanical component with a red arrow indicating downward motion (no text or symbols)2. CHUCK KEYLESS
natural_image
Diagram of a mechanical component with a red circular arrow indicating rotation or force direction (no text or symbols)natural_image
Illustration of a mechanical component with a red circular arrow indicating rotation or motion (no text or symbols)natural_image
Diagram showing a drill bit being reduced by a red arrow, next to a geometric object (no text or symbols)natural_image
Illustration of a hand holding a twisted cable with a red double-headed arrow indicating compression (no text or symbols)Retrait du foret
natural_image
Diagram of a device's interior panel with a red arrow pointing to a curved component (no text or symbols)
natural_image
Diagram of a device's internal components with a red arrow pointing to a curved area (no text or symbols)Contrôle de vitesse
natural_image
Technical line drawing of a mechanical component with a red arrow indicating direction (no text or symbols)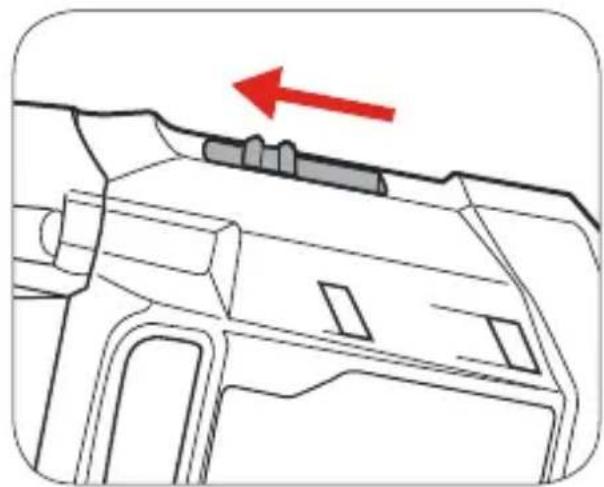
natural_image
Technical line drawing of a mechanical component with a red arrow indicating direction (no text or symbols)4. PERÇAGE
natural_image
Diagram of a car interior showing dashboard and steering wheel (no text or symbols)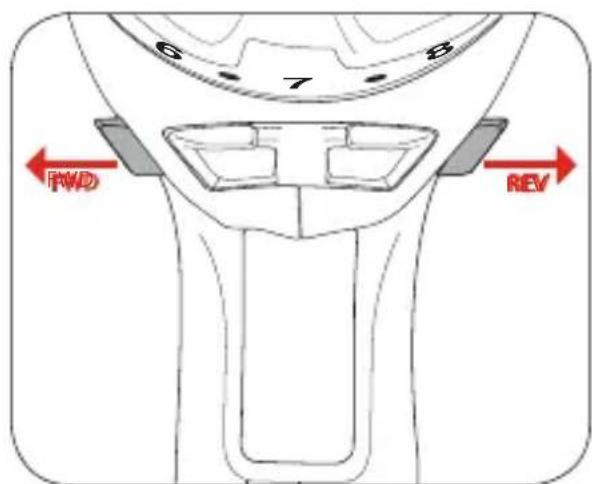
natural_image
Illustration of a C-shaped mechanical clamp with a threaded rod (no text or symbols)natural_image
Line drawing of a hand operating a drill bit with a red vertical line on the left (no text or symbols)natural_image
Diagram of a car interior showing a curved ramp and directional arrow (no text or symbols)natural_image
Technical line drawing of a drill bit with a red vertical line and measurement annotations (no readable text or symbols)natural_image
Diagram of a screwdriver inserted into a cylindrical tool, showing tip and base (no text or symbols)
natural_image
Diagram of a screwdriver inserted into a drill bit with a red circular motion indicator (no text or symbols)natural_image
Technical illustration of a screw and its tip (no text or symbols)ACCESORIOS
natural_image
Illustration of a hairdryer with a cable inserted, showing a red arrow pointing to the tip of the outlet (no text or symbols present)natural_image
Diagram showing a device with a downward arrow pointing to a sink, no text or symbols present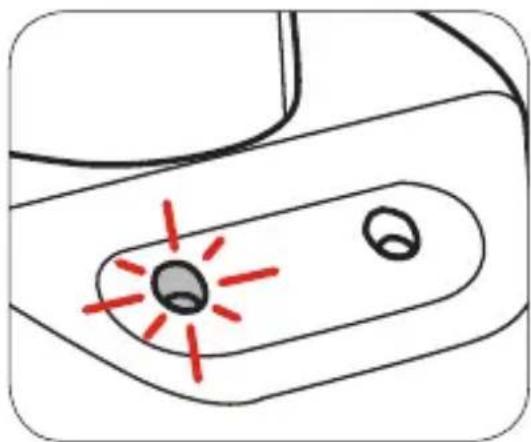
natural_image
Simple line drawing of a device with two circular components and red laser lines (no text or symbols)natural_image
Cross-sectional diagram of a mechanical component with a red upward arrow indicating motion or force (no text or symbols present)natural_image
Cross-sectional diagram of a mechanical component with a red arrow indicating downward motion (no text or symbols)natural_image
Diagram of a mechanical component with a red circular arrow indicating rotation or motion, showing internal structure and part numbers (no text or symbols)natural_image
Illustration of a mechanical component with a red circular arrow indicating rotation or motion (no text or symbols)natural_image
Diagram showing a tool being cut with a red arrow, next to a geometric shape (no text or symbols)natural_image
Illustration of a hand holding a twisted cable with a red double-headed arrow indicating compression (no text or symbols)Quitando el taladro
3. Controles
Forward / Reverse Lever
natural_image
Diagram of a car interior showing dashboard and steering wheel (no text or symbols)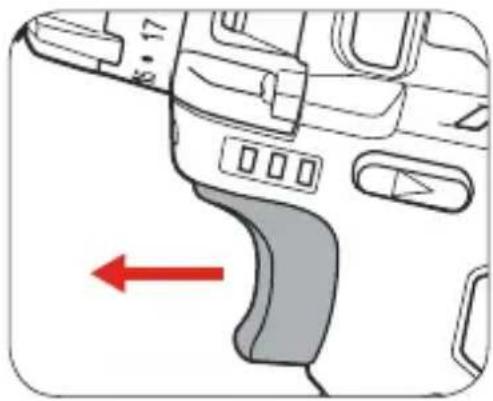
natural_image
Diagram of a device's left-hand grip with a red arrow indicating direction (no text or symbols)natural_image
Technical line drawing of a mechanical component with a red arrow indicating direction (no text or symbols)natural_image
Technical line drawing of a mechanical component with a red arrow indicating direction (no text or symbols)4. Perforación
natural_image
Diagram of a device's interior panel with a red arrow pointing to a curved component (no text or symbols)natural_image
Illustration of a C-shaped tool with a threaded base and clamped spring (no text or symbols)natural_image
Line drawing of a hand holding a drill bit with a red vertical line on the left (no text or symbols)natural_image
Diagram of a vehicle interior showing a curved ramp and directional arrow (no text or symbols)natural_image
Technical line drawing of a drill bit with a red vertical line and measurement annotations (no text or symbols)natural_image
Diagram of a screwdriver inserted into a cylindrical tool, showing tip and base (no text or symbols)
natural_image
Diagram of a screwdriver with a red circular motion indicator (no text or symbols)natural_image
Technical illustration of a screw and a pin (no text or symbols)natural_image
Illustration of a hairdryer with a plug inserted, showing a red arrow pointing to the tip of the outlet (no text or symbols present)natural_image
Diagram showing a device with a downward arrow pointing to a sink, no text or symbols present
natural_image
Simple line drawing of a device with a central button and two circular ports, no text or symbols present.natural_image
Cross-sectional diagram of a mechanical component with a red upward arrow indicating motion or force (no text or symbols)natural_image
Diagram of a mechanical component with a red arrow indicating downward motion (no text or symbols present)natural_image
Diagram of a mechanical component with a red circular arrow indicating rotation or motion, no text or symbols present.natural_image
Illustration of a mechanical component with a red circular arrow indicating rotation or motion (no text or symbols)natural_image
Illustration of a drill bit being reduced by a red arrow, next to a geometric object (no text or symbols)natural_image
Illustration of a hand holding a twisted cable with a red double-headed arrow indicating compression (no text or symbols)3. CONTROLLI
natural_image
Diagram of a car interior showing dashboard and steering wheel (no text or symbols)natural_image
Diagram of a vehicle interior showing dashboard and steering wheel (no text or symbols)natural_image
Technical line drawing of a mechanical component with a red arrow indicating direction (no text or symbols)natural_image
Technical line drawing of a mechanical component with a red arrow indicating direction (no text or symbols)4. FORATURA
natural_image
Diagram of a device's front panel with control buttons and a red arrow pointing to a curved component (no text or symbols)natural_image
Illustration of a C-shaped clamp with a screw and handle (no text or symbols)natural_image
Line drawing of a hand operating a drill bit with a red vertical line on the left (no text or symbols)natural_image
Diagram of a car interior showing dashboard and steering wheel (no text or symbols)natural_image
Technical line drawing of a drill bit with a red vertical line and dimension annotations (no text or symbols)natural_image
Diagram of a screwdriver inserted into a cylindrical component, showing tip and base (no text or symbols)
natural_image
Diagram of a screwdriver inserted into a drill bit with a red circular motion indicator (no text or symbols)natural_image
Technical illustration of a screw and its tip (no text or symbols)natural_image
Illustration of a hairdryer with a red arrow pointing to the outlet (no text or symbols)natural_image
Diagram showing a device with a red arrow pointing to a sink, no text or symbols present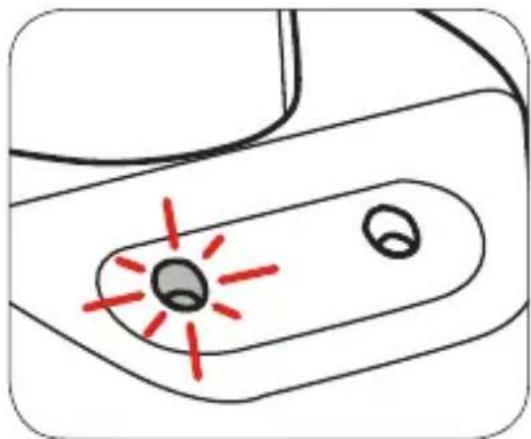
natural_image
Simple line drawing of a device with two circular components and red laser lines (no text or symbols)natural_image
Cross-sectional diagram of a mechanical component with a red upward arrow indicating motion or force (no text or symbols)natural_image
Cross-sectional diagram of a mechanical component with a red arrow indicating downward motion (no text or symbols)2. キーレスのチャック
ビットの取り付け方
natural_image
Diagram of a mechanical component with a red circular arrow indicating rotation or force direction (no text or symbols)- チャックジョーを締めます。

natural_image
Illustration of a mechanical component with a red circular arrow indicating rotational motion (no text or symbols)natural_image
Illustration of a drill bit being reduced by a red arrow, next to a hexagonal object (no text or symbols)natural_image
Illustration of a hand holding a twisted cable with a red double-headed arrow indicating compression (no text or symbols)ビットの取り外し方
3. コントロール
正逆転切り替え(fwd/rev)レバー
natural_image
Diagram of a car interior showing dashboard and steering wheel (no text or symbols)- トリガーを手放して穴あけを停止します。

natural_image
Diagram of a car interior showing dashboard and steering wheel (no text or symbols)トルクの調節
速度の切り替え
natural_image
Technical line drawing of a mechanical component with a red arrow indicating direction (no text or symbols)natural_image
Technical line drawing of a mechanical component with a red arrow indicating direction (no text or symbols)4. 穴あけ
natural_image
Diagram of a car interior showing dashboard and steering wheel (no text or symbols)natural_image
Illustration of a C-shaped clamp with a screw and handle (no text or symbols)natural_image
Line drawing of a hand holding a drill bit with a red vertical line on the left (no text or symbols)natural_image
Diagram of a device interior with a red arrow pointing to a curved component (no text or symbols)natural_image
Technical line drawing of a drill bit with a red vertical line and dimension annotations (no text or symbols)natural_image
Diagram of a screwdriver inserted into a cylindrical tip, showing mechanical advantage (no text or symbols)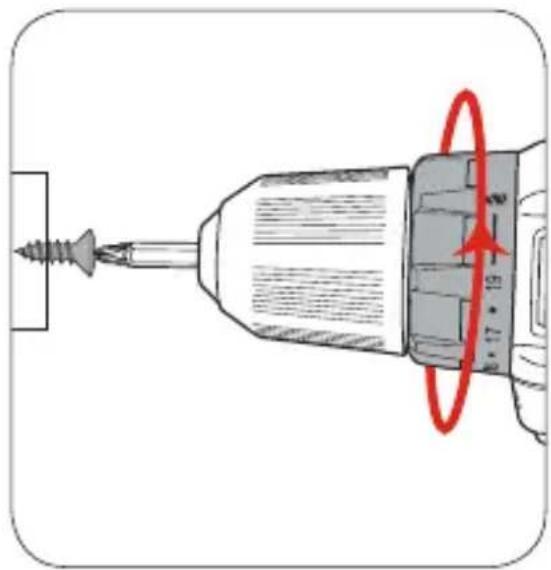
natural_image
Diagram of a screwdriver inserted into a drill bit with a red circular motion indicator (no text or symbols)natural_image
Technical illustration of a screw and its tip (no text or symbols)ADD: No.31, Qing Linxi Road, Longgang District,
Shenzhen, Guangdong, China 518172
Made in China
C€ RoHS


- Contents
- ACCESSORIES
- BATTERY
- Charging
- Installing and Removing
- KEYLESS CHUCK Installing Drill Bit
- Removing Drill Bit
- CONTROLS
- Forward/ Reverse Lever
- Variable Speed Trigger
- Adjusting Torque
- Speed Control
- DRILLING
- HELPFUL TIPS
- Drilling to a pre-set depth - Torque Settings
- KABELLOSER BOHRSCHRAUBER
- Bohrer Entfernung
- BEDIENELEMENTE
- BOHREN
- CHUCK KEYLESS
- Retrait du foret
- Contrôle de vitesse
- PERÇAGE
- ACCESORIOS
- Quitando el taladro
- Controles
- Forward / Reverse Lever
- Perforación
- CONTROLLI
- FORATURA
- キーレスのチャック
- ビットの取り付け方
- ビットの取り外し方
- コントロール
- 正逆転切り替え(fwd/rev)レバー
- トルクの調節
- 速度の切り替え
- 穴あけ
Brand : Tacklife
Model : PCD01B
Category : Screwdriver