793759 - Drill SILVERLINE - Free user manual and instructions
Find the device manual for free 793759 SILVERLINE in PDF.
| Product Type | Pneumatic Drill |
| Brand | Silverline |
| Model | 793759 |
| Maximum Working Pressure | 6,3 bar (90 psi) |
| Air Consumption | 140 L/min |
| Air Inlet | 1/4" BSP with male quick couplers EN-6 and EQ-4 |
| Minimum Hose Diameter | 9,5 mm (3/8") |
| No-Load Speed | 1800 min⁻¹ |
| Chuck Capacity | 10 mm |
| Weight | 1,1 kg |
| Sound Pressure Level | 89,7 dB(A) |
| Sound Power Level | 100,7 dB(A) |
| Weighted Vibration | 0,89 m/s² |
| Direction of Rotation | Forward/Reverse (reverse lever) |
| Application | Drilling, compatible with bits and accessories with 10 mm max shank |
| Power Supply | Clean, dry compressed air |
| Lubrication | Pneumatic tool oil (3-4 drops per day if no in-line lubricator) |
| Warranty | 3 years (registration within 30 days at silverlinetools.com) |
| Maintenance | Clean with soft brush or dry cloth; drain water separator daily |
Frequently Asked Questions - 793759 SILVERLINE
User questions about 793759 SILVERLINE
0 question about this device. Answer the ones you know or ask your own.
Ask a new question about this device
Download the instructions for your Drill in PDF format for free! Find your manual 793759 - SILVERLINE and take your electronic device back in hand. On this page are published all the documents necessary for the use of your device. 793759 by SILVERLINE.
USER MANUAL 793759 SILVERLINE
Air Drill Reversible 10mm
FR Perceuse pneumatique réversible
DE Druckluftbohrmaschine mit Rechts-/Linkslauf
ES Taladro neumático reversible
IT Trapano pneumatico reversible
NL Pneumatische boormachine
PL Wiertarka pneumatyczna

Register online: silverlinetools.com
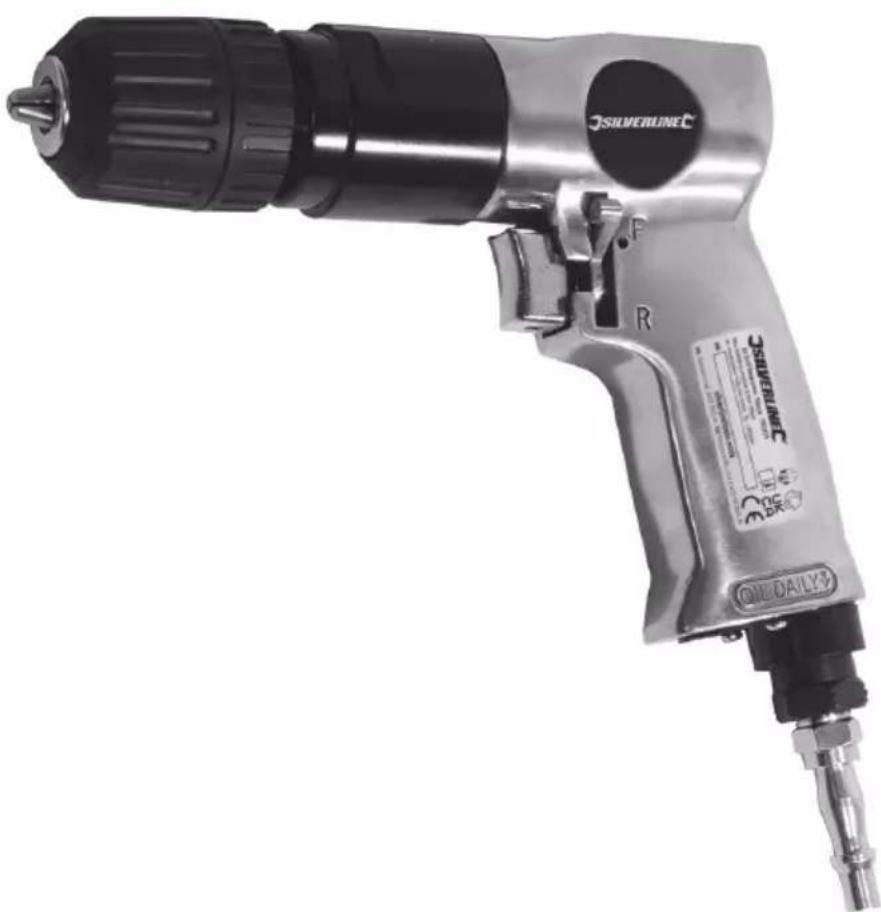
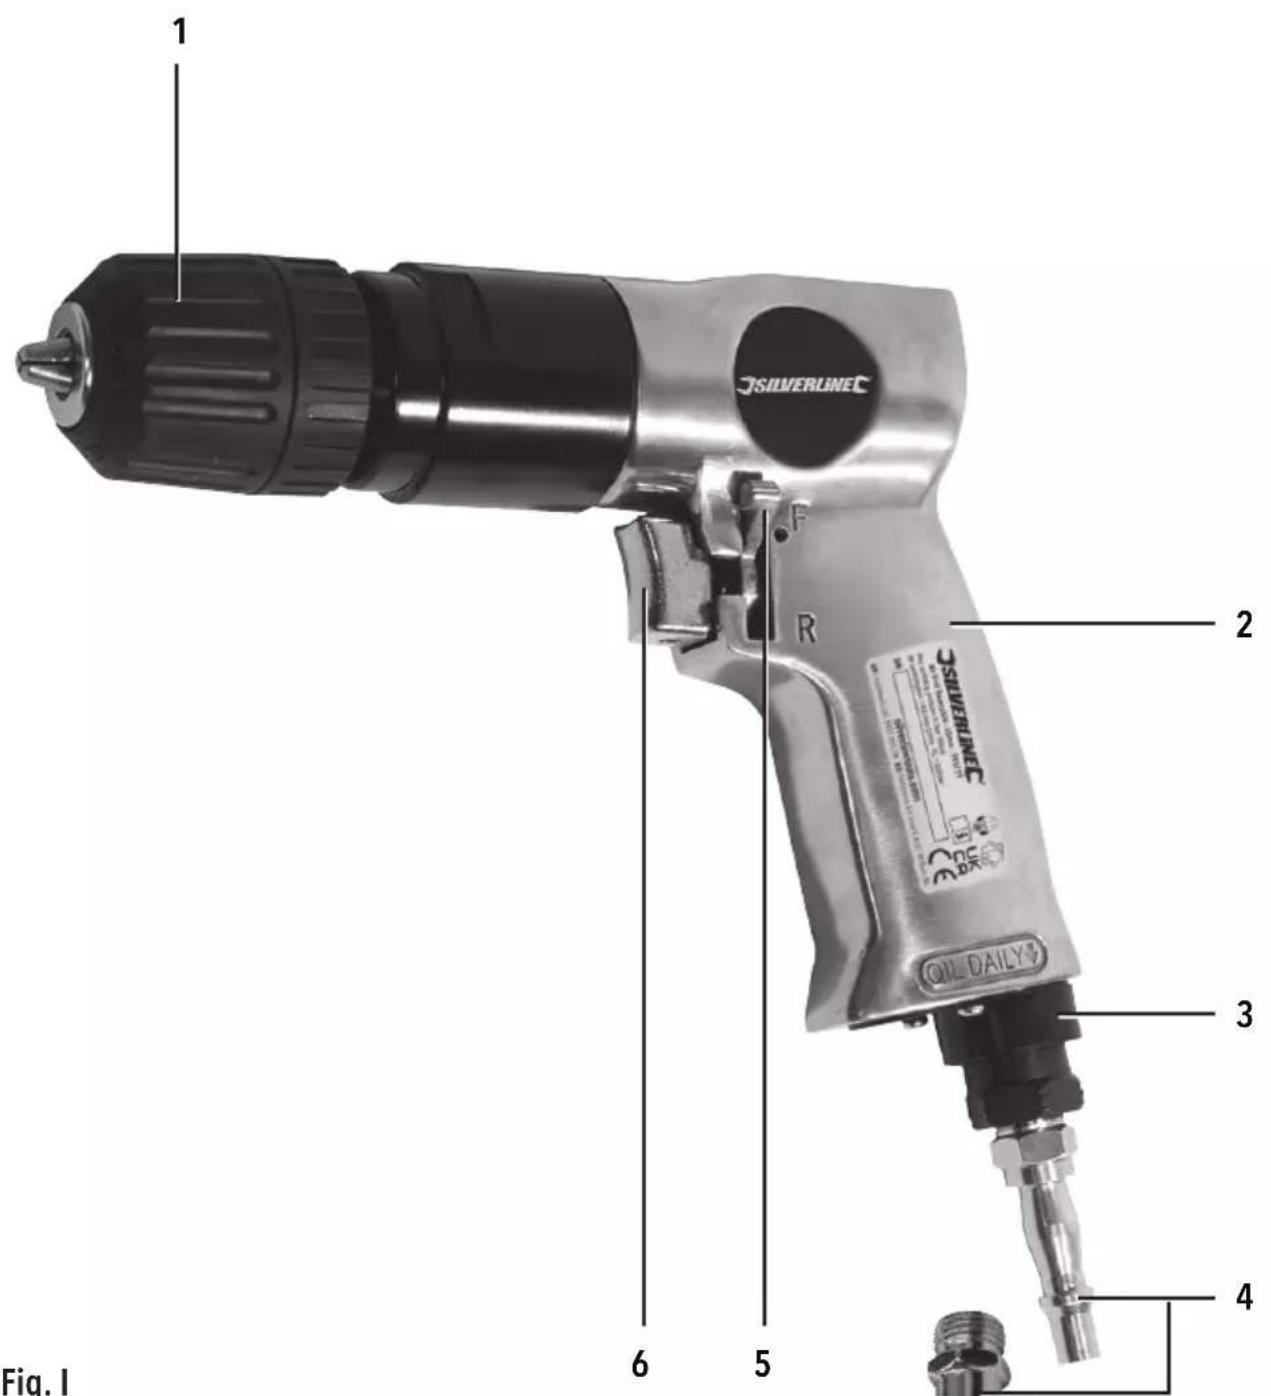
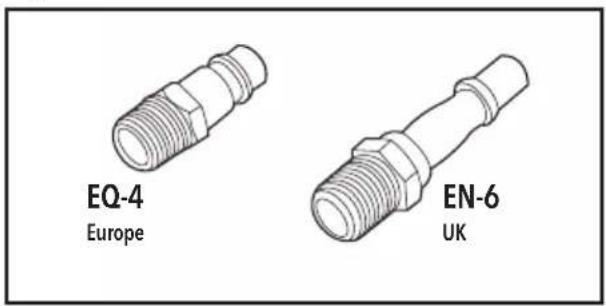
Fig.1
English .04
Français 10
Deutsch............16
Espanol. 22
Italiano............28
Nederlands .34
Polski 40
Introduction
Thank you for purchasing this Silverline product. This manual contains information necessary for safe and effective operation of this product. This product has unique features and, even if you are familiar with similar products, it is necessary to read this manual carefully to ensure you fully understand the instructions. Ensure all users of the product read and fully understand this manual. Keep these instructions with the product for future reference.
Description of Symbols
The rating plate on your tool may show symbols. These represent important information about the product or instructions on its use.

Wear hearing protection.
Wear eye protection.
Wear breathing protection.
Wear head protection.

Wear hand protection.

WARNING: To reduce the risk of injury, user must. Read instruction manual.

Caution!

DO NOT use with compressed gas cylinders!

Conforms to relevant legislation and safety standards.

Environmental Protection
Air tools should not be disposed of with household waste. They contain traces of oil and other lubricants. Please recycle where facilities exist. Check with your local authority or retailer for recycling advice.
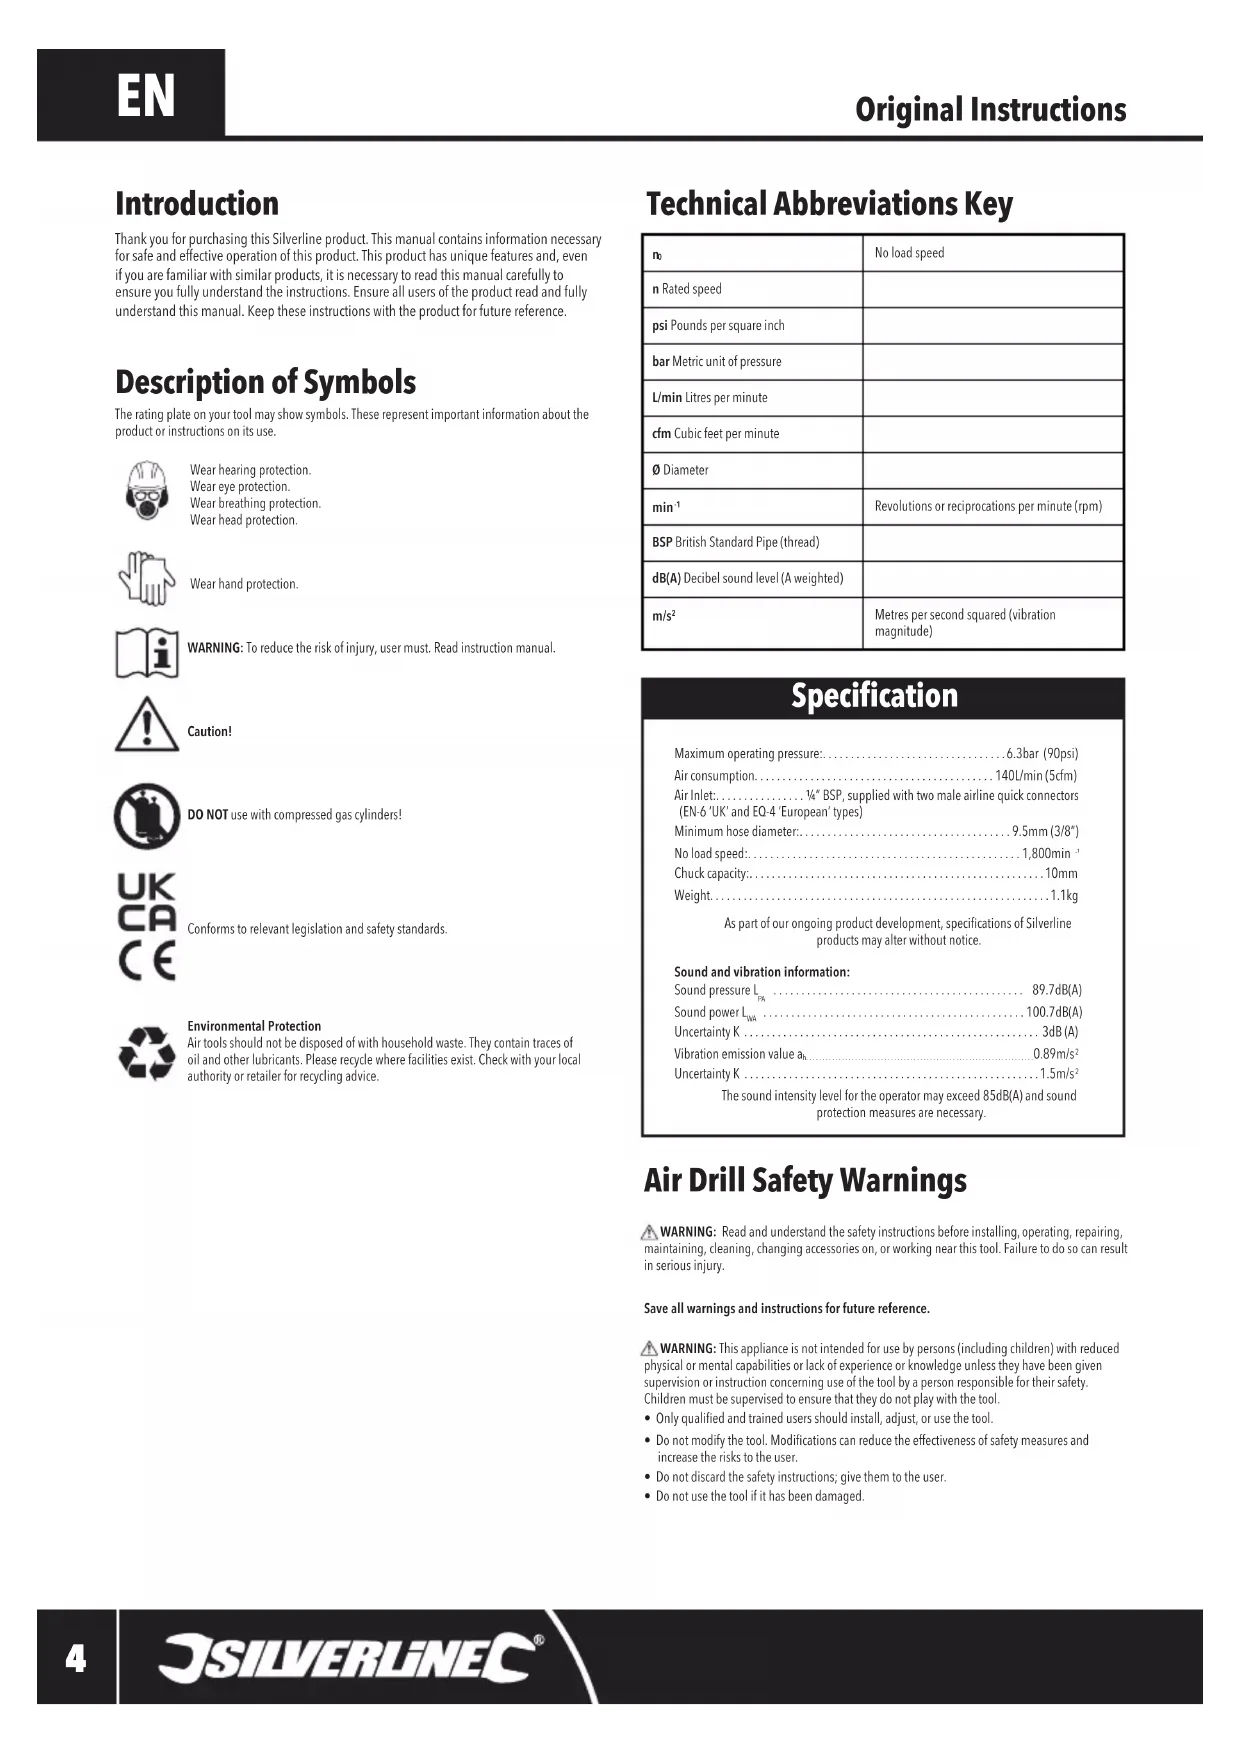
Technical Abbreviations Key
| no | No load speed |
| n Rated speed | |
| psi Pounds per square inch | |
| bar Metric unit of pressure | |
| L/min Litres per minute | |
| cfm Cubic feet per minute | |
| Ø Diameter | |
| min-1 | Revolutions or reciprocations per minute (rpm) |
| BSP British Standard Pipe (thread) | |
| dB(A) Decibel sound level (A weighted) | |
| m/s2 | Metres per second squared (vibration magnitude) |
Specification
Maximum operating pressure: 6.3bar (90psi)
Air consumption. 140L/min (5cfm)
Air Inlet. 14" BSP, supplied with two male airline quick connectors (EN-6 'UK' and EO-4 'European' types)
Minimum hose diameter: 9.5mm (3/8")
No load speed: 1,800min
Chuck capacity: 10mm
Weight 1.1kg
As part of our ongoing product development, specifications of Silverline products may alter without notice.
Sound and vibration information:
Sound pressure L_m 89.7dB(A)
Sound power L. 100.7dB(A)
Uncertainty K 3dB(A)
Vibration emission value a. 0.89m/s
Uncertainty K 1.5m/s2
The sound intensity level for the operator may exceed 85dB(A) and sound protection measures are necessary.
Air Drill SafetyWarnings
WARNING: Read and understand the safety instructions before installing, operating, repairing, maintaining, cleaning, changing accessories on, or working near this tool. Failure to do so can result in serious injury.
Save all warnings and instructions for future reference.
WARNING: This appliance is not intended for use by persons (including children) with reduced physical or mental capabilities or lack of experience or knowledge unless they have been given supervision or instruction concerning use of the tool by a person responsible for their safety. Children must be supervised to ensure that they do not play with the tool.
-
Only qualified and trained users should install, adjust, or use the tool.
-
Do not modify the tool. Modifications can reduce the effectiveness of safety measures and increase the risks to the user.
- Do not discard the safety instructions; give them to the user.
-
Do not use the tool if it has been damaged.
-
Inspect the tool periodically to verify that the ratings and markings required by ISO 11148 (detailed in the Description of Symbols) are legibly marked on the tool. The user (and employer if appropriate) should contact the manufacturer to obtain replacement marking labels when necessary.
- Compressed air can cause severe injury.
Always disconnect the tool from the air supply when not in use. - Always disconnect the tool from the compressed air supply before changing accessories, making adjustments and/or repairs and when moving away from an operating area to a different area.
- Keep fingers away from trigger when not operating the tool and when moving from one operating position to another.
- Never direct compressed air at yourself, others or animals.
- Whipping hoses can cause severe injury. Always check for damaged or loose hoses or fittings.
- Never carry or drag an air tool by its hose.
- When using air tools, do not exceed the maximum operating pressure.
- Inspect tools and accessories before each use. Do not use if damaged or excessively worn.
Air tools should only be powered by compressed air at the lowest pressure required by the task to reduce noise and vibration and minimise wear. - Never use pure oxygen or combustible gases to power an air tool. Air tools are not designed for these power sources and their use creates a fire and explosion hazard.
- Be aware that air tools may become cold during use, affecting grip, control and susceptibility to vibration-related injury.
IMPORTANT: Even when this tool is used as prescribed it is not possible to eliminate all residual risk factors. If you are in any doubt as to the safe use of this tool, do not use it.
Projectile Hazards
a) Be aware that failure of the workpiece, accessories, or tool itself can generate high-velocity projectiles.
b) Always wear impact-resistant eye protection during operation of this tool. The grade of protection required should be assessed for each use.
c) Assess risk to others when considering projectile hazard risk.
d) Ensure that the workpiece is securely fixed.
e) Remove the chuck key before drilling starts.
f) Ensure that the drill bit is securely fixed in the chuck. Insecure drill bits can be ejected from the machine causing a hazard.
Entanglement Hazards
a) Injury can occur if loose clothing, personal jewellery, neck wear, hair or gloves are not kept away from the tool and its accessories.
Operating Hazards
a) Ensure users and maintenance personnel are physically able to handle the bulk, weight and power of the tool.
b) Hold the tool correctly; be ready to counteract normal or sudden movements such as recoil. Have both hands available.
c) Maintain a balanced body position and secure footing.
d) Only use lubricants recommended by the manufacturer.
e) Personal protective safety glasses should be used; suitable gloves and protective clothing are recommended.
f) For overhead work, wear a safety helmet.
g) Avoid direct contact with moving parts to prevent injury by pinching or cutting.
h) Be aware that there is a risk of electrostatic discharge if used on plastic and other non-conductive materials. Take appropriate steps to reduce this risk when working with these materials (e.g. using a grounding system).
i) Be aware that certain materials may present fire or explosion risks when being processed. Take appropriate precautions to reduce hazards. Employers should make risks clear to operators.
j) Switch off device / release start-and-stop control if the air / power supply is interrupted.
k) High-reaction torque can be developed in the case of stalling, which can be caused by excessive loads being applied to the drill bit, by the drill bit snagging on the material being drilled into or by the drill bit breaking through the material being drilled.
1) In cases where the means to absorb the reaction torque are requested, it is recommended to use a suspension arm whenever possible. If that is not possible, side handles are recommended for straight-case tools and pistol-grip tools. In any case, it is recommended to use a means to absorb the reaction torque above 4 N-m for straight tools and above 10 N-m for pistol-grip tools.
m) Keep hands away from the rotating chuck and drill bit.
n) Use of the tool can expose the operator's hands to hazards, including cuts, abrasions and heat. Wear suitable gloves to protect hands.
o) Always wait until the drill has come to a complete stop before putting it down.
p) Use metal and voltage detectors to locate concealed electric, water or gas lines. Avoid touching live components or conductors.
Repetitive Motions Hazards
When using the tool the user may experience discomfort in the hands, arms, shoulders, neck or other parts of the body.
a) Adopt a comfortable posture whilst maintaining secure footing and avoiding awkward or off-balance postures. Change posture during extended tasks; this can help avoid discomfort and fatigue.
b) Symptoms such as persistent or recurring discomfort, pain, throbbing, aching, tingling, numbness, burning sensations or stiffness, should not be ignored. Inform employer if appropriate and consult a qualified health professional.
Accessory Hazards
a) Disconnect the tool from the air supply before fitting or changing the accessory.
b) Avoid direct contact with the accessory during and after use. Accessories are often sharp and may become hot during use.
c) Use only sizes and types of accessories and consumables that are recommended by the manufacturer of the tool; do not use other types or sizes of accessories or consumables.
d) Ensure the maximum operation speed of any accessory equals or exceeds the rated speed marked on the tool.
Work Area Hazards
a) Be aware of slippery surfaces caused by use of the tool and trip hazards caused by the air line. Slips, trips and falls are major causes of injury.
b) Where possible do not obstruct thoroughfares and passageways with air lines or cables. Take appropriate measures to reduce trip risk such as erecting warning signs and fixing cables and air lines in place.
c) Proceed with care in unfamiliar surroundings to minimise risk from hidden hazards such as utility lines.
d) The tool is not intended for use in potentially explosive atmospheres and is not insulated against contact with electric power.
e) Ensure that there are no electrical cables, gas pipes, etc., which could cause a hazard if damaged by use of the tool.
Dust and Fume Hazards
Dust and fumes can cause ill health (e.g. cancer, birth defects, asthma and/or dermatitis); risk assessment and implementation of appropriate controls for these hazards are essential.
a) Risks assessed should include dust created by the use of the tool and the potential for disturbing existing dust.
b) Direct the exhaust to minimise disturbance of dust.
c) Control dust and fumes at the point of emission as a priority.
d) Select, maintain and replace consumables / accessories as recommended in the instructions, to prevent an unnecessary increase in dust or fumes.
e) Use respiratory protection in accordance with any employer's instructions and as required by occupational health and safety regulations.
f) Take into account the risks associated with different materials. Working in certain materials creates dust and fumes that may cause an explosive environment.
g) Always use dust extraction or suppression systems which are suitable for the material being processed.
h) Operate and maintain this tool as recommended in these instructions, to minimize dust and fume emissions.
i) All integral features or accessories for the collection, extraction or suppression of airborne dust and fumes should be correctly used and maintained in accordance with the manufacturer's instructions.
Noise Hazards
Exposure to high noise levels can cause permanent, disabling hearing loss and other problems, such as tinnitus (ringing, buzzing, whistling or humming in the ears). Risk assessment and use of appropriate controls for these hazards are essential.
a) Use appropriate controls to reduce the risk of noise-related injury. These can include actions such as damping materials to prevent workpieces from 'ringing'.
b) Use hearing protection in accordance with any employer's instructions and as required by occupational health and safety regulations.
c) Operate and maintain this tool as recommended in the instructions to prevent an unnecessary increase in the noise level.
d) Select, maintain and replace the consumable l accessory as recommended in the instructions, to prevent an unnecessary increase in noise.
e) Where a silencer is available, ensure it is in place and in good working order when the tool is being operated.
f) Take steps to reduce noise in the work area where possible (e.g. by using damping mats).
Vibration Hazards
Exposure to vibration can cause disabling damage to the nerves and blood supply of the hands and arms. Not all vibration hazards can be eliminated by tool design or construction, and some residual risks remain. Check the vibration-emission value (obtained using ISO 28927-3) shown in the specification table. Ensure the risk it represents is assessed and managed. If the risk cannot be managed so that it falls within acceptable limits, then do not use the tool.
Take the following steps to reduce risk of vibration-related injury:
a) Wear warm clothing when working in cold conditions. Keep hands warm and dry.
b) If numbness, tingling, pain or whitening of the skin of fingers or hands is experienced, stop using the tool, inform employer (where appropriate) and consult a qualified health professional.
c) Operate and maintain the tool as recommended in the instructions to prevent an unnecessary increase in vibration levels.
d) Where appropriate, support the weight of the tool in a stand, tensioner or balancer.
e) The risk from vibration is generally greater when the grip force is higher. Hold the tool with a light but safe grip, taking account of the required hand reaction forces.
f) Ensure the tool and accessories are properly mounted and in good repair: improperly mounted or damaged tools can cause excessive vibration.
g) Do not allow the inserted tool to chatter on the workpiece, as this is likely to cause a substantial increase in vibration.
h) Select, maintain and replace the consumable/inserted tool as recommended in the instructions handbook to prevent an unnecessary increase in vibration levels.
Product Familiarisation
- chuck
2.1andle - Air Inlet
- Quick Connector
- Forward/Reverse Lever
- trigger
Unpacking Your Tool
- Carefully unpack and inspect your tool. Fully familiarise yourself with all its features and functions
- Ensure that all parts of the tool are present and in good condition. If any parts are missing or damaged, have such parts replaced before attempting to use this tool
Intended Use
Single speed drill, powered by compressed air from a compressor, with forward/reverse function. Uses drill bits and other compatible accessories with a shaft diameter up to 10mm
This air drill does not feature a torque clutch and must therefore not be used for screw driving or similar applications. Not intended for commercial use.
The tool must ONLY be used for its intended purpose. Any use other than those mentioned in this manual will be considered a case of misuse. The operator, and not the manufacturer, shall be liable for any damage or injury resulting from such cases of misuse. The manufacturer shall not be liable for any modifications made to the tool, nor for any damage resulting from such modifications.
Before Use
Fitting the quick connector
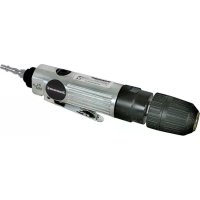
Note: This tool is supplied with two different male airline quick connectors (Fig. 1):
EQ-4 commonly used in Europe
EN-6 - mainly used in the UK
- Please choose the connector that is compatible with the airline system you are using, and install as outlined below:
- Apply some PTFE tape (not included) to the screw threads of the Quick Connector (4). This will help to maintain an air-tight seal
Note: Apply PTFE tape tightly and in a clockwise direction, so it does not come off when the thread is screwed into the tool.
- Remove the protective plug from the Air Inlet
- Using a spanner (not included) screw the Quick Connector into the Air Inlet located at the base of the Handle
- Connect to airline, pressurise carefully and carry out a leak check (e.g. by spraying small amounts of soapy water on to the outside of the connectors)
Air lines fitted with matching female Quick Connectors will now be a push fit to the tool
Recommended air supply
- This tool should be connected to a clean, dry air supply with inline oiler and water separator
- Do not allow supply pressure to exceed the maximum stated (see 'Specification')
- Ensure that water is drained from air system daily
- Ensure that all parts of the system (hoses, couplers, etc.) are correctly rated for the air pressure to be used
Setting tool power
- The tool speed/power can be adjusted by decreasing/increasing the air supply pressure within the range specified in 'Specification'.
Fitting and removing drill bits and accessories
WARNING: Always disconnect the tool from the air supply before fitting or removing drill bits or other accessories.
WARNING: NEVER run the drill while tightening the chuck or changing the direction.
WARNING: Never install accessories with a maximum speed rating below the no load speed of this tool.
1. Open the chuck by rotating the chuck collar anticlockwise
2. Insert the required drill bit or accessory
3. Close the chuck by rotating it clockwise. Tighten by hand
Note: Ensure the drill bit or accessory runs centrally and repeat above steps to correct the position of the bit in the chuck if necessary.
Forward/reverse function
For clockwise rotation (forward) tilt the Forward/Reverse Lever (5) into the position labelled 'F'
For anticlockwise rotation (reverse) tilt the Forward/Reverse Lever into the position labelled 'R'
WARNING: DO NOT operate the tool with the Forward/Reverse Lever in a position between 'F' or 'R', as this may damage the internal mechanisms.
Operation
- Select direction using the Forward/Reverse Lever (5)
- Hold the tool firmly by the Handle (2)
- Press the Trigger (6) to operate the drill. Release the Trigger to stop the machine.
Note: The air exhaust is located at the bottom of the Handle. During operation, air will escape directly next to the Air Inlet connection.
WARNING: Be aware that air tools may hold residual pressure after use. Always bleed air pressure from the tool after shutting off air supply.
Accessories
- Accessories for this tool, including drill and countersink bits, wire cup brushes and more, are available from your Silverline stockist. Spare parts can be obtained from your Silverline dealer or www.toolspareonline.com
Maintenance
WARNING: Always disconnect from the air supply and depressurise before cleaning or carrying out any maintenance.
Cleaning
- Keep your tool clean at all times. Dirt and dust will cause internal parts to wear quickly, and shorten the machine's service life. Clean the body of your machine with a soft brush, or dry cloth
IMPORTANT: There is very little that can go wrong with your air tool and it should be noted that when an air tool fails to work it is generally because the internal workings have corroded due to dirty, wet air and failure to follow the instructions given below.
Daily maintenance procedure
Disconnect from the air supply, pour the equivalent of a tablespoon of oil into the air intake. Operate the machine at low speed to thoroughly lubricate all internal workings.
If an inline lubricator is not fitted to the air supply, the tool must be manually lubricated.
1. Disconnect from the air supply
2. Pour 3-4 drops of oil into the air intake
3. Operate the machine at low speed to thoroughly lubricate all internal workings.
- If the machine is in constant use or used for long periods at a time, repeat the above procedure up to 3 times per day
- Use air tool oil. DO NOT UNDER ANY CIRCUMSTANCES USE NORMAL ENGINE OIL
- Failure to comply with the operating and maintenance instructions may invalidate the guarantee
Storage
- Store this tool carefully in a secure, dry place out of the reach of children
Contact
For technical or repair service advice, please contact the helpline on (+44) 1935 382 222
Web: www.tritontools.com
UK Address:
Toolstream Ltd.
Boundary Way
Lutton Trading Estate
Yeovil, Somerset
BA22 8HZ, United Kingdom
EU Address:
Toolstream B.V.
Holtum-Noordweg 11
Unit 4
6121 RE Born
The Netherlands
Disposal
- As with other power tools, air tools should not be disposed of with household waste
Air tools may contain traces of tool oil and other lubricants and so must be recycled accordingly - Contact your local waste disposal authority for information on the correct way to dispose of power tools
Troubleshooting
| Problem Possible Cause Solution | ||
| Tool operating slowly | Pressure incorrect Set the correct air pressure according to the specification | |
| Dirt within the mechanism Repeat the 'Daily maintenance procedure' several times to clear the dirt | ||
| Air blockage Operate tool in short bursts to clear blockage | ||
| Air leak Check all fittings and hose for air leaks and correct issue by tightening, using PTFE tape or replacing | ||
| Blockage in gauze mesh filter Remove Quick Connector (4) and clean mesh filter | ||
| Tool seized | Dirt or rust in mechanism Try 'Tool operating slowly' solutions | |
| Dirt or rust in mechanism Tap tool gently with a soft mallet | ||
| Dirt or rust in mechanism Free mechanism by rotating drive manually when disconnected from air line | ||
| Tool will not stop after Trigger (6) is fully released | Throttle valve O-ring or valve seat damaged Have the tool repaired at an authorised Silverline service centre | |
| If the above troubleshooting solutions fail, contact your dealer or an authorised Silverline service centre. | ||
Silverline Tools Guarantee
This Silverline product comes with a 3 year guarantee
Register this product at www.silverinetools.com within 30 days of purchase in order to qualify for the 3 year guarantee. Guarantee period begins according to the date of purchase on your sales receipt.
Registering your purchase
Registration is made at silverlinetools.com by selecting the Guarantee Registration button. You will need to enter:
- Your personal details
Details of the product and purchase information
Once this information is entered your guarantee certificate will be created in PDF format for you to print out and keep with your purchase.
Terms & Conditions
Guarantee period becomes effective from the date of retail purchase as detailed on your sales receipt.
PLEASE KEEP YOUR SALES RECEIPT
If this product develops a fault within 30 days of purchase, return it to the stockist where it was purchased, with your receipt, stating details of the fault. You will receive a replacement or refund.
If this product develops a fault after the 30-day period, return it to:
Silverline Tools Service Centre
PO Box 2988
Yeovil
BA21 1WU, UK
The guarantee claim must be submitted during the guarantee period.
You must provide the original sales receipt indicating the purchase date, your name, address and place of purchase before any work can be carried out.
You must provide precise details of the fault requiring correction.
Claims made within the guarantee period will be verified by Silverline Tools to establish if the deficiencies are related to material or manufacturing of the product.
Carriage will not be refunded. Items for return must be in a suitably clean and safe state for repair, and should be packaged carefully to prevent damage or injury during transportation. We may reject unsuitable or unsafe deliveries.
All work will be carried out by Silverline Tools or its authorised repair agents.
The repair or replacement of the product will not extend the period of guarantee
Defects recognised by us as being covered by the guarantee shall be corrected by means of repair of the tool, free of charge (excluding carriage charges) or by replacement with a tool in perfect working order.
Retained tools, or parts, for which a replacement has been issued, will become the property of Silverline Tools.
The repair or replacement of your product under guarantee provides benefits which are additional to and do not affect your statutory rights as a consumer.
What is covered:
The repair of the product, if it can be verified to the satisfaction of Silverline Tools that the deficiencies were due to faulty materials or workmanship within the guarantee period.
- If any part is no longer available or out of manufacture, Silverline Tools will replace it with a functional replacement part.
What is not covered:
Silverline Tools does not guarantee repairs required as a result of:
- Normal wear and tear caused by use in accordance with the operating instructions e.g. blades, brushes, belts, bulbs, batteries etc.
- The replacement of any provided accessories such as drill bits, blades, sanding sheets, cutting discs and other related items.
- Accidental damage, faults caused by negligent use or care, misuse, neglect, careless operation or handling of the product.
- Use of the product for anything other than normal domestic purposes.
- Change or modification of the product in any way.
- Use of parts and accessories which are not genuine Silverline Tools components.
- Faulty installation (except if installed by Silverline Tools).
- Repairs or alterations carried out by parties other than Silverline Tools or its authorised repair agents.
- Claims other than the right to correction of faults on the tool named in these guarantee conditions are not covered by the guarantee.
Introduction
Silverline Tools Service Centre
PO Box 2988
Yeovil
BA21 1WU, GroBbritannien
Silverline Tools Service Centre
PO Box 2988
Yeovil
Silverline Tools Service Centre
PO Box 2988
Yeovil
BA21 1WU, VK
Silverline Tools Service Centre
PO Box 2988
Yeovil
BA21 1WU, UK
EN 3 Year Guarantee. Register online within 30 days. Terms and Conditions apply.