HF310 - Coffee machine Soba - Free user manual and instructions
Find the device manual for free HF310 Soba in PDF.
Frequently Asked Questions - HF310 Soba
User questions about HF310 Soba
0 question about this device. Answer the ones you know or ask your own.
Ask a new question about this device
Download the instructions for your Coffee machine in PDF format for free! Find your manual HF310 - Soba and take your electronic device back in hand. On this page are published all the documents necessary for the use of your device. HF310 by Soba.
USER MANUAL HF310 Soba
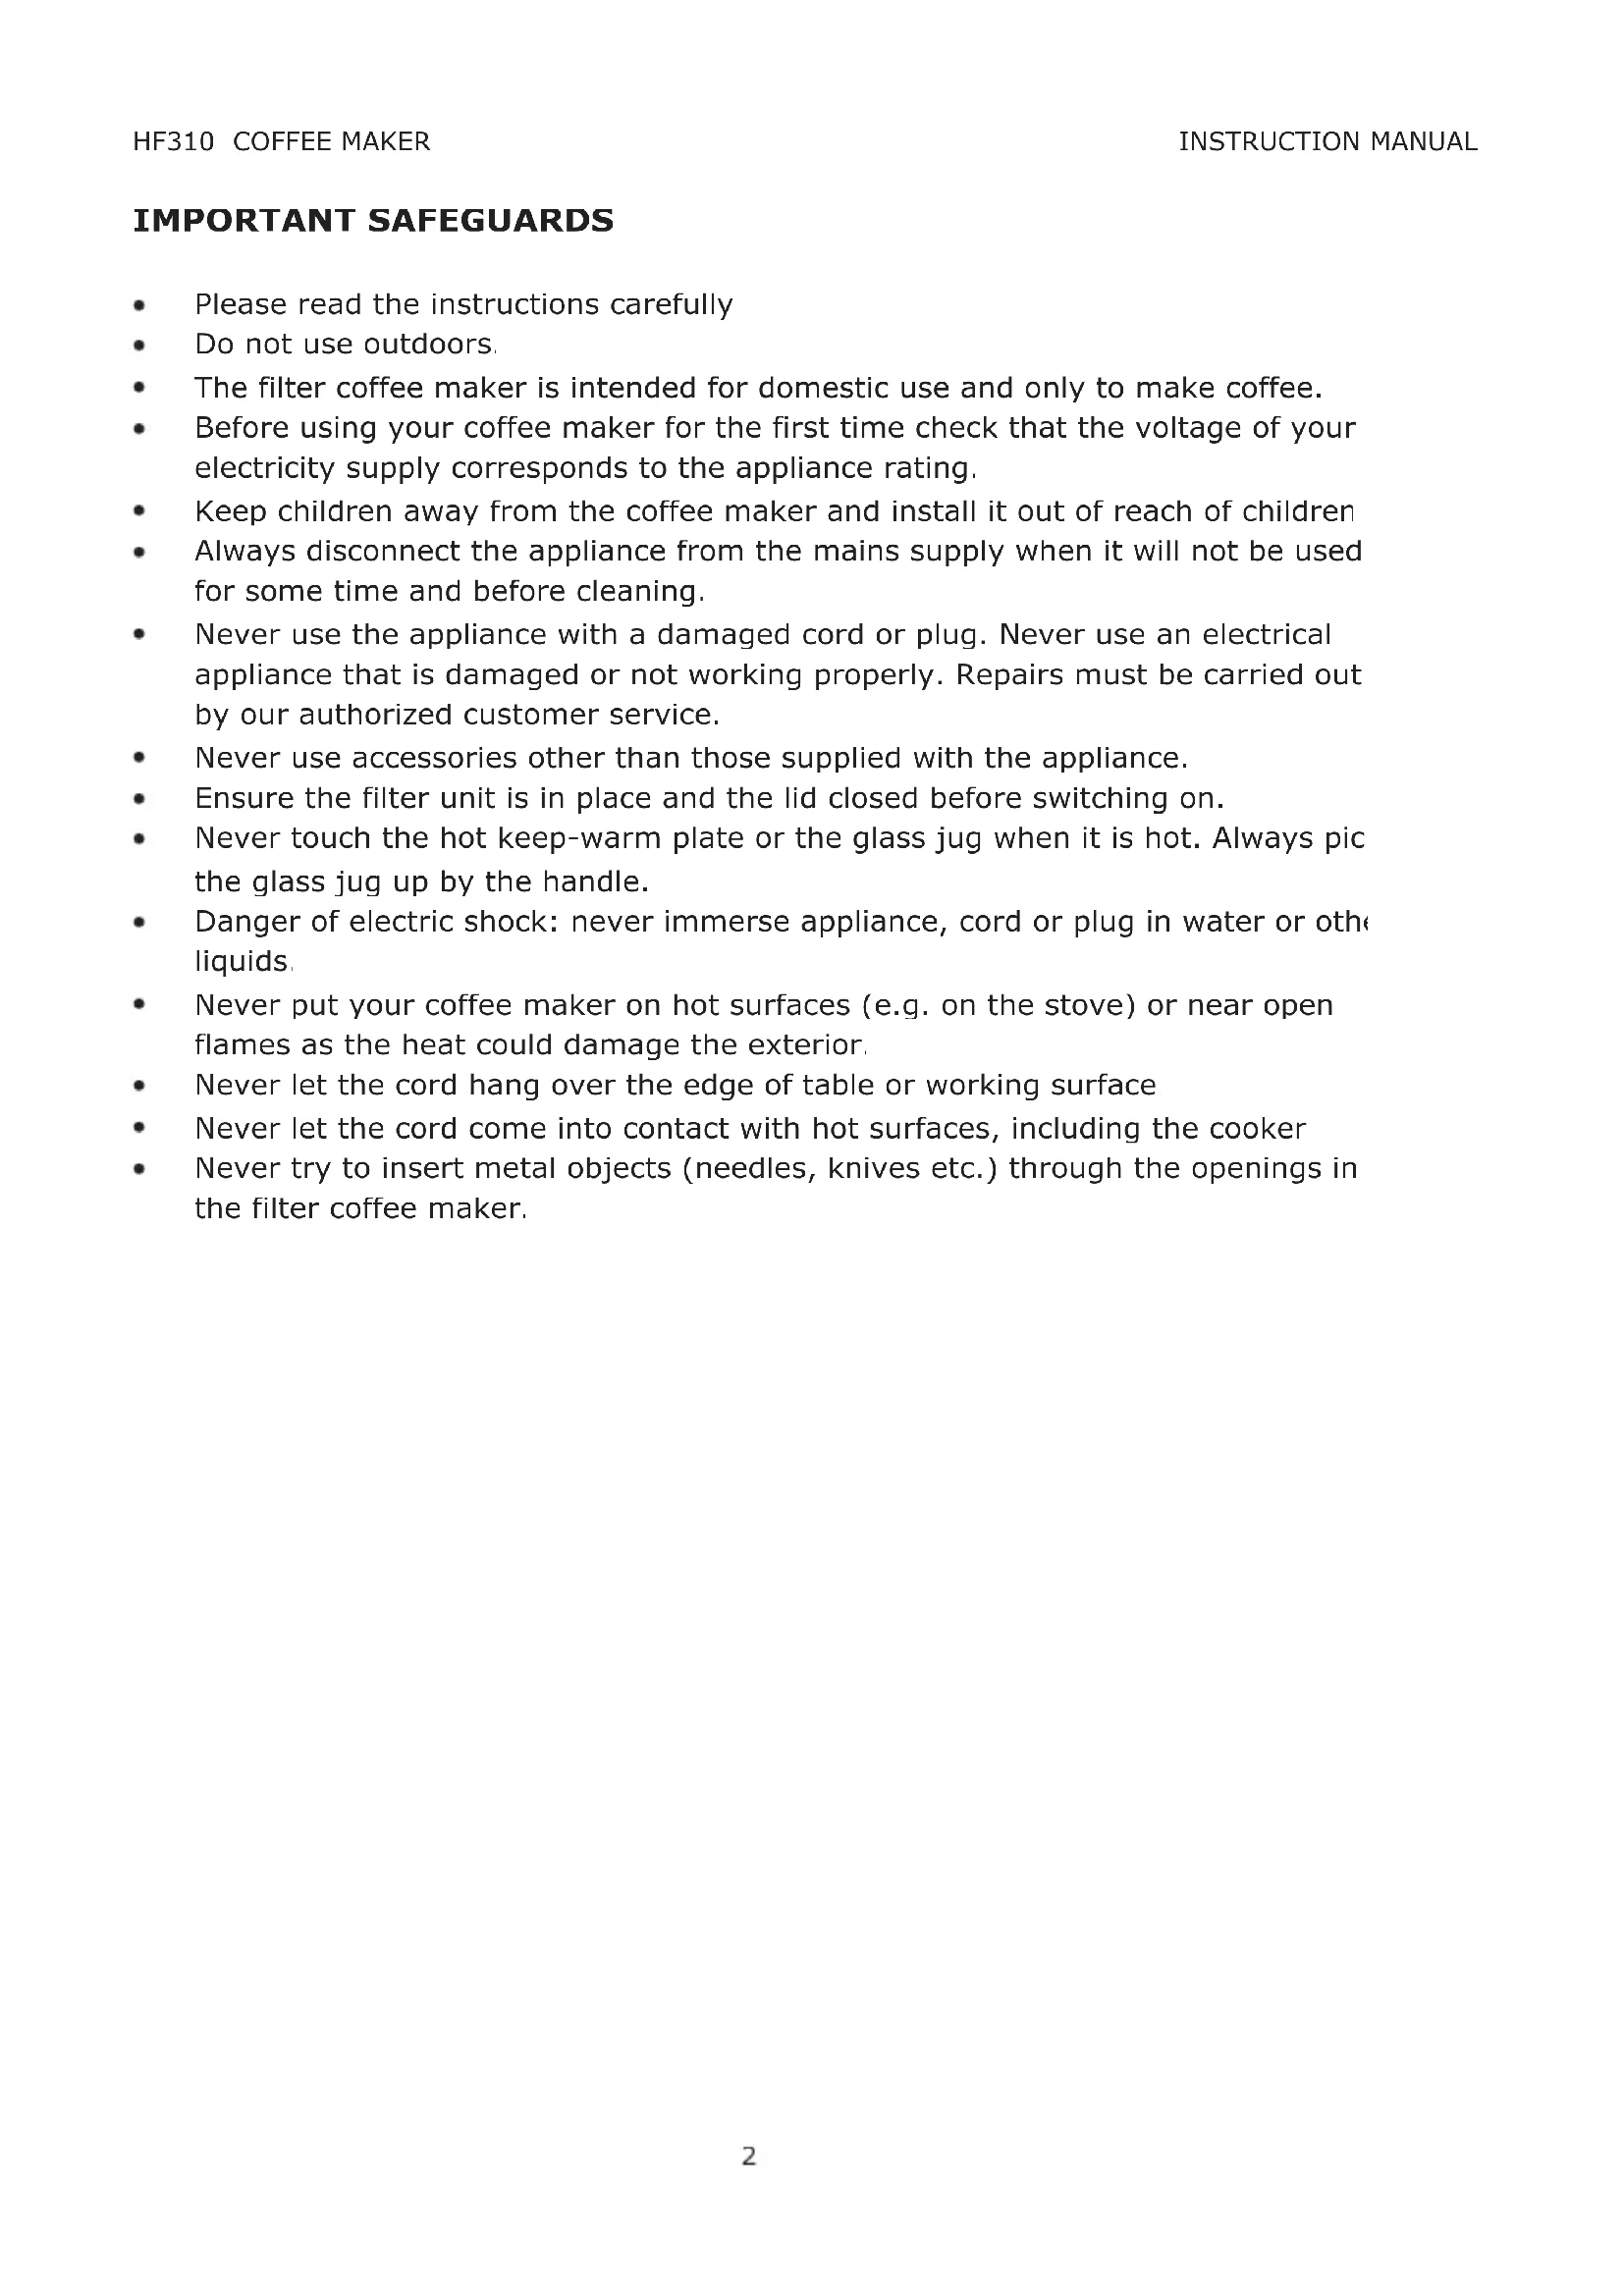
Please read the instructions carefully
Do not use outdoors.
The filter coffee maker is intended for domestic use and only to make coffee.
- Before using your coffee maker for the first time check that the voltage of your electricity supply corresponds to the appliance rating.
- Keep children away from the coffee maker and install it out of reach of children
Always disconnect the appliance from the mains supply when it will not be used for some time and before cleaning.
- Never use the appliance with a damaged cord or plug. Never use an electrical appliance that is damaged or not working properly. Repairs must be carried out by our authorized customer service.
- Never use accessories other than those supplied with the appliance.
- Ensure the filter unit is in place and the lid closed before switching on.
- Never touch the hot keep-warm plate or the glass jug when it is hot. Always pick the glass jug up by the handle.
- Danger of electric shock: never immerse appliance, cord or plug in water or other liquids.
- Never put your coffee maker on hot surfaces (e.g. on the stove) or near open flames as the heat could damage the exterior.
- Never let the cord hang over the edge of table or working surface
- Never let the cord come into contact with hot surfaces, including the cooker
- Never try to insert metal objects (needles, knives etc.) through the openings in the filter coffee maker.
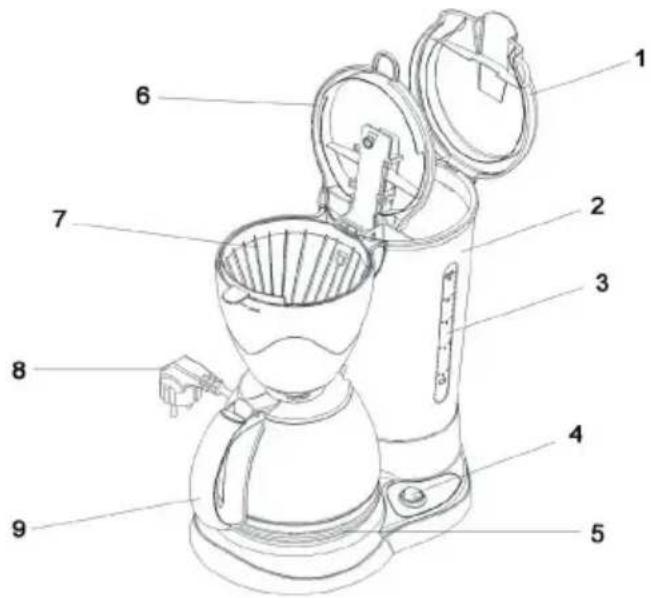
KNOWING YOUR NEW COFFEE MAKER
- Water tank lid
- Water tank
- Water level indicator
- On/Off switch
- Keep-warm plate
- Filter unit lid
- Filter unit with anti-drip protect
- Plug
- Glass jug with lid
STARTING UP
Choose a suitable place to set up your coffee maker; it should be heat resistant, flat and not slippery and in the immediate vicinity of a contact protected socket.
Before using for the first time
To remove any impurities or manufacturing residues, let fresh water run through the coffee maker several times until the water collected in the jug is clear and clean. Proceed as follows:
- Raise the water tank lid (1)
- Fill the water tank (2) with cold fresh tap water up to gauge 12 (Max.) on the water level indicator (3).
- Close the water tank lid (1), place the glass jug (9) with lid in place, on the keep warm plate (5) and close the filter unit (7) (without using a filter paper).
- IMPORTANT: When making coffee the glass jug must never be put under the filter unit without its lid as otherwise the non-drip valve on the filter unit will remain closed and the filter would run over.
- Connect the coffee maker and switch on.
Empty the glass jug. - Wait about 5 minutes before refilling with fresh water so the appliance can cool down
Cleaning the parts of your coffee maker
Later, when you have rinsed the appliance through thoroughly, clean the individual pieces
- Disconnect the mains plug (8)
Wait till the appliance has cooled completely - Remove the glass jug
- Raise the filter unit lid, lift the filter unit a little, tilt slightly to the side and remove.
- Wash the filter unit and glass jug in warm soapy water. These parts are dishwasher proof and can also be cleaned in the dish washer
Dry the parts well and reassemble.
When the filter coffee maker has not been used for sometime clean it in the same way.
Making coffee
- Fill the water tank with sufficient fresh cold water for the number of cups wanted (at least 2 maximum 12 cups).
- Raise the filter unit lid and insert a standard coffee filter, size 1x4
Put about 6 grams finely ground coffee per cup in the filter - Close the filter unit lid.
The glass jug must be in place on the keep-warm plate.
Plug in to the mains. - Then switch on the coffee maker with the On/OFF switch (4).
IMPORTANT: Never take the filter unit or the glass jug away while the water is running! - When the coffee has finished running through the glass jug may be removed. The filter has a non drip valve to prevent coffee dribbling out when the jug is not in place.
- As long as the coffee maker is switched on, the glass jug with the remaining coffee can be kept warm on the keep-warm plate
- Switch the coffee maker off when the keep-warm function is no longer needed.
CLEANING AND MAINTENANCE
Don't forget to always disconnect the plug and allow the appliance to cool before cleaning or maintenance!
Cleaning
- Never use aggressive or abrasive cleaners!
- Never immerse the appliance in water!
- Wipe the outer surfaces with a damp cloth.
- Raise the filter unit lid, lift a little, tilt to the side and remove.
- Clean the filter unit as well as the glass jug with lid thoroughly in warm soapy water. Dry well and replace. These parts and the water tank lid are dishwasher proof and may be cleaned in the dishwasher
Descalng
Furring deposits that would impair the functioning of the appliance may form in time. Descale the coffee maker regularly to remove these using a proprietary descending agent for coffee machines and following the maker's instructions.
Take care that none of the descending agent comes into contact with the keepwarm plate..
- Fill the water with fresh cold water up to the 12 marking (Max.) together with the recommended amount of descending agent.
- Place a paper filter in the filter unit to catch any particles that are flushed out. Close the filter unit and place the glass jug on the keep-warm plate.
- Do not switch on. Leave the appliance to stand for at least 30 minutes but no longer than an hour to allow the descending agent to work.
- Start the coffee making cycle.
- As soon as the cycle is finished, remove the glass jug and discard the solvent. Do not pour the discarded solution into an enameled sink. Do not use the same solution a second time.
Repeat the process if necessary.
- Traces of the descending agent can spoil the taste of the coffee. Consequently the coffee maker must be rinsed thoroughly by letting fresh water run through several times until every trace of the descending agent has been eliminated.
To finish, thoroughly clean the glass jug and filter unit
Subject to change without prior notice.
CONSERVACAO E MANUTENCAO
CONDITIONS OF GUARANTEE
The guarantee is valid for 2 years from date of supply to the end user. In order to claim under the guarantee the faulty appliance must be taken to the official after-sales service agent together with proof of purchase (copy of the invoice or receipt). The guarantee covers the costs for work and material.
The guarantee shall be invalid or prematurely discontinued if damages are due to any of the following causes: utilisation of the appliance in the commercial sector, exterior influences, non-professional installation, non-observance of the instructions for use or operating instructions, force majeure, inappropriate use, intervention by non-authorised persons as well as normal wear and tear. Also excluded are damage due to dropping or falling, water or operating with incorrect electrical power.
CONDITIONS DE GARANTIE
National representatives / After-sales service addresses: see last page
Contact us for Customer Service addresses in other countries.
Information from SOBA International Trading AG