FFL12 - Garage door BERNER - Free user manual and instructions
Find the device manual for free FFL12 BERNER in PDF.

| Product Type | Wireless digital reader for garage door |
| Brand | Berner |
| Model | FFL12 |
| Power supply | 4 AAA batteries (LR03) 1.5 V |
| Radio frequency | 868.3 MHz |
| Number of fingerprint memory slots | 14 (2 masters + 12 users) |
| Radio code slots | 2 |
| Display | Red, blue, green LED |
| Dimensions (approx.) | 58 x 58 x 22 mm |
| Weight (with batteries) | Approx. 80 g |
| Use | Opening and closing garage door or gate via fingerprint |
| Mounting | On wall or bracket, avoid direct mounting on metal (reduces range) |
| Maintenance | Clean the sensor with a soft cloth; avoid sharp objects |
| Security | Only master fingerprints allow adding users; reset deletes all fingerprints |
| Spare parts | AAA batteries, mounting accessories |
| Repairability | Battery replacement by user; reset possible; no repairable parts |
| Operating temperature | Not specified in manual, estimated -10°C to +50°C |
| Approval | CE, compliant with R&TTE directive (1999/5/EC) |
Frequently Asked Questions - FFL12 BERNER
User questions about FFL12 BERNER
0 question about this device. Answer the ones you know or ask your own.
Ask a new question about this device
Download the instructions for your Garage door in PDF format for free! Find your manual FFL12 - BERNER and take your electronic device back in hand. On this page are published all the documents necessary for the use of your device. FFL12 by BERNER.
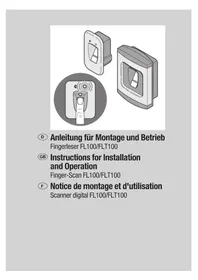
USER MANUAL FFL12 BERNER
Fitting and Operating Instructions
Radio Finger-Scan FFL12
4x Battery, Typ: AAA (LR03)
Masterfinger (M1/M2)
Intended for use in all EU countries, Norway, Switzerland and others.
1 About These Instructions ... 15
1.1 Intended use 15
1.2Warnings used 15
1.3 Symbols used 15
2 Basic Safety Instructions ... 15
3 Scope of Delivery 16
4 Definitions 16
5 Fitting 17
6 Display and control elements 17
6.1 Display elements 17
6.2 Control elements.. 17
7 Putting into Service 18
7.1 Assignment of a fingerprint to a radio code location 18
7.2 Learning the master fingers .. 18
7.2.1 Learning the first master finger (M1) 18
7.2.2 Learning the second master finger (M2) 19
7.3 Learning the user fingers (B1 - B12) 20
7.4 Learning the radio finger-scan on the receiver 21
8 Operation 21
9 删除的User Fingers..22
10 Overview of LED Displays .. 23
11 Reset 24
12 List of memory locations ... 24
13 Technical data 24
14 EC manufacturer's declaration 25

86
Dissemination as well as duplication of this document and the use and communication of its content are prohibited unless explicitly permitted. Noncompliance will result in damage compensation obligations. All rights reserved in the event of patent, utility model or design model registration. Subject to changes.
About These Instructions1
Read through all of the instructions carefully, as they contain important information about the product. Pay attention to and follow the instructions provided, particularly the safety instructions and warnings.
Please keep these instructions in a safe place and make sure that they are available to all users at all times.
1.1 Intended use
The radio finger-scan FFL12 is a transmitter that is used to send a specific radio code to open and close garage doors or entrance gates. Sending this radio code is enabled after one or more previously learned fingerprint has been identified by the system.
Other applications are not permitted. The manufacturer is not liable for damages caused by improper use or incorrect operation.
Warnings used1.2
| ATTENTION Indicates a | danger that can lead to damage or destruction of the product. |
Symbols used1.3
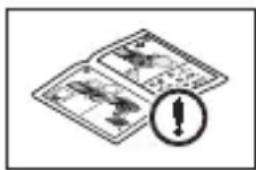
See illustrated section
See text section
Basic Safety Instructions2
ATTENTION
Damage caused by sharp items or metal objects
Damage to the surface of the finger sensor may lead to malfunctions.
Do not pull sharp items or metal objects, e.g. rings, over the finger sensor.
Scope of Delivery3
Radio finger-scan FFL12
4x battery, type: AAA (LR03)
Fitting material
Fitting and operating instructions
Definitions4
User fingers (B1 - B12)
The learned fingerprints with authorisation to open the garage door or entrance gate.
Enrol mode
Operating mode in which a fingerprint is learned.
Finger sensor
The sensor element is used to learn the fingerprint and recognise the authorisation to open the garage door.
Radio code
A unique fixed code preprogrammed at the factory that can be sent to open the garage door.
Radio code location
A radio code location is a space for storing a radio code, that can be sent and recoded. A total of 2 radio code locations are available in the device.
Identification mode
Operating mode in which the fingerprint on the finger sensor is compared to the learned finger prints.
Master fingers (M1/M2)
The first two successfully learned fingerprints are the so-called master fingers. Further finger prints (user fingers) can only be learned using the master fingers.
Timeout
A 15 second time span during which a user action is expected to take place (e.g. pressing a button or pulling a finger over the sensor). The radio finger-scan will switch itself off if this period elapses without an action taking place.
Fitting5
See Figure 1
NOTE:
Before fitting the radio finger-scan, check whether the radio signal can be received by the receivers in the chosen fitting area. Direct fitting on metal will affect the range. In this case, fit the finger-scan at a distance of 2-3 cm.
Display and control elements6
Display elements6.1
LEDs are used to display the status of the device and for operator guidance.
| Red LED (RD) | Delivery condition (illuminated)● Negative acknowledgement (briefly flashes 3 times)● Ready to learn the second master finger (illuminated)● Battery warning● |
| Blue LED (BU) | Delivery condition (illuminated)● Enrol mode for the master finger (flashes slowly)● Enrol mode for the user finger (flashes quickly)● First● radio code location (flashes slowly) Second● radio code location (flashes slowly in pairs) |
| Green LED (GN) | Delivery condition (illuminated)● Positive acknowledgement (one long flash)● Identification mode (illuminated) Radio code transmission (flashes quickly) |
6.2 Control elements
PRG button Initiation of programming functions
- Deleting the user fingers
- Reset
ON button Device activation
- Resend a radio code
KEY button -Reset (on the rear)
Putting into Service7
See Figure 2
The radio finger-scan is ready for operation immediately after the batteries have been inserted.
To properly learn a fingerprint, the same finger must successfully be pulled over the sensor three times.
NOTE:
To learn a fingerprint, the finger must be pulled over the sensor in the correct position and with increased pressure (see Figure 3).
The first two learned fingerprints are the master fingers. Further finger prints (user fingers) can only be learned using the master fingers.
NOTE:
After identification, the radio finger-scan will only send the radio code to open and close a garage door or entrance gate if both master fingers have been learned beforehand.
Assignment of a fingerprint to a radio code location7.1
The radio finger-scan has two radio codes preprogrammed at the factory. Before learning a fingerprint, you can select the first radio code location or the second radio code location using the PRG button. The learned fingerprint will then send the stored radio code.
Learning the master fingers7.2
See Figure 4
Learning the first master finger (M1)7.2.1
- Push the cover up to the second notch or press the ON button to activate the device.
All LEDs will be illuminated and indicate the delivery condition.
Press the PRG button for at least 2.
5 seconds (selection of the a. first radio code location). The red and green LEDs will go out and the blue LED slowly flashes for the duration of the learning process.
10 seconds (selection of the b. second radio code location). The red and green LEDs will go out and the blue LED slowly flashes in pairs for the duration of the learning process.
Pull the first master finger over the finger sensor. 3.
The green LED will slowly flash once as a positive acknowledgement.
Pull the same finger over the finger sensor again. 4.
The green LED will slowly flash once as a positive acknowledgement.
Pull the same finger over the finger sensor again. 5.
The blue LED will go out and the green LED is illuminated.
After 2 seconds, the red LED will also be illuminated, signalling that the 6.
second master finger must be learned.
If the red LED flashes three times as a negative acknowledgement during step 3, repeat the step until you receive a positive acknowledgement.
If the timeout elapses during the learning process, the radio finger-scan will switch itself off and you must begin again with step 1.
NOTE:
In order to ensure operational reliability, we recommend using a fingerprint from a different person to learn the second master finger. If both of the learned master fingers are from the same person, we recommend learning a fingerprint from each hand.
Learning the second master finger (M2)7.2.2
- Push the cover up to the second notch or press the ON button to activate the device.
The red and green LEDs are illuminated.
Press the PRG button for at least2.
5 seconds (selection of the a. first radio code location). The red and green LEDs will go out and the blue LED slowly flashes for the duration of the learning process.
10 seconds (selection of the b. second radio code location). The red and green LEDs will go out and the blue LED slowly flashes in pairs for the duration of the learning process.
Pull the second master finger over the finger sensor. 3.
The green LED will slowly flash once as a positive acknowledgement.
Pull the same finger over the finger sensor again. 4.
The green LED will slowly flash once as a positive acknowledgement.
Pull the same finger over the finger sensor again. 5.
The blue LED will go out and the green LED is illuminated.
If the green LED is illuminated after step 3, two master fingers have been 6.
learned and the device is now in identification mode.
Learning the user fingers (B1 - B12)7.3
See Figure 5
- Push the cover up to the second notch or press the ON button to activate the device.
The green LED is illuminated and indicates the identification mode.
Press the PRG button for at least 2.
5 seconds (selection of the first radio code location). The red and green a. LEDs will go out and the blue LED slowly flashes for the duration of the learning process.
10 seconds (selection of the second radio code location). The red and b. green LEDs will go out and the blue LED slowly flashes in pairs for the duration of the learning process.
Pull a master finger over the finger sensor. 3.
The green LED will slowly flash once as a positive acknowledgement.
The blue LED flashes quickly and indicates that the system is ready to learn a user finger.
Pull a user finger over the finger sensor. 4.
The green LED slowly flashes once as a positive acknowledgement; the blue LED flashes quickly.
Pull the same finger over the finger sensor again. 5.
The green LED slowly flashes once as a positive acknowledgement; the blue LED flashes quickly.
Pull the same finger over the finger sensor again. 6.
The blue LED goes out; the green LED is illuminated and indicates the identification mode.
If the red LED flashes three times as a negative acknowledgement during steps 3-5, repeat the step until you receive a positive acknowledgement.
If the timeout elapses during the learning process, the radio finger-scan will switch itself off and you must begin again with step 1.
A maximum of 12 different user fingers can be learned. If a further user finger is learned, the first one will be overwritten without prior warning. There is no warning or error message if an already learned user finger is learned again. The fingerprint will be recognised as an existing one and does not take up a second memory location.
Learning the radio finger-scan on the receiver7.4
- Push the cover up to the first notch or press the ON button to activate the device.
The green LED is illuminated and indicates the identification mode.
Prepare the receiver (e.g. garage door operator) for learning in accordance 2. with the operating instructions.
Pull a finger with a learned fingerprint over the finger sensor. 3.
The green LED will flash quickly as a positive acknowledgement and the radio code that belongs to this fingerprint is sent. Afterwards, the green LED is illuminated.
If necessary, press the ON button to extend the transmission time until the 4. receiver has recognised the radio finger-scan.
Operation8
NOTE:
868 MHz: When used at the same time, GSM 900 mobile phones can affect the range of the radio remote control.
- Push the cover up to the first notch or press the ON button to activate the device.
The green LED is illuminated and indicates the identification mode.
Pull a finger with a learned fingerprint over the finger sensor. 2.
The green LED will flash quickly as a positive acknowledgement and the radio code that belongs to this fingerprint is sent. Afterwards, the green LED is illuminated.
The ON button can be used to transmit again within 15 seconds. As long as the ON button is pressed, the radio code is transmitted, but for a maximum of 30 seconds. The green LED will flash very quickly during transmission.
If the timeout elapses during operation, the radio finger-scan will switch itself off and you must begin again with step 1.
NOTE:
If a finger with an unlearned fingerprint is pulled over the finger sensor, the green LED will go out and the red LED briefly flashes three times as a negative acknowledgement. Afterwards, the green LED is illuminated again.
Deleting the User Fingers9
See Figure 6
It is not possible to delete individual fingerprints. If the user fingers are deleted, only the master fingers and radio code will be retained.
- Push the cover up to the second notch or press the ON button to activate the device.
The green LED is illuminated and indicates the identification mode.
Press the PRG button for at least 5 seconds. 2.
The green LED will go out and the blue LED flashes slowly.
Pull a master finger over the finger sensor. 3.
The green LED will slowly flash once as a positive acknowledgement.
The blue LED flashes quickly and indicates that the system is ready to learn a user finger.
Press the PRG button again for 15 seconds. 4.
The blue LED will go out and after 5 seconds the blue LED flashes slowly; after a further 10 seconds it flashes faster for a period of 5 seconds.
Afterwards, the green LED is illuminated.
All user fingers have been deleted.
Overview of LED Displays10
| Red LED Blue LED Green LED Operating condition | |||
| Illuminated Illuminated Illuminated Delivery condition; Learn the first master finger. | |||
| Illuminated Illuminated The first master fingerhas been learned.Learn the second master finger, | |||
| Illuminated Identificaiton mode | |||
| Quickly flashes 3 times | Negative acknowledgement | ||
| Flashes for 5 seconds | Low battery voltage,Change the batteries soon. | ||
| Flashes quickly for 5 seconds and then the device switches itself off. | Batteries are empty.Exchange the batteries. | ||
| Flashes slowly and then quickly after 5 seconds | Flashes slowly and then quickly after 5 seconds | Device reset | |
| Flashes slowly Enrol mode for the 1 . | master finger.Identification mode when learning the user fingers.First 3. radio code location | ||
| Flashes slowly 2 times | Enrol mode for the 1 master finger.Second 2. radio code location | ||
| Flashes quickly | Enrol mode for the user finger | ||
| One long flash | Positive acknowledgement | ||
| Flashes very quickly | The radio code that belongs to this fingerprint is sent. | ||
Reset11
See Figure 7
The rear of the device must be accessible in order to reset the device. During a device reset, all of the stored master and user fingers will be deleted and new radio codes generated.
Remove the cover and disassemble the top of the device so that the KEY 1. button on the rear is accessible.
Press the ON button to activate the device.2.
The green LED is illuminated and indicates the identification mode.
Press and hold the KEY button and then immediately press the PRG button. 3.
Press and hold both for at least 5 seconds.
The red and blue LEDs will flash slowly; after 5 seconds the red and blue
LEDs flash faster; after a further 2 seconds all the LEDs are illuminated.
The radio finger-scan has now been reset to the delivery condition, all master and user fingers have been deleted and new radio codes generated.
List of memory locations12
See the appendix on page 92
Example:
| Des. Name Finger | Radio code location | ||
| 1 | 2 | ||
| M1 Max Mustermann R2 X | |||
| M2 Erika Mustermann L2 X | |||
Technical data13
Type: Radio finger-scan FFL 12
Memory spaces: 14 (2 master fingers, 12 user fingers)
Statusdisplay: LEDs (red, blue, green)
Learning: First in - First out
Delete: Only complete deletion; not possible to individually
delete user fingers.
Frequency: 868.3 MHz
Voltage supply: Battery (4 pieces, type: AAA, LR03)
EC manufacturer's declaration14
Manufacturer: Berner Torantriebe KG
Graf-Bentzel-Str. 68
72108 Rottenburg am Neckar
Product: Radio finger-scan for door operators and accessories
Device type: FFL12-868
Article identification: FFL12-868
CE mark:

0682
Intended for use in all EU countries, Norway, Switzerland and others.
On the basis of its design and type in the version marketed by us, the product described above meets the relevant safety and health requirements of the directives listed below. Any modification made to this product without our express permission and approval shall render this declaration null and void.
Pertinent provisions with which the product complies:
Conformity of the abovementioned product with the requirements of the directives according to section 3 of the R & TTE directives 1999/5/EC was verified by compliance with the following standards:
EN 300 220-1
EN 300 220-2
EN 301 489-1
EN 301 489-3
Rottenburg, Germany, 26.01.2009

ppa. Jirgen Ruppel
Managing Director
Table des matieres
Apprentissage: First In - First Out
Alimentation electrique: Pile (x 4, type: AAA (LR03)
Identification article: FFL12-868
Intended for use in all EU countries, Norway, Switzerland and others.
Mastervingers (M1/M2)
Intended for use in all EU countries, Norway, Switzerland and others.
Intended for use in all EU countries, Norway, Switzerland and others.
Rottenburg, 26/01/2009

ppa. Jürgen Ruppel
Dirección
Indice
4x battery, tipo AAA (LR03)
Intended for use in all EU countries, Norway, Switzerland and others.
Rottenburg, 26/01/2009

p.p. Jürgen Ruppel
Reset ao equipments11
Verilustracao 7
Intended for use in all EU countries, Norway, Switzerland and others.