AX 180 - Headphones TRITTON - Free user manual and instructions
Find the device manual for free AX 180 TRITTON in PDF.
Frequently Asked Questions - AX 180 TRITTON
User questions about AX 180 TRITTON
0 question about this device. Answer the ones you know or ask your own.
Ask a new question about this device
Download the instructions for your Headphones in PDF format for free! Find your manual AX 180 - TRITTON and take your electronic device back in hand. On this page are published all the documents necessary for the use of your device. AX 180 by TRITTON.
USER MANUAL AX 180 TRITTON
Connecting the Microphone 4
In-line Controls 5
Connect To
Xbox 360 ^® 6
PlayStation ^® 3 10
Wii U GamePad ™ / Mobile Devices 12
PC / Mac 14
Warranty 16
Technical Support 17
Package Contents
A
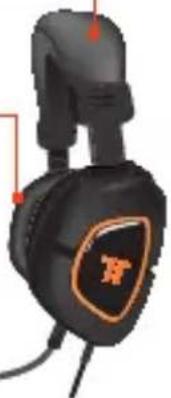
AX 180 Headset

natural_image
Black and orange headboard with logo (no visible text or symbols)B
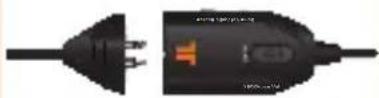
In-line Audio Controller with Breakaway Cable
C
Detachable,
Flexible Microphone

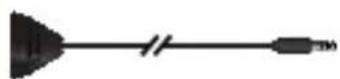
D
RCA
Connection Cable
E
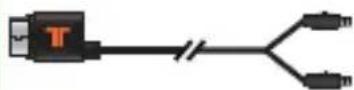
Xbox LIVE®
Communication Cable
natural_image
Two parallel black lines with connector ends, no text or symbols presentF
Analog Audio Adapter (Xbox 360 only)
G
Wii U™/Mobile
Adapter
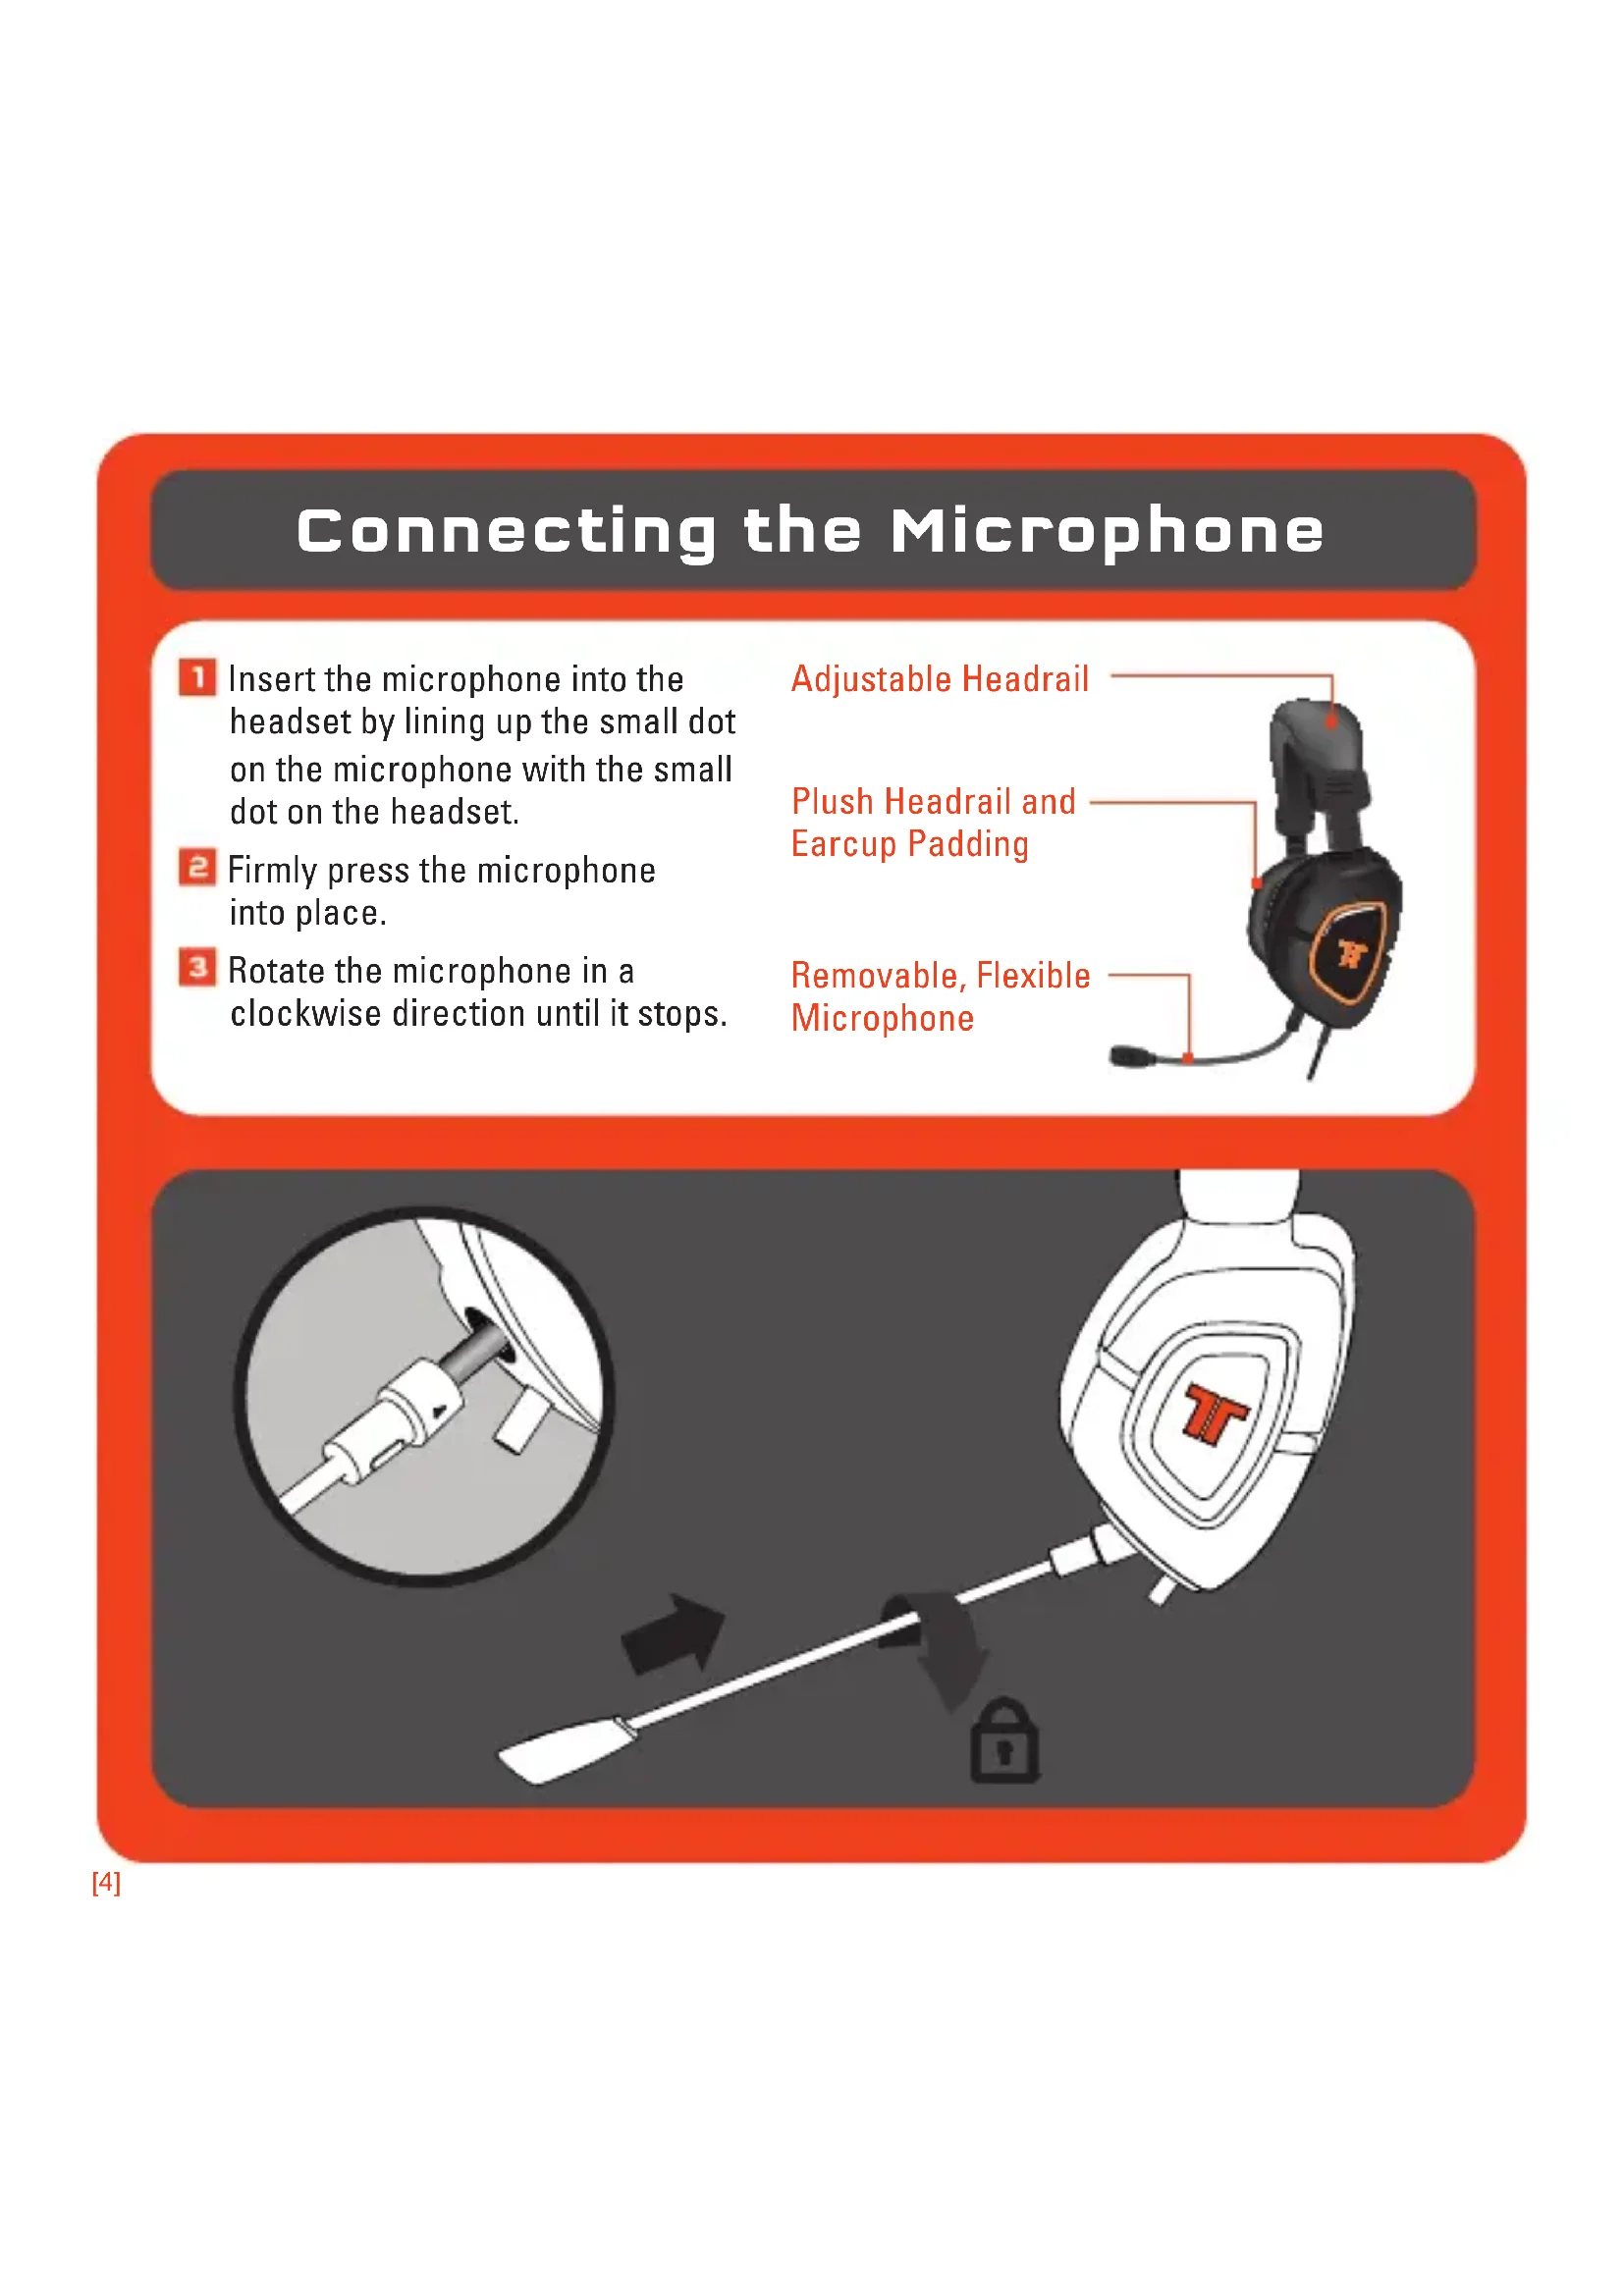
Connecting the Microphone
1 Insert the microphone into the headset by lining up the small dot on the microphone with the small dot on the headset.
2 Firmly press the microphone into place.
3 Rotate the microphone in a clockwise direction until it stops.
Adjustable Headrail
Plush Headrail and Earcup Padding
Removable, Flexible Microphone

natural_image
Close-up of a black and orange R2R head with a shield emblem, shown with connector cables (no text or symbols visible)
text_image
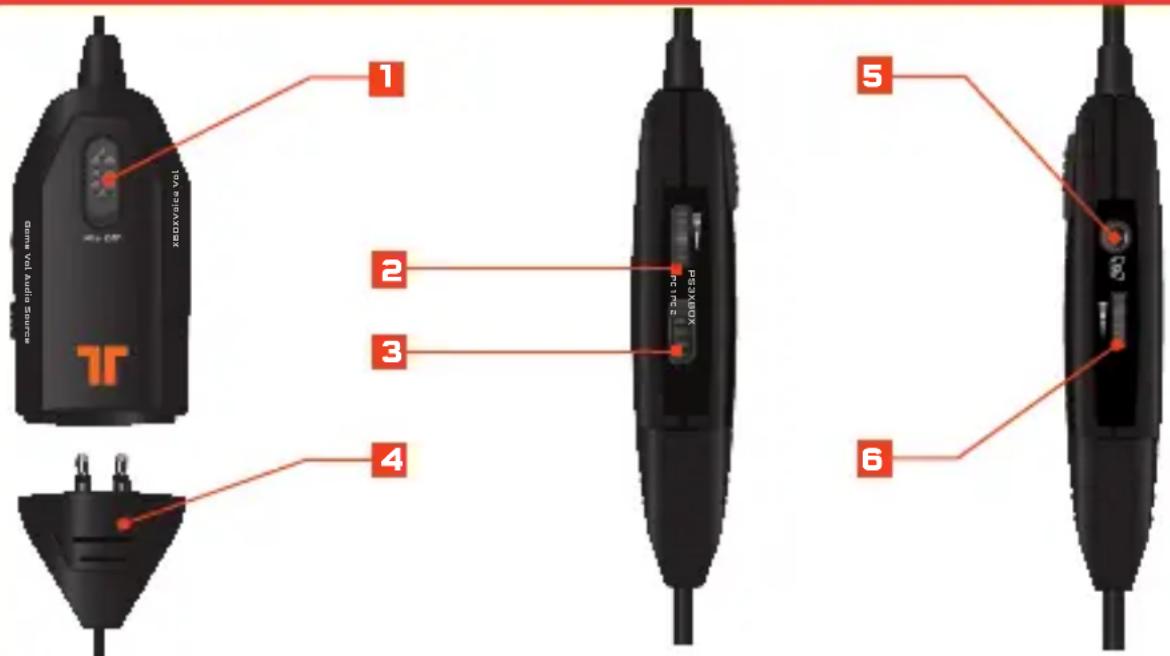
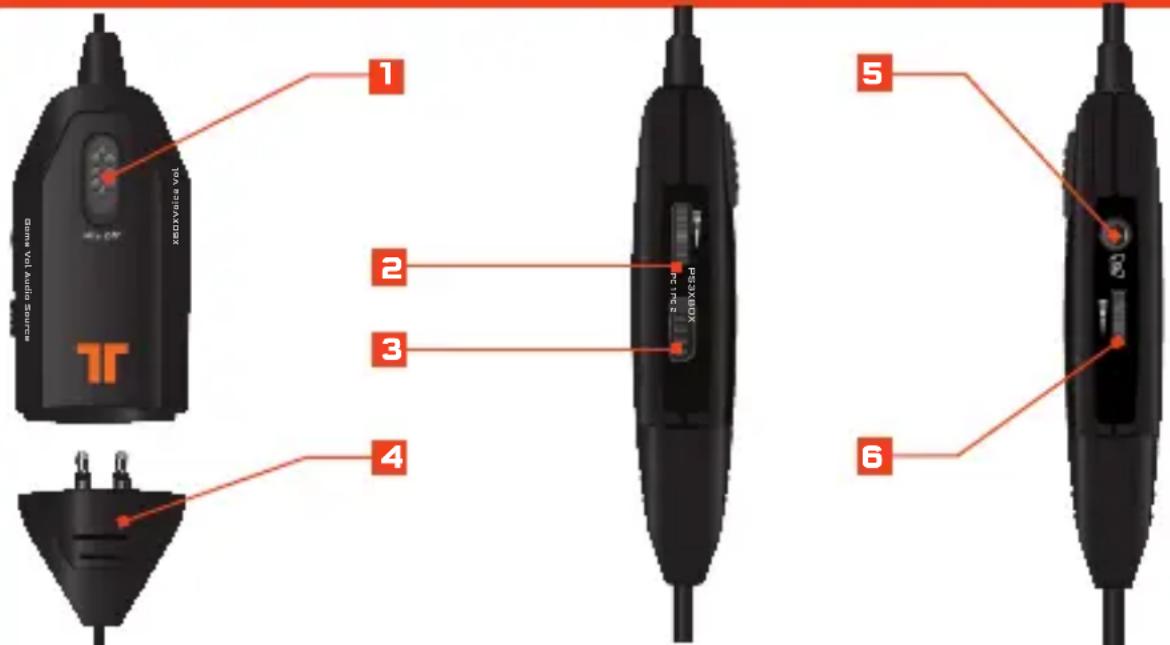
Diagram illustrating a medical procedure involving a tool and a lock, with magnified detail showing the insertion of a device.In-line Controller

Mic Mute: Slide the mic mute switch down to mute the microphone so others cannot hear you.
Master Volume and Mute: Use to adjust the master volume of game audio. Push in to mute all game sound.
Ebox/PS3 Switch: Activates the headset's microphone for use with corresponding console.
4 Breakaway In-line Connector
5 Xbox LIVE Port: Use to connect to Xbox LIVE.
Voice Communication Volume and SVM Control: Use to adjust the volume of the voices of other players. SVM = Selectable Voice Monitoring. SVM allows the user to hear his or her own voice through the headset. Push in to turn SVM ON/OFF.
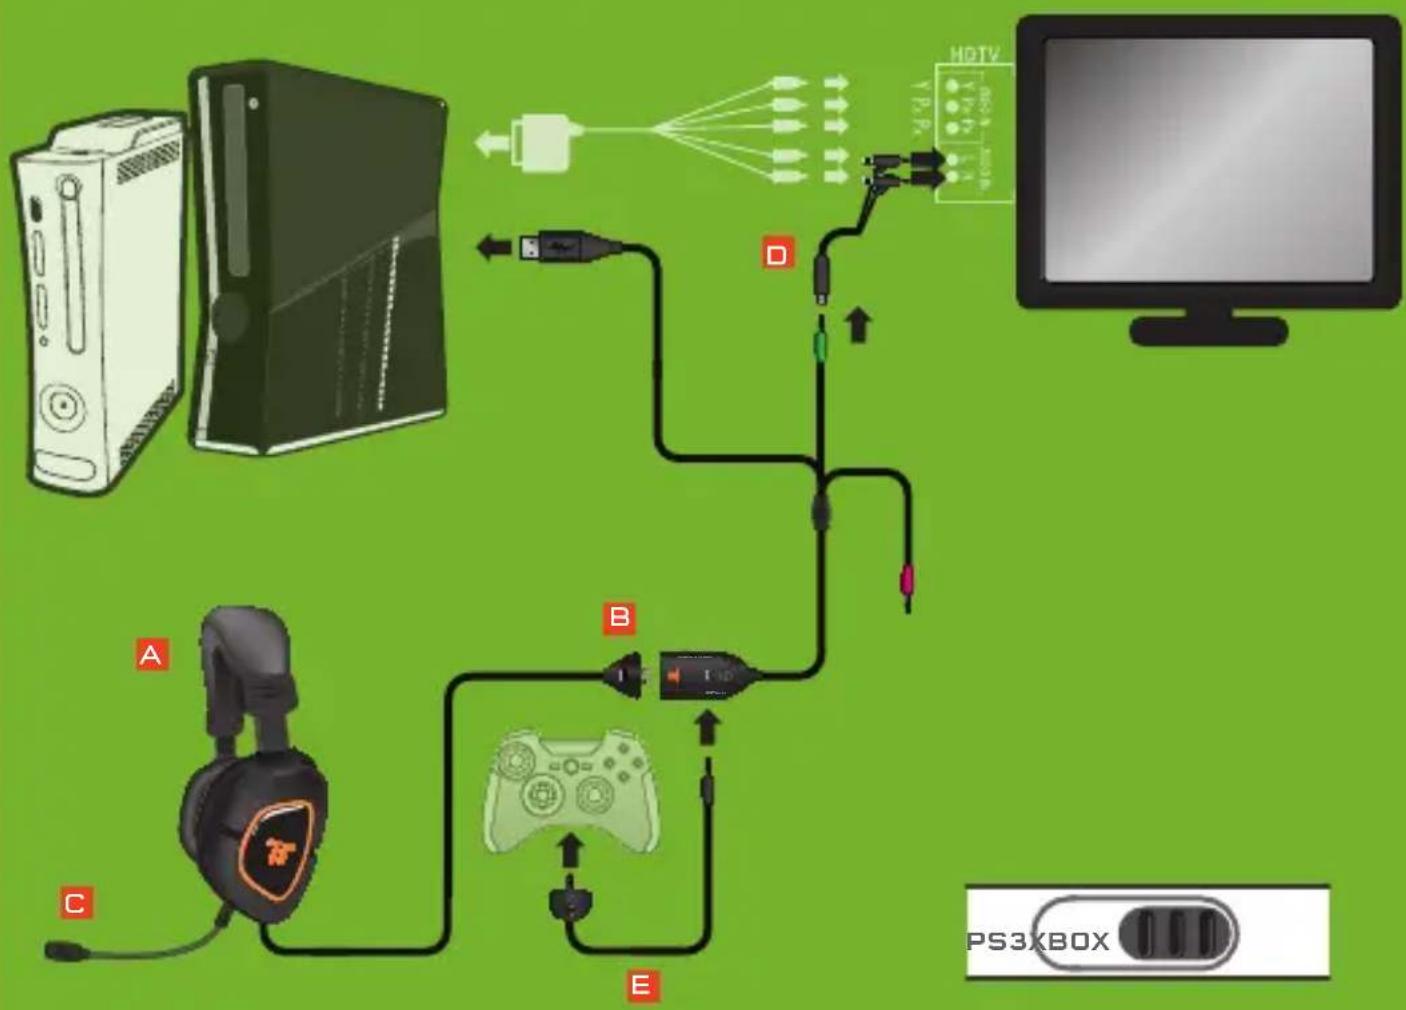
Connect to Xbox 360
1 Connect the USB Cable to a USB port on the console.
2 Connect the green 3.5mm jack into the green RCA connection cable.
3 Connect the RCA connection cable to the console Analog Audio Adapter.
4 Connect the Analog Audio Adapter to the AV port on the console.
5 On the in-line controller, slide the Xbox/PS3 switch to the Xbox setting.
6 Be sure to connect the Xbox LIVE communication cable in the proper order:
A. Connect Xbox LIVE cable into Xbox LIVE port on the in-line controller.
B. Connect puck side of Xbox LIVE cable into Xbox 360-compatible controller.
XBOX - HDMI
PARTS NEEDED FROM PACKAGE CONTENTS (REFERENCE PAGE 3)


flowchart
graph TD
    A["PC"] -->|F| B["Console"]
    B -->|D| C["PS3XBOX"]
    C -->|B| D["Game Controller"]
    D -->|E| E["Play Console"]
    E -->|C| A
    style A fill:#f9f,stroke:#333
    style B fill:#ccf,stroke:#333
    style C fill:#cfc,stroke:#333
    style D fill:#fcc,stroke:#333
    style E fill:#cff,stroke:#333
Connect to Xbox 360
1 Connect the USB Cable to a USB port on the console.
2 Connect the green 3.5mm jack into the green RCA connection cable.
3 Connect the RCA connection cable to the console AV cable.
4 On the in-line controller, slide the Xbox/PS3 switch to the Xbox setting.
5 Be sure to connect the Xbox LIVE communication cable in the proper order:
A. Connect Xbox LIVE cable into Xbox LIVE port on the in-line controller.
B. Connect puck side of Xbox LIVE cable into Xbox 360-compatible controller.
XBOX - Component/Composite/VGA
PARTS NEEDED FROM PACKAGE CONTENTS (REFERENCE PAGE 3)


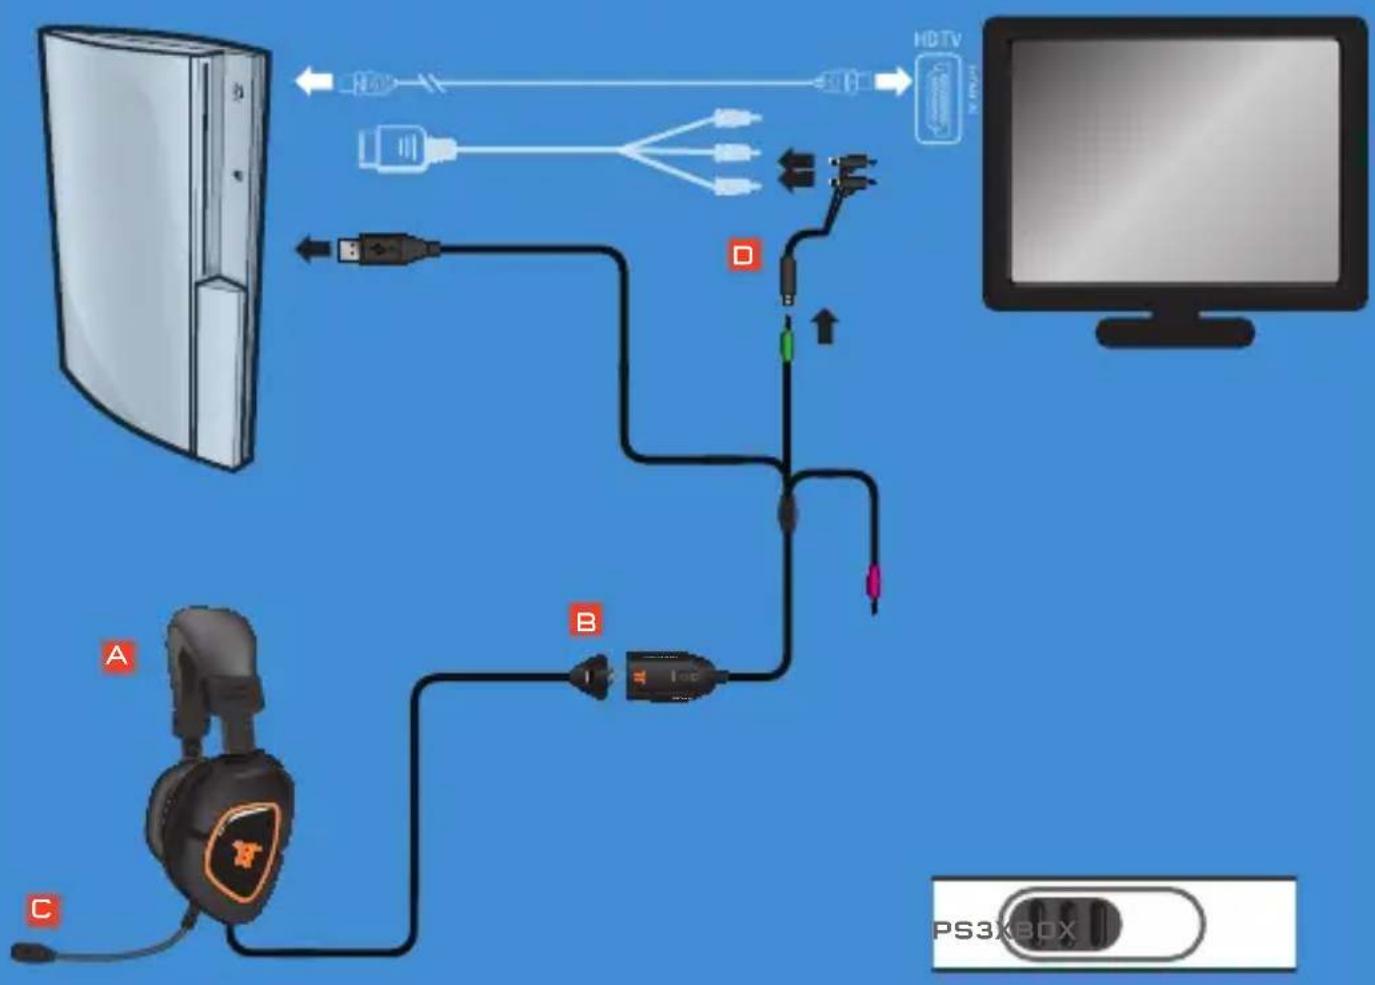
1 Connect the USB Cable to a USB port on the console.
2 Connect the green 3.5mm jack into the green RCA connection cable.
3 Connect the RCA connection cable to the console AV cable.
4 On the in-line controller, slide the Xbox/PS3 switch to the PS3 setting.
PlayStation®Network
On the PS3 go to Settings > Sound Settings > Audio Output Settings and change the audio output to be "Audio Input Connector/SCART/AV Multi."
On the PS3 go to Settings > Accessory Settings > Audio Device Settings, and set both the input and output to "TRITTON AX 180 Headset." You can see a visual confirmation that the microphone is functioning if the bar graph moves.
PS3
PARTS NEEDED FROM PACKAGE CONTENTS (REFERENCE PAGE 3)


flowchart
graph TD
    A["Desktop Computer"] -->|HD TV| B["USB Cable"]
    B --> C["HD TV + USB Cable"]
    C --> D["PS3XBOX Device"]
    D --> E["Audio Cable"]
    E --> F["USB Cable"]
    F --> G["HD TV + USB Cable"]
    G --> H["PC Monitor"]
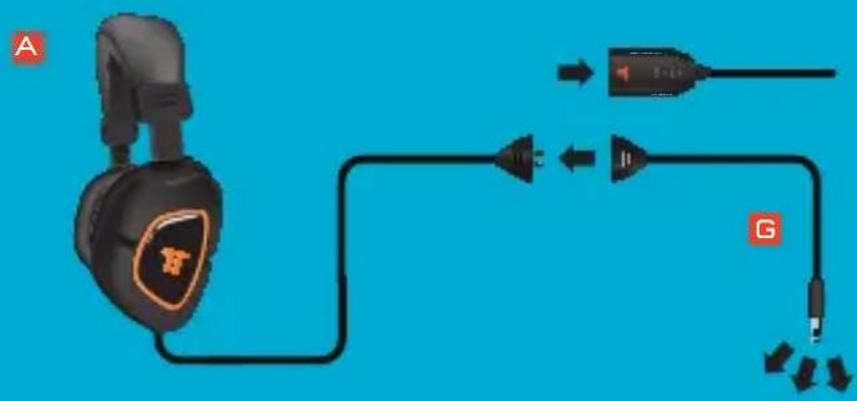
Connect to Wii U / Mobile Devices
1 Disconnect the headset from the in-line cable.
2 Connect the headset to the Wii U / Mobile adapter.
3 Connect the 3.5mm jack to the headphone output on the device.
Wii U / Mobile Devices
PARTS NEEDED FROM PACKAGE CONTENTS (REFERENCE PAGE 3)


text_image
A G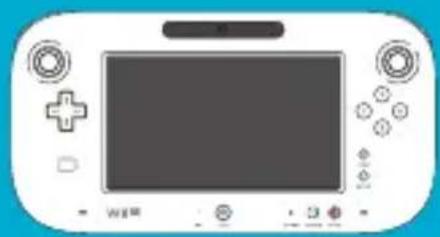
natural_image
Front view of a gaming controller with controller, game controller, and display screen (no text or symbols visible)
natural_image
Front view of a blank tablet device with no visible text or symbols
natural_image
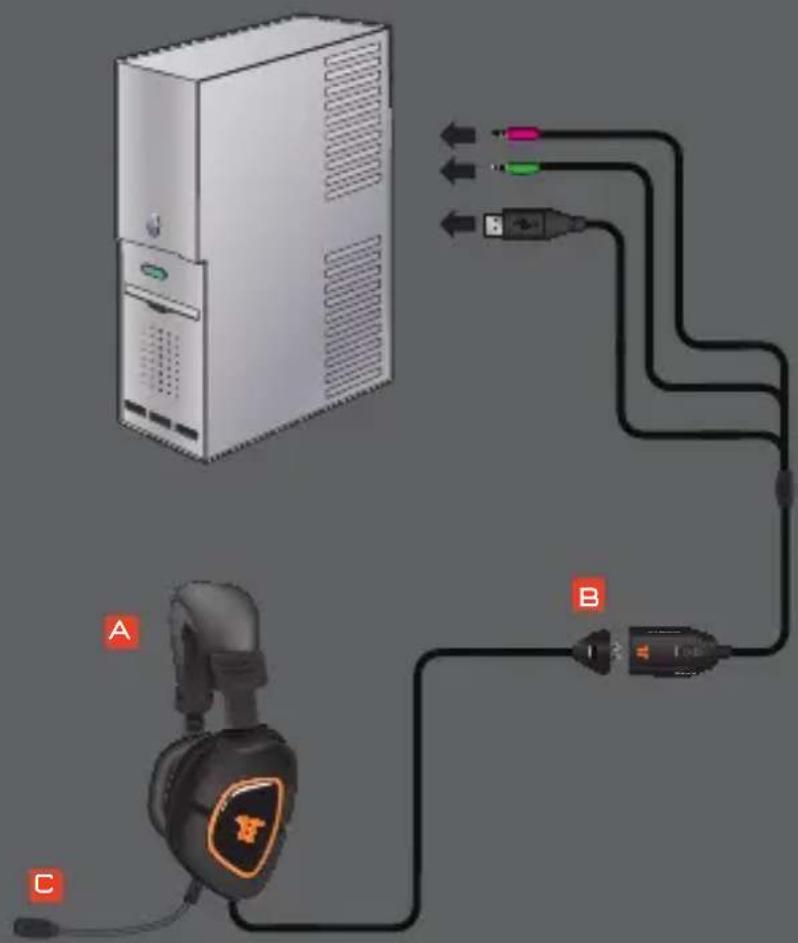
Illustration of a vintage PC with front panel, control buttons, and display screen (no text or symbols)Connect to PC / Mac
1 Plug the USB connector into an available USB port.
2 Standard: Connect the Pink 3.5mm and Green 3.5mm connectors to the PC sound card. Set the Audio Source switch on the in-line controller to PC2.
Optional: To use the separate chat and game audio controls, do not use the Pink 3.5mm connector. Set the Audio Source switch on the in-line controller to PC1. Set the audio input through the Control Panel to "TRITTON AX 180 Headset."
Mac: The Pink 3.5mm Mic connector is not used. Set the Audio Source switch on the in-line controller to PC1. Set the audio input in the Sound System Preference Pane to "TRITTON AX 180 Headset."
PC / Mac
PARTS NEEDED FROM PACKAGE CONTENTS (REFERENCE PAGE 3)


text_image
Diagram showing connections between a desktop computer tower, headphones, and audio equipment via labeled ports A, B, and C.WArrAnTy
2-YEAR LIMITED WARRANTY
Mad Catz warrants this product to be free from defects in materials and workmanship for the warranty period. This non-transferable, two- (2) year limited warranty is only to you, the first end-user purchaser. If a defect covered by this warranty occurs AND you provide proof of purchase, Mad Catz, at its option, will repair or replace the product at no charge.
The Mad Catz two- (2) year limited warranty is available to North American and European customers. Your sole and exclusive remedy is repair or replacement of your Mad Catz product. In no event shall Mad Catz liability exceed the original purchase price of the product. This warranty does not apply to: (a) normal wear and tear or abusive use; (b) industrial, professional or commercial use; (c) if the product has been tampered with or modified.
NORTH AMERICA AND EUROPE
To receive warranty service, you must:
Obtain a Return Authorization Number from Mad Catz Technical Support via ONE of the following methods:
a. Submit a Ticket at http://support.madcatz.com
b. Call the Mad Catz Tech Support Center nearest you:
North America: 1-800-659-2287 (USA) or 1-619-683-2815 (outside USA)
United Kingdom: 08450 508418
Europe (outside UK): +44(0) 1633 883110
France: 01 82 88 01 80
Germany: 089-21094818
Spain: 93 181 63 94
Once you have your unique Return Authorization Number, do the following:
- Ship the product to Mad Catz at your expense for service.
- Enclose a copy of the original sales receipt showing a purchase date.
- Enclose a full return address with daytime and evening phone numbers.
TECHNICAL SUPPORT
Online Support: http://support.madcatz.com
North American telephone, available Monday through Friday (excluding holidays): 1-800-659-2287 (USA only) or 1-619-683-2815 (outside USA).
United Kingdom telephone, available Monday through Friday (excluding bank holidays): 08450 508418.
European telephone (outside UK), available Monday through Friday (excluding bank holidays): +44(0) 1633 883110.
CAUTIONs
- Long-term exposure to loud music or other sounds in headphones may cause hearing damage. It is best to avoid extreme volume levels when using headphones, especially for extended periods.
• Use this unit only as intended. - To prevent fire or shock hazard, do not expose this unit to rain or moisture. Do not use within 30' of any water such as swimming pools, bathtubs, or sinks.
• To avoid electrical shock, do not disassemble. Refer servicing to qualified personnel only. - Never insert objects of any kind, other than authorized items, into the product as they may touch dangerous voltage points or short out parts that could result in fire or electrical shock.
- Stop using this unit immediately if you begin to feel tired or if you experience discomfort or pain in your hands and/or arms while operating the unit. If the condition persists, consult a doctor.
- Avoid prolonged use of this unit. Take breaks every 30 minutes.
- Route all cords so that they are not likely to be walked on or tripped over. Make sure that cords are not placed in a position or areas where they may become pinched or damaged.
- Do not wrap cords around any part of anyone's body.
- Do not allow children to play with cords.
- This product contains small parts that may cause choking if swallowed. Not intended for use by children under 3 years of age.
FCC & IC WARNING
This device complies with part 15 of the FCC Rules and Industry Canada licence-exempt RSS standard(s). Operation is subject to the following two conditions: (1) This device may not cause harmful interference, and (2) this device must accept any interference received, including interference that may cause undesired operation.
Any Changes or modifications not expressly approved by the party responsible for compliance could void the user's authority to operate the equipment.
FCC Radiation Exposure Statement:
This equipment complies with FCC radiation exposure limits set forth for an uncontrolled environment. This transmitter must not be co-located or operating in conjunction with any other antenna or transmitter.
CAUTIONs
IC RF Exposure Statement:
The device meets the exemption from the routine evaluation limits in section 2.5 of RSS 102 and compliance with RSS-102 RF exposure, users can obtain Canadian information on RF exposure and compliance.
Under Industry Canada regulations, this radio transmitter may only operate using an antenna of a type and maximum (or lesser) gain approved for the transmitter by Industry Canada. To reduce potential radio interference to other users, the antenna type and its gain should be so chosen that, the equivalent isotropically radiated power (e.i.r.p.) is not more than that necessary for successful communication.
EU DECLARATION OF CONFORMITY:
As required, certain of these products have been tested and conform to the requirements of the European Union Directives 2002/95/EC, 2002/96/EC, and 2004/108/EC. Authorized signatory of the manufacturer is Mad Catz, Inc., 7480 Mission Valley Road, Suite 101, San Diego, CA 92108.
04/13
WWW.TRITTONAUDIO.COM
©2013 Mad Catz, Inc. 7480 Mission Valley Road, Suite 101, San Diego, CA 92108 U.S.A. Mad Catz, TRITTON and the Mad Catz and TRITTON logos are trademarks or registered trademarks of Mad Catz Interactive, Inc., its subsidiaries and affiliates. The shape and design of this product are a trade dress of Mad Catz Interactive, Inc., its subsidiaries and affiliates. All other product names and images are trademarks or registered trademarks of their respective owners. Made in China. All rights reserved. Product features, appearance and specifications may be subject to change without notice. Please retain this information for future reference.
Mad Catz is a publicly traded company on the TSX/NYSE MKT, symbol MCZ.
Assistance Technique 17
natural_image
Exterior view of a black AX 180 Cosque headset with orange accent (no text or symbols on the headset itself)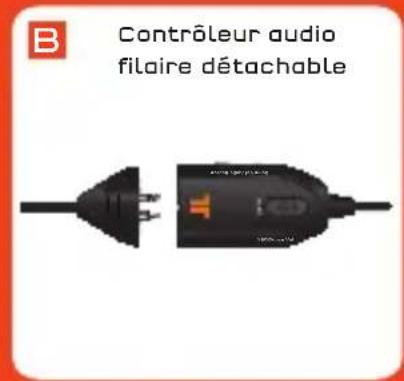
Microphone Amovable, flexible
natural_image
Close-up of a black and orange headboard with a logo (no visible text or symbols)
text_image
Diagram illustrating a medical procedure involving a screwdriver and a medical device with a red T-shaped logo, showing step-by-step installation.Contrôleur filaire

natural_image
Front view of a gaming controller with controller, game controller, and display screen (no text or symbols visible)
natural_image
Front view of a blank tablet device with no visible text or symbols
natural_image
Illustration of a vintage PC with front panel, control buttons, and display screen (no text or symbols)text_image
Diagram showing connections between a desktop computer tower, headphones, and audio equipment via labeled ports A, B, and C.GARANTIE
GARANTIE LIMITÉE DE 2 ANS
©2013 Mad Catz, Inc. 7480 Mission Valley Road, Suite 101, San Diego, CA 92108 U.S.A. Mad Catz, TRITTON, the Mad Catz logo and the TRITTON logo are trademarks or registered trademarks of Mad Catz Interactive, Inc., its subsidiaries and affiliates. The shape and design of this product are a trade dress of Mad Catz Interactive, Inc., its subsidiaries and affiliates. Microsoft, Kinect, Xbox, Xbox LIVE, Xbox 360, and the Xbox logos are trademarks of the Microsoft group of companies. PlayStation, XMB and PS3 are trademarks or registered trademarks of Sony Computer Entertainment Inc. (SCEI). This product is not sponsored, endorsed or approved by Microsoft or SCEI. All other product names and images are trademarks or registered trademarks of their respective owners. Made in China. All rights reserved. Product features, appearance and specifications may be subject to change without notice. Please retain this information for future reference.
Mad Catz is a publicly traded company on the TSX/NYSE MKT, symbol MCZ.
natural_image
Black and orange headboard with a logo (no visible text or symbols)natural_image
Two parallel black lines with connector ends, no text or symbols presentF
Analoger Audioadapter

natural_image
Close-up of a black and orange headboard with a logo (no visible text or symbols)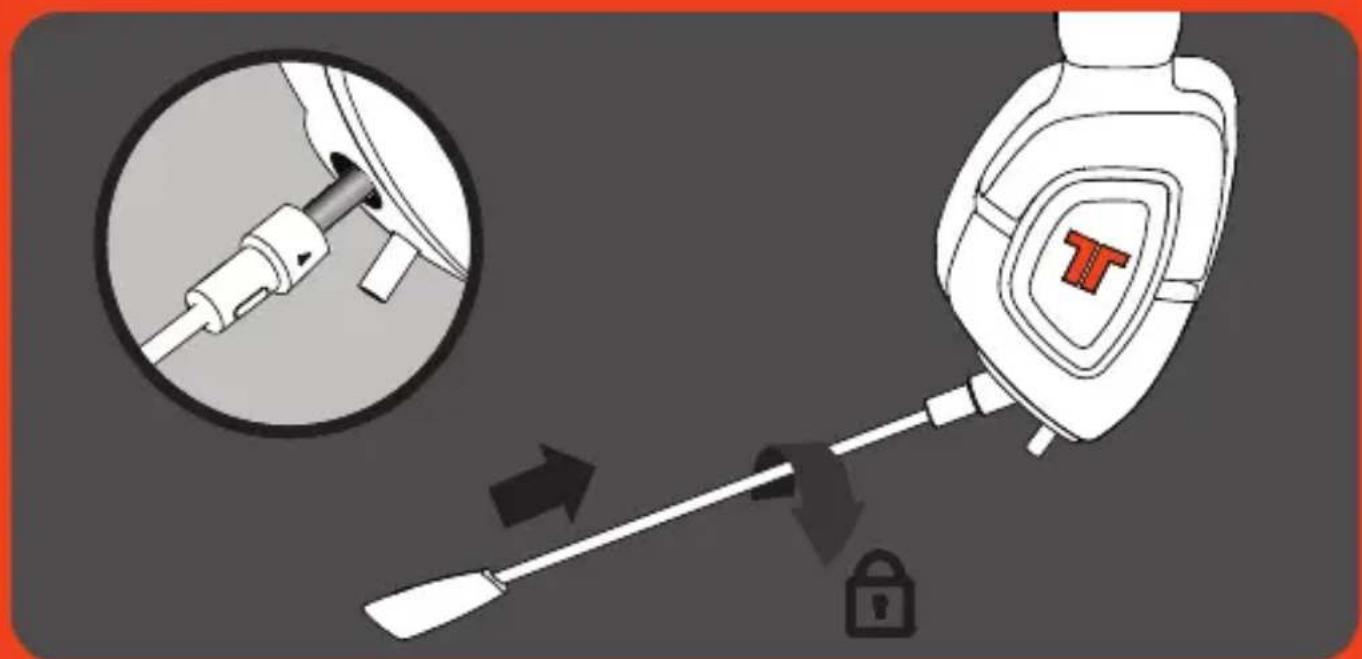
text_image
Diagram illustrating a medical procedure involving a tool and a lock, with magnified detail showing the insertion of a screwdriver.Bedienung am Kabel
flowchart
graph TD
    A[" gaming PC "] -->|A| B[" Headphone "]
    A -->|B| C[" Console "]
    A -->|C| D[" Headphone "]
    B -->|D| E[" Video Player "]
    C -->|E| F[" Video Player "]
    E --> G[" HDTV (VPS) "]
    F --> G
    G --> H[" PS3XBOX (Video Player ) "]
    style A fill:#f9f,stroke:#333
    style H fill:#ccf,stroke:#333
Anschluss an PS3
natural_image
Front view of a gaming controller with action buttons and a screen (no text or symbols visible)
natural_image
Front view of a blank tablet device with no visible text or symbols
natural_image
Illustration of a vintage Nintendo Switch with control panel and buttons (no text or symbols)text_image
Diagram showing connections between a desktop computer tower, headphones, and audio equipment via labeled ports A, B, and C.GEWÄHRLEISTUNG
©2013 Mad Catz, Inc. 7480 Mission Valley Road, Suite 101, San Diego, CA 92108 U.S.A. Mad Catz, TRITTON and the Mad Catz and TRITTON logos are trademarks or registered trademarks of Mad Catz Interactive, Inc., its subsidiaries and affiliates. The shape and design of this product are a trade dress of Mad Catz Interactive, Inc., its subsidiaries and affiliates. All other product names and images are trademarks or registered trademarks of their respective owners. Made in China. All rights reserved. Product features, appearance and specifications may be subject to change without notice. Please retain this information for future reference.
Mad Catz is a publicly traded company on the TSX/NYSE MKT, symbol MCZ.
natural_image
Black and orange headboard with a logo (no visible text or symbols)natural_image
Pure electrical circuit lines without any symbolsnatural_image
Close-up of a black and orange headboard with a logo, shown with earphones and connector cables (no visible text or symbols)
text_image
Diagram illustrating a medical procedure involving a tool and a lock, with magnified detail showing the insertion of a screwdriver.Control en línea

natural_image
Front view of a gaming controller with controller, game controller, and display screen (no text or symbols visible)
natural_image
Front view of a blank tablet device with no visible text or symbols
natural_image
Illustration of a vintage PC with front panel, control buttons, and display screen (no text or symbols)Conexión a PC / Mac
text_image
Diagram showing connections between a desktop computer tower, headphones, and audio equipment via labeled ports A, B, and C.GArAntÍA
GARANTÍA LIMITADA DE DOS AÑOS
©2013 Mad Catz, Inc. 7480 Mission Valley Road, Suite 101, San Diego, CA 92108 U.S.A. Mad Catz, TRITTON, and the Mad Catz and TRITTON logos are trademarks or registered trademarks of Mad Catz Interactive, Inc., its subsidiaries and affiliates. The shape and design of this product are a trade dress of Mad Catz Interactive, Inc., its subsidiaries and affiliates. All other product names and images are trademarks or registered trademarks of their respective owners. Made in China. All rights reserved. Product features, appearance and specifications may be subject to change without notice. Please retain this information for future reference.
Mad Catz is a publicly traded company on the TSX/NYSE MKT, symbol MCZ.
natural_image
Black and orange headboard with a logo (no visible text or symbols)natural_image
Two parallel black lines with connector ends, no text or symbols presentnatural_image
Close-up of a black and orange headboard with a logo (no visible text or symbols)
text_image
Diagram illustrating a medical procedure involving a tool and a lock, with magnified detail showing the insertion of a screwdriver.Controller in linea
text_image
GWA Vo1 Audio Source 1 2 3 4 PS3XBOX PC-1PCS 5 6natural_image
Front view of a gaming controller with controller, game controller, and display screen (no text or symbols visible)
natural_image
Front view of a blank tablet device with no visible text or symbols
natural_image
Illustration of a vintage Nintendo Switch with front panel, control buttons, and display screen (no text or symbols)Collegare a PC / Mac
text_image
Diagram showing connections between a desktop computer tower, headphones, and audio equipment via labeled ports A, B, and C.GARANZIA
GARANZIA LIMITATA DI 2 ANNI
©2013 Mad Catz, Inc. 7480 Mission Valley Road, Suite 101, San Diego, CA 92108 U.S.A. Mad Catz, TRITTON and the Mad Catz and TRITTON logos are trademarks or registered trademarks of Mad Catz Interactive, Inc., its subsidiaries and affiliates. The shape and design of this product are a trade dress of Mad Catz Interactive, Inc., its subsidiaries and affiliates. All other product names and images are trademarks or registered trademarks of their respective owners. Made in China. All rights reserved. Product features, appearance and specifications may be subject to change without notice. Please retain this information for future reference.
Mad Catz is a publicly traded company on the TSX/NYSE MKT, symbol MCZ.
natural_image
Exterior view of a black AX 180 headset with orange accent (no text or symbols on the headset itself)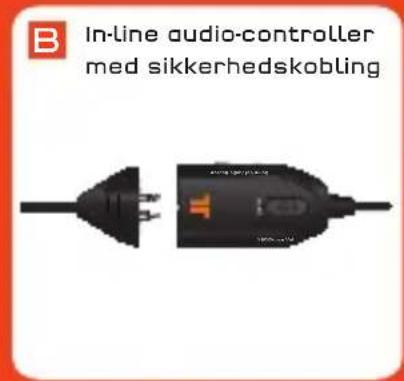
text_image
B In-line audio-controller med sikkerhedskobling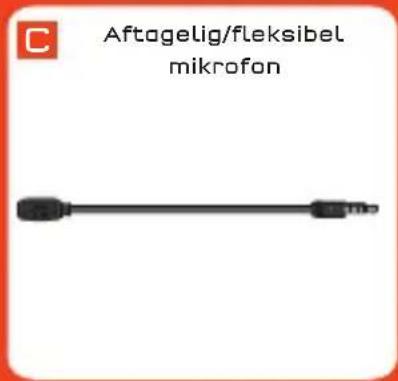
text_image
C Aftogelig/fleksibel mikrofon
natural_image
Close-up of a black and orange headboard with a logo, shown with earphones and cable (no visible text or symbols)
text_image
Diagram illustrating a medical procedure involving a tool and a lock, with an inset showing a close-up of the tool's internal structure.Inline kontrolenhed

natural_image
Front view of a gaming controller with controller, game controller, and display screen (no text or symbols visible)
natural_image
Front view of a blank tablet device with no visible text or symbols
natural_image
Illustration of a vintage PC with front panel, control buttons, and display screen (no text or symbols)Kobl til PC/Mac
text_image
Diagram showing connections between a desktop computer tower, headphones, and audio equipment via labeled ports A, B, and C.GARANTI
2 ÅRS BEGRÄNSET GARANTI
Online Support: http://support.madcatz.com
©2013 Mad Catz, Inc. 7480 Mission Valley Road, Suite 101, San Diego, CA 92108 U.S.A. Mad Catz, TRITTON and the Mad Catz and TRITTON logos are trademarks or registered trademarks of Mad Catz Interactive, Inc., its subsidiaries and affiliates. The shape and design of this product are a trade dress of Mad Catz Interactive, Inc., its subsidiaries and affiliates. All other product names and images are trademarks or registered trademarks of their respective owners. Made in China. All rights reserved. Product features, appearance and specifications may be subject to change without notice. Please retain this information for future reference.
Mad Catz is a publicly traded company on the TSX/NYSE MKT, symbol MCZ.
natural_image
Black and orange headboard with a logo (no visible text or symbols)natural_image
Two parallel black lines with connector ends, no text or symbols presenttext_image
Diagram of a black and orange headboard with labeled ports or features, including a shield icon and connector pin.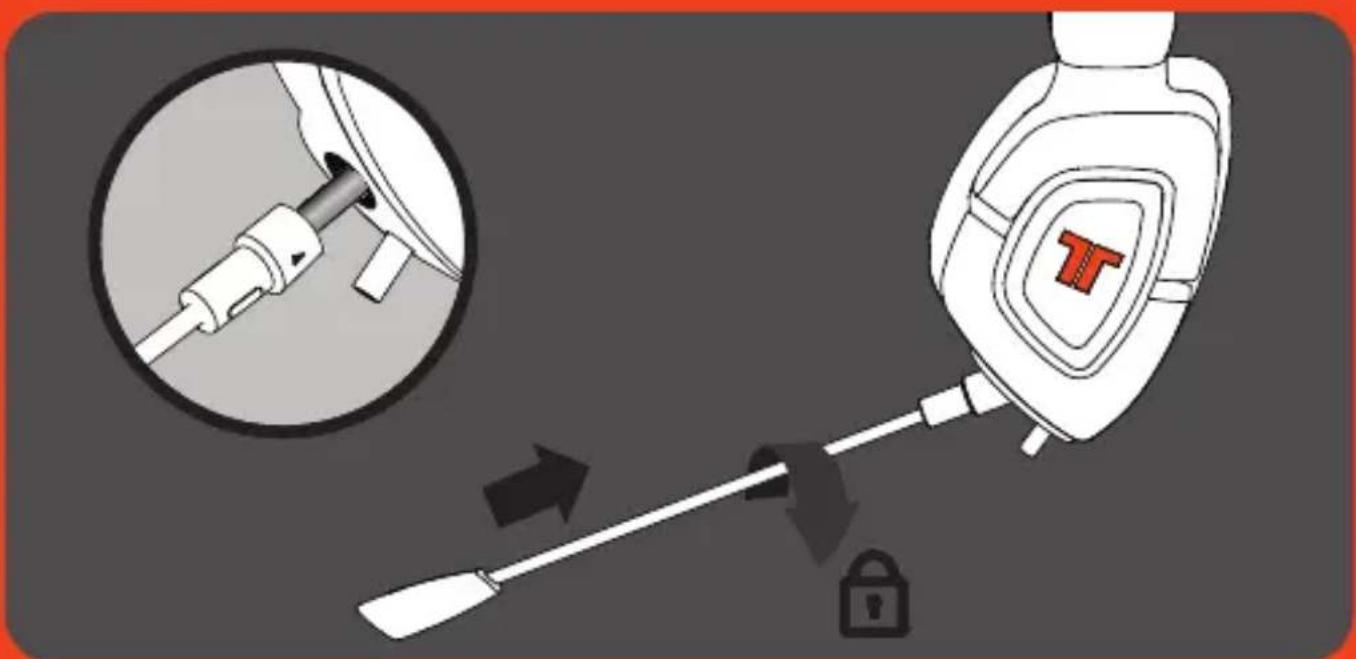
text_image
Diagram illustrating a medical or diagnostic procedure involving a screwdriver and a device with a T-shaped logo, showing step-by-step installation.text_image
1 2 3 4 5 6 Transceiver GPSX80X PGTFS2natural_image
Front view of a gaming controller with controller, game controller, and display screen (no text or symbols visible)
natural_image
Front view of a blank tablet device with no visible text or symbols
natural_image
Illustration of a vintage Nintendo Switch with front panel, control buttons, and display screen (no text or symbols)Ligar à PC / Mac
text_image
Diagram showing connections between a desktop computer tower, headphones, and audio equipment via labeled ports A, B, and C.GARANTIA
GARANTIA LIMITADA DE 2 ANOS
©2013 Mad Catz, Inc. 7480 Mission Valley Road, Suite 101, San Diego, CA 92108 U.S.A. Mad Catz, TRITTON and the Mad Catz and TRITTON logos are trademarks or registered trademarks of Mad Catz Interactive, Inc., its subsidiaries and affiliates. The shape and design of this product are a trade dress of Mad Catz Interactive, Inc., its subsidiaries and affiliates. All other product names and images are trademarks or registered trademarks of their respective owners. Made in China. All rights reserved. Product features, appearance and specifications may be subject to change without notice. Please retain this information for future reference.
Mad Catz is a publicly traded company on the TSX/NYSE MKT, symbol MCZ.
natural_image
Exterior view of a black AX 180 headset with orange accent (no text or symbols on the headset itself)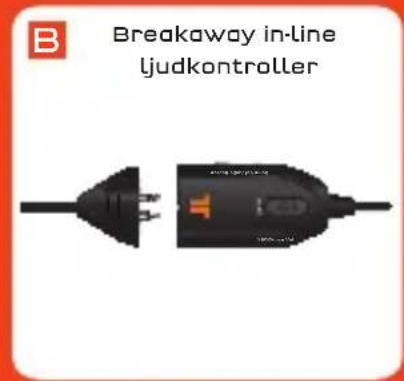
text_image
B Breakaway in-line ljudkontroller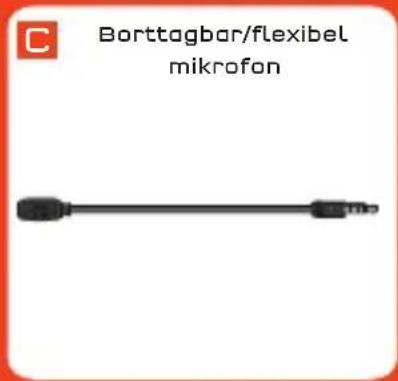
text_image
Borttagbar/flexibel mikrofon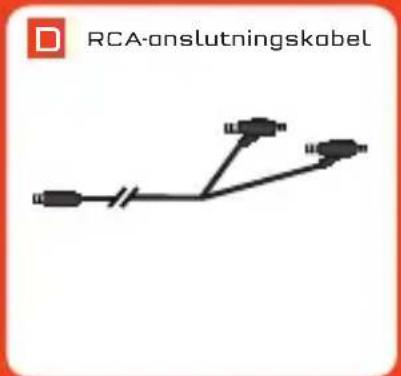
text_image
G Wii U™/den mobila enhetens adapternatural_image
Close-up of a black and orange headboard with a logo, shown with earphones and cable (no visible text or symbols)
text_image
Diagram illustrating a medical procedure involving a tool and a lock, with magnified detail showing the insertion of a screwdriver.Inline-kontroller

flowchart
graph TD
    A["Desktop Computer"] -->|HDTV| B["HDTV Interface"]
    B --> C["Audio System"]
    C --> D["Monitor"]
    D --> E["PS3XBDX Interface"]
    E --> F["Headphones"]
    F --> G["Audio Headset"]
    G --> H["Audio Headset"]
    H --> I["Audio Headset"]
    I --> J["Audio Headset"]
    J --> K["Audio Headset"]
    K --> L["Audio Headset"]
    L --> M["Audio Headset"]
    M --> N["Audio Headset"]
    N --> O["Audio Headset"]
    O --> P["Audio Headset"]
    P --> Q["Audio Headset"]
    Q --> R["Audio Headset"]
    R --> S["Audio Headset"]
    S --> T["Audio Headset"]
    T --> U["Audio Headset"]
    U --> V["Audio Headset"]
    V --> W["Audio Headset"]
    W --> X["Audio Headset"]
    X --> Y["Audio Headset"]
    Y --> Z["Audio Headset"]
    Z --> AA["Audio Headset"]
    AA --> AB["Audio Headset"]
    AB --> AC["Audio Headset"]
    AC --> AD["Audio Headset"]
    AD --> AE["Audio Headset"]
    AE --> AF["Audio Headset"]
    AF --> AG["Audio Headset"]
    AG --> AH["Audio Headset"]
    AH --> AI["Audio Headset"]
    AI --> AJ["Audio Headset"]
    AJ --> AK["Audio Headset"]
    AK --> AL["Audio Headset"]
    AL --> AM["Audio Headset"]
    AM --> AN["Audio Headset"]
    AN --> AO["Audio Headset"]
    AO --> AP["Audio Headset"]
    AP --> AQ["Audio Headset"]
    AQ --> AR["Audio Headset"]
    AR --> AS["Audio Headset"]
    AS --> AT["Audio Headset"]
    AT --> AU["Audio Headset"]
    AU --> AV["Audio Headset"]
    AV --> AW["Audio Headset"]
    AW --> AX["Audio Headset"]
    AX --> AY["Audio Headset"]
natural_image
Front view of a gaming controller with controller, game controller, and display screen (no text or symbols visible)
natural_image
Front view of a blank tablet device with no visible text or symbols
natural_image
Illustration of a vintage PC with front panel, control buttons, and display screen (no text or symbols)text_image
Diagram showing connections between a desktop computer tower, headphones, and audio equipment via labeled ports A, B, and C.BEGRÄNSAD GARANTI
2 ÅRS BEGRÄNSAD GARANTI
©2013 Mad Catz, Inc. 7480 Mission Valley Road, Suite 101, San Diego, CA 92108 U.S.A. Mad Catz, TRITTON and the Mad Catz and TRITTON logos are trademarks or registered trademarks of Mad Catz Interactive, Inc., its subsidiaries and affiliates. The shape and design of this product are a trade dress of Mad Catz Interactive, Inc., its subsidiaries and affiliates. All other product names and images are trademarks or registered trademarks of their respective owners. Made in China. All rights reserved. Product features, appearance and specifications may be subject to change without notice. Please retain this information for future reference.
Mad Catz is a publicly traded company on the TSX/NYSE MKT, symbol MCZ.