
WG705E - Lawn mower WORX - Free user manual and instructions
Find the device manual for free WG705E WORX in PDF.

| Product Type | Electric Lawn Mower |
| Brand | Worx |
| Model | WG705E |
| Rated Voltage | 220-240 V ~ 50/60 Hz |
| Rated Power | 1000 W |
| No-load Speed | 3500 rpm |
| Cutting Width | 32 cm |
| Cutting Height | 20-60 mm (3 positions) |
| Grass Collection Bag Capacity | 30 L |
| Double Insulation | Yes (Class II) |
| Machine Weight | 9 kg |
| Sound Pressure Level (LpA) | 77.5 dB(A), uncertainty K=3 dB(A) |
| Sound Power Level (LwA) | 89.3 dB(A) |
| Measured Vibration | 2.4 m/s², uncertainty K=1.5 m/s² |
| Blade Type | Rotary Metal Blade |
| Power Supply Type | Mains with Power Cable |
| Rear Discharge Function | Yes (mowing without bag) |
| Bag Full Indicator | Yes (floating lid) |
| Foldable Handle | Yes (for storage) |
| Motor Protection | Safety cut-out in case of overload |
| Maintenance | Clean with a dry cloth; replace blade after 50h or 2 years |
| Spare Parts | Blade, grass collection bag, handles (available from Worx) |
Frequently Asked Questions - WG705E WORX
User questions about WG705E WORX
0 question about this device. Answer the ones you know or ask your own.
Ask a new question about this device
Download the instructions for your Lawn mower in PDF format for free! Find your manual WG705E - WORX and take your electronic device back in hand. On this page are published all the documents necessary for the use of your device. WG705E by WORX.
USER MANUAL WG705E WORX
Not all the accessories illustrated or described are included in standard delivery.
TECHNICAL DATA
Type WG705E(705-719-designation of machinery, representative of Lawn mower)
| Rated voltage 220-240V~50/60Hz |
| Rated power 1000W |
| No load speed 3500/min |
| Cutting width 32cm |
| Cutting height 20-60mm |
| Grass collection capacity 30L |
| Protection class |
| Machine weight 9kg |
NOISE AND TECHNICAL DATA
| A weighted sound pressure L | pA: 77.5dB(A) | KpA: 3dB(A) |
| A weighted sound power L | wA: 89.3dB(A) | |
| Wear ear protection when sound pressure is over | 80dB(A) | |
| Typical weighted vibration | 2.4m/s2 | K=1.5m/s2 |
ACCESSION
Grass collection bag
We recommend that you purchase your accessories from the same store that sold you the tool. Use good quality accessories marked with a well-known brand name. Choose the type according to the work you intend to undertake. Refer to the accessory packaging for further details. Store personnel can assist you and offer advice.
GENERAL POWER TOOL SAFETY WARNINGS

WARNING! Read all safety warnings and all instructions.
Failure to follow the warnings and instructions may result in electric shock, fire and/or serious injury.
Save all warnings and instructions for future reference.
- This appliance is not intended for use by persons (including children) with reduced physical, sensory or mental capabilities, or lack of experience and knowledge, unless they have been given supervision or instruction concerning use of the appliance by a person responsible for their safety.
- Children should be supervised to ensure that they do not play with the appliance. If the supply cord is damaged, it must be replaced by the manufacturer, its service agent or similarly qualified persons in order to avoid a hazard.
TRAINING
a) Read the instructions carefully. Be familiar with the controls and the proper use of the equipment;
b) Never allow children or people unfamiliar with these instructions to use the lawnmower. Local regulations can restrict the age of the operator;
c) Never mow while people, especially children, or pets are nearby;
d) Keep in mind that the operator or user is responsible for accidents or hazards occurring to other people or their property.
PREPARATION
a) While mowing, always wear substantial footwear and long trousers. Do not operate the equipment when barefoot or wearing open sandals;
b) Thoroughly inspect the area where the equipment is to be used and remove all objects which can be thrown by the machine;
c) Before using, always visually inspect to see that the blades, blade bolts and cutter
assembly are not worn or damaged.
Replace worn or damaged blades and bolts in sets to preserve balance;
OPERATION
a) Mow only in daylight or in good artificial light;
b) Avoid operating the equipment in wet grass, where feasible;
c) Always be sure of your footing on slopes;
d) Walk, never run;
e) For wheeled rotary machines, mow across the face of slopes, never up and down;
f) Exercise extreme caution when changing direction on slopes;
g) Do not mow excessively steep slopes;
h) Use extreme caution when reversing or pulling the lawnmower towards you;
i) Stop the blade(s) if the lawnmower has to be tilted for transportation when crossing surfaces other than grass, and when transporting the lawnmower to and from the area to be mowed;
j) Never operate the lawnmower with defective guards, or without safety devices, for example deflectors and/or grass catchers, in place;
k) Switch on the motor carefully according to instructions and with feet well away from the blade(s);
I) Do not put hands or feet near rotating parts while the lawnmower is being operated;
m) Never pick up or carry a lawnmower while the motor is running;
n) Stop the motor and disconnect the plug from the mains
- Before checking, cleaning or working on the lawnmower;
- After striking a foreign object, inspect the lawnmower for damage and make repairs before restarting and operating the lawnmower;
- If lawnmower starts to vibrate abnormally (check immediately);
MAINTENANCE AND STORAGE
a) Keep all nuts, bolts and screws tight to be sure the equipment is in safe working condition;
b) Check the grass catcher frequently for wear
or deterioration;
c) Replace worn or damaged parts for safety;
d) Be careful during adjustment of the machine to prevent entrapment of the fingers between moving blades and fixed parts of the machine.

WARNING:
- Not to use the lawnmower if the cords are damaged or worn.
- Not to connect a damaged cord to the supply or touch a damaged cord before it is disconnected from the supply. A damaged cord can lead to contact with live parts.
- Not to touch the blades before the machine is disconnected from the supply and the blades have come to a complete stop.
- To keep extension cords away from the blades. The blades can cause damage to the cords and lead to contact with live parts.
- To disconnect the supply (i.e, pulling the plug from the socket)
- Whenever leaving the machine unattended,
- Before clearing a blockage,
- Before checking, cleaning or working on the machine,
- After striking a foreign object,
- Whenever the machine starts vibrating abnormally.
- To carefully read the instructions for the safe operation of the machine;
- Recommendations:
- To connect the machine only to a supply circuit protected by a residual current device (RCD) with a tripping current of not more than 30mA .
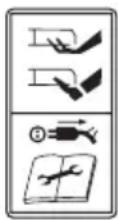
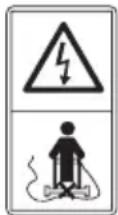
SYMBOLS

Read instruction handbook before operation this machine
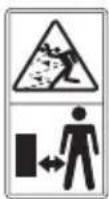
Keep bystanders away

Blade continues to rotate after the machine is switched off. Wait until all machine components have completely stopped before touching them.
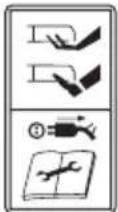
Beware of sharp blades. Blades continue to rotate after the motor is switched off- Remove plug from mains before maintenance or if cord is damaged.
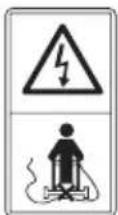
Keep the supply flexible cord away from the blades.

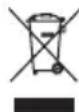
Double Insulation
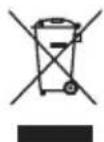
This product has been marked with a symbol relating to removing electric and electronic waste. This means that this product shall not be discarded with household waste but that it shall be returned to a collection system which conforms to the European Directive 2002/96/CE. It will then be recycled or dismantled in order to reduce the impact on the environment. Electric and electronic equipment can be hazardous for the environment and for human health since they contain hazardous substances.
INTENDED USE
This product is intended for domestic lawn mowing.
ASSEMBLY
IMPORTANT! Before you assemble the lawn mower, check the accessories according above information, make sure the accessories are completed.
1. FITTING THE HANDLE (See Fig. A1, A2, A3)
Remove the screws (X 2) on the both side of poles.
1) Insert the lower handle (8) into the holes provided.
2) Secure with the screws (See Fig. A1).
3) Attach the upper handle (6) with the bolts and handle knobs (7) to the lower handle (8) (See Fig. A2).
NOTE: Ensure the bolts are fully inserted through the handles before fitting the handle knobs.
Attach the cable clips (3) provided, to the upper and lower handle. Insert the cable into the clips ensuring there is enough cable slack. (See Fig. A3)
2. GRASS COLLECTION BAG ASSEMBLY
Connect the grass box handle to the box top as shown in Fig. B1-B4.
1) Press the front of the handle briefly (See Fig. B2).
2) Then push it forward (See Fig. B2).
3) Push down the back of the handle (See Fig. B2).
4) Finally, clip the plastic clips over the metal frame (See Fig. B3).
WARNING: Don't fit the handle in reversed direction. Fit the handle as shown in Fig B1.
3. GRASS COLLECTION BAG FITTING (See Fig. C1, C2, C3)
1) Turn the mower off, wait until blade stops.
2) Raise the safety flap (9) and hold it up
3) Pick up the grass bag by the handle, and position grass bag on the lower hooks (a)
on the mower deck ( See Fig. C2).
4) Release the safety guard to lock the grass bag into position. Ensure the grass bag is installed securely (See Fig. C3).
NOTE: Depress the grass bag slightly to ensure that it is completely installed.
4. REMOVING/EMPTYING
Lift the safety flap (9) and hold up. Remove grass collection bag (5).
WARNING! Always check the safety flap can close the discharge outlet tightly before using. Never lift the safety flap (9) when the lawn mower is being used without fitted grass collection bag.
OPERATION
1. STARTING AND STOPPING (See Fig. D1, D2)
STARTING
Connect the female extension cable connector to the pigtail. Connect the plug to the mains and switch ON.
The switch box is provided with a lockoff button to prevent accidental starting.
With one hand press and hold the safety button (D1), with the other hand squeeze the switch lever (D2) towards the handle, and release the safety lock-off button. The machine is now started, wait until the product is at full speed before cutting the grass. Then use both our hands to hold the switch lever to keep it running.
STOPPING
Release the switch lever.
2. ADJUSTING THE CUTTING HEIGHT (See Fig. E)
WARNING! Before adjusting the mower height, wait for the mower to completely stop. Mower blades continue to rotate after the machine is switched off and a rotating blade can cause injury. Wait until all machine components have completely stopped before touching them.
Before your first cut, adjust the mower cutting depth to the desired position. The lawnmower can be set to 3 cutting heights between 20mm and 60mm .
Grip one wheel and pull it out of the groove and reposition it in the required height. ALL other wheels should be positioned at the same height.
3. GRASS COLLECTION BAG FILLING INDICATOR (See Fig. F)
To remind you on time to empty when the grass collection bag is full, we provide an indicator on the top of bag. And you can follow as below:
Fully status: flap fall down (a)

Empty status: flap float (b)

4. REAR DISCHARGE (See Fig. G)
The mower provides a rear discharge function, so that you can mower without bag collection. The debris will be discharged from the rear chute.
5. MOWING
For cutting convenience, it may be best to start mowing at a point close to the power supply and to work your way away from the supply. Mow the lawn at a right angle from the power supply and place the power cable to side which has already been cut.
WARNING! When mowing do not allow the motor to labor particularly in heavy conditions. When the motor labors the speed of the motor drops and you will hear a change in the motor sound, when this occurs, stop mowing, release the switch lever and raise the height of cut. Failure to do so could damage the machine.
MAINTENANCE
Remove the plug from the socket before carrying out any adjustment, servicing or maintenance.
Your power tool requires no additional lubrication or maintenance.
There are no user serviceable parts in your power tool. Never use water or chemical cleaners to clean your power tool. Wipe clean
with a dry cloth. Always store your power tool in a dry place. Keep the motor ventilation slots clean. Keep all working controls free of dust. Occasionally you may see sparks through the ventilation slots. This is normal and will not damage your power tool.
If the supply cord is damaged, it must be replaced by the manufacturer, its service agent or similarly qualified persons in order to avoid a hazard.
BLADE MAINTENANCE (See Fig. H)
WARNING! Never carry out any assembly operations or adjustments with the power connected to the mower.
Always ensure that the power button is in the off position and that the power plug is disconnected from the supply.
Always handle the blade with care-sharp edges could cause injury use gloves.
Follow these procedures to remove and replace the blade. You will need garden gloves (not provided) and a spanner wrench (not provided) to remove the blade. Hold the blade (13) and unscrew the blade bolt (12) anticlockwise using a spanner wrench. Remove blade and attach a new one to the blade bolt.
Ensure that the blade is properly positioned as seen in Fig.H, then firmly tighten the bolt. Do not over tighten.
Renew your metal blade after 50hrs mowing or 2 years, which ever is the sooner- regardless of condition.
If the blade is cracked or damaged replace it with a new one.
STORAGE: (See Fig. I)
Clean the exterior of the machine thoroughly using a soft brush and cloth. Do not use water, solvents or polishes. Remove all grass and debris, especially from the ventilation slots. Turn the machine on its side and clean the blade area. If grass cuttings are compacted in the blade area, remove with a wooden or plastic implement.
Store the machine in a dry place. Do not place other objects on top of the machine.
To aid storage loosen the handle knobs and
fold the handles.
You could carry the mover by carry handle (10).
Ensure cables are not stuck or entangled when folding or unfolding upper handles. Do not drop the handles.
ENVIRONMENTAL PROTECTION

This product has been marked with a symbol relating to removing electric and electronic waste. This means that
this product shall not be discarded with household waste but that it shall be returned to a collection system which conforms to the European Directive 2002/96/CE. It will then be recycled or dismantled in order to reduce the impact on the environment. Electric and electronic equipment can be hazardous for the environment and for human health since they contain hazardous substances.
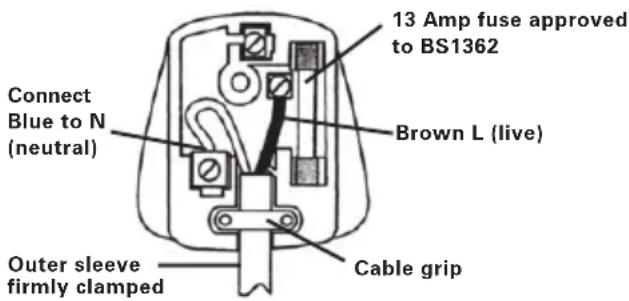
PLUG REPLACEMENT (UK & IRELAND ONLY)
If you need to replace the fitted plug then follow the instructions below.
IMPORTANT
The wires in the mains lead are colored in accordance with the following code:
Blue = Neutral
Brown = Live
As the colors of the wires in the electrical cord of this appliance may not correspond with the colored markings identifying the terminals in your plug, proceed as follows. The wire which is colored blue must be connected to the terminal which is marked with N. The wire which is colored brown must be connected to the terminal which is marked with L.

WARNING! Never connect live or neutral wires to the earth terminal of the Only fit an approved 13ABS1363/A plug he correct rated fuse.
NOTE: If a moulded plug is fitted and has to be removed take great care in disposing of the plug and severed cable, it must be destroyed to prevent engaging into a socket.
DECLARATION OF CONFORMITY
Declare that the product Description WORX Electric Lawn Mower Type WG705E(705-719-designation of machinery, representative of Lawn mower)
Function Cutting grass
Complies with the following Directives,
Machinery Directive 2006/42/EC
Electromagnetic Compatibility Directive 2004/108/EC
RoHS Directive 2011/65/EU
Noise Emission in the Environment by Equipment for Use Outdoors Directive 2000/14/EC amended by 2005/88/EC
Conformity assessment procedure as per Annex VI.
Measured Sound Power Level 89.3dB(A)
Declared Guaranteed Sound Power Level 94dB(A)
The notified body involved
Name: Intertek Testing & Certification Ltd Address: Davy Avenue, Knowlhill, Milton Keynes, MK5 8NL
Standards and technical specifications referred to:
EN 60335-1 EN 60335-2-77
EN 55014-1 EN 55014-2
EN 61000-3-3 EN 61000-3-2
EN ISO 3744 EN 62233
The person authorized to compile the technical file,
Name Russell Nicholson
Address Positec Power Tools (Europe)
Ltd, PO Box 152, Leeds, LS10 9DS, UK

2013/01/04
Leo Yue
POSITEC Quality Manager
Name: Intertek Testing & Certification Ltd
Anschrift:Davy Avenue,Knowlhill
Milton Keynes, MK5 8NL
Normen:
EN 60335-1 EN 60335-2-77
EN 55014-1 EN 55014-2
EN 61000-3-3 EN 61000-3-2
EN ISO 3744 EN 62233
MANUTENÇAO DAS LÁMINAS (Ver H)
Nome: Intertek Testing & Certification Ltd
Morada: Davy Avenue, Knowlhill, Milton
Keynes, MK5 8NL
Ltd, PO Box 152, Leeds, LS10 9DS, UK

2013/01/04
Leo Yue
Gestor de Qualidade POSITEC
| 1. SCHAKELHENDEL |
| 2. VEILIGHEIDSKNOP |
| 3. ELEKTRICITEITSSNOERKLEMMEIN |
| 4. INDICATOR VULNIVEAU GRASZAK |
| 5. GRASOPVANGZAK |
| 6. BOVENSTE HANDVAT |
| 7. BLOKKERENDE CAMHENDEL |
| 8. ONDERSTE HANDVAT |
| 9. VEILIGHEIDSFLAP |
| 10. DRAAGGREEP |
| 11. MOTORAFDEKKING |
| 12. BOUT VOOR HET MES (Zie H) |
| 13. ZAAGBLAD (Zie H) |
ALGEMENE VEILIGHE- IDSWAARSCHUWINGEN VOOR VERMOGENSMACHINE

4. ACHTERAFVOER (Zie G)
Naam: Intertek Testing & Certification Ltd
Adres: Davy Avenue, Knowlhill, Milton Keynes, MK5 8NL
Standaards in overeenstemming met,
EN 60335-1 EN 60335-2-77
EN 55014-1 EN 55014-2
EN 61000-3-3 EN 61000-3-2
EN ISO 3744 EN 62233
Type wG705E(705-719-udpegning af maskiner, representant for Gresskipper)
VEDLIGEHOLDELSAFBLADET (SeH)
Navn: Intertek Testing & Certification Ltd
Adresse: Davy Avenue, Knowlhill, Milton Keynes, MK5 8NL
Standarder i overensstemmelse med:
EN 60335-1 EN 60335-2-77
EN 55014-1 EN 55014-2
EN 61000-3-3 EN 61000-3-2
EN ISO 3744 EN 62233
Nimi: Intertek Testing & Certification Ltd
Osoite: Davy Avenue, Knowlhill, Milton Keynes, MK5 8NL
VEDLIKEHOLD OG LAGRING
KNIV-VEDLIKEHOLD (Se H)
ADVARSEL! Utfør aldri montering eller justering nár klipperen er tilkoblet strømledningen. Kontroller alltid at AV/PÅknappen er i AV-posisjon og at stɒpselet er tatt ut av stikkontakten. Vær alltid forsiktig ná du handterer kniven - skarpe kanter kan forårsake skader. Bruk hansker.
Navn: Intertek Testing & Certification Ltd
Adresse: Davy Avenue, Knowlhill, Milton Keynes, MK5 8NL
Berört notifierat organ
Namn: Intertek Testing & Certification Ltd
Adress: Davy Avenue, Knowlhill, Milton Keynes, MK5 8NL
Standarder overensstammer med EN 60335-1 EN 60335-2-77 EN 55014-1 EN 55014-2 EN 61000-3-3 EN 61000-3-2 EN ISO 3744 EN 62233
- Yetkili kurum:
Adi: Intertek Testing & Certification Ltd
Adres: Davy Avenue, Knowlhill, Milton Keynes, MK5 8NL
SYNTHPHsH AENIIADAs (Aeite H)
IPOEIAONIOIH! Mny EKTAEITE TOTe AIToupyiec ouvapuoloynong n puoiicis me tn unxavn ouvdeevn otnv TAPoxn TPOpOoioia. Na diaaqaiZeTe TAVTA OTI TO KOUPTI AIToupyiacivai OTN
n aTVEpyoToinos KAI TO 区 Eiva aTIOUVDedEevo aTNO TNY TPOPOO0ia. Na xEpiZcTe TTAVTA Nt LEITIDA ME TPOOOH- oI KOATEPcAixmuC TNS MTOPOUV VA TPOKAeouv TpaumATIOpO - va XpnoiUMOTOEYavTiA.
Akoauohtote Tcapakatw diabikaoies yia va aqaipoeote kai va avtikataohtote tn aeTIDA. Oa xpeiaotiteyavtia kniou (Ev npexovtai) kai KaeiOi e aykiotpo (Ev npexovtai) ia va aqaipoeote tn aeTIDA.KpatnoTe tn aeTIDA(13) kai Ebiowte to pavdaLo ts cTtioac (12) apiotepoostpopa xpnoiotoiWvtaCto KaeiOi e aykiotpo.AqaipoeTe tn aeTIDA kai evapmuote mia kaivoupi oTo pavdaLo ts aeTIDac.
Siyoupeuteiote n aeTiaivai ootatoToTOeTneVn OTWc qaietai OTo x.Hkai otouvexia ophiTe TO avdaLo.MHN ΣFIRTEYNEPBOAIKA.
Na avaveewete Tn eTAAIK n ETIIDA μeTa aTó 50 wpeKoUpeμa n eTα aTó 2 xpOvia, oTOIOBnTcTe aTó Ta dUo Ouβεi VwipTepa avEgApTnta aTó Tc OuvθnKec.
1.CBOPKA PYKOKTN (CM.A1,A2,A3) YdaJIte BnHTbI (X2)cObeNX CTOpOH KpbIuKN.
Bybte octopoxhbl npn o6paueHn c ocTpbiMn ne3BnA M. Ne3Bn npoJXaIOT Bpaatbcra HeKOTOpoe Bpem nocne OTKIOUeHn IIBrataJIy. BbHmMaTe BNky n3 po3ETKn peed npoBeHnEM 06cnykBaHn IIN B cIyae NOBpeKdEHNa Ka6eJnNTAHN.
1) BctaBte HxHIO pyKoTky (8) B OTBePCTnB KpbIiKe, npedymOTpeHHbIe dIg 3TOrO.
2) 3aФИКСИРУTe c NOMOцьIO NMEOUxCЯ BnHTOB (Cm. A1).
3)ПикpenTe BepxHIOу pyKoTky (6) c NOMOuIbI O6OITOB I 3aOpHOrO KpIBOJIHHeHOrO pblUara (7) K HnJxHeI pyKoTke (8) (CM.A2).
I36eraTe cOpnKocHOBeHna r6Koro Ka6eJIcJe3BnAMN.
1) BbIKJIIOHTe KOCNkCy, DOKdITcB OCTaHOBKn
JIe3BnI.
2)ПоднIMITE npedoxpaHNTeIbHyIO 3acNoHky n, ydepxnBa eE NOdHrToN, y6eDInTeCb, yTO 6bIJa ydaJeHa BCTaBka dIЯ MyJbUnpOBaHnI.
3) Bo3bMnTe MeWok dIra TpaBbl 3a pyky npa3MeCTuTE erO Ha HxKHX KpOchkax (a) Ha Deke KocnKn (Cm. C2).
4) Ocbo6oDnte 3aunTHbIKoKxuN dIaMbKaHnMa MeUka IJIa TpaBbl B HuyxHOM noLoXKeHH. IpOBepbTe HaJeXHoCTb yCTaHOBKn MeUka IJIa TpaBbly (CM.C3).
1. 3ANyCK N OCTAHOBKA (Cm. D1, D2) 3ANyCK
BcTaBbTe BnIky B 3JNeKtpnueckyIO po3eTKy IN BKJIouHIne NITaHHe rA3OHOKOcNIKN.
Ha naneJn ynpablenHn paCnoIooKeHa npedeoxpaHnteJbHna KHOJa, npenTCTbYIOUaA cnUaHOMy 3aNycky ra3OHOKOcNJKn.
Odno hyko haxmte n ydepknaite
hakato KNokky 6e3onacnctn (D1), pyrohy
pko npKmTe pbiar (D2) nepeknoyateJ K
pyke, 3aTeM OTnyCTne KhoNky 6e3onacnctn.
faoHOKocnka 3anycntc. Ipeed Hauanom
paobtI DoxndTecb, KOrda Ne3BVE DOCTnHET
MAKcImalbHOH CKOpOCTn. 3aTeM ydepknaite
pbiar nepeknoyatJIy DByMa pykAmn B
npocece paobtI.
OCTAHOBKA
OTnycntte pbiar nepeKnioaTeJIa.
2. PEGYINPOBKA BbICOTbl CPE3A (Cm. E)

PPEyPExEHNr! NpeD peRyInpOBKoB BICOTbI, OCTaHOBTecb,
OTnyCTnTe pIyar BbIKJIOUaTeIe I NOOxJNTe Do
NONHO OCTaHOBKN MOTopa. Je3BnI npoJOnKaIoT
BpaaTbcN OcJIe BbIKJIOUeHnMaUHNbl, a
BpaaIOUeEeCnJe3BVe MoKET npuBeCTn K
TpabMnpOBaHnHe KaCaIteCb BpaauOuXcR
JIe3BnI.
ДяпрвогВ ДаHHOM ce3OHe cKaшИВанЯ Heo6xOДIMOBbIbIpaTb BbICOKyU peRyInpOBKn pe3aHnY.
Ta3OHOKOcNlKa MoKet HacTpaNBaTbCra Ha 3 BBICOT pe3KN MeKdy 20MM n 60MM.
Bo3bMntecb 3a Ondo Koneco, n3BneKeTe erO n3 Na3a N yCTaHOBnTe Ha HyXHoN BbICote. BCE OCTaJIbHbIe KOJeca Heo6xOdImO yCTaHOBnTb Ha TAKo Jxe BBICOTE.
3AHTA OKPXXAOUeN CPeIbI
DAnHoe n3dJIe NMeET MapKnpoBky, OTHOCaYIOcK yTnJIn3aCIN
3NeKtpnuecknx N3NeKtpoHHbIX OTXODOB.
3TO O3HauaET, YTO DaHHoe N3dJIne HeIb3y TININ3NPOBaT BMeCTe C 6bITOBbIMN OTXODAMN, ETO CNEdyET BO3BpaAaTaB B NYKtBi IpnEma, KOTOpBie COOTBeTCTByOT EBpOEnCKoI INpeKTHBE 2002/96/CE. BnocLeIDCTBmN OHO 6yDet NOBeprHyTo nepepa60Te nIi pa3O6paHO B CEJAX CHNXeHnRA BpeDHO BO3DeIcTBnRA Ha OKpykaUoSyu CpeDy. 3NeKtpueckoe IN 3JIeKTPoHHe O6OpUOBAHne MoKeT PpeDCTABnYb ONaCHOCTb DnIg OKpykaUoSei CpeDbI N 3DopOBbY qJeIOBeka, NockONbKy OHO CODepxNT BpeDhble BeUeCTBa.
DEKJIAPAUÇN A COOTBETCTBNA
Mbl,
POSITEC Germany GmbH
2000/14/EC n3MeHeHa 2005/88/EC
- PpoeDypa OueHKn COOTBETCTBnB
COOTBETCTBnC PnpnoXeHne VI
-Измеренны уровени 3Вуковоь моцноctи:
89.3aB(A)
3aBHeHHbI rapaHTnpoBaHHbI ypOBeHb
3ByKOBO MOUHOCTN: 94dB(A)
- YnONHOMOeHHbOpraH,IMeUoN OTHOSeHHe
HaMMeHOBaHne: Intertek Testing &
Certification Ltd
Ampec:Davy Avenue, Knowlhill,Milton
Keynes, MK5 8NL
CTaHdapTbI COOTBeTCTBYIOT CJIeDyIOUeMy
EN 60335-1 EN 60335-2-77
EN 55014-1 EN 55014-2
EN 61000-3-3 EN 61000-3-2
EN ISO 3744 EN 62233
Пицoc npabOM kOMnINIpOBaHnЯ DAHHORo TexHnueckoro faaina,
Mra Russell Nicholson
Ampec Positec Power Tools (Europe)Ltd,
PO Box 152,Leeds,LS10 9DS,UK

2013/01/04
Leo YUE
MeHedkep no KaueCTby POSITEC

Copyright © 2013, Positec. All Rights Reserved.
2GLM09APK11001A1