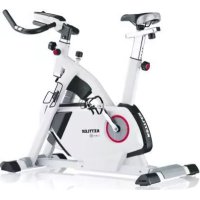
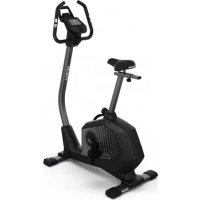
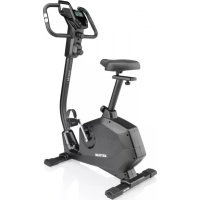
Giro S - Exercise bike KETTLER - Free user manual and instructions
Find the device manual for free Giro S KETTLER in PDF.



| Product Type | Exercise Bike |
| Brand | KETTLER |
| Model | Giro S |
| Power Supply | 2 batteries 1.5V UM3/AA (AA) |
| Display | Digital display showing SCAN, time, distance, calories, pulse, RPM, speed |
| Main Functions | Time setting, personal goals (time, distance, calories, pulse), recovery with fitness rating (F1 to F6), automatic SCAN every 6 seconds |
| Heart Rate Measurement | Hand grip sensors (standard), ear clip (optional), chest strap with receiver (optional) |
| Resistance | Adjustable mechanical brake by levels (variable intensity) |
| Usage | For amateur athletes, cardiovascular training, fitness, fat burning |
| Display Range | Time: 0:00 to 99:59, Distance: 0.00 to 99.99 km, Calories: 0 to 9999 kcal, Pulse: 40 to 220 bpm, Speed: 3.9 to 70.6 km/h, RPM: 11 to 199 |
| Training Programs | Manual with single goal (time, distance, calories or pulse) + Recovery function |
| Maintenance | Regularly check connections, replace batteries if display is weak, clean with a damp cloth |
| Safety | Consult a doctor before training, install on a solid surface, do not use if any part is damaged, use only original KETTLER spare parts |
| Included Accessories | Batteries, integrated hand pulse sensors |
| Optional Accessories | Ear clip, chest strap with receiver |
| Spare Parts | Available from KETTLER, order possible for optional accessories |
| Repairability | Battery replacement by user; for other repairs, contact customer service |
| Warranty | Not specified in the manual |
Frequently Asked Questions - Giro S KETTLER
User questions about Giro S KETTLER
0 question about this device. Answer the ones you know or ask your own.
Ask a new question about this device
Download the instructions for your Exercise bike in PDF format for free! Find your manual Giro S - KETTLER and take your electronic device back in hand. On this page are published all the documents necessary for the use of your device. Giro S by KETTLER.
USER MANUAL Giro S KETTLER
flowchart
graph TD
    A["SET"] --> B["MODE"]
    A --> C["RESET"]
    A --> D["RECOVERY"]


PLS = PULSE = Herzfrequenz
RPM = Round Per Minute = Umdrehung pro
Minute/Trittfrequenz

Gerätestart
Safety instructions 12
• Service 12
- Your safety 12
Short description 13-15
• Function area / keys 13
Pulse measurement
- Indication area / display 14-15
Starting the computer 16
- Insertion of batteries 16
- Changing the batteries 16
- Starting the computer without previous knowledge 16
- Setting the time 16
Training 17
Personal training default settings 17
- General 17
• Specification of target values 17 Example: DISTANCE 17
• SCAN operation 17
Recovery (measurement of pulse at recovery) 18
• Calculation of fitness level 18
Changing the batteries 19
• Disposal of used batteries and accumulators
Options for pulse registration 19
- With ear clip 19
- With chest strap 19
• With hand pulse 19
• Instructions for pulse measurement 19
Training instructions 20
• Endurance training 20
• Exercise intensity 20
• Exercise extent 20
18-19
Safety instructions
Please observe the following instructions for your own safety:
- The training device must be set up on an appropriate and firm surface.
- Inspect the connections for firm fitting before initial operation and additionally after approximately six operation days.
- In order to prevent injuries caused by wrong stress or overstress, the training device may only be used in accordance with the instructions.
- It is not recommended to permanently set up the device in humid rooms due to the resulting corrosion development.
- Assure yourself regularly that the training device functions properly and that it is in duly condition.
-
The operator is responsible for the safety controls, which have to be carried out on a regular and proper basis.
-
Defective or damaged parts must be exchanged immediately. Only use original KETTLER spare parts.
- The device may not be used until after repairs are completed.
- The safety level of the device can only be maintained provided that it is regularly inspected for damage and wear and tear.
For your safety:
- Please clarify with your general practitioner before you start with the training, whether or not your health condition allows you to train with this device. The diagnostic findings should be the basis for the determination of your training programme. Wrong or excessive training can cause damage to your health.
Short description
The device has a function area with keys and a display area with varying symbols and graphics.
Function area / keys
MODE
When pressing the MODE key without accomplishing any training activities, the symbol P appears at the top left side. In this mode, all functions can be set.
By briefly pressing the MODE key, you select different functions [TIME, DISTANCE, CALORIES or PULSE], the display and your personal settings.
Keeping the MODE key pressed for a while will set all values to >0<.
SET
With the SET key, the standard values are set. For this the device must be in idle state > shown in the display in the upper left: P. Through shortly pressing the SET key, the setting values of the differing functions increases > [TIME; DISTANCE, CALORIES or PULSE]. If the SET key is pressed for a longer time, the setting values can be reached in a quicker counting sequence.
RESET
Pressing the RESET key will set the functions to >0<. When setting the default values of each function, only the value of each individual function will be set to >0< by shortly pressing the RESET key. Keeping the RESET key pressed for a longer time, all values are set to >0<; this corresponds to a restart of the computer. In this case, the time setting must be entered again.
When changing the batteries, all values are also reset to >0<.
RECOVERY
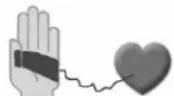
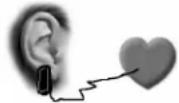
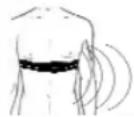
Pulse can be measured in three different ways:
- With hand pulse (standard)
- With an ear clip (optional)
The connector is plugged into the jack. - With a chest strap + plug-in receiver (optional)
If the chest strap option is used, the chest strap must be connected with the training computer via a plug-in receiver. Chest strap and plug-in receiver can be ordered additionally.

flowchart
graph TD
    A["SET"] --> B["MODE"]
    A --> C["RESET"]
    A --> D["RECOVERY"]


Training and operating instructions
| Indication area / displayOn the display, one large-sized display plus several display segments in the lower area of the display appear at the same time.After the completion of each training session, training data are saved and can be accessed for the next training session. Any new data are added. | 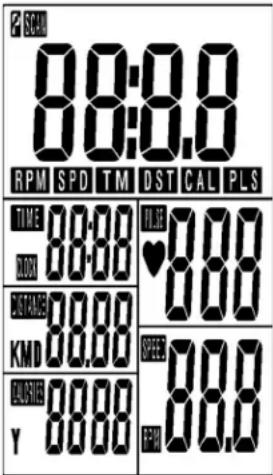 | |
| Time24 hours | 9:36 | After the completion of the training session, or if the training session is interrupted, the computer switches to sleep mode after 4 minutes.Only time is displayed. |
| Training time(TIME) | TIME 24:36 | Displayed values between 0:00 - 99:59 |
| Distance(DISTANCE)KM | 10:55 | Displayed values between 0.00 - 99.99 |
| Energy consumptionCALORIES(KCAL) | 10:55 | Displayed values between 0 - 9999However, the data are only rough values comparing different exercises. They cannot be used for medical purposes. |
| Pulse(PULSE)The heart symbol flashes when signal is identified. | 184 | Displayed values between 40 - 220As soon as you hold the handle sensors with both hands, the display indicates your current heart rate. You may enter a target value before starting the training. If the heart rate exceeds this target value, an acoustic alarm sounds to make you aware of such. |
Step frequency (RPM) – Round per Minute Pedal rotation per minute
Speed (SPEED) (KM/H) or (Mi/H)

other
| Metric | Value | |--------|-------| | RPM | 75 | | SPEED | 19.7 |
Changing display of all functions in large size. The abbreviation of each function appears on the left side of the display. TM = TIME = training time DST = DISTANCE = distance covered CAL = CALORIES = energy / calorific consumption PLS = PULSE = heart rate RPM = Round Per Minute = step frequency SPD = SPEED
For any value that appears on the large-size display, the corresponding function flashes in the small window.

Large-size SCAN display of e.g. RPM
Small-size SCAN display of e.g. RPM
Training and operating instructions


Starting the computer
Insert two batteries (1.5V UM 3/AA).
The computer starts a segment test indicating all available symbols plus confirmation sound. The figure "78.0" appears for a short time followed by the display for time setting – hour and minute "00:00".
Setting time
Time can be changed by pressing the SET and MODE keys:
The hour display flashes.
The current hour is set with the SET key. If you briefly press the SET key, the hour value is increased by one figure. Keeping the SET key pressed will accelerate the counting of the hour value to be set.
If the desired value has been missed by mistake, the SET key can be kept pressed for accelerated counting, or the RESET key can be pressed and counting will start from >0<.
Confirm the desired time value for the current hour with the MODE key.
The minute display flashes.
Set the time value for the current minute by means of SET, RESET and MODE as described above.
After having confirmed the time setting for the current minute by pressing the MODE key, you will return to the programme menu for the setting of your personal training default settings. The first field for TIME flashes, and TM is indicated on the large display.
Starting the computer without previous knowledge (guest)
With this setting, you can start your training even without previous knowledge. Any information is shown on the display. All values are counted from >0< upwards.
For efficient training and for setting your personal training default settings, please read and observe any further instructions provided in the chapter "Personal training default settings".
Training
Personal exercising specifications
General
- Without particular preliminary settings, the values in the individual functions [TIME, DISTANCE; CALORIES and PULSE] count from >0< upwards.
- For reasonable exercising, it is sufficient to merely set a target value in one function [TIME, DISTANCE, CALORIEN or PULSE].
- If a personal target value is set as an exercise specification, the computer counts from this value downwards. When reaching the target value >0<, an acoustic signal sounds off. If afterwards, without setting of a new target value, you continue exercising, the computer counts in this mode from >0< upwards again.
- Once target values have been set, during exercising these cannot be changed, only during a standstill.
Target value specifications
The setting of the target values is the same with all functions: e.g. DISTANCE
- Press the MODE key until in the field the number blinks in the field DISTANCE and the large number is in the display (identification > DST).
- Through shortly pressing the key SET, you increase the value. E.g. DISTANCE in 0.5 km steps. If you press and hold the SET key, the set value is counted quicker.
- If you would like to reduce the target value again, shortly press the RESET KEY: Counting will begin again from >0<. Press the SET key again until the target value has been reached.
- If you have set the target value, press the MODE key. The value is then stored in this function and you go to the next function, e.g. CALORIES.
- Enter the specification values if possible only in one function because otherwise the exercise goals will be overlapped. E.g. if you would reach the preset time goal earlier than the preset distance goal.
- The specified values in the other functions [TIME; CALORIES or PULSE] are, as described with 1-4, also entered with the keys SET, RESET and MODE.
After finishing the presettings, you can begin with exercising.
During the exercise session, in the display the display of the different functions changes every 6 seconds. If you press the MODE key during this display, the selected function remains in the display in large numbers. In the small display the function name blinks, e.g. PULSE.
Pressing the MODE key again operates the SCAN operation > display change every 6 seconds.


Training and operating instructions


RECOVERY
Pressing the RECOVERY key will start the recovery pulse measurement at the end of the training unit. Deviations and your fitness level are calculated from your initial and final pulse. In case of equal training units, the improvement of the fitness level is a measurement for increased fitness.
As soon as the target values are reached, you can finish the training session, press the recovery key and rest your hands on the hand pulse sensors.
In the case of a previous pulse measurement, the display indicates 00:60 for time, and the current pulse value flashes on the PULSE segment display (right). Time count-down starts from 00:60. Rest your hands on the hand pulse sensors until the count-down has reached >0<.
A value between F1 and F6 is indicated on the display. F1 is the best and F6 the worst status. Pressing the RECOVERY key again will finish the function.
Calculation of fitness score
The computer calculates and assess the difference between the training and recovery heart rate and the resulting "fitness score" according to the following formula:
$$ \text { Score } (F) = 6 - \left(\frac {1 0 \times (P 1 - P 2)}{P 1}\right) ^ {2} $$
P1 = Training pulse P2 = Recovery pulse
Score 1 = very good Score 6 = poor
A comparison of the training and recovery heart rate is a quick and easy way in which to determine physical fitness. The fitness score is an orientation value to assess your recovering ability after physical exercise. Before pressing the recovery heart rate button and determining your fitness score, you should train at your own level of intensity for a significant period of time e.g. 10 minutes. For regular cardiovascular training you will discover that your "fitness score" improves.
Change of batteries
If the display is only slightly illuminated, the batteries must be changed. The values and default settings of the previous training session will get lost. The time setting must be entered again.
Disposal of used batteries and storage batteries

This symbol tells you that batteries and storage batteries must not be disposed of with the normal household waste.
The symbols Hg (mercury) and Pb (lead) underneath the crossed-out rubbish bin also tell you that the battery or storage battery contains more than 0.0005% mercury or more than 0.004% lead.
Improper disposal damages the environment and can
damage people's health. Recycling of materials conserves precious raw materials. When disposing of the appliance, remove all batteries and storage batteries from the product and hand them over to the collection point for the recycling of batteries or electrical or electronic appliances. Information about the appropriate collection points can be obtained from your local authorities, your waste disposal team or in the outlet where this appliance was sold.
Possibilities for Pulse Measurement
The pulse measurement starts as soon as the heart in the display blinks in time with your pulse beat.
With ear clip
The pulse sensor works with infrared light and measures the variations in translucence in your skin, which are produced by your pulse beat. Rub your ear ten times strongly to activate the blood circulation before attaching the pulse sensor to your earlobe. Avoid disturbing pulses.
- Attach the ear clip properly to your earlobe and look for the best point for the measurement (heart symbol blinks without interruption).
- Do not train directly under strong incidence of light, e.g. neon light, halogen light, spotlight, sun light.
- Completely eliminate any shocks or bounces of the ear sensor and the cable. Always attach the cable with a clip at your clothing or, even better, at your headband.
With chest strap
If a chest strap should be used optionally, the connection between the chest strap and the training computer must be established by using a plug-in receiver. Chest strap and plug-in receiver can be ordered subsequently.
With hand pulse
An extra-low voltage caused by the contractions of your heart is registered by the hand sensors and evaluated by the electronics assembly of the device.
• Always grab the contact faces with both hands.
- Avoid jerky grasping.
- Hold your hands calmly and avoid contractions and rubbing on the contact faces.
Note:
Pulse measurement can be accomplished: by ear clip, by hand pulse, or by chest strap. If there is no ear clip or plug-in receiver in the pulse jack, hand pulse measurement is activated. If there is an ear clip or plug-in receiver in the pulse jack, the hand pulse measurement is automatically deactivated. There is no need to pull out the connector of the hand pulse sensors.
Options for pulse measurement.
 | |
 |  |
 | [2DST] |
 | optional |
Training and operating instructions
Training Instructions
For Your Safety:
- Before beginning your program of exercise, consult your doctor to ensure that you are fit enough to use the equipment. Base your program of exercise on the advice given by your doctor. Incorrect or excessive exercise may damage your health.
This device has particularly been designed and developed for leisure time sportsmen. It is excellently suited for cardiovascular training.
The training methodically has to be organised on the principles of stamina training. This will predominantly cause changes and adaptations of the cardiovascular system. This includes the reduction of the resting pulse frequency and of the load pulse.
This gives the heart more time for filling the ventricles and for the blood circulation of the cardiac musculature (through the coronary vessels. Moreover, depth of breathing and the volume of air that can be breathed in (vital capacity) are increased. Further positive changes take place in the metabolic system. In order to achieve these positive changes, the training has to be planned according to certain guidelines.
Planning and control of your training
The basis for your training planning is your current physical fitness condition. Your family doctor can diagnose your personal fitness by means of an exercise tolerance test, which will constitute the basis for your training planning. If you have not undergone an exercise tolerance test, high training exertion and/or overstraining must be avoided in all cases. The following rule should be considered in your planning: stamina training is controlled via the scope of exertion as well as via the level / intensity of exertion.
Regarding exertion intensity
The intensity of exertion should preferably be checked in your fitness training via your heart's pulse rate. The maximum heart rate per minute of >220 minus age must not be exceeded. The optimum training pulse is determined by age and training target.
Training target: fat burning/weight reduction
The optimum pulse frequency is calculated using the empirical formula (220 - age x 0.65).
Advice: fat burning for energy supply only gains significance after a minimum training period of 30 minutes.
Training target cardio-vascular fitness:
The optimum pulse frequency is calculated using the empirical formula (220 - age x 0.75).

line
| Age | Maximalpulse | Fitnesspulse | Fat combustion pulse | | --- | --- | --- | --- | | 20 | 200 | 140 | 130 | | 30 | 190 | 135 | 125 | | 40 | 180 | 130 | 120 | | 50 | 170 | 125 | 115 | | 60 | 160 | 120 | 110 | | 70 | 150 | 115 | 105 | | 80 | 140 | 110 | 100 | | 90 | 130 | 105 | 95 |The intensity is predetermined in your training by means of the braking levels. As a beginner, you should avoid too high braking level settings for your training, as this will quickly lead to exceeding the recommended pulse rate range. Start by using a low braking level setting and then approach your optimum training pulse step by step. Do not forget to regularly check during your fitness training whether you still range within the intensity area according to the above stated recommendations.
Sports physicians consider the following load factors to be positive for fitness:
Frequency Duration
daily 10 min
2-3 times weekly 20-30 min
1-2 times weekly 30-60 min
Beginners should not start with training units of 30 to 60 minutes.
A beginner training could be organised as follows during the first four weeks:
Training frequency Extent of training session
1st week
3 times a week 2 minutes of training
Break of 1 minute for physical exercises
2 minutes of training
Break of 1 minute for physical exercises
2 minutes of training
2nd week
3 times a week 3 minutes of training
Break of 1 minute for physical exercises
3 minutes of training
Break of 1 minute for physical exercises
2 minutes of training
3rd week
3 times a week 4 minutes of training
Break of 1 minute for physical exercises
4 minutes of training
Break of 1 minute for physical exercises
3 minutes of training
4th week
3 times a week 5 minutes of training
Break of 1 minute for physical exercises
4 minutes of training
Break of 1 minute for physical exercises
4 minutes of training
In order to have a personal training documentation, you can enter the training values achieved in the performance table. Prior to and after every training unit gymnastic exercises lasting approx. 5 minutes serve the warming up and/or cooling down. There should be a day without training between two training units, if you later on prefer to train three times a week for 20 - 30 minutes each. Otherwise nothing can be said against a daily training.
Performance table
| Date | Restpulse | Stress pulse | Recovery pulse | Slope | Time (min) (km) | Distance (Kcal) | Energy consumption | Fitness | Mark |
| 2015/06/28 | |||||||||
| 2015/06/28 | |||||||||
F
Table des matières
flowchart
graph TD
    A["SET"] --> B["MODE"]
    A --> C["RESET"]
    A --> D["RECOVERY"]


flowchart
graph TD
    A["SET"] --> B["MODE"]
    A --> C["RESET"]
    A --> D["RECOVERY"]


natural_image
Simple diagram of a device with a labeled component and connection lines (no text or symbols)
RECOVERY
2-3 x per week 20-30 min
1-2 x per week 30-60 min
flowchart
graph TD
    A["SET"] --> B["MODE"]
    A --> C["RESET"]
    A --> D["RECOVERY"]


Inicio del aparato
flowchart
graph TD
    A["SET"] --> B["MODE"]
    A --> C["RESET"]
    A --> D["RECOVERY"]


flowchart
graph TD
    A["SET"] --> B["MODE"]
    A --> C["RESET"]
    A --> D["RECOVERY"]


flowchart
graph TD
    A["SET"] --> B["MODE"]
    A --> C["RESET"]
    A --> D["RECOVERY"]


Iniciar o aparelho
flowchart
graph TD
    A["SET"] --> B["MODE"]
    A --> C["RESET"]
    A --> D["RECOVERY"]


Start af maskinen
Start af maskinen
Sæt 2 batterier i (1,5 V UM 3/AA).
P1 P2 Tid Distance Fitness
Dato Restitutionspuls Belastningspuls Hvilepuls Belastningstrin (min.) (km) Energiforbrug karakter
CZ
Obsah
flowchart
graph TD
    A["SET"] --> B["MODE"]
    A --> C["RESET"]
    A --> D["RECOVERY"]


Návod k obsluze a tréninku

Spuštění přístroje
Vložte 2 baterie (1,5 V UM 3/AA).
| Date | Restpulse | Stress pulse | Recovery pulse | Slope | Time (min) (km) | Distance (Kcal) | Energy consumption | Fitness | Mark |
| 1986 | 1987 | 1988 | 1989 | 1990 | 1991 | 1992 | 1993 | 1994 | |
Performance table
| Date | Restpulse | Stress pulse | Recovery pulse | Slope | Time (min) (km) | Distance (Kcal) | Energy consumption | Fitness | Mark |
| 2018-03-29 | |||||||||
KETTLER

natural_image
Person using a rowing machine on a tiled floor (no visible text or symbols)
natural_image
Person riding a three-wheeled vehicle on a snowy mountain slope, no visible text or symbols
natural_image
Black-and-white photo of a woman riding bicycles with two men in the background, snow-capped mountains in the background (no text or symbols visible)
natural_image
Black-and-white exterior view of a modern outdoor patio with a long wooden table and chairs, no visible text or signage.

- Gerätestart
- Safety instructions 12
- Short description 13-15
- Starting the computer 16
- Training 17
- Personal training default settings 17
- Recovery (measurement of pulse at recovery) 18
- Changing the batteries 19
- Options for pulse registration 19
- Training instructions 20
- Safety instructions
- Please observe the following instructions for your own safety:
- For your safety:
- Short description
- Function area / keys
- MODE
- SET
- RESET
- RECOVERY
- Training and operating instructions
- Starting the computer
- Setting time
- Starting the computer without previous knowledge (guest)
- Training
- Personal exercising specifications
- General
- Target value specifications
- Calculation of fitness score
- Change of batteries
- Disposal of used batteries and storage batteries
- Possibilities for Pulse Measurement
- With ear clip
- With chest strap
- With hand pulse
- Note:
- Training Instructions
- Planning and control of your training
- Regarding exertion intensity
- Training target: fat burning/weight reduction
- Training target cardio-vascular fitness:
- 1st week
- 2nd week
- 3rd week
- 4th week
- F
- Table des matières
- Inicio del aparato
- Iniciar o aparelho
- Start af maskinen
- CZ
- Obsah
- Návod k obsluze a tréninku
- Spuštění přístroje
- KETTLER
Brand : KETTLER
Model : Giro S
Category : Exercise bike