
BSR 913 CB - Vacuum Cleaner BOMANN - Free user manual and instructions
Find the device manual for free BSR 913 CB BOMANN in PDF.
| Product type | Robot vacuum cleaner |
| Brand | Bomann |
| Model | BSR 913 CB |
| Net weight | 1.85 kg |
| Power supply | Rechargeable Ni-MH battery (12 x 1.2 V, 800 mAh) |
| Power adapter | Input: AC 220-240 V, 50/60 Hz; Output: DC 16.8 V, 300 mA |
| Battery life | Up to 30 minutes |
| Charging time | 6 hours (first charge: 12 hours) |
| Filter type | Washable filter |
| Dustbin capacity | Approx. 0.3 L (estimate) |
| Main functions | Automatic cleaning, obstacle detection, anti-drop sensor, vacuuming with integrated mop |
| Included accessories | Adapter, mop, screwdriver |
| Safety | Step sensors, automatic shut-off, fall protection |
| Maintenance and cleaning | Dustbin and filter washable with water; mop washable with warm water |
| Repairability | Do not repair yourself, contact a qualified technician |
| General information | Household use only; do not use on thick carpets |
Frequently Asked Questions - BSR 913 CB BOMANN
User questions about BSR 913 CB BOMANN
0 question about this device. Answer the ones you know or ask your own.
Ask a new question about this device
Download the instructions for your Vacuum Cleaner in PDF format for free! Find your manual BSR 913 CB - BOMANN and take your electronic device back in hand. On this page are published all the documents necessary for the use of your device. BSR 913 CB by BOMANN.
USER MANUAL BSR 913 CB BOMANN
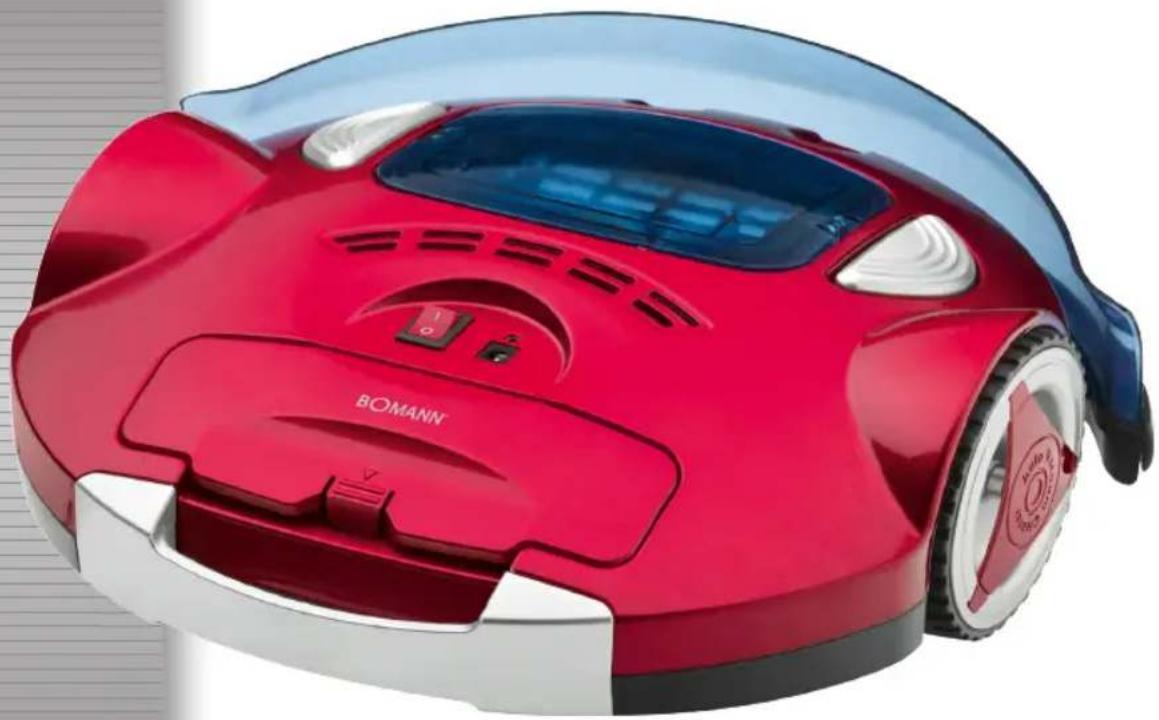
Robotsauger BSR 913 CB
Robotstofzuiger · Aspirateur robot · Aspiradora robotica · Aspirador rob
Robot aspirapolvere · Robot vacuum · Robot czyszczancy
Robotporszivó·Pobot-ninococ·Pobot-nbineco
Overview of the Components.. 3
Illustrations.. 4
Instruction Manual.. 30
Technical Data.. 33
Disposal.. 33
JEZYK POLSKI
Spis tresci
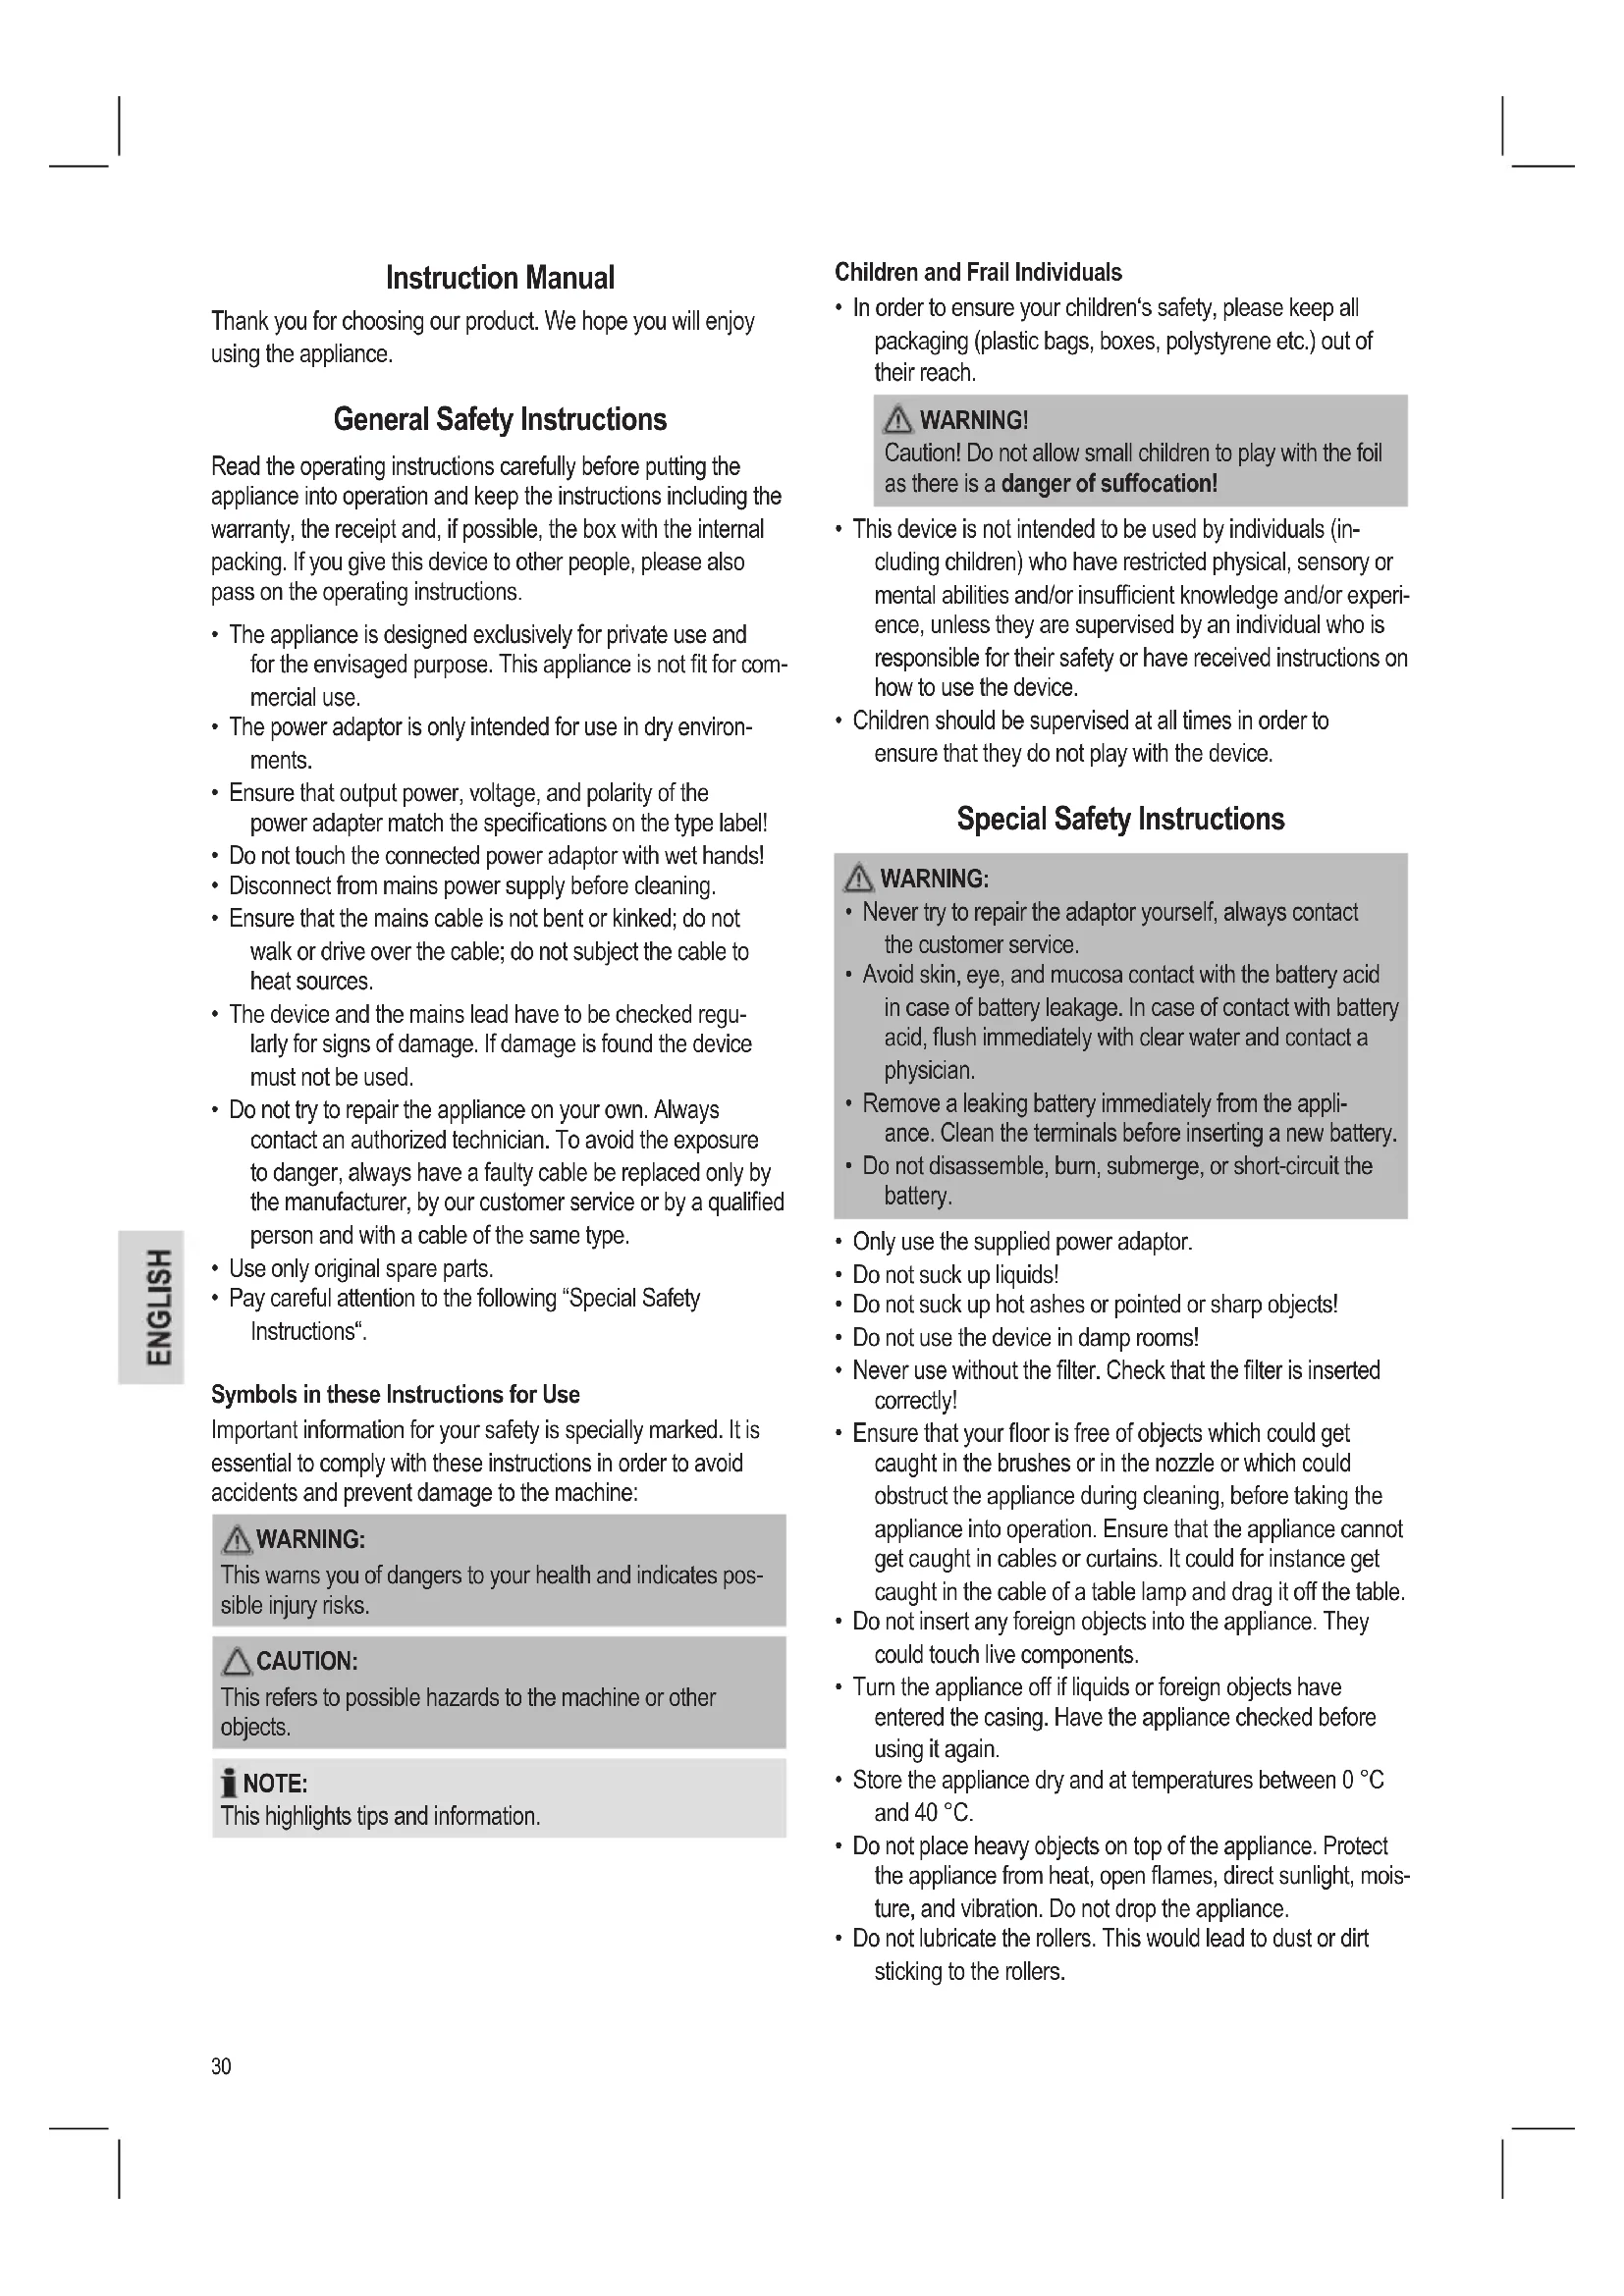
Thank you for choosing our product. We hope you will enjoy using the appliance.
General Safety Instructions
Read the operating instructions carefully before putting the appliance into operation and keep the instructions including the warranty, the receipt and, if possible, the box with the internal packing. If you give this device to other people, please also pass on the operating instructions.
- The appliance is designed exclusively for private use and for the envisaged purpose. This appliance is not fit for commercial use.
- The power adaptor is only intended for use in dry environments.
- Ensure that output power, voltage, and polarity of the power adapter match the specifications on the type label!
- Do not touch the connected power adaptor with wet hands!
- Disconnect from mains power supply before cleaning.
- Ensure that the mains cable is not bent or kinked; do not walk or drive over the cable; do not subject the cable to heat sources.
- The device and the mains lead have to be checked regularly for signs of damage. If damage is found the device must not be used.
- Do not try to repair the appliance on your own. Always contact an authorized technician. To avoid the exposure to danger, always have a faulty cable be replaced only by the manufacturer, by our customer service or by a qualified person and with a cable of the same type.
- Use only original spare parts.
- Pay careful attention to the following "Special Safety Instructions".
Symbols in these Instructions for Use
Important information for your safety is specially marked. It is essential to comply with these instructions in order to avoid accidents and prevent damage to the machine:

WARNING:
This warns you of dangers to your health and indicates possible injury risks.

CAUTION:
This refers to possible hazards to the machine or other objects.

NOTE:
This highlights tips and information.
Children and Frail Individuals
- In order to ensure your children's safety, please keep all packaging (plastic bags, boxes, polystyrene etc.) out of their reach.

WARNING!
Caution! Do not allow small children to play with the foil as there is a danger of suffocation!
- This device is not intended to be used by individuals (including children) who have restricted physical, sensory or mental abilities and/or insufficient knowledge and/or experience, unless they are supervised by an individual who is responsible for their safety or have received instructions on how to use the device.
Children should be supervised at all times in order to ensure that they do not play with the device.
Special Safety Instructions

WARNING:
- Never try to repair the adaptor yourself, always contact the customer service.
- Avoid skin, eye, and mucosa contact with the battery acid in case of battery leakage. In case of contact with battery acid, flush immediately with clear water and contact a physician.
- Remove a leaking battery immediately from the appliance. Clean the terminals before inserting a new battery.
-
Do not disassemble, burn, submerge, or short-circuit the battery.
-
Only use the supplied power adaptor.
- Do not suck up liquids!
- Do not suck up hot ashes or pointed or sharp objects!
- Do not use the device in damp rooms!
- Never use without the filter. Check that the filter is inserted correctly!
- Ensure that your floor is free of objects which could get caught in the brushes or in the nozzle or which could obstruct the appliance during cleaning, before taking the appliance into operation. Ensure that the appliance cannot get caught in cables or curtains. It could for instance get caught in the cable of a table lamp and drag it off the table.
- Do not insert any foreign objects into the appliance. They could touch live components.
- Turn the appliance off if liquids or foreign objects have entered the casing. Have the appliance checked before using it again.
- Store the appliance dry and at temperatures between 0^ and 40^ .
- Do not place heavy objects on top of the appliance. Protect the appliance from heat, open flames, direct sunlight, moisture, and vibration. Do not drop the appliance.
- Do not lubricate the rollers. This would lead to dust or dirt sticking to the rollers.
Overview of the Components
1 On/OFF switch
2 Dust container
3 Unlock buttons dust container
4 Status indicators
5 Shock absorbers
6 Drive wheel
7 Ventilation openings
8 Carrying handle
9 Battery compartment
10 Adaptor jack
11 Front wheel
12 Nozzle
13 Suction aid
14 Drive wheel
15 Rear wheel
16 Floor cloth holder
17 Drive wheel
Basic Functions
- The appliance vacuums loose dust through the nozzle. For more efficient cleaning, a floor cloth is attached (at the bottom).
- The appliance changes direction after touching a wall or other obstructions.
- The sensor at the bottom recognizes steps and hollows, so that the appliance cannot fall down.
Start-up
i NOTE:
Direct mains power operation is not possible.
Connect the Battery Cable (Fig. A)
- Ensure that the appliance is not connected to mains power.
- Open the battery compartment: Slightly press the lid down and lift it up.
- Insert the battery cable plug into the jack inside the battery compartment.
- Close the battery compartment.
Charge the Battery (Fig. B)

CAUTION:
Place the mains cable in such way that it does not become a trip hazard.
- The adaptor jack (10) is next to the On/Off switch (1).
- Lift the jack cover and connect the adaptor cable.
- Connect the adaptor's mains plug to a freely accessible wall outlet.
-
Charging starts. The green status indicator (4) starts flashing.
-
The green status indicator (4) lights up as soon as the battery is fully charged. Disconnect the appliance from mains power and close the cover.
- Your appliance is now ready to use.
i NOTE:
Charging takes 12 hours before first use and 6 hours for following charges.
Operating Instructions
Prepare the Room
CAUTION:
- Observe the appliance if you are using it in a room, to remove obstructions, if necessary, so that the appliance effectively can clean the entire room.
-
The appliance is not suitable for plush/deep pile carpeting.
-
Ensure that your floor is free of objects which could be caught in the nozzle or which could obstruct the appliance during cleaning. Especially, leave no plastic bags lying on the floor.
- Ensure that the appliance cannot come into contact with cables, cords or fringes of curtains, table cloths, or carpets. Fold carpet fringes under the carpet. (Fig. C)
- Remove all objects which could tip over (e.g. vases, small lamps, decorations).
- The distance between two objects (e.g. wall and shelf) must be at least 40~cm for the appliance to fit through.
- The appliance can get stuck under furniture, which is just high enough off the floor. Block the way, for instance with pot plants, which are heavy enough not to be tipped over.
Use Instructions
CAUTION:
- Do not leave the appliance without supervision during operation, so you can interfere if it is obstructed by furniture/objects.
-
Switch the appliance immediately off if something gets stuck in the nozzle and remove the obstruction.
-
Ensure that the dust container is empty, attached, and free of dirt (see chapter "Cleaning and Maintenance").
- Place the appliance in the center of the room to be cleaned.
- Set the On/Off switch to position I to switch the appliance on. The appliance starts cleaning the floor. The green and red status indicators are flashing in turn. The appliance changes direction upon touching an obstruction.
- The appliance cleans the floor until it is switched off (On/Off switch in position 0) or the battery is exhausted. The flashing red status indicator signals an empty battery. Charge the battery as described in chapter "Charge the Battery".
- Empty the dust container after every use and remove dirt as described in the following chapter.
Cleaning and Maintenance

WARNING:
- Always disconnect the device from the power adaptor before cleaning!
- Do not submerge the device in water. Only the dust container and the filter can be rinsed off.

CAUTION:
- Do not use a wire brush or other abrasives for cleaning.
- Do not use aggressive or abrasive cleaning agents.
Clean the casing with a dry cloth.
Ensure before and after each use that the nozzle and the ventilation openings are clean. For best performance, you should empty the dust container and clean the filter after every use.
Empty the Dust Container and Clean the Filter

CAUTION:
- Replace all parts only when they are completely dry!
- Do not wash the filters in the washing machine and do not use a hair dryer.

OTE:
Use a brush to clean the filter.
- Press the two unlock buttons (3) of the dust container down to loosen the dust container.
- Lift the dust container out of the appliance. (Fig. D)
- Carefully remove the dust container cover. Slightly pull one of the locks on the side slightly away from the dust container to unlock the cover. (Fig. E)
- Hold the dust container over a dustbin and remove the filter. (Fig. F)
- Empty the container into the dustbin and carefully beat on brush off the filter.
-
Both components can be cleaned under running water. They must be completely dry before being replaced.
-
Brush out the container compartment in the appliance before replacing the dust container. Turn the appliance upside down and brush off the nozzles and the bottom of the appliance. Wipe the casing with a dry or slightly damp cloth.
- Replace the filter in the dust container (the plastic grid must be aligned upward).
- Replace the dust container in the appliance so that it clicks into place.
Clean/Replace/Attach the Floor Cloth
Over time, dirt can collect on the floor cloth. You can clean or replace the floor cloth.
- Turn the appliance upside down and place it on the floor or on a table.
- The floor cloth is attached to a plastic holder (16). It is attached to the appliance on the left and right sides next to the drive wheels (14) and (17). Take the narrow end piece of the holder between your fingers and pull it outward towards the drive wheel until it comes free. Now you can remove the holder from the appliance. (Fig. G)
- Turn the holder around and pull the cloth out of the 4 clips.
- Now you can wash it in lukewarm water and a mild detergent. The supplied cloths are not suitable for the washing machine! Leave the cloth to dry completely before using it again.
- Dispose of the cloth after it is worn and use a new one. Place it in the holder and press the ends into the 4 clips. (Fig. H)
- Press the holder into the interlocks at the bottom of the appliance and check for proper fit.
NOTE:
- You can also use commercially available cloths as a floor cloth.
- A screwdriver is supplied for easy attachment of the floor cloth.
Troubleshooting
| Problem Possible Cause Solution | ||
| The appliance does not work. | The battery is not properly connected. | Connect the battery properly (see chapter "Start-up"). |
| The battery is not charged. Charge the battery (see chapter "Start-up"). | ||
| The battery is not charged. The green status indicator does not flash. | The appliance is not properly connected to the adaptor and/or the adaptor is not properly connected to a mains power supply. | Connect the adaptor properly to the appliance and the wall outlet. |
| Wall outlet is defective. Try a different wall | outlet. | |
| Check your fuses. | ||
| Adaptor is defective. Contact customer service. | ||
| The battery is not being charged. The green status indicator flashes. | Appliance is defective. Contact customer service. | |
| Insufficient suction power. Nozzle | is blocked. Clean the nozzle. | |
| Dust container is full. | Empty the dust container. | |
| Filter is dirty. | Clean the filter. | |
| Floor cloth is dirty. | Clean or replace the floor cloth. | |
Noise development
The sound pressure level in the ear of an operator (LpA) was measured according to DIN EN ISO 3744.
Sound pressure level detected: 70 dB(A) (no limit)
Technical Data
Model: BSR 913 CB
Net weight: 1.85 kg
Power Adaptor
Protection class:
Input: AC 220-240 V, 50/60 Hz
Output: DC 16.8 V, 300 mA
Polarity:
Batteries: 12 x 1.2 V, 800 mAh
Operating time: max. 30 minutes
Charging time: 6 hours
Subject to technical changes without prior notice!
This device has been tested according to all relevant current CE guidelines, such as electromagnetic compatibility and low voltage directives, and has been constructed in accordance with the latest safety regulations.
Disposal
Remove Batteries / Battery Disposal
This device contains rechargeable Ni-MH batteries.
Remove the batteries before disposing of the device.
You are bound by law to return used batteries.
WARNING
- Disconnect from mains power supply before removing the batteries!
-
Remove the batteries only in discharged condition.
-
Open the battery compartment: Press the lid slightly down and open.
- Remove the adaptor cable plug from the jack in the battery compartment.
- Remove the battery pack.
Return the battery pack at a collection point for exhausted batteries. Enquire at your municipal offices for further information.
Meaning of the "Dustbin" Symbol
Protect our environment: do not dispose of electrical equipment in the domestic waste.
Please return any electrical equipment that you will no longer use to the collection points provided for their disposal.
This helps avoid the potential effects of incorrect disposal on the environment and human health.
This will contribute to the recycling and other forms of reutilization of electrical and electronic equipment.
Information concerning where the equipment can be disposed of can be obtained from your local authority.
Instrukcja obslugi
He BnKOpncToBnyTe npOry a6o abpa3nBHi 3aco-6n dny HJH.
- He BnKOpIcTObyIte arpeCnBHi a6o abpa3nBHi 3acobn Dnla YnIeHn.
Kopnyc cnid ouhnilaT M'koTO TKAHHIO.
Ipeed KOxHMM BnKOpNCTaHHMa Ta nicna HbOro yneBHOITecA, 10o OTbip BCMOKTyBaHHa Ta BeHTnlaui Hi OTbOpn NcTl. Ipa Han6iJIbwoi epeKTINBHOCTi Tpeba CnpoxHOBaTu EMHCt bIpa 6pydTa YnCTNTn PInbTp nicra KoxHORo BnKOpNCTaHHa.
CnpoxkHeHHaEMHocTl dna 6pyDa Ta uHcHnHa pInbtpa

YBARA.
BCTaHOBIOHTe yci Detani TiIbKn NiCJn NOBHO BucxHaH Hr!
He nepitb pnty npalbni Maunhi Ta He cyuith ix peHOM.

PUMITKA.
IooNCTnTn fInbTp, KopncTyTeca 1tKIO.
- HataHcHb 6nDbI KhoNk Pikcaii (3) cMHOCTI nny, 06 BiD'edHATNI II.
- BtTnHtB is npnaIy emHicb nnny. (MaI. D)
- 06epeXHo 3HIMITb KpuuKy 3 EMHOCTI nIpy. IIO6 po3bNOkyBaTn KpuuKy, 3NtErKa NotrHiB y 6iK BiD EMHOCTI OINH i3AMKIB, IIO 3HAxoOnTbc 36Oky. (MaI. E)
- TpIMaOHcEMHicThbIINyHaN KOHTeHepOM dIa CMIT8,3HIMtB pInbp.(MaI.F)
5.CnopoXHtB cHcHt b y KOHTeHep dIa CMITT a o6epeXHO Bn6nte p1bTp a6o NOHCTiB noro IIO tKOHO. - 06nDi DeTani MoKHa MmTN IPOTOHIO BOIOIO. Npeed BCTAHOBJIeHHAM BOHN MAIOb TIOBHIcTHO BNCOXHYTN.
7.ПоистITb ьITKOIO BIDINOK EMHOCTI y npINAJI nepei BCTAHOBJIeHHaM EMHOCTI dIy nIIy.пepeBepHITb npINAД DorOpN Ta noHcTITb ьITKOHO OTBip BCMOKTyBaHHa T a HIXHIOчaTHHy npINAdy.ПрOTPITb KOPnyc cyXOIO abO 3nerka BOIoroHO raHipKOIO.
8.BctaHOBiBfipinbTp y eMHicTb Inny (nnactNKOBOp peWitKOIO Doropn). - BctahOBiBt bEMHicTh dIy nIIy y npnlaq.BoHa i3 KtaaH Hm Mae CTaTH Ha MicJe.
YiueHHa Ta nid'edHaHnTkAHHHoHa cAdKn nn niDnorn
3roDMHaTKaHHHnHacauiIyIiINoM MoKe HAKONuHTnc 6pyd.MoKHa NoCHNTn a60 3amHInIi.
- IpeBepHitb npnlaad doropn ta noknaidtb noRo ha niDnory cnTJ.
- TkaHHHa HacJa dIra NiIIOr KpINITbCdo nIaCTIKOBoro TpIMaHa (16).TpIMaN iIDcHAnO do npInaHy 3 IIBoro Ta npaboro 60ky 6Ira BeDyUHX KOlc (14) i (17).BisbMitb By3bKm KiHeCb TpIMaHa MIX NaIbCi Ta TgHiB MoRo Ha3OBHi y 6ik BeDyUHO KOneCa, DOKn BIn He 3BilbHHTbcr. Teep MoXHa 3HrTa TpIMaH i3 npInaHy. (MaI.G)
3.ПepeBepHitbТрИмaI bNTraHITb TkaHInHy 3-ПД qOTnPbOx npuJinok. - Tenep MoXHa BnnpaTn II TeNIO BOIO 3 DoDaBaHHM M'AKoTO 3acO6y Ira npAHn. TkaHHn, 0u HadaHbCry, HenpiDAtHi Ira npAHn y npAblHi MaunHi! TkaHHa MaE NOBHCtIO BnCOxHyTI nepeH HaCTyINHM BnKOpNCaH- HAM.
- Ytni3yIte TkAHHy y paai i3 3HOWeHHa Ta BnKOpNCToByTe HOBy. Po3TaUyIe TkAHHy Ha TpIMaHi Ta npNTCHiB II KInjO YoTmPMA npuJinKaMn. (MaI. H)
6.ПиТИСИТБТРIMаДоФIKCATOPIу HIXKIIЯСТИНI ПИЛаду Ta NepeBipTeпapBnBhICTb BCTaHOBJIeHЯ.
I PIMMITKA.
YKOCTI TKAHHHOHACADKNIINIOIMOXHA TAKOKBVKOPNCOTOBATN HACADKN, KIAHABHI y npodaky.
BnKpyTka nocTaayacBc, 06neIko npnKpyyBaTn TKAHHHy HacaKy dJa NiDnOrn.
YcyHeHHH HEnoJaOK
KINBJIENHHa BNXOJI:16,8B NoCTiHOro CTPMy,300MA
NonpaHictb:
AkymyIyTopn: 12x1,2B,800MAro.
Yac po6oTu: .MAKc. 30 XB.
3aIIIaEMO 3a co6oIO npaBO HaTexHiHi 3MiH!
Ley npnilad 6yno nepebipeho 3riDnBO Cix BiNObiHNx, akTyalbHnx DlpeKTNB CE, HapnKnad 1oDo eNeKpOMarHiTHoiCYMICHOCTa Hn3bKOBoTbHOI DlpeKTNBn, Ta 36yDoBaHO 3 a HOBITIM NIOJXeHHm TexHkN 6e3neKn.
BnMaHHy /ytniiazia6atapei
Ley npictiMiCTNTb akymyTOpHi Hikeb-MapraHcEbi 6aapei.
Iepu Hix ytni3yBatn npctpi, BnMItb 6aapeii.
3riINO 3aKoHOJaBCTBa BN 306OB'ra3aHI NOBepTaN BnKOpNCtahi 6atapei.
IIOPEEDKEHHRA
-Першніх Виимяп 6атapei, BiD'EDhaTe npicrtiBix DkepeNa XmBJIeHHI!
BnmaTe 6aTaPeI JnIe KOIN BOH pO3PjXKeHi.
- BiDkPnIte BiDnIIOK nIpy 6atapei, 3nerka HATNCHyBUn Ta nnHbwn KpUky.
BIMITb 1Tekep ka6eIIO aIaIaTepa 3 po3'Emy y BiIaIky dIra 6atapei.
Bnimitbatapeio.
Iobephitb 6atapeo B nyHKT npniomy BnKOpncTaHnx 6atapei. Dokadhiue di3HaabaTece y MicueBXn opraHax BnaDi.
PykoBoCTBO no 3Kcnnyatau
Cnacn6o 3a Bb6op Hauero npodykta. Hadeemc, OH Bam noHpabITc.
06uue yka3aHnno TExHnke 6e3oNaCHOCTn
Ipeed nauanom 3Kcnnyataun npnbopa BHIMatelbno npo-ntaTe npnnaeraemyIO NHCTpykUIO NO 3Kcnnyataunu COxpaHInTe ee B HadeXHom MeCTe, BMeCTe C rapaHTnHBIM TaHOHOM, KACCOBbIM YekOM I, PO BO3MOXHOCTN, KAPToHHO KoPObKOJ C yNAKOBOHbIM MaTepuaNoM. Ecni daete KOMy-ni6o NonoJIb3OBaTbCn pnpbOpom, O8a3aTeNbHO daIte BnpuJaCy daHHyo INHCTpykUIO NO 3KcnNyataunu.
Пльзутесь пибором только чаСнБIMобраЗМИп
НаЗнautheMH. Пибор He прднэнautheENДЯ КСМерч
СКOTO ИСПЛьЗВАHЯ.
CetbeoAaantepnpedna3nueHdIyncnoB30BaHnTOJbKO B cyxoi cpe.
- Y6eIITecb, YTO BbIXoHnA MoUHocTb, HAnpJxHeHne IIOJIyRHOCTb CeTeBOrO aAdIaTEpa COOTBeTcTBYIO T XapaKTePnCTIKAM Ha nacOpTHoI TaBnUke!
He npikacaiTecb K BKIOueHHOM CeTeBOMy aanTepy MOKpbIMn pykami!
-ПередЧИСТКОЛ OТСЕДИНITE OT NICTOΥNHA ПИТАнЯ.
- Y6eITeCb, YTO CEteBOJ Ka6eB He 3aHyT IN He 3anyTaH; He HAcTyNaIte INn He nepee3XkaIte Yepe3 Ka6eB; DePKIte Ka6eB NOdaJIbWe OT NCTOCHNKOB TENla.
-ПибориКабелсeteвогNTaHINHeOxOIMOpperIЯрнообслendobatbHaHaJIuHneCleIDOB nobpeKdEHN.IpiОbHApUKeHnIOBpeKdEHNnONb3OBAtbcrпибopomЗanpeSHTc.
HnB Koem cnyae He pemOHnpyTe np6op camocToreNbHO, a 0bpaaNTecb B TaKOM cnyae 3a NOMOuK CneuMaNCTy, IMeUcEmy COOTBeTCTByIOuN dOnyck. N3 COo6paxhen 6e3OanCHOCTN, ZameHa CeTEBOr O Hhpya Ha paBHO3NaHbI dONyCKaETC TOnbKO uepe3 3aOBn3ROTOBtEnb, HauSy CepBnCHyO MaCTepCKyO INn COOTBeTCTByIOUeRO KBaINnPHuPObAHORO CneuaJIACTa.
- IcnoIb3yIte ToIbKO opuHaHaJIbHbIe 3aIHaCTN.
- PtoKanyIcTa, cobIIOJaTe HmKeCneIyUOJIe "CneuHaJIbHbIe yka3aHnI NO TEXHKe 6eONaCHOCTN".
CnMBOJI npIMeHReMbIe B DaHHOM pyKOBoDCTBe NOJIb-3OBaTeJr
BaxhIbe peKOMeHdaun dIy oBeCneueHnBaWey 6eOnac-HocTn obo3HaueHb IIO oc6eHHomY.ObraTeJbHO cJeDyIte 3TNM peKOMeHdaunm, YTO6bl PpeOTbpaTb HechactHbIn cnUaHnnnoNOMky n3dEINr:
IPEyIPEKDEHNE:
IpeDynpexJaetobOaNCHoCTnIpy3OpOBbI BO3MOxHOM pncke IOnyHeHr TpaBMbl.
BHIMAHINE:
Yka3bIbaet Ha BO3MOXHyIO ONaCHOCTb IJI N3JeINr IN pyTHX OKpyKaIOUHX INpeDMETOB.
I\Pi\PiMeUaHInA:
Jaet COBETbI INHOpMaJIIO.
TeHn nIuHa HyKdaIouMeecB npncMOrpe
- 13 coobpaekHn 6e3oNaChOCTn DnI DeTeH He octabTnIe IexKaTb ynaKOBky (IIaCTNKOBbIe MeuK, KapTOH, NeHONlact n T.D.) 6e3 npncmOTpa.
IPEyIpyEeHHeI
He no3BOJnTe DeTmIrpaTb C nOIN3TNHeHOBOn nIeHko. Onachocb ydyuBa!
3TOT np6bOp He npEHa3HaueH IIN NOIb3OBAHnIINaMn (BKNIOyAJeTei) C OPAHueHHbIMN PnINuYeCKMN, CEHCOPHBIMN INN yMCTBEHHbIMN CNOCOBHOCTAMN INN INIaMn, HE IMHeoUHM NOnIta ININ INEOxODmBIX 3HaHm. NcKnIOHeHne COCTABJrOT cIyua, KOrDa OHn HaxoJrTCr IOI npICMOPTpOM INzua, OTBETCTBEHHORo 3a INX 6e30NaC-HocTB, INN KOITa OT 3TOI INZa POJIyHehbl Yka3AHn IIO NIOb3OBAHnIO np6bOpom.
Heo6xoJIMO npncMatpnbatb 3a DetbM, YTO6bI y6eINTbCBA TOM, YTO OH He HrpaIc C np6Opom.
CneuaJIbHbIe yka3aHnno TExNHKe 6e3ONaCHocTn
TPEyTPEJKDEHNE:
HnKOrHa He nbItaIteCb peMOHTnpoBaTb ceTeBoi aan- Tep caMoCTOReIbHo; BcerDa ObpaauTecb B Cnyk6y 06CnyKuBAHn NOKpNaTeNei.
B cnyuae Teu an kkymyjTopa n36eraTe noJaHn KNCNOTbI n3 Hero Ha KOxy, B rna3a n cIn3NCTyIO oboNochy. B cnyuae KOtAKTa C KcNToT O n3 AkkMyJrTopa HeMeDJIeHHo npOMOte MeCTo KOHTAKTa YINCToBdoI N o6paNTeCb K BpaCy.
- HemeIeHNO 3BLeKeNTe TeKyuIa kkyMyJrTOp n3 np6opa. Nocntte KJIeMMbI nepeD BCTaBcOHOBOrO aKKyMnyJrToPA.
He pa3bpaaiTe, He cxnraaiTe, He norpykaaiTe B kndkoctb nI H e 3akopauBaaiTe akkyMnyTOp.
IcnoJb3ayTeToJIbKO npNJaraembI cTeBoa aadantep.
He noIb3yIteCb nbIeCOCOM dIy ydaJIeHnBnJXHO nIu nn KUdkoCTe!
He nbineocbTe tnpaTuO 30Ny, octpbie nI npexyuue npedmetbl!
- He noJIb3yIiTeCb npIb6OpOM BO BnJaKbIx NOMeUHeHryX!
- Hn B koem cnyae He pa6oTaIe 6e3 fInbTpa. Iocne kaxdoi CmeHbI fInbTpa o63aTeIbHo npOBepbTe erO npabINbHyIO nocdky!
-Перед Исплььзовим пибopa убдтесь,чToHa
ПОЛу.net прдmetOB,КOTOPbie MOrYT nonactbВ�ETKN
ИПИСоПЮ ИПИ KOTOPbie MOrYT MeaATb пибору BO ВБЕ-
МЯЧТК.УБДNTeCB,чTo пибор He можетNonactbHa
КабELI INI 3ANyTATbCSB A StOpax.HanPIMeP,ONMOxET
3aXBaTITb Ka6JIb HAcToNtHOn JAmNBI N CTrHyTb ee CO
STOJa.
He npocobbBaIte noctopOHnne pEmtB np6Op. OHMOrT KcCHybcra Detalien NoHapRKeHnem
B cnyuae nonaahann jnkocte nnn noctopohnx npedmetOB B np60b BkIouHne np60p. OdaTe np60bp BnpoBepky npexde Yem nCNOJb3ObaTb erO CHOBA.
XpaHnTe npi6op B cyxom MeCTe n npi TempepaTypax Mejdy O C n 40^
- He CTaBbTe Ha npB6op Tae JeIbe IpeDMeTb.IpeDoxpaHnIe npB6op OT HArpeBaHn,OTKpbIToro OTHn,ipraMbIX coJIHeuHbIX nUey, BnaI IN Bn6paun. He poHnIte npB6op.
He cma3bIbAte poJIHK. 3To MOKeT npBecTe K HAIINaHnHO PbJIn I pR3N Ha HIX.
063op detae np6opa
1 PepeKIOUaTeB BKn./BbIKN.
2Пьлесборнik
3 KhoNkOcBO6oJdeHnIbIeC6OpHnKa
4 INHINKATOpbI COCTOHN
5 AMOpTN3aTOpbI
6 PnBODHOe KOJIeCO
7 BeHTINJIOHnBte OTBepCTN
8 Pucha dny nepeHockn
9 BaTapeHbI oTcEk
10 He3do ceTeBoro aanTepa
11 PpeDHee KOJecO
12 Conno
13 HanpaBnaIooa BcacbBaHn
14 PnIBoDHOe KOJIeCO
15 3aJHee KOJeco
16 DepeKaTeJIb HacaIkn DnI nOla
17 PnBbDHeoKoJIeCo
OCHOBHbIe yHKUIN
-Пиббор BCacbIbae TcB6OHyIO nbIb Ype3 cOnIO.ДЯ
Болee 3ФфektINHoi y6Opkn YCTAHOBITE Hacaiky ДЯ
нona (CHN3Y).
- Pπb6op n3MeHReT HappaBHeHne nocne KacaHnCtHeblnn Dpynx npenrCTBM
-ДатчИК chI3у onO3haET nopOrn I nyCTbIe npocTpaHCTBa, nO3Tomy np60p He moKet ynaCTb.
Nyck B pa60ty

ПИМЕЧАнЯ:
Pa6ota OT cETn nITaHn HeDOnyCTIma.
IpoednneKabena6aTapei (pnc.A)
- Y6eIITcB, YTO npNbOp He BKJIIOueH B cTeB.
- OTKpoTe 6batapeHbI OTcK: CneKa HaxMMTe Ha KpbIuKy I NOHMMTe ee.
- BCTaBbTe BnKy Ka6eJa 6aTapeu B rHe3do BHyTpNi 6aTapeHOrO OToCeKa.
- 3akpoTe 6aTaapeHbI OTeK.
3apka 6aTapeu (pnc.B)

BHIMAHINE:
IpoIoxnTe CeTeBOI Ka6eIb TaK, YTO6bl Ha 3aHHyTbCra O HrO.
- THe3do ceTeBoro aAnTepa (10) haxoDITcra pIOM c nepeKIOUOaTeJem BKNIOUeHn/ByIKIOUeHn (1).
- POnHIMMTE KpbIuKy rHe3a N PoDCOeINHITe Ka6eJIb cTeBOrO aAnTepa.
- BkHouHte CeTeBvIO BnIky aanTepa B CTeHHyIO po3eTKy CO CBO6OHNbIM DOCTYlOM.
- 3apJaKa HauHETcR. 3eIeHbI INHdNkATop COCTOHHa (4) HauHET MHaTaTb
- Nocne nonho3apr6n 6aTapee 3eneHb INHdkatop coCTOHHN (4) HauHET CBETNBc NOCTOHHo. OTCoeHNHTe np60pOT cTeBOI po3eTKN I 3akpoTte KpbIiky.
- Tepeb np60p roTOB K nCnOJIb3OBAHIO.

PIMEYAHIA:
Ipeep nepBbIM nCIOJIb3OBAHnEM 3apJNTe aKKyMylTOpbl
12 yacob; nocneyuoune no3aprKn Tpe6yot 6 yacob.
Hnctpykun no pa6oTe
IoproTOBka KOMHaTbI

BHIMAHINE:
OcmotnTe KOMHaTy n np Heo6xOaMocTny6epnte npenrTCTBna, YTObI npH6op MOr 3pFekTNBHO OCHNTb BcO KOMHaTy.
-Пибов He npeHa3HaueHдяЧICTКOBpoBbIX NOKpbITN CДИHHbIM BOPCOM.
- Y6eHITecb, yTO Ha NOny Het npEMeTob, KOtOpbIe MOryt nonactb B cOnIO uIN KOTOpbIe MOryt nOmeUaTb npi6Opby BO Bpemr y6OpKn. Oco6eHHO IpocneJeTe 3a Tem, YTo6bI Ha NOny He BaJIANCb NOnn3TNHeOBbIe MeuKn.
- Y6eIInTeCb, YTO npi6Op He CMOKet KOHTaKTIPOBaTb C Ka6eJIaMn, UHypaMn nIN 6axpOMoI uTOp, cKaTepeTey nIN KOBpIKOB. 3aBepHInTe 6axpOMy KOBpIKOB IOd KOBpIK (PNC.C).
- Y6epnte BCE npedMeTbI, KOtOpbIE MOrY ynactb (Ha npimep, Ba3bl, He6oJIbWne IaMnbl, DeKopaTINBHbIe npedMeTbl).
PacctoHne MeKdy DByMa npEmdTaMn (Haepmep, cTeHoi n CTeJIaXOM) DOJXHO 6bITb He MeHee 40 cm, TTo6bl np6Op Mor npoTn.
-Пиббог может 3аctрь по мeбельс, ecnpacctorHne OT nOla HeIoCTaTOUHO.Зakpoite BXOD noTakyHMe6eIb, HanpIMeR, UBeToCHbIM TOpUKOM, KOTOpBIndoCTaTOUHO TReKeIbI N He MOxET ynaCTb.
HCTpykunno nncnol3oBAHHIO

BHIMAHINE:
He octabnIte np6op 6e3 npncMoTpa BO BpeMpa60bl, yTo6bl MoXHO 6blIO BMeUaTbCBA Cnyae eO3actpeBaHnIO Me6BIO NIN DpyrIMN PpeMetamn.

BHIMAHINE:
Cpa3y BbIKIIOHITpeINp60B Ccnyae nonaDnHnKaKOrHOHydbnpdMeTaBcNOuYdaJItePpeMet.
- Y6eIntecb, yTO nblnc6opnK npCTo3aKepeHnHa MeCTe HHe 3aRpa3He (CM.pa3dTe "UcTka N o6cnykBaHne").
2.Помecntiteприбор вцентубураemoro пOMESEHЯ. - IpeekIIOHTe IpeekIIOATeJIb BKNIOUeHnB/ByIKIOUeHnB nIOXKeHne I dJa BKNIOUeHn np6oPa. Pnp6Op NaHETy6opKy nOJa. 3eJeHbN u KpaChbN INDnKaTOpbl COCTOHNr NoopeEHO MmraHOT. Pnp CONpNKOCHOHENC npEnrTCTBnEM Pnp6Op N3MeHReT HAnpaBHeHne.
- Pn606ydtncntb non Do BbIKIOHcHn (nepeKIOHcHn IpeKIOHcTeIaB KIOHOHcHn/BbIKIOHcHn B NOIOXeHne O) nIu pa3pKn 6batae. 3apAnte 6bataeO cHObA, kak onicaHo b pa3dene "3apKa 6batae".
- Ounuai Te nbIeScbOpnK nocne KaJIOU y6OpKn UybnpaTTe rpa3b, KaK ONuCaHO B CNeDuHoupe pa3dene.
Ynctka n o6nykubahne

PENYIPPEXDEHNE:
-Перед чисков BCERДа оТсоевинайе сетевой adanTep!
He norpykaTe yctpoIcTBo BBOy.MbITb MOxHO ToJIbKO Nblnc6OpHnK nФnTp.

BHIMAHINE:
He nIcIb3yIte npOBOIOHHyIO UeTky IINa 6pa3nBhie cpeCTBa DnI YNCTK.
He nCnoB3yInTe arpeccnBbIe nn a6pa3nBbIe YnCTa-
Ipoptpnte Kopnyc cyxou Tprnkoi.
NocIe KAKDOrO UcNoJIb3OBaHnI npOBepRrTe, YnCTbIe Nl cOnIIO N BEHTINJUHOHHIe OTBepCTnI. Ira HauNyUWeI 3oΦeK- TINBHOCTN OUYIaJIte NbJInc6OpHNk N pINbTp nOCIe KaKdOrO NCIOJIb3OBaHnI.
UncKa nIbIeSc6OpHnKa nΦJIbTpa

BHIMAHINE:
Bce deTani ycTaHabnBaIte Ha MeCTo nocIe nonHoro BbICyUmbaHia!
He MoIte qIbtpbI B NocydomooeHou MaHHe H He IcNoJIb3yIe pEHN DnA cyuK BONOC.

PIMEACHIA:
UHCTHTe dHnIbTp C NOMOULbHO UTeKMI.
- Haxmte DBe KhoNk OCBO6OKeHnra (3) nIe6OpHnka IraeroOCBO6OKeHnra.
- BbHbTe nbIe6OpHnK n3 npu6opa. (Pnc.D)
- Akkypatho CHIMMTE KpbliuKy nbIeScbopnka. Be3 ycnHnO tBeDInTe OINN H3 pKcTOpOB c60ky B cToPOHy OT nbIeScbopnka n ocB6oDInTe KpbliuKy. (Pnc.E)
4.Дерka nbIe6bOpHnK Hd MycOpHbIM KOHTeHepOM, n3BNEKeITeФЛьТР.(Pnc.F)
5. BbItpxHnTe coepKIMoe nbIeNec6OpHnKa B MycOpHbI KOHTeHep n AkkypaTHo Bbl6eIte NIN NOHCTnTe UeTKOJ fJIbTp.
6. O6a KOMnHOHeHTa MOxH0 NmBtB npOToHoi BDoI. IpeE yCTaHObKOHa MecTO TuaTeNbHO npocuWnte KOMnHOHeTbI.
7.ПочNTte ueTko OTcK nbIe6bOpHnka B npIbope neped BCtABKO nbIe6bOpHnka.IpeBepHnTe npIbOp n noCTte ueTKo cOnna n dHO npIbopa.IpoTpne Kopnyc cyxoi nn CJIerKa BlaXHoT kHaHbIO.
8.BCTaBtE pNlBtp B nIbIeSc6OpHnK (nnactMaCCOBa peWetKa DOJNkHa 6bITb ObaPeHa BBepx).
9. BCTaBbTe nbIeNc6OpHnK B npIbOp TaK, YTObI OH 3auJen-KHyJcR.
YnCTKa/3ameHa/kpenJeHne HacaKn dna nola
Co BpemeHem HacaIka IINI NOI MoKet 3aIrpA3Htbc. Ee MOXHO IOYNCHTb UINI 3aMeHITb.
- Ппевернite пибор и полхиerte erо на по пин ha CTON.
- Hacika Дяпona Кренистя Кл actMaccobomy DepxkaTeIIO (16).On KpeiniTcK npibopy c leboi n C npaboi CTOpOH pRdOM C npIBOHNbIMK ONEcamn (14) and (17). Bo3bMIteCb 3a y3kN KOHeC DepxkaTeJI NaIbCaAM N Bbl- TAHNTe B HaprablenH IN PpIBoNDHO KOleca, IOKA OH IIndet CBO6OJHO.Tenepb MoXHo ChrTb DepxkaTeJI b C npibopa. (Pnc.G)
3.ПepeBepHnTeДePkaTeIbИБыTЯHnTe Hacayu 34 aKHMOB. - Tenepb MoxHOb IpombItb HacaKy TeTnO BDOI MRAKIM MOUcIM CpeDCTBOM. NocTaBnEMbIe HacaKn He npedHa3NaYeHbI DnM MytB B NocyDomOeHOn MaunHe! PoiHocTbIO npocuWite HacaKy neped ee yCTaHOBko CHOBa.
- BbIbOcBte HacaIKy NocIe N3HOca N 3aMeHnTe ee HOBOI. IIOXKITE ee Ha depKaTeIb N 3aKMnTe Ha KOHax 4 aKIMAMn. (Pnc.H)
- 3axmnte depkateB bKcataopax cH3y np6opa n npoBepTe HaedxHOCTb yCTaHOBNK.
I PIMMEUAHNIA:
HacaiknIJIpaNJaTakKe MoXHo KynITb Bpo3HnHOI TOPROBcETn.
- OTeBepTka DnyyypoUeHnry yctaHOBKn HacaKn Dnna nona npinaraetc.
YcTpaHHe HEnCnpaBHOCTe

- JEZYK POLSKI
- Spis tresci
- General Safety Instructions
- Symbols in these Instructions for Use
- WARNING:
- CAUTION:
- NOTE:
- Children and Frail Individuals
- WARNING!
- Special Safety Instructions
- Overview of the Components
- Basic Functions
- Start-up
- i NOTE:
- Connect the Battery Cable (Fig. A)
- Charge the Battery (Fig. B)
- Operating Instructions
- Prepare the Room
- Use Instructions
- Cleaning and Maintenance
- Empty the Dust Container and Clean the Filter
- OTE:
- Clean/Replace/Attach the Floor Cloth
- Noise development
- Technical Data
- Power Adaptor
- Disposal
- Remove Batteries / Battery Disposal
- WARNING
- Meaning of the "Dustbin" Symbol
- Instrukcja obslugi
- CnpoxkHeHHaEMHocTl dna 6pyDa Ta uHcHnHa pInbtpa
- YBARA.
- PUMITKA.
- YiueHHa Ta nid'edHaHnTkAHHHoHa cAdKn nn niDnorn
- I PIMMITKA.
- BnMaHHy /ytniiazia6atapei
- IIOPEEDKEHHRA
- PykoBoCTBO no 3Kcnnyatau
- 06uue yka3aHnno TExHnke 6e3oNaCHOCTn
- CnMBOJI npIMeHReMbIe B DaHHOM pyKOBoDCTBe NOJIb-3OBaTeJr
- IPEyIPEKDEHNE:
- BHIMAHINE:
- I\Pi\PiMeUaHInA:
- TeHn nIuHa HyKdaIouMeecB npncMOrpe
- IPEyIpyEeHHeI
- CneuaJIbHbIe yka3aHnno TExNHKe 6e3ONaCHocTn
- TPEyTPEJKDEHNE:
- 063op detae np6opa
- OCHOBHbIe yHKUIN
- Nyck B pa60ty
- ПИМЕЧАнЯ:
- IpoednneKabena6aTapei (pnc.A)
- 3apka 6aTapeu (pnc.B)
- PIMEYAHIA:
- Hnctpykun no pa6oTe
- IoproTOBka KOMHaTbI
- HCTpykunno nncnol3oBAHHIO
- Ynctka n o6nykubahne
- PENYIPPEXDEHNE:
- UncKa nIbIeSc6OpHnKa nΦJIbTpa
- PIMEACHIA:
- YnCTKa/3ameHa/kpenJeHne HacaKn dna nola
- I PIMMEUAHNIA:
Brand : BOMANN
Model : BSR 913 CB
Category : Vacuum Cleaner