USER MANUAL C903IP.2 ELRO
Thank you for your purchase of the C903IP.2 network camera. We recommend that you carefully read this manual before use in order to use your camera as quickly and easily as possible.
You can find the illustrations from this manual prior to this chapter.
| smartwares
safety & lighting b.v. | NL:0900-2088888 lokaal tarief |
| BE:070-233031 lokaal tarief |
| F:0825 560 650 15ct/min |
| Broekakkerweg 15
5126 BD Gilze
The Netherlands | DE:+49 (0) 1805 010762
14Ct./Min. dt. Festnetz,
Mobil max. 42Ct./Min |
| UK:+44 (0) 845 230 1231 |
| WWW.ELRO.EU | ES:+34 938427589 |
1. Preventive measures and safety instructions
1.1. Safety symbols used
Warning! A warning indicates the risk of (serious) damage to the user or the product if the user does not carry out the procedures with care.
Pleasednote! A comment makes the user aware of possible problems.
Tip: A tip makes the user aware of convenient functions and additional options.
1.1.1. Notifications
Warning! Do not install the product in any place that might be exposed to extreme heat or cold.
Warning! Before beginning assembly, check to make sure there are no electrical wires or water pipes running through the wall where you want to drill.
Warning! By removing the plug from the power outlet, you immediately cut off power to the product; then contact the Smartwares service desk when:
suffered a hard fall;
Warning! It is not permitted to open the product yourself or to have it opened, neither is it permitted to repair the product yourself or to have it repaired. This will void the warranties. Please let any maintenance be carried out by certified maintenance personnel.
Warning! Only use original accessories from the manufacturer.
Warning! Keep the product out of reach of children.
Warning! Disconnect the device from all power sources before cleaning it.
Warning! Use a clean, dry cloth to clean the product.
Warning! Do not use any abrasive agents, corrosive cleaning products or any substances that contain bleach or solvents to clean the product.
Warning! Remove the adapter from the power outlet during storms, lightning and whenever the product will not be used for a longer period of time.
Please note! Install the product as indicated in this manual. If in doubt, consult a recognised technician and always take account of local installation codes and regulations.
Please note! The camera should be kept out of direct sunlight.
Please note! Do not point the camera at bushes, tree branches or other moving objects.
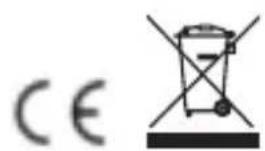
Pleases note! The product must not be discarded as unsorted municipal waste, it must be disposed of separately.
Pleases note! Find out about the options in your region for disposing of the product after use. Do not throw away electrical appliances or components, but see whether the product (components) can be turned in, recycled or reused.
Pleasednote! Wireless systems can be affected by interference from wireless telephones, microwave ovens and other wireless devices that operate in the 2.4 GHz range. Keep the product at least 3 metres away from any possible sources of interference during installation and operation.
Pleasednote! The camera is not able to view through glass at night. Keep this in mind when positioning it.
2. Intended use
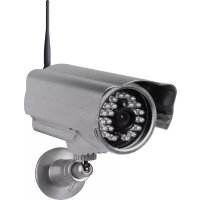
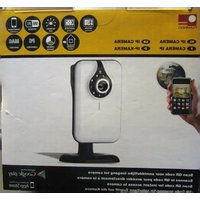
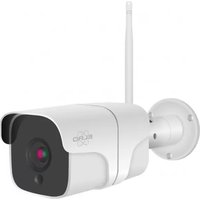
The C903IP.2 is a security camera that makes it possible to view surveillance images via a local network, an Internet connection or the Elro App "ELRO INSTALL" on your smartphone. The C903IP.2 can be connected either through an Ethernet cable or a Wi-Fi connection. The camera is equipped with infrared LEDs and is able to make video and audio recordings both during the day and at night. The camera has also been fitted with motion detection and can be used both indoors and outdoors.
3. Technical specifications
3.1. General product specifications
Sensor: 1/4" Colour CMOS Sensor
Resolution: 640 × 480 pixels (300k pixels)
IR Lens: f: 6mm, F 2.0
Viewing angle: 60 degrees
Minimal brightness: 0.5Lux @ F2.0
Night vision range: 20 meters
Video compression: MJPEG
Images per second: 15fps(VGA), 30fps(QVGA)
Power source: 230VAC/5VDC/2A Adapter
Energy consumption: 5W (Max.)
Temperature: -10^ 55^ (14°F~131°F)
Minimal system requirements:
CPU:
2.0 GHZ or higher
Memory:
256 MB or higher
Video card: 64 MB or higher
Supported OS: Windows 98/ME/2000/XP/Vista/7/8
Supported browsers: IE6.0-10.0, Firefox, Safari, Google Chrome
Supported mobile OS: iOS 4.3 and higher / Android 2.1 and higher
Certification: CE, FCC, RoHS, R&TTE
Warranty: Limited 3-year warranty
3.2. Main component parts ①
- 3 assembly screws and plugs
- C903IP.2 camera
- Camera base
- Detachable antenna
- Software CD-ROM
- User's manual
- DC supply
- Ethernet cable
3.3. Connections ②
- Antenna port
- Ethernet port
- DC connection
- Reset button
4. Camera installation
4.1. Connecting the camera

adapter plug into the power outlet.
Then insert the
5 Connect
the other end of the ethernet cable to your router. The green LED on the ethernet port will light up when the camera is connected to the network.
You can now operate your IP Camera using your smartphone or PC. Go to section 4.2 for use with smartphone and go to section 4.3 for installation on your PC.
4.2. Settings for smartphone use
Attention! To use the "ELRO INSTALL" App, you need a smartphone with internet access.
Attention! To scan a QR code, you need an APP that can scan barcodes.
To set up your camera using Android, go to section 4.2.1. To set up your camera using iOS, go to section 4.2.2.
4.2.1. Android


M1 Next, scan the QR code on the bottom of your camera. You can also choose to manually enter the code behind "UID". M2 You can find this code under the QR code on your IP camera.


Your camera has been added to your phone and will appear on the start screen of your App. On this you can see if the camera is connected (ONLINE) or if it is not connected (OFFLINE).
4.2.2. iOS
53 The "Add camera" menu appears.
52 Next, scan the QR code at the bottom of your camera.
"Add" button. Next, enter the code of your camera behind "UID". You can find this code under the QR code on your IP camera.


Your camera has now been added to your App and will appear on the home screen of your App. Here you can see if the camera is connected (Online) or not connected (Offline).
4.2.3. General
4.3. Install your camera on your PC
The IP camera tool is now installed on your computer. You will find the shortcut on your desktop.
Please note! Do not remove this shortcut! You will have to re-install the IP camera tool if you do.
4.4. Linking to your camera
Please note! To be able to use the IP camera's full functionality, you have to use Internet Explorer 6 or higher (32 bit) and select ActiveX Mode. It is not possible to make video recordings in other web browsers.
Please note! If you opt for the ActiveX mode there is a possibility that you will not have any picture yet. If this is the case, perform the following steps:
level D
and insertion applications. If the "Questions" option is not available, tick "Activate".
See also: E F G
Tip: if you wish to use a different web browser than the standard browser, copy the link from the open browser to a browser of your choice.
camera tool automatically searches for the IP camera(s) connected to your network.
A window opens A. This window displays all your IP cameras. If no cameras are connected, the window will remain empty.
identification window will open up asking for your user name.
password.
A menu will open B. You can choose from the following options:
ActiveX Mode: Internet Explorer
Server Push Mode: Safari, Firefox and Google Chrome
VLC Mode: Internet Explorer, Safari, Firefox, Google Chrome and
Opera
Please note! You have to download the VLC player for VLC Mode.
Sign in mobile phone: Access with a mobile browser
You are now logged in to the Network Camera browser screen. You can manage your camera and camera settings via this screen. (see chapter 6)
4.5. Linking to your camera wirelessly
Please note! In order to set up a wireless connection, your camera must be linked to your network via the included ethernet cable during set-up.
Please note! You need a wireless router in order to establish a wireless connection with your camera.
Please note! If your router is password protected, you will need to know the password.
will appear H

click on the "Network" tab. A list of settings
networks will appear.
this.
after "Share Key" or "key1", depending on the encryption.
The camera restarts automatically when you click 'submit'. This takes approximately 30 seconds.
camera wirelessly.
press the "refresh camera list" option.
4.6. Camera installation
Please note! Make sure that the camera functions properly in the chosen location before starting installation.
Please note! If the surface is too hard for the screws (stone/concrete), you will need to drill holes and use the screw plugs which are included.
7
4.7. Adjusting the camera angle
5. Managing your camera using your smartphone
Make sure your camera(s) is/are connected to your smartphone via the ELRO INSTALL App (see section 4.1 and 4.2).
5.1. You can view your camera image on your Android smartphone
picture appears on your smartphone.
The camera
Attention! If you do not have a picture it is possible that your wireless connection is not fast enough. In that case change the resolution of your camera image (see section 5.1.1)
The camera screen provides a number of options:
to make a snapshot of your camera image.
to adjust your sound settings.
5.1.1. Changing the settings of your camera on your Android smartphone
manage. A menu with options opens.
The
"Advanced settings" window opens. In the "Advanced settings" window you can change a number of properties of the camera.
The main functions are described below:
Modify security code Adjust the code of your camera. The default code is: 000000.
Video Quality R2: Adjust the resolution of your camera. If you have a slow wireless connection, change this setting to a lower setting.
5.2. Viewing your camera image on your iPhone
The camera
picture appears on your smartphone. W
Attention! If you do not have a picture it is possible that your wireless connection is not fast enough. In that case change the resolution of your camera image (see section 5.2.1)
The camera screen provides a number of options:
to make a snapshot of your camera image.
to adjust your sound settings.
5.2.1. Changing the settings of your camera on your iPhone
manage. A menu with options opens. In the "Advanced settings" window you can change a number of properties of the camera. The main functions are described below:
Security code: Adjust the code of your camera here. The default code is: 000000.
Video Quality: Adjust the resolution of your camera. If you have a slow wireless connection, change this setting to a lower setting.
6. Managing your camera using your PC

To be able to manage your camera from your PC, you need to be logged in to the "Network Camera" browser screen, with the aid of your web browser (see section 4.4). This screen contains the camera's control panel C1 a number of tabs C2 a channel overview C3 and a settings menu for the camera C4.
6.1. Camera control panel
You can use the control panel when you have selected the "live video" tab. This control panel provides the following options:
Play: Press "Play" to view your camera images live.
Stop: Press "Stop" to stop the live streaming of your camera images.
Record: Press "Record" to make a recording. Press record again to stop recording.
Please note! To be able to make recordings, you have to indicate where to save the recordings in the "Other" tab. This is explained in section 6.2.3.
Audio: Click on "Audio" to activate the sound. Click on audio again to turn the sound off.
6.2. Tabs
The tabs offer many different options for managing your camera(s). This manual covers the most important functions. If you would like to know more about specific settings, we advise you to consult the manual on the CD-ROM.
6.2.1. Live video
Click on the live video tab to view images from the set camera.
6.2.2. Network
Wireless Lan settings: This lets you set the wireless access to your camera. You can find more information in section 4.5 H.
DDNS Service settings: This lets you make your camera accessible via the Internet. Consult the manual on the CD-ROM for more information about this.
6.2.3. Other
Please note! Before you can save recordings in Windows 7, 8 or Vista, you need to make the following security setting changes in Internet Explorer. While changing these settings, make sure that the Network Camera screen is open in Internet Explorer.
Sites
Path settings: Under the "Path settings" option, select where you want to save the recordings that your camera makes
6.3. The camera's channel overview 3
With the channel overview you have the option to view images from multiple connected cameras simultaneously.
You can adjust the camera's image settings using this menu: resolution, image speed, clarity and contrast.
7. Cleaning and maintenance
Warning! Disconnect the device from all power sources before cleaning it.
The devices are maintenance-free, so do not open them. Opening the device will void the warranty. Only clean the outside of the devices with a soft, dry cloth or brush
8. Environment and disposal
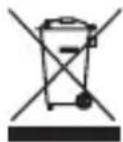
The symbol on the material, accessories or packaging indicates that this product may not be discarded as household waste. Dispose of the equipment through a recycling centre that handles electronics and electrical appliances within the EU and in other European countries which use separate collection systems for used electronics and electrical appliances. By disposing of the equipment in the proper way, you will be helping to prevent possible risks to
the environment and public health, which might otherwise be caused by improper handling of the discarded equipment. Recycling of materials contributes to the conservation of natural resources. Therefore, please do not dispose of your old electronics and electrical appliances via household waste.
9. Warranty
A limited 3 year warranty applies to this device. To view the warranty terms please go to: www.elro.eu.
Modify security code R1
IR Lens: f: 6mm, F 2.0
Kijkhoek: 60 Graden
Minimale Lichtsterkte: 0.5Lux @ F2.0
ActiveX Mode: Internet Explorer
Server Push Mode: Safari, Firefox en Google Chrome
VLC Mode: Internet Explorer, Safari, Firefox, Google Chrome en
Opera
Letop! Voor de VLC Mode dient u de VLC player te downloaden.
Portee vision nocturne: 20 metres
Compression video: MJPEG
Images par seconde: 15ips(VGA), 30ips(QVGA)
Certifications: CE, FCC, RoHS, R&TTE
Garantie: Garantie limite de 3 ans
presents commander your camera a distance.
CE, FCC, RoHS, R&TTE
Eyyunon:
Nepiopioevn 3-etnoia eyyunon
3.2. Ta pio oŋμavtiká εξαρτήμata ①
ActiveX Mode: Internet Explorer
Server Push Mode: Safari, Firefox a Google Chrome
VLC Mode: Internet Explorer, Safari, Firefox, Google Chrome a Opera
Upozornén! Pro VLC Mode je nutno stahnout si VLC player.
Prijlasei prs mobili telefon: Pristup na mobilim prohligei
Tanusftvany: CE, FCC, RoHS, R&TTE
ActiveX Mode: Internet Explorer
Server Push Mode: Safari, Firefox és Google Chrome
VLC Mode: Internet Explorer, Safari, Firefox, Google Chrome és Opera
Certificate: CE, FCC, RoHS, R&TTE
ActiveX Mode: Internet Explorer
Server Push Mode: Safari, Firefox i Google Chrome
VLC Mode: Internet Explorer, Safari, Firefox, Google Chrome i Opera
Napomena! Preuzmite VLC player za VLC Mode.
Prijavi mobilni ureddaj: Pristup sa mobilnim preglednikom
Sada ste prijavljeni u preglednik Mrežne Kamere Putem ovog preglednika možete upravljati kamerom i postavkama kamere. (pogledajte poglavlje 6)
4. Camera installation
ActiveX Mode: Internet Explorer
Server Push Mode: Safari, Firefox e Google Chrome
GB Smartwares hereby declares that the device complies with the essential requirements and other relevant provisions of Directive 1999/5/EC. Go to www.elro.eu for the declaration of conformity or scan the QR code.
D Hiermit erklart Smartwares, dass sich das Gerät in Übereinstimmung mit den grundlegenden Anforderungen und den übrigen einschlagigen Bestimmungen der Richtlinie 1999/5/EG befindet. Die Konformitätserklärung finden Sie auf www.elro.eu oder scannen Sie den QR-Code.
NL Hierbij verkaart Smartwares dat het toestel in overeenstemming is met de essentiele eisen en de andere relevante bepalingen vanrichtlijn 1999/5/EG. Ga waar www.elro.eu voor het document van conformiteit of scan de QR code.
F Par la presente Smartwares declare que l'appareil est conforme aux exigences essentielles et aux autres dispositions pertinentes de la directive 1999/5/CE. Pour le document de conformité, visitez www.elro.eu ou scannez le code QR.
PL Niniejszym Smartwares oswiadca, ze wyrrob jest zgodny z zasadniczymi wymogami oraz pozostalymi stosownymi postanowieniami Dyrektywy 1999/5/WE. Certyfikat zgodnosci przy poubrac ze strony www.elro.eu, lub ceskanować kod QR. W celu poubrania deklaracje zgodnosci przyd z do witryny www.elro.eu lub ceskanuj kod QR.
Por medio de la presente Smartwares declar que el equipo cumple con los requisitos esenciales y cualesquieraoras disposiciones aplicables o exigibles de la Directiva 1999/5/CE.Para ver el documento de conformidad,visite www.elro.eu o digitalice el@cdoigo QR.
GR Me to npawv n Smartwares otu oakevivai oupwn me tic onnavtikec anaitheic kai tacaae c xetikc diataeic tnc odnyiac 1999/5/EG. IyaiveTe OTO www.elro.eu yia to eyypaopo oumuoppwongn oapwot ToV kwokr QR.
CZ Smartwares timto prohlasuje, ze toto zaifzeni odpopvida zakladnim pozadavkum a dalsim ustanovenim smernice 1999/5/ES. Dokument o shod e najdete na strance www.elro.eu nebo k nemu prjejdtene naskenovanim QR kodu.
H A Smartwares ezennel kijelenti, hogy a keszülek megfelel az 1999/5/EK irányelvek alapvető kovetelményeinek és mas vonatkozó elöirasainak. Lepjen tovább a www.elro.eu oldalra a megfeleloségi nyilatkozathoz, vagy szkennelje be a QR kódot.
RO Smartwares declară prin prezenta cà echipamentul se afla in conformitate cu cerinteile esentiaeși alte prevederi relevante ale Directivei 1999/5/CE. Pentru declaratia de conformitate mergeti la www.elro.eu pau scanati codul QR.
TR Isbu belge ile Smartwares bu cihazin 1999/5/EC Direktifinin temel gereklilikinerine ve diger ilgili hukumlerine uygun oldugunu bany erder. Uygunluk belgesi icin www.elro.eu adresine gadin veya QR kodunu tarayin.
HR Smartwares ovime izjavljue da uredaj uodovljava svim osnovnim zahtjevima i ostalim relevantnim odredbama direktive 1999/5/EZ. Dokument o sukladnosti potrazite na www.elro.eu ili skenirajte QR kód.
Smartwares dichiarac on la presente che l'apparecchio e conformare alle esigenze essenziali e alle altre disposizioni pertinenti della direttiva 1999/5/CE. Per il documento di conformità, visitare www.eiro.eu o eseguire lo scan del codice QR.

Authorized representative: Mr. Ad Netten
Quality Manager
Date: 01.02.2013