BX 518 VW VE - Fridge AMANA - Free user manual and instructions
Find the device manual for free BX 518 VW VE AMANA in PDF.
Download the instructions for your Fridge in PDF format for free! Find your manual BX 518 VW VE - AMANA and take your electronic device back in hand. On this page are published all the documents necessary for the use of your device. BX 518 VW VE by AMANA.
USER MANUAL BX 518 VW VE AMANA
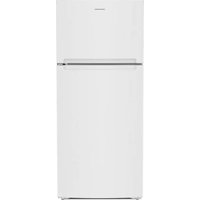
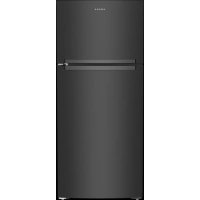
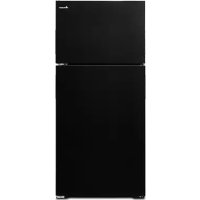
International Bottom Freezer Refrigerator Owner's Manual
English Section. 2
Dansk 15
Deutsch 30
Francais 45
Espanola 60
Nederlands 75
Norsk 90
Italiana 104
EXEIOIOIIOKTHN 178
Portuguesa 134
Suomi 149
Svenska 164
Keep these instructions for future reference. Be sure this manual stays with refrigerator.
International Bottom Freezer Refrigerator Use and Care Manual Contents
Electrical Requirements 2
Model Identification 2
Proper Disposal of Your Refrigerator 2
Installation Instructions 2
Installation Checklist 5
Controls. 6
Fresh Food and Freezer Controls 6
Setting Controls 6
Fresh Food Features. 6
Fresh Food Shelves 6
Garden FreshTM Crisper 6
Storage Rack (some models) 7
Covered Storage Bucket (some models) 7
Dairy Center (some models) 7
Door Buckets 7
Tall Package Retainer 7
Door Shelves 7
Adjustable Divider 8
Bottle Holder. 8
Freezer Features. 8
Frost-Free System 8
Ice Service Rack (some models) 8
Slideout Shelf (some models) 8
Vertical Shelf Divider (some models) 8
Fixed Wire Shelf (some models) 8
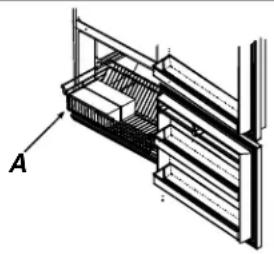
Wire Basket (some models) 9
Ice Bin (some models) 9
Care and Cleaning 9
General Cleaning 9
Odor Removal 9
Adhesives 9
Door Gaskets 9
Condenser Coils. 9
Glass Shelves 10
Light Bulb Replacement 10
Vacation Tips. 10
Energy Tips 10
Normal Operating Sounds 11
Before Calling For Service 12
Warranty 14
Note:
Translation may sometimes cause variations in meaning. In all cases where meaning varies, the most accurate meaning will be the English version of this document.

Recognize this symbol as a safety precaution.
Electrical Requirements
Refrigerator is designed to operate on a separate 230 volt, 50 Hertz., 10 amp. circuit.
Model Identification
Product information is on the serial plate. Record the following information.
Model Number:
Manufacturing Number:
S/N or Serial Number:
Date of Purchase:
Dealer's name and address:

DANGER
Proper Disposal of Your Refrigerator
IMPORTANT: Child entrapment and suffocation are not problems of the past. Junked or abandoned refrigerators are still dangerous--even if they will sit for "just a few days." If you discard an old refrigerator, please follow the instructions below to help prevent accidents.
Take off the doors.
- Leave the shelves in place so that children may not easily climb inside.

Installation Instructions
Introductions
A qualified engineer must connect refrigerator in accordance with these installation instructions.
Measure door opening and depth and width of refrigerator.
Remove handles or doors as required. Engineer must follow local water and electrical company connection regulations.
Service to, or replacement of, power cord must be performed by a qualified servicer.
Proper installation will ensure that this refrigerator operates most efficiently. Amana Appliances cannot be responsible for improper installation.
Installation Requirements
- Install on an earthed outlet with a separate 230 volt, 50 hertz, 10A circuit.
- Protect soft flooring with cardboard or rugs.
- Install on a floor which supports up to 429kg
- Provide 25 millimeter clearance on top and 5 millimeter on sides of refrigerator.
NOTE: Do not install the refrigerator near an oven, radiator, or other heat source. Do not install refrigerator in a location where the temperature will fall below 13^ .
1. Removing Wooden Base

CAUTION
- To avoid personal injury or property damage, two people must remove wooden base.
-
To avoid mechanical failure, do not leave refrigerator on side longer than necessary to remove bolts.
-
Tape doors on top right and left corners to prevent doors from opening unexpectedly.
- Slide appliance cart under side of refrigerator opposite hinges.
- Wrap refrigerator with blanket or pad. Thread strap around refrigerator. Put foam shipping pads, located in shipping carton, under strap. Tighten strap securely. Do not overtighten strap.
- Lower appliance cart to floor with appliance cart handles on bottom.
- Remove top two bolts from skid.
- Return refrigerator and appliance cart to an upright position. Remove strap.
- Slide appliance cart under opposite side of refrigerator.
- Repeat steps 3-5.
- Remove wooden base.
- Return refrigerator and appliance cart to an upright position. Move refrigerator in front of final location and remove appliance cart.
2. Remove and reverse doors if necessary.
Some installations may require door reversal to achieve full door swing. To reverse door swing direction perform the following steps:
Tools Required
Wrenches and drivers as applicable
Phillips screwdriver
Blade screwdriver
Masking tape
IMPORTANT: For plug removal requiring use of flat blade screwdriver or putty knife, blade of tool must be covered with masking tape to avoid damage to refrigerator finish. For plugs using a screwdriver or nut driver style head, use appropriate tool to avoid damage to plugs.
-
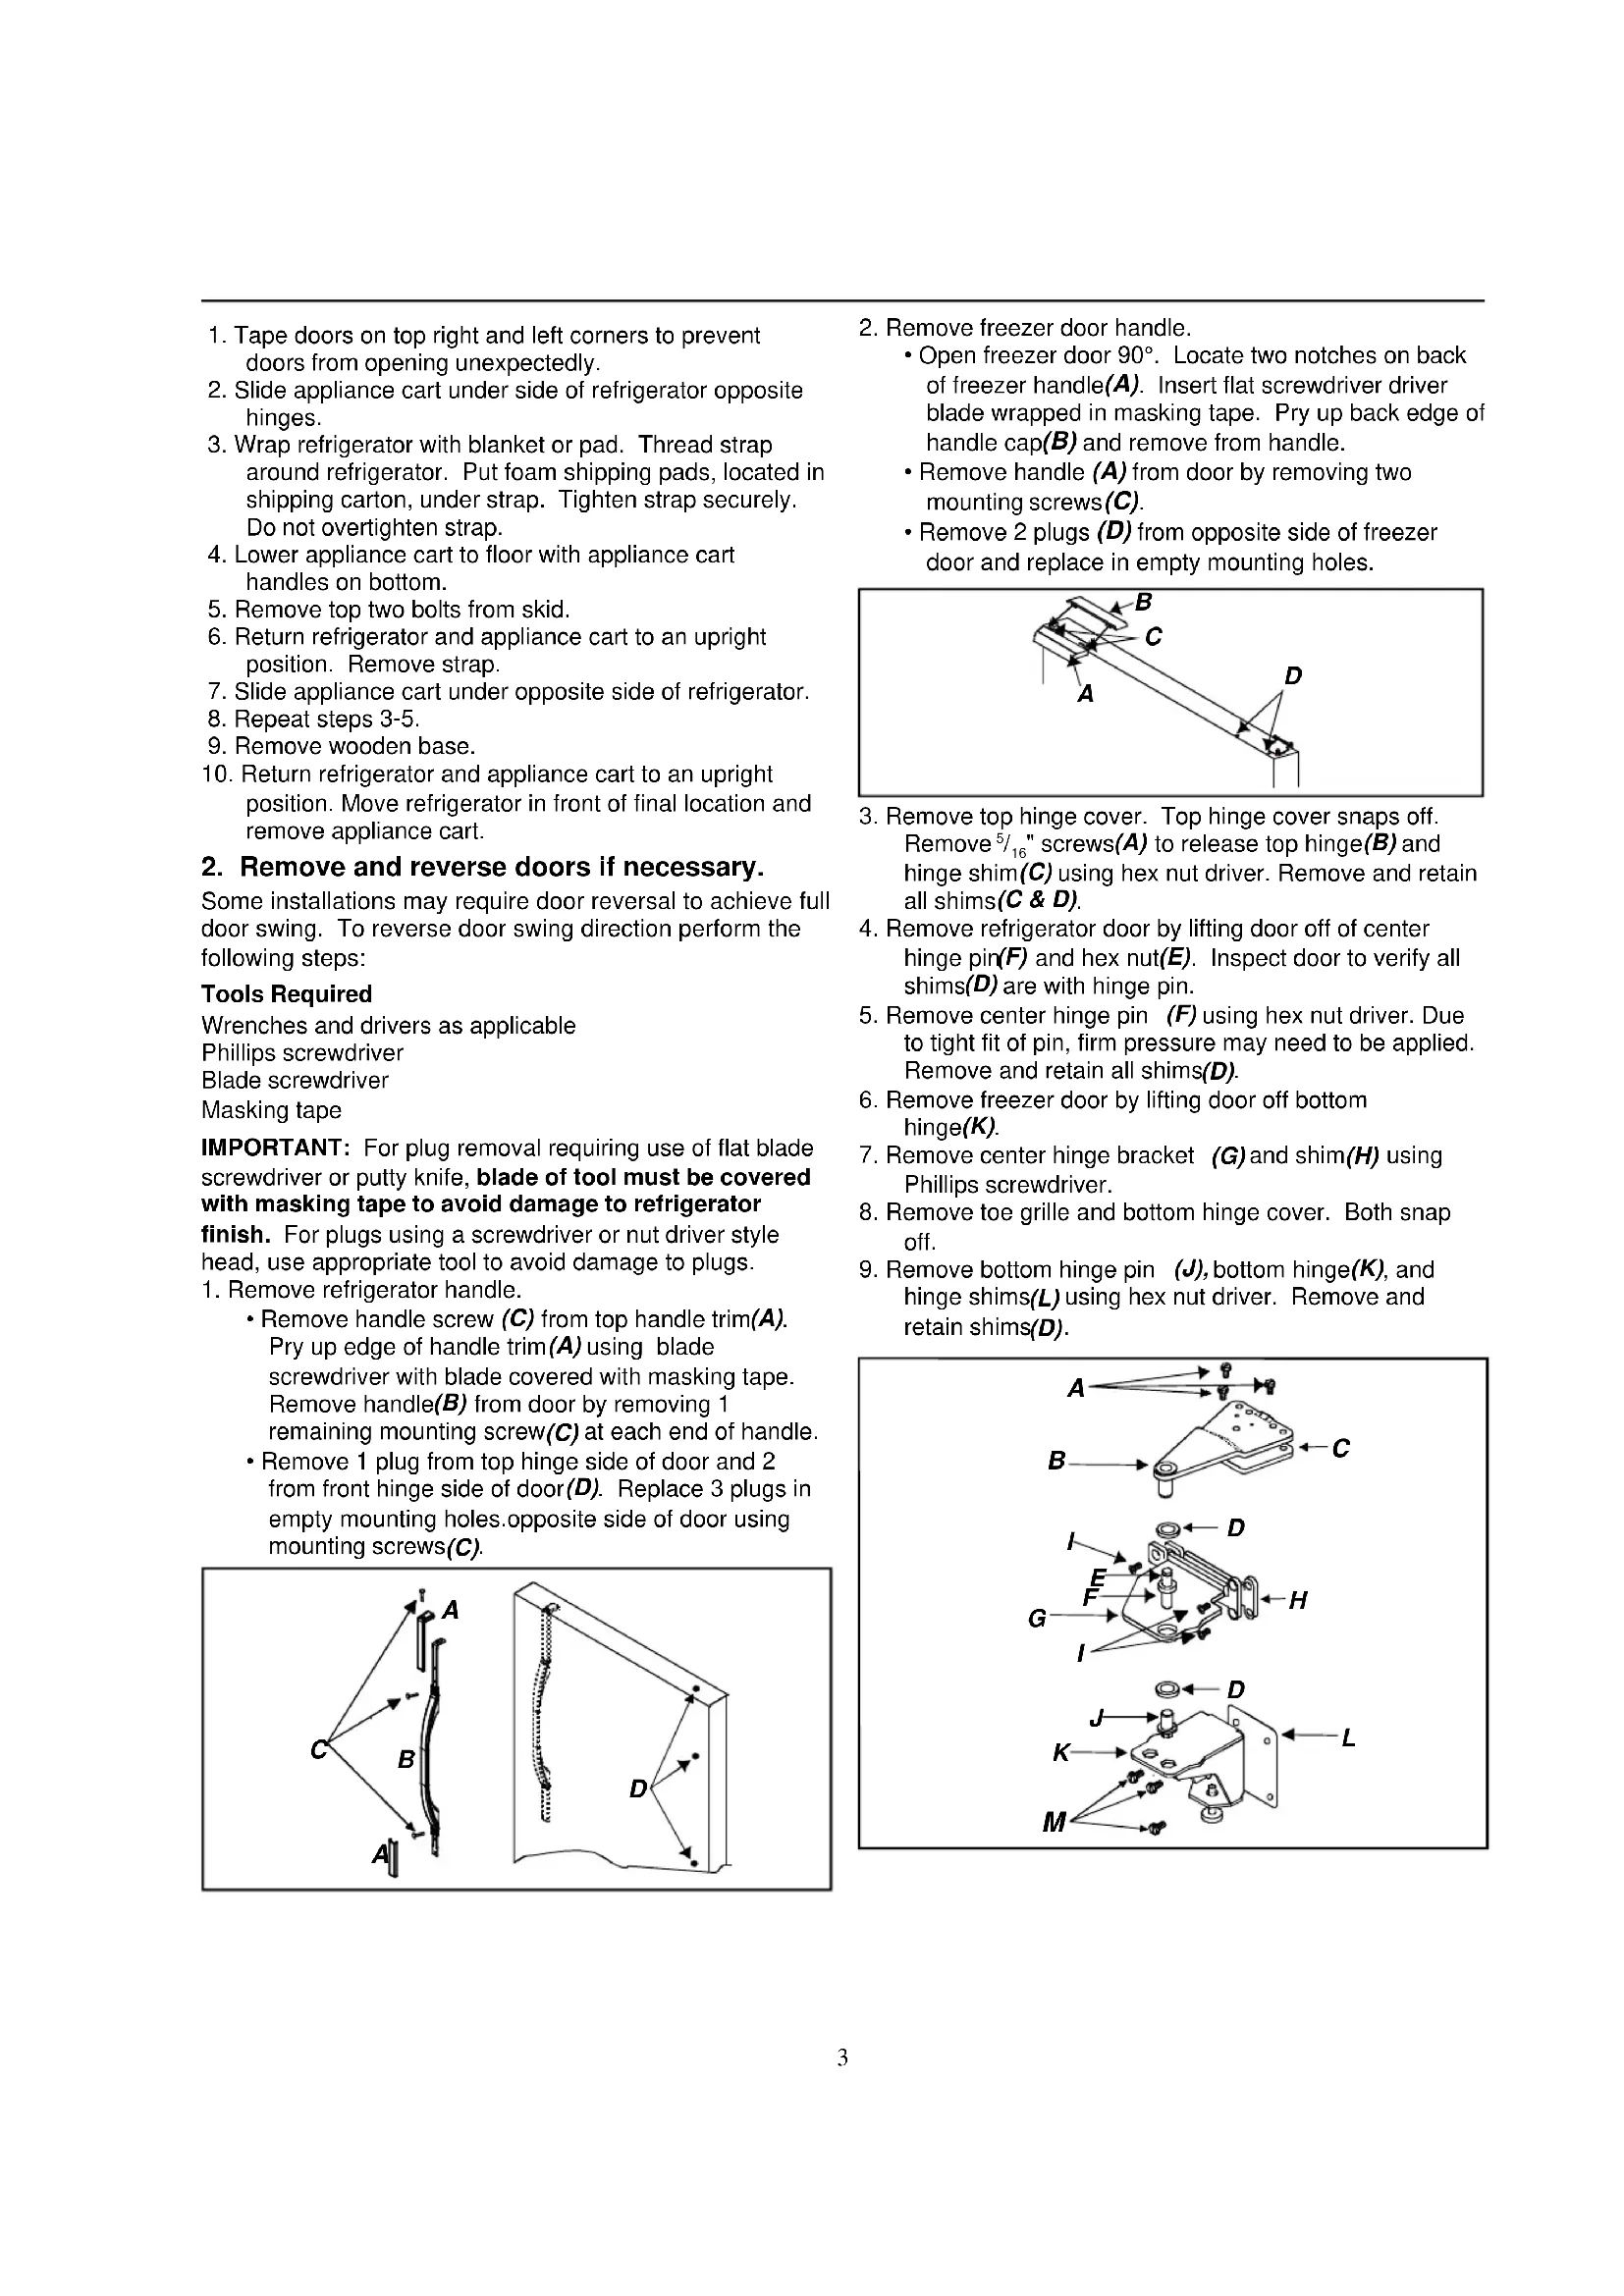
Remove refrigerator handle.
-
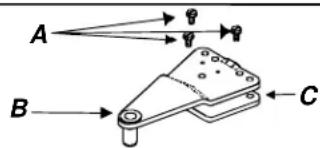
Remove handle screw (C) from top handle trim(A). Pry up edge of handle trim(A) using blade screwdriver with blade covered with masking tape. Remove handle(B) from door by removing 1 remaining mounting screw(C) at each end of handle.
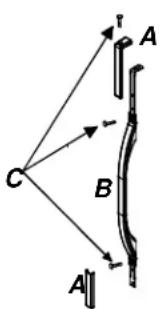
- Remove 1 plug from top hinge side of door and 2 from front hinge side of door(D). Replace 3 plugs in empty mounting holes.opposite side of door using mounting screws(C).
-
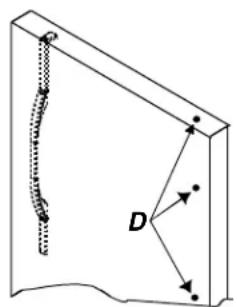
Remove freezer door handle.
-
Open freezer door 90^ . Locate two notches on back of freezer handle(A). Insert flat screwdriver driver blade wrapped in masking tape. Pry up back edge of handle cap(B) and remove from handle.
- Remove handle (A) from door by removing two mounting screws (C) .
- Remove 2 plugs (D) from opposite side of freezer door and replace in empty mounting holes.
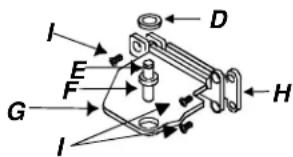
- Remove top hinge cover. Top hinge cover snaps off. Remove 5 / 16 screws(A) to release top hinge(B) and hinge shim(C) using hex nut driver. Remove and retain all shims(C & D).
- Remove refrigerator door by lifting door off of center hinge pin(F) and hex nut(E). Inspect door to verify all shims(D) are with hinge pin.
- Remove center hinge pin (F) using hex nut driver. Due to tight fit of pin, firm pressure may need to be applied. Remove and retain all shims(D).
- Remove freezer door by lifting door off bottom hinge(K).
- Remove center hinge bracket (G) and shim (H) using Phillips screwdriver.
- Remove toe grille and bottom hinge cover. Both snap off.
- Remove bottom hinge pin (J) , bottom hinge (K) , and hinge shims (L) using hex nut driver. Remove and retain shims (D) .
-
Reverse door stops.
-
Locate door stop (B) at bottom edge of refrigerator door(A). Unscrew two Phillips screws to remove door stop. Remove the two Phillips screws on opposite edge of door. Mount door stop on opposite side. Replace remaining screws in empty mounting holes.
- Repeat the above instructions to reverse door stop on freezer door.
- Reverse doors by performing the following steps:
- Remove plugs and screws in opposite side of refrigerator cabinet. Insert in holes left from hinge removal.
- Mount bottom, center, and top hinges with shims on opposite side of cabinet.
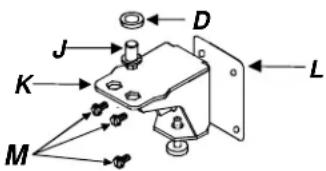
- Replace bottom hinge on opposite side of cabinet. Verify hinge shims are in position before screwing into place. After placing hinge pin into outside hole, replace round shims. Some bottom hinges may have plugs in holes. In case of this, remove plug from outside hole, put pin in hole, and replace plug in empty hole.
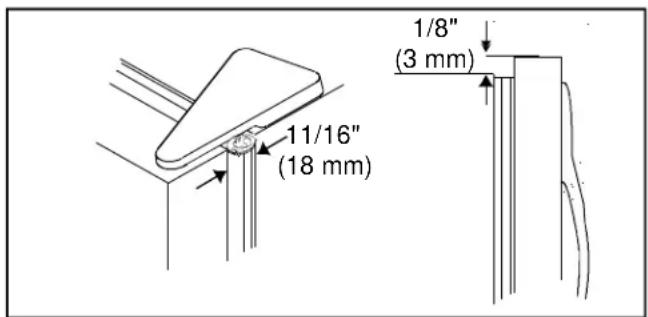
- Replace top hinge and shims, but allow enough clearance to slide hinge side of refrigerator door into place. Tighten down top hinge to securely hold door.
- Space door 1116 (18 mm) from cabinet.
- Handle side of door should be approximately 1/8 (3 mm) higher than hinge side. Door will become level when it is loaded with food.
- Mount refrigerator handle on opposite side of door using mounting screws removed in previous step.
- Snap handle trim into place and replace screw.
-
Mount freezer handle to opposite side of door using mounting screws removed in previous step.
-
Angle front edge of handle cap downward toward back lip of freezer handle. Verify bottom tab on freezer cap slides under rear lip of freezer handle. Snap rear edge of handle cap in place.
-
Check unit for proper leveling following instructions in starting with step 5.
- Replace toe grille and bottom hinge cover. Important: Look for arrow printed on inside of grille to insure proper placement.
- Snap top portion into place first. Press down on lower part of grille until bottom portion snaps into place.
3. Move refrigerator into final location.

CAUTION
Protect flooring with cardboard, rugs or other protective material to avoid property damage.
4. Plug in power cord.
- Power cord must be serviced only by a qualified service personnel. Special tools are required to service equipment. Contact nearest authorized service facility for examination repair or adjustment.
5. Level refrigerator.
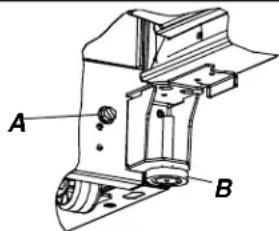
a. Turn roller adjustment screw(A) right to raise cabinet, and left to lower cabinet.
b. Adjust stabilizing leg (B) to support refrigerator firmly against floor.

CAUTION
To avoid personal injury or property damage caused by refrigerator tipping, stabilizing leg must be firmly against floor.
This checklist is for personal records only.
Consumer Installer
□
□
Doors
Handle side of door is 3mm higher than hinge side of door. (Door lowers when loaded with food.)
□
Doors seal completely to refrigerator cabinet.
□
□
Leveling
Refrigerator is tilted 6mm from front to rear.
□
□
Stabilizing leg is against floor.
□
□
Toe grille is properly attached to refrigerator.
□
□
Product Literature
Owner's manual is reviewed including the following information:
- Fresh Food and freezer controls
- humidity controlled risper drawer
- temperature controlled drawer
normal operating sounds
Notes
Consumer's Signature
Installer's Signature
Dateligner's Co.
Controls
This refrigerator is designed to operate at normal household temperatures of 13^ to 43^ .
Fresh Food and Freezer Controls
Fresh Food control is located on upper rear wall of Fresh Food section.
Freezer control is located on right front ceiling of freezer section.
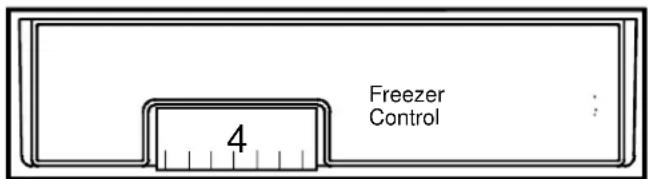
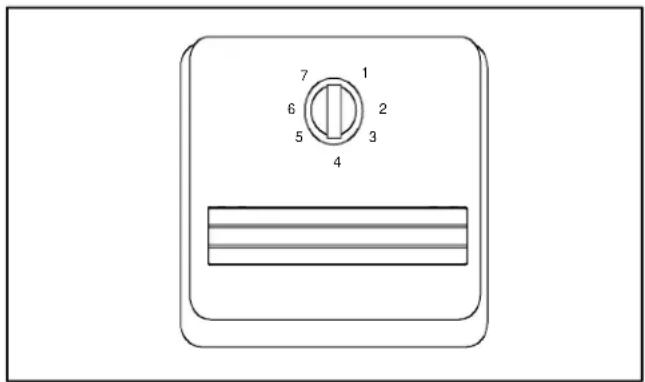
Setting Controls
When freezer control is set to neither refrigerator nor freezer sections will cool. Initially, set both controls to 4. Wait 24 hours for refrigerator and freezer sections to stabilize temperatures. After 24 hours, adjust controls, one number at a time, as desired. One is warmest setting and seven is coldest.
Set controls precisely using a household thermometer with a temperature range between -21^ to 10^ .
Put thermometer snugly between frozen packages in freezer section. Wait 5-8 hours. If freezer temperature is not -17^ to -16^ , adjust freezer control one number at a time. Check again after 5-8 hours.
Put thermometer in a glass of water in middle of Fresh Food section. Wait 5-8 hours. If Fresh Food temperature is not 3^ to 4^ , adjust Fresh Food control one number at a time. Check again after 5-8 hours.
Fresh Food Features
Fresh Food Shelves
Shelves adjust to meet individual storage needs. Some models feature SpillsaverTM Shelves and Easy GlideTM shelves. SpillsaverTM Shelves hold minor spills for easier cleaning.

CAUTION
Make sure shelf is secure before replacing items on shelf to avoid property damage.

CAUTION
Handle tempered glass shelves carefully to avoid personal injury or property damage. Shelves may break suddenly if nicked, scratched, or exposed to sudden temperature change.
- Remove shelves (A) by lifting up shelf front, releasing hooks (C) from metal track (B) , then pulling out.
- Replace shelves by inserting hooks (C) into metal track (B) and lowering front of shelf.
Easy Glide™ shelves pull forward for easy access to items in back.
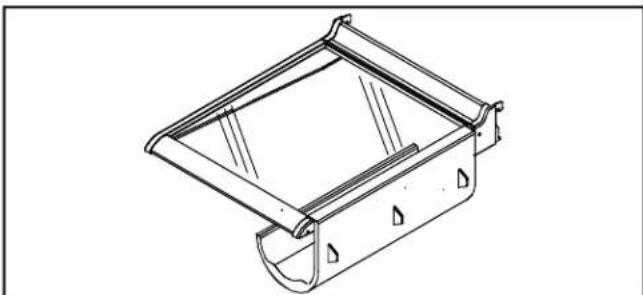
Garden Fresh™ Crispers
Garden Fresh™ crispers keep produce fresh longer. Wrap produce tightly. Do not wash produce before placing in crispers. Excess moisture could cause produce to spoil prematurely. Do not line crispers with paper towels. Paper towels retain moisture.
Garden FreshTM crispers control (D) is located below front shelf trim. Control adjusts humidity in crisper drawers. Slide control to high for produce with leaves such as lettuce, spinach or cabbage. Slide control to low for produce with skins such as cauliflower, corn or tomatoes.
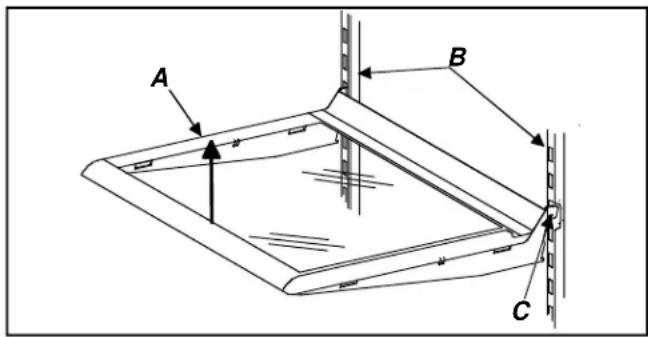
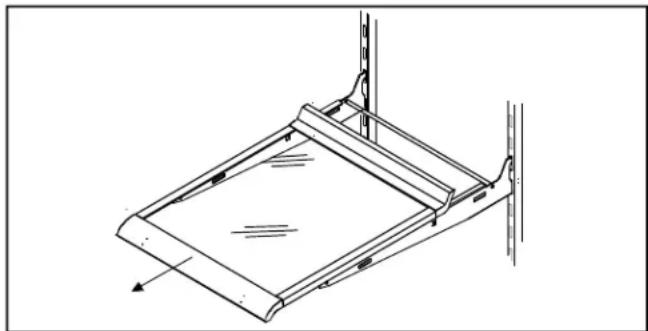
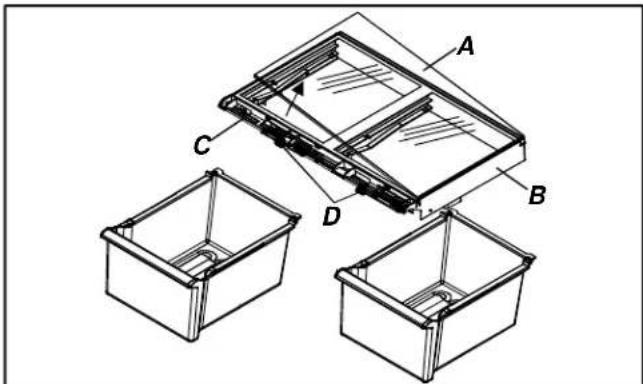
To clean or reposition crisper drawers, remove shelf and crisper drawers by completing the following steps:
-
Open left crisper.
-
For doors hinged on left, open right crisper.

CAUTION
Handle tempered glass shelves carefully to avoid personal injury or property damage. Shelves may break suddenly if nicked, scratched, or exposed to sudden temperature change.
- Remove glass crisper top (A) by gently pushing up from underneath. Tilt one end up and pull out.
- Remove left crisper drawer by lifting from front while supporting underneath and pulling out. For refrigerator doors hinged on left, remove right crisper.
- Remove other crisper drawer per step 3. If door restricts ability to remove drawer, remove drawer along with crisper frame per step 5.
- Remove risper frame (B) by raising frame by front plastic molding(C) and lifting free from grooves in the refrigerator cabinet rail assembly. Pull forward and out of unit.
- Replace crispers and shelf by performing steps 2-5 in reverse order.
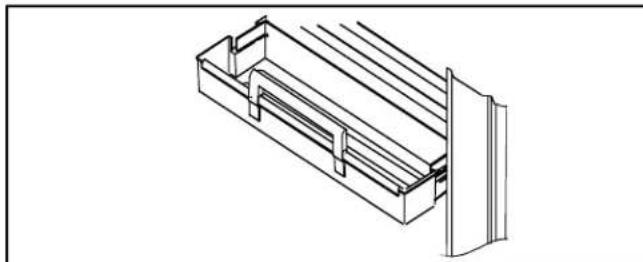
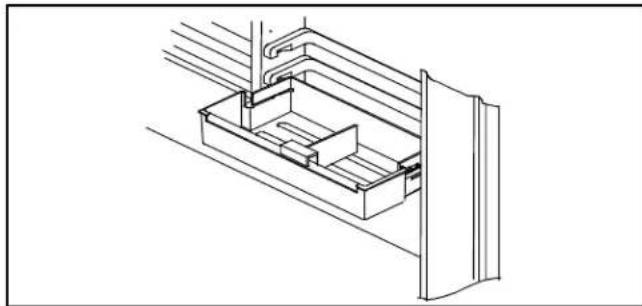
Storage Rack (some models)
Storage rack provides convenient storage for a large bottle, eggs, etc.
- Hang rack by hooking over side of shelf.
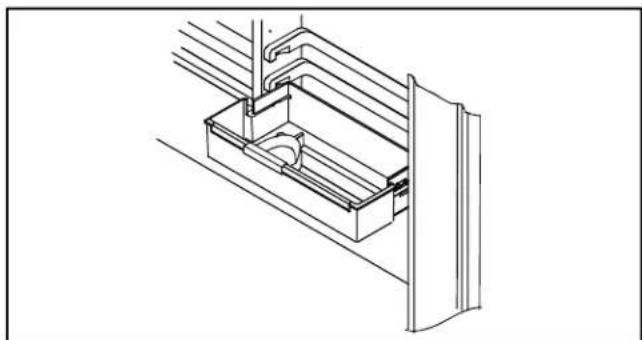
Covered Storage Bucket (some models)
The covered storage bucket has a lid and removable egg tray. When tray is removed, bucket will accept standard egg carton, ice, etc.
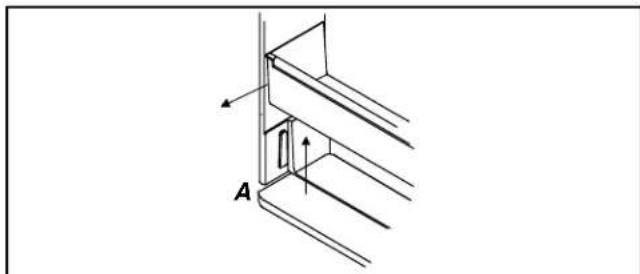
Dairy Center (some models)
The dairy center provides convenient storage for butter, cheese, etc.
- Remove dairy center by lifting door (A), pushing tabs(B) of shelf down on both sides, and pulling out.
- Replace dairy center by sliding in until tabs (B) lock into place, then lower door(A).
Door Buckets
Door buckets adjust to meet individual storage needs.
- Remove door buckets by pushing tabs(A) on both sides of shelves toward center and pulling bucket out.
- Replace door buckets by sliding in until tabs (A) lock into place.
Tall Package Retainer (some models)
Tall package retainer keeps tall items secure. Retainer fits on front edge of any refrigerator door bucket or door shelf.
Door Shelves
- Remove door shelves by lifting ends and pulling out.
- Replace door shelves by placing shelf on glides (A) and sliding down.
Adjustable Divider (some models)
Adjustable divider keeps items in place and adjusts to meet individual storage needs. Divider fits in any door bucket or door shelf.
Bottle Holder (some models)
Bottle holder keeps items in place and adjusts to meet individual storage needs. Bottle holder fits in any door bucket or door shelf.
Freezer Features
Frost-Free System
The Fresh Food and freezer sections are completely frost-free. Defrosting is automatic under normal conditions. Fresh Food and freezer sections never have to be defrosted.
Ice Service Rack (some models)
Install ice service rack(C) by placing ice service rack on screws and washers(A & B) and sliding down.

CAUTION
Make sure shelf is secure before placing items on shelf to avoid property damage.
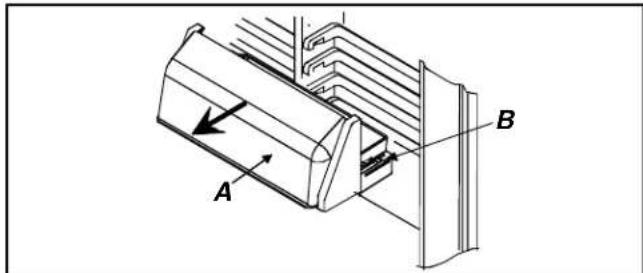
Slideout Shelf (some models)
Slide out shelf pulls forward for easy access to items in back.
- Remove slideout shelf by sliding forward until ball point(B) beneath center rail(A) catches in molding groove.
- Grasp shelf by center rail (A), pull up, and remove.
- Slide in until ball point (B) falls into molding groove.
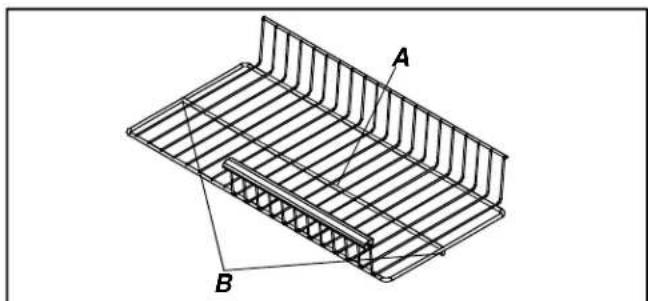
Vertical Shelf Divider (some models)
Install vertical shelf divider by completing the following steps:
- Slide prongs of shelf divider beneath desired grill work, slightly off-center from center rail.
- Press top of divider down and slide hook assembly beneath center rail.
Fixed Wire Shelf (some models)
- Remove wire shelf by pulling out. A sharp tug may be necessary.
- Replace wire shelf by sliding in until back locks in place.
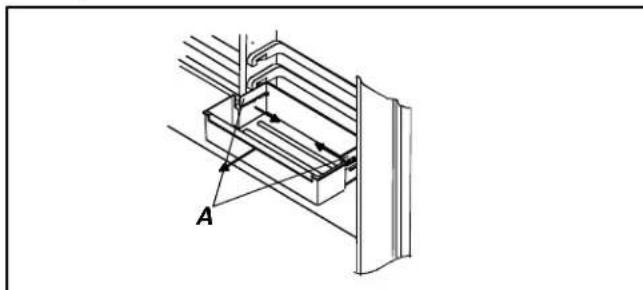
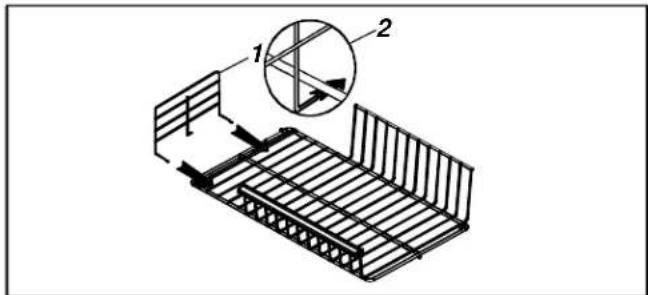
Wire Basket
Wire basket(A) slides out for easy access to items in back.
- Remove wire basket by lifting and pulling out.
- Replace wire basket by sliding in.
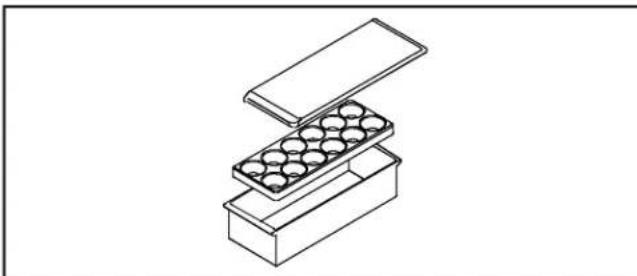
Ice Bin (some models)
Ice bin(A) sits below the ice service rack on the wire freezer shelf.
Care and Cleaning

WARNING
Disconnect power to refrigerator before cleaning to avoid electrical shock which can cause severe personal injury or death. After cleaning, restore power.

CAUTION
Read and follow all manufacturer's cleaning directions to avoid personal injury or property damage.
General Cleaning
- Wash surfaces and exterior with 60~mL baking soda dissolved in 1 liter warm water and a soft, clean cloth.
- Rinse surfaces and exterior with warm water. Dry surfaces with a soft, clean cloth.
-
DO NOT USE the following items:
-
abrasive or harsh cleaners, ammonia, chlorine bleach, etc.
- concentrated detergents or solvents
metal scouring pads
These items can scratch, crack, and discolor surfaces.
4. Do not place buckets, shelves, etc., in dishwasher.
Odor Removal
-
Remove all food and disconnect power to refrigerator.
-
Clean all interior surfaces including ceiling, floor, and walls according to general cleaning instructions above. Pay special attention to corners, crevices, and grooves. Include all drawers, shelves, and gaskets.
- Connect power to refrigerator and return food to refrigerator. Wash and dry all containers. Wrap foods in tightly sealed containers to prevent further odor. After 24 hours, check if odor has been eliminated.
Complete steps 4-10 if odor has not been eliminated.
- Remove all food and disconnect power to refrigerator.
- Clean all interior surfaces including ceiling, floor, and walls according to general cleaning instructions above. Pay special attention to corners, crevices, and grooves. Include all drawers, shelves, and gaskets.
- Place crispers on top shelf of refrigerator section. Pack refrigerator and freezersections, including doors, with crumpled sheets of newspaper.
- Place charcoal briquettes randomly throughout newspaper.
- Close doors and let stand 24-48 hours.
- Remove charcoal briquettes and newspapers.
- Connect power to refrigerator and return food to refrigerator. Wash and dry all containers. Wrap foods in tightly sealed containers to prevent further odor. After 24 hours, check if odor has been eliminated.
Adhesives
- Remove adhesive residue from refrigerator surfaces by rubbing toothpaste into adhesive with fingers until adhesive loosens.
- Rinse surface with warm water. Dry surface with a soft, clean cloth.
Door Gaskets
- Clean door gaskets every 3 months according to general cleaning instructions. Clean any spills immediately.
- Apply a light film of petroleum jelly to keep gaskets pliable.
Condenser Coils
Clean condenser coil behind toe grille every 3 months to ensure maximum performance of refrigerator.
Accumulated dust and lint may cause the following:
- reduced cooling performance
- increased energy usage
-
premature part failure
-
Remove toe grille by holding ends and pulling away from refrigerator.
- Clean front surface of condenser coil with a vacuum cleaner hose nozzle.
- Replace toe grille by inserting clips in holes and snapping in.
- Raise stabilizing legs (some models) by turning leg left.

CAUTION
Protect flooring with cardboard, rugs or other protective material to avoid property damage.
- Pull refrigerator away from wall. Run a vacuum brush across grille on back of refrigerator.
Glass Shelves

CAUTION
Handle tempered glass shelves carefully to avoid personal injury or property damage. Shelves may break suddenly if nicked, scratched, or exposed to sudden temperature change.
Remove shelf by lifting front, releasing hooks from metal track then pulling out. Place shelf on a towel. Allow shelf to adjust to room temperature before cleaning. Clean crevices by completing the following:
- Dilute mild detergent and brush solution into crevices using a plastic bristle brush. Let sit for 5 minutes.
- Spray warm water into crevices using faucet spray attachment.
- Dry shelf thoroughly and replace shelf by inserting hooks into metal track and lowering it from the front.
Light Bulb Replacement

WARNING
Disconnect power to refrigerator before replacing light bulb to avoid electrical shock which can cause severe personal injury or death. After replacing light bulb, restore power.

CAUTION
Observe the following to avoid personal injury or property damage.
- Allow light bulbs to cool
- Wear gloves when replacing light bulb.
Fresh Food Light
- Remove light bulb cover (B) by removing 14 hex nut screws(A). Replace with appliance bulb no greater than 25 watts.
- Replace light bulb cover (B) by replacing 14 " hex nut screws(A).
Freezer Light
- Remove light bulb cover (B) by removing 14 hex nut screws(A). Replace with appliance bulb no greater than 25 watts.
- Replace light bulb cover (B) by replacing 14 " hex nut screws (A).
Vacation Tips
Complete the following steps for short vacations.
- Remove perishable foods.
- If an ice maker is installed, move ice maker arm to Off position. (See "Automatic Ice Maker" section page 12)
Complete the following steps for long vacations.
- Empty refrigerator and freezer sections.
- Unplug refrigerator.
- Clean refrigerator and door gaskets according to General Cleaning instructions in "Care and Cleaning" section.
- Prop doors open, so air can circulate inside.
- If an ice maker is installed, turn off water supply to refrigerator and move ice maker arm to Off position. (See "Automatic Ice Maker" section page 12)
Energy Tips
This refrigerator is designed to be one of the most energy efficient refrigerators available. Reduce energy use by observing the following.
- Operate in normal household temperatures of 13^ to 43^ away from heat sources and direct sunlight.
- Set refrigerator, freezer, and temperature controlled meat drawer system controls no colder than necessary.
- Keep freezer section full.
- Keep door gaskets clean and pliable. Replace gaskets if worn.
- Keep condenser coils clean.
Normal Operating Sounds
This new refrigerator may be replacing a differently designed, less efficient or smaller refrigerator. Today's refrigerators have new features and are more energy efficient. As a result, certain sounds may be unfamiliar. These sounds are normal and will soon become familiar to you. They also indicate refrigerator is operating and performing as designed.
- Freezer control clicks when starting or stopping compressor.
- Freezer fan air rushes and whirs.
- Sealed system (evaporator and heat exchanger) refrigerant flow gurgles, pops or sounds like boiling water.
- Defrost heater sizzles, hisses or pops.
- Defrost timer sounds like an electric clock and snaps in and out of defrost cycle.
- Condenser fan air rushes and whirs.
- Compressor has a high pitched hum or pulsating sound and cycles on and off.
- Ice cubes from ice maker (some models) drop into ice bucket.
- Ice maker water valve hookup (some models) --not shown here--buzzes when ice maker fills with water. This occurs whether or not refrigerator is connected to water supply. If refrigerator is not connected to water supply, stop sound by raising ice maker arm to Off position. Ice maker water valve hookup is located behind condenser fan in back of refrigerator.
Note: Foam insulation is very energy efficient and has excellent insulating capabilities. However, foam insulation is not as sound absorbent as previously used fiberglass insulation.
| Problem Solution | |
| Refrigerator does not operate. | Make sure freezer control is on. Make sure refrigerator is plugged in. If not, firmly plug the cord into a live outlet with proper voltage. Check fuse or circuit breaker. Plug in another item at that wall outlet. If outlet does not work, replace the fuse or reset the circuit. If freezer control is on, light works but 2 fans and compressor are not operating, refrigerator may be in defrost cycle. Wait 40 minutes to see if refrigerator restarts. |
| Refrigerator still will not operate. | Unplug refrigerator. Transfer food to another refrigerator or place dry ice in freezer section to preserve food. Call for service. |
| Food temperature appears too warm. | See above sections. Allow time for recently added warm food to reach Fresh Food or freezer temperature. Adding food warms the refrigerator. It can take a few hours for the refrigerator to return to normal temperature. Check gaskets for proper seal. Gaskets should seal tightly to cabinet. Clean condenser coils. See “Condenser Coils” instructions in “Care and Cleaning” section. Adjust Fresh Food and freezer control. See “Setting Controls” instructions in “Controls” section. Freezer or refrigerator light stays on. If light stays on, remove bulb and call service. Return air vents behind crisper are blocked restricting airflow. Locate return air vent behind crispers and remove any debris that blocks vents or restricts airflow. |
| Food temperature is too cold. | Clean condenser coils. See “Condenser Coils” instructions in “Care and Cleaning section. Adjust Fresh Food control. See “Setting Controls” instructions in “Controls” section. Adjust freezer control to warmer setting. See “Setting Controls” instructions in “Controls” section. Allow several hours for temperature to adjust. |
| Refrigerator runs too frequently. | It may be normal to maintain constant temperature. Doors have been opened frequently or for an extended period of time. When the door is opened warm humid air is allowed into the refrigerator. The more the door is opened the more warm air the refrigerator must cool. Allow time for recently added warm food to reach refrigerator or freezer temperature. It can take a few hours for the refrigerator to return to normal temperature. Clean condenser coils. See “Condenser Coils” instructions in “Care and Cleaning” section. Adjust freezer control. See “Setting Controls” instructions in “Controls” section. Check gaskets for proper seal. Gaskets should seal tightly to cabinet. Freezer light stays on. If light stays on, remove bulb and call service Make sure refrigerator is level. See “Leveling Refrigerator” section of Installation Instructions. |
| Water droplets form on inside of refrigerator. | It is normal during high humidity periods or if doors have been opened frequently. Wrap food tightly and wipe off damp containers prior to storing in the refrigerator to avoid moisture accumulation. |
| Water droplets form on outside of refrigerator. | Check door seals for proper seal. Gaskets should seal tightly to cabinet. It is normal during high humidity periods or if doors have been opened frequently. |
| Refrigerator has an odor. | See “Odor Removal” instructions in “Care and Cleaning” section. |
| Refrigerator makes unfamiliar sounds or seems too loud. | It may be normal. See “Normal Operating Sounds” section. |
| Ice cubes have an odor. | See “Odor Removal” instructions in “Care and Cleaning” section. Food has not been wrapped tightly in either refrigerator or freezer compartment. Rewrap foods since odors may migrate to the ice if food is not wrapped properly. Discard ice and clean ice bucket or trays more frequently. Ice cubes are porous and absorb odors easily. Water supply contains minerals such as sulfur. In some situations a filter may need to be installed to eliminate taste and odor problems. |
| Ice cubes stick together or “shrink”. | Empty ice cube bucket or trays more frequently. If used infrequently, ice cubes may stick together or shrink. |
Limited One Year Warranty
Limited Five Year Warranty on Compressor
First Year
Amana will provide a free replacement part, f.o.b. Amana, Iowa, U.S.A., for any part which is defective due to workmanship or materials.
Second through Fifth Years
Amana will provide a free replacement part, f.o.b. Amana, Iowa, U.S.A., for any compressor which is defective due to workmanship or materials.
Warranty Limitations
- Begins at date of original purchase.
Service must be performed by an authorized Amana technician.
Warranty Is Void If
- Serial plate is defaced.
- Product is used on a commercial, rental or leased basis.
- Product has defect or damage due to product accident, alteration, connection to an improper electrical supply, fire, flood, lightning, shipping and handling, or other conditions beyond the control of Amana.
- Product is improperly installed or used.
Owner's Responsibilities
- Provide proof of purchase (sales receipt).
- Provide normal care and maintenance. Replace owner replaceable items where directions appear in Owner's Manual.
- Make product reasonably accessible for service.
- Pay premium service costs for service outside technician's normal business hours.
- Pay for service calls related to product installation or usage.
In no event shall Amana be liable for incidental or consequential damages including food loss*.
Any questions regarding the above or to locate an authorized servicer, contact appliance supplier or:
International Division
Amana
2800 220th Trail
PO Box 8901
Amana, IA 52204-0001
USA
Telephone 1-319-622-5511
Facsimilie 1-319-622-2180
International Division
Amana
2800 220th Trail
PO Box 8901
Amana, IA 52204-0001
USA
Telefon 1-319-622-5511
Fax 1-319-622-2180
International Division
Amana
2800 220th Trail
PO Box 8901
Amana, IA 52204-0001
USA
Telefon 1-319-622-5511
Fax 1-319-622-2180
International Division
Amana
2800 220th Trail
PO Box 8901
Amana, IA 52204-0001
ETATS-UNIS
Tél. 1-319-622-5511
Fax 1-319-622-2180
Contenor Garden FreshTM 65
International Division
Amana
2800 220th Trail
PO Box 8901
Amana, IA 52204-0001
USA
Telefon 1-319-622-5511
Fax: 1-319-622-2180
International Division
Amana
280D 220th Trail
PO Box 8901
Amana, IA 52204-0001
USA
Telefoon: +319-622-5511
Telefax: +319-622-2180
International Division
Amana
2800 220th Trail
PO Box 8901
Amana, IA 52204-0001
USA
Telefon: 1-319-622-5511
Telefax: 1-319-622-2180
International Division
Amana
2800 220th Trail
PO Box 8901
Amana, IA 52204-0001
USA
Telefon 1-319-622-5511
Fax 1-319-622-2180
AeEeEeyxepio XpnoC kal povtida To yuyo KaTwaugns
FeplexXueva
HεKtpiKc∑PiouuNooεε1 119
TaoXiaMoVTgAou 119
KaTaaanAnoppnTuouuyouoa 119
O8nyieEeykaTaOaOns 119
AOTA EYEXOU EYKATQoTaOg 123
Xeipotnpia 124
Xeipotnpa Suvtponnc kal Katauuenc 124
Punon XepioTnpw 124
Xapaktnpiotikα Xpou Suvtnpnonc 124
Papua Xwpou Suvtnpnoans 124
Oaaloi Xwpou Suvtnpnns Garden Fresh 124
PaKaI ANoTHKeuONc (opougva uovtga) 125
Aaayn otic laaep 128
ZUUMOULGyta TnV NEPIOO dakONW 129
UHouAeS Yla To Pua 129
ΦuioAoYIKoI ΘOpBαI AεIToupyiα 130
PivKaAeOeTe To eepis 131
Papla 133
∑nμε(iωπ)
HETAPPAOINOPEKAIPOPAVAENUOUPYNEI NAPAALAYES OTOVONLA 05ECNIEPIITW0EIC ONOU TO VONHA DIAPEPETO AKPTEPOVONLA 出 EVAUYAAIKN EKGOAUTO

AvaywipzETe autoTO aUHBOO wC npocuaen aoopaiaac
HAKTPIKES PPOUHOEGEOE
Touyyo exo oxedotra va va atoupye oexwipto
Kukawuawv230b0a50HertKa1oanep
TolxiaMoTuO
Ta oToiXeia Tou npoiovtoc bpiokovtal OTo oelipako nai
Kataaann Anoppn Tou you oac
IPOSOXH: OKVvUOC EYKwBIOu KAI aocpuiaac Tov
TALWvEVExEeKAEyTe Ta TETaueVa n EYkTaAeHueva
psiyeia eakaoauoov va evai eNtivdua-otw Ka av
Ppoketal YA NPOOWVa' AV TATE TO naio oacpsiyei
napakaojue akOauoane Tc napakatow onnyiec YIA TIV
PpOAnn atuxnTuV
IPIN IETAETE TO NAIIO ZAZ YYTEIO H TON KATAWYKTH
ByaTe Ns nOpeTc
AOTe Ta pia Otn Toa Va Vn unavou Ekoaa Ta nla
Oenyies EYkataotaong
Eoaywyn
O apu6ioJnxavikoc npEeI va ouvfoeI To
yuEvIO Ouupwva e autc TIC oynieC
Eykataotaon
METPOTE TO avoiHa TNC N6ptac To baooc KAI TO nAtoC
Tou yueou AV xpeiaotc apaipeote Ta xepoula n Tc
NpTeC O mXavikoc npeneva aKoauon Touc
TONIKOJ KAVOVIAIOUc ouvdeon Tov Etaipw UdpuONc
Kai nEKTPIOooj
To oepic n avitakotaoon tou kaawou Tpoopooaoc npnei va eKTeAeTal aI0 apuodio TEXVIKO epic
HKataaann EYkataoan gnlaopaaicntn
anosotokote np anitoupya autou tou yuyeiou H Amana
Appliances eev eunveta Tnv aKatataaann
Eykatotaon
PnooOeoeEeykaotaaonC
1' EYkataaotnoTe to yuyeio oE yelwEvn npiau EEXWPIOTo Kukawma 230 BoaT' 50 HZ' 10A
2' PooataeTToaak6 daπe0eXapTovi Xaia
3 TOIOEETnOe To OE daIEo nou ONKwveI HEXpI 429 Kla
4° AΦnOTe 25 XIA' KEvO NaVw Ano To yUyeio KaI 5 XIA' Ota NáAyia Tou yUyeiou
\SHMEIQsH:MnV EykataoTavE To yuyEio KovTa oE
Pourho' KaOpiep' n aAaN nnyn
eepnoTNTac'MNV EykataoTavE To yuyEio
e Onueo onou n eepokpaia uTopei va
Teoei KaTw ano TouC 13°C
Aqipoean Inc. 2uVnc Baoanc

HPOEOXH
TnV anopuy npoownikou atuxnmuoc n Cnmuoc otEykataotaoic n Euaivn bao npeie va apaieTau ano duo atoua
TnV anopuyn unxavnkBlaBNC nV aPvETo yueo me to na! nepooTo po ao ooo XpeiaZeai ia va apaoote ta unouovia
1 KεiOTε TIC NpTEc με Taivia OoKEuaOia γia va μηv avoiouv anpoonta
2 KUAnote TnV KInTbaon TnG ouKeunKaTOW ano TnV PAEuP aTO uuyEIOu TE TOUC AVIKpVOJc MEVTEOEDEC
3 TUaIgTe to yuyeiO uKouBepTa n OtpwA' Nepaote to
Loupi YUpawAoTo tyuyeiO BaTc Ta appoale
anooToaNc' Nou BpOkoVTal OTO KUWtio MtaPopaC
KaTOWoTo Loupi ETE KaA to Loupi
MnV npapaoyETe to Loupi
4Xaunawote TNV KIVTN BaON TNC OOKeUNs HEXPI TO NaTua ME ta Xepoula nou Bpiokovtal OTN Baon
5 ApalpeoTe Ta enavw duo moulovia aio to Eulvo unootnpiyua
6' ENavapeptTo puyeio kai TnV KInTn Baoon oE opela 0eON ApaipoeTo To auOp!
7 KUAnote TnV KInTn BaonKaTw ano TnV anEavTu Paupa Tou yuyEou
8'EnavaaβETaβnμata3-5
9 Apalpeote Tnv Euivn Bao
10' ENavapept To uyEio KAI TIV KIVNTn Baoon Oe opela
BcON KAI aPapoeote TNV KIVNTn Baoon METAKIVnOte To
UYEIO UNPOOTa ANo TIV TEALIK N EoN KAI aPapoeote
TIV KIVNTn Baoon Tns OUOKeUns
International Division
Amana
2800 220thTrail
PO Box 8901
Amana' IA 52204'0001
USA
Tnλ: 1-319-622-5511
Φaξ: 1'319-622-2180
International Division
Amana
2800 220th Trail
PO Box 8901
Amana, IA 52204-0001
E.U.A.
Telephone +1-319-622-5511
Fax +1-319-622-2180
International Division
Vardochrengoring. 172
Allman rengoring 172
INNAN DU KASSERAR DIN GAMLA KYL
ELLER FRYS:
International Division
Amana
2800 220th Trail
PO Box 8901
Amana, IA 52204-0001
USA
Telefon: 1-319-622-5511
Telefax: 1-319-622-2180