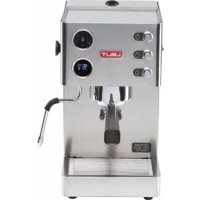
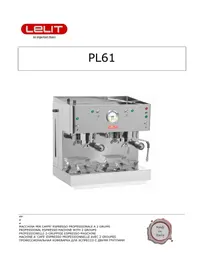
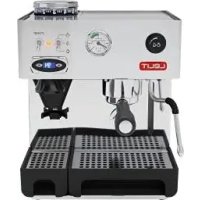
USER MANUAL Victoria PL91T Lelit
THANK YOU FOR CHOOSING US
Careful design and choice of components are the secret of the excellent performance of all our models.
We develop our products with the technology applied only to the best professional machines.
The materials used meet very high standards of quality and reliability to provide you with durable, and long-lasting products.

Write down the serial number of your product
Serial number
Purchased from Date of purchase
For more information, please register your product on care.lelit.com
Index
Safety notes 4
Main specifications 9
LCC-LELIT Control Center 10
Product overview 11
Instructions for use 12
The art of Espresso coffee 18
Cleaning and maintenance 22
Solving the most common problems 25
Warranty terms 27
01. Safety notes
Warnings - Please read carefully before use. This espresso machine is suitable for the preparation of 1 or 2 cups of coffee; it is equipped with a multi-directional wand for dispensing steam and hot water. The controls on the front panel have easy understandable symbols. The machine is designed for domestic use and is not suitable for continuous professional use. The noise rating of the unit does not exceed 70 dB (A). The data and images shown are subject to change without notice in order to improve the performance of the machine.
Symbols used
It is absolutely essential to observe the following warnings and symbols:

Shock hazard. Failure to comply may cause electric shock with danger to life.

Burn hazard. Failure to comply may cause severe burns.

Caution. Failure to comply may cause damage to the appliance.

Please Note. This symbol indicates important advice and information for the user.
Numbers in brackets
The numbers in brackets refer to the key provided in the description of the appliance in Chapter 04 "Product overview" and to the pictures in the Quick start guide attached.
IMPORTANT SAFEGUARDS

General warnings
This manual is an integral and essential part of the product. Please read all these warnings carefully as they provide important information on safe installation, use and maintenance. These instructions should be carefully retained for future reference.
-
This appliance can be used by children aged from 8 years and above and persons with reduced physical, sensory or mental capabilities or lack of experience and knowledge if they have been given supervision or instruction concerning use of the appliance in a safe way and understand the hazards involved. Children shall not play with the appliance. Cleaning and user maintenance shall not be made by children without supervision.
-
This appliance can be used by children aged from 8 years and above if they have been given supervision or instruction con
cerning use of the appliance in a safe way and if they understand the hazards involved. Cleaning and user maintenance shall not be made by children unless they are older than 8 and supervised. Keep the appliance and its cord out of reach of children aged less than 8 years.
- Appliances can be used by persons with reduced physical, sensory or mental capabilities or lack of experience and knowledge if they have been given supervision or instruction concerning use of the appliance in a safe way and understand the hazards involved. Children shall not play with the appliance.
- This appliance is intended to be used in household and similar applications such as: staff kitchen areas in shops, offices and other working environments; farm houses; by clients in hotels, motels and other residential type environments; bed and breakfast type environments.
- The appliance is only designed for making espresso coffee or hot drinks using the hot water or steam tubes and for pre-heating cups.
- Store the packaging material
(plastic bags, polystyrene, etc.) out of the reach of children.
- The appliance is only designed for making espresso coffee or hot drinks using the hot water or steam wands and for pre-heating cups.
-Any use other than that described above is improper and could be hazardous; the manufacturer accepts no liability whatsoever for any damage arising from improper use of the appliance.
- This appliance is not intended for use by persons (including children) with reduced physical, sensory or mental capabilities, or lack of experience and knowledge, unless they have been given supervision or instruction concerning use of the appliance by a person responsible for their safety.
- Children must not be allowed to play with the appliance.
- The appliance must not be left unattended or used outdoors.
- The appliance should not be immersed in water or cleaned by spraying.
- The appliance must not be exposed to atmospheric agents (rain, sun, ice).
- If the appliance is stored in rooms where the temperature can go below freezing, the tank and the water pipes must be emptied.
- All the packing material (plastic bags, polystyrene, etc.) should be keep out of the reach of children.
- No liability is accepted for the use of unauthorized spares and/or accessories.
- No liability is accepted for repairs not carried out by authorized service centres.
- The manufacturer accepts no liability for tampering with any of the appliance components.
In all the above cases the warranty will be void.

Essential safety warnings
As with all electrical appliances, the risk of electric shock cannot be excluded, therefore, the following safety warnings should be carefully observed.
-
To avoid spilling the connector, never pull the power cord.
-
Always attach plug to appliance first, then plug cord into the wall outlet.
- To disconnect the appliance, turn any control to "off", then remove plug from wall outlet.
- In the event of any fault or malfunction, do not attempt to carry out repairs. Switch the appliance off, remove the plug and contact the Service Centre.
- In the event of damage to the plug or the power cord, do not operate the appliance, these should be replaced only and exclusively by the Service Centre.
- Unplug from outlet when not in use.
- Before cleaning the exterior surfaces of the appliance, putting on or taking off parts, switch it off, remove the plug from the outlet and allow to cool.
- To reduce the risk of injury do not drape cord over the counter top or table top where it can be pulled on by children or tripped over unintentionally.
- Do not let cord touch hot surfaces.
-
Do not let cord hang over edge of table or counter.
-
The use of accessory attachments not recommended by the appliance manufacturer may result in fire, electric shock or injury to persons.
- Do not place on or near a hot gas or electric burner, or in a heated oven.
- Before switching on, ensure that the power supply voltage corresponds to that indicated on the plate on the base of the appliance and that the power supply is properly earthed.
- Do not tamper with the appliance. Contact an authorized technician or the nearest service centre for any problem.
- Do not touch the appliance if your hands or feet are wet.
- Do not touch the plug with wet hands.
- Ensure that the electrical outlet is always freely accessible so that the plug can be easily removed when necessary.
- When removing the plug, always hold it directly. It should never be removed by pulling on the power cord, as this can cause damage.
- To protect against fire, electric shock and injury to persons do
not immerse cord, plugs in water or other liquid.
- Donotuse adapters, multiple sockets or extension cords. If their use is unavoidable, use simple adapters or multiple sockets and extension cords that conform to current safety standards, taking care not to exceed the current limit marked on the simple adapter or extension cord, or the maximum capacity of the multiple socket.

Warning about burn/scald risks
This appliance produces hot water and steam; therefore the following safety warnings should be strictly observed.
SAVE THESE INSTRUCTIONS
02.
Main specifications
We design our machines based on our customers' needs.
We are sure that the features selected for this model will meet all your wishes, so you can make perfect tasting espresso for yourself and your guests.

LCC (LELIT Control Center)
To adjust the boiler temperature and to control constantly the perfect settings for making coffee.

Pre-brewing
To moisten the coffee for a few seconds before the start of the actual brewing stage. This compacts the coffee powder and improves the flow of the espresso.

Coffee Slide
An innovative dispensing spout that can be used for both one or two cups and that allows the user to see the coffee cream on its way towards the cup.

Stainless steel
For maximum hygiene in the kitchen and easy cleaning of the appliance. A simple wipe with a sponge and your machine will shine again.

Backlit gauge
To keep an eye on the pressure in the dispensing circuit and know whether your espresso is being prepared in the right way.

Energy saving
When the machine is not used for a long time, it automatically enters the power-saving mode. This saves money for you and valuable resources for the planet.
03.
LCC-LELIT Control Center
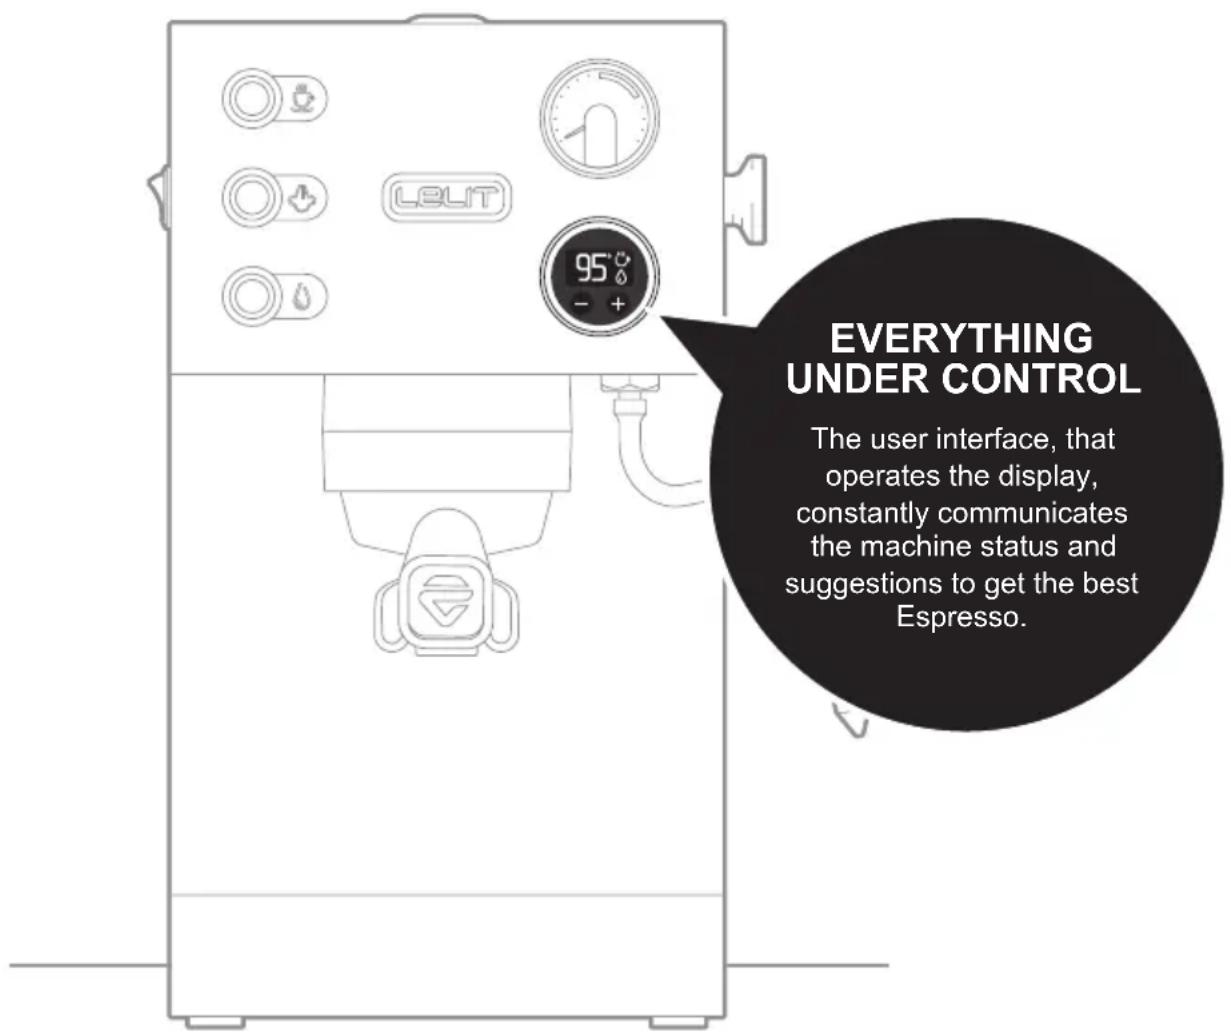
LCC (LELIT Control Center) is the brain of the new LELIT espresso machines. It has an elegant, graphic LED display of the latest generation. It controls all the functions of the machine and allows you to adjust the settings, as well as giving valuable tips on how to achieve the best results.
LCC lets you manage a number of settings in your machine:
- The temperature of the coffee and hot water dispensed
- The temperature of the steam dispensed
- Enabling/disabling of pre-brewing function
- Partial & total doses counter (only the partial dose can be reset)
04.
Product overview
Take your new espresso coffee machine out of the box and have a look at the various components and accessories designed for you. The numbers refer to the pictures in the Quick start guide attached.
- Water tank cover.
- On/off switch.
- Coffee switch.
- Steam switch.
- Hot water switch.
- Coffee distribution group.
- Cup-holding grate.
-
Removable water drip tray.
-
Wide cup warmer.
- Backlit brew pressure gauge.
- Steam/hot water dispensing knob.
- LCC (LELIT Control Center).
- Multi-directional steam/hot water wand.
What's in the box
a. Plastic tamper
b. Coffee measuring spoon
c. Power cord
d. Blind filter
e. Filterholder with filter for 1 and 2 cups
f. Support for espresso cups
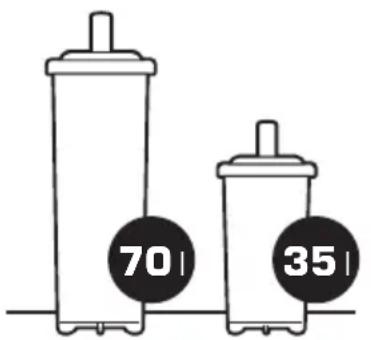
g. LELIT Resin filter 35 I
05.
Instructions for use
LELIT coffee machines are not automatic. To make a good cup of coffee, you must know how to use them properly and will need a bit of practice. Follow the instructions carefully. You can also refer to the Quick start guide where you will find illustrated instructions. You'll soon be making coffee just like in the cafes, with the ideal smooth, creamy texture you prefer.

to start
Starting the machine
It is important to carefully follow these instructions the first time the machine is started, to ensure that it works properly. These instructions are only for the first time the machine is used. The instructions given in the subsequent chapters are for all further use. For subsequent uses do not consider this chapter and follow the chapter Making an Espresso.

Open the packaging
A.1 Open the packaging and place the machine on a flat surface.

Be careful. The unit weighs 9.2kg

Water filling
B.1 Remove the tank from its seating (1).
B.2 Fill the tank with water at room temperature.
B.3 Replace the tank in its seating.
Caution. The tank is fitted with a device that automatically detects the presence of water. When repositioning the tank, check that the tubes are not bent and that the filter is fully inserted into the end of one of them. In case of lack of water, the LCC will show a warning signal. Follow the instructions in section B to refill the tank.

Switch on the coffee machine
Caution. Ensure the power supply voltage is the same as that indicated on the information plate and that the supply system has an adequate circuit breaker.
C.1 Connect one end of the power cord (c) to the socket in the machine and the other (plug) into the wall socket.
C.2 Turn on the espresso machine by pressing the main on/off switch (2). The display (12) will show the LELIT logo, the three switches and the gauge will go on for a short time.
Note. ONLY for the first time that the machine is switched on, the machine will start to fill the boiler automatically. During this operation, water will flow from the coffee distribution group for about 40 seconds and the LELIT logo will flash on the LCC display.
C.3 On the LCC display (12) you'll see the water boiler temperature flashing. This will grow until the set temperature will be reached.
C.4 Wait until the bar is fully loaded and "Ok" appears on the display. This way the machine will reach the set temperature.
C.5 After reaching the pre-set temperature, the bar will disappear. The machine will be ready for use.

Checking that the machine is working properly
Coffee
D.1 Insert the filterholder (e) without coffee firmly into the coffee distribution group (6), so as to align the handle with the padlock symbol on it.
Note. With a new machine, in order to reach this position, it is advisable to moisten the edge of the filter with water. After a short period of use, this position will be reached regularly without excessive effort.
D.2 Press the coffee switch (3) to dispense about half a litre of water. The display (12) will indicate the coffee icon and a chronometer showing the ascending dispensing time.
D.3 When you've taken about half a litre of water, press the switch (3) to stop dispensing.

Note. This procedure helps filling the hydraulic circuit completely and using the circuit itself.
Hot water
D.4 Place a jug under the steam/hot water wand (13).
D.5 Press the hot water switch (5). The pump starts and the water icon appears on the display (12), accompanied by the indication to rotate the steam/hot water knob (11).
D.6 Turn the steam/hot water knob (11) counterclockwise.
D.7 As soon as water comes out of the wand (13), rotate the knob (11) clockwise to close it and press the switch (5) again to stop the function.
Steam
D.8 Point the steam/hot water wand (13) onto the cup-holding grate (7).
D.9 Press the steam switch (4). The LCC display (12) will flash, showing the water temperature in the boiler. Wait until the bar is complete, so that the machine reaches the operating temperature for steam dispensing.
D.10 When the desired temperature has been reached, the bar will disappear and the steam icon will appear, accompanied by an indication to turn the steam/ hot water knob (11). The machine is now ready for use.
D.11 Turn the steam/hot water knob (11) counterclockwise.
D.12 When steam comes out from the nozzle, turn the knob (11) clockwise to close it and press the steam dispensing switch (4) again to return the machine to its function of dispensing coffee and hot water.
Note. If the machine hasn't been used for 30 minutes, the machine will go in stand-by (energy saving status). The display and the heating element will be switched off, and the switch (3) will flash every 3 seconds to indicate the standby status. To restart the machine, you must press the switch (3) again.

to start
Making an Espresso
Thanks to the pre-set function settings, the machine is immediately ready to dispense espresso. To change the settings, please refer to "Adjusting the LCC settings" section.

Note. The machine comes with a cup warmer (9). Using warm cups ence the organoleptic qualities, the flavour and aroma of an Espresso.

Preparing the machine for making coffee
E.1 Turn on the espresso machine by pressing the main on/off switch (2). The display (12) will show the LELIT logo, the three switches and the gauge will go on for a short time.
E.2 Insert the filterholder (e) without coffee firmly into the coffee distribution group (6), so as to align the handle with the padlock symbol on it.
E.3 On the LCC display (12) you'll see the water boiler temperature flashing. This will grow until the set temperature will be reached.
E.4 Wait until the bar is fully loaded and "Ok" appears on the display. This way the machine will reach the set temperature.
E 5. After reaching the desired temperature, the bar will disappear and the machine will be ready for use.

Distributing the coffee
F.1 Insert the selected filter into the hot filterholder (e).
F2 Pour the desired amount of ground coffee into the filter.

Note. We suggest 7 g for one cup and 14 g for two cups.
F3 Press the coffee with the tamper (a) and remove any coffee residues from the edge of the filterholder.
F4 Insert the filterholder (e) firmly into the coffee distribution group (6), so as to align the handle with the padlock symbol on it.
F5 Place one or two cups on the cup-holding grate (7), under the filterholder (e).
F.6 Press the coffee switch (3) to start dispensing. The display (12) shows the coffee extraction time in seconds.
F7 Once the required amount has been dispensed, press the switch (3) to stop dispensing coffee.
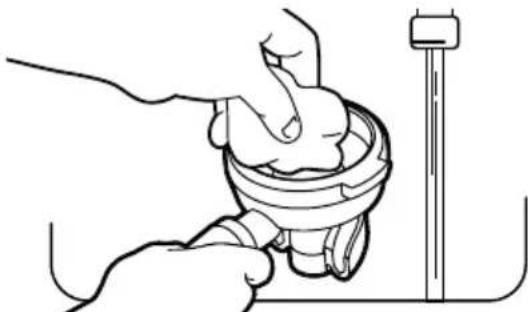
F8 Remove the filterholder (e), empty out the coffee grounds and clean thoroughly with a damp cloth.

Caution. The filterholder must not be removed before coffee brewing is pleted.

Note. To prepare a good espresso, the coffee pump pressure gauge (10) t be in the green zone, while dispensing is in progress.

for experts
Steam and hot water
The device is equipped with a steam/hot water wand that can foam the milk to perfection, producing the creamy and compact foam that is the mark of the real cappuccino.

Preparing the coffee machine
G.1 Press the steam switch (4). The LCC display (12) will flash, showing the water temperature in the boiler. Wait until the bar is complete, so that the machine reaches the operating temperature for steam dispensing.
G.2 When the desired temperature is reached, the bar will disappear and the steam icon will appear, accompanied by an indication to turn the steam/hot water dispensing knob (11). The machine is now ready for use.

Caution. Never place your hands or other body parts under the steam/ water wand. Risk of scalding.
Steam distribution
H.1 Open the knob (11) counterclockwise with the steam / hot water wand (13) pointed at the cup-holding grate (7) and release the initial amount of water.
H.2 When steam comes out, close the knob (11), place a jug with the beverage to be foamed under the steam wand and re-open the steam/hot water knob (11).
H.3 When the desired result has been achieved, close the steam/hot water knob (11) turning it clockwise and press the steam switch (4) to turn off the steam function.
Note. The machine, thanks to its electronic controls, returns to the coffee/ water function if the steam function has not been used for a certain period.
Note. See chapter 06 "The art of Espresso coffee" for the best way to froth milk.
Caution. Clean the steam/hot water wand (13) after every use by pointing the steam wand to the cup-holding grate and dispensing some steam. Thoroughly clean the wand (13) with a sponge or clean cloth. In the chapter "Cleaning and maintenance", you will find all the necessary advice.
Hot water distribution
1.1 Press the hot water switch (5). The pump starts and the water icon appears on the display (12), accompanied by the indication to rotate the steam/hot water knob (11).
1.2 Place a jug under the steam / hot water wand (13) and open the knob (11) counterclockwise until you reach the desired amount.
1.3 When the desired amount has been reached, close the knob (11) clockwise and press the hot water switch (5) to stop the function.
Note. The machine is equipped with an electronic control that stops the water function after a pre-determined time. To withdraw more water, repeat the "Hot water distribution" operation.
for experts Adjusting
The LCC - LELIT Control Center (12) has pre-set default settings. Here you can learn how to adjust them.
J Changing the factory settings
J.1 Press the “-” button to enter settings mode, and scroll through the menu.
J.2 Press "+" to change the setting. The setting flashes.
J.3 Change its value and/or state by using the “-” and “+” buttons.
J.4 Three seconds after the last press of a button, LCC stores the data and exits from settings mode.
Note. Converting the temperature: press "+" and "-" buttons at the same time for about 3 seconds. When the display shows "C-F", release both buttons and afterwards press the button "+" to convert the temperature from Celsius degrees to Fahrenheit degrees. About 3 seconds after the last button has been pressed, the setting will be saved.
06.
The art of Espresso coffee
Contrary to what you might think, making a perfect Espresso is not that easy. It takes experience, ability, passion and a little bit of curiosity. In this paragraph we would like to share with you some of the basic rules for making a perfect cup of Espresso.
Suggested doses:
Ristretto (Strong) about 20 ml - Espresso about 30 ml - Lungo (Long) about 60 ml.
The "5 M's"
If you want to make perfect Espressos, you should start by ensuring the five essential factors which turn a simple cup of coffee into an Espresso for connoisseurs! These are the "5 M's"; in Italian: miscela (blend), macinatura (grinding), macchina (machine), manualità (skill) and manutenzione (maintenance).
1 - Miscela (Blend)
Good Espressos are always made with a good blend of coffee. An Espresso with the right taste requires a blend of two types of coffee, Arabica and Robusta. The first gives the coffee its delicate aroma and the right amount of acidity, while the second type gives it its full taste, body and cream. The quantities depend on your own taste. Try out different combinations until you find the blend you like best!
2 - Macinatura (Grinding)
The grinder is a must for making good Espresso. Coffee should always be ground just before it is used so that it preserves its taste and aroma. The LELIT grinders let you adjust the grinding level to suit the coffee blend in order to establish the correct extraction time and amount of cream.
LELIT machines are designed and built so that the water temperature can be adjusted to suit your needs. In addition, setting this variable correctly will allow you to extract from the ground coffee, not only the soluble substances that give it taste, but also the non-soluble ones that give body and flavour to your coffee.
Half of the result depends on how you use the machine. A passionate expert
is an essential part of the Espresso production chain and can enhance the result to bring additional value to the final product. Passion and practice are, therefore, the secrets to learning how to use the machine. You can experiment with different blends of coffee, grinding, pressing, water temperature and pressure, not just to make an Espresso, but to make the one that is just right for you.
Daily maintenance, scheduled maintenance and care of the machine will ensure the quality of the beverage and the durability of the product you have purchased.
A clean machine says a lot about your passion for coffee making.
Coffee varieties
The choice of the blend is an essential factor for making the ideal coffee for your taste. There are a lot of different varieties of coffee blends on the market to choose from. The differences in flavour, aroma and texture depend on the quantities of the two varieties of coffee that make the blend.
Arabica
This is a sweeter and more delicate variety of coffee, with a rich aroma and cream that is very thin, dense and compact.

Arabica
It is grown between 900/2000 m Rich aroma.
Caffeine between 0.9 1.7%
Robusta
This variety is woody, bitter, fullbodied and spicy,with little aroma. Its cream is more frothy and grey.

Robusta
It is grown between 200/600 m Spicy aroma.
Caffeine between 1.8 4%
No variety of coffee can make an ideal Espresso on its own.
The perfect Espresso has a top layer of cream 2-3 mm thick, a nut brown to dark brown colour, with reddish tinges and light streaks, a harmonious flavour, a strong, balanced aroma and a sweet, long-lasting aftertaste. It has a strong aroma with notes of flowers, fruits, toast and chocolate. These sensations can last just a moment or can persist for a few minutes in your mouth. The taste is round and well structured. The acid and bitter perceptions are well balanced whereas there is little or no astringency. The ideal parameters to obtain this type of coffee are:
7± 0,5 g.of ground coffee.
25 seconds to brew 30 ml.
88/92°C when brewing and 80^ in the cup.
8/10 bar pressure during extraction.
Even Arabica blends often contain a small amount of Robusta, which is necessary to enhance the cream and add aroma and body to the espresso. Blends made for coffee bars usually contain 20% Robusta but in southern Italy, where they prefer a stronger taste, the percentage can reach 40-50%. At the end of the day, it's just a matter of taste...Experiment until you find the blend you like best!
Cappuccinos
There's nothing better than a cappuccino to start your day. Although they are made and served everywhere, few people know how to make one properly.
Making the coffee is only part of this complex procedure. The froth often creates major problems, but thanks to the steam wand on our machine, with a few suggestions and a little practice you'll soon be making cappuccinos just like in the coffee bars!
Milk and jug
You need 100 ml of milk to make a cappuccino.
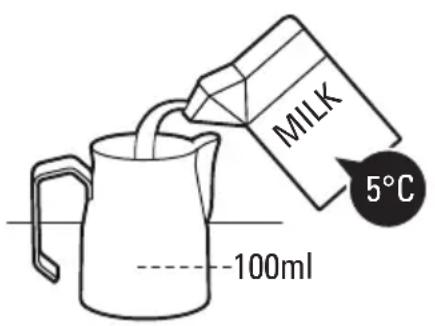
Fresh whole milk provides a smoother, creamier and tastier froth. Milk will not froth at over 65^ , so cold milk from the fridge should be used to allow more time for it to froth. The best jug, on the other hand, is one made of stainless steel, provided with a spout, such as LELIT models (codes PLA301L - PLA301M - PLA301S - not included). The level of milk should never exceed half the volume of the jug.
Frothing the milk
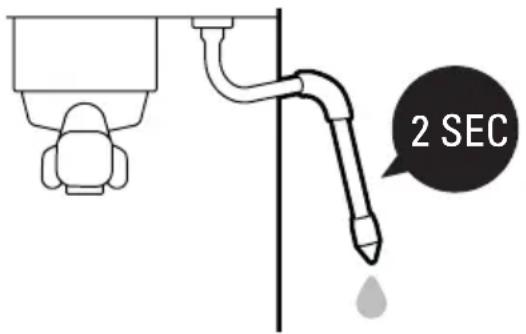
Before using the steam wand, some steam should be released for about two seconds, as it always contains some water due to condensation.
Insert the wand so that the end of the nozzle is near the side of the jug (pretend you have split the top section into four parts and insert the nozzle into one of them) and about one centimetre below the surface of the milk. Since the milk will start to expand in volume, you will have to gradually lower the jug so that the nozzle is always kept immersed at the same depth. This process is complete when the milk reaches a
temperature of about 37^ or when you can feel the warmth with your hand. You can use the thermometer too (code PLA3800 - not included).
Processing the milk
This phase is very important to make the cream thick, with a fine texture and a shiny surface.
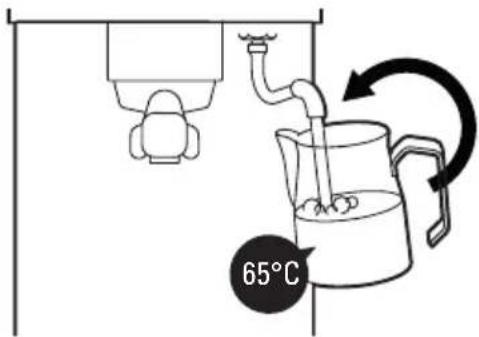
Insert the wand all the way down and tilt the jug to create a vortex. Heat the milk to the desired temperature, without exceeding 65^ . Close the steam.
Prepare the milk by first tapping the jug on the countertop to remove any air bubbles and then rotating it to keep the milk and froth well amalgamated. The final result should be a smooth, creamy surface without any bubbles.
Pouring the milk
You should leave the milk to settle for a least half a minute, so we suggest you always prepare it before making the coffee.
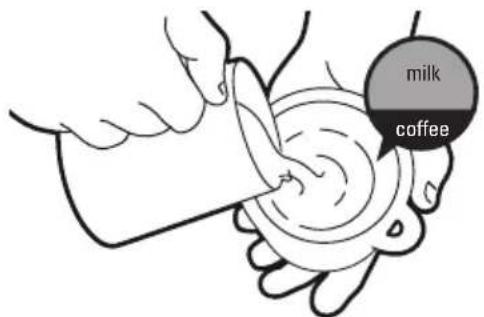
The doses for a cappuccino should be one part Espresso and two equal parts of milk and froth. Clean the steam wand with a damp cloth.

To see the tutorial, please scan the QR-Code.
07.
Cleaning and maintenance
Cleaning and maintenance of the machine are essential for the quality of the coffee and the durability of the appliance.
Cleaning
The machine must be cleaned at least once a week.
Before starting, remove the plug from the electrical outlet and allow the machine to cool.
Use a soft cloth, preferably microfiber, like the LELIT cloth (Cleaning Kit code PLA9101 - not included), and moisten it with plain water. Do not use abrasive detergents and do not immerse the machine in water.
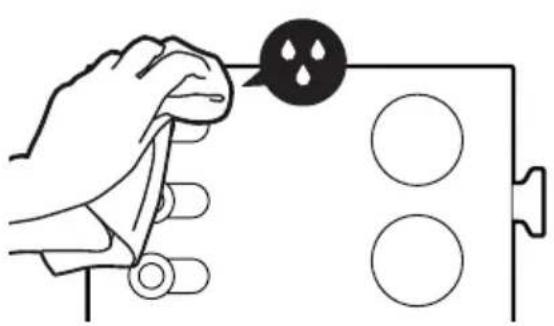
For thorough maintenance, we suggest you use the LELIT cloth (Cleaning Kit code PLA9101 – not included), which will help you clean the nozzles and the spaces between the gaskets more effectively, removing stains and coffee residues from even the smallest cracks.
Warm running water can be used to clean the removable parts of the machine. The filters and filterholders should never be washed in a dishwasher. There is no need to clean the filters after each use, but just to ensure they are not clogged.
However, to ensure the best performance from your machine, it is essential to thoroughly clean the steam wand and filterholder after each use.
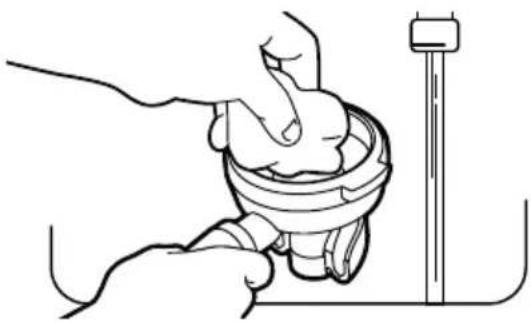
The filterholder should be cleaned to remove the greasy coffee residues that can negatively affect the taste of your espresso.
Wash the exterior part of the steam wand with a damp cloth and release a little steam to remove any milk residues from inside the tube, as these could obstruct the steam output, making it more difficult to froth milk properly.
Descaling the machine
Use of the machine creates a natural formation of limescale, over a time period depending on how frequently the machine is used and on the hardness of the water.
Limescale deposits can obstruct the tubes and decrease the brewing temperature, altering the quality of the coffee and reducing the lifetime of your machine.
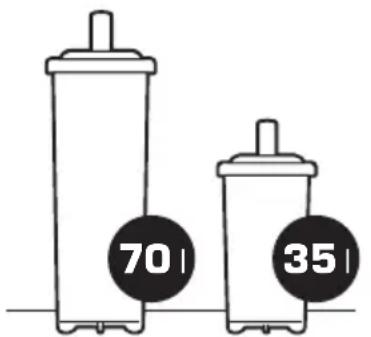
To avoid the formation of limescale, which can also deposit in the internal circuits, we recommend the use of our LELIT resin filter to soften the water. Please insert the filter (g) in the tank following the instructions on the packaging.
The filter purifies the water from the calcium and magnesium salts which are deposited to form limescale and affect the taste of your coffee. Remember that the filter loses its effectiveness after a certain number of gallons treated, so replace it periodically. Instructions for the use and replacement of the filter are given on the box.
To avoid any possibility of damaging the machine's components, ADD ONLY NATURAL DESCALING PRODUCTS INTO THE WATER TANK.

Watch the tutorial to understand how the water softener filters work.
Backflushing
It is advisable to backflush the machine once a month (washing the operational parts used during brewing) using the blind filter supplied (d) and the LELIT detergent sachets (code PLA9201 – not included).
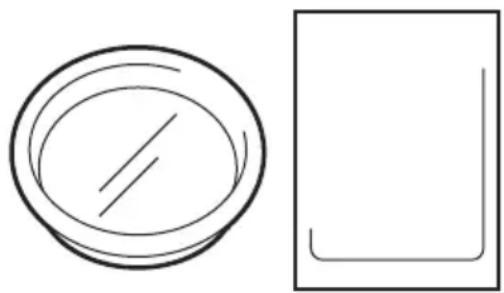
In order to backflush, follow these instructions:
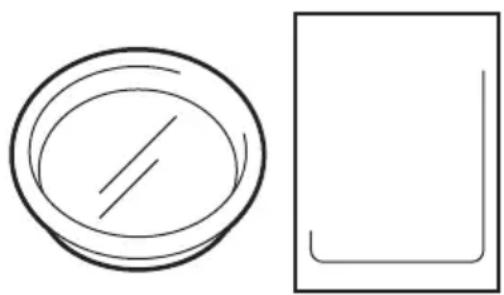
a) Insert the blind filter (d) provided into the filterholder (e).
b) Pour 3.5g of detergent inside the blind filter (d).
c) Insert the filterholder (e) firmly into the coffee distribution group (6), so
as to align the handle with the padlock symbol on it.
d) Keep the switch (3) pressed and press the hot water switch (5) within 2 seconds.
e) The LCC display (12) will show a flashing drop and the two switches will keep flashing until the procedure is finished.
f) When the procedure is finished, the display (12) returns to its normal status.
g) Remove the filterholder (e), press the coffee switch (3) to start the water distribution and rinse the filterholder using the hot water that comes out of the coffee group; stop the water distribution by pressing the coffee switch (3) again.
h) Use the brush (code PLA9101 - not included) to clean the coffee group (6), the group gasket and the fixing rims of the group. Use a damp cloth to eliminate the coffee powder rests.
i) To rinse, fix the filterholder (e) into the coffee group (6) and repeat the operations described under points d), e), f), without using the detergent.
j) Remove the filterholder and the blind filter from it.
08.
Solving the most common problems
We recommend careful reading of this guide in order to solve the most common problems before referring to an authorised service centre.
1 The coffee is too cold when dispensed
| The machine has not reached its operating temperature yet. | Follow the instructions in the “Making an Espresso” paragraph. |
| The filterholder has not been heated adequately. | Follow the instructions in the paragraph “Switch on the machine.” |
The coffee is dispensed too quickly and without cream
The grind is too coarse. Grind the coffee more finely.
The quantity of coffee is insufficient. Increase the amount of coffee.
The coffee has not been pressed enough. Press coffee more firmly.
The coffee used is old or unsuitable. Replace the coffee.
The coffee is not dispensed or is only dispensed in drops
The grind is too fine. Grind the coffee more coarsely.
The amount of coffee is too much. Decrease the amount of coffee.
The coffee has been pressed too much. Press the coffee less.
The distribution group is clogged. Run a backflush, see the "Cleaning and Maintenance" section.
4 The LCC does not light up and the machine does not work
| The plugs of the power cable are not inserted correctly. | Insert the power cord plugs into their respective sockets correctly. |
The power cable is damaged. Contact the service centre.
5 The machine does not dispense steam
The hole at the end of the steam/hot water Free the hole with the aid of a needle. wand is obstructed.
The power is on, but the set temperature is not reached.
The circuit breaker is interrupted. Contact the service centre.
The LCC is not working. Contact the service centre.
7 Alarms shown on the display.
There is no water into the tank. On the display the following icon appears:

Remove the water tank from its housing. Fill the tank with water at room temperature. Reposition the tank in the housing
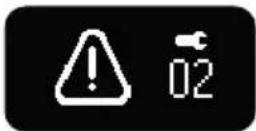
The temperature probe is in short circuit, all the machine functions will be disabled.
On the display the following icon appears:

Contact the service center
The temperature probe is faulty or disconnected all the machine functions will be disabled.
On the display the following icon appears:
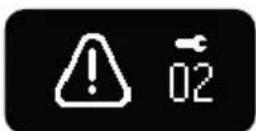
Contact the service center
09.
Warranty terms
Legal warranty
The seller of this product, who is not the manufacturer, may provide a written warranty for this product. Apart from any written warranty that the seller may provide, this product is covered by legal warranty laws or guarantee laws valid in the country where the product is sold. You may have additional rights under applicable local law that are greater than those provided in any written warranty from the seller. The seller is responsible for any service that may be provided as a result of any written warranty.
Inside the European countries, and for products sold in those countries, the laws that are in force are the national laws implementing EC Directive 44/99/EC.
For Australian consumers, this product comes with guarantees that cannot be excluded under the Australian Consumer Law. You are entitled to a replacement or refund for a major failure and compensation for any other reasonably foreseeable loss or damage. You are also entitled to have the goods repaired or replaced if the goods fail to be of acceptable quality and the failure does not amount to a major failure
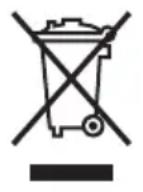
For the correct disposal of the product in accordance with EU DIRECTIVE 2012/19/EC and with Legislative Decree no. 151 of 25 July 2005. At the end of its working life, the product must not be disposed of as urban waste. It must be taken to a special authorised differential waste collection centre or to a dealer providing this service. Disposing of a household appliance separately avoids possible negative consequences for the environment and health caused by improper disposal and enables recovery of the materials it contains, with significant savings in energy and resources. The product is marked with a crossed-out wheelie bin as a reminder of the need to dispose of household appliances separately.
C E
LELIT srl a socio unico declares under its own responsibility that the product: Coffee machine type: PL91T to which this declaration relates conforms to the following standards:
EN 60335-2-15:2016 + A11:2018 + A1:2021 + A2:2021 + A12:2021;
EN60335-1:2012+AC:2014+A11:2014+A13:2017+A1:2019 +A14:2019 +A2:2019 +A15:2021;
EN 62233:2008; CISPR 14-1; CISPR 14-2; EN 61000-3-2;
EN 61000-3-3; EN 55014-1:2017; EN 55014-2:2015;
EN 50564:2011.
pursuant to directives:
2014/35/EC; 2011/65/EU; 1907/2006/EU
NB: This declaration is null and void should the machine be modified without our specific authorisation.
Castegnato, 04/07/2022
Emanuele Epis - Legal Representative
CLIT
Manuale d'uso
Victoria
PL91T
Dimensioni
22,5x27x38cm
Peso netto
9,2 kg
LCC-LELIT Control Center 40
LCC-LELIT Control Center 71
LCC-LELIT Control Center 100
LCC-LELIT Control Center 130
Ristretto (mic) circa 20ml - Espresso circa 30ml - Lungo (mare) circa 60ml
Cele ,5 M"
PykoBoDCTBO NOIb3OBaTeJIa
Victoria
PL91T
Pa3Mepbl
22,5x27x38cm
Bec HeTTo
9.2 K
IcToUHKn NHTaHn
230B 50Γu / 120B 60Γu
Mouchoctb
1200BT
ДаВленье Насoca
156ap
Emkoctb pe3epByapa JnBbI
2.5 n
EMKocTb 6oJnepa
300 M

Благорадiam BAC
3A BblbOP HAlWei
ПОНДУКЦИ
TuaTeIbHbI NOxOaK KOHCTpyKcN IN BHMaHne K BbI6Opy KOMHOHTOB - BOT CekpeT OTINuHOn Ipon3BOIDteJIbHOCTn
BCEX Haux Moidele. Mby pa3pa6aTbIbAem Hauy PpOdyKcHIO, INcNoJb3yra TexHOJOrn, PpIMeHReMbIe JINsb DJIa LyuNX pOoceCNOHaJIbHbIX MaunH.
ИспОЛьзУЕмье MaTeриаЛы COOTBETCTBYOT BbICOKIM CTaHДapТам КаYeCTВа И НаджноCTN, YTO ПОЗВОЛЯET HaM BbIpyCKaTb ИЗдeЛЯ, рAccЧИТаHHьe Ha ДЛNTeЛьньИ ССКСПЛуаТaцИ.

Приимп Te BO BHMaHne cepинbl Homep Baшero n3delen
CepiHbI Homep
I3dJIeIne npno6peTeHO B KOMpaHIN DaTa npno6peTeHnA
Дяdoнонтьнoiинфорmaци,зaperиntpypuyte, nokaуcta,BaW npodykT ha caite care.letit.com
Copepkane
Yka3aHnno 6e3oNaChoctn 180
Ochobhpie xapaKtepncnkn 185
LCC- ΚeHTp ynpaBneHnA LELIT 186
KpaTkne cBeDeHn8 o6 n3deIin 187
Hnctpykunno 3Kcnpnyatau 188
OuNCTKy KoFeBapKn Heo6XoIMOBbInONHЯTb He pexe OndHO pa3a BHeJeIIO. NpePnHaJOM OUnCTKNBbITaUHTe BNky n3 PO3ETKn I NOOXdIte, noka yCTPOINCTBO He OCTbIHet.NcNoJIb3yIte MfKyo TkaHB, npeiNoHTeINbHO n3 MmKpOΦn6pbI, KaTKaHB ot LELIT (Ha6Op dIra YnCTKNKoD PLA9101-B KOMnIeKT He BXo-DNT), n CMOHTe eepocToB BOOn. He nCnoJIb3yIte a6pa3NBhIe MOIO-une cpeIcTBaN He norgyKaIte annapaT BBOy.

Дябоjee TцаTeьногухoda peKOMeHnyem ИСПОЛБ3OBaTb 电Tky LELIT (Ha6op ДячNTК KoI PLA9101-B KOMPJIeKT He BXOДИТ), KOtopaЯ NO3BOJЯET IDeaJIbHO OUHCTNtB BCE φOPcYHKn InpocTpahCTBa MeKdY yINOTHeHnMn, ydaJIntb BCE
IYTHA N OCTaTKM MONOTORO KOFe I3 CAMbIX MeNLKx ⅢeNe. DnA OYNCTKN CBeMHbIX YAcTeN KOFeBapKn MOXHO BOCNoJIb3OBaTbcr TEnIOH pTOUHO BOIo. Hn B Koem cIyuae He MoNTe FInbTpbl N FInbTpOpeJkAteNb B NocydOMoeuHO MaUNHe.
Het Heo6xOdImocTn Ounuatb fNtpbI nocLe kaxDOrO nCnOJb3OBaHnra, ecn TOnbKO INx OTBepCTnR He 6ydyT 3a6ntbl. HanpoTnB, dIra nOpAePkaHnRA BbICOKnx pa6oynx noka3aTeNe KoeBapKn BaXHo, yTo6bl Tpy6ka dIra npa I oINbTpOpePkaTeNb TuaTeNbHO OunuauinCb nocLe kaxDOrO nCnOJb3OBaHnra.
OuHuaTe QnIbTpOepKaTeIb IydaJIeHnJ XnHPbIX OCTaTKOB KoPe, KOToPbIe OTpuCaTeIbHO BnIaHOT Ha BKyc 3cnpecco.
BbIMoIte HApxHyIO Yactb Tpy6Kn Inna npa BnaXHO TkaHbIO n npony
CTNTe HEMHoro npapaYepe3 Tpy6ky Dnra ydaJIeHnBHyTpeHHNX OCTaTKOB MOJOKa, KOTOpbIE MOryT NOMEuAtb npoxOKeHnIO npap, YTO, B CBOU OChpeDb, Meuaet peYIpopoBaTb NeHy.
YdaJIeHneHaKnPiNc KoΦeBaPkn
IcnoJb3OBaHne KoOeBapKn npNBO-DnT K eCTeCTBeHHOMy OTIOJOHeHnHO HAKIN, CKOPoCTb KOtOporo 3aBNCIT OT YactOTbI NCNoJb3OBaHnY yCTpOHTBa I JXecTKOCTN BObl.
N3BecTKOBbIe OTIOXKeHn 3a6nBaIoT Tpy6Kn I CHNXaHT Tempeatypy Ha BbIXOJe, BInra Ha KaueCTBO BbIXoJa- Uero Koe n COKpaUaJcPCKJyK- 6bl yCTpOuCTBa.
Bo n36exaHne o6pa3OBaHnHaKn- n, KOtopa OTKlaDbIbAeTcB HByTpN 6oJepa, Mbl peKOMeHdyem Bcerda nCNoIb3OBaTb φnIbTp-ymrHTeJIb BOdbl Ha OCHOBE IOHOO6MeHHbIX CmO1 LELIT (g), KOTOpbl, 6yduu N BCTaBHeHHbIM B pe3epByap, Ounca-et BODy OT coJe KaIbZnI y MaHnIy, KOtOpblie o6pa3yIOT hAKINb I BnIaHOT Ha BKyc KoPe. IopraDOK nCNoIb3OBA
HnI 3aMeHbI yKa3aH Ha yNaKOBKe camoro qnIbTpA.
ДяТOrO,TO6bI npeDoTbpaTnTb BO3MOxHoe NOBpeKdEHNc KOMNoHErTOBMaunHbI,IOsABJIaIte TOJbKO HATyPAJIbHbIE CPEdCTBAДЯ YDAJIeHnA HAKINB PE3EPByAPДЯBODbI.

Дя npocmoTpa
INHCTpyKcM
OTcKaHpyTe QR-KoI,
YTO6bI NOHrTb KaK
fNbtppa6oTaet
06paTHa npombyBka
Pa3 B MeçaH Heo6xOДM0 BbIOnHЯTb 6paTHyIO npOMbIKy (npOMbIBka aK- TnBbIX qaCTe, nCNoJIb3YeMbIX dJIa BbIpyCKa KoPe), nCNoJIb3yra CJIeNoi QnIbTp, BXODaUIM B KOMPJIeKT NocTaNk (d) n COOTBeTCTByUOuNe naketNIK MoUcero cpeDCTBa LELIT (KoD PLA9201-B KOMPJIeKT He BXODIT).
3 Koe He BbIXOHT Nn BbIXOHT NO KaJIaM
4 LCC He 3aropaeTcH KoΦeBapKa He pa6oTaet
5 KoΦeBaPka He BbIaTe np
OTBepCTne HaKoHeuHnKa Tpy6Kn IJn npapa/ropeuey BoDbl 3acopeHo.
OuHCTNEOTBepCTNEcNOMOUsbIOIgbl.
6 KofoeBapka BkIoueHa, Ho 3aHaHHa TeMnepaTpa He DOCTnraetcA
ConpoTnBHeHne npepbBaetc. O6paTntecb B cepBnchbl ueHTp.
LCC He pa6oTaet. O6paTntecb B cepBnchHn ceHTp.
7 AbarHbIe cHnbl, oTo6paXaemble Ha dinCnnee
HeBBoBb6ake.HaDnCnIeeNoBNTcCJeDyUoN
3Ha4OK:

BbHbTe pe3epByap nIy BObI n3 cneuaJIbHO MecTa. 3aONHnTe 6ak BOIOI KOMHaTHOI TeMnepaTypbI. NocTabbTe 6ak o6paTHo.
ДатунК Temператуbl NaхODNTCВ KOPOTKOM 3amblkaHnN (nIIN 3amepeHHaTempepatya Bblue 200°C),Bce yHKUIM MaUNHb OTKJIIOyeHb.
Ha dincnnee noBntcnaeDyouu 3NaOH:

O6paTntecb B cepBnchbI ueHtp. Ha dinCnlee noBnTcra cneDyUo 3HaQok:
DaTnK TempepaTypbI HeucnpaBeH nn OTKIOueH. Bce yHKun MaUNHbI OTKIIOUeHbI.
O6paNTecb B cepBnchbI ueHtp.
09.
YcnoBra rapaHTn