Phalanx Micro 200 A - Speaker HECO - Free user manual and instructions
Find the device manual for free Phalanx Micro 200 A HECO in PDF.
User questions about Phalanx Micro 200 A HECO
0 question about this device. Answer the ones you know or ask your own.
Ask a new question about this device
Download the instructions for your Speaker in PDF format for free! Find your manual Phalanx Micro 200 A - HECO and take your electronic device back in hand. On this page are published all the documents necessary for the use of your device. Phalanx Micro 200 A by HECO.
USER MANUAL Phalanx Micro 200 A HECO
At the end of the product's useful life, please dispose of it at appropriate collection points provided in your country.
Congratulations on your fine new loudspeakers and thank you very much for choosing HECO! You have made an excellent choice. The high-quality speakers produced by HECO are renowned all over the world.
Please study the instructions and information below carefully before using your new loudspeakers.
The triangle with a lightning symbol warns the user that high voltage is used within the device which can result in electric shock.
The triangle with an exclamation mark informs the user that important operating and maintenance instructions (repair) are contained in the accompanying instruction manual, which must be observed.
DO NOT OPEN! RISK OF ELECTRIC SHOCK!
CAUTION: In order to avoid electric shock do not open the speaker housing/ mains adapters or remove the covers. The user is not to conduct any repairs him/herself. Repairs should only be conducted by qualified technicians! Do not use any sockets or extension cables that do not fully accommodate the plug of the device.
IMPORTANT SAFETY NOTICE
Please read through the instruction manual carefully before starting to use the device. This manual contains important information concerning operation and safety aspects. It is imperative you observe all of the information. Keep the manual in a safe location.
- Never subject the subwoofer to dripping or splashing water. Do not place any flower vases or other filled recipients on top of the subwoofer.
- The distance between the active subwoofer enclosure and the walls of the room or other objects (e. g. furniture, shelf units) may not be less than 5 cm on any side.
The aluminium plate and cooling fins of the amplifier at the rear of the active subwoofer serve to cool the built-in amplifier; for this reason, they must also be at least 5 cm away from all objects and must not be covered (e.g. by a curtain).
The bass reflex opening(s) on the active subwoofer must not be covered (e. g. by curtains, etc.) in order to guarantee adequate ventilation of the amplifier.
- The subwoofer should not be positioned near heat sources (heaters, ovens, radiant heaters, naked flames, etc.).
- Only operate the subwoofer at an ambient/room temperature from 10°C to 40°C. The active subwoofer may not be used in very humid rooms.
- Please do not place any items with naked flames (e.g. candles) on the active subwoofer.
- Please do not touch or connect the mains cable when your hands are damp.
- Keep the mains cable away from heaters.
- The device should not continue to be operated if there is visible damage to the mains cable. A damaged cable should not be repaired, but must be replaced.
• Never place heavy items on the mains cable.
• The mains cable should always be freely accessible. - If the device is not going to be used for a prolonged period (e.g. when on holiday), it should be disconnected from the mains by removing the plug. The device should also be disconnected from the mains in the event of a thunderstorm. Doing this will prevent damage caused by lightning and overvoltage.
- Do not use any cleaning agents or chemical solvents when cleaning, as these could damage the surface of the device.
- Repairs must always be conducted by qualified specialists, as you might otherwise be exposed to dangerous high voltage levels or other hazards.
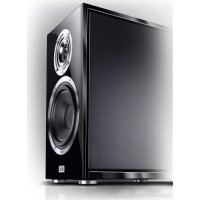
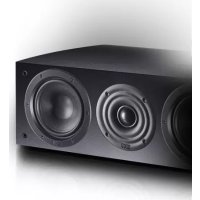
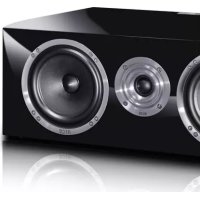
THE HECO PHALANX MICRO 200A ACTIVE SUBWOOFER
When connecting your loudspeaker, please make sure that everything has been switched off. Furthermore, make sure that all loudspeaker cables are connected to the proper poles, i.e. the positive pole for the output is connected to the positive pole for the input and the negative pole with the negative pole. Please also refer to your receiver's/amplifier's and loudspeakers' instructions.
POSITIONING
The frequency range reproduced by the subwoofer cannot be pinpointed by the human ear. That's why positioning generally doesn't present any problems. However, it is preferable to place the speaker close to the front loudspeaker in front of the listening position. You should also make sure that the distance from the sides to items and walls is at least 30 centimetres and at least 20 centimetres from the rear as otherwise bass reproduction may be impaired.
THE SUBWOOFER'S OPERATING ELEMENTS (FIG. 1)
Mains connection (1)
The subwoofer is equipped with an integrated amplifier and needs to be connected to a mains outlet by means of the supplied mains cable.
Mains switch (2), power LED (3), power switch (4)
| Mains switch ON Mains switch OFF | ||
| Power switch ON | Subwoofer is in permanent operation, the power LED is green.Favourable setting for the reproduction of programmes with long quiet passages (this prevents the subwoofer from switching off unintention-ally). | Subwoofer switched off, Power LED off.This is the setting for when subwoofer isn't used over long periods. |
| Power switch AUTO | Subwoofer initially in standby mode, the power LED is red.The subwoofer switches on automatically when it receives a signal from the re-ceiver, the power LED turns green.It automatically switches to standby after receiving no signals for around 15 min-utes, the power LED returns to red.Recommended setting. |
Line inputs (5)
For connecting to level outputs on a receiver/amplifier (stereo mode), see Fig. 2.
For connecting to an AV receiver with low-level subwoofer output, see Fig. 3.
Line outputs (6)
For connecting to a receiver's/amplifier's low-level inputs (stereo mode), see Fig. 2, or for connecting a second subwoofer.
Level control (7)
This control is used to set the bass volume according to your preferences. Proceed as follows:
- Set the bass control of your amplifier into its centre (linear) position.
- Important: Set the level control to its left stop (lowest volume).
- Now, play back some music and set the volume control of the amplifier to the desired level.
- Set the subwoofer level control to the desired bass level.
Warning: when connecting to an AV receiver's subwoofer output, the subwoofer level should be set to 0 dB in the receiver's set-up.
Cross-over frequency control (8)
Used to set the upper limit of the subwoofer operating range. The cross-over frequency should be set to approximately 100 to 150 Hz when the system is used in combination with shelf loudspeakers and to 50 to 100 Hz with stand loudspeakers.
Phase control (9)
In normal use the phase control should be set to 0^ . However, in rare cases it may be advantageous to vary the phase to between 0^ and 360^ (e.g. if the subwoofer is far away from the front satellites or in the event of unfa-vourable acoustics in the room). Generally speaking: the setting where the lower base tone area has a more natu-ral sound is the correct one.
MAINTENANCE
The lacquered surface is best cleaned with a mild household cleaner. On no account use furniture polish or similar products on these surfaces. Please also do not use a microfiber cloth as this may damage the surface.
SPECIFICATIONS
Configuration: Powered compact subwoofer
Fitted with: 20 cm woofer, 2 x 20 cm bass radiators
Output power RMS/Max.: 325 / 650 watts
Frequency range: 22 – 200 Hz
Cross-over frequency: 50 – 200 Hz, adjustable
Dimensions (WxHxD): 238 x 245 x 270 mm
Accessories: mains cable
SUBJECT TO TECHNICAL CHANGE.
Très cher client,
COMPOSITION DU SUBWOOFER (FIG. 1)
Congratulations! You have made a wise selection in becoming the owner of a HECO HiFi equipment. Due to high quality HECO HiFi products have earned an excellent reputation through the western world. And this high quality standard enables us to grant a 5-years warranty for HECO HiFi speakers and a 2-years warranty for HECO HiFi-electronic components.
The equipments are checked and tested continuously during the entire production process. In case you have problems with your HECO HiFi equipment, kindly observe the following:
- The guarantee period commences with the purchase of the component and is applicable only to the original owner.
- During the guarantee period we will rectify any defects due to faulty material or workmanship by replacing or repairing the defective part at our discretion. Further claims, and in particular those for price reduction, cancellation of sale, compensation for damages or subsequential damages, are excluded. The guarantee period is not altered by the fact that we have carried out guarantee work.
- Unauthorized tampering with the equipment will invalidate this guarantee.
- Consult your authorized dealer first, if guarantee service is needed. Should it prove necessary to return the component to the factory, please insure that • the component is packed in original factory packing in good condition • the quality control card has been filled out and enclosed with the component • your enclose your receipt as proof of purchase.
- Excluded from the guarantee are: • Illuminates • Wear parts • Shipping damages, either readily apparent or concealed (claims for such damages must be lodged immediately with forwarding agent, the railway express office or post office). • Scratches in cases, metal components, front panels, etc. (You must notify your dealer directly of such defects within three days of purchase.) • Defects caused by incorrect installation or connection, by operation errors (see operating instructions), by overloading or by external force. • Equipments which have been repaired incorrectly or modified or where the case has been opened by persons other than us. • Consequential damages to other equipments. • Reimbursement of cools, without our prior consent, when repairing damages by third parties.
F
Toutes nos félicitations!
No warranty without receipt!
HECO®
Lise-Meitner-Str. 9 • D-50259 Pulheim • Germany Tel. +49 (0) 2234 / 807 - 0 • Fax +49 (0) 2234 / 807 - 399
Internet: http://www.heco-audio.de