
KRC 4338 - Radio AEG - Free user manual and instructions
Find the device manual for free KRC 4338 AEG in PDF.

| Product type | Built-in kitchen radio |
| Brand | AEG |
| Model | KRC 4338 |
| Display | LCD screen |
| Power supply | 220-240 V~, 50 Hz |
| Power consumption | 3 W |
| Net weight | 0.65 kg |
| Radio frequency range | FM 87.5 - 108 MHz |
| Number of radio presets | 20 stations |
| Main functions | 24h clock, dual alarm, snooze, sleep timer, auto scan |
| Controls | Physical buttons (STANDBY, TIME SET, ALARM, etc.) |
| Installation | Built-in under cabinet |
| Protection class | II |
| Care and cleaning | Slightly damp cloth, no detergent |
| Safety | Do not expose to water, unplug before cleaning, cable replaced by a professional |
| Supplied accessories | 4 screws, 4 spacers, 1 drilling template |
| Repairability | Repair by manufacturer or specialist only |
Frequently Asked Questions - KRC 4338 AEG
User questions about KRC 4338 AEG
0 question about this device. Answer the ones you know or ask your own.
Ask a new question about this device
Download the instructions for your Radio in PDF format for free! Find your manual KRC 4338 - AEG and take your electronic device back in hand. On this page are published all the documents necessary for the use of your device. KRC 4338 by AEG.
USER MANUAL KRC 4338 AEG
Overview of the Components ...... Page 3
Instruction Manual......Page 25
Technical Data Page 27
Disposal Page 28
Język polski
Spis treści
Overview of the Components
D-47906 Kempen/Germany
Entsorgung
Thank you for selecting our product. We hope that you will enjoy use of the appliance.
General Safety Instructions
Read the operating instructions carefully before putting the appliance into operation and keep the instructions including the warranty, the receipt and, if possible, the box with the internal packing. If you give this device to other people, please also pass on the operating instructions.
- To avoid the risk of fire or an electric shock, you should not expose the device to rain or moisture. Consequently, do not use the device in the immediate vicinity of water - for example near a bath tub, a swimming pool or in a damp cellar.
• Use the device only for the intended purpose. - Only connect the device at a properly installed plug socket. Pay attention that the specified voltage corresponds to the voltage of the plug socket.
- When using external mains supply, pay attention to the correct polarity and voltage. Always place the batteries in the correct direction.
- Assemble the device in such a way that the available ventilation openings are not covered.
- Never open the housing of the device. Incorrect repairs can constitute a considerable risk for the user. Should the device become damaged, in particular the mains supply cable, do not operate the device any longer, but rather have it repaired by an expert. Check the mains supply cable regularly for damage.
- For safety reasons a broken or damaged mains lead may only be replaced by an equivalent lead from the manufacturer, our customer service department or a similar qualified person.
- If the device is not used for a longer period, remove the plug connector from the plug socket or take out the batteries.
These symbols may be found on the machine and are intended to indicate the following:

The lightning symbol should advise the user of parts in the inside of the device which carry dangerously high voltage levels.

The symbol with an exclamation mark should advise the user of important operation or maintenance instructions in the accompanying documentation.
Symbols in these Instructions for Use
Important information for your safety is specially marked. It is essential to comply with these instructions in order to avoid accidents and prevent damage to the machine:
WARNING:
This warns you of dangers to your health and indicates possible injury risks.
CAUTION:
This refers to possible hazards to the machine or other objects.
i NOTE:
This highlights tips and information.
Children and Frail Individuals
- In order to ensure your children's safety, please keep all packaging (plastic bags, boxes, polystyrene etc.) out of their reach.
Caution! Do not allow small children to play with the foil as there is a danger of suffocation! - This device is not intended to be used by individuals (including children) who have restricted physical, sensory or mental abilities and/or insufficient knowledge and/or experience, unless they are supervised by an individual who is responsible for their safety or have received instructions on how to use the device.
- Children should be supervised at all times in order to ensure that they do not play with the device.
WARNING!
Overview of the Components
1 LCD clock
2 Spacers for sub - assembly
3 Screw for sub - assembly
4 STANDBY button (on/standby)
5 TIME SET button (time setting)
6 LCD display
7 ALARM 1 button
8 ALARM 2 button
9 STANDBY indicator lamp
10 SLEEP button (sleep timer)
11 PROG button (presetting of radio stations)
12 SKIP+ button
13 SKIP-button
14 VOL+/VOL- buttons (volume)
15 SNOOZE/DIMMER button (Snooze/display illumination)
Installation Instructions for Bottom-Mounted Devices
CAUTION:
Make sure that the plug is not inserted when assembling the device!
- Remove all objects from the cupboard and anything which is fragile in the adjacent cupboards.
26 English
- For the installation the cupboard must fulfil the following conditions:
Thickness of the cupboard floor between 16 mm and 20 mm.
- The wall mounting of the cupboard must be stable and anchored firmly in the wall with at least 2 screws.
• Important! Do not install the device above a cooker! - When installing the device it must be ensured that there is a power socket within reach.
- The mains socket must be within easy reach, so that the plug can be quickly removed in an emergency.
- Important! Do not connect the device to the mains power supply until after installation!
- The device cannot be installed under cupboards under which there is a lighting strip.
- For mounting, you may need the following supplies: A drill with 6 mm drill bit, pilot drill or nail, Allen key, tape measure, adhesive tape, scissors, safety goggles.
Supplied mounting accessories
4 Screws
4 Spacers
1 Drilling template
CAUTION:
- Please adhere to the dimensions stated in the installation instructions.
- You should use only the installation accessories supplied.
Installation
- Tape the template firmly down to the shelf with adhesive tape. With the help of a gimlet or nail pierce the crosses at the attachment points and use it to mark the holes.
- Remove the template and drill the holes into the wall cupboard.
- Insert the spacer into the holes provided on the device.
i NOTE:
Sufficient ventilation is only guaranteed with a spacer.
- Countersink the screws into the holes in the cupboard.
- Using the 4 screws and the spacers, attach the kitchen radio to the bottom of the cupboard.
- Tighten the screws hand-tight with an Allen key.
CAUTION:
Use a wrench and not an electric screwdriver.
Start-up of the device / Introduction
- Read the operating instructions thoroughly before the start-up!
• Make sure that the device is adequately ventilated!
• If applicable, remove the protective film from the display.
Power supply
Insert the plug into a properly installed 230 V, 50 Hz power socket. 0:00 will appear on the display. Please ensure that the mains voltage corresponds to the information on the type plate.
Switching the Device on/off (4)
Switch the device to the standby mode with the STANDBY button (the time is displayed). If this button is pressed once more, the device switches on again.
Setting of the Clock (24 h) (in Standby Mode)
- Hold down the TIME SET button (5) for approx. 3 seconds. The hour indicator will flash on the display.
- Adjust the setting with the SKIP+/SKIP- buttons (12/13).
- Press the TIME SET button for confirmation. The minute indicator will flash on the display.
- Adjust the setting with the SKIP+/SKIP- buttons (12/13).
- Save the time setting by pressing the TIME SET button again.
Adjusting the volume
Use the VOL+/VOL- buttons (14) to adjust the volume.
Display brightness
Use the SNOOZE/DIMMER button (15) to adjust the brightness of the display and the LCD clock.
Listening to the radio
i NOTE:
The preset stations will be lost if the power is interrupted.
Scanning stations
- Tune the desired stations with the SKIP+ (12) and SKIP- (13) buttons. When holding down either of the buttons, the device will start scanning until the next radio station is found. The display will show the respective frequency.
- If there is interference on the received station, try to improve the reception by rotating, winding or unwinding the wire antenna.
Presetting radio stations
The device can preset up to 20 radio stations. To preset a station, follow the steps below:
- Search for a station as described in "Scanning stations".
- Press the PROG button (11). The display will show MEMORY and the respective preset location will begin to flash.
- Use the SKIP+ (12) and SKIP- (13) buttons to choose the preset location for the corresponding station.
- Press the PROG button again. The station will be preset. The MEMORY indicator and the preset location will disappear.
Recalling preset radio stations
- Press the TIME SET button (5).
- Choose the preset location with the SKIP+ (12) and SKIP- (13) buttons.
Automatic station scan
When holding down the PROG button (11) for approx. 3 seconds, the device will start the automatic station scan searching the entire frequency range automatically for stations. The stations found will be stored on the preset locations 1-20 in ascending order.

NOTE:
The order cannot be changed once set.
Setting the Alarm Time (24 h) (in Standby Mode)
You can set up to two alarms. As follows:
- Hold down the ALARM1 or the ALARM2 button, (7/8) for approx. 3 seconds. The hour indicator as well as AL1 or AL2, will flash on the display.
- You can now adjust the settings for hours, minutes and the buzzer successively with the SKIP+ (12) and SKIP- (13) buttons. With regard to the alarm, you can choose between buzzer (BU) and radio (FM).
BU = Upon reaching the alarm time, a buzzer will sound. The volume will increase slowly. FM = Upon reaching the alarm time, the last preset radio station will sound.
- Confirm each entry with the ALARM1 or ALARM2 button. The setting to be adjusted will flash on the display.
Snooze function
The automatic alarm can be switched off using the SNOOZE/ DIMMER button (15) for approx. 9 minutes.
Switch off the buzzer
In order to switch off the alarm until the following day please press the STANDBY button.
Disabling the alarm
To disable the alarm completely, choose standby mode and press the ALARM 1 or ALARM 2 button (7/8).
Delayed Shut-Off
You can use the function for delayed power-off with radio operation. The unit is switched off automatically when the selected time is reached.
- Select the time after which the unit is switched off by repeatedly pressing the SLEEP button (10). The following selections can be made: 60, 45, 30 and 15 minutes. SLEEP OFF = function is disabled.
- This function can be cancelled with the STANDBY button (4).
Cleaning

CAUTION:
Do not dip the appliance in water.
- Remove the plug before cleaning.
- Clean the appliance with a slightly humid cloth without any additives.
Trouble-shooting
| Symptoms Cause Solution | ||
| The unit cannot be operated. | The unit is blocked and "hangs". | Pull the mains plug for approximately 5 seconds. Then connect the unit again. |
Technical Data
Model: KRC 4338
Power supply: 220-240 V\~, 50 Hz
Power consumption:....3 W
Protection class: ....II
Net weight: 0.65 kg
Radio section
Frequency ranges: ....UKW/FM 87,5 \~ 108 MHz
Subject to technical changes without prior notice!
This device has been tested according to all relevant current CE guidelines, such as electromagnetic compatibility and low voltage directives, and has been constructed in accordance with the latest safety regulations.
28 English
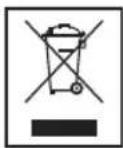
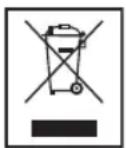
Disposal
Meaning of the "Dustbin" Symbol
Protect our environment: do not dispose of electrical equipment in the domestic waste.
Please return any electrical equipment that you will no longer use to the collection points provided for their disposal.
This helps avoid the potential effects of incorrect disposal on the environment and human health.
This will contribute to the recycling and other forms of reutilisation of electrical and electronic equipment.
Information concerning where the equipment can be disposed of can be obtained from your local authority.
