USER MANUAL 6H860AX FAGOR
Important! Read the entire manual before using the oven. The documentation and accessories are inside the oven.
The texts in the manual correspond to the numbered diagrams.

Identification

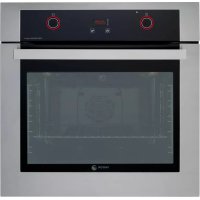
To find out which model your oven is ("a", "b", "c", "d", "e") compare its control panel with the control panels shown in the illustrations.
1
Installation
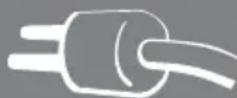
1.1 Unpacking. Remove all the protective packaging elements. 1.2 Mains connection. Always take into account the data on the reference plate (1.2.1) and the measurements of the cabinet the oven will be housed in (1.2.2, 1.2.3).
The appliance must be connected to the mains with a fixed single-phase connection with the neutral-to-neutral (blue) connection guaranteed (1.2.4). Fit the oven into the space and centre it (1.2.5). Make sure there is no excess cable in the upper part (1.2.6). Screw it to the fitting using the two screws supplied (1.2.7).
2
Using the oven

2.1 Setting the time. When you switch on the oven, the display will flash (2.1.1, 2.1.2, 2.1.3). Adjust the time by pressing (2.1.4), or turning the dial (2.1.5, 2.1.6). The time will automatically be validated after 3 seconds, or if you press either the (2.1.7) or button (2.1.8). Note: The time will need to be reset if a power cut occurs. 2.2 Changing the time With the oven switched off, press until it shows (2.2.1, 2.2.2), or press and hold it down for a few seconds (2.2.3). The time will flash. Adjust it by pressing (2.2.4), or by turning the dial (2.2.5, 2.2.6). The hour will automatically be validated after a few seconds.
2.3 Beeper function
appears (2.3.1, 2.3.2, 2.3.3). Adjust the time using the end buttons or by turning the dial (2.3.4, 2.3.5, 2.3.6). The time will automatically be validated after a few seconds and the countdown will start. A beep will sound when the countdown ends. Press any button to stop the beep.
2.4 Before using your new oven for the first time, heat it up while empty (with no food in it and with the control turned to , for 30 minutes at 250°C). It may produce some smoke or a bad smell (this is normal and is caused by the oven heating up grease residue etc.). When it has cooled down, pre-clean it by wiping the inside with a damp cloth. 2.5 Accessories. Depending on the model, the oven is equipped with a Standard Tray (2.5.1), a Deep Tray (2.5.2) and a Standard Rack (2.5.3), which function separately. You may also combine any tray with the standard rack (2.5.4) to form a unit. The half-removable rack (2.5.5) and the fully-removable rack (2.5.6, 2.5.7) support the trays or the unit (2.5.8). If your oven has "Impulse" slide-out runners, firstly slide them into the oven without the tray (2.5.9). The "Impulse" runners will come out automatically due to the weight of the tray when the oven is opened. To prevent this from happening, acc. model use the locking system (2.5.10). You must use a tray under the food with the "Impulse" runners (2.5.11). Take the position of the racks into account when placing them inside the oven. They have anti-overturn side stops (2.5.12). 2.6 Accessory positions. The accessories can be fitted in 5 different positions 2.7 Cooking the food. Place the food in the oven. Choose the accessory or accessories to be used and their recommended position, or consult the cooking table. Close the oven door.
COOKING
2.8 Selecting the cooking function. Turn the function selector and select the desired function according to the model.
Traditional fanned heat. For any kind of dish. Several dishes may be cooked at once without their flavours or smells mixing. Turbo plus. The heat is produced by the central element. Fanned high grill. This browns the food, distributing the heat evenly. Ideal for large-sized roasts. High grill. For browning pasta, soufflés and bechamel sauce. Low grill. For hamburgers, toast and food with a small surface area. High base heat. The heat from the oven base is evenly distributed. Ideal for paellas or pizzas. Fanned base heat. The fan distributes the base heat evenly. Suitable for paellas. Traditional heat. For bread, cakes, cakes with filling and lean meat. Defrost. Rapidly thaws any kind of food.
2.9 Selecting the temperature. Turn the temperature selector dial to the desired setting (2.9.1).
If the oven suggests an optimum temperature when you select the cooking function, the cooking process will start immediately. You can change this temperature during the 3 seconds the temperature is flashing, or as follows: press the button (2.9.2). The temperature will flash. Change the temperature by turning the dial (2.9.3). Alternatively, press the button until ° C appears (2.9.4). The temperature will flash. Change it by turning the dial (2.9.5).
If the ° C button is pressed and held down, the real temperature inside the oven will appear on the display.
2.10 Switching off the oven. In all cases, when the cooking process is complete, turn the function selector dial (2.10.1). If your oven has a temperature selector dial (C), you should also turn it to 0 (2.10.2).
TIME FUNCTIONS
2.11 Selecting the cooking time. Select the cooking function and the desired temperature. Press + or - until the time display starts to flash (2.11.1, 2.11.2, 2.11.3). Adjust the cooking time by pressing + or - (2.11.4), or by turning the dial (2.11.5, 2.11.6). After a few seconds the time will automatically be validated and the countdown will begin. When cooking is complete, a beep will sound. To stop the
beep, press any button and switch off the oven.
2.12 Select the end time. Select the cooking function, the temperature and the cooking time. Press + or - until the end time display is flashing (2.12.1, 2.12.2, 2.12.3). Adjust the cooking end time by pressing + or - (2.12.4), or by turning the dial (2.12.5, 2.12.6). The start of cooking will be delayed so that it finishes at the time shown. When the end time is reached, the oven will beep. To stop the beep, press any button and switch off the oven. 2.13 Automatic switch-off (b, c, d, e). If you forget to switch off the oven, it will switch off automatically after a certain time. If the temperature is lower than 100°C, the oven will switch off after 10 hours. If the temperature is higher than 100°C, it will switch off after 3 hours. 2.14 Celeris Function. For pre-heating the oven. Turn the function selector dial to the pre-heating position and enter the desired temperature (2.9). The oven will quickly reach the temperature selected. When it has been reached, place the food inside the oven and select the cooking function and cooking time required. 2.15 Child lock. For preventing children from playing with the oven. It is activated by pressing the + and - buttons simultaneously until the lock symbol appears (2.15.1). Alternatively, press the function and temperature buttons simultaneously until the lock symbol appears (2.15.2). To unblock it, repeat the operation. 2.16 Residual heat. This shows that the oven is still hot after it has been switched off. The thermometer symbol will appear on the display while the temperature inside the oven is over 60°C.
3
Maintenance and cleaning

3.1 Cleaning the accessories. The accessories are dishwasher-safe. To wash them by hand, use ordinary detergent. Leave them to soak for easier cleaning.
Non-pyrolytic ovens
3.2 Smooth-walled models. Clean the oven while it is warm, wiping the walls with a cloth soaked in hot soapy water.
3.3 Self-cleaning rough-walled models. On these models, the rear plate and side panels are covered with a self-cleaning enamel that removes the grease while the oven is functioning. The side panels are reversible, doubling the lifetime of the coating.
If the panels are not performing the self-cleaning process sufficiently, they will need regenerating. To do this, remove all the accessories and utensils from the inside of the oven. Thoroughly clean the oven surfaces that are not self-cleaning. Select the function.
Set the temperature to 250°C and set the time between 30 and 60 minutes, depending on how dirty the oven is.
When the cleaning programme ends and the oven has cooled down, wipe the self-cleaning elements with a damp sponge. They will then be totally functional again.
Pyrolytic ovens
3.4 Pyrolysis cleaning.
- The cleaning process consists of the dirt being burnt at high temperatures.
- The smoke and smells are eliminated by a catalyser.
- There is no need to wait until the oven has accumulated a large amount of grease to perform the cleaning process. After pyrolysis, when the oven has cooled down, wipe it with a damp cloth to remove the white ash residue.
- Before starting the pyrolysis process, take all the accessories out of the oven, including the cooking accessories and the telescopic runners.
- If any substances are stuck to the inside of the oven due to spill-overs, remove them before carrying out the pyrolysis process as they could catch fire or give off large amounts of smoke.
- During the pyrolysis process the surfaces become hotter than during normal use. Keep children away from the oven.
Depending on how dirty the oven is, you can choose between two types of pyrolysis.
Pyrolysis: This type of pyrolysis should only be used when the oven is very dirty. The cleaning process takes 2 hours. To activate it, turn the function selector dial to (3.4.1).
Note: Pyrolysis cleaning is possible with this option, with the enamelled tray accessory. Place it at level 2. First remove the excess grease accumulated.
ECO pyrolysis: The cleaning process takes 1 hour 30 minutes. To activate it, turn the function selector (3P2).
Note: The time and temperature parameters are set parameters and cannot be altered.
When the process begins, the oven reaches very high temperatures, the door safety lock is activated and the pilot light beside the symbol comes on (3.4.3). When the oven has cooled down, the pilot light switches off and the door can be opened.
3.5 Delayed pyrolysis. You can programme the pyrolysis end time. Turn the function selector dial and select (3.5.1). Press (3.5.2) or (3.5.3) until begins to flash. Adjust the pyrolysis end time by turning the time selector dial (3.5.4, 3.5.5).
3.6 Cleaning the inside walls. Take out the side runners and clean off any grease or ash that has been left after the cleaning processes. Depending on the models, the side runners are fixed in two ways, either without a support (3.6.1, 3.6.2) or with a support (3.6.4, 3.6.5). When you have removed them, use a damp cloth to clean the side walls (3.6.3, 3.6.6). When you have cleaned the oven walls, replace the runners. If your oven has a fold-down grill, pull upwards and press to fold it down (3.6.7) and clean the top wall with a damp cloth (3.6.8).
3.7 Cleaning the glass.
Cleaning the outside of the glass: Use a soft cloth soaked in a glass cleaning product.
Cleaning the inside of the glass: If the inside of the glass is dirty, you can remove it for cleaning.
When the oven has cooled down, open the door as far as it will go (3.7.1) and fix it in place with the red stops supplied in the accessory bag (3.7.2). Insert the two
remaining accessories so that they provide leverage to lift up the glass (3.7.3). Remove the glass (3.7.4), clean it and dry it with a cloth (3.7.5). If necessary, remove the whole glass panel unit inside the door. This unit consists of either one or two glass panels, depending on the model, with a black stop in each corner. To remove them, place your hand under the door and pull upwards (3.7.6). When you have taken out the unit, remove the stops to clean the glass panels (3.7.7).
When the glass panels are clean (3.7.8) fit them onto the rubber stops again, with the stud facing upwards (3.7.9) and replace the glass panels so that the letters "L" (left) and "R" (right) are beside the hinges (3.7.10). Lastly, place the remaining glass panel so that the word PYROLYTIC can be read (3.7.11). Remove the stops (3.7.12) and close the door.
Warnings:
- Make sure the oven is switched off.
- Allow the glass to cool down before removing it.
- Never use steam cleaning machines.
3.8 Cleaning the outside of the oven. Use neutral cleaning products. Dry the oven well with a soft cloth.

Troubleshooting

You can solve the following problems yourself:
4.1 The oven is not heating up. Check it is plugged in and switched on and that the fuse has not blown. Select a higher temperature setting. 4.2 The interior light is not working. Change the bulb or replace the fuse. 4.3 Smoke is coming out during cooking. Turn the temperature down and/or clean the oven. 4.4 The pyrolysis cleaning process is not being carried out. Ensure the door is correctly closed. Locking system or temperature sensor failure. Call the Technical Service. 4.5 A beep is sounding. The selected temperature setting has been reached. The
cooking cycle is complete.
4.6 The oven makes a noise after cooking.
This is normal, as the fan keeps running until the temperature inside and outside the oven is reduced.
4.7 Failure warnings.
FT Temperature sensor failure. FO2 Door blocked (4.7.1). F03 Pyrolysis cannot be carried out. FO4 Door block failure. F05 Software Failure. F Power cut during cooking. The oven automatically switches off as it has been functioning for several hours (4.7.2).
Do not try to repair the oven yourself. Call the technical assistance service.

Safety

- The oven must be installed by an authorised installer in accordance with the manufacturer's instructions and diagrams.
- The electrical installation must be dimensioned for the maximum power indicated on the reference plate and the electrical socket must have a regulatory earth connection.
- The mains circuit supplying the oven must have a single-pole cut-off switch with at least 3 mm between contacts.
- If the power cord is damaged, it must be replaced by the after-sales technical service or by similarly qualified staff, to avoid hazard.
- Ensure the appliance is unplugged from the mains before replacing the oven lamp, to avoid electric shock.
- Do not use abrasive cleaning products or metal scouring pads to clean the oven door, as they could scratch the surface and cause the glass to shatter.
- Keep small children away from the oven. It has accessible parts that can heat up during functioning.
- Do not touch the heating elements inside the oven.
- This appliance is not intended for use by people (including children) whose physical, sensory, or mental capacities are reduced or who lack experience or knowledge, except under supervision or after receiving instruction regarding use of the appliance from a person responsible for their safety. Use by children should be supervised to prevent them playing with the appliance.

The Environment

This oven has been designed with environmental protection in mind.
Respect the environment. Only preheat the oven when necessary (see table). Use dark coloured cake tins whenever possible. For long cooking times, switch off the oven 5 or 10 minutes before the end of cooking time.
Management of waste electrical and electronic equipment.
The symbol indicates that the appliance must not be disposed of in traditional bins for domestic waste.
Take your oven to a special collection centre. Recycling domestic appliances will prevent negative consequences for health and the environment and will allow savings on energy and resources.
For further information, contact the local authorities or the shop where you bought the oven.
Cooking Table
| Food | Programme and temperature | Time | Position | Preheat | Accessories |
| beef
1,5 Kg | 190°C | 210°C 1 | 50 - 60 min no | | |
| pork
1,5 Kg | 150°C | 180°C | 85 - 95 min | 2 | no |
| lamb
1,2 Kg | 200°C | 220°C | 40 - 50 min | 2 | no |
| turkey
4 Kg | 170°C | 190°C | 115 - 125 min | 1 | no |
| chicken
1,25 Kg | 210°C | 230°C | 50 - 60 min | 1 | no |
| roasted red
peppers
1,25 Kg | 190°C | 210°C | 30 - 40 min | 2 | no |
| stuffed
tomatoes
4 servings | 200°C | 220°C | 15 - 19 min | 2 | no |
| baked
hake
1,5 Kg | 210°C | 230°C | 7 - 9 min | 2 | yes |
| roasted
lobster
1 Kg | 220°C | 240°C | 4 - 5 min | 4 | yes |
| baked
fish
1 Kg | 200°C | 220°C | 13 - 17 min | 2 | yes |
| baked
cod
1,5 Kg | 210°C | 220°C | 7 - 9 min | 2 | yes |
| pizza | 200°C | 220°C | 18 - 22 min | 1 | yes |
| bread | 200°C | 220°C | 18 - 22 min | 2 | no |
| sponge cakes | 190°C | 210°C | 15 - 19 min | 2 | yes |
| flan | 130°C | 150°C | 30 - 40 min | 1 | no |
| defrosting, all
types of food | 75°C | | | 2 | no |
Defect temperature sensor.
FOH Storing deuvergrendeling.
F05 Software error.
2.8 Selecting the preparation mode for this
It is necessary to turn the mode selector
, selecting the required mode depending on the appliance model.
Traditional cooking with
forced air circulation in the chamber
of the oven. This mode is suitable for preparing any dish. You can cook several dishes at the same time, their smells and tastes will not mix.
The «Turbo grill» mode. The food is cooked
by the central heating element.
Intensive cooking mode on the grill with forced air circulation in the oven chamber. In this mode you can cook with evenly distributed heat. The mode is suitable for preparing large pieces of meat.
Intensive cooking mode on the grill.
Baked dishes: flour products, soups and sauces.
Gentle cooking mode on the grill.
Hamburgers, croutons and products with a small surface.
Intensive heating. Intensive
heating according to the type of oven with uniform distribution. The mode is very good for cooking poultry and fish.
Intensive heating with forced circulation
of air in the oven chamber. Due to the operation of the ventilator, uniform distribution of heat supplied from below is ensured. The mode
is recommended for cooking poultry.
Traditional heating. Bakery products
products, pies, pastries with filling, lean meat.
Defrosting. Using this mode, you can defrost any products in a short time.
2.9 Temperature setting. Turn the temperature selector knob to the required position (2.9.1).
If after selecting the cooking mode the appliance itself offers the optimal temperature level, then cooking starts immediately. The temperature suggested by the appliance can be changed within 3 seconds while its designation is flashing, or in one of the following ways. Press the button (2.9.2); the temperature designation will start flashing; the temperature level can be changed by turning the knob (- + (2.9.3). Alternatively, you can press the button and hold it until the desired position is reached (2.9.4); the temperature designation will start flashing; the temperature level can be changed by turning the knob (- + (2.9.5).
If you keep the button pressed, you can see the actual temperature inside the oven.
2.10 Switching off the oven. In all cases, after finishing cooking, the mode selector knob must be turned to position 0
(2.10.1). If the appliance you have purchased has a temperature selector knob, it must also be set to the off position (2.10.2).
FUNCTION PROGRAMMED BY TIME
2.11 Setting the cooking duration
To select the cooking mode, set the required temperature level. Then press the button and hold it until the indicator starts flashing (2.11.1, 2.11.2, 2.11.3). To start cooking, press the + button (2.11.4) or turn the knob (2.11.5, 2.11.6).
After a few seconds, the set time will be confirmed by the appliance with a beep, and the countdown will begin. At the end of cooking, the appliance will emit a high-frequency sound signal; to turn it off, press any button or switch off the oven.
2.12 Setting the end time of cooking
First, you must select the cooking mode, set the required temperature level and the cooking duration. Then press the button and hold it until
the indicator starts flashing (2.12.1, 2.12.2, 2.12.3). To set the end time of cooking, press the + button (2.12.4) or turn the knob (2.12.5, 2.12.6). The oven will be switched off delayed in such a way that cooking finishes at the set time. At the end, the appliance will emit a high-frequency sound signal. To turn it off, press any button and switch off the oven.
2.13 Automatic switch-off (b, c, d, e). If you forget to switch off the oven, it will switch off automatically after some time. At temperatures below 100°C, the appliance switches off after 10 hours. If the oven operates at temperatures above 100°C, it switches off after 3 hours. 2.14 Celeris mode. This mode is intended for preheating the oven. To use it, turn the mode selector knob to the position and set the required temperature level (2.9.). The oven will heat up quickly to the set temperature. After the oven has preheated to the set temperature, place the dish to be cooked in it and set the required cooking mode and its time. 2.15 Child lock function. Using this function prevents the appliance from being switched on by children or their interference in its operation. To activate this function, press and hold the buttons simultaneously until the symbol appears on the display (2.15.1). Alternatively, you can press and hold the buttons simultaneously until the symbol LOC appears on the display (2.15.2). To unlock the appliance, repeat these procedures. 2.16 Residual heat. Indicates that after switching off the oven, it still remains hot. On the display, the symbol is shown until the temperature in the oven drops below 60°C.
Care and cleaning
3.1 Cleaning the accessories. The accessories can be washed in a dishwasher. For hand washing, you can use a common household detergent that you normally use for dishes. If the dirt is difficult to remove, the cleaning process can be facilitated by pre-soaking the accessories.
Ovens without pyrolytic cleaning function
3.2 Ovens with smooth walls. The oven should be wiped slightly heated, washing the tray with water and mild detergent or soap. 3.3 Ovens with catalytic walls (self-cleaning). In ovens of this type, the rear and side panels are covered
with a self-cleaning enamel. Thanks to it, grease is removed from the walls during operation of the appliance. The side panels can be turned to the other side, which extends the service life of the panels by about two times.
When the panels cease to provide sufficient cleaning due to their properties, it is necessary to regenerate them. For this, from the oven it is necessary to remove all accessories and containers. After that, carefully clean the surfaces of the oven, without using abrasive agents. Then set the mode
Set the temperature to 250 °C and the time in the range of 30-60 minutes, depending on the degree of contamination of the appliance.
After the cleaning program has finished its work and the oven has cooled down, the self-cleaning element must be wiped with a damp soft cloth. After this procedure, they fully restore their functionality for operation.
Ovens with pyrolysis cleaning function
3.4 Cleaning by pyrolysis method.
It is carried out by burning contaminants at high temperatures. - Smoke-forming substances and odors are removed when passing through the catalyst. - To perform this cleaning, it is not necessary to wait until the oven is contaminated with a large amount of dirt. - After performing the pyrolysis cleaning procedure and cooling the oven, the surfaces should be wiped with a damp cloth, removing the remains of white plaque. - Before turning on the pyrolysis cleaning mode, it is necessary to remove all accessories from the oven, including accessories for cooking and telescopic guides. - If a large amount of liquid from cooked dishes has spilled into the chamber, before pyrolysis cleaning it must be removed, because otherwise such contaminants may ignite or lead to the formation of a large amount of smoke. During the pyrolysis procedure, the surfaces heat up more than during
normal cooking. Therefore, during this procedure, children should be at a safe distance from the oven.
Depending on the degree of contamination of the oven, you can choose one of two types of pyrolysis cleaning.
Mode: 3TIN is used for heavy contamination of the oven, and the cleaning cycle lasts 2 hours. To activate this cleaning mode, turn the mode selector knob to position 3.4.1. Note: In this mode, the programmed cleaning time can be used by setting it to level 2, after first removing the accumulated residue. Pyrolysis cycle: lasts 1 hour 30 minutes. To activate this cleaning mode, turn the mode selector knob to position 4.2. Note: The time and temperature settings are fixed and cannot be changed. After the cleaning process starts, the temperature in the oven reaches very high values. Therefore, for safety reasons, the door is locked, and a warning indicator light (3.4.3) flashes. After the temperature drops, the indicator light goes out, and the door can be opened. 3.5 Pyrolytic cleaning timer. It is possible to program the end time of the pyrolytic cleaning process. First, turn the mode selector knob to select the cleaning mode (3.5). Then press (3.5.2) or (3.5.3) and hold until the indicator lights up. Set the end time of the cleaning process by turning the time selector knob (3.5.4, 3.5.5). 3.6 Cleaning the internal walls. To remove food residues that may remain after cleaning procedures, it is necessary to remove the side guides. Depending on the oven model, the side guides can be attached in one of two ways: without support (3.6.1, 3.6.2) or with support (3.6.4, 3.6.5). After removing the guides, the side walls should be wiped with a damp cloth (3.6.3, 3.6.6). After completing the wall cleaning procedure, the guides should be reinstalled. If the oven has a removable grill, it should be lifted, tilted, and pulled out downwards (3.6.7). Clean the top wall with a damp cloth (3.6.8).
3.7 Cleaning the glass
External surfaces: To clean the external surfaces of the glass, use a soft cloth and a glass cleaning product.
Internal surfaces: If the internal surfaces of the glass are dirty, they can be removed for thorough cleaning.
The oven must be unplugged. Open the door (3.7.1) and secure it with the stop (red) provided in the accessory kit (3.7.2). Insert the two other elements so as to lift the glass, forming a gap (3.7.3). Remove the glass (3.7.4), clean it, and dry it with a cloth (3.7.5). If necessary, all the glass panes can be removed from the door with the special kit. The kit may consist of one or two panes depending on the oven model. In each corner there is a black mark. To remove the panes, insert your hand through the lower part of the door and push the guide upwards (3.7.6). After the panes have been removed, for cleaning the supports should be removed (3.7.7).
Insert the glass (3.7.8) again, install the rubber stops with the protrusion facing up (3.7.9), and position them so that the markings "L" on the left and "R" on the right are next to the hinges (3.7.10). The procedure ends with installing the glass on the oven in such a way that the word PYROLYTIC is positioned correctly for reading (3.7.11). After this, the clamps can be removed (3.7.12) and the doors closed.
Important precautions regarding operation:
Do not forget to turn off the oven after finishing cooking. The glass can be removed from the door only after the oven has completely cooled. It is strictly forbidden to use steam cleaning devices for cleaning this appliance.
3.8 Cleaning the external surfaces of the oven: Use neutral cleaning agents. After cleaning, the surface should be carefully dried with a soft cloth.

Possible problems and their resolution

Some problems may arise that can be resolved by the user independently.
4.1 The oven does not heat up. Check the power connection, the condition of the fuse, and increase the set temperature level.
4.2 The internal oven light does not work. Replace the bulb or the fuse. 4.3 During cooking, smoke comes out of the oven chamber. It is necessary to reduce the cooking temperature and/or clean the oven. 4.4 Pyrolytic cleaning is not performed. Check that the door is closed properly. The cause may also be a malfunction of the locking system or the temperature sensor. In this case, contact the service department for technical maintenance. 4.5 The oven emits a high-frequency sound signal. The set temperature has been reached. The selected cooking program is complete. 4.6 After cooking, the oven is slightly damp. This is normal and is due to the fact that the fan continues to operate until the temperature inside the oven chamber equalizes with the external temperature. 4.7 Fault warnings.
F01 Malfunction of the temperature sensor F02 Door lock (4.7.1) F03 Impossible to perform pyrolytic cleaning F04 Door locking system malfunction F05 Software failure F06 Power outage during cooking. A Automatic shutdown after several hours of continuous operation (4.7.2).
Interference in the operation of the device by the user is prohibited. To repair the device, contact the service department for technical maintenance.

Safety

- Installation of the oven must be carried out by a qualified specialist in installation, in accordance with the instructions and diagrams of the manufacturer. The electrical installation must be carried out in accordance with the maximum power indicated on the identification plate, using
an electrical socket with grounding, conforming to standards.
- The electrical circuit supplying the oven must be equipped with an omnipolar circuit breaker with a minimum contact opening distance of 3 mm.
- If the appliance is damaged, it must be replaced by the after-sales service department or by specialists with the same qualifications, in order to ensure safety.
- Before replacing the lamp, make sure that the appliance is switched off to avoid an electric shock. Do not use abrasive cleaning agents or sharp metal scrapers to clean the oven door glass, as this can damage the surface and cause the glass to shatter.
- Do not allow small children to be near the oven while it is in operation. Some external parts may become hot.
- Avoid touching the heating elements inside the oven. This appliance is not intended for use by persons (including children) with reduced physical, sensory or mental capabilities, or lack of experience and knowledge, unless they have been given supervision or instruction concerning use of the appliance by a person responsible for their safety. Children should be supervised to ensure that they do not play with the appliance.

Environment

The design of the oven is based on the principles of environmental protection.
Follow the principles of environmental protection.
Preheat the oven only if necessary (see table).
When cooking, switch off the oven 5-10 minutes before the set time.
Disposal of waste electrical and electronic equipment.
The symbol indicates that this appliance cannot be disposed of in ordinary containers for household waste.
Take the old oven to a special collection center. Recycling of household electrical appliances helps to avoid negative consequences for health and the environment, and helps to save energy and resources.
For additional information, contact your local authorities or the organization where you purchased the oven.
Cooking table