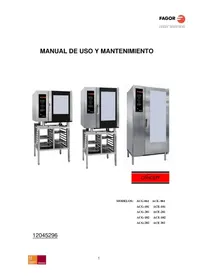
6H815A TCX - Electric oven FAGOR - Free user manual and instructions
Find the device manual for free 6H815A TCX FAGOR in PDF.
User questions about 6H815A TCX FAGOR
0 question about this device. Answer the ones you know or ask your own.
Ask a new question about this device
Download the instructions for your Electric oven in PDF format for free! Find your manual 6H815A TCX - FAGOR and take your electronic device back in hand. On this page are published all the documents necessary for the use of your device. 6H815A TCX by FAGOR.
USER MANUAL 6H815A TCX FAGOR
Important! Read the entire manual before using the oven. The documentation and accessories are inside the oven.
The texts in the manual correspond to the numbered diagrams.

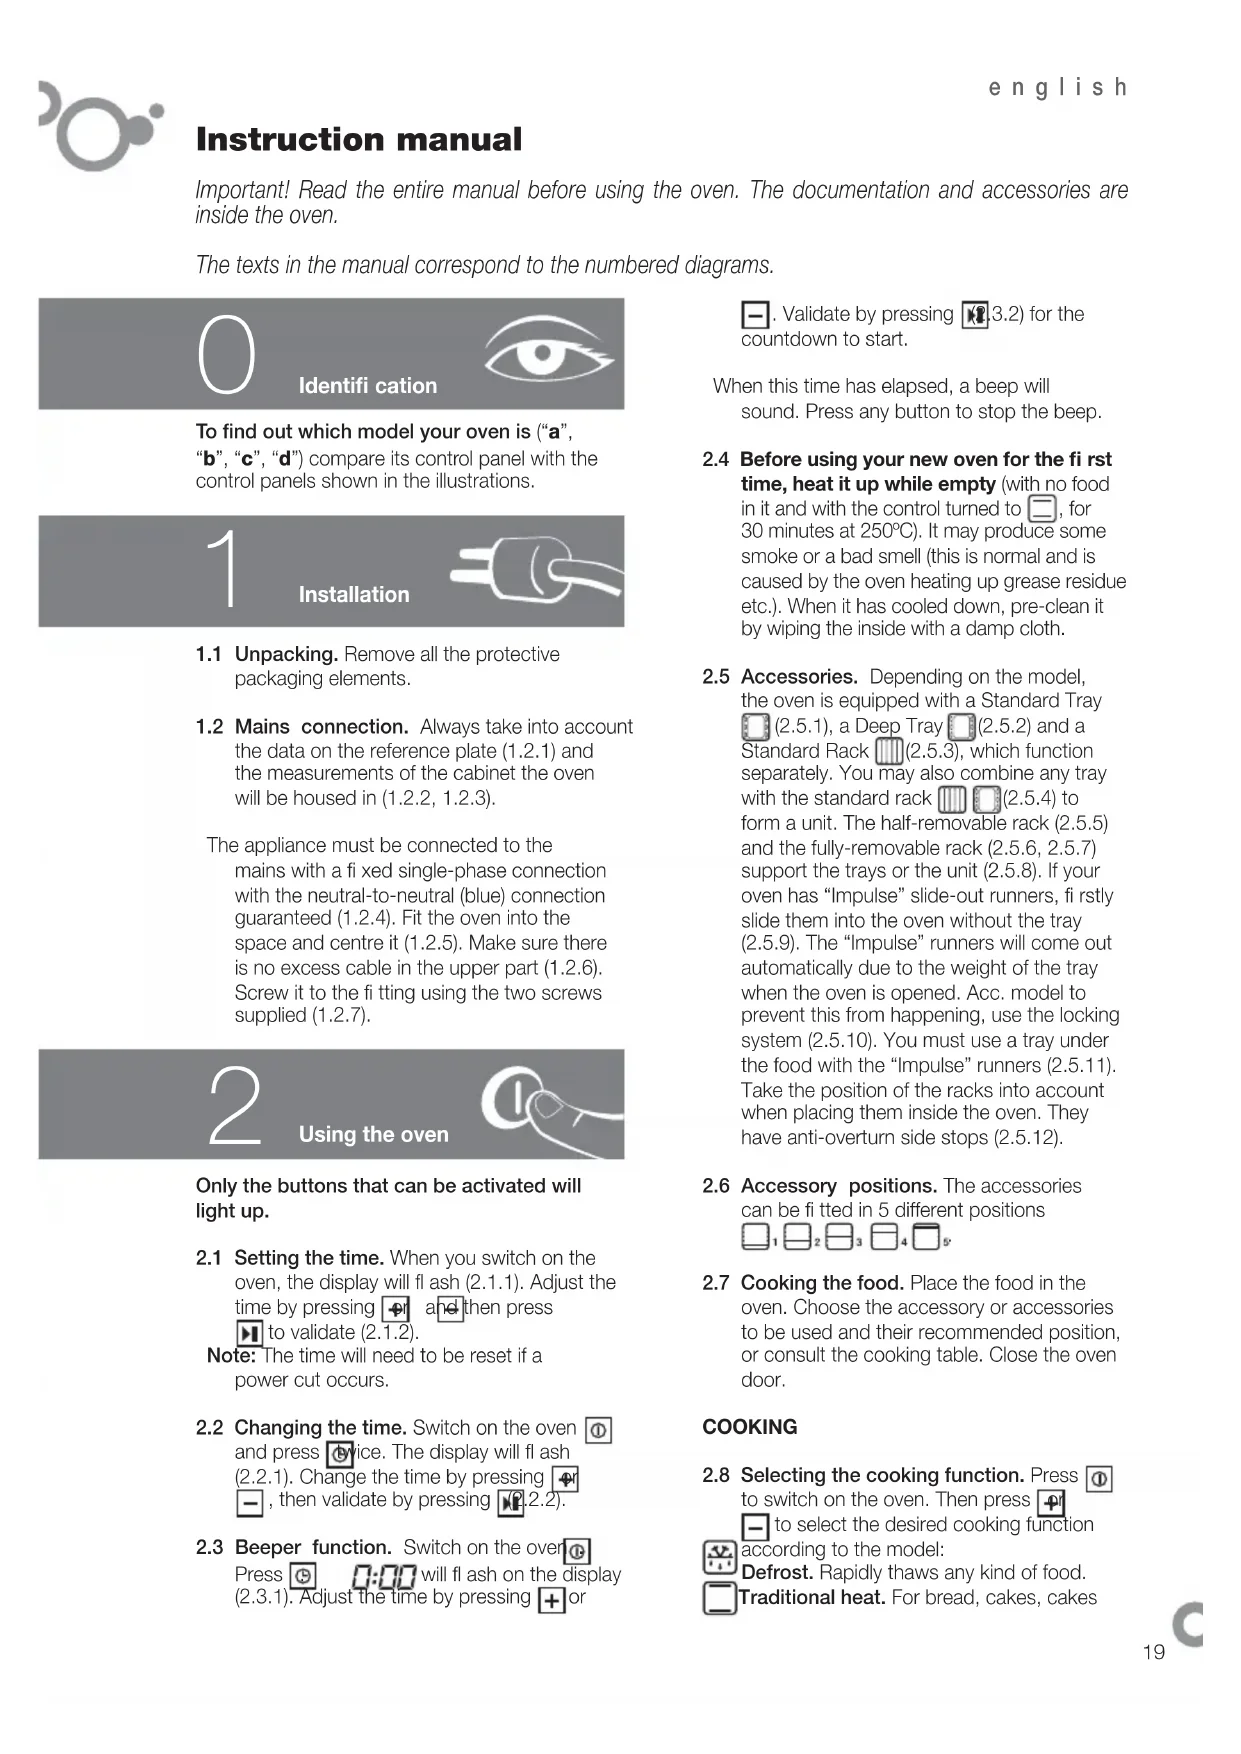
Identification

To find out which model your oven is ("a", "b", "c", "d") compare its control panel with the control panels shown in the illustrations.
1

Installation
1.1 Unpacking. Remove all the protective packaging elements.
1.2 Mains connection. Always take into account the data on the reference plate (1.2.1) and the measurements of the cabinet the oven will be housed in (1.2.2, 1.2.3).
The appliance must be connected to the mains with a fi xed single-phase connection with the neutral-to-neutral (blue) connection guaranteed (1.2.4). Fit the oven into the space and centre it (1.2.5). Make sure there is no excess cable in the upper part (1.2.6). Screw it to the ftting using the two screws supplied (1.2.7).
2

Using the oven
Only the buttons that can be activated will light up.
2.1 Setting the time. When you switch on the oven, the display will flash (2.1.1). Adjust the time by pressing + and then press to validate (2.1.2).
Note: The time will need to be reset if a power cut occurs.
2.2 Changing the time. Switch on the oven ① and press ②ice. The display will flash (2.2.1). Change the time by pressing , then validate by pressing (2.2.2).
2.3 Beeper function. Switch on the over Press will flash on the display (2.3.1). Adjust the time by pressing + or
- Validate by pressing 3.2) for the countdown to start.
When this time has elapsed, a beep will sound. Press any button to stop the beep.
2.4 Before using your new oven for the first time, heat it up while empty (with no food in it and with the control turned to , for 30 minutes at 250^ ). It may produce some smoke or a bad smell (this is normal and is caused by the oven heating up grease residue etc.). When it has cooled down, pre-clean it by wiping the inside with a damp cloth.
2.5 Accessories. Depending on the model, the oven is equipped with a Standard Tray (2.5.1), a Deep Tray (2.5.2) and a Standard Rack (2.5.3), which function separately. You may also combine any tray with the standard rack (2.5.4) to form a unit. The half-removable rack (2.5.5) and the fully-removable rack (2.5.6, 2.5.7) support the trays or the unit (2.5.8). If your oven has "Impulse" slide-out runners, firstly slide them into the oven without the tray (2.5.9). The "Impulse" runners will come out automatically due to the weight of the tray when the oven is opened. Acc. model to prevent this from happening, use the locking system (2.5.10). You must use a tray under the food with the "Impulse" runners (2.5.11). Take the position of the racks into account when placing them inside the oven. They have anti-overturn side stops (2.5.12).
2.6 Accessory positions. The accessories can be fitted in 5 different positions
2.7 Cooking the food. Place the food in the oven. Choose the accessory or accessories to be used and their recommended position, or consult the cooking table. Close the oven door.
COOKING
2.8 Selecting the cooking function. Press to switch on the oven. Then press to select the desired cooking function according to the model:
according to the model: Defrost. Rapidly thaws any kind of food. Traditional heat. For bread, cakes, cakes
with filling and lean meat.
High base heat. The heat from the oven base is evenly distributed. Ideal for paellas or pizzas.
Low grill. For hamburgers, toast and food with a small surface area.
High grill. For browning pasta, soufflés and bechamel sauce.
Fanned high grill. This browns the food, distributing the heat evenly. Ideal for large-sized roasts.
Turbo plus. The heat is produced by the central element.
Traditional fanned heat. For any kind of dish. Several dishes may be cooked at once without their fl avours or smells mixing.
Delicate food. For yoghurt or dried foods (dried mushrooms, for example).
3D heat. This enables you to cook several trays of food at the same time.
4-level grill. The browning time is longer than with a standard grill.
Keep warm function. This keeps already-cooked food warm.
Consult the table to find out which function is the most suitable for the food to be cooked. Validate by pressing and the oven will start cooking.
2.9 Changing the temperature When you have selected the programme, press Change the temperature by pressing
or -/alidate by pressing . the ^ C button is pressed and held down, the real temperature inside the oven will appear on the display.
Note: The cooking process can be stopped at any time by pressing
To switch off the oven, press. ①
TIME FUNCTIONS
2.10 Selecting the cooking time When the programme has been selected and the temperature changed if necessary, press until appears on the display (2.10.1) Adjust the time by pressing and validate by pressing 10.2). The countdown will start immediately after adjustment.
When the cooking process ends, a beep will sound. Press any button to stop the beep.
2.11 Selecting the end time Select a cooking function, temperature and cooking time (2.10). Press until 211.1). appears on the display. Press to adjust the end of cooking time and validate by pressing 11.2). While the oven is
on hold, a moving dotted line will appear on the display (2.11.3). The cooking process will end at the time indicated. When it ends, a beep will sound. Press any button to stop the beep.
Note: During the cooking process, the thermometer will flash. When the selected temperature is reached, a beep will sound.
2.12 Automatic switch-off. If you forget to switch off the oven, it will switch off automatically after a certain time. If the temperature is lower than 100^ , the oven will switch off after 10 hours. If the temperature is higher than 100^ , it will switch off after 3 hours.
2.13 Celeris function. Recommended for dishes requiring pre-heating.
Pyrolytic oven: Select a function (2.9). Press ^ C and then press again and hold it down for 5 seconds until appears on the display. Validate by pressing 2.13.1) When the temperature is reached, will disappear.
Non-pyrolytic oven: Switch on the oven and select a function (2.9). Press l (2.13.2). The oven will quickly reach the temperature required for this function. When the temperature is reached, the symbol will disappear. You can now place the food in the oven.
Note: The Celeris function is not applicable to some programmes.
2.14 Residual heat. If the oven is still hot after it has been switched off, will appear on the display. It will only disappear when the temperature inside the oven drops below 60^ .
2.15 (Button) lock function: For preventing children from playing with the oven.
With the oven cooking or completely switched off, press and hold it down for a few seconds (2.15.1). To unblock the oven, repeat the operation.
On some models, with the oven cooking or completely switched off, press and hold it down for a few seconds (2.15.2). To unblock it, repeat the operation.
Note: If you block the oven when it is switched on, you can switch it off by pressing and holding it down.
2.16 Recipe function switch on the oven
Press 16.1) and use and to select the recipe from the ones you have stored.
| P01 | Stuffed tomatoes | P01 |
| P02 | Roasted red peppers | P02 |
| Paella | P03 | |
| Hake pie with prawns | P04 | |
| Leek pastry | P05 | |
| Rabbit and rice | P06 | |
| Pizza with 4 cheeses (fresh dough) | P07 | |
| P03 | Baked hake or cod | P08 |
| P04 | Salmon in beer | P09 |
| P05 | Trout and mushrooms | P10 |
| P06 | King prawns | P11 |
| Monkfi sh and clams | P12 | |
| Baked sea bream | P13 | |
| Tuna slices in onion sauce | P14 | |
| Filleted anchovies | P15 | |
| Lobster | P16 | |
| P07 | Pork tenderloin | P17 |
| P08 | Roast lamb | P18 |
| P09 | Beef roti | P19 |
| P10 | Roast rabbit | P20 |
| P11 | Roast chicken | P21 |
| Beef ribs | P22 | |
| Stuffed tenderloin | P23 | |
| Stuffed meat roll | P24 | |
| Duck in orange sauce | P25 | |
| Roast quail | P26 | |
| P12 | Traditional sponge cake | P27 |
| P13 | Fairy cakes | P28 |
| P14 | Egg fl an | P29 |
| P15 | Bread, pre-cooked baguettes | P30 |
| Almond tart | P31 | |
| Apple tart | P32 | |
| Petit choux | P33 | |
| Swiss roll | P34 | |
| Baked apples | P35 | |
| validate by pressing (2.16.2). Adjust the weight by pressing and validate by pressing (1.16.3). Adjust the cooking degree (rare well done) pressing , and validate by pressing (2.16.4). The oven will start functioning (2.16.5). The recipes marked with (*) |
| require pre-heating except on delayed programming. When the temperature is reached, a beeper will sound. You can then place the food in the oven. If you wish, you can programme an end-of-cooking time (2.11.1, 2.11.2). When the cooking is complete, a beep will sound. Press any |
button to stop the beep.
Note: During the cooking process, if you press and hold it down, the information on the recipe in progress will appear on the display (2.16.6).
2.17 Interior oven light function: When the oven is in power saving mode, the light only comes on for a few seconds, when you press ^ C . You can deactivate this function so that the light remains permanently on during cooking if you wish. To do this, with the oven switched off, press the + and buttons simultaneously and hold them down until you hear a beep. To return to power saving mode, repeat the operation.
3
Maintenance and cleaning

3.1 Cleaning the accessories. The accessories are dishwasher-safe. To wash them up by hand, use ordinary detergent. Leave them to soak for easier cleaning.
Non-pyrolytic ovens
3.2 Smooth-walled models. Clean the oven while it is warm, wiping the walls with a cloth soaked in hot soapy water.
3.3 Self-cleaning rough-walled models. On these models, the rear plate and side panels are covered with a self-cleaning enamel that removes the grease while the oven is functioning. The side panels are reversible, doubling the lifetime of the coating.
If the panels are not performing the self-cleaning process sufficiently, they will need regenerating. To do this, remove all the accessories and utensils from the inside of the oven. Thoroughly clean the oven surfaces that are not self-cleaning. Select the function.
Set the temperature to 250^ and set the time between 30 and 60 minutes, depending on how dirty the oven is.
When the cleaning programme ends and the oven has cooled down, wipe the self-cleaning elements with a damp sponge. They will then be totally functional again.
Pyrolytic ovens
3.4 Pyrolysis cleaning
- The cleaning process consists of the dirt being burnt at high temperatures.
- The smoke and smells are eliminated by a catalyser.
- There is no need to wait until the oven has accumulated a large amount of grease to perform the cleaning process.
After pyrolysis, when the oven has cooled down, wipe it with a damp cloth to remove the white ash residue. - Before starting the pyrolysis process, take all the accessories out of the oven, including the cooking accessories and the telescopic runners.
- If any substances are stuck to the inside of the oven due to spill-overs, remove them before carrying out the pyrolysis process as they could catch fire or give off large amounts of smoke.
- During the pyrolysis process the surfaces become hotter than during normal use. Keep children away from the oven.
You can choose between three types of pyrolysis for cleaning.
Pyro Turbo P: The cleaning process takes 2 hours.
Note: Pyrolysis cleaning is possible with this option, with the enamelled tray accessory. Place it at level 2. First remove the excess grease accumulated.
Pyro Eco : The cleaning process takes one-and-a-half hours.
Auto Pyro : duration depends on how dirty the oven is.
To activate it, switch on the oven by pressing 0 , then press repeatedly to select the desired cleaning mode. Validate by pressing (3.4.1). The pyrolysis will begin immediately.
Note: The time and temperature parameters for pyrolysis are set parameters and cannot be altered.
When the process begins, the oven reaches
very high temperatures, the door safety lock is activated and 0 appears on the display (3.4.2). When the oven has cooled down, the symbol 0 disappears and the door can be opened.
3.5 Delayed pyrolysis: You can programme the pyrolysis end time. Press to switch on the oven and then press select the most suitable pyrolysis mode (3.5.1). Press The symbol will appear on the display. Enter the cleaning end time by pressing . Validate by pressing 5.2).
3.6 Cleaning the inside walls. Take out the side runners and clean off any grease or ash that has been left after the cleaning processes. Depending on the models, the side runners are fixed in two ways, either without a support (3.6.1, 3.6.2) or with a support (3.6.3, 3.6.4). When you have removed them, use a damp cloth to clean the side walls (3.6.5). When you have cleaned the oven walls, replace the runners. If your oven has a fold-down grill, pull upwards and press to fold it down (3.6.6) and clean the top wall with a damp cloth (3.6.7).
3.7 Cleaning the glass
Cleaning the outside of the glass: Use a soft cloth soaked in a glass cleaning product.
Cleaning the inside of the glass: If the inside of the glass is dirty, you can remove it for cleaning.
When the oven has cooled down, open the door as far as it will go (3.7.1) and fix it in place with the red stops supplied in the accessory bag (3.7.2). Insert the two remaining accessories so that they provide leverage to lift up the glass (3.7.3). Remove the glass (3.7.4), clean it and dry it with a cloth (3.7.5). If necessary, remove the whole glass panel unit inside the door. This unit consists of either one or two glass panels, depending on the model, with a black stop in each corner. To remove them, place your hand under the door and pull upwards (3.7.6). When you have taken out the unit, remove the stops to clean the glass panels (3.7.7).
When the glass panels are clean (3.7.8) fit them onto the rubber stops again, with the stud facing upwards (3.7.9) and replace the glass panels so that the letters "L" (left) and "R" (right) are beside the hinges (3.7.10). Lastly, place the remaining glass panel so that the word PYROLYTIC can be read (3.7.11). Remove the stops (3.7.12) and close the door.
Warnings:
Make sure the oven is switched off.
- Allow the glass to cool down before removing it.
- Never use steam cleaning machines.
3.8 Cleaning the outside of the oven: Use neutral cleaning products. Dry the oven well with a soft cloth.
4 Troubleshooting
You can solve the following problems yourself:
4.1 4.1 The oven is not heating up. Check it is plugged in and switched on and that the fuse has not blown. Select a higher temperature setting.
4.2 The interior light is not working. Change the bulb or replace the fuse.
4.3 Smoke is coming out during cooking. Tun the temperature down and/or clean the oven.
4.4 The pyrolysis cleaning process is not being carried out. Ensure the door is correctly closed. Locking system or temperature sensor failure. Call the Technical Service.
4.5 A beep is sounding. The selected temperature setting has been reached. The cooking cycle is complete.
4.6 The oven makes a noise after cooking.
This is normal, as the fan keeps running until the temperature inside and outside the oven is reduced.
4.7 Failure warnings.
FTemperature sensor failure.
FO2 Door blocked (4.7.1).
F03 Pyrolysis cannot be carried out.
Door block failure.
F05 Software Failure.
Power cut during cooking.
The oven automatically switches off as it has been functioning for several hours (4.7.2).

Do not try to repair the oven yourself. Call the technical assistance service.
5 Safety
- The oven must be installed by an authorised installer in accordance with the manufacturer's instructions and diagrams.
- The electrical installation must be dimensioned for the maximum power indicated on the
reference plate and the electrical socket must have a regulatory earth connection.
- The mains circuit supplying the oven must have a single-pole cut-off switch with at least 3 mm between contacts.
- If the power cord is damaged, it must be replaced by the after-sales technical service or by similarly qualified staff, to avoid hazard.
- Ensure the appliance is unplugged from the mains before replacing the oven lamp, to avoid electric shock.
- Do not use abrasive cleaning products or metal scouring pads to clean the oven door, as they could scratch the surface and cause the glass to shatter.
- Keep small children away from the oven. It has accessible parts that can heat up during functioning.
- Do not touch the heating elements inside the oven.
- This appliance is not intended for use by people (including children) whose physical, sensory, or mental capacities are reduced or who lack experience or knowledge, except under supervision or after receiving instruction regarding use of the appliance from a person responsible for their safety. Use by children should be supervised to prevent them playing with the appliance.

The Environment

This oven has been designed with environmental protection in mind.
Respect the environment. Only preheat the oven when necessary (see table). Use dark coloured cake tins whenever possible. For long cooking times, switch off the oven 5 or 10 minutes before the end of cooking time.
Management of waste electrical and electronic equipment.
The symbol indicates that the appliance must not be disposed of in traditional bins for domestic waste.
Take your oven to the a special collection centre. Recycling domestic appliances will prevent negative consequences for health and the environment and will allow savings on energy and resources.
For further information, contact the local authorities or the shop where you bought the oven.
Cooking Table
| Food | Programme and temperature | Time | Position | Preheat | Accessories |
| beef1,5 Kg | 190°C | 210°C 1 | 50 - 60 min no | ||
| pork1,5 Kg | 150°C | 180°C | 85 - 95 min | 2 | no |
| lamb1,2 Kg | 200°C | 220°C | 40 - 50 min | 2 | no |
| turkey4 Kg | 170°C | 190°C | 115 - 125 min | 1 | no |
| chicken1,25 Kg | 210°C | 230°C | 50 - 60 min | 1 | no |
| roasted redpeppers1,25 Kg | 190°C | 210°C | 30 - 40 min | 2 | no |
| stuffedtomatoes4 servings | 200°C | 220°C | 15 - 19 min | 2 | no |
| bakedhake1,5 Kg | 210°C | 230°C | 7 - 9 min | 2 | yes |
| roastedlobster1 Kg | 220°C | 240°C | 4 - 5 min | 4 | yes |
| bakedfish1 Kg | 200°C | 220°C | 13 - 17 min | 2 | yes |
| bakedcod1,5 Kg | 210°C | 220°C | 7 - 9 min | 2 | yes |
| pizza | 200°C | 220°C | 18 - 22 min | 1 | yes |
| bread | 200°C | 220°C | 18 - 22 min | 2 | no |
| sponge cakes | 190°C | 210°C | 15 - 19 min | 2 | yes |
| flan | 130°C | 150°C | 30 - 40 min | 1 | no |
| defrosting, all types of food | 75°C | 2 | no |
Bedienungsanleitung
npiroTOBHeH N: ChaHaJna Heo6xOJIMMO BbIpaTbpeKIM npiroTOBHeH N yCTaHOBtB Tpe6yEmbI yPOBeHb TEMNEpApTyblN DITeNBHOCTb npiroTOBHeH N (2.10.). 3aTEM HaxMITE KJIaBNIUy SDEPKINBaH ee Do TEX nop, NOKa Ha DCIIeE He OTO6pa3NTcR (2.11.1). YTO6blYCTaHOBtB BPEMr 3aBepseHn npiroTOBHeH,NAXMaIte KJIaBNIU, aTaEM NOITBepDInTe erO HaxKaTNem
(2.11.2).PnHaxoXdEHNn Pnp6opaBpeKIMMe OxNdaHnHa dncnlee OTobpaXkaeTcnyHKTpHnA DnXkyUaCra KpNBaR (2.11.3).PnroTOBLeHne 3abepuNTcB yCTaHOBHeHnOe Bpem. I0 er0 3aBepWeHn DxyOBKa NOaCT 3ByKOBo CNrHaJ. JTo rTOyTObbl OTKnIOHTb 3ByKOBo CNrHaJ, HaxMnte LIObIyKnaBnUy.
PnmeHne.BoBpMa npiroTOBHeHH 3NaOHK TepMometpa Muraet. IIOOCTNXeHN 3aHaHHOB BENHHbI TEMNepaTpybl npibop noJaET BBICOKOCACTOTHbI 3ByKOBOc HnHaI.
2.12 ABToMaTnueckoe OTKIOUeHne.Ecnn
BbI 3a6bIIN BbIKNIOHTb DyXOB0 WkaΦ,
Yepe3 HeKOTOPOE BpEMr OH BbIKNIOHTcR
ABTomatnueckn. Pn TEmnpaType Hxke
100°C np6op BbIKNIOaETcR Yepe3
10 Yacob. EcIn dYxOBKa pa6OtaT pRn
TeMnpaType Bblwe 100°C, ee BbIKNIOUeHne
IponCxOJNT Yepe3 3 Yaca.
2.13 Pekm Celeris .TOT peKmM
peKOMeHnyETcH NcHOB30BaTb DnI npriROBHeHH 6JIoD, KOToPbIe Tpe6yIOT npEiBaHTeJIbHOrO pa3OrpeBa.
DyXOBbie wkaΦbI cФyHKuEn
HnpoJIHTUeCKO OuHCTKn: BbIbepnte
peXIM npIROBJIeHnra (2.9.).HaXMMTe
KJIaBNy IOBTOPHO HaxMMTe
yJePxxNBAe ee 5ceKyHd,doTexnop,noka
Ha IINCIIee He NOBITc3HaQoK .IJa
NoTBePxxDeHnRA Heo6xOIMo HaKaTb .
(2.13.1)Iocne Toro KaK bJET DoCTnHytA
3aDaHHa BEiHuHa TeMpeaTypbI,3HaQoK
NCHe3Het.
DyXOBbie ⅢkaΦbI 6e3 ΦyHKUH
HINPOJNTMueCKO OUHCTKn:BKNIOHTe
DyXOBky N BbIepeHtepeKIM pnpiroTOBJIeHHA
(2.9).HaxmTe (2.13.2).DyXOBka 6bictpo
Harpeetcdo TemnepaTpybl, Tpe6yemoi IpaobtB BbIbpaHOM pexkme. Nocne toro KaK 6ydtIOCTnHyTa 3daHna BELINHa TEMnepaTpybl, 3NaOHK Hcye3HeT, M0XHO CTaBHTB DuxOBky 6JIIOda.
PpmeaHne. Pn HeKOTopbIX nporpaMMax nCNoIb3OBAbpeXm Celeris HeBO3MOxHO.
2.14 OctatoHoe TenNo
Ecnn noce
BbIKIOUeHn DyXOBKn OHa BCE eIe OCTaETcRToprueH,Ha DCNIIee OTObpaKaEeTc3HaOK DoTexnop,Noka TempePaTypa B WkaFy He onyCTNTcHnKe 60°C.
2.15ФункцнКлавишог6лoka.
IcnoB3OBAHne 3Tof yHKUIN NO3BOJHET
PpeD0TBPaTNTB BKNIOUeHHe PnIBopa DeTbMn
NIN IN BMeWATeNBCTBO B erOpTOy.
INB KJIIOUeHn PEXIMa 6IOKnPOBKn
Pn paOtaIOUeM NIN NIOHOCTbHO
BbIKIOUeHHOM PnIOBope Heo6XODmHO HaxKaTb
UYepKINBaTb HECKoJIbKO CeKYHd KNaBnUy
(2.15.1). Dnpa36LOknpOBKn Pn6bopa
HEo6XoDNMO NOBOTpNTb 3Ty pOceDpy.
B HeKOTopbIX MOeJAX DnRA BKNIOUeHn
peXIMa 6IOKnpOBKn Pn paOtaIOUeM
NIN NIONHOCTbIO BbIKIOUeHHOM PnIOBope
HEo6XoDNMO HaxKaTb N UdepXnBA Tb
HECKoJIbKO CeKYHd KNaBnUy (2.15.2).
Dnpa36LOknpOBKn Pn6bopa Heo6XoDNMO
NOBTpNTb 3Tu pOceDpy.
PpmeaHne. B cnyae ecn6boknpOBka BKIOUcAeTcR npBkIOUeHHoJ dYXOBKe, np6op MOKHO BbIKIOuHTb HaKaB N ydepXINBaN KJIaBNIy
2.16 Pexim «PnproToBJIeHne no peIeNTam»
BKnIOuHTe dIyXOBky TaXMMTe (2.16.1) n c NOMOUsKNaBnW
Bb6epnte noxoxraun Tn peenta n3 npdycMOTpeHHbIX B BaWe MoDen DxyOBKn.
a b c d Пи��罗Влесни no pecentam
HcTka HApyKhbIX NOBepXHOCTeI:
HApyXHBIX NOBepxHOCTe CTKONBOCNOJb3yTEcMbKOnTpIKoN CpeCDTBOMMblbCTeKoN.
UHCTKa BHyTpEHHNX NOBepxHOcTeH:
Ecnn 3arpa3HnIINCBbHTpeHHne NOBepxHOCTN CTeKoJ, DnA TuaTeJIbHOU OCHNTK IN MOXHO CHrTb.
DyXOBka DOnkHa 6bITb XoNoHoi.
OTKpoIte DBepu Do KOHca (3.7.1)
n 3aKpeNITe ee ynpamn (kpacHOrO
Ubeta),noCTabJIeMbIMn B naKeTe C
PnHaadJeXHOCTMn (3.7.2).BCTaBbTe DBa
DpyrIX 3neMeHTa, TaK YTO6bl NOHATb
CTeKNo, o6pa3yra pIurar (3.7.3). N3BNeKeNTe
CTeKNo (3.7.4), ONUCTnte ero n OcyuHtete
TPAnKoN (3.7.5).ECn HEO6xOJMo,MOXHO
N3BLeueB BCE CTeKJa n3 DBepCuI CEJbHbIM
NAketOM.PakET MOKET COCTOHTb n3
ODHORO INn DByx CTeKoB B 3ABUCMHOCTH
OT MoJen WkaPa.B KaJdOM erO yIy
NMEETCn yIop UePHoro UCBeta.Dn
N3BLeueHn CTeKoN Heo6xOJMo BBecTI
pyKy cheEHNXHIOU qAcTb DBePcbl N
NOTAHytB H AnpaBHeHm Bepx (3.7.6).
Piocne TORo KaC TcKna 6dyT n3BLeueHbl,
DNn IN OUnCTKn yOpbl CNeDuYet CHATb
(3.7.7).
Iocne OuchcKn CTeKOJ (3.7.8) cHOBa BCTaBHTb INX B pe3HOBbIe ORpaHnUHTeIN BBICTyIOM BBepx (3.7.9) n pacnoLoXHTe TaK, YTO6bl 6O3HaueHnIi "L" cIeBa I "R" cnpaba HaxoDInlncb PAnOM C wapHnpAMN (3.7.10). IpoaeDypa 3aBepwaetc yCTaHOBkoC TKeKla Ha MeCTO TaKIM o6pa3OM, YTO6bl CNoBO PYROLYTIC 6blIO paCNOLOXeHO B KOppeKTHOM dJIr YTeHNr noLOXeHN (3.7.11). Iocne 3tOrO ynpbI MOxHo y6paTb (3.7.12) n 3aKpbITb DBepyu.
BaxKhble npedynpexkdeHn
OTHOCNTeIbHO 3KcNpyatauIN:
He 3a6bBAIte BblKIOUaTb DyXOBky
NOCJE OKOHUHINI INPINOTOBJIENIA.
CTeKIO MOXHO BbIHMaTb N3 DBePcbl TOJbKO NOCNE NOJIHoro OCTbIBaHnry DyXOBKn.
- KaTeOpnueckn 3aIpeuaeTcnpmEHaTB JnA YNCTKn DaHHO rnpbopaycTPOINCTBa npoBOOn OYNCTKn.
3.8 OuNCTka HapyXhBIX NOBepxHocTei DyXOBOrO uKaΦa. PnIMeHraTe
HeItpaBbHbIe CpeIcTbA. Iocne YnCTKn IOBepxHOCTN CJeIyET TuaTeIbHo OcyuHTb MArKoI TpRnKOi.

Bo3moXhbie npo6JIemblnx ycTpaHeHne

Bo3MOxHO BO3HKnHOBHeHne pHa npo6IeM, KOTOpbIE MOrYT 6bITb yCTpaHeHbI NOb3OBaTeJIeM CaMOCTOReTbHo.
4.1 Duyxobka He HarpeBaetc. IpOBepbTe NOdkIIOUeHne K CETn NITaHnN COCToRHe PnabKOro PpeDOxpaHnteJIy YBeINuYte yPoBeHb yCTaHOBNeHHoI TEMpepaTypbl.
4.2 He pa6oTaet BnyTpehHee OcBeueHne KaMepbI. 3aMeHnte JAmnOky NnN PnlaBKn IpeDoXpaHnteJb.
4.3 Bo Bpem npnroTOBneHn n3 KaMepbI DxyOBKn BbIXOAnT DbIM. Heo6xoDnMo yMeHbWntb TempeaTy pnproTOBneHn n/nnn PPOIN3BecTN OcNCTKy DxyOBKn.
4.4 He BbINOJIHHeTcOuHCTKa NpOJN3OM. PpOBepbTe, DOCTaTOUHO JIN NIOTHO 3aKpbIta DBePua. PnUnHoM oKxet 6bIb TaKxHe HEnCnpaBHOCTb CnCTeMbI 6JIOKpOBKn JIN TEMpePaTyphoro DaTuNka. B 3tOM cLyuae Heo6xoJIMo 06paNTbcr B CIny6by CepBnCHOrO JIN TexHNueCKOrO OcCnykUBAHNA.
4.5 DuyxOBKa NOaet BBICOKOAcTOTHbIM 3ByKOBoI CnHaI. IOCTnHyTa 3aJaHHaB BeJIuHnA TeMnepaTypbl. 3aBepseH BbI6paHHbI cNKl pNiroTOBJeHnA.
4.6 IIO 3aBepeHn npiroTOBJIeHn n3 DyXOBKn CbIWeH Wym. 3To HopMaJIbHo N CBaHO C TEM, YTO BEHTINrTOp PPOJONJaET paOToTaB Do BBipAByHbAHNr TEMpepaTypbI BHyTpN KaMepbl DxyOBKn C BHeuHem TempepaTypoi.
4.7 PpeynpeKdEHHO HeNCpabBHOCTAX.
FHeHcnpaBHOCTb TemnepaTyphoro DaTnka
F023a6nokpoBaHa nBepca (4.7.1)
F03 HeBO3MOXHO BbIIOJHHTb OUNCTKY HPOJIN3OM
F0HHeNCnPaBHOCTb CNTeMbI 6JOKINPOBKN DBepu
F05 OTka3 nporppaMMHoro obecneueHna.
OTKIOUeHne 3NEKTPoNTaHnB O Bpem npiroTOBJIeHnA.
FTO ABTomatHeCKoe BbIKIOueHne NocLe HeCKoJIbKINX YacOB HnpepbIBHO paOtbl (4.7.2).

BmeaTeJIbCTBO B pa60Ty np60pa B daHHbIMOMeHT 3anpeueHo. TTo6bl OTpeMOHTnpoBaTb np6Op, o6paTnTeCb B CnyK6y cepBnCHOrO nIN TEXHnueCKOrO 06cIyXnBAHN.
5
Be30nachoctb

- YctaHOBka DyXOBKn DOJNXHa OcyueCTBnTbCn KBaJIINpUPOBaHHbIM CneuaJIInCTOM NO MOHTaxy B COOTBETCTBmC INHCTpyKUNMn IN CXeMaMn N3ROTOBNTeJI.
3JIeKtpoyctaHOBka DOJXHa IPOUN3BOINTBcB C COOTBECTCBN C MaKcImaJIbHOH MOUHOCTbIO, yKa3aHHoH Ha NDeHTuΦnKaUHOH O TabIuYKe, nC INcNoJIb3OBaHNEM 3JIeKTPnueCKO pO3eTKn C 3a3EmJeHNEM, COOTBECTBYIOUM HOpMaM.
LcENb3neKtpnueckoroToKa,NTaIOUero DyXOBky,DOnxHa6bITb CHa6KeHa OMHINOLAPHBIM npepbIbATEmEM C MHNMaJIbHbIM paCCTOAHEm MeJdy KOHTaKTAM3MM. - Ecnn nntaoun KabeNb noBpeKdH, OH dOnJxH 6bIb 3ameHn nepcoHaOM OTdena nocTnpoDaXHOrO bcnyXnBaHn IIN CneuaJIncTaMn TaKoJ Xe KBaIIuΦkaCn C ueIbIO oBeceueHn Be3onacHOCTN.
- PpexKe Yem 3aMeHHTb lamny yIOCTOBepbTecb TOM, YTO annapaT BbIKJIOHeH, YTO6bl N36ExKaTb yDapa TOKOM.
He nCnoB3yIte a6pa3nHBbIe uNCTaIue CpeIcTba IIN XEcTKne MetaJIInueCKne MoaJKN dNn YnCTKn DBePcbl DxyOBKn, TaK KaK 3TO MOKeT npNBecTN K NOBpeXDeHIO NOBepxHOCTn IN K pa3pySeHIO CTeKJa.
He pa3pewaTe MaIeHbKIM DeTAM HaxoINTbcra pAnOM c pa6OtaUcEi dYxOBKOJ. HeKOTOpBie HApXHbIe qactn N3dEINr MOryT HarpeBaTcR.
-ИзбeraиTeДOTparNBAТьСАД НагрБаTeЛьнБIx 3ЛЕмEHTOВ BHyTpNi ДухOBК.
Данн布局прибор He npedha3haueHдя ЭкплyaТаци Лцамь(B TOMчсп Детьм)С орарниуehнblIMФИЗИЕCKIM,CEHCOPHBIM И YMCTBEHHbIMBO3MOXHOCTAMN,a TaKxe JILZAMN,HeIMeIOUIMdoCTaTOHORO ONbITAи 3HaHIN.ПOLb3OBaHne рибopom TaKIM JILZAMn pa3peшaeTc TOnbKO IOd pncmOTpOMJIUca,OTBETCTBEHHORO 3a TEXHNky6e30NaCHOCTN,IIN NOcIe npoBeDeHIN
Hm COOTBETCTByIOUeI O HNCTpyKtJaKa nO 3KcPnyatau. Ipn 3KcPnyatau nnPnp6opa DeTbMn 3a HmN Heo6xOdmo npncMaTpnuBaTb, He No3BOJra INpaTb C np6opom.

Okpykaioza cepa

KoHCTpykunnydxyOBKn OCHOBaHa Ha npHnuaX 3aunTbI OKpykaIouee cpebl.
Co6JIOaIte npHcunbI 3auNTbI OKpykaIoUeI cpebl. PpOu3BOdnte
PpeBapnteHoe HarpBaHne DxyOBKn, TOnbKO eCn3To Heo6xOJMo (CM. Ta6nUy). Pn dIInTeBHO pa6ote DxyOBKn BblKIOaHTe ee 3a 5-10 MNHyT do yCTaHOBHeHHoro BpeMeHN.
Ipo6Jema Otpa6oTaHHbIX 3JIeKtpnuecknx I 3JIeKtpoHHbIX annapaTOB.
O6o3HaueHne yKa3bIbAeT Ha To, YTO daHHbI np6op HeIb3R Bbl6paCbIBaTb B 06bUHbIe KOHTeHepbl Ira 6blTOBbIX OTXoIOB. IpeJaTe BaWy dYxOBky B cneuaJIbHbI ueHTp npEIMKn.
YtINn3aun6bITOBbIX 3NEKtpoPnp6OpOB
I03B0JAErN36ExKaTb HeraTINBbIX NocJeDCTBNI
IIN3dOPOBbR,OKpyKaIOUeN Cpebl IN
NOMORAET 3KOHOMNTb 3NEKtpo3HepriuIO H
pecypcbI.
IINI NOJYeHnI DOnOIHNTEJIbHO INHΦOpMaUNI O6paTNTecb K MecTHbIM BNaCTAM IINB OprAHN3aUIO, IDe Bbl Prno6peJIN BaWy dYXOBKY.
Tаблца пи��овлени