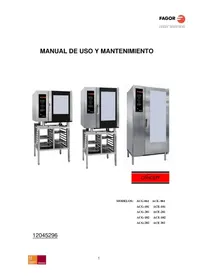
6H475X - Electric oven FAGOR - Free user manual and instructions
Find the device manual for free 6H475X FAGOR in PDF.
| Product type | Electric built-in oven |
| Brand | Fagor |
| Model | 6H475X |
| Dimensions (W x H x D) | 595 x 595 x 550 mm (estimate) |
| Net weight | Approx. 30 kg (estimate) |
| Electrical supply | 230 V, 50 Hz, 16 A (estimate) |
| Maximum power | Approx. 3000 W (estimate) |
| Cooking functions | Fan-assisted, natural convection, grill, defrost, pulsed heat |
| Number of shelf positions | 5 |
| Control type | Mechanical (conventional) or digital depending on variant |
| Display | Digital or conventional clock depending on model |
| Timer | Yes, with programmable duration and end of cooking |
| Child lock | Yes, via key combination or mechanical controls |
| Interior lighting | Yes, interior lamp |
| Cleaning | Manual (smooth walls) or self-cleaning (rough walls) depending on version |
| Supplied accessories | Standard shelf, standard tray, deep tray, partial/full extraction shelves depending on model |
| Installation types | Freestanding, with ceramic hob, or oven + hob set |
| Energy class | Not specified (estimated A+) |
| Maximum temperature | 250 °C |
| Interior volume | Approx. 70 L (estimate) |
| Safety | Automatic shut-off after several hours, rapid cooling door |
| Repairability | Approved technical service, spare parts available from manufacturer |
Frequently Asked Questions - 6H475X FAGOR
User questions about 6H475X FAGOR
0 question about this device. Answer the ones you know or ask your own.
Ask a new question about this device
Download the instructions for your Electric oven in PDF format for free! Find your manual 6H475X - FAGOR and take your electronic device back in hand. On this page are published all the documents necessary for the use of your device. 6H475X by FAGOR.
USER MANUAL 6H475X FAGOR
Important! Read the entire manual before using the oven. The documentation and accessories are inside the oven.
The texts in the manual correspond to the numbered diagrams.

Identification

To find out which model your oven is ("a", "b", "c", "d", "e", "f") compare its control panel with the control panels shown in the illustrations.
1

Installation
1.1 Unpacking. Remove all the protective packaging elements.
1.2 Mains connection. Always take into account the data on the reference plate (1.2.1) and the measurements of the cabinet the oven will be housed in (1.2.2, 1.2.3).
Freestanding ovens: the appliance must be connected to the mains with a fixed single-phase connection with the neutral (blue) connection guaranteed (1.2.4). Fit the oven into the space, ensuring there is no excess cable in the upper part (1.2.5, 1.2.6). Screw it to the fitting using the two screws supplied (1.2.7).
Multi-purpose ovens for vitro-ceramic
hobs: to avoid hazard, the oven may only be installed with the vitro-ceramic hobs recommended by the manufacturer. Fit the cooking hob into the worktop and remove the switch box (1.2.8). Insert the hob in the worktop space according to the installation requirements (see the hob manual) (1.2.9). Insert the oven into the cabinet space, leaving enough room for handling (1.2.10). Screw the switch box onto the oven (1.2.11, 1.2.12). Connect the hob to the oven (1.2.13). Fully insert the oven and fix it in place with the two screws supplied (1.2.14, 1.2.15). Firmly push in the control accessories, according to the cooking ring type (1.2.16), and the controls (1.2.17).
Oven + hob unit: connect the oven to the mains (1.2.4). Insert the hob in the worktop space according to the installation requirements (see the hob manual) (1.2.18).
Insert the oven into the cabinet space, leaving enough room for handling (1.2.10). Connect the hob to the oven (1.2.19). Fully insert the oven and fix it in place with the two screws supplied (1.2.14, 1.2.15).
2

Using the oven
Before using your new oven for the first time, heat it up while empty (with no food in it and with the control turned to , at for 30 minutes at 250^ ). It may produce some smoke or a bad smell (this is normal and is caused by the oven heating up grease residue etc.). When it has cooled down, pre-clean it by wiping the inside with a damp cloth.
2.1 Accessories. Depending on the model, the oven is equipped with a Standard Tray (2.1.1), a Deep Tray (2.1.2) and a Standard Rack (2.1.3), which function separately. You may also combine any tray with the standard rack (2.1.4) to form a unit. The half-removable rack (2.1.5) and the fully-removable rack (2.1.6, 2.1.7) support the trays or the unit (2.1.8). Take into account the position of the racks when placing them inside the oven. They have anti-overturn side stops (2.1.9).
2.2 Accessory positions. The accessories can be fitted in 5 different positions,
2.3 Setting the time. Ordinary clock: press and turn the lower button (2.3.1). Set the time (2.3.2). Digital clock: press the button. (2.3.3). Set the time using the + and - buttons (2.3.4). After a few seconds will stop flashing (2.3.5). Note: the time will need to be set again after an electricity cut or when the hour changes.
2.4 Cooking the food. Place the food in the oven. Consult the cooking table to choose the accessory or accessories to be used and their position. Close the oven door.
2.5 Selecting the cooking function. Select the cooking function according to the model, by turning the selector dial. The On pilot light will switch on.
2.6 Selecting the temperature ^ C . Select the temperature by turning the selector dial. The pilot light will switch off when the selected temperature is reached.
TIME FUNCTIONS
2.7 Selecting the cooking time. Timer: select the minutes by turning the selector dial.(2.7.1).If you prefer the oven to function without a time limit, turn it to hand position
Ordinary clock: turn the lower button to the left and select the minutes (2.7.2). If you prefer the oven to function without a time limit, turn it to hand position and line up the red arrow with the time shown by the hands of the clock.
Digital clock: press the button. will start to flash (2.7.3). Adjust the duration using the + and - buttons (2.7.4). will stop flashing after a few seconds.
2.8 Selecting the start time.
Ordinary clock: after selecting the programme, temperature and duration, press and turn the top button until the red arrow is pointing to the start time.
2.9 Selecting the end time.
Digital clock: after selecting the programme, temperature and cooking time, press the button. will start to flash (2.9.1). Set the desired end of cooking time by pressing the + and - buttons (2.9.2). will stop flashing after a few seconds.
2.10 Beeper function.
Ordinary clock: Select the position 0 on the programme dial (2.10.1). Press the upper dial and turn it until the red arrow is pointing to the beeper time (2.10.2). This only works if the oven is switched off.
Digital clock: press the button several times. will start to flash (2.10.3). Adjust the duration using the + and - buttons (2.7.4). will stop flashing after a few
seconds. This works with the oven switched off and switched on.
2.11 Child lock. To prevent children from playing with the oven.
Ordinary clock: press and turn the lower button to A. (2.11.1)
Digital clock: press the + and - buttons at the same time and hold them down for 3 seconds. will appear on the display (2.11.2). To remove the child lock, repeat the process.
Warnings: when the cooking time has elapsed, turn the function and temperature dials to 0 and the time dial to hand position. Open the oven door, taking care as hot steam may come out.
3
Maintenance and cleaning

3.1 Cleaning the accessories. The accessories are dishwasher-safe. To wash them up by hand, use normal detergent. Leave them to soak for easier cleaning.
3.2 Cleaning the side rails. Remove the side rails (3.2.1, 3.2.2) or (3.2.3, 3.2.4) depending on the model. They are dishwasher-safe. To wash them up by hand, use normal detergent and a sponge or washing-up brush.
3.3 Cleaning the inside of the oven. Switch on the internal oven light (3.3.1, 3.3.2). Smooth-walled models: manual cleaning. Clean the oven when warm, using a cloth soaked in warm water and vinegar. Rough-walled models: self-cleaning. Cooking function , 30-60 minutes at 250^ .
3.4 Cleaning the oven ceiling. If the grill is fold-down type (3.4.1, 3.4.2), clean it with a cloth soaked in hot water and vinegar.
3.5 Cleaning the outside of the oven. Use neutral cleaning products and dry the oven well with a soft cloth.
Warnings: 1. Make sure the oven is switched off.
2. Never use steam cleaning machines.

Troubleshooting

You can solve the following problems yourself:
4.1 The oven does not switch on. Check it is plugged in and that the time selector dial is not turned to 0.
4.2 Smoke comes out during cooking. Tum the temperature down and/or clean the oven (point 3.3).
4.3 The oven makes a noise after cooking. This is normal, as the fan keeps running until the temperature inside and outside the oven is reduced.
Digital display models have a diagnosis system which detects any problems and warns the user. You can see this on the display:
4.4 Oven not working. is fl ashing. Turn the function selector dial to 0 and set the time (point 2.3).
4.5 Oven not working. is flashing. The oven has been working for several hours and for safety reasons it has switched off automatically. Turn the function selector dial to 0 and set the time (point 2.3).
4.6 Oven not working. is flashing. Turn the function selector dial to 0 and remove the child lock (point 2.11).
4.7 Oven not working. l is fl ashing. Press any button.

- Do not try to repair the oven yourself.
Call the technical assistance service.

Safety

- The oven must be installed by an authorised installer in accordance with the manufacturer's instructions and diagrams.
-
The electrical installation must be dimensioned for the maximum power indicated on the reference plate and the electrical socket must have a regulatory earth connection.
-
The mains circuit supplying the oven must have a single-pole cut-off switch with at least 3mm between contacts.
- If the power cord is damaged, it must be replaced by the after-sales technical service or by similarly qualified staff, to avoid hazard.
- Ensure the appliance is unplugged from the mains before replacing the oven lamp, to avoid electric shock.
- Do not use abrasive cleaning products or metal scouring pads to clean the oven door, as they could scratch the surface and cause the glass to shatter.
- Keep small children away from the oven. It has accessible parts that can heat up during functioning.
- Do not touch the heating elements inside the oven.
- This appliance is not designed to be used by people with reduced capacities.

The Environment

This oven has been designed with environmental protection in mind.
Respect the environment. Only preheat the oven when necessary (see table). Use dark coloured cake tins whenever possible. For long cooking times, switch off the oven 5 or 10 minutes before the end of cooking time.
Management of waste electrical and electronic equipment.
Do not dispose of the appliance with the ordinary domestic waste.
Take your oven to the a special collection centre. Recycling domestic appliances will prevent negative consequences for health and the environment and will allow savings on energy and resources.
For further information, contact the local authorities or the shop where you bought the oven.
Cooking Table
| Food | Programme and temperature | Time | Position | Preheat | Accessories |
| beef 1,5 Kg | 190°C | 210°C 1 50 - 60 min no | |||
| pork 1,5 Kg | 150°C | 180°C | 85 - 95 min | 2 | no |
| lamb 1,2 Kg | 200°C | 220°C | 40 - 50 min | 2 | no |
| turkey 4 Kg | 170°C | 190°C | 115 - 125 min | 1 | no |
| chicken 1,25 Kg | 210°C | 230°C | 50 - 60 min | 1 | no |
| roasted red peppers 1,25 Kg | 190°C | 210°C | 30 - 40 min | 2 | no |
| stuffed tomatoes 4 servings | 200°C | 220°C | 15 - 19 min | 2 | no |
| baked hake 1,5 Kg | 210°C | 230°C | 7 - 9 min | 2 | yes |
| roasted lobster 1 Kg | 220°C | 240°C | 4 - 5 min | 4 | yes |
| baked fish 1 Kg | 200°C | 220°C | 13 - 17 min | 2 | yes |
| baked cod 1,5 Kg | 210°C | 220°C | 7 - 9 min | 2 | yes |
| pizza | 200°C | 220°C | 18 - 22 min | 1 | yes |
| bread | 200°C | 220°C | 18 - 22 min | 2 | no |
| sponge cakes | 190°C | 210°C | 15 - 19 min | 2 | yes |
| flan | 130°C | 150°C | 30 - 40 min | 1 | no |
| defrosting, all types of food | 75°C | 2 | no |
Bedienungsanleitung
AD^2 = AB^2 + BD^2
J 1
()
.(4.2.1)
a
jlll llll 0gill gllllll
Jaaal Jilzhuo Jiajiao.
6.2
j
.6
1
.
.
.5
1
·s + 1
a1^2 + a2^2
:
山
。
i
1
B
m = 311 ;
m = 311
声
5
图2
m = 311
D.
m = 311
.
m = 311
m = 311
设
.
几
Date
由
小
m = 311
.
m = 311
。
B
10/12
m = 311 ;
1
1
1
1
特此公告。
:
1
。
1
10/12
.
1
9
Jau
21
1
1
m = 311 ;
13/14
m = 311 ;
m = 311
m = 311
12
.
(2)
1
1.
:
8
1
如
3
m = 311
1
m = 311
一
7
.
1
C
1
m = 311
12
图1
户
a_1 = 2
11
。
a_2 = 5
S
设
12
12
中
m = 311
m = 311
3
1
1
1
月
三
一
C
1
3
12
9
9
j4
1.
1
C.
1
.
i
1
:
31
A
30
9
31
so
2x - 6 = 2 + 2k ,
3
1 + u1 - 1 = ( 1 + u) u1 < 1 = u
1 + u7 = 7019
1 + u7 = 70%
1 + u7 = 70%
31 + u + 4q = 1 + uq dH
1 + u7 = 70%
m = 311
m = 311 ;
m = 311
7
:
m = 311
1 + u7 = 70%
1
12/12
1
(2)
图1
A
1
1 + u1 - 1 = ( 1 + u) u1 < 1 = u
m = 311
9
/
m = 311
m = 311
1 + u7 = 7019
m = 311
m = 311
m = 311
m = 311
-
1
25
m = 1
山
L
上。
m = 311
山
-
m = 311 ;
m = 311
m = 311
15
(1)
。
.
.
.
配比
图
1
.
设
12
a.
m = 311
m = 311
1
(4
2
。
L
1
.
。
(4)
.2
9
S
图
J
y
9
m = 311
m = 311
m = 311
m = 311
k > 0
21
:
m = 311
…
.
.
.
m = 311
+
X
.
9
m = 311
m = 311
31
。
m = 311
620
第
图
16
S OBC = S AOB + S_ BOC
1
m = 311
.
1
.
68
。
.
1
m = 311
d
92
50
0
3
m = 311 ;
。
1
.
1
。
1.5
m = 311
24
5
。
m = 311
山
31
10/12
m = 311 ;
m = 311

JSL

a
1.4J2yN
12x - 1 > 0
j
0
2.4
jz jzj1jzj 1
(3.3)
3.4
a a a a a a a a a
.
y
Aailllly oerbi jol

Jax 24.4
0 1
.(ibill 3.2)aclll bial
图
aaiiaaii aiee iie 1
Jzll gaii yia jia Jia jao Jao jia j
jiaial jaiolall lalally Jaiil ctldgall no jai
.

S OBC = S COD + S_ BOC

aai jaojolc jao plall jllSji
all lalbi j 1
y 1
J 1
e la liao s y s i 1 y jy all s
Jusy jus yjss jio3 jy1 jgl k jy