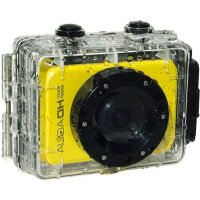
Easy Snap HD Wifi - Camcorder Best Buy - Free user manual and instructions
Find the device manual for free Easy Snap HD Wifi Best Buy in PDF.
User questions about Easy Snap HD Wifi Best Buy
0 question about this device. Answer the ones you know or ask your own.
Ask a new question about this device
Download the instructions for your Camcorder in PDF format for free! Find your manual Easy Snap HD Wifi - Best Buy and take your electronic device back in hand. On this page are published all the documents necessary for the use of your device. Easy Snap HD Wifi by Best Buy.
USER MANUAL Easy Snap HD Wifi Best Buy
natural_image
Transparent cylindrical device with water droplets and a small embedded photo showing a person swimming in the ocean (no text or symbols visible)EASY SNAP HDAQUA ^wifi

WIRELESS CONTROL
* BY SMARTPHONE / TABLET
* Only Android and iOS devices

natural_image
Open book illustration with blank pages (no text or symbols)USER MANUAL
www.bestbuy-int.com
ESPAÑOL 3
ENGLISH 19
FRANÇAIS 35
ITALIANO 51
PORTUGUÊS 67
DEUTSCH 83
POLSKI 99
РУССКИЙ 115
text_image
Technical line drawing of a device control panel with labeled buttons and portsnatural_image
Technical line drawing of a mechanical device with no visible text or symbols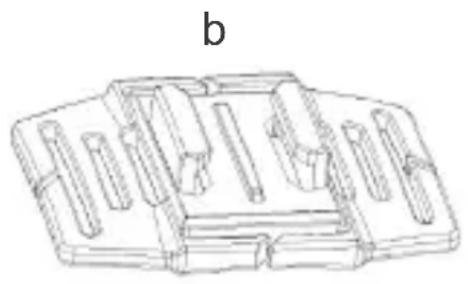
natural_image
Technical line drawing of a mechanical component with multiple slots and a base plate (no text or symbols)text_image
① OR + OR ↓text_image
Technical diagram showing assembly of mechanical components with labeled parts and a downward trend arrow indicating progression.Operativa básica
Encendido y apagado
EMC Directive 2004/108/EC
CE Marking Directive 95/68/EEC
R&TTE Directive 1999/5/EC
IPX8
Fecha y lugar
10/04/2014
Best Buy Asia Limited
906, 9/F, Two Grand Tower, 625 Nathan Rd.,
Mongkok, Kowloon, Hong Kong
EN 55022: 2010 / EN 55024: 2010
EN 61000-3-2: 2006+A1: 2009+A2: 2009
EN 61000-3-3: 2008
EN 60950-:2006+A11:2009+A1:2010+A12:2011
EN 62479:2010
ETSI EN 301 489-1 V1.9.2 (2011-09)
ETSI EN 301 489-17 V2.2.1 (2012-09)
ETSI EN 300 328 V1.7.1 (2006-10)
IEC 60529: 1989+A1:1999
EN 60529: 1991+A1:2000

natural_image
Simple line drawing of a stylized object with a vertical line and curved lines (no text or symbols)Firmado: Patty Zheng, Lab Inspector
User Manual
Attention
Thank you for purchasing this Best Buy camera. Please read the operating instructions carefully in order to use the unit properly and correctly. Keep this pamphlet in a safe place after reading should you need to refer to it later on.
- Before using this unit, please read and understand the safety precautions described below. Always ensure that the camcorder is being operated correctly.
- Do not point this unit directly into the sun or any other intense light sources which could damage your eyesight.
- Do not try to open the case of this unit or attempt to modify this unit in any way. Maintenance and repairs should be carried out only by authorized service providers.
- Keep this unit and its accessories out of the reach of children and animals to prevent accidents or damage to the unit.
- If you notice smoke or a strange odor coming from the unit, turn the power off immediately. Take the unit to the nearest authorized service center for repair. Do not attempt to repair the unit on your own.
- Use only recommended power accessories. Use of power sources not expressly recommended for this unit may lead to overheating, distortion of the equipment, fire, electrical shock or other hazards.
DISCLAIMER
We assume no responsibility for damages suffered by the end user or any third party as a result of inappropriate handling of the product or its accessories, or by their operational failure and by their use. We reserve the right to make changes to this product and its accessories without prior notice at any time. The photos included in this user manual are for reference only.
WARNING: The battery has a specific number of charging and discharging cycles. When these cycles have been exceeded, the battery may need to be changed. A battery that has completed its life cycle is not covered by the guarantee.
Parts of the camcorder
- USB jack
- Down button
- Start/Stop/Power/Shutter button
- LCD screen
- Busy indicator light
- Lens
- Speaker
- TF card slot
- Microphone
- HDMI jack
- OK button
- Reset
- Up/Wi-Fi button
- Bracket
- Mode button
- Tripod slot
- Menu button
- Water proof case
Charging the battery
The camcorder has an internal lithium-ion battery, please charge it for the first time use.
- Turn off the camcorder.
- Find the USB cable, and connect it to a computer.
- Open the cover at the side of the camcorder, and find the USB jack in it.
- Connect the other side of the USB cable to the USB jack of the camcorder.
- During charging, the busy indicator light turns red, once the battery is fully charged, the busy indicator light will turn off.
- It's normal that the camcorder will become warm after extend using.
- Don't use the power adapter output current is below 1A.
- Over heat of the camcorder, please turn it off.
- Don't use the camcorder when charging.
Inserting the Memory Card
Before using this camcorder, a TF card(at least Class 4) that can save your video files and images is necessary prepared.
- Find the TF card cover at the bottom of the camcorder.
- Open it and find the TF card slot in it, then put the TF card into the slot, making sure that the direction in the card is the same with in the slot cover.
- If it's inserted successfully, you will hear a litter clear buzzer.
TIPS: The camcorder can not record without a TF card.
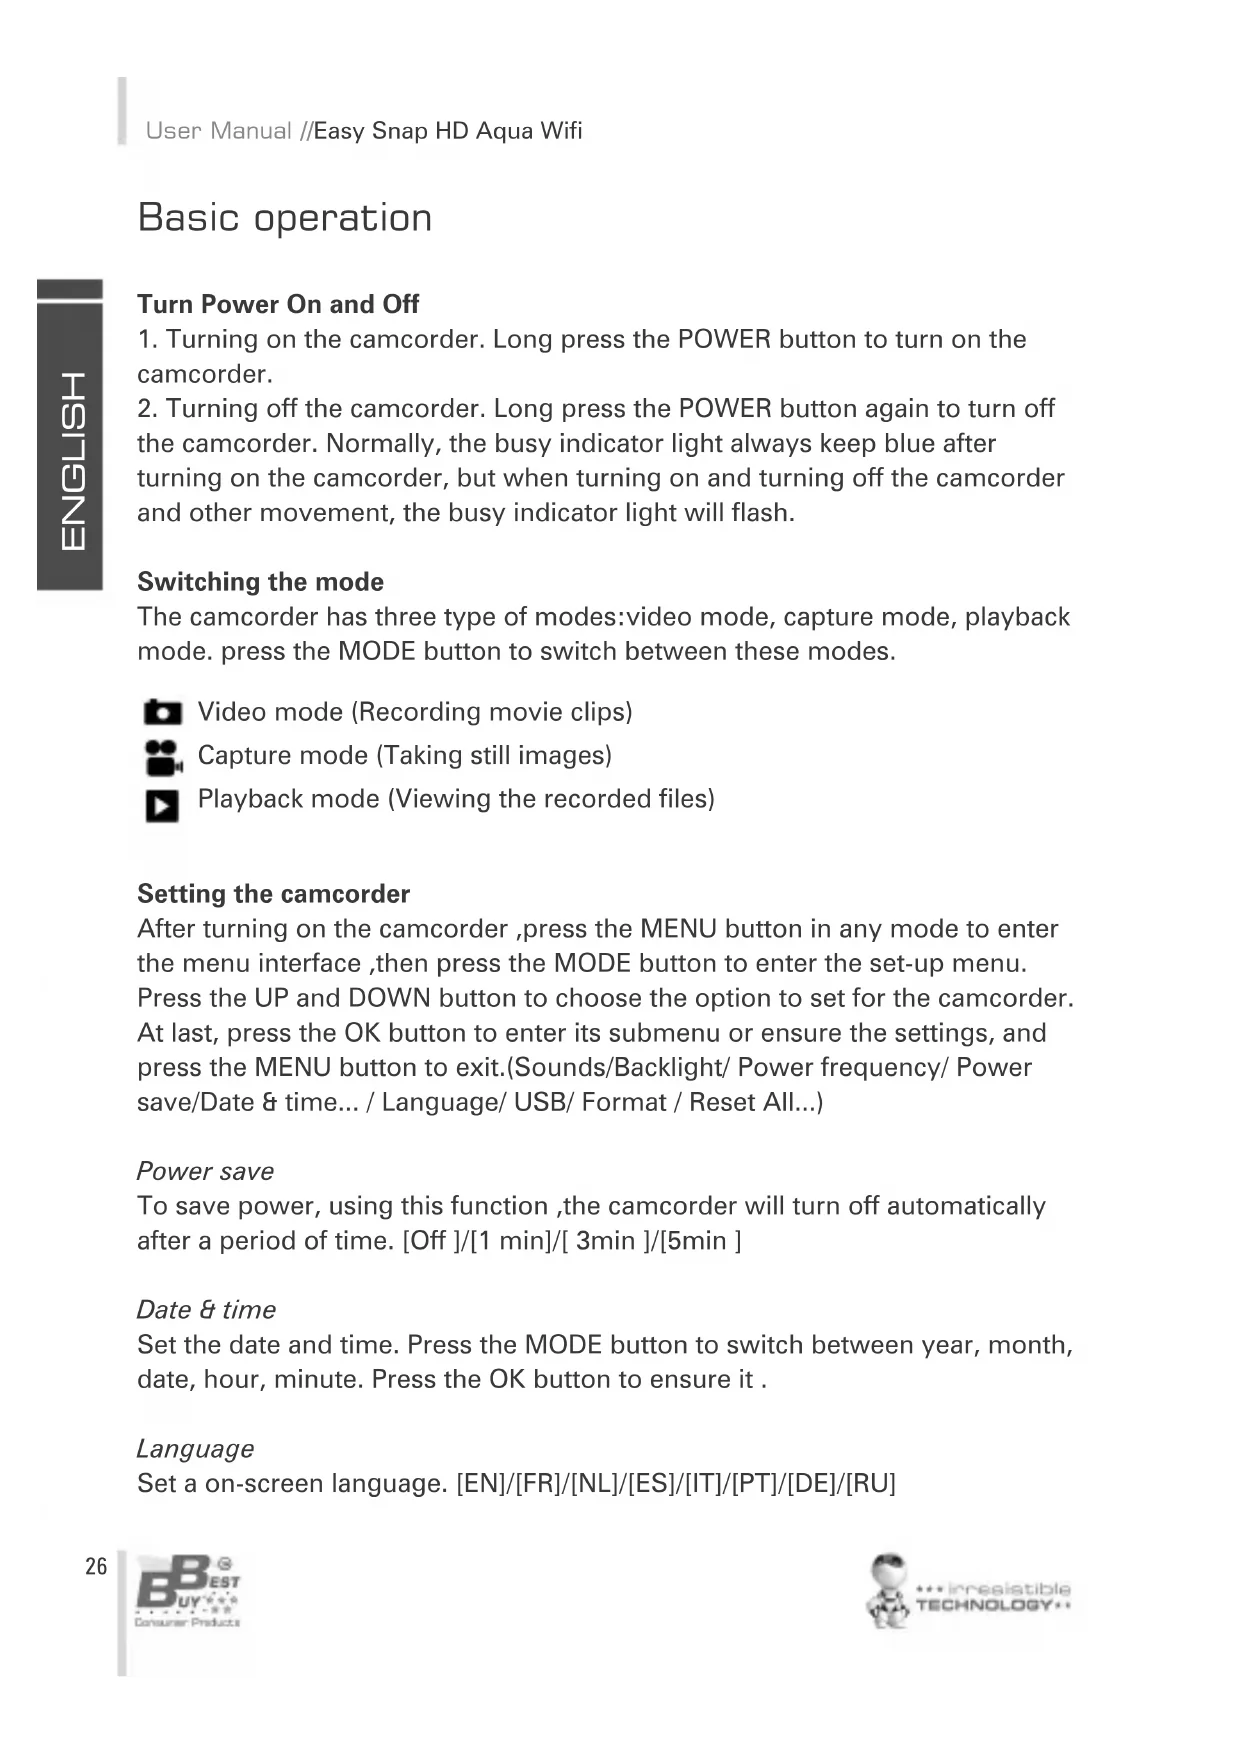
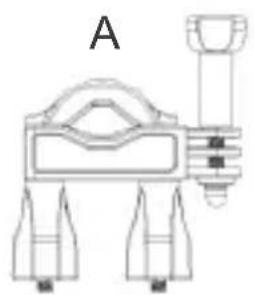
Mounts
In order to use the camcorder more convenient in outdoor sports or in under water situations, We have provided two kinds of main mounts packaged in this camcorder. Mount a is used in fixing to a bike, and mount b is used in fixing to a helmet.
natural_image
Technical line drawing of a mechanical device labeled A, showing components like a housing, shafts, and a vertical component (no text or symbols beyond label)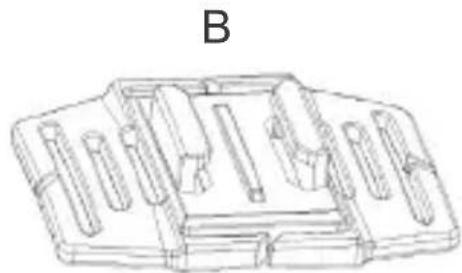
natural_image
Technical line drawing of a mechanical component with multiple cylindrical features (no text or symbols)The operating steps as follow:
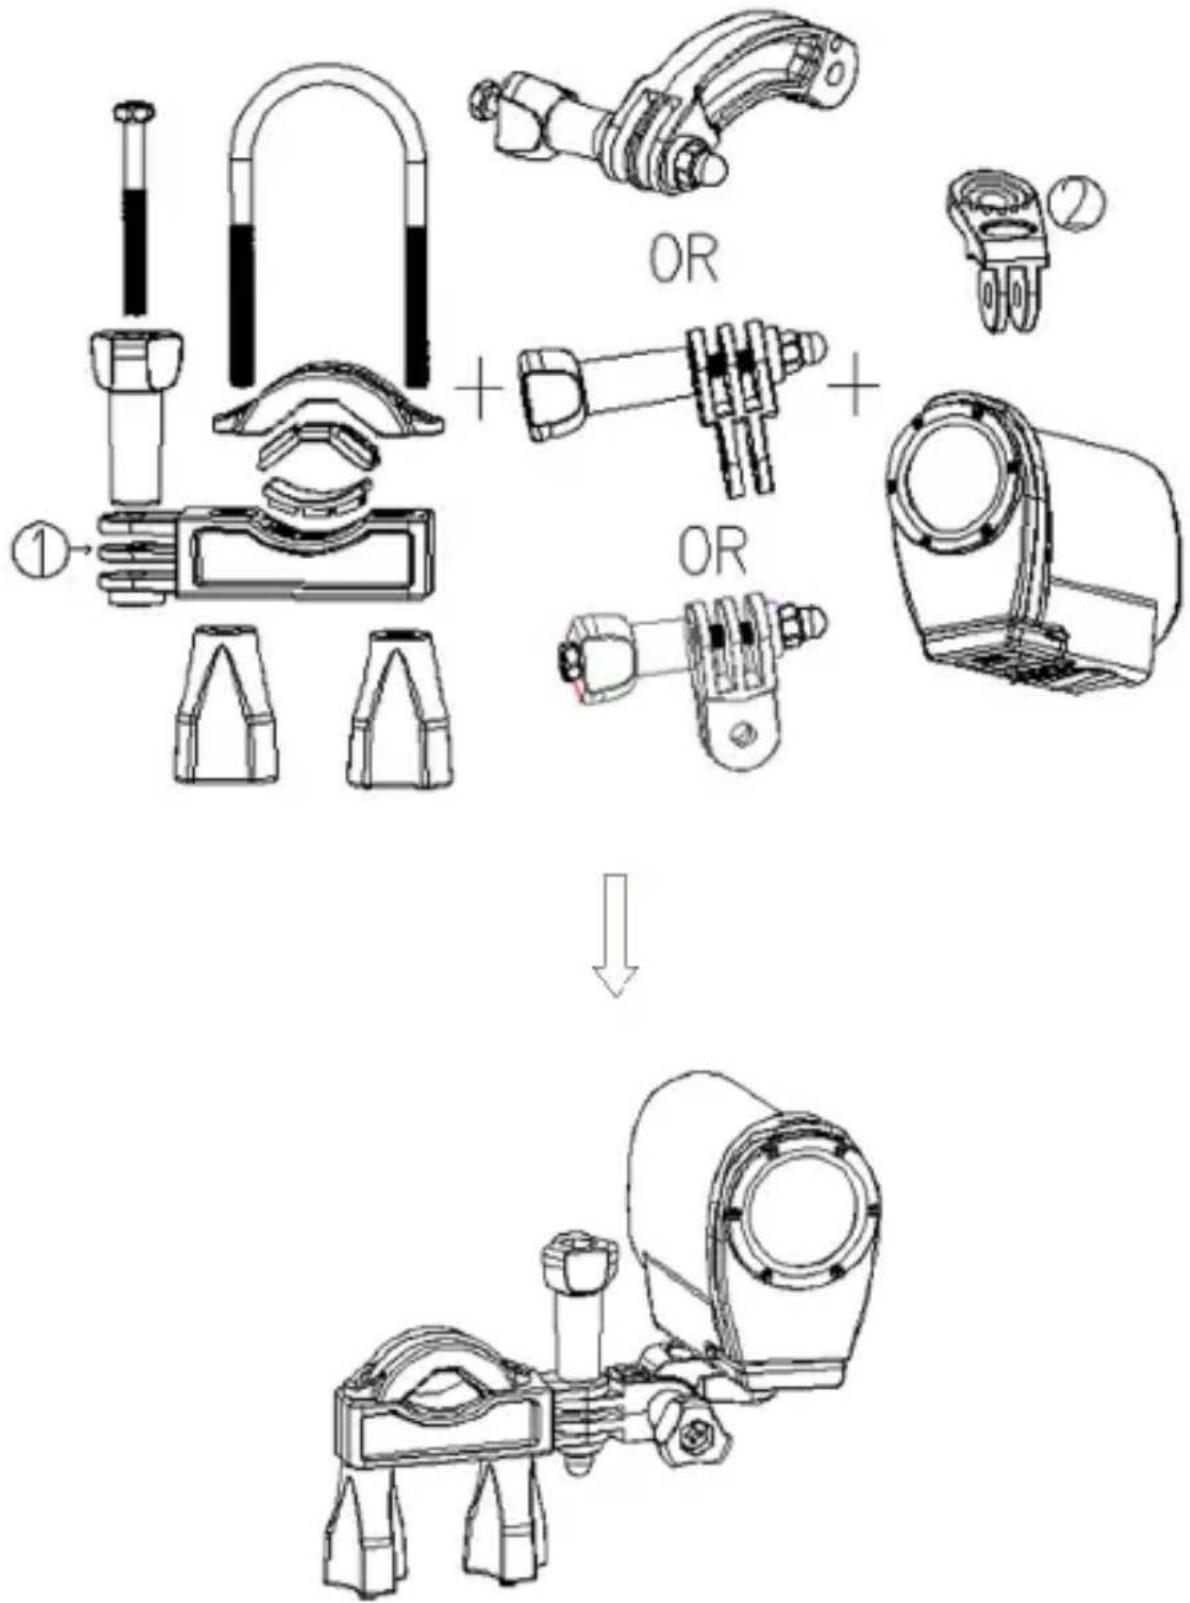
Fix the sportive camcorder to a bike
- Choose to put the camcorder into the water resistant case or the bracket, then lock it.
- Find the mount a, fix it to the handlebar of a bike by placing the rubber pad, and rotating screws.
- Choosing connectors from the three given below, and then fix them to the part 1 of the main mount a.
- Fix the connector 2 that have a metal screw on it to the last connector.
- Fix the tripod slot of the camcorder to the metal screw of the mount 2 respectively.
- Adjust those screws to make the camcorder more steady and convenient.
text_image
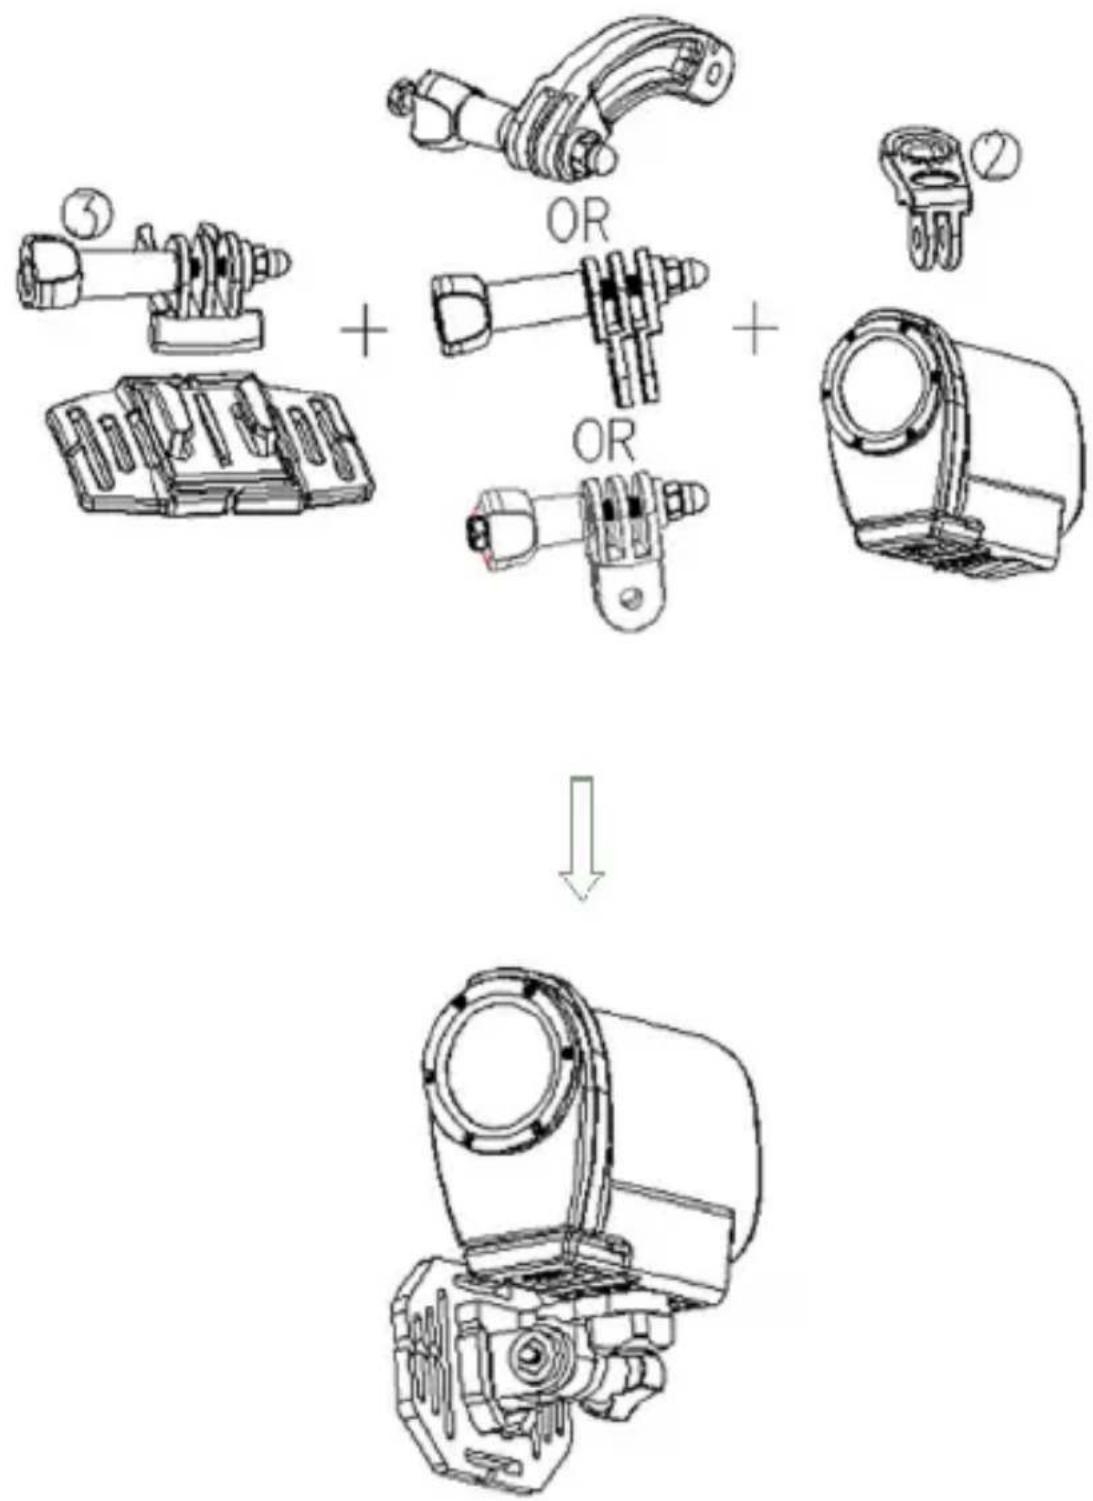
① ② OR + OR ↓Fix the sportive camcorder to a helmet
- Choose to put the camcorder into the water resistant case or the bracket, then lock it.
- Fix the connector 3 to the main mount b as given below.
- Choosing (one, more, none) connector from the three given above, and then fix them to the connector 3.
- Fix the connector 2 that have a metal screw on it to the last connector.
- Fix the tripod slot of the camcorder to the metal screw of the mount 2 respectively.
- Adjust those screws to make the camcorder more steady and convenient.
- After fixing the camcorder to the mount correctly, using a strap to fix them to the helmet.
Insert a strap into the two ends of the main mount b, adjust length according to the helmet's size, and then tie the strap up to your helmet.
Note: You can also follow the same steps to the point 6 and then install the accessory for motorcycle helmets and flat surfaces. Once installed just stick the camera with the attachment to the helmet or on the surface you want to place the camera.
NOTES
- No sound is recorded when using the underwater housing.
- Some small leaks might occur in the waterproof housing. It is completely normal.
- When the camera records just after being submerged, image can be blurred.
text_image
Technical diagram showing assembly of mechanical components with OR labels and a final assembled viewBasic operation
Turn Power On and Off
- Turning on the camcorder. Long press the POWER button to turn on the camcorder.
- Turning off the camcorder. Long press the POWER button again to turn off the camcorder. Normally, the busy indicator light always keep blue after turning on the camcorder, but when turning on and turning off the camcorder and other movement, the busy indicator light will flash.
Switching the mode
The camcorder has three type of modes: video mode, capture mode, playback mode. press the MODE button to switch between these modes.
Video mode (Recording movie clips)
Capture mode (Taking still images)
▶ Playback mode (Viewing the recorded files)
Setting the camcorder
After turning on the camcorder, press the MENU button in any mode to enter the menu interface, then press the MODE button to enter the set-up menu. Press the UP and DOWN button to choose the option to set for the camcorder. At last, press the OK button to enter its submenu or ensure the settings, and press the MENU button to exit.(Sounds/Backlight/ Power frequency/ Power save/Date & time... / Language/ USB/ Format / Reset All...)
Power save
To save power, using this function, the camcorder will turn off automatically after a period of time. [Off]/[1 min]/[3min]/[5min]
Date & time
Set the date and time. Press the MODE button to switch between year, month, date, hour, minute. Press the OK button to ensure it.
Language
Set a on-screen language. [EN]/[FR]/[NL]/[ES]/[IT]/[PT]/[DE]/[RU]
USB
Extend other functions by using USB.
[MSDC]: choose this option to enter the storage mode when connecting to a computer.
[Pictbridge]: choose this option to print files when connecting to a printer marked with the pictbridge logo.
[UVCH264]/[UVCMJPG]: choose this function to set it as a PC camera when connecting to a computer.
Select this option; and connect the camcorder to a computer; then you can use it as a PC camera by double click the icon in [my computer]
After connecting to a computer, press the MODE button to switch between [MSDC] and PC camera mode
Format
Delete all date including protected files. It is advised to download important files to a computer before formatting. [Yes]/[No]
Recording movie clips
- Press the MODE button to switch the camcorder to video mode.
- Use the screen to view the object that you want to record.
- Press the SHUTTER button to start recording, press it again to stop recording.
- Press the UP button to have a pause, repeat it to recovery.
- Press the DOWN button to enter the power save mode, and the screen is totally black. During this time, it still stay recording movie clips. Press it again to recovery.
- Pressing the OK button to capture a still image while recording movies, and the icon "capture done" will show on the screen.
- After exit the recording, Press the UP button to enter the Wi-Fi connection mode, the detail use refers to Wi-Fi connecting.
- Press the MENU button to set the camcorder in video mode. (Movie size/Video quality/ White balance/ Metering / Effect / Loop Recording / Date stamp / Media Format).
Loop Recording
Set the looping recording time. [Off]/[1min]/[3min]/[5min]
Taking still images
- Press the MODE button to switch the camcorder to capture mode.
- Use the screen to view the object that you want to take, then press the SHUTTER or the OK button to capture it.
- Press the DOWN button to enter the power save mode, and the screen is totally black.
- Press the UP button to enter the Wi-Fi connection mode, the detail use refers to Wi-Fi connecting.
- Press the MENU button to set the camcorder in capture mode. (Resolution/Quality/Metering/White balance/ISO/Exposure/Sharpness/Effect/Drive mode/Burst mode/Date stamp)
Driver mode
[Off]: off - [2s]/[10s]: set a delay from the time the shutter button is pressed to the time the image is shot.
Burst mode
Take some pictures per shoot: [Off] /[3] /[5]/ [10]
Playback
All recorded videos and images are saved in the TF card, only after inserting the TF card can you view the files you have recorded.
- Press the MODE button to enter the playback mode.
- Press the UP and DOWN button to view all the files.
- When viewing images, press the OK button to start the slide show, press the MENU button to exit.
- When playing video files, press the OK button to start playing, press the UP button to have a pause, press it again to recovery. At last, press the MENU button to stop replaying.
- Press the MENU button to set the camcorder in playback mode. (Protect/Delete/ Slide show/ Photo effect/ Rotate/ Resize/ Voice memo)
Delete
Choose to delete files. [Single]/[ all ]
Slide show
Only for all the images to show together automatically.
Start: start playing the slide show
Interval : [1 up to 10sec]
Transition: [1]/[2] /[3] /[4] /[5] /[mix]
Repeat : [Yes]/[No]
Photo effect
Set the color effect to add a color tone to the image:
[B&W] /[sepia] /[negative] /[vivid red] /[vivid green]/[vivid blue]
Resize
Resize the current image to a smaller size image.
[3M]/[2M]/[1M]/[VGA]
Voice memo
Add a background music for the current file:
[Add]/[delete]
Making connections
Downloading files
There are two ways to download files from the camcorder's internal memory or memory card to a computer:
- By inserting the memory card into a card reader
- By connecting the camera to a computer using the supplied USB cable.
Using a Card Reader
- Eject the memory card from the camcorder and insert it into a card reader.
- Connect the card reader to the computer.
- Open [My Computer] or [Windows Explorer] and double-click the removable disk icon that represents the memory card.
- Copy images from the card into a directory of your choice on the computer's hard disk.
Using a USB Cable
- Connect the supplied USB cable to the computer's USB port and turn the camcorder on.
- After the camcorder turning on, the screen will turn bright, and you will see a icon "MSDC" on the screen.
- Open [My Computer] or [Windows Explorer]. A"Removable Disk" appears in the drive list. Double-click the "Removable Disk" icon to view its contents. Files stored on the camera are located in the folder named "DCIM".
- Copy the files that you want to your computer.
Connecting a HDTV
- Connect the camcorder to HDTV by attached HDMI-cable.
- Turn on HDTV and switch to HDMI-mode.
- Turn on the camcorder.
- After connecting correctly, the screen of the camcorder will darken, but we can see the objects shown on the HDTV, and we can use it to record videos, images, and set menus, just the screen is the HDTV.
Wi-Fi connecting
You can use your cellphone/tablet PC in Android or IOS system to control the camcorder through the Wi-Fi function.
- Make sure you have installed the software "iSmart DV" in your cellphone or tablet PC(Android can download from the "Play Store", while the IOS downloads from the "APP Store").
https://play.google.com/store/apps/details?id=com.astrotek.ptpcamera https://itunes.apple.com/es/app/ismart-dv/id635238395?mt=8
- Turn the camcorder on, then press the UP button to enter the Wi-Fi connecting mode, and it shows the "Waiting For Wi-Fi Connecting" on the screen.
- Open and search the Wi-Fi named "BBAQUAWIFI_000001" in your cellphone/tablet PC, then connect it. The primary password is "12345678"
- After building up the Wi-Fi connection successfully, an icon" Wi-Fi Connection Ready...!" is shown on the screen of the camcorder.
Note: The connected device will not have access to Internet when it is linked to the camera via Wi-Fi.
- Run the "iSmart DV". So you can see the objects viewing by your camcor-der is shown on your cellphone or tablet PC. And at this time you can control it by your cellphone or tablet PC.
Start
- Touch the icon to switch between video mode and capture mode.
- Touch the icon "REC" to start recording a movie clip, touch it again to stop recording.
And touch the icon to take a still photo.
Settings: (It may be different depending on your software version)
Touch the icon you want to set, including self-timer, resolution, white balance.
- Self-timer: set a delay from the time the shutter icon is touched to the time the image is shot. [Off]/[2s]/[10s]
- Photo resolution: [5M]/[3M]/[2M]/[1M]/[VGA]
- Video resolution: [FHD 1080p@30fps]/[HD 720P@60fps]/[HD 1280*720(30fps)]
- White balance: Auto/Daylight/Cloudy/Fluorescent/Incandescent
And we can touch the icon to set more options. Continues shooting, white balance, frequency, format camera, and version informations.
- Continues shooting: it will take several photos per shoot as you set. [Off]/[3 photos]/[5 photos] /[10 photos]
- During using, either pressing the UP button of the camcorder or exit the "i Smart DV" in your cellphone/tablet PC can exit the connections.
Specification
Sensor: 2.0 Mega Pixel CMOS Sensor
Operation modes: Video mode, Capture mode, Playback mode
Shutter: Electronic
LCD screen: 1.5" TFT Screen
Storage: TF card (up to 32G)
Resolution: Video: [1920*1080(30fps)]/[1280*720(60fps)]/[1280*720(30fps)]
Image:[2560*1920]/[2048*1536]/[1600*1200]/[1280*960]/[640*480]
Continue shoot: [3] /[5]/ [10] frames per shoot
ISO: Auto/50/100/200/400/800
Exposure: -2EV\~ +2EV
White balance: Auto/Daylight/Cloudy/Tungsten/Fluorescent
File format: Image:JPG Video:MOV
Battery: Lithium-ion battery(build in)
Speaker: Build in
Microphone: Build in
Dimension: 82*47.2*27.1(mm)
Weight: About 75 g
Warranty
BEST BUY PRODUCT GUARANTEE CONDITIONS
- HARDWARE UNITS: Best Buy offers a 2 year guarantee (24 months) in materials and workmanship from the date of purchase. It is therefore necessary to present a document proving the date of delivery or purchase, whether the invoice, receipt or delivery note. Documents that have been manipulated will not be accepted.
- SOFTWARE ACCESSORIES: (only if included in the product) Product software accessories will be sent via a download link or email within 30 days of the date of purchase.
- REQUEST FOR TECHNICAL ASSISTANCE: Connect online to the Best Buy website (www :// bestbuy-int.com) and see if you can find the solution to the problem. If not, contact the Best Buy technical service (specified below) to request repair of the product.
- REPLACEMENT: Within the first 15 days from the date of purchase, if it cannot be easily repaired, the product will be replaced by another (only the defective item will be replaced and not the other elements that go with it).
- REPAIR: Repair of a product is free (both labour and materials) within the two years of the guarantee provided that there is no reason for the cancellation of the guarantee. For repair of the product you must previously contact the technical service and obtain a repair number (RMA); otherwise the product will be returned to sender and shipping costs will be charged.
- CANCELLATION OF GUARANTEE: The guarantee will be automatically cancelled in the following cases:
- Deficiencies of product use in countries other than the country of sale.
- Handling of the product or its identification elements (serial numbers) by anyone other than the official technical service staff.
- Deficiencies caused by improper installation of the product.
- Problems arising from use of unofficial product accessories.
- Breakage caused by manipulation of the components of the unit.
- Damage caused fortuitously by accidents, falls or natural disasters.
- The guarantee does not include consumables and parts used and worn by normal use (remote control keys, batteries, bulbs, connectors scratched by multiple connections and disconnections, etc.).y desconexiones, etc.).
-
ADDITIONAL NOTES: Batteries that have reached the end of their useful life will not be covered by the guarantee. Replacement of damaged equipment or any part thereof shall not involve extension of the guarantee.
-
USER COMPENSATION: The liability and SOLE compensation will be to change or repair the defective product (or defective part thereof), provided they fall within the aforementioned cases.
- GENERAL: Best Buy International or its representatives shall in no case be liable for any damages, including those resulting from lost profits or any other pecuniary loss, arising as a result of the use or inability to use the product in question, even assuming that Best Buy International has reported that they may arise.
How to benefit from being a registered user.
Register on our website http://www.bestbuy-int.com
How to request technical assistance.
Once registered, you can request technical assistance at any time as follows:
BEST BUY INTERNATIONAL

sat@bestbuy-int.com

www.bestbuyasia.com.hk
DECLARATION OF CONFORMITY
CE EMC 1308078
Best Buy Asia Limited declares that this product, Easy Snap HD Aqua Wi-Fi, by the brand Best Buy Consumer Products, with a CE certificate for the year 2013, is a device that complies with:
EMC Directive 2004/108/EC
CE Marking Directive 95/68/EEC
R&TTE Directive 1999/5/EC
IPX8
EN 55022: 2010 / EN 55024: 2010
EN 61000-3-2: 2006+A1: 2009+A2: 2009
EN 61000-3-3: 2008
EN 60950-:2006+A11:2009+A1:2010+A12:2011
EN 62479:2010
ETSI EN 301 489-1 V1.9.2 (2011-09)
ETSI EN 301 489-17 V2.2.1 (2012-09)
ETSI EN 300 328 V1.7.1 (2006-10)
IEC 60529: 1989+A1:1999
EN 60529: 1991+A1:2000
Date and place
10/04/2014
Best Buy Asia Limited
906, 9/F, Two Grand Tower, 625 Nathan Rd.,
Mongkok, Kowloon, Hong Kong

natural_image
Simple line drawing of a stylized object resembling a pen or tool, with no text or symbols present.Signed: Patty Zheng, Lab Inspector
natural_image
Pure mechanical diagram showing a lever and base assembly without any text, numbers, or symbols
natural_image
Technical line drawing of a mechanical component with multiple slots and a central base (no text or symbols)text_image
① ② OR + OR ↓text_image
Technical diagram showing assembly of mechanical components with OR labels and a final assembled viewSans coupures (Loop Recording)
CONDITIONS DE GARANTIE DES PRODUITS BEST BUY
EMC Directive 2004/108/EC
CE Marking Directive 95/68/EEC
R&TTE Directive 1999/5/EC
IPX8
Date et lieu
10/04/2014
Best Buy Asia Limited
906, 9/F, Two Grand Tower, 625 Nathan Rd.,
Mongkok, Kowloon, Hong Kong
EN 55022: 2010 / EN 55024: 2010
EN 61000-3-2: 2006+A1: 2009+A2: 2009
EN 61000-3-3: 2008
EN 60950-:2006+A11:2009+A1:2010+A12:2011
EN 62479:2010
ETSI EN 301 489-1 V1.9.2 (2011-09)
ETSI EN 301 489-17 V2.2.1 (2012-09)
ETSI EN 300 328 V1.7.1 (2006-10)
IEC 60529: 1989+A1:1999
EN 60529: 1991+A1:2000

natural_image
Simple line drawing of a stylized object resembling a bird or plant stem (no text or symbols)Signature: Patty Zheng, Lab Inspector
natural_image
Technical line drawing of a mechanical device with no visible text or symbolsnatural_image
Technical line drawing of a mechanical component with multiple slots and a central base (no text or symbols)text_image
① ② OR + OR ↓text_image
Technical diagram showing assembly of mechanical components with OR labels and a final assembled viewOperazioni di base
Ininterrotta (Loop Recording)
EMC Directive 2004/108/EC
CE Marking Directive 95/68/EEC
R&TTE Directive 1999/5/EC
IPX8
Data e luogo
10/04/2014
Best Buy Asia Limited
906, 9/F, Two Grand Tower, 625 Nathan Rd.,
Mongkok, Kowloon, Hong Kong
EN 55022: 2010 / EN 55024: 2010
EN 61000-3-2: 2006+A1: 2009+A2: 2009
EN 61000-3-3: 2008
EN 60950-:2006+A11:2009+A1:2010+A12:2011
EN 62479:2010
ETSI EN 301 489-1 V1.9.2 (2011-09)
ETSI EN 301 489-17 V2.2.1 (2012-09)
ETSI EN 300 328 V1.7.1 (2006-10)
IEC 60529: 1989+A1:1999
EN 60529: 1991+A1:2000

natural_image
Simple line drawing of a curved line with a vertical tick mark (no text or symbols)Firmato: Patty Zheng, Lab Inspector
Manual do Utilizador
Precauções
natural_image
Pure mechanical diagram showing a lever and base assembly without any text, numbers, or symbols
natural_image
Technical line drawing of a mechanical component with multiple slots and a central base (no text or symbols)text_image
① ② OR + OR ↓text_image
Technical diagram showing assembly of mechanical components with OR labels and a final assembled viewOperações Básicas
Sem cortes (Loop Recording)
Operation modes: Video mode, Capture mode, Playback mode
Shutter: Electronic
LCD screen: 1.5" TFT Screen
Storage: TF card (up to 32G)
Resolution: Video:[1920*1080(30fps)]/[1280*720(60fps)]/[1280*720(30fps)]
Image: [2560*1920]/[2048*1536]/[1600*1200]/[1280*960]/[640*480]
Continue shoot: [3] /[5]/ [10] frames per shoot
ISO: Auto/50/100/200/400/800
Exposure: -2EV\~ +2EV
White balance: Auto/Daylight/Cloudy/Tungsten/Fluorescent
File format: Image:JPG Video:MOV
Battery: Lithium-ion battery(build in)
Speaker: Build in
Microphone: Build in
Dimension: 82*47.2*27.1(mm)
Weight: About 75 g
Garantia
CONDIÇÕES DE GARANTIA DE PRODUTOS BEST BUY
EMC Directive 2004/108/EC
CE Marking Directive 95/68/EEC
R&TTE Directive 1999/5/EC
IPX8
Data e lugar
10/04/2014
Best Buy Asia Limited
906, 9/F, Two Grand Tower, 625 Nathan Rd.,
Mongkok, Kowloon, Hong Kong
EN 55022: 2010 / EN 55024: 2010
EN 61000-3-2: 2006+A1: 2009+A2: 2009
EN 61000-3-3: 2008
EN 60950-:2006+A11:2009+A1:2010+A12:2011
EN 62479:2010
ETSI EN 301 489-1 V1.9.2 (2011-09)
ETSI EN 301 489-17 V2.2.1 (2012-09)
ETSI EN 300 328 V1.7.1 (2006-10)
IEC 60529: 1989+A1:1999
EN 60529: 1991+A1:2000

natural_image
Simple line drawing of a curved line with a vertical tick mark (no text or symbols)Assinado: Patty Zheng, Lab Inspector
natural_image
Technical line drawing of a mechanical device with no visible text or symbols
natural_image
Technical line drawing of a mechanical component with multiple slots and a central housing (no text or symbols)text_image
① ② OR + OR ↓text_image
Technical diagram showing assembly of mechanical components with OR labels and a final assembled viewEMC Directive 2004/108/EC
CE Marking Directive 95/68/EEC
R&TTE Directive 1999/5/EC
IPX8
EN 55022: 2010 / EN 55024: 2010
EN 61000-3-2: 2006+A1: 2009+A2: 2009
EN 61000-3-3: 2008
EN 60950-:2006+A11:2009+A1:2010+A12:2011
EN 62479:2010
ETSI EN 301 489-1 V1.9.2 (2011-09)
ETSI EN 301 489-17 V2.2.1 (2012-09)
ETSI EN 300 328 V1.7.1 (2006-10)
IEC 60529: 1989+A1:1999
EN 60529: 1991+A1:2000
Datum und Ort
10/04/2014
Best Buy Asia Limited
906, 9/F, Two Grand Tower, 625 Nathan Rd.,
Mongkok, Kowloon, Hong Kong

natural_image
Simple line drawing of a curved line with a vertical tick mark (no text or symbols)Patty Zheng, Lab Inspector
Instrukcja Obsługi
Ostrzeżenie
natural_image
Technical line drawing of a mechanical device with no visible text or symbols
natural_image
Technical line drawing of a mechanical component with multiple slots and a central base (no text or symbols)text_image
① ② OR + OR ↓text_image
Technical diagram showing assembly of mechanical components with OR labels and a final assembled viewPodstawowa obsługa
WARUNKI GWARANCJI PRODUKTÓW BEST BUY
EMC Directive 2004/108/EC
CE Marking Directive 95/68/EEC
R&TTE Directive 1999/5/EC
IPX8
EN 55022: 2010 / EN 55024: 2010
EN 61000-3-2: 2006+A1: 2009+A2: 2009
EN 61000-3-3: 2008
EN 60950-:2006+A11:2009+A1:2010+A12:2011
EN 62479:2010
ETSI EN 301 489-1 V1.9.2 (2011-09)
ETSI EN 301 489-17 V2.2.1 (2012-09)
ETSI EN 300 328 V1.7.1 (2006-10)
IEC 60529: 1989+A1:1999
EN 60529: 1991+A1:2000
Data i miejsce
10/04/2014
Best Buy Asia Limited
906, 9/F, Two Grand Tower, 625 Nathan Rd.,
Mongkok, Kowloon, Hong Kong

text_image
Handwritten signature or scribble on white background, possibly a signature or artistic markPodpis: Patty Zheng, Lab Inspector
natural_image
Technical line drawing of a mechanical device with no visible text or symbols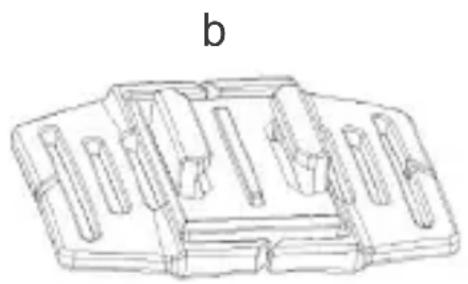
natural_image
Technical line drawing of a mechanical component with multiple slots and a central housing (no text or symbols)text_image
① ② OR + OR ↓text_image
Technical diagram showing assembly of mechanical components with OR labels and a final assembled viewОсновные операции
EMC Directive 2004/108/EC
CE Marking Directive 95/68/EEC
R&TTE Directive 1999/5/EC
IPX8
EN 55022: 2010 / EN 55024: 2010
EN 61000-3-2: 2006+A1: 2009+A2: 2009
EN 61000-3-3: 2008
EN 60950-:2006+A11:2009+A1:2010+A12:2011
EN 62479:2010
ETSI EN 301 489-1 V1.9.2 (2011-09)
ETSI EN 301 489-17 V2.2.1 (2012-09)
ETSI EN 300 328 V1.7.1 (2006-10)
IEC 60529: 1989+A1:1999
EN 60529: 1991+A1:2000
Дата и место
10/04/2014
Best Buy Asia Limited
906, 9/F, Two Grand Tower, 625 Nathan Rd.,
Mongkok, Kowloon, Hong Kong

natural_image
Simple line drawing of a pen or stylus (no text or symbols)Podpis: Patty Zheng, Lab Inspector

be eco-friendly!
Environment protection first!
Your appliance contains valuable materials which can be recovered or recycled. Leave it at a local civic waste collection point.