CM1622 - Coffee machine Minimoka - Free user manual and instructions
Find the device manual for free CM1622 Minimoka in PDF.
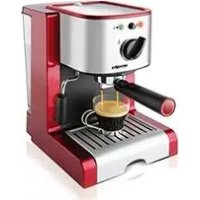
| Product type | Espresso coffee machine with milk frother |
| Brand | Minimoka |
| Model | CM1622 |
| Power supply | 220-240 V ~ 50/60 Hz |
| Compatible coffee types | Ground coffee and pods (ESE type) |
| Functions | Espresso coffee preparation, hot water dispenser, steam production for cappuccino |
| Indicator lights | Connection indicator (blue) and heating indicator |
| Controls | On/off switch, coffee button, steam button, steam regulator |
| Included accessories | Measuring spoon, filter for ground coffee, filter for pods, filter holder, drip tray |
| Water tank capacity | Not specified (MIN and MAX marks) |
| Safety | Do not operate without water; unplug before cleaning; use on a stable surface |
| Cleaning | Clean with a damp cloth; regular descaling with specific descaling product |
| Recommended descaling frequency | Every 6 weeks (very hard water) or every 12 weeks (hard water) |
| Intended use | Household use only |
| Weight | Not specified |
Frequently Asked Questions - CM1622 Minimoka
User questions about CM1622 Minimoka
0 question about this device. Answer the ones you know or ask your own.
Ask a new question about this device
Download the instructions for your Coffee machine in PDF format for free! Find your manual CM1622 - Minimoka and take your electronic device back in hand. On this page are published all the documents necessary for the use of your device. CM1622 by Minimoka.
USER MANUAL CM1622 Minimoka
Espresso coffee-maker
Cafetière expresso
Espressomaschine
Espresso coffee-maker CM-1622

Dear customer,
Many thanks for choosing to purchase a MINIMOKA brand product.
Thanks to its technology, design and operation and the fact that it exceeds the strictest quality standards, a fully satisfactory use and long product life can be assured.
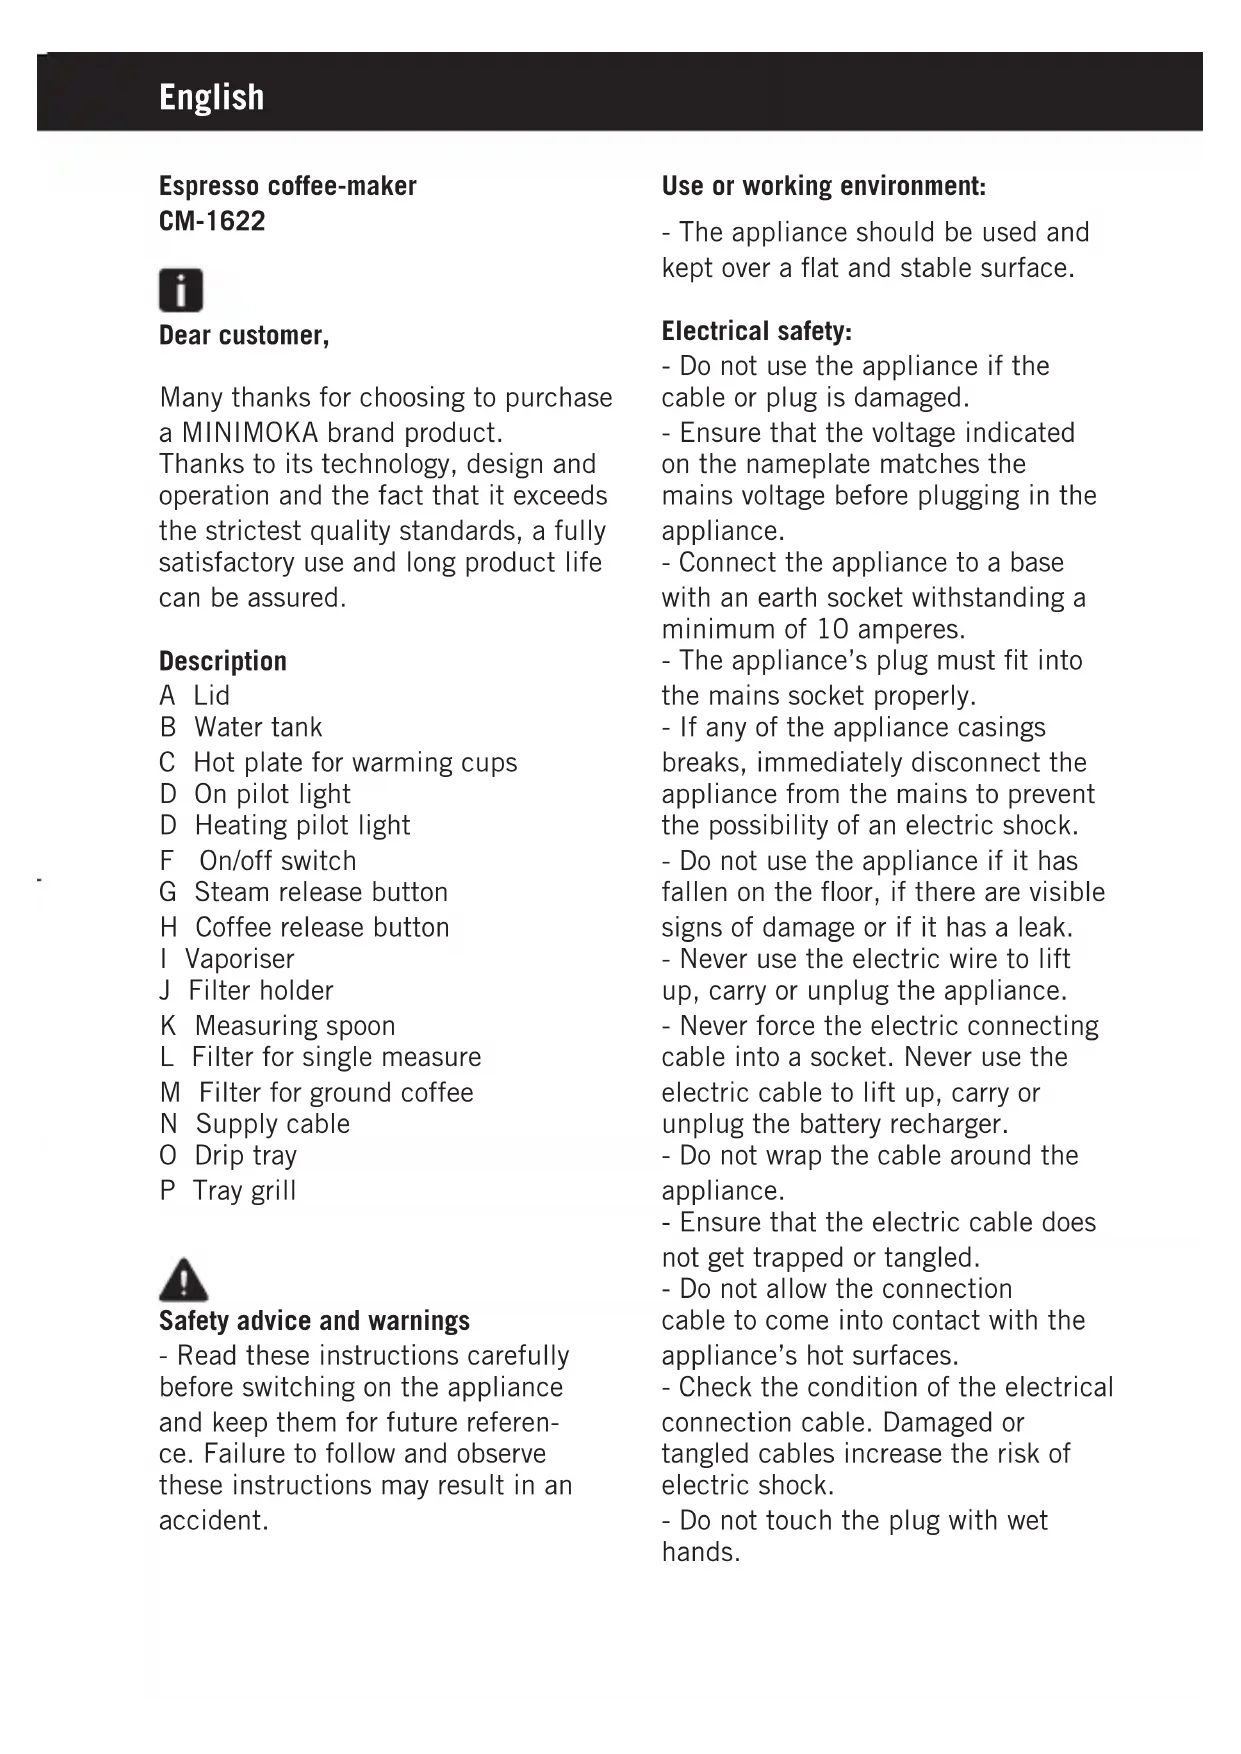
Description
A Lid
B Water tank
C Hot plate for warming cups
D On pilot light
D Heating pilot light
F On/off switch
G Steam release button
H Coffee release button
I Vaporiser
J Filter holder
K Measuring spoon
L Filter for single measure
M Filter for ground coffee
N Supply cable
O Drip tray
P Tray grill

Safety advice and warnings
- Read these instructions carefully before switching on the appliance and keep them for future reference. Failure to follow and observe these instructions may result in an accident.
Use or working environment:
- The appliance should be used and kept over a flat and stable surface.
Electrical safety:
- Do not use the appliance if the cable or plug is damaged.
- Ensure that the voltage indicated on the nameplate matches the mains voltage before plugging in the appliance.
- Connect the appliance to a base with an earth socket withstanding a minimum of 10 amperes.
- The appliance's plug must fit into the mains socket properly.
- If any of the appliance casings breaks, immediately disconnect the appliance from the mains to prevent the possibility of an electric shock.
- Do not use the appliance if it has fallen on the floor, if there are visible signs of damage or if it has a leak.
- Never use the electric wire to lift up, carry or unplug the appliance.
- Never force the electric connecting cable into a socket. Never use the electric cable to lift up, carry or unplug the battery recharger.
- Do not wrap the cable around the appliance.
- Ensure that the electric cable does not get trapped or tangled.
- Do not allow the connection cable to come into contact with the appliance's hot surfaces.
- Check the condition of the electrical connection cable. Damaged or tangled cables increase the risk of electric shock.
- Do not touch the plug with wet hands.
Use and care:
- Do not use the appliance if the accessories or parts are not fastened together properly.
-
Do not switch on the appliance without water.
-
Do not use the appliance if the on/off switch does not work.
- Do not move the appliance while in use.
- Respect the MAX and MIN levels.
- Disconnect the appliance from the mains when not in use and before undertaking any cleaning task.
- This appliance is for household use only, not professional or industrial use.
- Children should be supervised to ensure that they do not play with the appliance.
- Ensure that this product is not used by the disabled, children or people unused to its handling.
- This appliance should be stored out of reach of children and/or the disabled.
- Do not store or transport the appliance if it is still hot.
- Any misuse or failure to follow the instructions for use renders the guarantee and the manufacturer's liability null and void.

Instructions for use
Use:
- Unroll the cable completely before plugging it in.
- Connect the appliance to the mains.
This simple operation ensures optimum dispensing and must be carried out:
- When switching on for the first time:
- When the machine has been out of use for a long time (1 or 2 weeks)
- After making steam
- When the tank is without water.
- Press the on/off switch and the machine will be connected.
- Rinse the tank and fill it with cool drinking water.
-Place a receptacle under the vaporiser. Turn on the control switch by turning it towards the right. - Press the coffee release button and water will flow out through the vaporiser. Wait until approximately a cupful has come out.
- To turn off the supply, turn off the control switch by turning it towards the left.
Filling with water:
- Remove the tank from the appliance.
- Open the cover.
- Fill the compartment with cold water.
- Fill the receptacle taking care to observe the MAX and MIN level (Fig. 1)
- Replace the tank in its housing, ensuring that it is well fitted.
- Close the lid.
Preparing coffee:
- Check that the removable filter is perfectly fitted into the filter holder.
- Fill the tank with cold water to the indicated level.
- Connect the appliance to the mains.
-
Fill the removable filter with ground coffee (6-7 g per cup to be prepared).
-
If you wish to make 1 coffee, fill the ladle to half its capacity (1 spoonful), taking the capacity of the measuring spoon as the measurement for 1 coffee.
-
For 2 coffees, put in 2 spoonfuls.
-
Next lightly press down the ground coffee with the back of the spoon.
-
Before fitting the filter holder in the coffee maker assembly, turn the ladle-holder backwards.
-
Fix the filter holder into the coffee assemblage by inserting it from below the assemblage.
-
Turn the filter holder in the coffeemaker assemblage from below the assemblage and turn it from left to right until it locks.
-
Place one or two pre-heated cups at the filter holder outlet as desired, and then press the coffee release button. The coffee infusion will begin to pour out. It does not matter if the blue pilot light goes out during this process. When you have obtained the desired quantity of espresso coffee (short or long), press the coffee button.
-
When the dispensing is completed, wait a few seconds and then remove the cups of coffee.
-
Remove the filter holder and empty out the grounds.
-
Wash the filter holder with running water.
-
Check that the removable filter is perfectly fitted into the filter holder.
-
Fit the filter holder in the appliance once more.
Preparing coffee with single-measure bags:
- Remove the filter for ground coffee from the filter holder.
- Insert the filter for single-measure
bags in the filter holder.
- Next, put the single-measure bag into the filter holder, ensuring that the paper of the bag does not protrude from the filter holder.
- Fix the filter holder into the coffee assemblage by inserting it from below the assemblage.
- Turn the filter holder from left to right until it locks.
- Place 1 pre-heated cup under the filter holder;
- Press the coffee release button.
- Follow the "coffee preparation" procedure.
- Remove the single-measure filter and throw away the used bag.
-Clean the filter holder and the single-measure filter.
Obtaining hot water:
- Switch on the appliance by operating the on/off control.
- The heating pilot light will come on indicating that the water is heating.
- Wait until the coffee release pilot light also comes on. This situation tells us that the water has reached the appropriate temperature.
- Place a receptacle under the vaporiser.
-Turn on the vaporiser by turning it towards the right. - Press the coffee release button.
- The hot water begins to pour out through the vaporiser.
- Once you have obtained the desired amount of hot water, press the coffee release button.
-Turn off the control switch by turning it towards the left.
Obtaining steam:
- The steam is used to foam milk for cappuccino, and also to heat other liquids.
- Turn the appliance on using the on/off switch.
- The heating pilot light will come on indicating that the water is heating to produce steam.
- Wait until the coffee release pilot light comes on, indicating that the appliance has reached the appropriate temperature.
- Press the steam release button.
- Place a receptacle under the steam pipe.
- Open the control for a few seconds so that the water that has remained in the vaporiser can be released. In a short time steam only will start to be released.
- Close the control and remove the receptacle.
Once you have finished using the appliance:
Turn the appliance off, using the on/off switch.
- Unplug the appliance to the mains.
- Remove the water from the water tank.
- Clean the appliance

Cleaning
- Disconnect the appliance from the mains and let it cool before undertaking any cleaning task.
-
Clean the equipment with a damp cloth with a few drops of washing-up liquid and then dry.
-
Do not use solvents, or products with an acid or base pH such as bleach, or abrasive products, for cleaning the appliance.
- Do not submerge the appliance in water or any other liquid, or place it under a running tap.
How to deal with lime scale incrustations:
- For the appliance to work correctly it should be kept free of lime scale or magnesium incrustations caused by the use of hard water.
- To avoid this type of problema, the use of distilled water is recommended.
- To prevent this kind of problem, we recommend the use of water with low lime or magnesium mineralisation.
- However, if it is not possible to use the kind of water recommended above, you should periodically remove the lime scale from the appliance:
- Every 6 weeks if the water is "very hard".
- Every 12 weeks if the water is "hard".
- To do so, we recommend the use of the specific product Taurus Decal, which can be found in specialised shops and authorised technical services.
- A specific anti-lime scale product should be used on this kind of product.
- Homemade solutions are not recommended in the de-scaling of this appliance, such as the use of vinegar.

Anomalies and repair
- Take the appliance to an authorised technical support service if problems arise.
- If the connection to the mains has been damaged, it must be replaced and you should proceed as you would in the case of damage.
For EU product versions and/or in case that it is requested in your country:
Ecology and recyclability of the product
- The materials of which the packaging of this appliance consists are included in a collection, classification and recycling system.
- The product does not contain concentrations of substances that could be considered harmful to the environment
This appliance contains, or could contain, oil. Remember that one should abide by the regulations concerning the elimination of this type of contaminant.

This symbol means that in case you wish to dispose of the product once its working life has ended, take it to an authorised waste agent for the selective collection of
waste electrical and electronic equipment (WEEE)
This appliance complies with Directive 2006/95/EC on Low Voltage and Directive 2004/108/EC on Electromagnetic Compatibility.
Cafetiere expresso CM-1622

Cher Client,
CbBETN INIpeDynpexKeHn83a 6e3onacHOCT
-ПpoуетЕВнMuTeJIHo Ta3N
6poWypa npedn da nycHeTe ypeDa B DeiCTBne IЯ 3ana3eTe 3a noHaTaTbShn cnpaBKn. Hecnaa3BaHeto Ha INHCTpyKcInTe MoKe da DoBeDe do 3IOnOlyKa.
OTctpaHЯBaHe Ha KOTJIeHnKaMbK:
- 3a npabnHOTo fynKcnoHnpaHe Ha ypeDa,ToT Tp6Ba Da e NOpHCTeH OT KOTLeH KaMbK INI MaHHe3N, KOHTO ce OTlaRaT pRn n3NoJ3BaHe Ha CnHOBapOBNTa B0da.
- 3a Да педOTВраТITE TOЗ пробLEM, Bn перорьваме ДИЗПОЛЗВаTe DeCTNILIPAHa BOda.
-3aДапразOTВРАТTETOЗпрбLEM, BnnpenopbYBaMeДaИЗПОЛ3ВaTe BOdaC HNcKO CbДьрЖаHneHaBapOBHK IJIIMaRHe3N. - BbnpKn TOBa, aKO He e Bb3MOxHOn 3nOJI3BaHeTo Ha npenOpbuaHnT NO-rope BnD BODa, Tp6Ba Da npncTbNITe KbM nepNoDnHaTa Opb6OTKa Ha ypeDa 3a HamaJBAhe Ha KOtJeHnT KaMbK, C nepNoDnHOCT OT:
- BceKn 6 ceMnU, aKO BODaTa e "MHOROTBbPda".
- Bcekn 12 ceMnucn, aKO BodaTa e "TBbPda".
-3a TOBa npenOpbUbAME cneuaJIHnIrpenapat "Taurus Decal", KoITo ce npOdaBa BbB cpeuaJIu3npaHnTe MaRa3HH N OTOpN3npaHnTe cepBn3n. - 3a TOBa TpI6Ba Da n3noJ3BaTe aHTnBapOBuKOB npenapaT cneuaJIHo 3a To3N BnD ypeiN.
- He ce npenopbuaT domaunpa3TBOpn, TaKa KaHTO n3NoJ3BaHeToHa OcET npn 6pb60Tkata 3anpemaxbaHeTo Ha KaIzra OT ypeDa.
-Ako 3axpaHbauT Ka6eI e NOBpeH, Tp6Ba Da ce NODMeHn. HanpaBeTe CbOTo KaKTo npi HEN3npaBHOCT.
3a npodykTN OT Ebponeckn Cb03 n/nn B cnya, ye taKa ro n3ncBa HopMaTnBaTa BbB BaWaTa cTpaHa:
J 1 J 1 J 1 J 1 J 1 J 1 J 1 J 1 J 1 J 1 J 1 J 1 J 1 J 1 J 1 J 1 J 1 J 1 J 1 J 1 J 1 J 1 J 1 J 1 J 1 J 1 J 1 J 1 J 1 J 1 J 1 J 1 J 1 J 1 J
:
J 1
"12 aai" cll j 6
"12
Taurus Decal " wkl 1 j 100i y i 100i 100i
2x-1y

a a a a a a a a a a a a a a a a a a a a a a a a a a a
1
a
g 100000000000000000000000000000000000000000000000
0a clll j 511 5i g j 111 111 111 111 111 111 111 111 111
1.5c
EC/2004/108 a j 95 95
jLwclJ
y1/1j 2j jbi jie jie
clll 1
aJ 10000000000000000000000000000000000000000000000000
j 1 j 10
i 1
.
jla jlae no gjrl jslalll
.
.
:
J 1
j j 1
Jusll Jusllal j 1
a
jL 1
.
i 1
e 1
jglz11 Jlaaii jc sglz11 ic
y
j
.ii jol io ooi
j ≤ k ≤ 10 啦 a_i
i 1
aal lal aal al gol bglgol gol
j j 1
jgl jg jgl jgl jgl jgl jgl jgl jgl jgl jgl jgl jgl jgl jgl jgl jgl jgl jgl jgl jgl jgl jgl jgl jgl jgl jgl jgl jgl jgl jgl jgl jgl jgl jgl jgl jgl jgl jgl jgl jgl jgl jgl jgl jgl jgl jgl jgl jgl jgl
0
g j 100000000000000000000000000000000000000000000000000000
jolal Jolal jn Jn Jn Jn Jn Jn
.8gall 29j j lbc
1
J 1
$$ \therefore \int_ {0} ^ {1} f (t) d t = \int_ {0} ^ {1} f (t) d t $$
$$ (\mathrm {i n c} \omega \omega \mathrm {g e o}) \mathrm {j i n j i n a l} \mathrm {a l p h a} \mathrm {d e l} \mathrm {j e c t} \mathrm {l} \mathrm {j o s i w} \mathrm {p r} \mathrm {i d} $$
$$ \therefore \lim _ {u \to 0} u ^ {2} + \frac {1}{u ^ {3}} $$
$$ \therefore \text {l a s} \text {c l} \text {a l j} \text {j i} \text {i} \text {i} \text {i} \text {i} \text {i} \text {i} $$
$$ j _ {i} \text {g a l l} j _ {i} \text {g a l l} j _ {i} \text {g a l l} j _ {i} \text {g a l l} j _ {i} \text {g a l l} j _ {i} \text {g a l l} j _ {i} \text {g a l l} j _ {i} \text {g a l l} j _ {i} \text {g i s b i a n d} $$
$$ \therefore \text {i} _ {j} \text {i} _ {j} \text {i} _ {j} \text {i} _ {j} \text {i} _ {j} \text {i} _ {j} \text {i} _ {j} \text {i} _ {j} \text {i} _ {j} \text {i} _ {j} \text {i} _ {j} \text {i} _ {j} $$
$$ \therefore \text {i n} \left[ \begin{array}{l l l l l l l l l l l l l l l} \end{array} \right] $$
$$ \left. \right. \int_ {D} f _ {i j k l} \left. \right\rvert\left. \right. \int_ {D} f _ {i j k l} \left. \right\rvert \int_ {D} f _ {i j k l} \left. \right. $$
$$ . j _ {j} \text {s i g m a} j j _ {j} \text {s i g m a} j _ {j} \text {s i g m a} j _ {j} \text {s i g m a} j _ {j} \text {s i g m a} j _ {j} \text {s i g m a} j _ {j} \text {s i g m a} j _ {j} \text {s i g m a} j _ {j} \text {s i g m a} j $$
ai a ai
$$ . j _ {k} \text {全} n j _ {l} j _ {k} j _ {l} j _ {k} j _ {l} j _ {l} j _ {l} j _ {l} j _ {l} j _ {l} j _ {l} j _ {l} j _ {l} j _ {l} j _ {l} j _ {l} j _ {l} j _ {l} j _ {l} j _ {l} j _ {l} j _ {l} j _ {l} $$
让e上
$$ \therefore \Delta J _ {1} ^ {\prime} = \Delta J _ {2} ^ {\prime} = \Delta J _ {3} ^ {\prime} = \Delta J _ {4} ^ {\prime} $$
$$ (1 8) \text {s a t e} \quad \text {l i d} \quad \text {l i d} \quad \text {l i d} \quad \text {l i d} \quad \text {l i d} \quad \text {l i d} \quad \text {l i d} \quad \text {l i d} \quad \text {l i d} \quad \text {l i d} \quad \text {l i d} \quad \text {l i d}. $$
$$ \therefore \text {J} _ {\text {i}} \text {i} _ {\text {i}} \text {i} _ {\text {i}} \text {i} _ {\text {i}} \text {i} _ {\text {i}} \text {i} _ {\text {i}} \text {i} _ {\text {i}} \text {i} _ {\text {i}} \text {i} _ {\text {i}} \text {i} _ {\text {i}} \text {i l i} _ {\text {i}} \text {i} _ {\text {i}} \text {i} _ {\text {i}} \text {i} _ {\text {i}} \text {i} _ {\text {i}} \text {i} _ {\text {i}} \text {i} _ {\text {i}} \text {i} _ {\text {i}} \text {i} _ {\text {i}} $$
$$ . \dot {s} \dot {l} \dot {u} \dot {a} \dot {a} \dot {l} \dot {j} \dot {a} \dot {j} \dot {i} $$
$$ \because \mathrm {g a s s i l l} $$
$$ \therefore \sum_ {i = 1} ^ {n} k _ {i} j _ {i} \sum_ {j = 1} ^ {n} j _ {i j} \sum_ {k = 1} ^ {n} k _ {i k} j _ {i k} $$
$$ \therefore \text {d i f f} \quad \text {j} \text {s w a l l} \quad \text {g} \text {g i s s w a l l} \quad \text {i} \text {i} \text {j} \text {l l l} \quad \text {l l l} \quad \text {j} \text {j} \text {j} \text {j} \text {j} \text {j} \text {j} \text {j} \text {j} \text {j} \text {j} \text {j} \text {j} $$
$$ \therefore \text {i s i} _ {\text {i}} \leqslant 1, \text {j i l l l} _ {\text {j}} \leqslant 1, \text {j e t a l l} _ {\text {j}} \leqslant 1, \text {j o u g i} _ {\text {o}} \leqslant 1 $$
$$ \text {d r a g} \delta \text {g e l l} \text {j a n j i s t h e} \text {i g o b a l l} \delta \text {g e l l} \text {j a n j i s t h e} 7 - 6 (\text {c u c k}) \text {a i g o b a l l} \delta \text {g e l l} \text {j a n j i s t h e} \text {l i a l} \text {j i} $$
m = 311
$$ j _ {i} \Delta_ {i} \Delta_ {i} \Delta_ {i} \Delta_ {i} \Delta_ {i} \Delta_ {i} \Delta_ {i} \Delta_ {i} \Delta_ {i} \Delta_ {i} \Delta_ {i} \Delta_ {i} \Delta_ {i} \Delta_ {i} \Delta_ {i} \Delta_ {i} \Delta_ {i} $$
j
$$ \therefore \text {i} \text {i} \text {i} \text {i} \text {i} \text {i} \text {i} \text {i} \text {i} $$
12alj 15g yLg:
Jnssnnnns
10 J 1
y
y
y
1
JgJgJgJgJgJgJgJgJgJgJgJgJgJgJgJgJgJgJgJgJgJgJgJgJgJgJgJgJgJgJgJgJgJgJgJgJgJgJgJgJgJgJgJgJgJgJgJgJg
15gla 11
y
J 1
y
1
1
J 1
eLo jLj
Jbale 1
Aac cll jgl jgi yj p