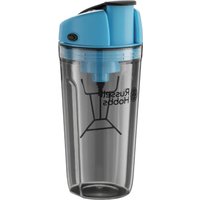
1477956 - Blender RUSSELL HOBBS - Free user manual and instructions
Find the device manual for free 1477956 RUSSELL HOBBS in PDF.
User questions about 1477956 RUSSELL HOBBS
0 question about this device. Answer the ones you know or ask your own.
Ask a new question about this device
Download the instructions for your Blender in PDF format for free! Find your manual 1477956 - RUSSELL HOBBS and take your electronic device back in hand. On this page are published all the documents necessary for the use of your device. 1477956 by RUSSELL HOBBS.
USER MANUAL 1477956 RUSSELL HOBBS
b: Ensemble bol hachoir
b1: Poussoir doseur
Read the instructions and keep them safe. If you pass the appliance on, pass on the instructions too. Remove all packaging, but keep it till you know the appliance works.
Important safeguards
Follow basic safety precautions, including:
1 This appliance must only be used by a responsible adult.
2 Don't leave the appliance unattended while plugged in.
3 Don't put the appliance in liquid, don't use it in a bathroom, near water, or outdoors.
4 Sit the motor unit on a dry, firm, level surface, near a power socket.
5 Route the cable so it doesn't overhang, and can't be tripped over or caught.
6 Keep the appliance and the cable away from hotplates, hobs or burners.
7 Unplug before dismantling or cleaning.
8 Never touch the moving parts - wait for the appliance to come to a complete stop before removing accessories.
9 Don't put your hand into the jug, even after you've removed it from the motor unit -- the blades are sharp.
10 Handle preparation bowl and mixing bowl blades as well as multifunctional knife and vegetable cutting blades with care: they are extremely sharp. It is essential that you remove the multifunctional knife (d) by the drive shaft (c) before emptying the bowl of its contents.
11 Always use the buttons to guide food through the funnel, never your fingers, nor a fork, a spoon, a knife or any other object.
12 Always use preparation bowl and blender bowl with the lids on.
13 Don't fill the jug above the mark – if you do, the contents may force the lid off when you start the motor.
14 Don't let the jug overflow. If liquid gets under the motor unit, it may be sucked into the motor, damaging it.
15 Don't run the motor for more than three minutes at a time, then leave it for a minute to cool down before using it again.
16 Do not use the appliance when empty.
17 Do not allow long hair, scarves, ties, etc. to hang over the bowl or accessories whilst in use.
18 Do not use accessories as containers (for freezing, cooking, heat sterilisation, etc.).
19 Do not put accessories in a microwave oven.
20 Don't fit any attachment or accessory other than those we supply.
21 Don't use the appliance for any purpose other than those described in these instructions.
22 Don't operate the appliance if it's damaged or malfunctions.
23 It is recommended that the power cable be regularly inspected to detect any trace of possible damage, and the appliance should not be used if the cable is damaged.
24 If the power cable is damaged, it must be replaced by the manufacturer, their after-sales service or a manufacturer-approved technician to avoid any danger.

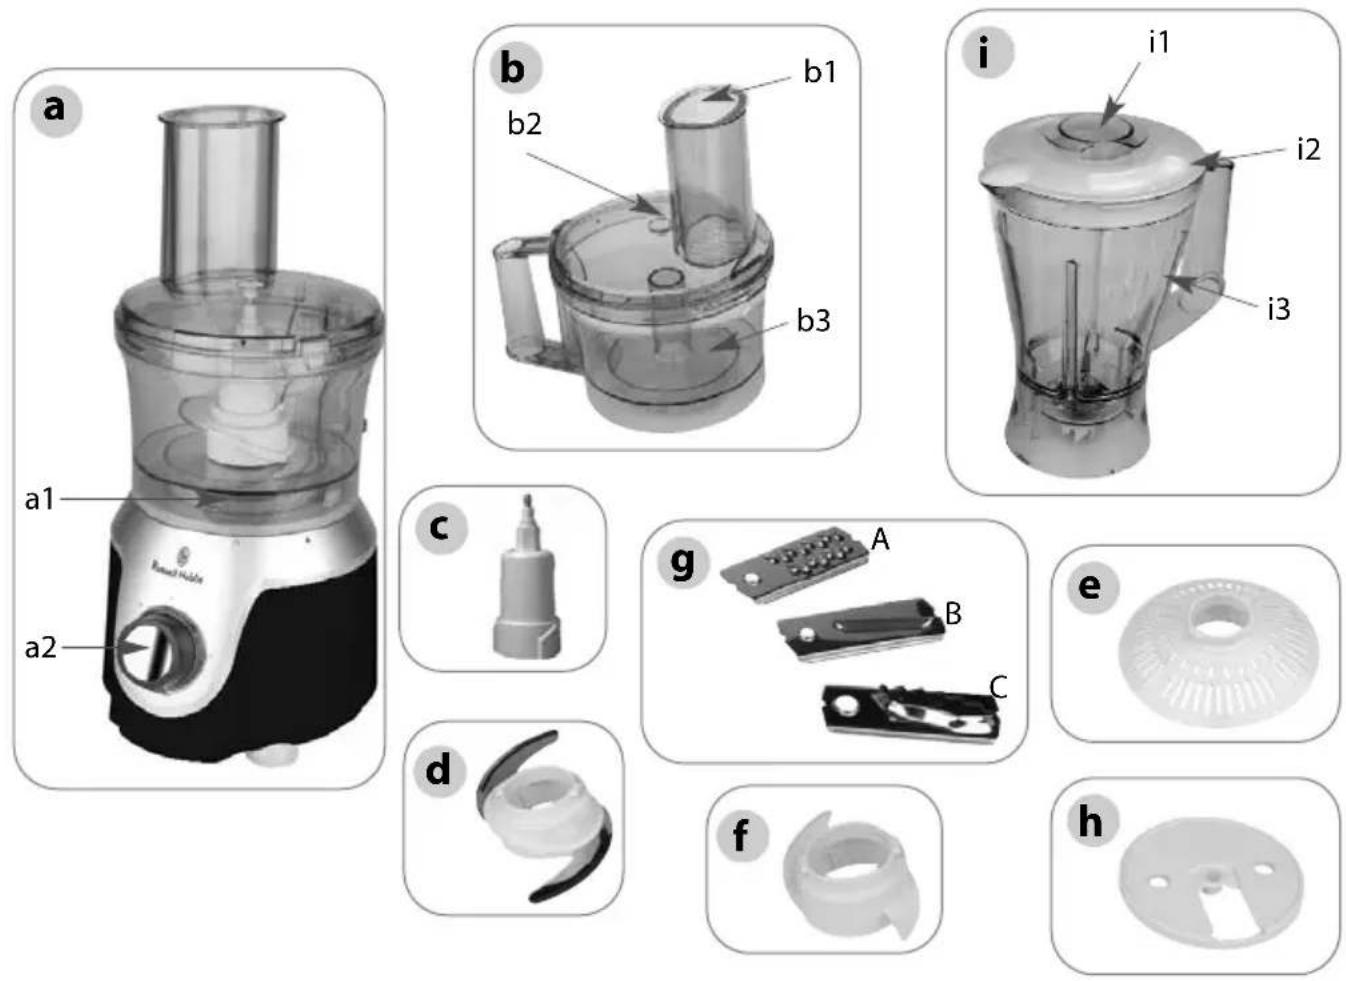
Description:
a:Motor unit
a1: Motor unit output
a2: Speed selector: Pulse position
(intermittent speed)-0-1-2
b: Chopping bowl set
b1:Dispensing button
b2: Cover with funnel
b3:Bowl
c: Drive shaft
Accessories:
d: Multifunctional knife
e: Emulsifying disc
f: Kneading knife
g:Vegetable cutting blades
A: Grating blade
B: Slicing blade
C: Chip-cutting blade
h: Blade holder
i: Blender
i1: Measuring cap
i2:Lid
i3: Blender bowl
Setup
- Before initial use, wash all accessories and parts thereof in warm soapy water (see section on cleaning). Rinse and dry.
- Place the motor unit (a) on a flat, clean, dry surface.
- Plug in the appliance.
- Pulse (intermittent speed): turn the button (a2) to the successive Pulse position for better control over certain functions.
- Continuous speed: turn the button (a2) to position 1 or 2.
- Stop: turn the button (a2) to position 0.
1: INSTALLATION OF THE CHOPPING BOWL AND LID
Accessories used:
- Bowl set (b).
Accessory assembly:
- Place the bowl (b3) on the motor unit (a), the handle of the bowl positioned slightly to the right of the button.
- Lock the bowl (b3) in place by turning it to the right.
- Put the lid (b2) on the bowl (b3). Lock the lid in place by pushing it to the right in the handle of the bowl.
It is essential that you lock the bowl in place on the motor unit (a) before locking the lid (b2) in place on the bowl (b3).
2: REMOVING THE CHOPPING BOWL AND LID
- Unlock the lid by turning clockwise to release the handle of the bowl. You can then lift and remove it.
- Unlock the bowl by turning clockwise.
- Only now can you lift and remove the bowl from the motor unit.
3: MIXING/BLENDING/CHOPPING
Accessories used:
- Bowl set (b).
- Drive shaft (c).
- Multifunctional knife (d).
Accessory assembly:
- Place the bowl (b3) on the motor unit (a) and lock in place.
- Slide the multifunctional knife (d) onto the drive shaft (c), and position the whole thing on the motor unit output (a1).
- Place the ingredients in the bowl.
- Place the lid (b2) on the bowl (b3) and lock in place.
- To remove the bowl-lid set:unlock the lid, then the bowl.
MIXING
- Turn the speed selector (a2) to position 2 to start up.
You can mix up to 300g of light mixture such as sponge cake, pound cake, yoghurt cake, etc. in 1 min. 30s to 3 mins. 30s.
You can also mix up to 0.5 litres of crepe mixture, waffle mixture, etc. in 1 min. to 1 min. 30 seconds.
CHOP
- Turn the speed selector (a2) to position 2 to start up, or for better chopping control use the pulse position.
You can chop upto 300g of food such as:
- raw or cooked meat (boned, degristled and diced).
- raw or cooked fish (skinless and boneless).
- hard foods:cheese, dried fruits, certain vegetables (carrots, celery, etc.).
- soft foods: certain vegetables (onions, spinach, etc.).
BLENDING
- Turn the speed selector (a2) to position 2 to start up.
You can blend up to 0.5 litres of soup or stewed fruit in 20s.
4. KNEADING
Accessories used:
- Bowl set (b)
- Drive shaft (c).
- Kneading knife (f)
Accessory assembly:
- Place the bowl (b3) on the motor unit (a) and lock in place.
- Slide the kneading knife (d) onto the drive shaft (c), and position the whole thing on the motor unit output (a1).
- Place the ingredients in the bowl.
- Place the lid (b2) on the bowl (b3) and lock in place.
- To remove the bowl-lid set: unlock the lid, then the bowl.
KNEADING
- Turn the speed selector (a2) to position 2 to start up.
You can knead up to 300g of heavy mixture, such as: white bread dough, shortcrust pastry, etc. in 30s.
5: GRATING/SLICING
Accessories used:
- Bowl set (b).
- Drive shaft (c).
-
Choice of vegetable cutting blade (g).
-
Blade holder (h).
Accessory assembly:
- Place the bowl (b3) on the motor unit (a) and lock in place.
- Insert the chosen blade (g) into the blade holder (h), fully insert the drift shaft (c) through the blade (g), and lock into place, and position the whole thing on the motor unit output (a1).
- Place the lid (b2) on the bowl (b3) and lock in place.
- To remove the bowl-lid set: unlock the lid, then the bowl.
- Insert food into the funnel of the lid and guide it in using the button (b1).
-
Turn the speed selector (a2) to position 1 to slice or position 2 to grate. The blades can be used for preparing the following:
-
Grating blade (A): celeriac, potatoes, carrots, cheese,etc.
- Slicing blade (B): potatoes, onions, cucumbers, beetroot, apples, carrots, cabbage, etc.
- Chip-cutting blade (C): chips, etc.
6: EMULSIFYING / WHISKING / WHIPPING
Accessories used:
- Bowl set (b).
- Drive shaft (c).
- Emulsifying disc (e).
Accessory assembly:
- Place the bowl (b3) on the motor unit (a) and lock in place.
- Slide the emulsifying disc in the right direction, lock in place and position the whole thing on the motor unit output (a1).
- Place the ingredients in the bowl.
- Place the lid (b2) on the bowl (b3) and lock in place.
- To remove the bowl-lid set: unlock the lid, then the bowl.
- Turn the speed selector (a2) to position 2 to start up.
- Never use this accessory to knead heavy mixtures or mix light mixtures.
You can use it for mayonnaise, aioli, sauces, stiffly beaten egg whites (1 to 4), whipped cream and chantilly cream (upto 0.2 litres).
7: HOMOGENISING/MIXING/VERY FINE BLENDING
Accessories used:
- Blender set (i).
Accessory assembly:
- Place the ingredients in the blender bowl (i3) without exceeding 1.5L.
-
Put on the lid (i2) with the measuring cap (i1), and lock in place on the bowl.
-
Position the assembled blender (i) on the motor unit output (a1) with the handle of the blender facing you.
- Wait until the processor comes to a complete stop before removing the blender bowl from the motor unit.
- Turn the speed selector (a2) to position 1 or 2 to start up.
You can use the Pulse position for better mixing control. - Never fill the blender bowl with boiling liquids.
- Never use the blender with dry foods (hazelnuts, almonds, peanuts, etc.).
- Always use your blender with the lid on.
- Always pour liquid ingredients in first before adding solid ingredients, without exceeding 1.5L.
- To add ingredients during mixing, remove the measuring cap (i1) from the lid and pour ingredients through the fill hole, without exceeding 1.5L.
Do not use for more than 3 minutes.
Advice:
- If ingredients stick to the sides of the blender when mixing, turn the appliance off and unplug it. Remove the blender set from the body of the appliance. Using the spatula, bring the mixture down onto the blade.
Never put your hands or fingers into the blender bowl or near the blades.
You can:
- make finely blended soups, veloutés, creams, stewed fruit, milkshakes and cocktails.
- mix all fluid mixtures (crepes,doughnuts, clafoutis, flans)
Cleaning
- Unplug the appliance.
- For easier cleaning, rinse accessories quickly after use.
- The preparation bowl, blender bowl and accessories are machine washable.
- Pour some warm water with a few drops of liquid soap into the blender bowl (i3). Close the lid (i2) with the measuring cap (i1). Run for a few seconds. Unplug the appliance.Rinse the bowl
- Do not put the motor unit (a) in water or under running water. Wipe it with a damp sponge.
- The accessory blades are very sharp. Handle them with care.
Tip: In the event of your accessories becoming discoloured by food (carrots, oranges, etc.) rub them with cooking oil then proceed with normal cleaning.
Storage
- Do not store your processor in a damp environment.
- For easy and compact storage you can store all accessories in the preparation bowl.
- In order to avoid damaging the appliance do not switch it on while the accessories are stored in the bowl.
Warning :This device should not be disposed of with your household waste.
A recycling system has been set up by the town councils for this type of product.
Contact your town hall to find out further information on your nearest recycling centre. Electrical and electronic products contain dangerous substances that have a detrimental effect on the environment and human health and should therefore be recycled.
After sales service
The appliance isn't user-serviceable. If it's not working properly, check that:
- You've followed the instructions correctly;
- The main supply fuse/circuit breaker hasn't blown/tripped.
If it still doesn't work, consult your retailer.
Guarantee
Any defect affecting the functionality of the appliance which becomes apparent within one year of its purchase will be corrected by free repair or replacement provided that it has been used and maintained in accordance with the instructions and has not been abused or misused in any way.