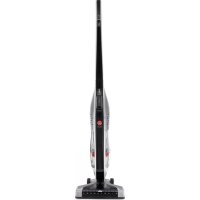
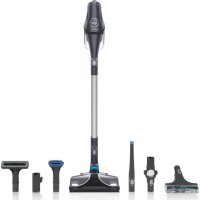
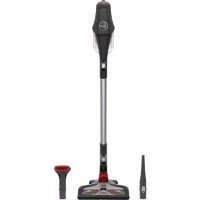
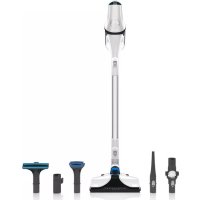
TS 2308 011 - Vacuum Cleaner HOOVER - Free user manual and instructions
Find the device manual for free TS 2308 011 HOOVER in PDF.
Download the instructions for your Vacuum Cleaner in PDF format for free! Find your manual TS 2308 011 - HOOVER and take your electronic device back in hand. On this page are published all the documents necessary for the use of your device. TS 2308 011 by HOOVER.
USER MANUAL TS 2308 011 HOOVER
Warning: - Electricity can be extremely dangerous.
This appliance is double insulated, and must not be earthed. This plug is fitted with a 13 Amp fuse. (UK only). Important: - The wires in the mains lead are coloured in accordance with the following code: - BLUE – Neutral BROWN – Live Static Electricity: - Some carpets can cause a small build up of static electricity. Any static discharge is not hazardous to health. REMEMBER: - After use, switch the cleaner off and remove the plug from the electricity supply. Always switch off and remove the plug before cleaning the appliance or attempting any maintenance. DO NOT:
- Position the cleaner above you when cleaning stairs.
- Use your cleaner out of doors, on wet surfaces or for wet pick-up.
- Pick up matches, hot ash and cigarette ends, hard or sharp objects or anything that may obviously damage the cleaner.
- Spray with or pick up flammable liquids, cleaning fluids, aerosols, or their vapours as they may cause risk of fire / explosion.
- Run over the supply cord whilst using the cleaner or remove the plug by pulling the cord.
- Stand on or rap the power cord around arms or legs when using the cleaner.
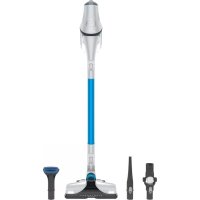
- Continue to use the cleaner if it appears to be faulty. If the supply cord is damaged then stop using the cleaner immediately. The supply cord must be replaced only by an authorised Hoover service engineer to avoid a safety hazard. TO AVOID SAFETY HAZARDS THE CLEANER MUST ONLY BE REPAIRED BY A HOOVER SERVICE ENGINEER. Assembling and getting to know your cleaner By following this step by step guide your new Hoover Sensory will be ready for use:
- Remove the cleaner from the packaging. Please dispose of the bags and other packaging material in a safe and conscientiouse way.
- Open the top cover (A) ensuring that the bag (B1), premotor filter (B2) and exhaust filter (B3) are fitted correctly. Close the top cover.
- Insert the hose end into the top cover, ensuring it clips and locks into position (C). To release simply press the two latches and pull.
- Fit the free end of the hose into the handle using the lock ring (D).
- Fit the extension tubes (E1), floor nozzle (E2), and other accessories as required for use.
- Your Sensory is now ready for use. Using your cleaner
- ON/OFF button (F). Once plugged in, press this button to start the cleaner. Press it again to stop the cleaner before removing the plug after use.
- Cord rewind button (G). Remove the plug from the power supply. Press this button to wind the power cord back into the cleaner. sens_bag_NO_Buzzer_Multi_29.qxd 28/6/05 11:08 am Page 6GB
- Electronic Bag Check indicator (H). When active this device flashes a Red light to warn about the following. A. On models fitted with Active Power Sensor. The device flashes to warn that the bag is nearly full. If the light is on continuously, change the paper bag or empty the permanent bag, depending on model. Please refer to chapter “replacing the bag / emptying the permanent bag”. B. On models without Active Power Sensor. The device illuminates to warn you that the bag is full. Please refer to chapter “replacing the bag / emptying the permanent bag”. C. On all models. If after changing the paper bag or emptying the permanent bag the light is still illuminated or flashing a blockage has occurred. Please refer to chapter “Removing a blockage from the system”.
- Thermo Protection Switch. Cleaner automatically switches off. In this event extract the plug from the socket and allow the cleaner to cool for 30 minutes. Check if there is any blockage in the system and remove. Please refer to chapter “Removing a blockage from the system”.
- Fixed Power control (depending on model). The cleaner will operate at a fixed power setting.
- Variable Power control (I) (depending on model). Rotate the On/Off button to increase or decrease the suction level. Use low suction for delicate fabrics.
- Active Power Sensor mode (depending on model). Rotate the On/Off button (I) to select Active Power Sensor. The cleaner will keep a constant airflow during the majority of the cleaning operation. A slight drop in performance will occur when the bag is near full, indicated by the red flashing bag check indicator light. Important: Manually select low power setting for delicate fabrics.
- Carpet and floor nozzle (J). Press pedal on the nozzle to lower the brush head when cleaning hard floors. Press the pedal again to lift the brush head when cleaning carpets.
- Turbo nozzle (depending on model). Use the Turbo nozzle for deep cleaning on carpets. IMPORTANT: Do not use the turbo nozzle on rugs with long fringes, animal hide and over carpets with pile depths exceeding 15mm. Do not keep the nozzle stationary while the brush is rotating.
- Caresse Nozzle (depending on model). Use over wooden floors to avoid scratching.
- Multi Function Tool. Tool is stored on the handle (E1). Remove tool and use as: A) Crevice tool: For corners and hard to reach areas (K1) B) Furniture nozzle: For soft furnishings and fabrics (K2) C) Dusting brush (depending on model): For bookshelves, frames, keyboards etc (K2)
- Tube parking and storage (L). The tubes can be parked at the rear of the rear of the cleaner or stored into the storage slot underneath the cleaner. Cleaner maintenance Replacing the bag (depending on model): When full (see “electronic bag check indicator” paragraph) please dispose of the bag immediately.
- Open the top-cover and grip the bag holder. Lift the bag holder vertically out of the cleaner (M1).
- Close the bag to avoid dust escaping by pulling the tongue. Dispose of the full bag into the bin (M2).
- Fold and fit the new bag into the bag holder (M3). Replace the bag holder into the cleaner.
- Only use Hoover genuine bags Emptying the permanent bag (depending on model): When full (see “electronic bag check indicator” paragraph) please dispose of the bag immediately.
- Open the top-cover and grip the bag holder. Lift the bag holder vertically out of the cleaner (N1).
- Remove the Permanent bag from the bag holder.
- Remove the plastic guide at the end of the bag allowing dirt collected to fall into the bin (N2).
- Return the guide back into the original position.
- Fit the empty Permanent bag into the bag holder (N3). Replace the bag holder back into the cleaner (N4).
- Check filters for an excessive build up of dust. If required, clean or replace. Close the top-cover. See diagram (B1, 2, 3) to access the filters.
- T o maintain best performance we recommend you wash the filters and the permanent bag (depending on model) after 5 full bags. Please refer to chapter “filters maintenance”. Filters Maintenance
- To maintain best performance we recommend that you wash the filters after 5 full bags.
- To access the filters please refer to diagrams B1, 2, 3, O1
- Rinse both filters under hand warm water (O2 & 3).
- Do not scrub the filters.
- Remove excess water with a dry cloth and leave to air dry for 24 hours or until fully dry.
- After completing the washing operations, return the filters to their original positions in the cleaner. Removing a blockage from the system The bag check indicator on your cleaner is illuminated or flashing.
1) Check to see if the dust bag is full. If so refer to chapter “Replacing the bag / emptying the permanent bag”.
- Did you wash the filters after 5 full bags? They may be blocked. Please refer to chapter “filters maintenance”
- Check if there are any other blockages in the system. sens_bag_NO_Buzzer_Multi_29.qxd 28/6/05 11:08 am Page 7GB
- Use a rod or a pole to remove any blockage from the tubes and flexible hose.
- It may also be possible to remove an obstruction in the flexible hose by lightly squeezing or bending it.
- Clean the underside of the carpet and hard floor nozzle frequently by using the crevice tool. Simple user check list before calling for service
1) Is there a working electricity supply to the cleaner? Check with another working appliance
2) Is a restriction causing the bag check indicator to be illuminated?
Is the dust bag full? Please refer to chapter “Replacing the bag / Emptying the permanent bag”.
Are the filters blocked? Please refer to chapter “Filter maintenance” c) Is the hose or nozzle blocked? Please refer to chapter “removing a blockage from the system”.
3) Has the cleaner switched off automatically? In this case the thermo protection switch has been activated.
Please refer to chapter “Using your cleaner”, paragraph “Thermo protection switch”.
Call your nearest Hoover service Centre in the event of dissatisfaction
Ensure that all servicing and repairs are carried out by an authorised Hoover Service Engineer
- Only use genuine Hoover spare parts
- Replace the paper bag or empty the permanent bag as soon as the bag check indicator illuminates
- Always switch off and remove the power plug from the electricity supply after use and and before cleaning the appliance or attempting ang user maintenance as described in these instructions
- Remember: Electricity can be dangerous. Consumable Parts: For consumables Please quote the following pack numbers
- Caresse nozzle pack No. G50 0484 5044 Any questions you may have, please call:
- Hoover help line 08705 400 600
- Hoover spares 012054 556111 Safety and the environment As the owner of a new Hoover product we would like to tell you more about the high standards we have set in safety and the environment: Safety Although safety certification is not required by law in the UK, Hoover believe that independent approval is the best way of demonstrating safety in design and manufacture. The British Electro technical Approvals Board (BEAB), the independent UK national authority for the safety of domestic appliances, ensure that European safety standards are met and maintained throughout the production life of the appliance. All appliances, which pass these tests are permitted to carry the BEAB safety mark The Environment Hoover has made a long-term commitment, in all its activities, to safeguarding the environment. Our environmental policy states: ”To adopt the best practicable environmental methods in design, production, packaging, use and disposal of products, whilst continuing to improve benefits to the consumer”. The majority of materials used in the appliance are recyclable. Please use the best available disposable method to take advantage of this feature. This appliance is marked according to the European directive 2002/96/EC on Waste Electrical and Electronic Equipment (WEEE). By ensuring this product is disposed of correctly, you will help prevent potential negative consequences for the environment and human health, which could otherwise be caused by inappropriate waste handling of this product. The symbol on the product indicates that this product may not be treated as household waste. Instead it shall be handed over to the applicable collection point for the recycling of electrical and electronic equipment. Disposal must be carried out in accordance with local environmental regulations for waste disposal. For more detailed information about treatment, recovery and recycling of this product, please contact your local city office, your household waste disposal service or the shop where you purchased the product. sens_bag_NO_Buzzer_Multi_29.qxd 28/6/05 11:08 am Page 8Your Guarantee The guarantee conditions for this appliance are as defined by our representative in the country in which it is sold. Details regarding these conditions can be obtained from the dealer from whom the appliance was purchased. The bill of sale orreceipt must be produced when making and claim under the terms of the guarantee. Subject to change without notice.Hoover Helpline 0875 400 600Hoover Spares 01204 556111 Hoover Limited Pentrebach Merthyr Tydfil Mid Glamorgan CF48 4TU ISO9001 BEAB Approved Quality: Our factories meet the strict standards of the BEAB - the British Electrotechnical Approvals Board - that ensures that European safety standards are met and maintained throughout the production life of an appliance. Safety: We gain independent approval from BEAB to demonstrate that our domestic electrical appliances are safe. 0565-5177