PL2650 - Iron FAGOR - Free user manual and instructions
Find the device manual for free PL2650 FAGOR in PDF.
| Brand | Fagor |
| Model | PL2650 |
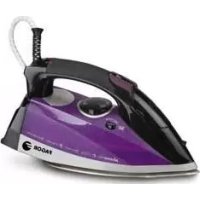
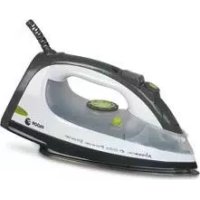
| Product type | Clothes iron |
| Power supply | 220-240 V ~ 50/60 Hz (estimated) |
| Power | Approximately 2000-2400 W (estimated) |
| Water tank capacity | Approximately 300 ml (estimated) |
| Soleplate | Non-stick (estimated) |
| Ironing functions | Dry ironing, steam ironing, spray, extra steam, IONIC function |
| Steam flow regulator | Variable |
| Temperature selector | Graduated from MIN to MAX, with settings for different fabrics |
| IONIC function | Finer steam, activated by dedicated button |
| Auto shut-off | Yes, after 8 min vertical, 30 sec horizontal |
| Anti-scale system | Self-cleaning recommended once a month |
| Spray | Integrated, to dampen fabrics |
| Vertical steam | Yes, via extra steam button |
| Power cord | Detachable (estimated), length approx. 2 m |
| Weight | Approximately 1.2 kg (estimated) |
| Dimensions | Approximately 30 x 15 x 15 cm (estimated) |
| Maintenance and cleaning | Clean the soleplate and exterior with a damp cloth; empty the tank after each use |
| Safety | Overheat protection, automatic shut-off, do not immerse |
| Spare parts and repairability | Contact an authorized after-sales service; do not attempt repair yourself |
| General information | Compliant with EMC and Low Voltage directives; household use only |
Frequently Asked Questions - PL2650 FAGOR
User questions about PL2650 FAGOR
0 question about this device. Answer the ones you know or ask your own.
Ask a new question about this device
Download the instructions for your Iron in PDF format for free! Find your manual PL2650 - FAGOR and take your electronic device back in hand. On this page are published all the documents necessary for the use of your device. PL2650 by FAGOR.
USER MANUAL PL2650 FAGOR
*versionas en otros idiomas disponibles en la web www.fagor.com* *Other languages available on the web www.fagor.com*
ES
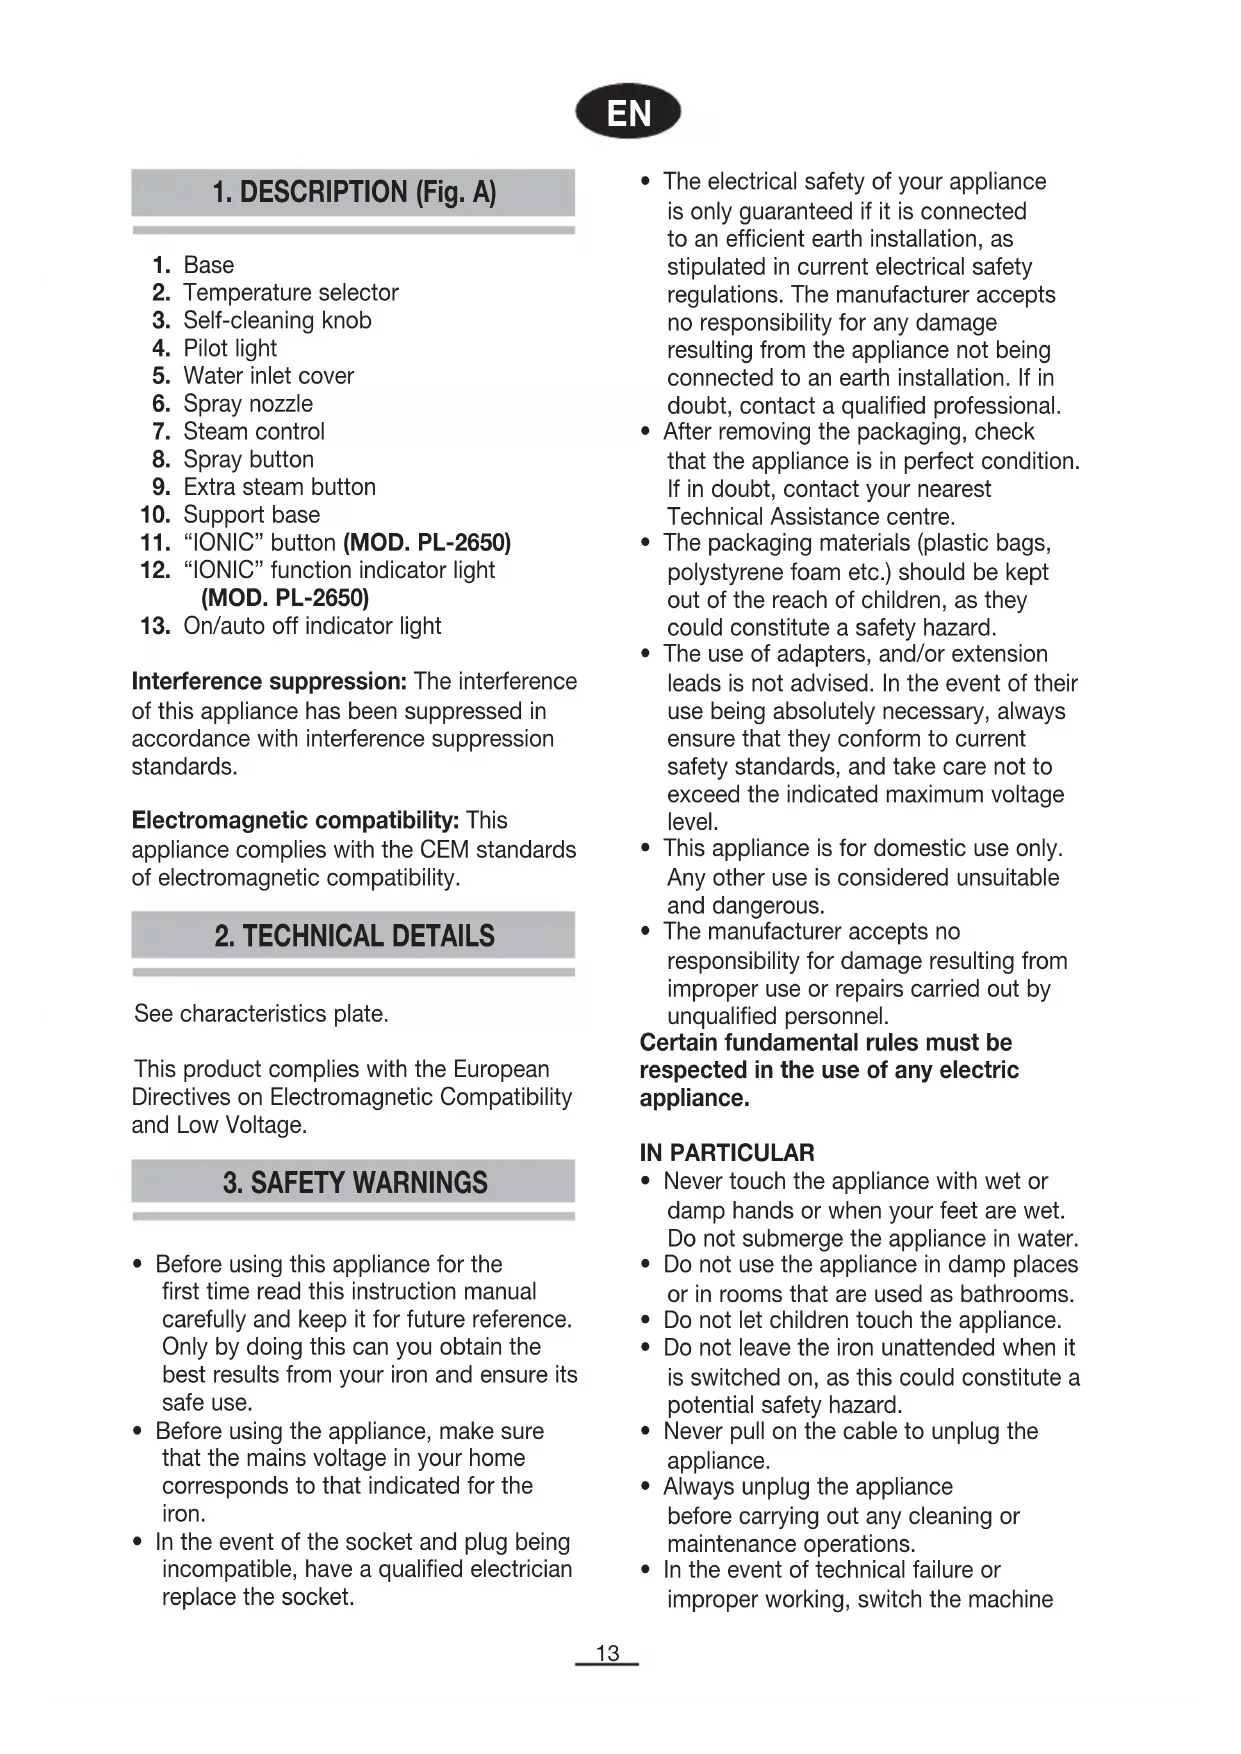
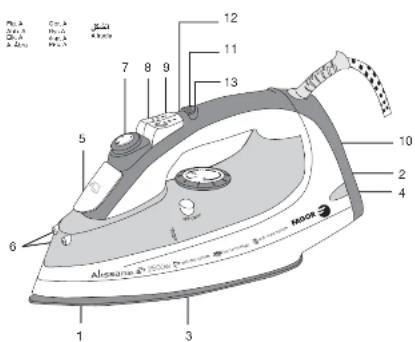
1. DESCRIPCION (Fig. A)
"IONIC" (MOD. PL-2650)
- Base
- Temperature selector
- Self-cleaning knob
- Pilot light
- Water inlet cover
- Spray nozzle
- Steam control
- Spray button
- Extra steam button
- Support base
- "IONIC" button (MOD. PL-2650)
- "IONIC" function indicator light (MOD. PL-2650)
- On/auto off indicator light
Interference suppression: The interference of this appliance has been suppressed in accordance with interference suppression standards.
Electromagnetic compatibility: This appliance complies with the CEM standards of electromagnetic compatibility.
2. TECHNICAL DETAILS
See characteristics plate.
This product complies with the European Directives on Electromagnetic Compatibility and Low Voltage.
3. SAFETY WARNINGS
- Before using this appliance for the first time read this instruction manual carefully and keep it for future reference. Only by doing this can you obtain the best results from your iron and ensure its safe use.
- Before using the appliance, make sure that the mains voltage in your home corresponds to that indicated for the iron.
-
In the event of the socket and plug being incompatible, have a qualified electrician replace the socket.
-
The electrical safety of your appliance is only guaranteed if it is connected to an efficient earth installation, as stipulated in current electrical safety regulations. The manufacturer accepts no responsibility for any damage resulting from the appliance not being connected to an earth installation. If in doubt, contact a qualified professional.
- After removing the packaging, check that the appliance is in perfect condition. If in doubt, contact your nearest Technical Assistance centre.
- The packaging materials (plastic bags, polystyrene foam etc.) should be kept out of the reach of children, as they could constitute a safety hazard.
- The use of adapters, and/or extension leads is not advised. In the event of their use being absolutely necessary, always ensure that they conform to current safety standards, and take care not to exceed the indicated maximum voltage level.
- This appliance is for domestic use only. Any other use is considered unsuitable and dangerous.
- The manufacturer accepts no responsibility for damage resulting from improper use or repairs carried out by unqualified personnel.
Certain fundamental rules must be respected in the use of any electric appliance.
IN PARTICULAR
- Never touch the appliance with wet or damp hands or when your feet are wet. Do not submerge the appliance in water.
- Do not use the appliance in damp places or in rooms that are used as bathrooms.
- Do not let children touch the appliance.
- Do not leave the iron unattended when it is switched on, as this could constitute a potential safety hazard.
- Never pull on the cable to unplug the appliance.
- Always unplug the appliance before carrying out any cleaning or maintenance operations.
- In the event of technical failure or improper working, switch the machine
off and do not try to repair it. Repairs should only be carried out by a Technical Assistance Service authorised by the manufacturer. Always demand the use of original spare parts. Any failure to follow the above instructions could affect the safe functioning of the appliance.
- If you decide never to use the appliance again, cut the lead, first ensuring that the appliance is unplugged.
- The user should never attempt to change the cable. If, for any reason, the cable requires changing, contact a Technical Assistance Service authorised by the manufacturer.
- Never hold the appliance under the tap to fill the water deposit.
- Do not let the mains cable touch the hot parts of the iron.
- During use, the appliance becomes extremely hot and can cause serious burns. Always pick up the iron by the handle and avoid contact with the metallic parts and steam.
- Do not turn the iron towards people when it is expelling steam. This is extremely dangerous.
- Do not use the iron on very wet fabrics.
- Do not store the iron in a horizontal position (base down) whilst still hot. Wait until it has cooled.
- Do not mix stain-removers or similar products on fabrics to be ironed.
- Unplug the iron when not in use. Never leave plugged in when not absolutely necessary.
- The appliance contains a safety device which, when activated, interrupts the working of the iron. To reactivate your iron, contact an authorised Technical Assistance Service.
- If you decide never to use the appliance again, remove the plug from the socket and render it useless by cutting the power cable.
- For greater protection, we recommend installing a residual current device (RCD) with an operational residual current not exceeding 30 mA. Ask your installer for advice.
4. BEFORE USING YOUR IRON FOR THE FIRST TIME
Remove all stickers or protective labels from the base and the body.
Unroll and straighten the electrical cable.
Follow the instructions given in the "Self-cleaning" section in point "10 - CLEANING", in order to prepare your iron for use.
INSTRUCTIONS FOR USE
5. DRY IRONING
- Place the iron on a stable and heat-resistant surface.
- Turn the temperature selector knob (2) to MIN (Fig. B).
- Slide the steam control knob (7) to the dry iron position (Fig. C).
- Place the iron in an upright position, resting it on the support base (10).
- Plug it in and turn the temperature selector to the desired position. The pilot light (4) will come on.
- When the iron has reached the selected temperature, the pilot light (4) will switch off. This pilot light may turn on and off several times while you are ironing, indicating the cycles of the thermostat. Remember that if you change from a higher to a lower temperature, the pilot light (4) will remain off until the temperature of the base (1) has dropped to the selected level, at which point it will come on again.
- When you have finished, turn the temperature selector to MIN and unplug the iron. Leave to cool before cleaning the exterior and storing.
When you are dry ironing, you can use the spray option at any moment, providing there is water in the deposit. (See sections entitled "Spray" and "Filling the deposit").
6. FILLING THE WATER DEPOSIT
Place the unplugged iron on a stable surface.
- Slide the steam control knob (7) to the dry iron position (Fig. C).
- Open the lid that covers the water inlet (5).
- Slowly pour water into the inlet using a cup (Fig. D). Never pour cleaning products or solvents into the water deposit.
- Check that the water does not exceed the maximum water level and replace the cover.
Note: If the water in your area is too hard, >27^ F, we recommend that you use distilled water. Do not use battery water or water mixed with starch, perfume, fabric softener, etc.
7. STEAM IRONING
Before steam ironing any garment, check that the fabric is designed for this kind of treatment. The appliance works with normal tap water. If the water in your area is very hard (hardness level over 27^ F), we recommend the use of pure distilled water.
- Place the unplugged iron on a stable, heat-resistant surface.
- Fill the water deposit (See "Filling the deposit").
- Turn the temperature selector (2) to "MIN" (Fig. B).
- Place the iron in an upright position, resting it on the support base (10).
- Plug the iron in and turn the temperature selector to " ●●● " (3 dots) or "Max". To obtain optimum results when steam ironing, do not use the " ● " (1 dot) or " ●● " (2 dot) positions.
The pilot light (4) will come on. When this pilot light switches off, the iron will have reached the selected temperature. The pilot light will turn on and off at regular intervals during the ironing process, indicating the cycles of the thermostat. Remember that if
you change from a higher to a lower temperature, the pilot light (4) will remain off until the temperature of the base has dropped to the selected level, at which point it will come on again
- Turn the steam control knob (7) to one of the steam iron positions (fig. E). Hold the iron in a horizontal position and the steam outlets will begin to expel steam. If no steam is produced, lightly tap the iron base against the ironing board. Setting the iron in an upright position, resting on the support base, will interrupt the steam expulsion.
Caution! Avoid contact with the steam and do not direct it towards people.
- When you have finished, turn the temperature selector to "MIN", slide the steam control knob to the dry iron position (Fig. C), unplug the cable and empty the deposit. The deposit should be emptied after each use as follows: Open the cover (5) and pour the water out of the deposit (Fig. F). Press the extra steam button to remove any water that may still be in the deposit while the base is still hot. Leave in an upright position until cool.
Note: If you need to top up the deposit while ironing, always unplug the iron beforehand.
"IONIC" function (MOD. PL-2650)
With this function, a finer steam is produced during steam ironing. The steam penetrates deeper into the fabrics, thin materials particularly, and helps remove especially tough creases.
- Follow the steps given in "7 STEAM IRONING"
- Press and hold down the "IONIC" button (11). The "IONIC" function indicator light (12) will come on and you will hear a beep. The "IONIC" function is now switched on (hold down the "IONIC" button during ironing for this function to remain activated). (Fig. I)
Nota: The "IONIC" function is only effective when the temperature dial (2) and the steam regulator "●●" and "MAX/
8. SPRAY (FIG. G)
This function will only work if there is water in the deposit. Press the spray button (8) ☐ (Fig. G), to obtain a burst of sprayed water to dampen dry or difficult-to-iron fabrics such as linen, cotton or wool. Dampening the fabric slightly will help remove stubborn creases. The spray option is also useful for dampening accidental creases created whilst ironing. Spray is released through spray outlet nozzle (6).
Note: The first time you use your iron, you may have to press the spray button a few times before the option will work.
9. EXTRA STEAM (FIG. H)
Turn the iron on as indicated in the "Steam ironing" section.
When the iron has reached the selected temperature, press the extra steam button (9) down firmly (Fig. H), for an intense steam expulsion. This option enables you to iron more quickly and to smooth out stubborn creases more easily. Wait for at least 5 seconds before pressing the extra steam button again, in order to enable the iron to reach the optimum temperature required for maximum additional steam expulsion.
Note: Before ironing, press the extra steam button a few times to activate it. For best results, do not press the extra steam button more than three times after the pilot light has gone off.
Vertical steam: The extra steam function can also be used when the iron is in an upright position. To do so, hold the iron in an upright position approx. 15 to 20 cm from the fabric and press the extra steam button (9).
Warning: Avoid contact with the steam. Do not direct the steam jets towards people.
10. CLEANING AND MAINTENANCE
Unplug the iron and wait until it has cooled before cleaning.
Clean the exterior and base with a damp cloth. Do not use detergents or abrasive products.
The surface of the iron base (1) should be kept clean at all times. To clean the base, wait until it has cooled completely and then wipe with a damp cloth.
In order to prevent scratching, do not iron over hook and eye fastenings, zips or metallic buttons, etc. and do not place the iron on metallic or rough surfaces.
After each use, empty the deposit and leave the iron to cool before storing.
Never submerge the iron in water or hold it under a running tap.
Self-cleaning
In order to prevent the accumulation of harmful minerals that may obstruct the iron, and to guarantee correct heating and steam generation, we recommend that you use this function at least once a month, depending on frequency of use and the hardness of the water in your area.
-
Turn the temperature selector to "MIN".
-
Slide the steam control knob to the dry iron position (Fig. C).
-
Fill the water deposit to the maximum level.
-
Place the iron in an upright position, resting on its support base.
-
Plug it in and turn the temperature selector to "MAX". Wait until the pilot light switches off and on 2 or 3 times.
-
Turn the temperature selector to "MIN" and unplug the iron.
-
Press and hold the self cleaning button (3). The water will start to drip through the stream holes. In order to make sure that all the water has emptied out, rock the iron slowly from side to side and forwards and backwards for 30 seconds. When rocking the iron, put the nose of the iron slightly lower that the back end to make sure that the water circulates completely. Let go of the self cleaning button after one minute.
-
Iron over a damp cloth in order to clean the base.
-
When you have finished, leave the iron to cool before storing.
11 AUTOMATIC SWITCH-OFF
The automatic switch-off device is activated when the iron has not been moved for approximately 8 minutes in standing position, or 30 seconds in horizontal position. The auto off indicator light (13) flashes and a beep sounds. As soon as the iron is moved, the device is deactivated and the iron switches on again.
12. IRONING TIPS
When selecting the temperature, follow the instructions printed on the label of the garment to be ironed. If the garment does not have a label, use the table below:
TEMPERATURE TABLE
| Fabric Temperature | ||
| Synthetic fibres | ● | |
| Silk | ● | |
| Wool | ●● | |
| Cotton | ●●● | |
| Linen | ●●● | |
If you have any doubts about the composition of the fabric, always begin ironing at a low temperature on a concealed part of the garment and slowly increase the temperature setting, taking care not to spoil the fabric, until all the creases have disappeared.
- Fabrics such as velvet, wool, etc., and items such as gloves and bags, can be revamped by slowly passing the iron a few inches above them with the steam option on.
- Carpets can be made to look like new and furniture marks eliminated by lightly steaming the flattened area and then brushing gently.
-
Divide the items to be ironed into temperature groups and begin with those that require the lowest setting.
-
Silken fabrics should be ironed inside out.
- Wool, cotton and fine linen should be steam ironed inside out. Alternatively, you can iron them the right way round covering them first with a thin piece of cloth to avoid "shiny" results. Starched fabrics need to be dampened slightly. For best results, iron white and light coloured garments the right way round, and dark and embroidered items inside out.
- Linen fabrics should be steam ironed. Use the spray option liberally and iron dark garments inside out to avoid "shiny" results. Iron lapels the right way round for best results.
13. INFORMATION FOR THE CORRECT DISPOSAL OF ELECTRICAL AND ELECTRONIC APPLIANCES
At the end of its working life, the product must not be disposed of as urban waste. It must be taken to a special local authority differentiated waste collection centre or to a dealer providing this
service. Disposing of a household appliance separately avoids possible negative consequences for the environment and health deriving from inappropriate disposal and enables the constituent materials to be recovered to obtain significant savings in energy and resources.
To remind you that you must collaborate with a selective collection scheme, the symbol shown appears on the product warning you not to dispose of it in traditional refuse containers.
For further information, contact your local authority or the shop where you bought the product.