
BSS 4808 - Cd player/recorder AEG - Free user manual and instructions
Find the device manual for free BSS 4808 AEG in PDF.
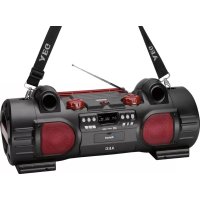


| Product type | CD player/recorder with FM radio, Bluetooth, USB, memory card reader |
| Brand | AEG |
| Model | BSS 4808 |
| Mains power supply | AC adapter 100-240 V~ 50/60 Hz, DC 12 V, 3 A output |
| Battery power | 10 UM1/R20 batteries (1.5 V) – not included |
| Output power | 400 W PMPO |
| Power consumption | 36 W |
| Net weight | 5.8 kg |
| FM radio | Range 87.5 – 108.0 MHz, manual tuning, 30 presets |
| Bluetooth | Version 2.0 + EDR, range approx. 15 m, profiles A2DP/AVRCP |
| CD playback | Audio CD, CD-R, CD-RW, MP3 CD |
| Readable formats | Audio CD, MP3 (on CD, USB, memory card) |
| Ports and connectors | USB port (front), memory card slot (front), AUX input 3.5 mm |
| Playback functions | Repeat, random playback, programming, intro, folder playback (MP3) |
| Equalizer | Presets CLASSIC, ROCK, POP, JAZZ, FLAT |
| Bass control | Manual adjustment |
| Remote control | Infrared, CR2032 battery included |
| Display | LCD screen with backlight |
| Ventilation | Do not cover ventilation slots |
| Cleaning | Unplug before cleaning, slightly damp cloth, no additives |
| Laser safety | Class 1 laser |
| General information | Compliant with EC directives (EMC, low voltage) |
Frequently Asked Questions - BSS 4808 AEG
User questions about BSS 4808 AEG
0 question about this device. Answer the ones you know or ask your own.
Ask a new question about this device
Download the instructions for your Cd player/recorder in PDF format for free! Find your manual BSS 4808 - AEG and take your electronic device back in hand. On this page are published all the documents necessary for the use of your device. BSS 4808 by AEG.
USER MANUAL BSS 4808 AEG
D Bluetooth Sound System
NL Bluetooth sound system
Elimination. Page 29
Spanish
Contents
Location of Controls . Page 3
User manual.. Page 46
Technical Specifications . Page 53
Disposal . Page 53
Polish
Table of contents
Location of controls. Page 3
User manual............Page 71
Technical specifications Page 78
Russian
Contents
Location of Controls p.3
Operating Instructions p.79
Technical Specifications 87
Location of Controls
▶ II PLAY/PAUSE (8/11)
Installation/Introduction
AM = matin, PM = apres - midi.
▶ II PLAY/PAUSE (8/11)
Cordless via Bluetooth
Thank you for choosing our product. We hope you will enjoy using the appliance.
Symbols in this user manual
Important notes for your safety are marked distinctively. Pay absolute attention to them to avoid accidents and damage to the device:
WARNING:
Warns of dangers for your health and indicates potential risks of injury.
CAUTION:
Indicates potential dangers for the device or other objects.
NOTE:
Highlights tips and information for you.
General Safety Guidelines
Before using this device, carefully read this user manual and keep it together with the Warranty Certificate, cashier receipt and if possible, the original package inclusive its interior packing. If you hand on the device to any third person, include the user manual as well.
- To avoid the risk of fire or electric shock, you should not expose the device to rain or humidity. Do not use the device near water (e.g. bathroom, swimming pool, humid cellars). The unit is designed solely for private use and its intended purpose. This unit is not designed for commercial use. Make sure that the power cable is not bent, pinched, or comes into contact with heat sources. Make sure that the power cable is not a tripping hazard. The AC adapter is only suitable for use in dry rooms.
- Connect the AC adapter only to a properly installed outlet. Be sure the device voltage corresponds to the grid voltage. Also check that the output current and the polarity of the power supply match the information on the connected device.
- Do not touch the AC adapter with wet hands! Always install batteries in the correct direction.
- Avoid covering the device's vent openings.
- Never open the device's case. Improper repairs can cause severe danger to the user. If the device or particularly the power cord is damaged, don't use the device any further and have it repaired by a qualified specialist. Check the power cord regularly for damages.
- To avoid any danger, a damaged power cord must be replaced only by the producer, its customer service or a similarly qualified person with an equal cord.
If the device won't be used over an extended period of time, disconnect the power cord and remove the batteries.
These symbols may be found on the device and are intended as warnings:

The lightning flash is intended to alert the user to the presence of dangerous voltage within the device.

The exclamation mark is intended to alert the user to the presence of important operating and maintenance instructions accompanying this device.

Products with this symbol operate with a "Class 1 Laser" for scanning the CD. The built-in safety switches are intended to prevent the user from being exposed to the dangerous laser beam not visible to the eye when opening the CD compartment.
These safety switches must not be bypassed or altered; otherwise there is a risk of being exposed to the laser beam.
Children and disabled persons
- For the safety of your children, keep any packing parts (plastic bags, cardboard, Styrofoam, etc.) out of their reach.
WARNING!
Don't let small children play with foils for danger of suffocation!
- This device is not intended for use by persons (including children) with reduced physical, sensory or mental capabilities, or lack of experience and/or knowledge unless they have been given supervision or instructions concerning the use of the device by a person responsible for their safety. Supervise children to ensure they do not play with the device.
Special safety guidelines
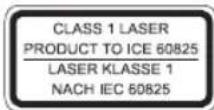
This device operates with a Class 1 laser.
WARNING:
This appliance shall not be exposed to dripping or splashing water and that no object filled with liquids such as vases shall be placed on apparatus.
CAUTION:
Do not touch the speaker membranes (A) with your hands or with objects. This may damage the membranes.
Overview of the components
1 CD compartment 2 Handle for opening the CD compartment 3 VOLUME control (volume) 4 LCD display 5 IR sensor for the remote control 6 REPEAT button (repeat) 7 button (Stop) 8 button (play/pause) 9 / button (search forward/backwards) 10 PROG button (Memory) 11 Memory card slot 12 AUX IN jack 13 USB connection 14 FOLDER+ button (folder upward) 15 MUTE button 16 FOLDER- button (folder downward) 17 STANDBY/ON button (standby/power) 18 EQ button (Equalizer) 19 FUNCTION function switch 20 BASS control (Bass) 21 Nylon handle mounting 22 Telescopic antenna
A Speaker
Rear view (not shown)
POWER ON/OFF switch
DCIN 12V Power supply connection
Battery compartment
Remote control
1 STANDBY button 2 FM button (radio) 3 AUX/BT button 4 PROG button (Memory) 5 PRESET Button (radio memory) 6 ID3 button 7 EQ button 8 SKIP/TUNING UP button (search forward) SKIP/TUNING DOWN button (search backwards) 9 STOP / FM MONO/ST button 10 VOLUME + / - (volume) button 11 PLAY/PAUSE (play/pause) button 12 RANDOM button (random playback) 13 REPEAT/INTRO button (repeat) 14 FOLDER +/- buttons (Album selection) 15 MUTE button 16 CD/USB/SD button
Installation/Introduction
- Read the manual thoroughly before operating the device!
- Select a suitable location for the device. Suitable locations are dry, even and anti-slip surfaces on which you may operate the device easily. Make sure there is proper ventilation for the device!
- Remove, if necessary, the protection sheet from the display.
WARNING:
Turning up the volume too high may damage your hearing.
Power supply
- Insert the grid plug into a properly installed three-prong socket with 230 V, 50 Hz. Connect the device with the plug connector by inserting its plug into the IN 12 V jack of the device.
- Make sure the grid voltage corresponds to the figures on the rating plate.
CAUTION:
The included AC adapter may only be used with this device. Do not use it for other devices. - Use only an AC adapter with 12 V (⊕ 一). A different AC adapter may damage the unit.
NOTE:
- Disconnect from mains power supply during longer periods of non-use. The preset time and radio stations are lost as soon as the power supply is interrupted.
Battery Operation (Batteries not supplied)
- Open the lid of the battery compartment on the rear side.
- Insert the 10 batteries type UM1/R20 1.5 V. Observe the correct polarity (see bottom of battery compartment)!
- Close the battery compartment.
Should the device not be used for a long period, remove the batteries to prevent any "leakage".
NOTE:
If a mains cable is connected, the batteries are automatically switched off. The preset time and radio stations are lost as soon as you remove the batteries.
CAUTION:
- Different battery types or new and used batteries must not be used together.
- Do not dispose of batteries with your household trash. Please hand over at authorized collection points or return to your dealer.

WARNING:
Do not expose to intense heat, e.g. sunlight, fire etc. Danger of explosion!
Insert/Replace Battery in Remote Control

NOTE:
The lithium cell in the battery compartment of the remote control may have been safeguarded for transport with a piece of foil. This extends the life of the battery. Please remove this foil before the first use to make the remote control ready for operation.
- Open the battery compartment on the underside of the remote.
- Replace the cell by a battery of the same type (CR 2032). Check that the polarity is correct (see battery compartment).
- Close the battery compartment.
If the remote is not in use for a lengthy period of time, please remove the battery to prevent the battery acid from "leaking".

WARNING:
- The battery shall not be exposed to excessive heat such as sunshine, fire or the like. Danger of explosion!
- Keep batteries out of the reach of children. They are not toys.
- Do not force batteries open.
- Avoid contact with metallic objects (rings, nails, screws, etc.). Danger of short circuits!
- Short circuits may overheat or even ignite batteries. This may lead to combustion.
- When transporting the batteries, cover the terminals for your safety with an adhesive strip.
- If a battery leaks, do not rub the fluid into the eyes or on the skin. If acid comes into contact with the eyes, rinse with purified water and seek medical advice if symptoms persist.

CAUTION:
Batteries must not be disposed of in the garbage. Please bring used batteries to competent collection centers or return them to the dealer.
Transport securing device of CD compartment
- Pull the CD compartment (1) upwards on the handle (2) in order to open it.
- Remove, if present, the transport securing device from the CD player before starting operation.
- Close the CD compartment again.
Turning the device on/off
- Turn the device on by setting the POWER ON/OFF switch to the "ON" position on the rear side of the device.
- To turn off the device, set the POWER ON/OFF switch to the "OFF" position. Then, disconnect the device from the mains.
Setting the clock (during standby mode)
- Briefly hold down the PROG button (10/4). The display will show "24 HOUR".
- Use the button (9/8) to select between 24-hour and 12-hour display setting. Confirm with PROG.
NOTE: The 12-hour setting will result in the following display
AM = morning, PM = afternoon.
3. Use buttons to set the hours. Confirm with PROG. 4. Use buttons to set the minutes. 5. Press PROG again in order to save the time settings.
General operation
NOTE:
Some buttons you will find on both the device and the remote control. Buttons with the same name result in the same functions.
STANDBY/ON (17/1)
Press STANDBY button to switch the device into standby mode. Press this button again to turn on the device.
NOTE: In the BLUETOOTH, USB, CARD, AUX and CD mode
After approx. 20 minutes without a signal, the device automatically switches to standby.
Volume (3/10)
Adjust to your preferred volume level. The display will show "VOL" and a number. This will equal to the set volume of "VOL MAX" or "VOL MIN".
BASS control (20)
You can use this control to adjust the bass individually. The display will show "BASS" and a number.
Infrared remote control
Wireless operation from a distance of up to 5 meters. If this range gets less, please change the battery. Make sure there are no obstacles between the remote control and the sensor (5) on the device during operation.
AUX IN jack (12)
Connect analogue playback devices. When connecting to this jack you may also listen to the audio of other devices, such as MP3 or CD players etc., via the speakers.
- Flip the cover downwards.
- Please connect the external device via 3.5mm plug jack to the AUX IN jack.
English
- Now select AUX mode with the FUNCTION button (19 on the device) or with the AUX/BT button (3 on the remote).
- You will hear the sound playback through the speakers. You can adjust the volume with the VOLUME control (3) or the VOLUME +/- buttons (10 on the remote). The CD buttons are not active.
- For further functions please refer to the user manual of the external audio device.
NOTE:
Set the volume of the external device to a proper audible level.
Always keep the cover closed when not in use.
USB port (13)
This device has been developed in line with the latest technical advances in the USB field. The wide range of different USB storage devices of all types which are currently on the market, unfortunately do not allow us to guarantee full compatibility with all USB storage devices. For this reason, in rare cases there may be problems in playing back files from USB storage devices. This is not a malfunction of the device.
- Flip open the cover.
- Press the FUNCTION button (19 on the device) or the (16 on the remote) until "USB" appears in the display.
- Directly connect a USB storage medium to the respective port. READING appears on the display. After a few seconds, the total number of folders and the title will be shown for a short time. Playback then begins. The current folder (e.g. 01), the current song (e.g. 005), and the elapsed play time will be shown in the display.
NOTE:
Always directly connect a USB storage medium to the USB port to prevent any malfunctions. - The USB connection is not suitable for charging external devices.
For the operation, please follow the section "Play CDs/MP3". Always keep the cover closed when not using it.

CAUTION:
Before you remove the USB memory medium, switch the device to Radio operation.
Memory card slot (11)
- Flip open the cover.
- Press the FUNCTION button (19 on the device) or the CD/USB/SD button (16 on the remote) until "CARD" shows in the display.
- Insert the memory card into the intended opening until it audibly locks in with a "click". Thereby the contacts need to point downward. READING appears on the display. After a few seconds, the total number of folders and titles will be shown for a short time. Playback then begins. The
current folder (e.g. 01), the current song (e.g. 005), and the elapsed play time are shown in the display.
For operation, please refer to the section "Play CDs/MP3". Always keep the cover closed when not using it.

CAUTION:
Before you remove the memory card, switch the device to Radio operation.
Press on the end of the memory card to remove it again.
Listening to the radio
Searching for stations
- Repeatedly press FUNCTION button (19 on the device) until the display shows "TUNER". Or press the FM button (2) on the remote control.
- Use the buttons (9/8) to tune in the desired station.
- The FM.ST control lamp ((ST)) (in the display) will light up when the selected station is received with stereo quality. If reception is too poor and the station experiences static, the control lamp will flicker. Try to improve the reception by changing the position of the telescopic antenna. For FM stations you may use STOP / FM MONO/ST button (9 on the remote) to switch between MONO and STEREO reception. In case of poor reception we recommend switching to MONO mode.
Saving/Selecting Stations
- When you have found the desired station, press the PROG button (10/4). MEMORY will light up in the display and the memory position will flash.
- To select the programming channel, press the PRESET button (5 on the remote).
- Press PROG to save the settings.
To choose a stored channel, press the PRESET button (5 on the remote).
Playing CDs/MP3
This is how to play a CD
4. AUDIO CD:
- Repeatedly press the FUNCTION button (19 on the device) until the display shows "CD". Or press the CD/USB/SD button (16) on the remote control.
- Pull the CD compartment (1) upwards on the handle (2) to open it.
- Insert the audio CD onto the conical spindle with the label facing upwards, so that it snaps into place mechanically. Then close the CD compartment cover again.
"READING" briefly appears on the display, then "Cd", the number of titles, and total playback time. Playback starts from the first title on the CD. The current song, the elapsed playback time, and the "Cd" symbol are displayed.
50
English
CD in MP3 format:
"READING" briefly appears on the display. The number of folders (F) and the titles will then appear briefly. Playback starts from the first track and from the first folder. The current folder (e.g., 01), the current song (e.g., 005), and the elapsed playing time will be shown in the display. Use the FOLDER+ or FOLDER- buttons (14/16/14) to select the individual folders.
- To remove a CD, press the STOP button (7/9), open the CD compartment, and carefully take out the CD.
Always keep the CD door closed.
NOTE:
- When playing a CD in MP3 format containing folders, the display will show 001 for the first track of the new folder when switching to another folder. If a disc is not properly or not at all inserted, "READING" will light up and the display will show "NO DISC".
- Playback of CDs created by the user cannot be guaranteed due to the variety of available software and CD media equipment.
Playing back music via Bluetooth
Cordless via Bluetooth
Bluetooth is a technology for wireless radio connection of devices over a short distance. Devices with Bluetooth standard transmit between 2.402 and 2.480 GHz in the ISM band (Industrial, Scientific and Medical). Interference can be caused, for example, by WLAN networks, DAB radios, cordless phones, or microwave ovens that work on the same frequency band.
This device offers you the possibility to use a Bluetooth-enabled device. The functional radius is limited to approx. 15 metres, depending on the surroundings and the unit used.
If your playing device supports the A2DP profile (Advanced Audio Distribution Profile) and has a music-player function, then you can also wirelessly transfer music to the device. The A2DP profile is a multi-vendor Bluetooth profile. By streaming, stereo-audio signals are wirelessly transferred between the playing device (source) and the receiving device. To remotely control the source, the playback device has to support the AVRCP profile (Audio Video Remote Control Profile).
Due to the different device manufacturers, models, and software versions, full functionality cannot be guaranteed.
Logging on devices (Pairing)
Before you listen to music via the unit, you must pair the devices.
- Ensure that the Bluetooth function is activated in your player (e.g., mobile phone). For this, refer to the operation manual of your player.
- Press the FUNCTION button (19 on the device) repeatedly until "BT" is shown on the display. Alternatively, you can also press the AUX/BT button (3 on the remote).
- Choose the Bluetooth menu in your player and register the device in your player. For this, refer to the operation manual of your player. The device "BSS 4808" will show in your player as a selection.
NOTE:
Only one player can be connected to the device. If the device is already connected to another player, the device will not appear in the BT selection menu.
- Now enter the password "0000" in your player, depending on the device manufacturer, model, and software version.
Pay attention to the indicators on your player to check whether the devices are successfully connected to each other. For operation, please refer to the section "Description of the Operating Buttons".
If possible, adjust the volume of the external unit to a comfortable level.
NOTE:
Depending on the device manufacturer, you may need to perform the registration (PAIRING) again to connect the devices. In case of problems during repairing of a playback device, deactivate the WiFi and mobile data function in your playback device. - Bluetooth compatibility cannot be ensured for devices (e.g., mobile phones) released in the future. To ensure an optimal connection, make sure that the battery of your player is completely charged. Some mobile phone brands have an energy-saving mode. Deactivate the energy-saving mode as it can otherwise result in problems during data transfer via Bluetooth. - To be able to transfer audio data, Bluetooth must stay activated in your player. Observe the operation manual of your player. - If a mobile phone on which you are playing music receives a call, the music will be interrupted. The sound is played back by the speaker depending on the mobile phone. To transfer the conversation to your mobile telephone, please refer to the popup on the mobile phone display. After you have terminated the phone call, the devices will be connected to each other again. You may have to restart playback.
Description of the Operating Buttons
PLAY/PAUSE (8/11)
You may temporarily stop playback and start again. The elapsed playing time will flash on the display. Pressing the button again will continue playback from the same position.
SKIP/TUNING UP/DOWN (9/8)
During playback:
With the button you may skip to the next or next but one track, etc. Press and hold this button to quickly search music (sound will be muted).
You may operate the button as follows:
Press 1 × = Starts current track again from the beginning.
Press 2x = Skips back to previous track.
Press 3x = Plays track prior to that, etc. Press and hold this button to quickly search music (sound will be muted).
During radio mode:
Tune the desired radio station.
STOP (7/9)
The CD or the song stops.
During FM radio mode:
Switch between STEREO and MONO.
MUTE (15/15)
Quickly turn off the sound. "MUTE" will flash in the display.
To cancel this function, press MUTE again.
EQ (18/7)
(Preset equalizer function). There are different sound modes available (CLASSIC, ROCK, POP, JAZZ, FLAT).
REPEAT/INTRO (6/13)
Press 1x: (REPEAT lights up) The current track will be repeated entirely.
Press 2x: (REPEAT ALL lights up) The complete CD will be repeated entirely.
Press 3x: (INTRO lights up) Each title of the CD will be played for 10 seconds.
Press 4x: All functions will be canceled. Normal playback will be continued.
Only for CDs in MP3 format:
Press 1x: The current track will be repeated continuously (The display will show REPEAT).
Press 2x: The selected folder of the MP3 CD will be repeated continuously (the display will show REPEAT ALBUM). Use FOLDER+/- buttons (14/16/14) to select the individual folders.
Press 3x: The entire CD will be repeated continuously (REPEAT ALL is displayed).
Press 4x: Each title of the CD will be played for 10 seconds each (INTRO will appear on the display).
Press 5x: The function will be deactivated and the CD will be played in normal mode.
RANDOM (12 on the remote)
The display will show "RANDOM" and the number of the track that will be played first. All tracks will be played consecutively in random order.
FOLDER +/- (14/16/14)
CD in MP3 format:
Press these buttons during playback to switch one folder up or down. The display shortly shows a message, e.g. ALBUM 02, Then the system automatically starts play-back of the MP3 CD. When pressing the buttons during stop mode, the message will also shortly be shown in the display. Then press
▶II PLAY/PAUSE to start playback.
PRESET (5 on the remote)
During radio mode:
Select a stored radio station.
ID3 (6 on the remote)
In case of a CD or file in the MP3 format:
Press the button to turn on the function. "ID3 ON" will show in the display for a short time. In case of a stored ID-3 Tag information it will show up in the display as a continuing band. Press the button again to deactivate the function. "ID3 OFF" will show in the display for a short time.
PROG (10/4)
To save the stations and to set the programmed playback.
Program Playback
Program playback in desired sequence. (Only in CD/USB/SD mode)
- Press STOP button (7/9).
- Press PROG button (10/4). The display will show "---PR:01" ("track" PR: "memory position") and MEMORY. Use the Buttons (9/8) to select the desired track and press PROG buttons again. The display will change to memory position P02.
- Use the buttons to select the next track and press PROG again. Repeat the steps until you have selected all tracks.
i NOTE:
If the memory capacity of the programmable title is reached, "FULL" will be displayed.
- Press the ▶ PLAY/PAUSE button (8/11). Playback starts. The display will show the first selected track number.
- Press STOP button once to stop playback. The memory will be kept.
- For repeated playback of the programmes, press the ▶ PLAY/PAUSE button.
- To delete memory, please press STOP button twice. MEMORY will no longer be displayed.
The device will stop automatically after all stored tracks have been played. The program sequence will be kept in the memory until you switch to another mode, remove the CD from the compartment or switch off the device.
It is possible to combine program playback with the REPEAT function. After programming and starting playback, please press REPEAT button (6/13) up to three times; the functions can be applied as described under "REPEAT".
Playback of music files in MP3 format
This device allows the playback of music files in MP3 format. The device furthermore supports the common CD types: CD, CD-RW, and CD-R.
Your device can play MP3 CDs. These are compressed CDs that can store up to 200 tracks. Your device automatically recognizes MP3 discs (the display will show total number of tracks and folders). Please refer to chapter "Playing CD/MP3" for playback of such CDs. You may program tracks as already described under "Program playback".
Please note:
There are many burning and compressing methods, as well as differences in quality of CDs and burnt CDs.
Furthermore, the music industry does not apply fixed standards (copy protection).
For that reason there might, in rare cases, occur problems when playing CDs and MP3 discs. That is not a malfunction of this device.
Cleaning and maintenance
- Disconnect the mains plug before cleaning.
- You may wipe off external stains, using a slightly damp cloth without any additives.
Troubleshooting
| Symptoms Course Solution | ||
| CD can not be played back. | CD is not inserted or inserted incorrectly. | Ensure that the disc is inserted with the label facing upwards. |
| Batteries too weak. Insert new batteries or operate the device with the mains lead. | ||
| CD jumps dur-ing playback. | Check the disc for fingerprints, dirt or scratches. | Check the disc for fingerprints, dirt or scratches. |
| The unit does not work. | The unit is blocked and “hangs”. | Disconnect the mains plug for approximately 5 seconds. Then switch the unit back on. |
| Volume (3) and basses (20) cannot be adjusted on the device. | The PROG but-ton (10/4) was held pressed down until the time display appeared. Then one of the controls was pressed while the time was displayed. | Press any button to release the lock of the control. |
| No audio signal via the Bluetooth connection | Speaker is not paired to the audio source. | Check whether a connection exists. If necessary, pair the speaker again to the audio source. |
| Volume too low Increase | the volume on the speaker | |
| Increase the volume on the audio source. | ||
| Speaker cannot be connected | Pairing does not work | Check whether the audio source supports the A2DP protocol. |
| Audio source is switched off | Switch on the audio source | |
| Bluetooth is switched off at the audio source. | Switch on the Bluetooth function in the audio source. | |
| Bluetooth version is not supported. | Use a different playback unit. | |
Technical Specifications
Model: BSS 4808
Voltage supply: DC 12 V
Battery operation: 10x 1.5 V Type UM1/R20
Output power: 400 W PMPO
Power consumption: 36 W
Net weight: 5.8 kg
Radio: Frequency ranges: FM 87.5 ~ 108.0 MHz
AC adapter
Protection class:
Input: AC 100-240 V~50/60 Hz
Output: DC 12V, 3A
Polarity:
Bluetooth
Bluetooth support: V2.0 + EDR
Range: approx. 15 meters
Transmission frequency: 2.4 GHz
Protocols: A2DP/AVRCP
The right to make technical and design modifications in the course of continuous product development remains reserved.
This device has been tested according to all relevant current CE guidelines, such as electromagnetic compatibility and low voltage directives, and has been constructed in accordance with the latest safety regulations.
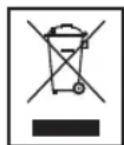
Disposal
Meaning of the "Wheelie Bin" Symbol
Take care of our environment, do not dispose of electrical appliances via the household waste.
Dispose of obsolete or defective electrical appliances via municipal collection points.
Please help to avoid potential environmental and health impacts through improper waste disposal.
You contribute to recycling and other forms of utilization of old electric and electronic appliances.
Your municipality provides you with information about collecting points.
CTC Clatronic Sp. z o.o
Remote control buttons
1 STANDBY button 2 FM button (radio) 3 AUX/BT button 4 PROG button (memory) 5 PRESET button (programming radio stations) 6 ID3 button 7 EQ button 8 SKIP/TUNING UP button (skip forward) SKIP/TUNING DOWN button (skip backward) 9 STOP / FM MONO/ST button 10 VOLUME +/- button (volume) 11 PLAY/PAUSE button (pause/play) 12 RANDOM button (random playback) 13 REPEAT/INTRO button (repeat) 14 FOLDER + / - button (album selection) 15 MUTE button (mute sound) 16 CD/USB/SD button
Installation/Startup
- Please read the manual carefully before using the device!
Choose a suitable location for the device. The device should be installed in a dry, well-ventilated place, on a flat and non-slip surface. Make sure the device is placed in a location with adequate ventilation! If necessary, remove the protective film from the screen.
DAMAGE.
High volume may damage your hearing.
Power supply
Connect the plug to a properly installed 230 V, 50 Hz power outlet. Connect the device using the plug connector, inserting the plug into the DC IN 12 V socket on the device. - Make sure that the voltage matches the values on the rating plate.
BATTERY.
Batteries can be used with this device. Do not use batteries with other devices. Use only 12 V (DC) batteries. The battery may damage the device.
NOTE.
Disconnect the device from the power supply if you do not use it for a long period of time. - The time and date settings will be lost when the power is disconnected.
Battery operation (batteries are not included)
3. Insert the battery into the device compartment. Open the battery compartment cover. Insert the battery type UM1/R20, 1.5 V. Observe correct polarity (as shown inside the battery compartment)! Close the battery compartment cover.
If the device is not used for a long time, remove the battery to prevent it from leaking.
NOTE.
If the battery is removed, the cable connection to the battery is disconnected automatically. Only after inserting the battery, the clock and settings will be lost.
CAUTION.
Do not use batteries of different types or new and old batteries together. Do not dispose of batteries with household waste. Return them to a special collection point or give them to the seller.
WARNING.
Protect from exposure to high temperatures, especially from direct sunlight, water, and moisture. There is a risk of explosion!
Installing/Replacing the battery in the remote control
NOTE.
The left battery of the tablet type in the remote control compartment can be secured for transport with a film. This extends the battery life. Before using the remote control, remove the film to activate the remote for operation.
Open the battery compartment cover. Insert the battery with the correct polarity (see diagram inside the compartment). Close the battery compartment cover.
If you intend to use the device for a long time, remove the battery to avoid battery acid leakage.
WARNING.
Do not throw batteries into fire or expose them to direct sunlight. Never dispose of batteries in fire. There is a risk of explosion! Keep batteries out of reach of children. Do not short-circuit. Do not deform batteries. Avoid contact with metal objects (rings, chains, screws, etc.). There is a risk of short circuit! A short circuit can cause overheating or fire. This can cause damage. During transport, protect the battery terminals with insulating tape. - If the battery leaks, avoid contact with eyes or skin. If acid gets into eyes, rinse with plenty of water and if symptoms persist, seek medical attention immediately.
VBA
Remove the battery from the device before disposal. Dispose of the battery at a designated collection point or return it to a collection point.
Protective cover for the compact disc compartment during transport
- To open the compact disc compartment cover (1), pull the handle (2) upward. The cover protects the compact disc compartment during transport and is closed before using the device.
Close the compact disc compartment cover again.
Switching the device on and off
To switch on the device, set the POWER ON/OFF switch on the side of the device to the "ON" position. To switch off the device, set the POWER ON/OFF switch to the "OFF" position. Then disconnect the device from the mains.
Setting the clock (time setting)
- Briefly press the PROG button (10/4). The display shows "24 HOUR".
- Using the buttons (9/8), select the 24-hour or 12-hour display mode. Confirm the selection with the PROG button.
NOTE: If the 12-hour mode is set, the display will show: AM = before noon, PM = after noon.
- Set the hour using the buttons. Confirm the selection with the PROG button.
- Set the minutes using the buttons.
- Press the PROG button again to save the time setting.
General information about the device
NOTE.
You can listen to the device both via the remote control and via the device itself. The same functions are performed with the same names.
STANDBY/ON (17/1)
Press the STANDBY button to switch the device to standby mode. To turn on the device, press the button again.
NOTE. In BLUETOOTH, USB, CARD, AUX modes and CD player
if no signal is received for about 20 minutes, the device automatically switches to standby mode.
VOLUME (3/10)
You can set the required volume level. The display shows the "VOL" indicator and a number. This means that the volume is set in the range from "VOL MAX" to "VOL MIN".
BASS control (20)
Use the regulator to adjust the low frequencies according to your preference. The display shows the "BASS" indicator and a number.
74 Ukrainian
Remote control
Operates via wireless connection at a distance of 5 meters. When the distance starts to decrease, replace the batteries. Make sure that during use of the remote control and the sensor (5) on the device, there is no obstacle.
AUX IN jack (12)
This is an analog input for external devices. Using the jack, you can play sound from other devices, such as MP3 players or CD players, through the device.
- Connect the external device to the 3.5 mm jack or the AUX IN jack.
- Select the AUX mode using the FUNCTION button (19 on the device) and the AUX/BT button (3 on the remote control).
- The sound will be played through the speakers. The volume level can be adjusted using the VOLUME knob (3) or the VOLUME +/- buttons (10 on the remote control). The buttons for programming compact discs are disabled.
- For detailed information about the functions, refer to the user manual for the external audio device.
NOTE.
Set the volume of the external device to a moderate level.
If the device is not in use, be sure to close the cover.
USB PORT (13)
The device is designed taking into account the latest developments in the field of USB connections. However, we cannot guarantee compatibility with all USB flash drives due to their large number and variety on the market. In some rare cases, problems may arise with the playback of content from USB flash drives. This is not a malfunction of the device.
- Open the cover.
- Press the FUNCTION button (19 on the device) or the CD/USB/SD button (16 on the remote control) until the "USB" indicator appears.
- Directly connect the USB flash drive to the corresponding port. The "READING" indicator will appear on the screen. After a few seconds, the total number of folders and titles will appear. Playback will begin. The screen will display information about the current folder (e.g., 01), the current track (e.g., 005), and the elapsed time.
NOTE.
Be sure to directly connect the USB flash drive to the USB port to avoid possible malfunctions.
NOTE.
USB port for connecting external devices.
For operating instructions, see the section "Playback from CD/MP3 discs".
If the device is not in use, close the cover.
CAUTION.
Before removing the USB device, switch the device to standby mode.
MEMORY CARD PLAYBACK (11)
- Open the cover.
- Press the FUNCTION button (19 on the device) or CD/USB/SD (16 on the remote control) until "CARD" appears.
- Insert the memory card into the corresponding slot until it clicks. The contacts must face down. The "READING" indicator appears on the screen (flashing). After a few seconds, the total number of folders and titles appears on the screen. Playback begins. The screen displays the current folder (e.g., 01), the current track (e.g., 005), and the elapsed time.
For operating instructions, see the section "Playback from CD/MP3 discs".
If the device is not in use, close the cover.
CAUTION.
Before removing the memory card, switch the device to standby mode.
To remove the memory card, press on its edge.
Playback
Nowyk cTanhui
- Press the FUNCTION button (19 on the device) repeatedly until the "TUNER" indicator appears on the display. Or press the FM button (2) on the remote control.
- Set the desired station using the buttons.
- The FM.ST (ST) indicator (on the display) lights up when the selected station is received in stereo. If the signal is weak and the station is received with interference, the indicator will blink. Try to improve the signal by changing the position of the telescopic antenna. For FM stations, you can use the STOP / FM MONO/ST button (9 on the remote control) to switch between MONO and STEREO modes. In case of weak reception, we recommend switching to MONO mode.
Storing radio stations
- When the desired station is found, press the PROG button (10/4). The MEMORY indicator appears on the display and the memory position will blink.
- To select a program channel, press the PRESET button (5 on the remote control).
- To store the tuning, press the PROG button.
To select a stored channel, press the PRESET button (5 on the remote control).
Playback from Compact Disc/MP3
About playback from Compact Discs
- Press the FUNCTION button (19 on the device) repeatedly until the "CD" indicator appears on the display. Or press the CD/USB/SD button (16) on the remote control.
- To open the CD compartment (1), pull the lid (2) upward.
- Insert the audio compact disc into the compartment with the label side facing up. Close the CD compartment.
4.AUDIO COMPACT DISC.
On the short press of the DISC button, the display shows "READING", then "Cd", and the number of tracks and total playing time. Playback starts from the first track on the compact disc. The display shows information about the current track, playing time in minutes, and the "Cd" symbol.
Compact disc MP3 format
On the short press of the DISC button, the display shows "READING". Then, for a short time, the number of folders (F) and their names are displayed. Playback starts from the first track of the first folder. The display shows the following data: current track (e.g., 01), next track (e.g., 005), and total playing time. You can select a folder using the FOLDER+ or FOLDER- buttons (14/16/14).
- To eject the compact disc, press the STOP button (7/9), open the disc compartment, and carefully remove the compact disc.
Keep the disc compartment door closed.
NOTE.
- When playing a compact disc in MP3 format that has several folders, the display will show the indication "001" before the first track of the new folder during the transition to another folder.
- If the disc is not installed securely or is not installed at all, the message "READING" will appear, and then the display will show the indication "NO DISC" (disc absent).
NOTE.
Playback of a compact disc created by the user is not guaranteed due to the variety of available software and disc drives.
Playback via Bluetooth
Wireless method via Bluetooth
Bluetooth uses wireless radio technology to connect devices over short distances. Devices with Bluetooth function use frequencies between 2.402 and 2.480 GHz in the ISM band (Industrial, Scientific, and Medical). Interference may be caused, for example, by WLAN signals, DAB radio, wireless telephones, microwave ovens, and other devices in the same frequency range.
This device ensures the connection of other Bluetooth devices. Its range is limited to approximately 15 meters, depending on the conditions of use.
If your device supports the A2DP profile (Advanced Audio Distribution Profile) and has a music playback function, you can also transfer music files to the device wirelessly. The A2DP profile uses the Bluetooth profile of various brands. The stereo audio signal is transmitted wirelessly between the playback device (source) and the receiving device. To be able to remotely control the source, the playback device must support the AVRCP profile (Audio Video Remote Control Profile).
It is impossible to guarantee full functionality, since there are many manufacturers of devices, models and versions of software.
Device registration (pairing)
Before you can listen to music on a trial basis, the device must be paired.
- Make sure that the program (application) on your mobile phone has the Bluetooth function enabled. Read the user manual of the program.
- Press the FUNCTION button (19 on the device), until the display shows the "BT" indicator. Or you can press the AUX/BT button (3 on the remote control).
- Select Bluetooth on the program, register the device on the program. Read the user manual of the device. The device "BSS 4808" will be displayed on the program as the selected item.
NOTE.
Programming is done using the programming buttons. When programming is complete, a menu will appear for selection.
76
Ukrainian
- Now enter the password "0000" on the programmer taking into account the device model and software version.
To check the installed connection between devices, refer to the indicators and the program.
Information about further operation is provided in the "Description of control keys" section.
It is possible to set the required sensitivity level on the external device.
i
PIPIMITKA.
If problems occur during pairing, you can reset the device to factory settings. In case of problems or repeated pairing with the device, turn off the WiFi/data transfer function on the device. We cannot guarantee compatibility with Bluetooth devices (e.g., mobile phones) that are currently on the market. For optimal connection, make sure the battery is fully charged. - Some mobile phone models support the power saving function. Turn off this function, as it may cause data transfer issues via Bluetooth. - To transmit audio, you need to enable Bluetooth on the program. Follow the program's user guide. - If the mobile device is playing music and receives a call, playback will be interrupted. The quality of the reproduced sound depends on the mobile phone. To switch the call to the mobile phone, press the corresponding buttons on the mobile phone. After the call ends, the device will reconnect automatically. Playback may need to be resumed.
Description of control buttons
▶I PLAY/PAUSE (8/11)
Allows you to pause playback for a while and resume it again. The display will show the elapsed time. Pressing the button again will resume playback from the same point.
SKIP/TUNING UP/DOWN (9/8)
During playback
With the button you can skip to the next or previous track. Press and hold the button for fast forward (sound will be muted).
With the button you can also do the following:
1 press = starts playback of the current track from the beginning. 2 presses = skips to the previous track. 3 presses = plays the track before the previous one. Press and hold the button for fast rewind (sound will be muted).
Radio mode
Setting the desired radio station.
STOP (7/9)
The compact disc stops.
FM radio mode
STEREO and MONO indicator.
MUTE (15/15)
Press to mute the sound. The display will show the indicator "MUTE". To disable the function, press the MUTE button again.
EQ (18/7)
ID3 (6 on the remote control path)
For MP3 format discs:
Press the button to enable the function. The indicator "ID3 ON" will appear on the display. If ID3 tag information is saved, it will be displayed on the screen. To disable the function, press the button again. The indicator "ID3 OFF" will appear on the display.
PROG (10/4)
Stores the current and programmed playback order.
Programmed playback
Program the playback order in the desired sequence. (For CD/USB/SD sources)
- Press the STOP button (7/9).
- Press the PROG button (10/4). The display will show the message "PR:01" ("Track" PR:"memory position") and MEMORY. Use the buttons (9/8) to select the desired track and press the PROG button again. The memory position on the display will change to P02.
- Using the buttons, select the next track and press the PROG button again. Repeat these steps until all tracks are selected.
NOTE.
KIO DOCAHHTO MAKCNMAJIbHO OJYCTIMORO 06'EM nporpamOBaHN DaHINX,3'ABITbcI INNkaui "FULL".
- HATNCHTb KONky PLAY/PAUSE (8/11). PO3noHETbcB BIDTBOpEHnHa eKpaHi BiO6pa3ntbCn HOpE npWoBn6paHOiDopixKn.
YkpaIHcbka
77
MoeIb: BSS 4808 Hanpyra: noCTiHn CTpym 12 BO-C+ KMBJIeHHB iD baTaTpeek: .10x1,5BTin UM1/R20 BHXIDHa IOTyXHICTb: 400BT (MAKcIMaJIbHa IOTyXHICTb... BIXIDHOrO CnHany) CIOXIBaHHJ XMBJIeHHA: .36BT Bara HeTTo: .5,8Kr Paio: YactOTTHn diJana3OH: FM 87,5~108,0 M
AadTep 3miHHoro CTpyM
Klae63neKn: ...II XnBHeHHa BxoDi: 3miHHn cTpyM 100-240 B ~ 50/60 T XnBHeHHa BxOdi: ...NocTIHHn cTpyM 12 B, 3 A IopHicTB:
Bluetooth
Пдгмьа ВсрсьBluetooth: V2.0+EDRДаьнICTb.. np6n.15 MeTPIVBacToTa nepeDaBaHnra: 2,4TgPIpotoKoI: A2DP/AVRCP
IpaBOHaTexHnHi3MInTa3MInuYdN3aHi36epiraetbCnpoD0Bx npOecy p03p06Kn npOkykTy.
LeynpctpiBicnoBidae Bcim dioyHm DnpeKtBam PaN Cbpnn, 3okpema 1o do eJeKtpomarHITHOi cymicHOCTi i DnpeKTIbI 10do Hn3bKOi HanpyrTa Bnpo6JIeHn BiDnOBiHO IO OCTaHHIX BnMOr 6e3neKn.
PykoBoDcTBO IO 3KcnIyatauIN
Cnacnbo 3a BbIbOp HaIeero npOyKta. Haneemc, OH Bam nHpabNTca.
CMMBOJIbI B DaHHOM ykoBODCTBe Nolb3ObaTeN
BaxkHbIe yka3aHnA, kacaioUmeCBAwei 6eOtonacHocTn, OTMeueHbIOcObo.Bo n36exKaHne HeCuaCThix ClyuaeB INOBpeXJeHnYyCTpoiCTBa OpaauTe Ha HIX ocoOoe BHNMaHne:
Danger: indicates a potential for damage.
WARNING:
Potential hazard to the device or other objects.
NOTE:
Advice and information.
General safety rules
Before using the device, carefully read this manual. Keep it, as well as the warranty, receipt, and if possible the original packaging, including its internal elements. In case of transfer of the device, this manual must be attached.
- To eliminate the risk of fire or electric shock, do not expose the device to rain or moisture. Do not use the device near water (e.g., in a bathroom, pool, or wet floor). - Use the device only as intended. The device is not intended for commercial use. - Ensure that the power cord is not pinched, damaged, or in contact with heat sources. - Ensure that the power cord is properly plugged in. - The power adapter is intended for indoor use only. Plug the power adapter into a properly installed wall outlet. Ensure the voltage of the device matches the voltage of the electrical network. Also check the output current and polarity of the power source against the specifications table of the connected device. Do not touch the power adapter with wet hands! - When installing batteries, observe polarity. Do not cover the ventilation openings of the device.
Do not open the device casing. Incorrect repair may lead to serious danger to the user. If the device or its power cord is damaged (in particular), stop using the device and have it repaired by a qualified specialist. Regularly check the power cord for damage. - To eliminate any danger, a damaged power cord must be replaced by the manufacturer, its service department, or a similarly qualified person with an identical power cord. - If the device will not be used for an extended period, unplug the power cord and remove the batteries.
The following symbols may be indicated on the device and are intended for warnings:
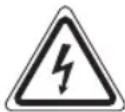
The lightning flash is intended to alert the user to the presence of dangerous voltage within the device.

The exclamation mark is intended to alert the user to the presence of important instructions regarding operation and maintenance that accompany the device.
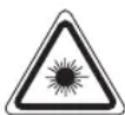
Products with this symbol operate with a "Class 1 laser" for scanning CDs. Built-in safety switches are intended to prevent the user from being exposed to hazardous laser radiation when opening the CD compartment.
These safety switches must not be bypassed or modified; otherwise, there is a risk of exposure to laser radiation.
- For safety reasons, all packaging elements (plastic bags, cardboard, and insulating materials, etc.) should be kept out of reach of children.
WARNINGS
Do not allow small children to play with the film. Danger of suffocation!
This device is not intended for use by persons (including children) with reduced physical, sensory, or mental capabilities, or lack of experience and knowledge, unless they have been given supervision or instruction concerning use of the appliance by a person responsible for their safety. Children should be supervised to ensure that they do not play with the appliance.
Special safety instructions
CLASS 1 LASER PRODUCT TO IEC 60825 LASER KLASSE 1 NACH IEC 60825
This device operates with a Class 1 laser.

CAUTION:
Do not touch the membrane (A) with your hands or sharp objects. This may damage the membranes.
Location of components
1 CD compartment 2 Handle for opening the CD compartment (compact disc) 3 VOLUME control (loudness) 4 Display 5 Remote control sensor 6 REPEAT button (repeat) 7 Stop button 8 Play/Pause button 9 Track skip buttons 10 PROG button (programming tracks) 11 Slot for memory card 12 AUX IN jack (auxiliary input) 13 USB connector 14 FOLDER+ button (folder up) 15 MUTE button (mute) 16 FOLDER- button (folder down) 17 STANDBY/ON button (standby/power) 18 EQ button 19 FUNCTION selector 20 BASS control (bass) 21 Mounting for handle 22 Telescopic antenna
DYNAMICS
Vidéo (not shown)
POWER ON/OFF switch (power on/off)
Power supply DC IN 12 V (DC input)
Battery compartment
Remote control
1 STANDBY button 2 FM button (radio) 3 AUX/BT button (aux input) 4 PROG button (programming memory) 5 PRESET button (radio memory) 6 ID3 button (tags) 7 EQ button 8 SKIP/TUNING UP button (forward skip)
SKIP/TUNING DOWN button (backward skip)
9 STOP / FM MONO/ST button 10 VOLUME +/- button (volume) 11 PAUSE button (playback/pause)
12 RANDOM button
(playback in random order)
13 REPEAT/INTRO button (repeat) 14 FOLDER +/- button (album selection) 15 MUTE button (sound off) 16 CD/USB/SD button
Installation / Connection
- Read the instructions completely before using the device! Choose a suitable place for the device. A suitable place is a dry, non-slip surface on which you can use the device without problems.
- Make sure that the device is properly ventilated!
- If necessary, remove the protective film from the display.

WARNING:
Too high a volume level is dangerous for hearing.
Plug the power adapter into a properly installed three-pin 230 V, 50 Hz mains socket. Connect the power cable to the power adapter. Plug the power adapter into the DC IN 12 V socket. Make sure the mains voltage matches the rated voltage indicated on the rating plate.

WARNING:
- The supplied power adapter may only be used with this device. Do not use it with other devices. Plug the power adapter only into the 12 V socket. Connecting a different power adapter may damage the device.

NOTE:
Disconnect the device from the mains power supply if it is not planned to be used for an extended period. As soon as a power failure occurs, the previously set time and settings will be lost.
Battery operation (batteries not included)
- Open the battery compartment cover on the rear side. Insert 10 batteries of type UM1/R20, 1.5 V. When inserting the batteries, observe the correct polarity (see markings on the bottom of the battery compartment)! Close the battery compartment.
If the device is not used for a long time, remove the batteries from it, as they may start to leak.
NOTE:
- When the mains power is disconnected, the battery power supply is automatically switched off.
- The set time and settings will be lost when the batteries are removed.
WARNING:
Do not mix different types of batteries or old and new batteries. Do not dispose of used batteries in household waste. Please return them to an authorized collection point or to your dealer.
CAUTION:
3anpeaaetcCnIbHOHarpeBaTbp6Op,Hanpimep,depKaTbNOIprMbIMCOJIHeuHbIMNJyamn,PdOMCOrhem N.T.D.OnachocbB3pbiba!
Bctabka/3aMeHa 6aTapeKn B dNCTahUHOM ynpabJeHM
I PIMMEYAHNA:
JIITHeBbI 3JEmeH B6aTapeHOM OTeCeke Iy MoKeT 6bItb 3aUuueH KycOuyKOM IJeHKn. 3TO CdeJaHO dIg npOJIeHnIcPoka cIyX6bl 3JemeHa. IpeE npBbIM nCIOJIb3OBAHnEM Iy ydaJIte 3OT KycOuyKIIeHKn.
- OTKpoIte OTCEK 6aTapeek B 3aHHeY qactn nyIbTa Inc-TaHIOHO HOrO ynpabNeHnA (Dy). ДлгзаменияпспьзутToTж.TибБаТeн(CR2032).ПровьтппавиьнocьпларноCTN (CM.BOTCEKe6aTaapeek). 3akpoTe oTceK 6aTaapeek.
Ecni He nlaHpyeTcN cNoIb3ObaHne Dy dIITeNbHbI cPok, NOxJaIyIcTa, N3BNEKeIte 6aTapeKn, YTO6bl IpeIOTbpaTNTb "BbITEKaHne" N3 HNX KICJOTbl.
IPEyUPTKDEHNE:
He noDBepraIte 6aTapeKu INHTEHCBHOMy HArpeBy IIN BO3DeIeCTBIO pRMOrO COJIHEUHO rCBeta. He 6pocaiTe 6aTapeKu B OROh. OnacHoctb B3pbiba! XpaHNTe 6BaTapeKn B HeIOCTyINbIX DeTAM MeCTax. BaTapeKn HE ABJIANTC NrpUwKaMn. He nbitaTecb oTkpbItb 6aTapeKy. He donyckaIte KOHTaKTa C MetaJIInueckmN IpeMMeTAMn (KOJIbUa, TBO3IN, BUNThbI N T.D.). Onachoctb KOPOTKORO 3amBikAHNA! - Пи КОРOTКOM 3amblaKaHn BO3MOxeH NepeRpeB nДже BO3ropaHne 6aTapeek.ЗTo MoxeT npUBeCTN K B3pyIBy. Ipn TpaHcnpTupOBKe 3aKJeIe IunKoJIeHTO KJIeMMb6aTapeIKnIa ObecneYehn6e3OnacHOCTN.
IPEyUPTPEKDEHNE:
- Pn yteKe n3 6aTapeKn He donyckaIte nonaHaHn JnkKoCTn B rla3a nn Ha Koxy. Pn KOHTaKTe KNCLOTb C rla3am, IpomOnTE YcHToB BOOn I ObaPntEc b 3a MEduuHCKO NOMUbBO Cclyae CmIMTTOMOB TpaBMbl.
BHIMAHHE:
He Bb6paBbAaTe 6aTapeKn BMeCTe C 6bITOBbIMN OTXoJaM. PoKaJyIcTa, OTHecNTe NcNoJIb3ObaHhbIe 6aTapeKn B ceHTp c6opa nn ObpaTHo p03HmHOMy npOaBly.
3aunTHoe yctpoiCTBo dIra TpaHcnpTIpOBKn BaWero OTceKa dIg CD
-ДЯТOrO yTo6bI OTKpbITb OTcEK CD (1),notaHTb pykoTky (2) BBepx. BbHbTe 3aunTHoe yctpOCTBO dI TaPcHcnpOpTPOBKn n3 CD npOnrpbBaTeJI, ecJI NaKoe eCTb, nepeI Tem, kaK haHaTb NcONlb3OBAHne yCTpoiCTBa. CHOBA 3aKoIe OTcEKNaKOMnAaKT-DnCKOBe.
BkIOeHMe/BbIKIOeHMe ycToIcTba
Connect the device to the power supply and set the POWER ON/OFF switch on the rear side of the device to the "ON" position. To turn off the device, set the POWER ON/OFF switch to the "OFF" position. Then disconnect the device from the mains power supply.
Setting the clock (standby time)
- Press the PROG button (10/4). The display will show "24 HOUR". 2. Use the buttons (8/8) to switch between 24-hour and 12-hour time modes. Confirm with PROG.
NOTE: In 12-hour mode, the time will be displayed as follows: AM = morning, PM = afternoon.
3. Use the buttons to set the hour. Confirm with PROG. 4. Use the buttons to set the minutes. 5. Press PROG again to save the time settings.
General operating instructions
NOTE:
Some buttons are located both on the device itself and on the remote control. Buttons with the same name have the same functions.
STANDBY/ON (17/1)
Press the STANDBY button to switch the device to standby mode. Press this button again to turn on the device.
NOTE: In BLUETOOTH, USB, CARD, AUX, and CD modes
If there is no signal for 20 minutes, the device will automatically switch to standby mode.
Volume (3/10)
Adjust the volume to the desired level. The display will show "VOL" and a number. It corresponds to the set volume in the range from "VOL MAX" to "VOL MIN".
BASS control (20)
You can use this control to adjust the bass manually. The display will show "BASS" and a number.
Remote control
Wireless operation up to 5 meters. If this distance decreases, please replace the batteries. Check that there are no obstacles between the remote control and the sensor (5) on the device during operation.
AUX IN jack (12)
Connect analog devices for playback. When connected to this jack, you can also listen to audio from other devices, such as MP3 or CD players, through the speakers.
How to play CDs
- Press the FUNCTION button (19 on the device) several times until "CD" appears on the display. Or press the CD/USB/SD button on the remote control (16 on the remote). 2. To open the CD compartment (1), pull the handle (2) upwards.
- Place an audio CD on the conical spindle with the label facing up, so that it snaps into place. Then close the CD compartment.
4. Audio CD:
The display will briefly show "READING", then the word "CD", the number of tracks, and the total playing time. Playback starts from the first track on the CD. The display will show the current track, time elapsed since the start of playback, and the symbol "CD".
CD in MP3 format:
The display will briefly show "READING". The number of folders (F) and names will be shown briefly. Playback starts from the first track and the first folder. The display will show the current folder (e.g., 01), the current song (e.g., 005), and the elapsed playing time. Use the FOLDER+ and FOLDER- buttons (14/16/14) to select specific folders.
- To remove the compact disc from the device, press the STOP button (7/9), open the CD compartment, and carefully remove the disc.
Always keep the CD door closed.
IIPIMMEYAHNIA:
- When playing MP3 CDs, the folder name and track number will be displayed on the display. When switching to another folder, the folder name will be shown.
- If the disc is inserted incorrectly or not inserted at all, "READING" will light up and "NO DISC" will be displayed on the display. Playback of user-created CDs cannot be guaranteed due to the variety of software available on the market for our equipment.
Playing music via Bluetooth
Wireless Bluetooth connection
Bluetooth operates on the basis of wireless radio communication between devices over short distances. Devices with the Bluetooth standard transmit data at frequencies from 2.402 to 2.480 GHz, in the ISM band (Industrial, Scientific and Medical). Interference may be caused, for example, by wireless local networks WLAN, radio stations, wireless telephones, or microwave ovens operating in a similar frequency range.
This device allows you to connect with devices that support Bluetooth. The range of action is limited to approx. 15 meters, depending on external conditions and the block used.
If the playback device supports the A2DP profile (Advanced Audio Distribution Profile) and has the functions of a music player, then you can use it without
84
Russian
wires to transmit music to the speakers. The A2DP profile ensures coordination of Bluetooth devices from different manufacturers. Thanks to streaming transmission, high-quality audio signals are transmitted wirelessly between the playback device (source) and the receiving device. For remote control of the source, the playback device must support the AVRCP profile (Audio Video Remote Control Profile).
However, due to inconsistencies between devices from different manufacturers, models, and software versions, the operation of all functions is not guaranteed.
Input system of the device (pairing)
Before playing music on the device, it is necessary to ensure a pairing mode between the devices.
- Check that the Bluetooth function is activated on the player (for example, on a mobile phone). For this, see the operating instructions of the player.
- Press the FUNCTION button repeatedly (button 19 on the device) until "BT" appears on the display. You can also press the AUX/BT button (button 3 on the remote control).
- Select the Bluetooth menu on the player and register the device in it. For this, see the player's operating manual. The device "BSS 4808" will be shown in the player as the selected device.

NOTE:
Only one player can be connected to the device. If the device is already connected to another player, the device will not appear in the selection menu.
- Then enter the code "0000" on the player, depending on the manufacturer, model, and software version.
The device stops automatically after playback of all tracks stored in memory has finished. The program sequence will be kept in memory until you switch to another mode, remove the CD from the tray, or turn off the device.
It is possible to combine the playback program with the REPEAT function. After programming
the start of playback, please press the REPEAT button (6/13) up to three times; the functions may be applied as described in the "REPEAT" section.
Playback of MP3 music files
The device allows playback of MP3 music files. The device also supports recordable discs: CD-R and CD-RW. Your device can play MP3 CDs. These are CDs that can contain up to 200 tracks. Your device automatically recognizes MP3 files (the total number of tracks and folders will be displayed). Please refer to the "CD/MP3 Playback" chapter for playing such CDs. You can program tracks as described above in the "Playback Program" section.
Please note:
There are many methods of recording to CDs, as well as different qualities of CDs and recorded CDs.
Moreover, music discs often use copy protection standards.
For this reason, in rare cases problems may arise with the playback of CDs and MP3 discs. This is not a malfunction of the device.
Cleaning and maintenance
- Turn off the network switch before cleaning. Wipe the external surfaces using a slightly damp cloth without any cleaning agents.
Troubleshooting
the device, and has been developed in accordance with the latest
safety standards.


- SPANISH
- CONTENTS
- POLISH
- TABLE OF CONTENTS
- RUSSIAN
- II PLAY/PAUSE (8/11)
- INSTALLATION/INTRODUCTION
- CORDLESS VIA BLUETOOTH
- SYMBOLS IN THIS USER MANUAL
- WARNING
- CAUTION
- NOTE
- GENERAL SAFETY GUIDELINES
- CHILDREN AND DISABLED PERSONS
- SPECIAL SAFETY GUIDELINES
- OVERVIEW OF THE COMPONENTS
- REMOTE CONTROL
- POWER SUPPLY
- BATTERY OPERATION (BATTERIES NOT SUPPLIED)
- INSERT/REPLACE BATTERY IN REMOTE CONTROL
- TRANSPORT SECURING DEVICE OF CD COMPARTMENT
- TURNING THE DEVICE ON/OFF
- SETTING THE CLOCK (DURING STANDBY MODE)
- GENERAL OPERATION
- STANDBY/ON (17/1)
- NOTE: IN THE BLUETOOTH, USB, CARD, AUX AND CD MODE
- VOLUME (3/10)
- BASS CONTROL (20)
- INFRARED REMOTE CONTROL
- AUX IN JACK (12)
- ENGLISH
- USB PORT (13)
- MEMORY CARD SLOT (11)
- LISTENING TO THE RADIO
- SEARCHING FOR STATIONS
- SAVING/SELECTING STATIONS
- PLAYING CDS/MP
- THIS IS HOW TO PLAY A CD
- AUDIO CD
- CD IN MP3 FORMAT
- PLAYING BACK MUSIC VIA BLUETOOTH
- LOGGING ON DEVICES (PAIRING)
- DESCRIPTION OF THE OPERATING BUTTONS
- PLAY/PAUSE (8/11)
- SKIP/TUNING UP/DOWN (9/8)
- STOP (7/9)
- MUTE (15/15)
- EQ (18/7)
- REPEAT/INTRO (6/13)
- RANDOM (12 ON THE REMOTE)
- FOLDER +/- (14/16/14)
- PRESET (5 ON THE REMOTE)
- ID3 (6 ON THE REMOTE)
- PROG (10/4)
- PROGRAM PLAYBACK
- I NOTE
- PLAYBACK OF MUSIC FILES IN MP3 FORMAT
- PLEASE NOTE
- CLEANING AND MAINTENANCE
- TECHNICAL SPECIFICATIONS
- AC ADAPTER
- BLUETOOTH
- DISPOSAL
- MEANING OF THE "WHEELIE BIN" SYMBOL
- REMOTE CONTROL BUTTONS
- INSTALLATION/STARTUP
- DAMAGE
- BATTERY
- BATTERY OPERATION (BATTERIES ARE NOT INCLUDED)
- INSTALLING/REPLACING THE BATTERY IN THE REMOTE CONTROL
- VBA
- PROTECTIVE COVER FOR THE COMPACT DISC COMPARTMENT DURING TRANSPORT
- SWITCHING THE DEVICE ON AND OFF
- SETTING THE CLOCK (TIME SETTING)
- GENERAL INFORMATION ABOUT THE DEVICE
- NOTE. IN BLUETOOTH, USB, CARD, AUX MODES AND CD PLAYER
- UKRAINIAN
- MEMORY CARD PLAYBACK (11)
- PLAYBACK
- NOWYK CTANHUI
- STORING RADIO STATIONS
- PLAYBACK FROM COMPACT DISC/MP
- ABOUT PLAYBACK FROM COMPACT DISCS
- AUDIO COMPACT DISC
- COMPACT DISC MP3 FORMAT
- PLAYBACK VIA BLUETOOTH
- WIRELESS METHOD VIA BLUETOOTH
- DEVICE REGISTRATION (PAIRING)
- PIPIMITKA
- DESCRIPTION OF CONTROL BUTTONS
- I PLAY/PAUSE (8/11)
- ID3 (6 ON THE REMOTE CONTROL PATH)
- PROGRAMMED PLAYBACK
- YKPAIHCBKA
- AADTEP 3MIHHORO CTPYM
- PYKOBODCTBO IO 3KCNIYATAUIN
- CMMBOJIBI B DAHHOM YKOBODCTBE NOLB3OBATEN
- GENERAL SAFETY RULES
- WARNINGS
- SPECIAL SAFETY INSTRUCTIONS
- LOCATION OF COMPONENTS
- INSTALLATION / CONNECTION
- BATTERY OPERATION (BATTERIES NOT INCLUDED)
- BCTABKA/3AMEHA 6ATAPEKN B DNCTAHUHOM YNPABJEHM
- I PIMMEYAHNA
- IPEYUPTKDEHNE
- IPEYUPTPEKDEHNE
- BHIMAHHE
- AUNTHOE YCTPOICTBO DIRA TPAHCNPTIPOBKN BAWERO OTCEKA DIG CD
- BKIOEHME/BBIKIOEHME YCTOICTBA
- SETTING THE CLOCK (STANDBY TIME)
- GENERAL OPERATING INSTRUCTIONS
- NOTE: IN BLUETOOTH, USB, CARD, AUX, AND CD MODES
- HOW TO PLAY CDS
- IIPIMMEYAHNIA
- PLAYING MUSIC VIA BLUETOOTH
- WIRELESS BLUETOOTH CONNECTION
- INPUT SYSTEM OF THE DEVICE (PAIRING)
- PLAYBACK OF MP3 MUSIC FILES
Brand : AEG
Model : BSS 4808
Category : Cd player/recorder