USER MANUAL ESSENTIAL EA815P10 KRUPS
FR HOTLINE:BE:3270233159-FR:0974501061-CH:0800377737 DE HOTLINE:DE:08009800000-AT:0800225225-CH:0800377737 EN HOTLINE:UK:0345 3306460-ROI:(01)6774003 NL HOTLINE:NL:0318582424 IT SERVIZIO CONSUMATORI: IT: 199 207701 - CH: 0800 37 77 37 ES HOTLINE:ES:902312300 PT CENTRO DE CONTACTO DO CONSUMIDOR:PT:808284735 EL EMAA:GR:2106371251 RU TOPAJARJIHHRA:RU:4952133228 UK yKPAIHA:UK:0443001304 PL INFOLINIA:PL:0801300420 CS HOTLINE:CZ:731010111 SK ZAKAZNLCKA LINKA : SK : 233 595 224 HU UGYFÉLSZOLGÁLAT: HU : (1) 8018434 567
www.krups.com
Réf. 8080014573-05 21/2022
KRUPS
EA815 - EA816 - EA817
www.krups.com
1 2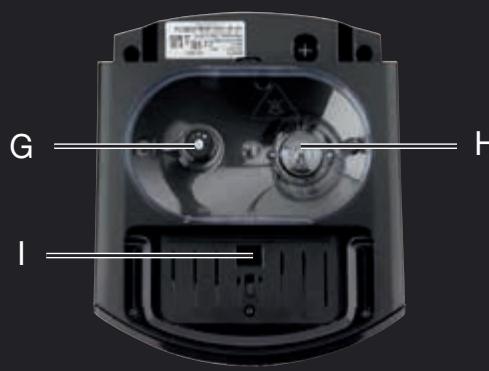
L M N O P Q R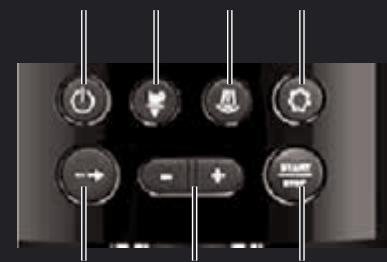
1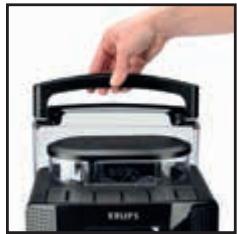
2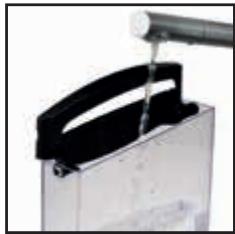
3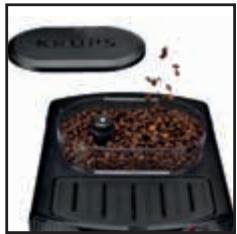
4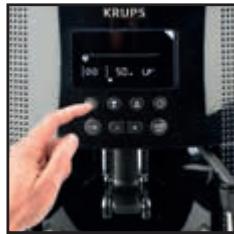
25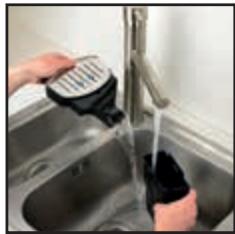
26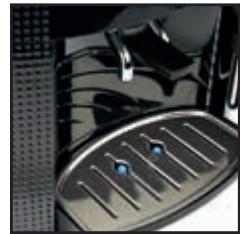
27
28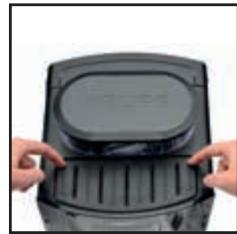
5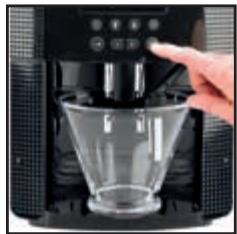
6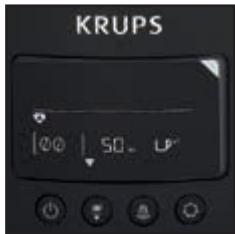
7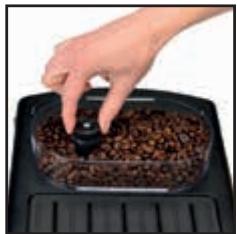
8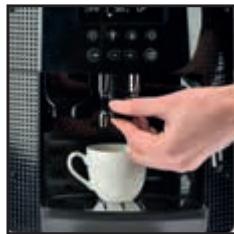
29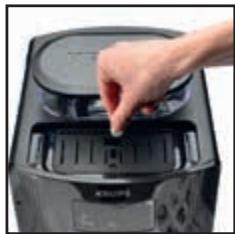
30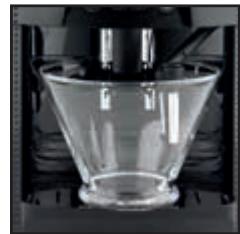
31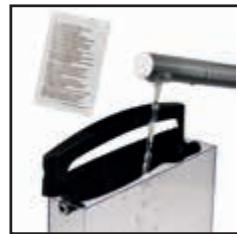
32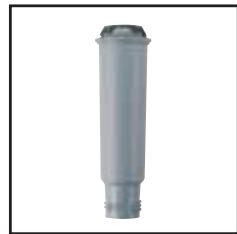
9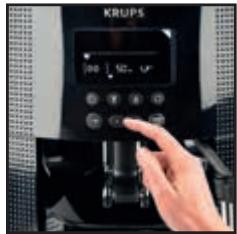
10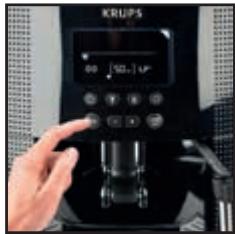
11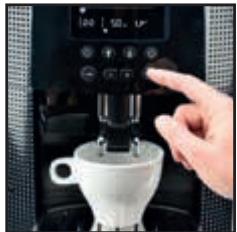
12
33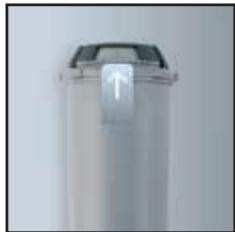
34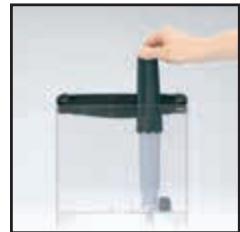
13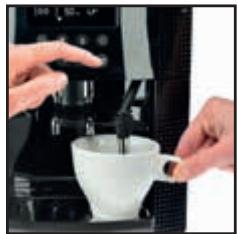
14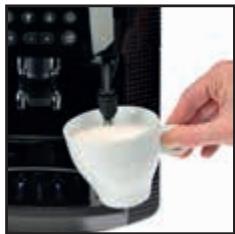
15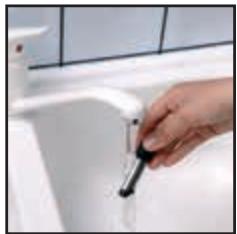
16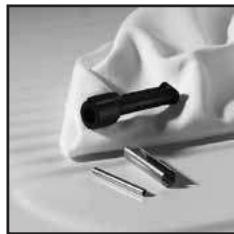
17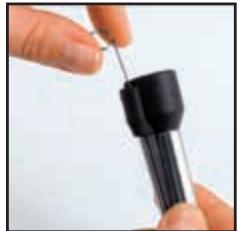
18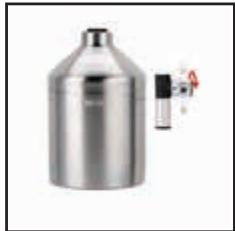
19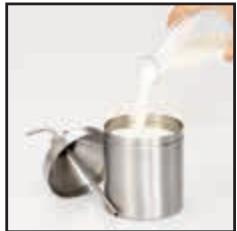
20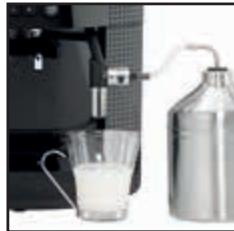
21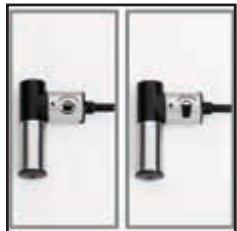
22
23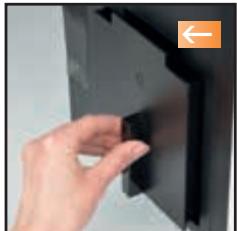
24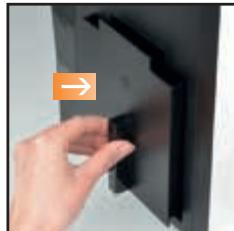
Congratulations! You are now the proud owner of an Espresso Automatic EA815-EA816-EA817 Series. With your machine, you can make a wide range of drinks: espressos, coffees or ristrettos, completely automatically. You can also make milk-based drinks such as cappuccinos. It has been designed so that you can enjoy restaurant quality coffee at home, whatever the time of the day and every day of the week. You will appreciate its ease-of-use and the quality of your cup of coffee. You can set the amount, strength and temperature of your drinks.
Thanks to its Compact Thermoblock System with built-in percolation chamber, its 15 bar pump, and because it uses coffee beans which have been freshly ground just before making the coffee, your machine will give you hot ristrettos, espressos and coffees from the first cup with maximum aroma and a creamy golden-brown froth.
To give the drink maximum flavour, an espresso is traditionally served in a small, flared porcelain cup. For an optimum temperature espresso and a dense creamy froth, we recommend that you pre-heat your cup.
You will probably need to try several types of coffee before you find the one that suits you.
By experimenting with the blend and/or roast, you will eventually arrive at the ideal result.
Espresso coffee has a richer aroma than classic filter coffee. Despite its stronger taste which remains longer on the palate, an espresso contains less caffeine than filter coffee (around 60 to 80 mg per cup compared to 80 to 100 mg per cup) due to its shorter percolation period.
The quality of water used is another determining factor which affects the overall quality of the brewed coffee. You should ideally use water which is fresh from the tap (so that it hasn't had time to stagnate due to air contact), which is cold and which does not smell of chlorine.
The ergonomic, compact LCD display makes the machine easy to use. It will guide you through each step, from preparing your drink to servicing your machine.
We wish you many years of enjoyment with your Krups machine.
The Krups team

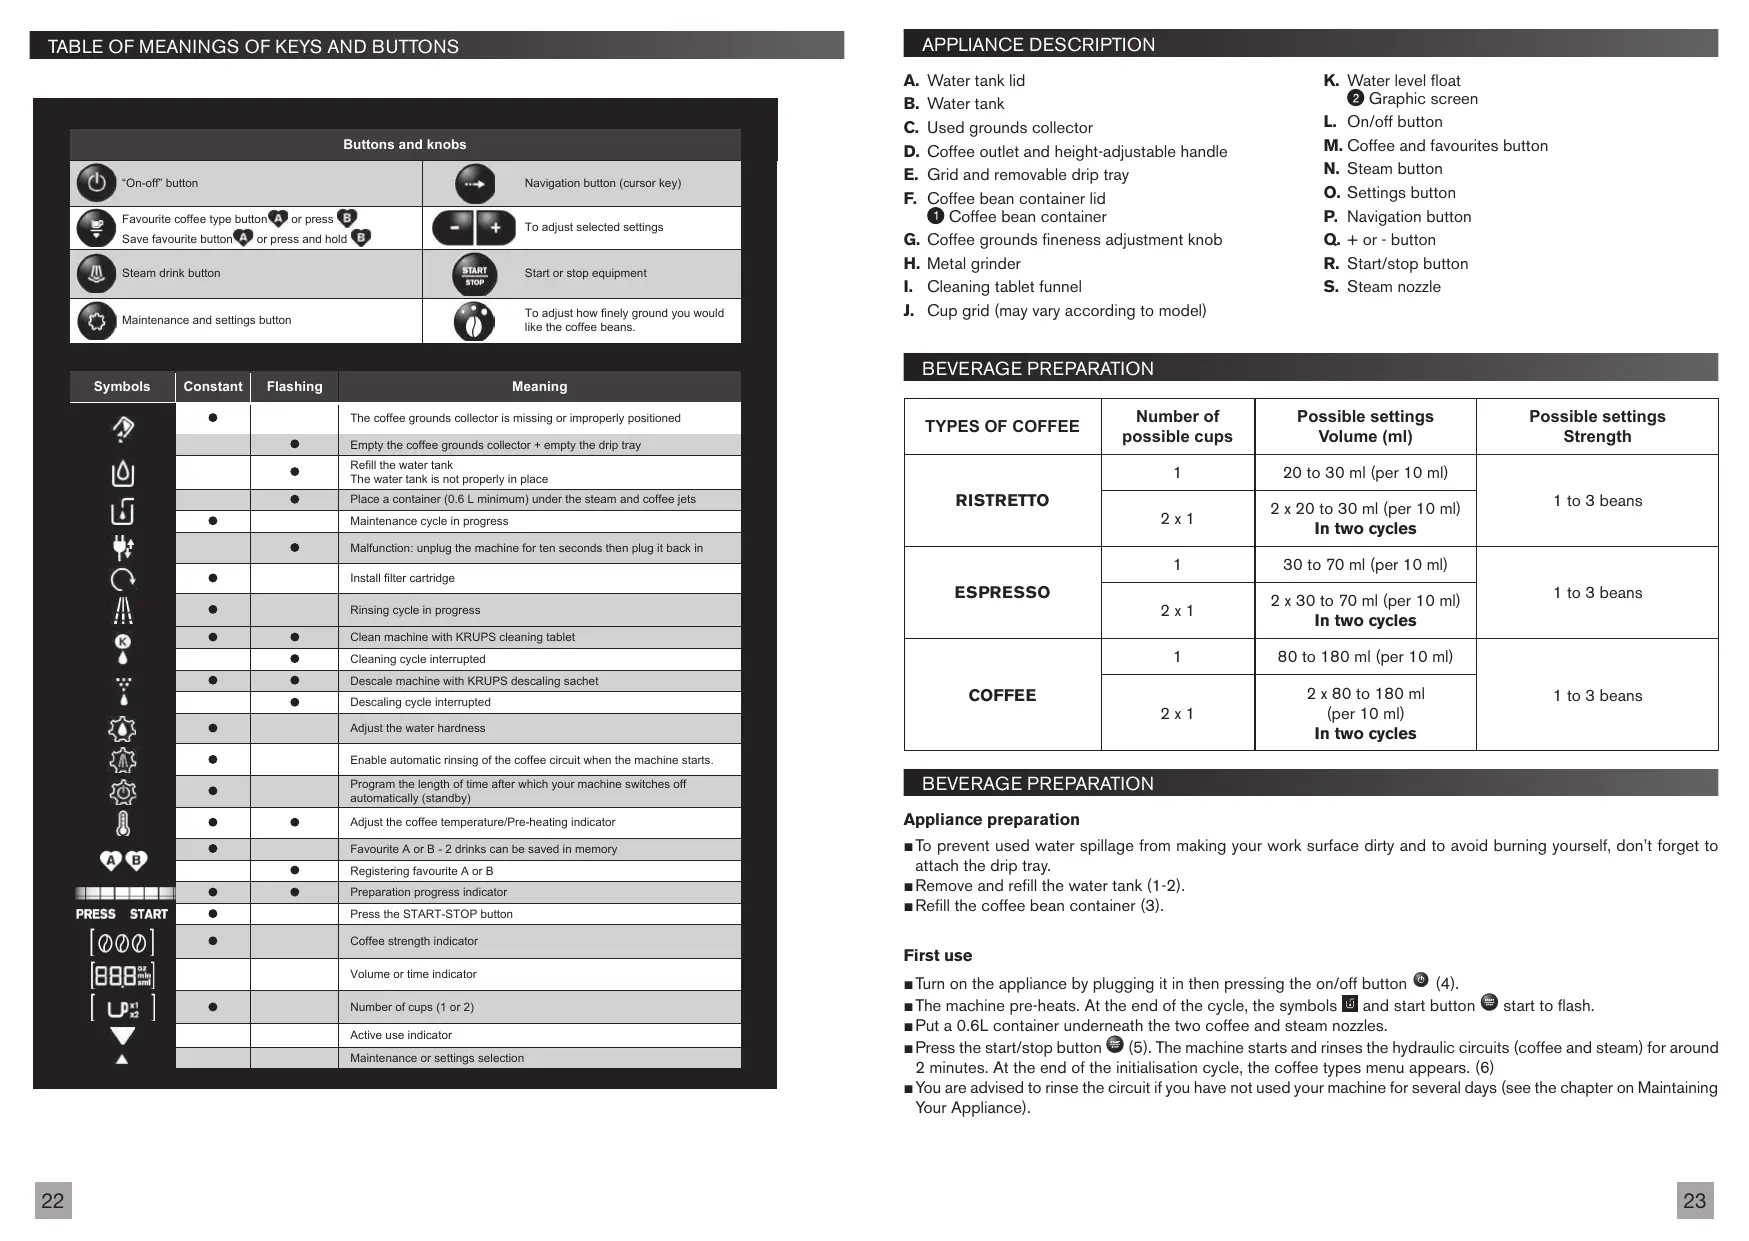
| Buttons and knobs |
| "On-off" button | → | Navigation button (cursor key) |
| Favourite coffee type button A or press B
Save favourite button A or press and hold B | - + | To adjust selected settings |
| Steam drink button | START
STOP | Start or stop equipment |
| Maintenance and settings button | | To adjust how finely ground you would like the coffee beans. |
| Symbols | Constant | Flashing | Meaning |
| ● | | The coffee grounds collector is missing or improperly positioned |
| | ● | Empty the coffee grounds collector + empty the drip tray |
| | ● | Refill the water tank
The water tank is not properly in place |
| | ● | Place a container (0.6 L minimum) under the steam and coffee jets |
| ● | | Maintenance cycle in progress |
| | ● | Malfunction: unplug the machine for ten seconds then plug it back in |
| ● | | Install filter cartridge |
| ● | | Rinsing cycle in progress |
| ● | ● | Clean machine with KRUPS cleaning tablet |
| | ● | Cleaning cycle interrupted |
| ● | ● | Descale machine with KRUPS descaling sachet |
| | ● | Descaling cycle interrupted |
| ● | | Adjust the water hardness |
| ● | | Enable automatic rinsing of the coffee circuit when the machine starts. |
| ● | | Program the length of time after which your machine switches off automatically (standby) |
| ● | ● | Adjust the coffee temperature/Pre-heating indicator |
| ● | | Favourite A or B - 2 drinks can be saved in memory |
| | ● | Registering favourite A or B |
| ● | ● | Preparation progress indicator |
| ● | | Press the START-STOP button |
| ● | | Coffee strength indicator |
| | | Volume or time indicator |
| ● | | Number of cups (1 or 2) |
| | | Active use indicator |
| | | Maintenance or settings selection |
APPLIANCE DESCRIPTION
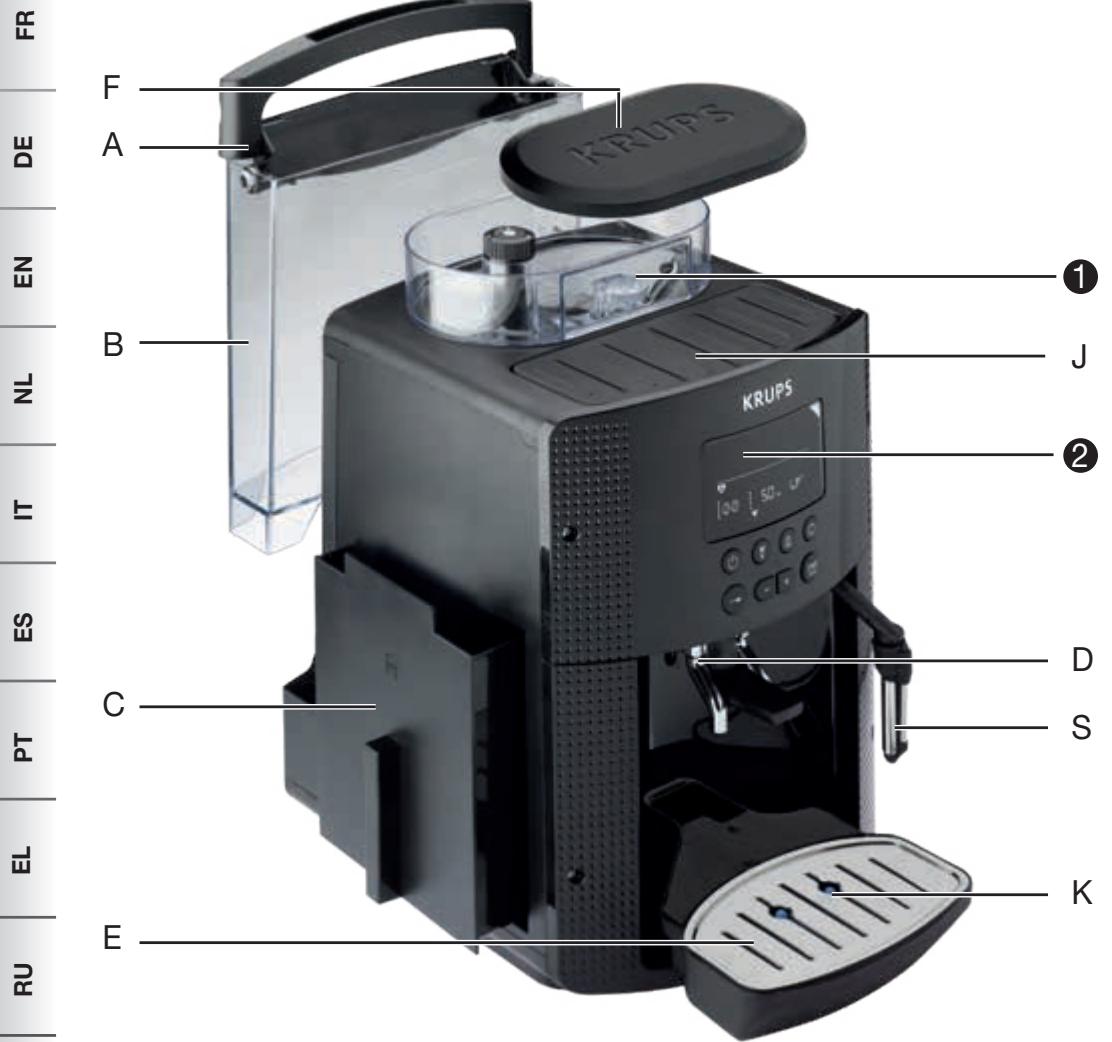
A. Water tank lid B. Water tank C. Used grounds collector D. Coffee outlet and height-adjustable handle E. Grid and removable drip tray F. Coffee bean container lid ① Coffee bean container G. Coffee grounds fineness adjustment knob H. Metal grinder I. Cleaning tablet funnel J. Cup grid (may vary according to model)
K. Water level float 2 Graphic screen L. On/off button M. Coffee and favourites button N. Steam button 0. Settings button P. Navigation button Q. + or - button R. Start/stop button S. Steam nozzle
BEVERAGE PREPARATION
| TYPES OF COFFEE | Number of possible cups | Possible settings Volume (ml) | Possible settings Strength |
| RISTRETTO | 1 | 20 to 30 ml (per 10 ml) | 1 to 3 beans |
| 2 x 1 | 2 x 20 to 30 ml (per 10 ml)
In two cycles |
| ESPRESSO | 1 | 30 to 70 ml (per 10 ml) | 1 to 3 beans |
| 2 x 1 | 2 x 30 to 70 ml (per 10 ml)
In two cycles |
| COFFEE | 1 | 80 to 180 ml (per 10 ml) | 1 to 3 beans |
| 2 x 1 | 2 x 80 to 180 ml
(per 10 ml)
In two cycles |
BEVERAGE PREPARATION
Appliance preparation
To prevent used water spillage from making your work surface dirty and to avoid burning yourself, don't forget to attach the drip tray. Remove and refill the water tank (1-2). ■ Refill the coffee bean container (3).
First use
Turn on the appliance by plugging it in, then pressing the on/off button (4). The machine pre-heats. At the end of the cycle, the symbols and start button start to flash. Put a 0.6L container underneath the two coffee and steam nozzles. Press the start/stop button (5). The machine starts and rinses the hydraulic circuits (coffee and steam) for around 2 minutes. At the end of the initialisation cycle, the coffee types menu appears. (6) ■ You are advised to rinse the circuit if you have not used your machine for several days (see the chapter on Maintaining Your Appliance).
Preparing the grinder
You can adjust the strength of your coffee by adjusting how finely the coffee beans are ground.
Generally, the finer the coffee is ground, the stronger and creamier the coffee will be, but this also depends on the type of coffee used.
Adjust the fineness of grinding by turning the coffee grounds fineness adjustment knob ⑥ which is located in the coffee bean container. It is advised that you do this during grinding, one notch at a time.
After 3 rounds, you will notice a pronounced difference in taste. To the left, the grounds are finer. To the right, the grounds are coarser. (7)
Claris F 088 - Aqua Filter System cartridge (Sold separately)
To optimise the taste of your drinks and the lifespan of your appliance, you are advised to only use a Claris - Aqua Filter System cartridge with your machine (see the chapter OTHER FUNCTIONS - Installing the filter).
Every time you place a Claris-Aqua Filter into the machine you must prime the filter before using the machine by activating the "install filter cartridge" program.
MAKING AN ESPRESSO AND A COFFEE
Note:
The amount of water for making an espresso is between 30 and 70 ml.
The amount of water for making a coffee is between 80 and 180 ml.
Starting preparation (with 1 or 2 cups)
Press the on-off button, and wait for the appliance to finish heating up. The coffee types menu is displayed. The function indicator is shown above the coffee types button (6). Place one or two cups under the coffee jets. You can lower or raise the coffee jets according to the size of your cup (8). Select the coffee strength (shown coffee beans displayed on the screen in brackets) with the + button to increase or the - button to decrease. (9). Press the navigation button to set the volume: select the volume of water displayed on the screen between brackets using the + or - buttons (10). - Press the navigation button to set the number of cups: select 1 or 2 cups, displayed on the screen between brackets using the + or - buttons. Press the START button (11). You can set the water volume at any time using the + or - buttons. To stop the flow into your cup, press the STOP button. ■ You can also adjust the temperature of your coffee (see the chapter OTHER functions - Settings).
Two cup function
The appliance will automatically carry out 2 full cycles of coffee preparation.
MAKING DRINKS USING STEAM
Steam is used to froth the milk, for example when preparing a cappuccino or caffe latte, and also to heat up liquids.
As a higher temperature is required when producing steam than when making an espresso, the appliance will launch an additional pre-heating phase.
Frothing milk
■ For best results, you are advised to use very fresh, very cold pasteurised or UHT milk, recently opened. Unpasteurised milk does not produce the best results. - Check that the steam nozzle is correctly positioned. Pour the milk into a milk jug which has a handle or into a cappuccino cup. Only fill it half way. ■ When the screen displays the drink selection menu, press the steam button (12). The function indicator is located above the steam button. Insert the steam nozzle into the milk.
A screen indicates that the appliance is heating up. Once the appliance has finished heating up, you can begin to make steam by pressing START , and following these steps (13):
Step 1: holding the milk jug in place, insert the steam nozzle approximately 2 cm into the milk and wait for it to start frothing.
Step 2: raise the container slightly (approximately 1 cm). Do not completely submerge the metal tube.
Step 3: gradually lower the container as the froth accumulates. (14)
■ When you have frothed the milk enough, press the STOP button to stop the cycle. Warning: the cycle does not stop immediately. To remove any milk traces from the steam nozzle, place a container under the nozzle and start the steam function again (approximately 10 seconds). The steam nozzle is removable in order to allow for deep cleaning. Wash it with water and a little non-abrasive detergent using a brush. Rinse and dry (15-16). Before replacing, make sure that the air holes are not clogged with milk residue. Unclog the holes with the needle supplied with your appliance if necessary (17). To stop the steam, press the STOP button
Steam can be produced for a maximum of 2 minutes per cycle.
Auto-cappuccino XS 6000 set (sold separately)
This auto-cappuccino accessory enables you to make cappuccinos or lattes (18). Connect the different parts to each other. Ensure that the pipe is not pierced by keeping the knob in the correct place. After removing the lid, fill the jug with milk (19) and place a cup or glass under the auto-cappuccino nozzle (20). Select cappuccino or latte on the special nozzle (21). Start steam, as indicated in the chapter "Making drinks with steam". Once you have made the milk froth, place your cup under the coffee jets and start a coffee cycle (22).
To prevent the milk from drying on the auto-cappuccino accessory, ensure that you clean it thoroughly. You are advised to wash it immediately by running a steam cycle with the accessory jug filled with water in order to clean the inside of the nozzle. For this you can use the KRUPS liquid detergent available separately.
MAINTAINING YOUR APPLIANCE
Emptying the coffee grounds collector and the drip tray
If the symbol starts flashing, empty and clean the drip tray (the drip tray may contain coffee grains) and the coffee grounds collector (23-25). The drip tray is fitted with floats which indicate when it needs to be emptied (26). Once you have removed the coffee grounds collector, you should empty it completely in order to avoid any overflow. The warning message will continue to be displayed if the coffee grounds collector is not pushed in or inserted correctly (24). You cannot make an espresso or a coffee while the warning message is shown.
Rinsing the circuits:
Press the maintenance and settings button (27). The function indicator is shown above the maintenance button.
If necessary, using the navigation button, select the rinse symbol.
Press START, rinsing starts and finishes when the coffee menu appears.
Automatic rinsing of the circuits when the machine starts.
You can choose to program the machine to be rinsed automatically each time it is turned on. To do this, press the maintenance and settings button (27). Using the navigation button, select the automatic rinsing programming symbol. Press the button to choose ON which confirms this program. If you press the button again, automatic rinsing is disabled. You can return to the coffee types menu by pressing the bullet button.
Warning: after this rinsing process, hot water will be released from the coffee jet. Ensure that the drip tray is in place even when the machine is not being used. The cycle lasts only a few seconds and stops automatically.
Cleaning program - total duration: approximately 13 minutes
You do not have to run the cleaning program as soon as the appliance requests it, but it must be done reasonably soon after. If cleaning is postponed, the alert message will remain illuminated until the process is carried out.
- When the bullet symbol lights up, you can run the automatic cleaning program by pressing the maintenance and settings button. The bullet symbol is selected. The function indicator bullet is shown above the maintenance button.
- The automatic cleaning program is divided into 2 stages: the cleaning cycle itself, followed by the rinse cycle. You can clean the machine at any time by pressing the maintenance and settings button, then, using the navigation button, select the cleaning symbol. To run this cleaning program, you will need a container which holds at least 0.6 L and which can be placed beneath the coffee jets and the steam nozzle. The symbol flashes. Lift the cup grid (28). Insert the KRUPS cleaning tablet (29). Fill the water container to its maximum level of 1.7 L (2). Empty the coffee grounds collector and the drip tray (23-25). Put a 0.6 L container under the coffee and steam jets (30). Press START. The symbol becomes constant. The first phase (approximately 10 minutes) begins. When this phase has finished, empty the container and the drip tray. The symbol flashes. Put the parts back in place. Press START. The symbol becomes constant, the final phase (approximately 3 minutes) begins. When this phase has finished, empty the container and the drip tray. The cycle has finished, the coffee types menu appears.
Note: if you turn off or unplug your machine during cleaning or if there is a power failure, the cleaning program will start from the beginning of the program once the power is restored to the appliance. It is not possible to postpone this process. It is obligatory in order to rinse the water circuit. In this case, a new cleaning tablet may be necessary. It is best to run the full cleaning program in order to avoid any risk of poisoning. The cleaning cycle is irregular: do not put your hands under the coffee jets while the cycle is running.
Descaling program - duration: approximately 20 minutes
You do not have to run the descaling program as soon as the appliance requests it, but it must be done reasonably soon after. If descaling is postponed, the alert message will remain illuminated until the process is carried out. The amount of limescale collected depends on the hardness of your water.
Warning: if your product is fitted with our Claris - Aqua Filter System cartridge, remove the cartridge before descaling.
- When the 1 symbol lights up, you can run the automatic descaling program by pressing the maintenance and settings button (27). If necessary, using the navigation button, select the 1 symbol. The 1 symbol flashes and the function indicator is located above the maintenance button. ■To run the descaling program, you will need a container which holds at least 0.6 L and a sachet of KRUPS descaler. ■ Fill the water tank up to the CALC mark then pour in the contents of one sachet (31). Put a 0.6 L container under the coffee and steam nozzles. Press START to begin the first phase (approximately 8 min). The 回 symbol becomes constant. When this phase has finished, empty the container and the drip tray. The 回 and 回 symbols flash. Remove and clean the water tank using a sponge. Once clean, refill your water tank and replace all parts. The symbol disappears. Press START to begin the second phase (approximately 6 min). The symbol becomes constant. When this phase has finished, empty the container and the drip tray. The symbol flashes. Press START to begin the final phase (approximately 6 min). The symbol becomes constant. When this phase has finished, empty the container and the drip tray. DESCALING is complete.
Note: if you turn off or unplug your machine during descaling or if there is a power failure, the cleaning program will start from the beginning of the program once the appliance is restarted. It is not possible to postpone this process. It is obligatory in order to rinse the water circuit. Running the descaling program is advisable. The descaling cycle is irregular: do not put your hands under the steam jet.
Once the cycle has finished, the coffee types menu appears.
OTHER FUNCTIONS
■ You can access the appliance's OTHER FUNCTIONS menu by pressing the maintenance and settings button. For all settings, use the navigation button and + or - for the values. To come out of the maintenance and settings menu, press the button.
MAINTENANCE
All of the following options allow you to run the selected programs:
| MAINTENANCE | | Allows you to access rinsing. |
| K | Allows you to access cleaning. |
| Allows you to access descaling when the appliance requests it. |
| Allows you to prime the filter (Claris cartridge). |
| Return to coffee types menu. |
TURNING OFF YOUR APPLIANCE
You can turn off your appliance at any time. When stopped, the machine emits a double beep and OFF is displayed on the screen. The appliance has registered your request and will stop as soon as possible.
All of the following options allow you to run the selected programs:
| SETTINS | | You can set your water hardness between 0 and 4 by pressing the + or - buttons . See “Measuring water hardness” (below) |
| You can program automatic rinsing each time the appliance is turned on by pressing the buttons and selecting ON. |
| You can choose the period after which your appliance will turn off automatically (between 15 and 120 minutes by pressing the buttons). |
| You can adjust the temperature of your coffee to three different levels by pressing the buttons. |
| Return to coffee types menu. |
Measuring water hardness
It is advisable to adjust the appliance according to the hardness of the water used. To check the water hardness, use the stick supplied with your machine or contact your local water authority.
| Degree of hardness | Class 0 Very soft | Class 1 Soft | Class 2 Average hardness | Class 3 Hard | Class 4 Very hard |
| ° dH | <3° | >4° | >7° | >14° | >21° |
| ° e | <3,75° | >5° | >8,75° | >17,5° | >26,25° |
| ° f | <5,4° | >7,2° | >12,6° | >25,2° | >37,8° |
| Appliance settings | 0 | 1 | 2 | 3 | 4 |
Installing the filter (Claris - Aqua Filter System cartridge) (32)
Note: To correctly install your cartridge, ensure that you follow the installation procedure each time you replace it. (33) A mechanism which memorises the month in which the cartridge was changed and replaced (after a maximum of 2 months): set the date using the cartridge cursor. Fit the cartridge in the tank (34). In the maintenance and settings menu, the function indicator is located above the maintenance button . Using the navigation button , select the filter cartridge installation symbol . The symbols and the start button start to flash. Place a 0.6 L container under the steam nozzle. Press start . The start-up cycle begins and finishes when the coffee types menu appears.
TROUBLESHOOTING
If one of the problems described in the table persists, contact KRUPS customer service.
| PROBLEM MALFUNCTION | CORRECTIVE ACTION |
| Your machine detects a fault:
a symbol appears. | Switch off and disconnect the machine, remove the filter cartridge, wait for a minute and restart the machine. |
| The appliance does not turn on when the button is pressed. | Check your fuses and plug sockets.
Check that the two power plugs are pushed in properly both on the appliance and at the socket. |
| The coffee grinder makes a strange noise. | There is a foreign body in the grinder. Disconnect the machine before investigating.
See if you can extract the foreign body using your vacuum cleaner. |
| The steam nozzle makes a noise. | Check that the steam nozzle is correctly attached to its corresponding end piece. |
| The steam nozzle on your machine seems partially or completely clogged. | Ensure that the opening in the end piece is not obstructed by milk residue or limescale. Unclog the holes with the needle supplied with your appliance. |
| The steam nozzle makes little or no milk froth. | For milk-based drinks, you use very fresh, very cold pasteurised or UHT milk.
It is also advisable to use a cold container. If the results do not improve, try changing the brand of milk. |
| No steam comes out of the nozzle. | Empty the tank and temporarily remove the filter cartridge. Fill the water tank with mineral water which is high in calcium (>100 mg/l) and run successive steam cycles. |
| The auto-cappuccino setting makes little or no froth.
The auto-cappuccino setting does not take in milk. | Check that the accessory is correctly attached to the appliance, remove it then replace it.
Check that the flexible tube is not obstructed or pierced and that it is correctly attached to the accessory so as to make it airtight. Rinse and clean the accessory (refer to the "Auto-cappuccino accessory" chapter). |
| There is water underneath the appliance. | Before removing the water tank, wait for 15 seconds after the coffee has finished flowing so that the machine finishes its cycle properly.
Check that the drip tray is correctly positioned on the machine; it should always be in place, even when the appliance is not in use.
Check that the drip tray is not full.
The drip tray should not be removed during a cycle. |
| After emptying the coffee grounds collector, the warning message is still displayed on the screen. | Correctly replace the coffee grounds collector and follow the instructions on the screen.
Wait at least 8 seconds before replacing them. |
| The coffee dispenses too slowly. | Turn the coffee fineness knob to the right to make the grounds courser (this could also depend on the type of coffee used).Run one or several rinsing cycles. Run a machine clean (see “Cleaning program”). Change the Claris Aqua Filter System cartridge (see “Installing the filter”). |
| Water or steam comes out abnormally from the steam nozzle. | At the beginning or end of making a drink, the steam nozzle may drip slightly. |
| The coffee fineness knob is difficult to turn. | Only change the grinder setting when it is running. |
| The espresso or coffee is not hot enough. | Increase the coffee temperature in the Maintenance and settings menu ❶. Warm the cup by rinsing it with hot water before making the drink. |
| The coffee is too lightly coloured or too weak. | Avoid using oily, caramelised or flavoured coffee. Check that the coffee bean container has coffee in it and that it is dispensing correctly. Decrease the drink volume, increase the drink strength. Turn the coffee fineness knob to the left to make the grounds finer. Make the drink in two cycles by using the 2 cups function. |
| The appliance is not producing coffee. | A problem has been detected during preparation of the drink. The appliance has restarted automatically and is ready for a new cycle. |
| Why can I not run descending/why does my machine not request a descending cycle? | The machine only requests a descending cycle once it has made a certain number of drinks using steam. |
| A power failure occurs during a cycle. | The appliance is automatically restarted when power is switched back on. |
| The appliance is working but no liquid is coming out. | Check that the water container is in the correct position and that the cord is not jammed between the appliance itself and the water container. |
| Coffee grains have found their way into the drip tray. | This happens if coffee grains fall outside the percolation tank; this keeps the machine clean. |

Danger: Only a qualified technician is authorised to carry out repairs on electrical wiring and carry out work on the electrical grid. If you do not follow these instructions, you risk death by electrocution! Do not use an appliance that is visibly damaged!
DESCRIPTION OF THE APPLIANCE
You can adjust the strength of your coffee by setting the fineness of the grind of the coffee beans. In general, the finer the grind of the coffee beans, the stronger the coffee. The quality of the drink obtained also depends on the type of coffee used.
To adjust the fineness of the grind, turn the grind fineness knob , located inside the coffee bean hopper. It is recommended to perform this adjustment during the coffee grinding process, gradually moving through the settings. By trying coffees with different grinds, you will clearly notice differences in taste. When turning clockwise, the grind becomes finer. When turning counterclockwise, it becomes coarser.
The amount of water for one coffee ranges from 80 to 180 ml.
Starting preparation (1 or 2 cups)
Press the On/Off button and wait for the preheating to finish. The coffee menu is displayed on the screen. The function indicator ▪ is located above the coffee selection button (6). Place one or two cups under the coffee dispensing spouts. You can lower or raise the coffee dispensing spouts to fit the size of your cups. (8). Select the coffee strength (indicated by coffee beans in brackets) using the + button to increase and the - button to decrease. (9). Press the navigation button to go to the volume settings menu: select the water volume, shown on the screen in brackets, using the + and - buttons (10). Then press the navigation button to go to the number of cups settings menu: select 1 or 2 cups, shown on the screen in brackets, using the + or - buttons. Press the START button (11). At any time, you can adjust the water volume with the + or - buttons. To stop the coffee flow, press the STOP button. You can also adjust the temperature of your coffee (see section Other Functions - Settings).
Function: Two cups
The machine automatically produces 2 full jugs of coffee.
PREPARATION AND USE OF STEAM
Steam is used to heat milk when preparing cappuccino or latte, as well as to preheat liquids. Since steam production requires a higher temperature than espresso preparation, the machine performs an additional preheating stage. Milk froth
For the best results, we recommend using fresh pasteurized milk or UHT milk that has undergone heat treatment. Using raw milk, you will not achieve the best result. After using the steam wand, the nozzle may be hot; we recommend you wait a few minutes before performing any manipulations with it. Make sure the nozzle is correctly installed. Pour the milk into the jug or cup with handle or into the milk container. Do not fill the jug/cup more than half full. When the machine displays the drink selection menu, press the steam wand button (12). The function indicator is located near the steam wand button. Lower the steam wand into the milk. A message about the appliance preheating appears on the screen. As soon as the preheating phase is finished, you can start the steam production process by pressing the START button, and then proceed to the following steps (13):
Step 1: Lower the steam wand into the milk approximately 2 cm deep. Wait for the beginning of froth formation.
Step 2: Slowly raise the container (approximately 1 cm). Do not fully immerse the metal tube in the milk.
Step 3: Gradually lower the container as the froth forms. (14)
When a sufficient amount of froth has formed, press the STOP button to stop the cycle. Attention, the cycle stop is not instantaneous. To remove milk residues from the steam wand, place a container under it and restart the preparation using steam (about 10 seconds). ■For deeper cleaning, the steam wand can be disassembled. Wash it in water with a small amount of mild dishwashing detergent. Then rinse and dry (15-16). Before installing the wand in place, make sure that the air intake holes are not clogged with milk residues. Clean them if necessary with the special needle included in the machine kit (17). And to stop the steam wand, press the STOP button
ATTENTION! THE CYCLE STOP IS NOT INSTANTANEOUS.
The maximum duration of steam production in one cycle is no more than 2 minutes. AUTOCAPPUCCINATORE XS 6000 (sold separately)
■The autocappuccinatore simplifies the preparation of cappuccino or latte (18). Connect its parts together. Make sure the tube is not kinked while maintaining a comfortable position of the knob. ■After removing the lid of the container, fill it with milk (19) and place the cup or glass under the autocappuccinatore (20). Select the cappuccino or latte position on the special nozzle (21). As shown in the chapter Preparation with steam. As soon as the milk froth appears, place the cup under the hot water outlet and start the coffee cycle (22).
To prevent milk from being forgotten on the automatic cappuccino maker, it must be thoroughly cleaned. It is recommended to rinse it immediately by starting a rinse cycle with a full tank of water to clean the milk spout inside. For these purposes, you can also use a liquid milk cleaner, such as KRUPS.
MAINTENANCE OF THE DEVICE
Cleaning the container for used coffee grounds and the drip tray
If the programming indicates it, empty the drip tray and the container for coffee grounds (the drip tray may contain a little water from the coffee). The drip tray has floats that signal the need to empty the tray (26). As soon as you remove the coffee grounds container, you must empty it completely to avoid overflow later. A warning message will be displayed if the coffee grounds container is not installed correctly (24). When the warning message is displayed, preparing espresso or coffee is impossible.
Rinsing the system:
Press the maintenance and configuration button (27). The function indicator is located on the maintenance button. If necessary, use the navigation button to select the rinsing program. Pressing the START button starts the rinsing process and returns to the coffee menu on the display.
AUTOMATIC RINSING OF THE SYSTEM AFTER STARTING THE MACHINE
You can choose the automatic rinsing program for each start. To do this, press the maintenance and configuration button (27). Using the navigation button, select the automatic rinsing program. Press the button to select ON, which confirms the activation of the program. If you press the button again, the automatic rinsing is deactivated. You can return to the recipes menu by pressing the button.
Warning! During the rinsing operation, hot water flows from the outlet opening.
Make sure that the drip tray is in place, even when the machine is not in use. The cycles last only a few seconds and stop automatically.
Cleaning program - total duration: about 13 minutes
You can start the cleaning program immediately after the machine informs you of the need to do so. But try to carry out this procedure as quickly as possible. If the cleaning process is delayed, the warning message will be displayed until the cleaning is carried out. During the display of the pictogram, you can start the automatic cleaning program by pressing the service button and confirming. Select the pictogram. The function indicator is located on the service button. The automatic cleaning program consists of two parts: the cleaning cycle itself, followed by a rinsing cycle. At any moment you can start the cleaning procedure by pressing the service button and confirming, then using the navigation button select the cleaning pictogram. To carry out the cleaning procedure, you need a container with a capacity of at least 0.6 l, which must be placed under the outlet openings for coffee and the steam nozzle. The pictogram flashes. Lift the drip tray (28). Insert the KRUPS cleaning tablet into its housing (29). Fill the reservoir with water to the maximum level of 1.7 l (2). Empty the container for used coffee and the drip tray (23-25). Place a container with a capacity of 0.6 l under the coffee and steam nozzle (30). Press the START button. The pictogram lights up constantly. The first phase (about 10 min) starts. At the end of this phase, empty the container and the drip tray. The symbol flashes. Put the elements back in place. Press the START button. When the symbol stops flashing, the final phase starts (about 3 min). At the end of this phase, empty the container and the drip tray. At the end of the cycle, the coffee recipe menu is displayed.
Note: If you switch off the machine during the cleaning process, the electricity supply is interrupted, the cleaning program will start again when the power supply is restored. It is not possible to postpone this operation, as it is mandatory for starting the rinsing procedure. In this case, the use of new cleaning tablets may be necessary. It is important to carry out the cleaning procedure correctly and in a timely manner to avoid the risk of poisoning. The cleaning cycles are carried out with interruptions, do not put your hands under the outlet openings for coffee during the cycle.
Descaling program - duration: about 20 minutes
You are not obliged to start the descaling program immediately after the machine informs you of the need to do so. But try to carry out this procedure as quickly as possible. If the descaling procedure is delayed, the warning message will be displayed until it is carried out.
The amount of scale formation depends on the hardness of the water used.
Attention! If your machine is equipped with the Claris - Aqua Filter System filter, remove it before starting the descaling operation.
You can start the automatic descaling program by pressing the service and configuration button (27). If necessary, use the navigation button to select the program. The program indicator is located on the service button. To run the descaling program, you will need a container with a capacity of at least 0.6 L, as well as KRUPS descaling agent. Fill the reservoir with water up to the CALC mark, then add the agent (31). Place the container with a capacity of 0.6 L under the coffee spout and the steam wand. Press the START button for the first stage (about 8 minutes). The program indicator lights up constantly. At the end of this phase, empty the container and the drip tray. The program indicator is off. Remove and clean the water reservoir. Refill the reservoir if it is empty, and return all elements to their place. The program indicator is off. Press the START button to start the second stage (about 6 minutes). The program indicator lights up constantly. At the end of this phase, empty the container and the drip tray. The symbol flashes. Press START to start the final stage (about 6 minutes). The program indicator lights up constantly. At the end of this phase, empty the container and the drip tray. The descaling process is complete.
Note: If you switch off the machine during the rinsing process, or if there is a power failure, the descaling program will restart from the beginning when power is restored. It is not possible to postpone this operation, as it is essential for the proper functioning of the rinsing system. For the correct execution of the descaling program, the descaling cycles are performed with interruptions. It is forbidden to put your hands in the steam outlet. At the end of the cycle, the coffee recipes are displayed.
OTHER FUNCTIONS
Access to the other functions menu of the device is done using the service and configuration button. Use the navigation button + and - to set the values. To exit the service and configuration menu, press the button
MAINTENANCE
All these operations allow you to start the selected programs:
| ПОЗВOLЯТЕ ПОЛУЧИТ ДОCTУР K Фун的游戏 К��ьваня. |
| ПОЗВOLЯТЕ ПОЛУCHITДОCTUР K Фун的游戏 Oсистг. |
| ПОЗВOLЯТЕ ПОЛУCHITДОCTUР K Фун的游戏 НаWIENY Prin
Здюрес устюпstва. |
| ПОЗВOLЯТЕ РИВODITSВЕ ДЕЙСТВЕ ФИльчт(Pаразн Clearis). |
| ВОЗВРАВ MEHЮ C PEÇENTAMN KOФe. |
SWITCHING OFF
You can interrupt the operation of the device at any time. During switching off, a sound signal is emitted, and the message OFF appears on the display. The device stops the request and performs a maximum quick stop.
SETTINGS
All these operations allow you to start the selected programs:
| HACTPOMK | Bbl MoxeTe BblpaTb JceSTKOcTB BoIbI MexdU 0 n4.
Сm. Измерене JceSTKOcTH BoIbI (HIXe). HabatneM KhoNOK
+ИПИ -ФФФ |
| Bbl MoxeTe HacTpOHTb abTomatUcckoe npombyBaHnE pri
kaxdOm 3aynCke MaunHbI, HabKab Ha KhoNKN -ФФДлЯ
Bbl6opA ON. |
| Bbl MoxeTe BblpaTb npomexyTok BpemeHn, noCle KeTOporo
MaunHa BblKnIOuHTcR abTomatUcckn (ot 15 do 120 mIn., HabKab Ha KhoNKN -ФФФ |
| Мохно HabtpoINTb Tempepattypу Baшero KoΦe Ha tpex
ypobnIx. HabatneM KhoNOK -ФФФ |
| Возврат В мени с рeцentamn Кофe. |
WATER HARDNESS MEASUREMENT
It is necessary to calibrate the device to the hardness of the water used. To determine the water hardness, use the test strip or contact your local water authority.
FAULTS AND ACTIONS TO REMEDY THEM
If any of the faults listed in the table persists, contact the KRUPS service center.
Step 2: Gently pull the unit (about 1 cm). Do not bend the metal tube completely.
Step 3: Press the button to release the steam according to the instructions. (14)
When the milk is sufficiently frothed, press the STOP button to stop the steam. Caution! The steam function does not stop immediately. To remove the steam wand from the milk to avoid possible splashes, repeat the steam cycle (approximately 10 seconds) with a container placed under it. The steam wand is cleaned, which allows you to clean its interior thoroughly. Perform the cleaning with a damp cloth and a small amount of mild detergent. Rinse and dry (15-16). Before installation, check that the opening of the milk container is not blocked by milk residues. If necessary, clean them with a damp cloth (17). To start the steam, press the STOP button.
CAUTION! THE STEAM FUNCTION DOES NOT STOP IMMEDIATELY.
The maximum duration of steam generation during one cycle is limited to 2 minutes.
Milk frother XS 6000 (sold separately)
This accessory makes it easier to prepare cappuccino or latte automatically (18). Connect the accessory parts. Make sure the seal is not damaged, fits well, and ensures a secure position. Remove the lid from the milk container, pour milk into it (19), and place the cup or glass under the milk frother nozzle (20). Select the position according to the special nozzle. (21). Prepare the steam as described in the section "Preparation with steam". ■When the milk froth is ready, place the cup under the steam outlet and start preparing the cappuccino (22).
Thoroughly wipe the milk frother to remove milk, so it does not dry on it. Rinse the nozzle inside immediately after preparation. Start a steam cycle using the accessory container filled with water. For cleaning, you can use the cleaning agent from KRUPS, available as an accessory.
MAINTENANCE OF THE DEVICE
Cleaning the drip tray and the water tank
■When the indicator lights up, empty and clean the drip tray (for the drip tray, a small amount of water may be needed) and the water tank (23-25). ■The drip tray is equipped with a float that indicates when it needs to be emptied (26). As soon as you remove the water tank, clean it thoroughly to prevent any blockage or overflow. The display shows a message that the water tank is not installed correctly (24). When the display shows a message, preparation is not possible.
Troubleshooting:
Press the maintenance button and navigate (27). The indicator is located on the maintenance button.
If necessary, use the navigation keys to select the cleaning program.
Press the START button. The cleaning cycle starts and ends when the menu for selecting the coffee is displayed.
Automatic cleaning of the system before switching off the device
You can program automatic rinsing cycles for each device activation. Press the
service button (27). Using the navigation knob, select the automatic rinsing program. Press the knob to confirm the selection, then press the knob again to start programming. If you press the knob, the automatic rinsing is canceled.
You can return to the selection menu by pressing the knob. During rinsing, hot water flows through the water inlet opening. Make sure the water container is in place, even when the device is not in use. The cycle lasts a few seconds and then stops automatically.
Cleaning program - Duration: approximately 13 minutes
It is not mandatory to perform the cleaning cycle immediately after receiving the notification, but it should be done as soon as possible. If the cleaning is not performed, the notification will remain on the device display until you perform this operation.
When you have selected the program, you can start the automatic cleaning cycle by pressing the service button. The indicator for the selected program is on. The cleaning program includes 2 stages: 2 cleaning cycles and 2 rinsing cycles. You can perform the cleaning at any time by pressing the service button, then using the navigation knob to select the cleaning program. For cleaning, you need to place the container with a capacity of 0.6 L at the water inlet and steam nozzle. The program will start. Remove the drip tray grid (28). Place the cleaning tablet in the holder (29). Fill the reservoir with water to the maximum level (1.7 L) (2). Empty the container for used water and the drip tray (23-25). Place the container with a capacity of 0.6 L at the water outlet and steam nozzle. (30). Press the START button. The program will start. The first phase begins (duration approximately 10 min). After the first phase, empty the container and the drip tray. The program will continue. Keep all parts and put them back in place. Press the START button. The program will stop, and the final phase begins (duration approximately 3 min). After the final phase, empty the container and the drip tray. When finished, the selected program is complete.
Note: If you turn off the device during cleaning or if it is turned off due to a power outage, the program will stop after the device is turned off. This operation is not possible because it is necessary for the rinsing cycle of the main system. In this case, a new descaling tablet may be needed. To avoid incorrect operation, it is necessary to correctly perform the full rinsing of the device. This rinsing is continuous, and during this operation, it is recommended to keep the water outlet open.
ESPRESSO AND COFFEE PREPARATION
Note:
PROBLEMS AND THEIR SOLUTIONS