
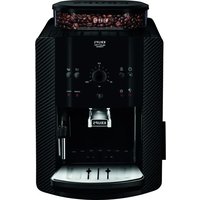
Essential EC771 - Coffee maker KRUPS - Free user manual and instructions
Find the device manual for free Essential EC771 KRUPS in PDF.


User questions about Essential EC771 KRUPS
0 question about this device. Answer the ones you know or ask your own.
Ask a new question about this device
Download the instructions for your Coffee maker in PDF format for free! Find your manual Essential EC771 - KRUPS and take your electronic device back in hand. On this page are published all the documents necessary for the use of your device. Essential EC771 by KRUPS.
USER MANUAL Essential EC771 KRUPS
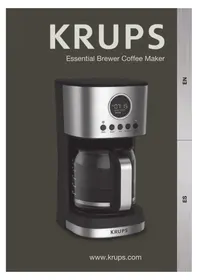
Essential Brewer Coffee Maker
IMPORTANT SAFEGUARDS
When using electrical appliances, basic safety precautions should always be followed to reduce the risk of fire, electric shock, and/or injury to persons including the following:
- Read all instructions.
■ Do not touch hot surfaces. Use handles or knobs.
■ To protect against fire, electric shock and injury to persons, do not immerse cord, plugs or machine in water or other liquid.
■ Close supervision is necessary when any appliance is used by or near children.
■ Unplug from outlet when either the appliance or display clock is not in use, and before cleaning. Allow to cool before putting on or taking off parts, and before cleaning the appliance.
Do not operate any appliance with a damaged cord or plug or after the appliance malfunctions, or has been damaged in any manner. Return appliance to the nearest authorized service facility for examination, repair or adjustment.
■ The use of an accessory not evaluated for use with this appliance may cause injuries.
■ Do not use outdoors.
■ Household use only.
-
Do not let cord hang over edge of table or counter, or touch hot surfaces.
■ Do not place on or near a hot gas or electric burner, or in a heated oven.
■ Always attach plug to appliance first, then plug cord into the wall outlet. To disconnect, turn any control to the "off" position, then remove plug from wall outlet.
■ Do not use appliance for other than intended use.
■ The coffee pot is designed for use with this appliance. It must never be used on a range top.
■ Do not set a hot container on a wet or cold surface. -
Do not use a cracked container or a container having a loose or weakened handle.
■ Do not clean container with cleansers, steel wool pads, or other abrasive material.
■ Extreme caution must be used when moving an appliance containing hot liquids.
■ Do not operate the coffee maker without water.
■ Do not clean coffee pot with cleansers, steel wool pads, or other abrasive material.
■ Scalding may occur if the lid is removed during the brewing cycles.
■ WARNING - Risk of Fire or Electric Shock. Do not remove the cover of the unit. No user serviceable parts inside. Repair should be done by authorized service personnel only.
SAVE THESE INSTRUCTIONS
CAUTION
This machine is intended for household use only. Any servicing other than cleaning and user maintenance should be performed by the nearest authorized KRUPS Service Center. Visit our website at www.krupsusa.com in the USA or contact your respective country's Consumer Service department for the service center nearest you. To reduce the risk of fire or electric shock, do not attempt to disassemble the machine.
Repair should be done by an authorized KRUPS Service Center only.
SHORTCORDINSTRUCTIONS
a) A short power cord or a detachable power cord is provided to reduce the risks of becoming entangled in or tripping over a longer cord accidentally.
b) Longer detachable power cords or extension cords are available and may be used if care is exercised in their use.
c) If a long detachable power cord or an extension cord is used:
- the marked electrical rating of the detachable power cord or extension cord should be at least as great as the electrical rating of the appliance.
- the longer cord should be arranged so that it will not drape over the counter where it can be pulled on by children or tripped over accidentally.
POLARIZATION INSTRUCTIONS
This appliance has a polarized plug (one blade is wider than the other). To reduce the risk of electric shock this plug is intended to fit Into a polarized outlet only one way. If the plug does not fit fully into the outlet, reverse the plug. If it still does not fit, contact a qualified electrician. Do not attempt to modify the plug in any way.
ADDITIONAL SAFETY
INSTRUCTIONS
This appliance is not designed to be used by children or people without knowledge or experience with the product, unless they are supervised or given prior instructions concerning the use of the appliance by someone responsible for their safety.
■ Burns can occur from touching hot water or steam. Exercise caution.
All machines are subject to stringent quality control. Practical tests using machines taken at random are conducted and this may explain any slight marks or coffee residue showing prior to use.
- Do not pour liquids other than water and descaling solutions specified in this manual into the water tank.
■ Protect the machine against humidity and freezing.
■ Do not pour water into the appliance if it is still hot.
■ Always place your coffee maker on a flat, stable, heat resistant work surface away from water splashes and any external sources of heat.
■ Never place your coffee pot in a microwave oven or on a stove top.
■ Never put your hand inside the coffee pot.
In the interest of improving products, KRUPS reserves the right to change specifications without prior notice.
■ A short power supply cord is provided to reduce the hazards resulting from becoming entangled in or tripping over a long cord.
This appliance is not intended for use by persons (including children) with reduced physical, sensory or mental capabilities, or lack of experience and knowledge, unless they have been given supervision or instruction concerning use of the appliance by a person responsible for their safety. Children should be supervised to ensure that they do not play with the appliance.
It is not intended to be used in the following applications, and the guarantee will not apply for: staff kitchen areas in shops, offices and other working environments, farm houses, in hotels, motels and other residential type environments, and bed and breakfast type environments.
- The coffee maker shall not be placed in a cabinet when in use.
- Cleaning and user maintenance shall not be made by children without supervision.
How to Brew Coffee / Cómo preparar café

16

18

19

USEFUL INFORMATION AND TIPS
When preparing small amounts of coffee, we recommend that you use the "SMALL BATCH" setting, which is designed for this purpose.
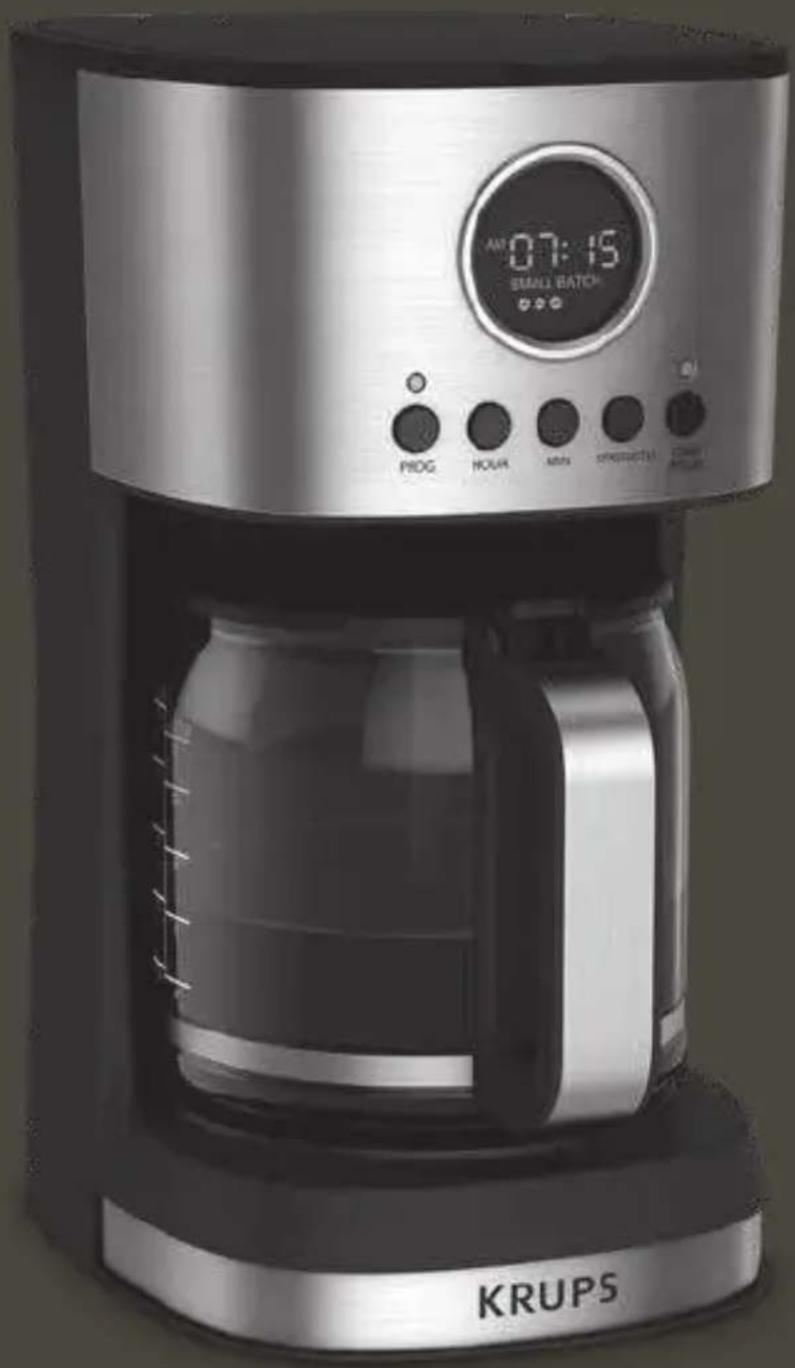
A Lid
B Water tank
C Measuring spoon
D Permanent filter
E Filter holder
F Holder of the filter holder
G Warming plate
H Coffee pot lid
I Flavortube
J Coffee pot
K PROG (Timer programming)
L HOUR
M MIN (Minute)
N STRENGTH (Coffee strength)
O START/PAUSE
Using the machine for the first time
■ Unbox the coffee machine and remove packaging and any other items that are not part of the product (labels, ties, etc.). (Fig. 1)
■ Clean the coffee machine with a damp sponge or cloth. (Fig. 2)
■ Run your machine for the first time without coffee, i.e. by just adding water to the tank (B) up to the maximum level indicated.
BREWING COFFEE
- Place the machine on a solid, flat surface. Connect the appliance to a 120 V\~ electrical outlet. (Fig. 3)
- Fill the water tank with cold water to desired water level (Max 60fl oz). (Fig. 4-6)
Note: Do not exceed the Max line (60fl oz) when brewing into coffee pot. Doing so could cause coffee maker to overflow.
- Place the coffee pot (J) with its lid on the warming plate (G). CAUTION: Make sure the coffee pot is correctly placed on the warming plate before starting the brew cycle. If the coffee pot is not correctly positioned on the warming plate, hot water or coffee could overflow from the appliance.
-
Place filter holder (E) correctly in the coffee machine, then put permanent filter (D) in the correct position. (Fig. 7-8)
-
Add the desired amount of ground coffee directly into the filter, then close the top cover (A). The amount of coffee to use will vary depending on the desired strength and taste. (Fig. 9)
- Press the START/PAUSE button (O); an LED light will come on. The appliance will start the brew cycle and coffee will pass through the flavortube (I), providing a balanced coffee in each cup. (Fig. 10) During the brew cycle, only the START/PAUSE button (O) will work.
- The cycle can be interrupted at any time by pressing the START/PAUSE button (O); the LED will turn off.
- When the brew cycle has finished, the unit will beep. Wait a few minutes for the rest of the coffee to finish dripping into the coffee pot (J) before removing it. (Fig. 11)
- The coffee maker automatically goes to Keep Warm function after the brew cycle and the "Time since brew" display will appear on the LCD screen. Default keep warm time is 2 hours after coffee brewing has finished. The keep-warm time can be adjusted, see "Setting the Keep Warm Time" section (p. 17) for more information.
Note: You can end the keep warm time any time by pressing the "START/PAUSE" button (O). The LED light and the appliance will turn off. Wait a few minutes before making a second pot of coffee.
USEFUL INFORMATION AND TIPS
The amount of coffee prepared will be less than the volume of water you filled the tank with, as the ground coffee and filter partially absorb it.
| Approximate cups of coffee | Approximate amount of water (fl oz) |
| 4 | 20 |
| 6 | 30 |
| 8 | 40 |
| 10 | 50 |
| 12 | 60 |
SETTING THE CLOCK
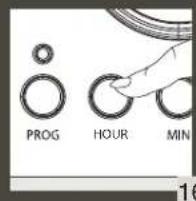
- Press and hold the "HOUR" button (L) for three seconds. (Fig. 12) The time on the LCD screen will flash. Use the "HOUR" (L) and "MIN" (M) buttons to set the time. (Fig. 13 and 14)
- After your selection, the time on the LCD screen will flash for five seconds and the time is set.
USEFUL INFORMATION AND TIPS
Once the clock is set, it will continue to show the correct time. However, the clock will be reset if the coffee machine is disconnected from the mains or if there is a power failure. In this case, repeat the instructions above to reset the clock. The hour and minute can be reset at any time.
SETTING THE AUTO-ON FUNCTION
- First, make sure the clock on the appliance is set to the correct time. If the time shown is incorrect, follow the instructions in the "Setting the clock" section.
- Press the "PROG" button (K) once (Fig. 15). The LED light will come on.
- Use the "HOUR" (L) and "MIN" (M) buttons to set the desired start time for the brew cycle. (Fig. 16 and 17)
- After your selection, auto start time on the LCD screen will blink for five seconds and the time is set. The blue LED light will stay on. Note: i) The current time is shown on the screen. You can check the auto start time by pressing the "PROG" button (K) again. ii) You can cancel the auto start function by pressing the "PROG" button (K) and the LED light will go out. iii) If you want to change the set auto start time, simply repeat steps 1 to 4 above.
- The coffee maker will automatically brew coffee at the set auto-on time.
- After the brew cycle, if you do not want to pour the coffee immediately, leave the machine switched on and the coffee will stay warm on the warming plate (G). Default keep warm time is 2 hours after coffee brewing has finished. The keep-warm time can be adjusted, see "Setting the Keep Warm Time" section (p. 17) for more information.
USEFUL INFORMATION AND TIPS
You can only set one auto-on time at a time on this machine. The brew cycle can be interrupted at any time by pressing the START/PAUSE button (O); the LED light and the appliance will turn off.
SETTING THE KEEP WARM TIME
- Press and hold the START/PAUSE button (O) for three seconds. (Fig. 18)
- The keep-warm time will flash on the LCD display. Use the "HOUR" (L) and "MIN" (M) buttons to set desired Keep Warm Time. (Fig. 19 and 20)
- After your selection, the keep warm time on the LCD screen will blink for five seconds and the time is set.
SETTING THE COFFEE STRENGTH/
SETTINGS FOR SMALL BATCHES OF COFFEE
To personalize brewing strength for best taste: select 1 bean for mild, 2 beans for medium, and 3 beans for strong. When preparing small amounts of coffee, we recommend that you use the “SMALL BATCH” setting, which is designed for this purpose.
- Press the "STRENGTH" (N) button once. (Fig. 21) The coffee bean strength on the LCD screen will flash.
- Press the "PROG" button (K) to adjust the coffee strength: 1 bean, 2 beans, 3 beans or SMALL BATCH. (Fig. 22 and 23)
- After you have done this, the coffee strength selection on the LCD screen will flash for five seconds and the strength will be set.
USEFUL INFORMATION AND TIPS
When preparing small amounts of coffee, we recommend that you use the "SMALL BATCH" setting, which is designed for this purpose.
MUTE/UNMUTE THE MACHINE
- If you want to mute the machine so that it does not make a sound to alert the end of the brew cycle, press the "PROG" (K) and "STRENGTH" (N) buttons together. Hold for three seconds. The mute icon will be displayed on the LCD screen.
- If you want to unmute the machine so that it makes a sound to alert the end of the brew cycle, press the "PROG" (K) and "STRENGTH" (N) buttons at the same time. Hold for three seconds. The mute icon will disappear from the LCD screen.
CLEANING AND MAINTENANCE
■ Unplug the appliance from the wall socket outlet, and allow the coffee maker to completely cool down.
■ To dispose of the used coffee grounds, remove the permanent filter from the machine and clean gently.
■ Do not clean the appliance while it is still hot.
■ Clean the rest of the appliance with a slightly damp soft cloth or sponge. Never use strong detergents or abrasive cleaners on any part of the machine.
■ After cleaning, dry thoroughly with a soft, dry cloth.
■ Use a soft sponge or cloth moistened with vinegar to remove stubborn stains.
■ Never immerse the appliance in water or clean it under a running tap.
■ Any other type of maintenance must be carried out by our authorized service center staff.
USEFUL INFORMATION AND TIPS
Only the coffee pot (J), its lid (H) and the removable filter holder can be cleaned in a dishwasher. The other parts of the machine are not suitable for dishwashers.
DESCALING THE APPLIANCE
For your machine to work optimally over time, you will need to remove mineral deposits left by the water used. How often they should be removed will depend on the quality of water supplied to your area and how often you use your machine. You can use whichever of the following methods is most practical for you:
A. Using a commercially available descaling product. Prepare the descaling solution as per the instructions provided with the product. Next, add the solution to the water tank (B) and run a brew cycle but do not add ground coffee to the filter. Once the equivalent of a cup has dripped into the pot, switch off the appliance and wait 15 minutes. Switch the appliance on again and complete the brew cycle until the descaling solution previously added to the tank has run out. Repeat if necessary. B. Using a white vinegar and water solution. The ratio should be 1 part vinegar diluted in 3 parts water. Carry out a brew cycle as described above until the yellow liquid is no longer dripping. Once the descaling process is complete, use tap water to rinse the coffee machine several times until the smell of vinegar or descaling product disappears.
If the build-up of limescale or mineral deposits is excessive, the appliance will show the following symptoms:
- The brew cycle takes too long. If there is an excessive accumulation of mineral deposits, the drip rate becomes slower, therefore the cycle takes longer to complete.
- The drip function switches on and off constantly before the end of the brew cycle.
If you notice any of the above symptoms, use the regular brew cycle to descale the unit using suggested method A or B.
- The "Clean" icon on the LCD screen flashes to indicate that the appliance needs cleaning. To descale the appliance, use the suggested method A or B and the cleaning function by holding down the "HOUR" (L) and "MIN" (M) buttons, and then press the START/PAUSE button (O) to start the cleaning cycle.
Think of the environment!

iYour appliance contains valuable materials that can be recycled.
Leave it at a local civic waste collection point where it will be disposed of properly.
KRUPS INTERNATIONAL LIMITED GUARANTEE

www.krups.com
This product is repairable by KRUPS during and after the guarantee period.
Accessories, consumables and end-user replaceable parts can be purchased, if locally available, as described on the KRUPS internet site www.krups.com
The Guarantee:
This product is guaranteed by KRUPS (company address and details included in the country list of the KRUPS International Guarantee) against any manufacturing defect in materials or workmanship for a period of 2 years starting from the initial date of purchase or delivery date.
The international manufacturer's guarantee by KRUPS is an extra benefit which does not affect consumer's Statutory Rights.
The international manufacturer's guarantee covers all costs related to restoring the proven defective product so that it conforms to its original specifications, through the repair or replacement of any defective part and the necessary labour. At KRUPS's choice, an equivalent or superior replacement product may be provided instead of repairing a defective product. KRUPS's sole obligation and your exclusive resolution under this guarantee are limited to such repair or replacement.
Conditions & Exclusions:
The International KRUPS guarantee only applies within the guarantee period and for those countries listed in the country list attached and is valid only on presentation of a proof of purchase. The product can be taken directly in person to an authorised service centre or must be adequately packaged and returned, by recorded delivery (or equivalent method of postage), to a KRUPS authorised service centre. Full address details for each country's authorised service centres are listed on KRUPS website (www.krups.com) or by calling the apopropiate telephone number as set out in the country list to request the apopropiate postal address.
KRUPS shall not be obliged to repair or replace any product which is not accompanied by a valid proof of purchase. This guarantee will not cover any damage which occurs as a result of misuse, negligence, failure to follow KRUPS instructions, use on current or voltage other than as stamped on the product, or a modification or unauthorised repair of the product. It also does not cover normal wear and tear, maintenance or replacement of consumable parts, or the following:
- using the wrong type of water or consumable
- damage as a result of lightning or power surges
- scaling (any de-scaling must be carried out according to the instructions for use)
- damages or poor results due to wrong voltage or frequency
- professional or commercial use
ingress of water, dust or insects into the product (excluding appliances with features specifically designed for insects) - mechanical damages, overloading
- accidents including fire, flood, thunderbolt, etc.
- damage to any glass or porcelain ware in the product
This guarantee does not apply to any product that has been tampered with, or to damages incurred through improper use and care, faulty packaging by the owner or mishandling by any carrier.
In order to offer the best possible after-sales service and constantly improve customer satisfaction, KRUPS may send a satisfaction survey to all customers who have had their product repaired or exchanged in a KRUPS authorised service centre. The international KRUPS guarantee applies only for products purchased in one of the countries listed, and used for domestic purposes only in one of the countries listed on the Country List. Where a product purchased in one listed country and then used in another listed country:
a. The international KRUPS guarantee does not apply in case of non-conformity of the purchased product with the local standards, such as voltage, frequency, power plugs, or non-conformity with other local legal requirements or other local technical specifications.
b. The repair process for products purchased outside the country of use may require a longer time if the product is not locally sold by KRUPS country of usage.
c. In cases where the product is not repairable in the new country of usage, the international KRUPS guarantee is limited to a replacement by a similar product or an alternative product at similar cost, where possible.
Consumer Statutory Rights:
This international KRUPS guarantee does not affect the statutory rights a consumer may have or those rights that cannot be excluded or limited, nor rights against the retailer from which the consumer purchased the product. This guarantee gives a consumer specific legal rights, and the consumer may also have other legal rights which vary from State to State or Country to Country. The consumer may assert any such rights at his sole discretion.
For Australia only:
Our goods come with guarantees that cannot be excluded under the Australian Consumer Law. You are entitled to a replacement or refund for a major failure and compensation for any other reasonably foreseeable loss or damage. You are also entitled to have the goods repaired or replaced if the goods fail to be of acceptable quality and the failure does not amount to a major failure.
Please keep this document for your reference should you wish to make a claim under the guarantee.
DESCRIPCIÓN


- IMPORTANT SAFEGUARDS
- WHEN USING ELECTRICAL APPLIANCES, BASIC SAFETY PRECAUTIONS SHOULD ALWAYS BE FOLLOWED TO REDUCE THE RISK OF FIRE, ELECTRIC SHOCK, AND/OR INJURY TO PERSONS INCLUDING THE FOLLOWING
- SAVE THESE INSTRUCTIONS
- CAUTION
- SHORTCORDINSTRUCTIONS
- POLARIZATION INSTRUCTIONS
- ADDITIONAL SAFETY
- INSTRUCTIONS
- USEFUL INFORMATION AND TIPS
- USING THE MACHINE FOR THE FIRST TIME
- BREWING COFFEE
- SETTING THE CLOCK
- SETTING THE AUTO-ON FUNCTION
- SETTING THE KEEP WARM TIME
- SETTING THE COFFEE STRENGTH
- SETTINGS FOR SMALL BATCHES OF COFFEE
- MUTE/UNMUTE THE MACHINE
- CLEANING AND MAINTENANCE
- DESCALING THE APPLIANCE
- THINK OF THE ENVIRONMENT
- KRUPS INTERNATIONAL LIMITED GUARANTEE
- WWW.KRUPS.COM
- THE GUARANTEE
- CONDITIONS & EXCLUSIONS
- CONSUMER STATUTORY RIGHTS
- FOR AUSTRALIA ONLY
- DESCRIPCIÓN
Brand : KRUPS
Model : Essential EC771
Category : Coffee maker