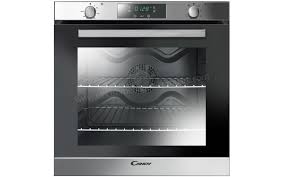
FXP649X & FXP 649 X - Built-in oven CANDY - Free user manual and instructions
Find the device manual for free FXP649X & FXP 649 X CANDY in PDF.


User questions about FXP649X & FXP 649 X CANDY
0 question about this device. Answer the ones you know or ask your own.
Ask a new question about this device
Download the instructions for your Built-in oven in PDF format for free! Find your manual FXP649X & FXP 649 X - CANDY and take your electronic device back in hand. On this page are published all the documents necessary for the use of your device. FXP649X & FXP 649 X by CANDY.
USER MANUAL FXP649X & FXP 649 X CANDY
Safety Instructions 04
- General warnings 05
1.1 Declaration of compliance 05
1.2 Safety hints 05
1.3 Recommendations 05
1.4 Installation 05
1.5 Electrical connection 05 - Accessories 06
2.1 Oven equipment 06
2.2 Rotisserie 06
2.3 LED VISION 06 - Cleaning the oven 06
- Service centre 07
5.Description of the display 08
5.1 Before using the oven for the first time 09
5.2 How to use the oven 09
5.3 The programmedization 10
5.4 Using the end of cooking timer 10
5.5 Cooking tips 10
5.6 Adjusting the display contrast 10
5.7 Use Of Touch Control Clock Programmer 11
5.8 Setting The Correct Time 11 - Pyrolytic cycle 12
7.Child safety 12
INDICE
IT
WARNING: The appliance and its accessible parts become hot during use. Care should be taken to avoid touching heating elements.
- Children under 8 Year of age must be kept away from the appliance unless they are continuously supervised.
- This appliance can be used by children aged from 8 years and above and persons with reduced physical, sensory or mental capabilities or lack of experience and knowledge if they have been given supervision or instruction concerning use of the appliance in a safe way and understand the hazards involved.
- Children must not play with the appliance.
- Cleaning and user maintenance shall not be made by children without supervision.
- During use the appliance becomes hot. Care should be taken to avoid touching heating elements inside the oven.
WARNING: Accessible parts may become hot during use. Young children must be kept away.
- Do not use harsh abrasive cleaners or sharp metal scrapers to clean the oven door glass since they can scratch the surface, which may result in shattering of the glass.
- The oven must be switched off before removing the guard, after cleaning, the guard must be replaced in accordance with the instructions.
- Only use the temperature probe recommended for this oven.
- Do not use a steam cleaner for cleaning operations.
- WARNING: Avoid possibility of electric shock - ensure the appliance is switched off before replacing the lamp.
- The means for disconnection must be incorporated in the fixed wiring in accordance with the wiring rules.
- The instructions state the type of cord to be used, taking into account the temperature of the rear surface of the appliance.
- If the supply cord is damaged, it must be replaced by a special cord or assembly available from the manufacturer or its service agent.
- CAUTION: In order to avoid a hazard due to inadvertent resetting of the thermal cutout, this appliance must not be supplied through an external switching device, such as a timer, or connected to a circuit that is regularly switched on and off by the utility.
- CAUTION: Accessible parts may be hot when the grill is in use. Young children must be kept away.
- Excess spillage must be removed before cleaning.
- During self-cleaning pyrolytic operation the surfaces may get hotter than usual and children MUST be kept away.
1. GENERAL WARNINGS
Read the instructions carefully to make the most of your oven. We recommend you keep the instructions for installation and use for later reference, and before installing the oven, note its serial number in case you need to get help from the after-sales service.
When you have unpacked the oven, make sure that it has not been damaged in any way. If you have any doubts at all, do not to use it. Contact a professionally qualified person. Keep packing materials such as plastic bags, polystyrene, or nails out of the reach of children because they are dangerous to children.
The company shall not be liable if the instructions provided in this document are not complied with.
I NOTE: Functions, properties and accessories of ovens which are mentioned in this manual, can be change depending on oven models.
1.1 DECLARATION OF COMPLIANCE
The parts of this appliance that may come into contact with foodstuffs comply with the provisions of EEC Directive 89/109.Appliance
CE complies with European Directives 2006/95/EC and 2004/108/EC, and subsequent amendments. When you have unpacked the oven, make sure that it has not been damaged in any way. If you have any doubts at all, do not use it: contact a professionally qualified person.
Keep packing materials such as plastic bags, polystyrene, or nails out of the reach of children because they are dangerous to children.
1.2 SAFETY HINTS
- The oven must be used only for the purpose for which it was designed. It must only be used for cooking food. Any other use, e.g. as a form of heating, is an improper use of the oven and is therefore dangerous.
- The manufacturers cannot be held responsible for any damage caused by improper, incorrect or unreasonable use.
When using any electrical appliance you must follow a few basic rules. - Do not pull on the power cable to remove the plug from the socket.
- Do not touch the oven with wet or damp hands or feet.
- Do not use the oven unless you are wearing something on your feet.
- It is not generally a good idea to use adapters, multiple sockets for several plugs or cable extensions.
- If the oven breaks down or develops a fault switch it off at the mains and do not touch it.
- If the cable is damaged it must be replaced promptly.
When replacing the cable, follow these instructions.
Remove the power cable and replace it with one of the H05VV-F type. The cable must be able to bear the electrical current required by the oven.Cable replacement must be carried out by properly qualified technicians.
The earthing cable (yellow-green) must be 10 ~mm longer than the power cable.
Use only an approved service centre for repairs and ensure that only original parts are used. If the above instructions are not adhered to the manufacturers cannot guarantee the safety of the oven. - The oven you have just acquired has the described technical characteristics and you must not make any modifications to it.
- Do not store flammable products in the oven; they can catch fire if the oven comes on accidentally.
- Do not press on and do not let children sit on the oven door.
- Use kitchen oven gloves, when putting into or removing a dish from the oven.
1.3 RECOMMENDATIONS
- After each use of the oven, a minimum of cleaning will help keep the oven perfectly clean.
- Do not line the oven walls with aluminium foil or single-use protection available from stores. Aluminium foil or any other protection, in direct contact with the hot enamel, risks melting and deteriorating the enamel of the insides.
- In order to prevent excessive dirtying of your oven and the resulting strong smokey smells, we recommend not using the oven at very high temperature. It is better to extend the cooking time and lower the temperature a little.
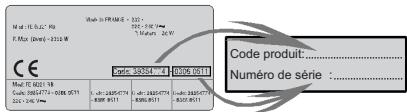
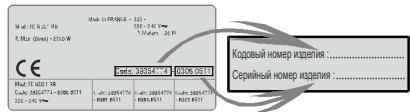
Identification plate
In addition to the
accessories supplied with the oven, we advise you only use dishes and baking moulds resistant
to very high Temperatures.
1.4 INSTALLATION
The manufacturers have no obligation to carry this out. If the assistance of the manufacturer is required to rectify faults arising from incorrect installation, this assistance is not covered by the guarantee. The installation instructions for professionally qualified personnel must be followed. Incorrect installation may cause harm or injury to people, animals or belongings. The manufacturer cannot be held responsible for such harm or injury.
The kitchen unit in which the oven is to be fitted must be made of material resistant to temperatures of at least 70^ .
The oven can be located high in a column or under a worktop. Before fixing, you must ensure good ventilation in the oven space to allow proper circulation of the fresh air required for cooling and protecting the internal parts. Make the openings specified on last page according to the type of fitting.
1.5 ELECTRICAL CONNECTION
THE ELECTRICAL CONNECTION SHOULD BE CARRIED OUT BY AN APPROVED CONTRACTOR OR TECHNICIAN WITH SIMILAR QUALIFICATIONS.
The installation receiving the appliance must comply with the standard in force in the installation country.
The manufacturer does not accept any responsibility if this provision is not complied with.
Connection to the network must be by earthed socket outlet, or by means of a multipole circuit-breaker, in compliance with the installation country.
The installation must be protected by suitable fuses, and have wires with a large enough cross-section to supply the oven normally.
CONNECTION:
The oven is fitted with a power lead for connecting exclusively to a voltage of 220-240 V AC across the phases or across phase and neutral.
Connection must be carried out having first checked:
-the supply voltage indicated on the meter,
The lead protection wire (green/yellow) connected to the earth terminal of the oven must be connected to the earth terminal of the installation.
Caution:
- Have the earth continuity of the installation checked by an electrician before making the connection.
- The manufacturer will not be liable for any incident, or the possible consequences that may arise from the use of the oven not earthed, or connected to an earth with defective continuity.
NB: Do not forget that the oven may require after-sales service.
Also, locate the socket outlet so that the oven can be connected once it is removed from its space.
Power supply cable: If the power supply cable has to be changed, please have this done by the after-sales service or by someone with similar qualifications.
2.1 OVEN EQUIPMENT
It is necessary to do an initial cleaning of the equipment before the first use of each of them. Wash them with a sponge. Rinse and dry off.
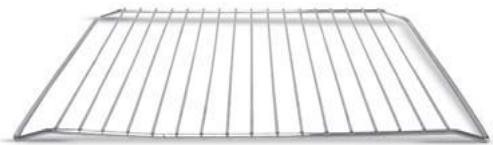
The shelf can take moulds and dishes.
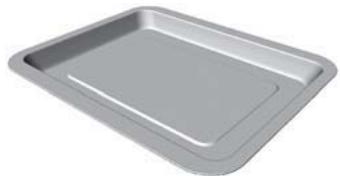
The drip tray catches the juices from grilled foods.
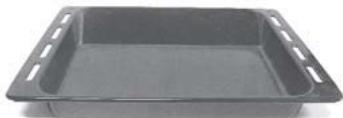
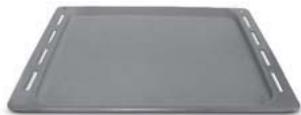
Never use he drip tray as a roasting tray as fat deposits can be quickly spread throughout the oven, which produces excess smoke.
Never place the drip tray directly on the oven bottom.
The pizza stone for a crisper pizza equipped according to the model with its stand and the pizza roller.
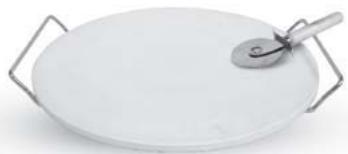
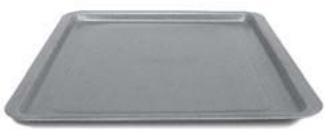
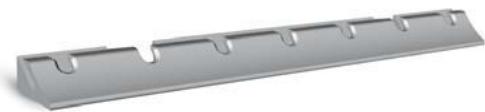
The pastry tray must be placed on the shelf. It is for cooking small pastries like choux, biscuits, meringues, etc...
Never place the pastry tray directly on the oven bottom.
2.2 ROTISSERIE
No pre-heating is required for rotisserie cooking.
Cooking with the door closed.
The energy consumption is 90 - 95% less than traditional system.
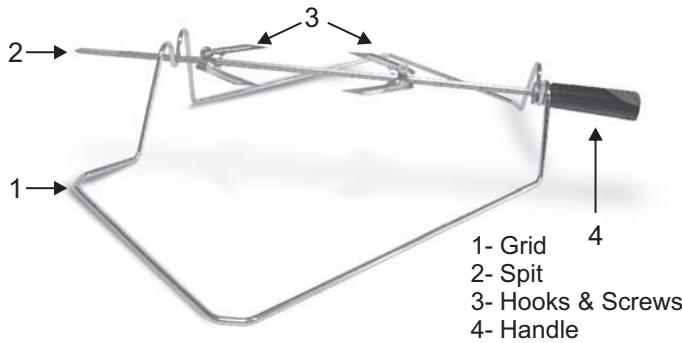
HOW TO USE TURNSPIT
- Unscrew the hooks
- Put the spit into the meat
- Fix the meat with the hooks
- Tighten the screws
- Insert the spit into the motor hole
- The handle
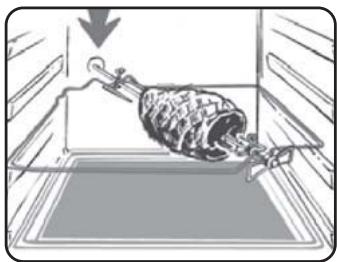
When the oven is in use, any unused accessories should be removed from the oven.
2.3 LED VISION
Is an illumination system which replaces the traditional « light bulb ». 14 LED (for non-pyrolitic versions) or 10 High Power LED (for pyrolitic versions) lights are integrated within the door. These produce white high quality illumination which enables to view the inside of the oven with clarity without any shadows on all the shelves.
Advantages :
This system, besides providing excellent illumination inside the oven, lasts longer than the traditional light bulb its easier and to maintain and most of all saves energy.
-Optimum view
-Long life illumination
- Very low energy consumption, -95% in comparison with the traditional illumination High.
3. CLEANING THE OVEN
- Wait for the oven to cool down before doing any cleaning by hand.
- Never clean your oven with abrasive cleaners, wire wool or sharp objects, or the enamel may be damaged beyond repair.
- Only use soapy water or bleach (ammonia) cleaners.
- Never line the oven sides with aluminium foil.
GLASS PARTS
We recommend you wipe clean the glass door with absorbent kitchen paper every time you use the oven. If the spattering is heavy, then you can clean with a well squeezed sponge and detergent, and rinse.
Do not use harsh abrasive cleaners or sharp metal scrapers to clean the oven door glass since they can scratch the surface, which may result in shattering of the glass.
OVENDOOR SEAL
If this gets dirty, clean the oven seal with a slightly damp sponge.
ACCESSORIES
Clean them with a sponge soaked in soapy water. Rinse with clean water and dry off. Avoid abrasive cleaners.
DRIP TRAY
After grilling, remove the drip tray from the oven. Take care to pour the warm grease into a container. Wash and rinse the drip tray in hot water with a sponge soaked in washing up liquid.
If residues remain attached, soak them off in water and detergent.
It can also go in a dishwasher or be cleaned with a commercial oven cleaner.
Never place a soiled drip tray in the oven.
OVENLIGHTING
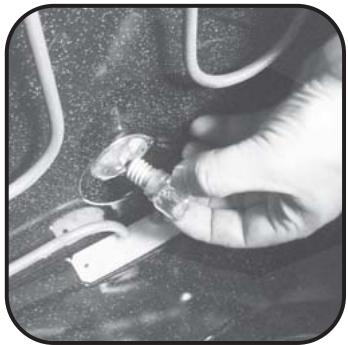
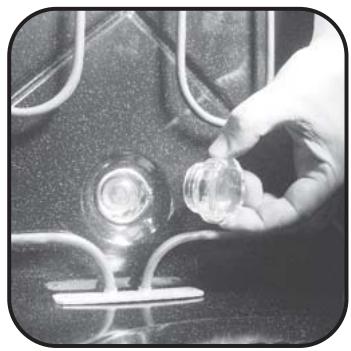
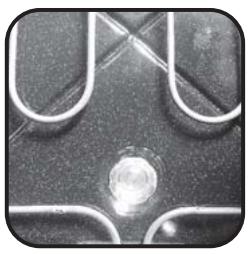
Disconnect the power supply from the oven before cleaning or replacing the lamp.
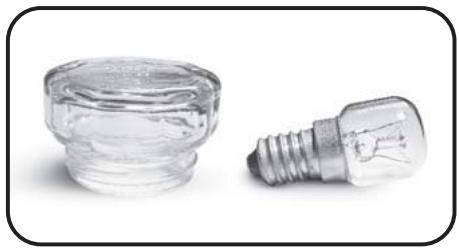
The bulb and its cover are made of material resistant to high temperatures.
Bulb characteristics:
230 V AC - 25W- E 14 base Temperature 300^ to change a defective bulb, just:
- Unscrew the glass cover,
-Unscrew the bulb. - Replace it with the same type: see characteristics above,
- After replacing the defective bulb, screw back the protective glass cover.
4. SERVICE CENTRE
Before calling the Service Centre.
If the oven is not working, we recommend that:
- Check that, if the oven is properly plugged into the power supply.
If the cause of the fault cannot be detected:
- Disconnect the oven from the mains, do not touch the oven and call the after sales service.
Before calling the Service Centre remember to make a note of the serial number on the serial number specifications plate.
The oven is supplied with a guarantee certificate that ensures that it will be repaired free of charge by the Service Centre whilst under guarantee.
This appliance is marked according to the European directive 2002/96/EC on Waste Electrical and Electronic Equipment (WEEE).
By ensuring this product is disposed of correctly, you will help prevent potential negative consequences for the environment and human health, which could otherwise be caused by inappropriate waste handling of this product.
The symbol on the product indicates that this product may not be treated as household waste.
Instead it shall be handed over to the applicable collection point for the recycling of electrical and electronic equipment Disposal must be carried out in accordance with local environmental regulations for waste disposal.
For more detailed information about treatment, recovery and recycling of this product, please contact your local city office, your household waste disposal service or the shop where you purchased the product.
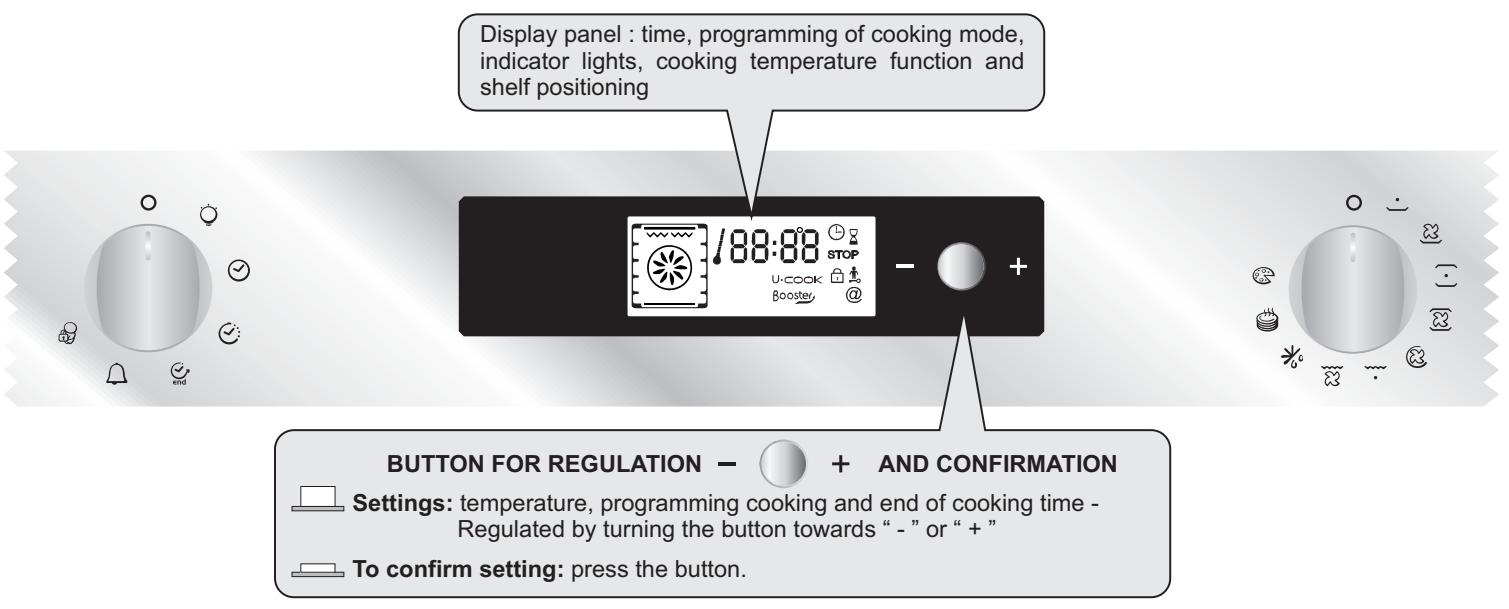
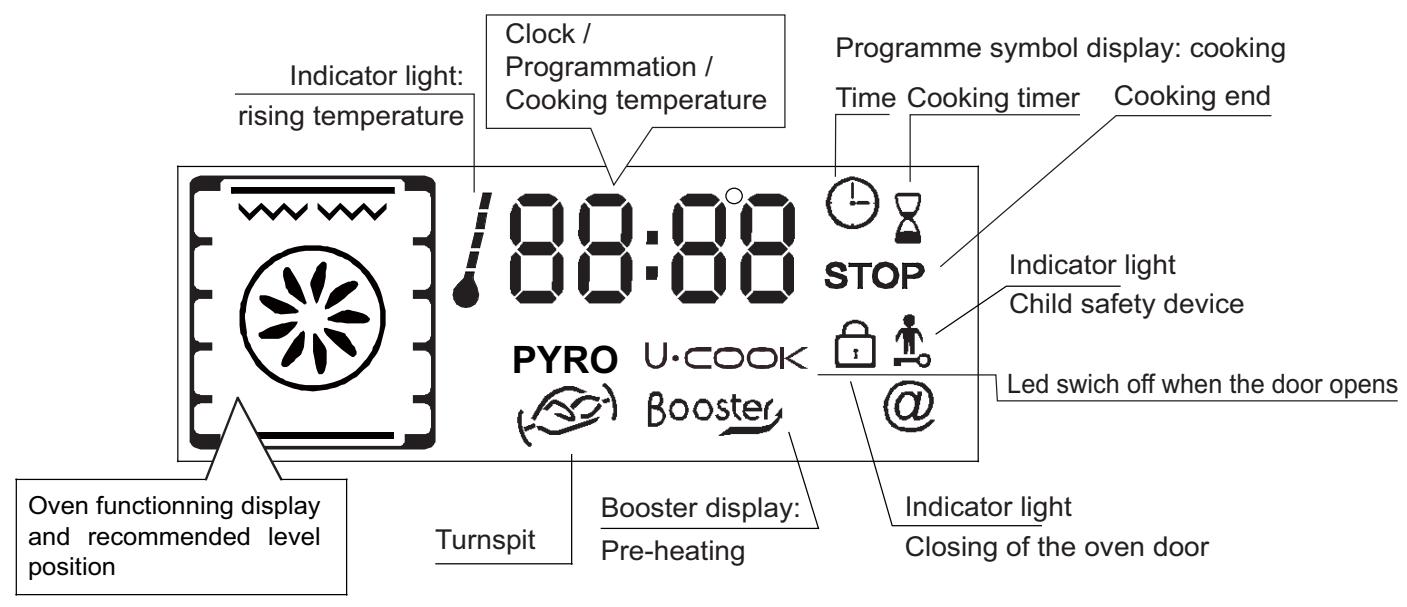
5. DESCRIPTION OF THE DISPLAY


5.1 BEFORE USING THE OVEN FOR THE FIRST TIME
PRELIMINARY CLEANING
-Clean the oven before using for the first time:
-Wipe over external surfaces with a damp soft cloth.
-Wash all accessories and wipe inside the oven with a solution of hot water and washing up liquid.
-Set the empty oven to the maximum temperature and leave on for about 1 hour, this will remove any lingering smells of newness. Ensure that the room is well ventilated while this is being done.
- THINGS TO REMEMBER
Confirmation of operation on timer
Modification must be confirmed by pressing the button.
Stopping the oven:
This may be necessary if you have input an incorrect instruction.
To stop the oven .... turn back the function selector knob to the Stop Position.
Child safety device:
To lock the oven controls, select the child safety device. Refer to the section entitled "Programming - The child safety device".
The cooling fan:
This protects the control panel and electronics from heat damage.
It begins and then stops automatically even when the oven is switched off.
Oven lighting:
By turning to the light symbol, you can switch on the oven light when it is not in use.
When the oven is in use, the light stays on during all of the oven functions and when the door is opened.
CLOCK SETTING
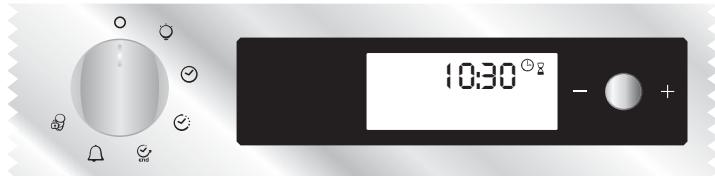
When the oven is connected to the electricity supply or after a long power cut, the clock must be re-set.
To set the clock:
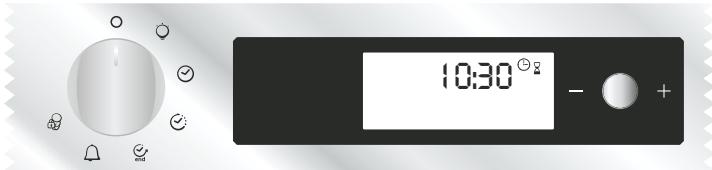
1 - Turn the control knob to the "Clock" symbol :
2 - Set the clock with the central button by turning to the “-” or “+”,
3 - Turn back the control knob to the STOP position.
5.2 HOW TO USE THE OVEN
- THE MANUAL MODE
The cooking methods suggested in manual mode are set out in the table below. A temperature is also suggested for each cooking method. This can be modified within a pre-determined range.
| Function Mode according to the oven model | Pre-set Temperature °C | Pre-determined Temperature °C | Function Booster* |
| Bottom + Fan | 210 | 50-220 | Booster |
| Bottom | 160 | 50-220 | Booster |
| Bottom + Top | 220 | 50-240 | |
| Bottom + Top + Fan | 210 | 50-230 | |
| Circular Heating Element + Fan | 180 | 50-230 | |
| Grill | L2 | L1-L3 | |
| Grill + Fan | 190 | 50-200 | Booster |
| Grill + Turnspit + Fan | 240 | 180-240 | Booster |
| Defrost | 40 | No | |
| Keep Warm | 60 | No | |
| Pizza ** | 230 | 230 | |
| Pyro ** | Pyro | ECO: 425 / 65min SUP: 425 / 1h 30min | |
| *Booster: rapid temperature raised | |||
| **Oven must have this function | |||
1- Turn the oven selector knob to the function required to the cooking.
The heating elements in operation for the selected cooking method are displayed.
2- The appropriate temperature according to the cooking method selected is displayed. It can be modified within a pre-determined range - see the table above.
To modify the temperature setting, turn the central button and on the timer confirm the setting by pressing the same button.
... the temperature display is fixed but can be modified during the cooking cycle.
The oven will start cooking and will start to heat up.
The indicator light flashes until the selected temperature has been reached. An audible signal sounds at the end of this operation and the indicator light becomes fixed.
3- A cooking time and an end of cooking time can be programmed by turning the programme selector knob to "cooking time" or "end of cooking time".
The "cooking time" or "end of cooking time" display starts flashing. Using the central button, modify the settings as required and on the timer confirm.
When you have done this, do not forget to turn the programme selector knob back to "stop position" to confirm the new setting.
For more details about programming, refer to the chapter 5.3 entitled PROGRAMMES.
4- At the end of the cooking cycle, turn the function selector knob back to "stop position".
The indicator flashes again, it will remain also turned on after having extinguished the oven and it will extinguish when the inside temperature of the oven is sufficiently low.
COOKING MODE
All cooking should be carried out with the door closed.
3
BOTTOM + FAN - The combination of the bottom heating element and fan is ideal for fruit flans, tarts, quiches and pastries. It serves food from becoming too dry and encourages bread dough to solidify. Place the shelf in the bottom position in the oven.
#
BOTTOM - Using the lower element. Ideal for cooking all try based dishes. Use this for flans, quiches, tarts, pâté and any king that needs more heat from below.
#
BOTTOM + TOP - Both top and bottom heating elements are use. This method is ideal for all traditional roasting and baking. When, taking red meat, roast beef, leg of lamb, game, bread or foil wrapped in rolls.
3
BOTTOM + TOP + FAN - Both top and bottom heating elements are used in conjunction with the fan, which circulates hot air throughout the oven. We recommend this method for poultry, pastries, and vegetables. By using this method better heat penetration is achieved and cooking and preheating times are also reduced. The fan, taking option allows you to cook different foods together at different locations in the oven all at the same time, providing even heat distribution but without the risk of mingling tastes and smells. When taking different foods at the same time allow a further 10 minutes.
#
CIRCULAR HEATING ELEMENT + FAN - Air that has been heated is blown by the fan onto the different levels. It is ideal for cooking different types of food at the same time (e.g. Meet and fish) without losing tastes and smell. It cooks very gently and is ideal for sponges, pastries, etc.
#
GRILL - Using the top heating element. Success is guaranteed in mixed grills, kebabs and gratin dishes. The grill should be pre-heated at high temperature for 5 minutes. White meats should always be placed at some distance from the grill element, the cooking time is not only longer but the meat will be more succulent. Red meat and fish, which can be placed directly onto the shelf with the drip tray placed on the death on lower shelf position.
#
GRILL + FAN - The top heating element is used in conjunction with the fan which circulates the hot air around the oven. Pre heating is recommended for red meats but is not necessary for white meats. Heating is ideal for cooking thicker food items such as pork or poultry. It is said to be grilled should be placed directly at the centre of the middle of half.
By sliding the drip tray underneath the shelf it will ensure that any juices are collected. For best results always make sure that the food is not too close to the grill element and turn the food over half way through the cooking time.
X
GRILL + TURNSPIT + FAN - The advantage of using the top element at the same time as the fan and rotisserie is that the food is only cooked, preventing it from becoming dry and tasteless. The sserie is programmed to continue rotating for approximately five outes after cooking, making full use of the residual oven heat. No preting is required for rotisserie cooking.
%
DEFROST - When the dial is set to this position. The fanulates hot air around the frozen food so that it defrosts in a fewutes without the protein content of the food being changed or altered. temperature is preset in 40^ constant, no regulation is possible.
#
KEEP WARM - This is recommended to reheat precooked stuff, positioning the shelf on the second level from top, or to defrost and pizza or pastry by positioning the shelf on the lower level.
temperature is preset in 60^ constant, no regulation is possible.
#
PIZZA - With this function hot air circulated in the oven to cure perfect result for dishes such as pizza or cake.
#
PYRO - The oven takes care of the entire inside oven cleaning, no choices are possible ECO, SUPER
5.3 PROGRAMMES
Cooking time programming
End of cooking time programming
Timer in operation
Child safety device operational
Locking oven door
THE TIMER:
The timer works independently of the oven and has no effect on the heating elements. It is simply a reminder.
- Turn the knob to the Timer position. The Timer symbol will appear. The digits 00:00 will appear on the display.
- The minutes will then flash, turn the central button to the required number of minutes and confirm by pressing the same button.
- The hours will flash, turn the central button to the required number of hours and confirm by pressing the same button.
- Turn the knob back to the Stop position.
When the time is up, the cooking time will disappear. An audible signal will sound for 15 seconds and the Timer display will flash (to stop it before the 15 seconds are up, just press the central button).
PROGRAMMING THE COOKING TIME:
Various recipes are pre-programmed with a cooking time. In Manual mode, Defrosting or Keep warm Mode can be pre-set, if required.
- Turn the knob to the Cooking time position. The Cooking time symbol will appear. A pre-programmed cooking time for the various recipes will appear, or 00:00 for other functions of the oven.
- With the minutes flashing, turn the central button to the required number of minutes confirm by pressing the same button.
- With the hours flashing, turn the central button to the required number of hours and confirm by pressing the same button.
- Turn the programme selector knob back to the Stop position to confirm the new cooking time.
When the time is up, the cooking time will disappear from the display. An audible signal will sound for 15 seconds and the Cooking time and STOP symbols will flash.
- Turn the programme function knob back to Stop. If you do not do this, the Cooking time and STOP symbols will continue flashing.
PROGRAMMING THE END OF COOKING TIME:
Various recipes are pre-programmed with a cooking time and therefore with an end of cooking time. In Manual Mode, Defrosting or Keep warm mode can be pre-set, if required.
- Turn the knob to the End of cooking position. The STOP symbol will appear. A pre-programmed end of cooking time for the various recipes will appear, or 00:00 for other oven functions or the time of day will be shown.
- Turn the programme selector knob to confirm the end time.
- The minutes will flash. Turn the central button to indicate the required number of minutes, and confirm your choice by pressing the same button.
- The hours will then flash. Turn the central button to indicate the required number of hours, and confirm your choice by pressing the same button.
NB: With a delayed start, the end of programme time will appear on the display with the "Cooking time" and "STOP" symbols, and only the function Recipe mode of the oven remains.
The oven automatically calculates the start time (end time minus cooking time).
At the end of the cycle the oven switches itself off automatically. For 15 seconds, an audible signal lets you know that the cycle has ended and the "Cooking time" and STOP symbols will flash.
- Turn the function selector knob to Stop. Unless you do this, the symbols will continue flashing.
- This function is typically used with "cooking duration" function.
For example if the dish has to be cooked for 45 minutes and needs to be ready by 12:30;
-
select the required function
-
set the cooking duration time to 45 minutes
-
set the end of cooking time to 12:30.
Cooking will start automatically at 11:45 (12:30 minus 45 mins) and will continue until the pre-set end-of
cooking-time, when the oven will switch itself off automatically.
WARNING.
If the END of cooking is selected without setting the length of cooking time, the oven will start cooking immediately and it will stop at the END of cooking time set.
5.4 USING THE END OF COOKING TIMER
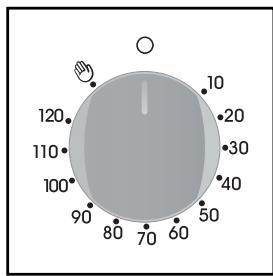
This control enables to set the desired cooking time (max. 120 min.) the oven will automatically switch off at the end of the set time.
The timer will count down from the set time return to the O position and switch off automatically.
For normal use of oven set the timer to the position.
To set the oven ensure the timer is not on the O position.
5.5 COOKING TIPS
It is better not to salt meats until after cooking as salt encourages the meat to spatter fat. This will dirty the oven and make a lot of smoke.
Joints of white meat, pork, veal, lamb and fish can be put into the oven cold. The cooking time is longer than in a preheated oven, but it cooks through to the centre better as the heat has more time to penetrate the joint.
Correct preheating is the basis of successful red meat cookery.
GRILLS
- Before loading the grill:
Remove the meat from the refrigerator a few hours before grilling. Lay it on several layers of kitchen paper. This improves seizing, making it tastier and avoids it staying cold at the centre.
Add pepper and spices to the meat before grilling, but add any salt after cooking. This way it will seize better and stay juicy. Baste all the food to be cooked with a little oil. This is best done with a wide flat blasting brush. Then sprinkle with more pepper and herbs (thyme, etc.).
- During cooking:
Never pierce the food during cooking even when you turn it. This lets the juice out and it becomes dry.
BAKING
Avoid using shiny tins, they reflect the heat and can spoil your cakes. If your cakes brown too quickly, cover them with greaseproof paper or aluminium foil.
Caution: The correct way to use foil is with the shiny side in towards the cake. If not the heat is reflected by the shiny surface and does not penetrate the food.
Avoid opening the door during the first 20 to 25 minutes of cooking:
Soufflés, brioches, sponge cakes, etc. will tend to fall. You can check if cakes are done by pricking the centre with a knife blade or metal knitting needle. If the blade comes out nice and dry, your cake is ready and you can stop cooking. If the blade comes out moist or with bits of cake attached, continue baking but slightly lower the thermostat so that it is finished off without burning.
5.6 ADJUSTING THE DISPLAY CONTRAST
The display contrast can be adjusted at any time.
The default setting is "C5". To adjust the setting, carry out the following:
- Turn the programme selector to "Light" and the function selector to "0". Press in the central key for 3 seconds and "CX" will appear on the display (where X = the contrast level).
Turn the central key to adjust the contrast setting. The settings go from 1 to 9. Confirm the new setting by pressing the central key for 3 seconds.
5.7 USE OF TOUCH CONTROL CLOCK PROGRAMMER
| FUNCTION | HOW TO ACTIVATE IT | HOWTO SWITCH ITOFF | WHAT IT DOES | WHAT IT IS FOR |
| MINUTE MINDER | •Push the central button 1 times •Press the buttons "-" "+" to set the required time •Release all the buttons | •When the set time as elapsed an audible alarm is activated (this alarm will stop on its own, however it can be stopped immediately by pressing the button) SELECT. | •Sounds an alarm at the end of the set time. •During the process, the display shows the remaining time. | •Allows to use the oven as alarm clock (could be activated either with operating the oven or with out operating the oven) |
| COOKING TIME | •Push the central button 2 times •Press the buttons "-" or "+" to set the lenght of cooking required •Release all buttons •Set the cooking function with the oven function selector | •When the time is elapsed the oven will switch off automatically. Should you wish to stop cooking earlier either turn the function selector to 0, or set time to 0:00 (SELECT and "-" "+" buttons) | •It allows to preset the cooking time required for the recipe chosen •To check how long is left to run press the SELECT button 2 Times. •To alter/change the preset time press SELECT and "-" "+" buttons | •Push any button to stop the signal. Push the central button to return to the clock function |
| END OF COOKING | •Push the central button 3 times •Press the buttons "-" "+" to set the time at which you wish the oven to switch off •Release the buttons •Set the cooking function with the oven function selector | •At the time set, the oven will switch off. To switch off manually, turn the oven function selector to position O. | •Enables you to set the end of cooking time •To check the preset time push the central button 3 times •To modify the preset time press buttons SELECT + "-" "+" | •This function is typically used with "cooking time" function. For example if the dish has to be cooked for 45 minutes and needs to be ready by 12:30, simply select the required function, set the cooking time to 45 minutes and the end of cooking time to 12:30. •At the end of the cooking set time, the oven will switch off automatically and an audible alarm will ring. •Cooking will start automatically at 11:45 (12:30 minus 45 mins) and will continue until the pre-set end-of-cooking-time, when the oven will switch itself off automatically. WARNING. If the END of cooking is selected without setting the length of cooking time, the oven will start cooking immediately and it will stop at the END of cooking time set. |
| KEY LOCK | •Child Lock function is activated by touching Set (+) for a minimum of 5 seconds. From this moment on all other function are locked and the display will flash STOP and preset time intermittently. | •Child Lock function is deactivated by touching touchpad Set (+) again for a minimum of 5 seconds. From this moment on all functions are selectable again. |
5.8 SETTING THE CORRECT TIME

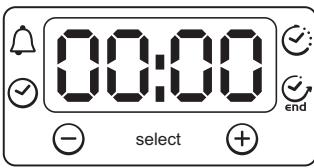
WARNING : the first operation to carry out after the oven has been installed or following the interruption of power supply (this is recognizable the display pulsating and showing 12:00) is setting the correct time. This is achieved as follows
-Push the central button 4 times
-Set time with"-"+" buttons.
- Release all buttons.
ATTENTION: The oven will only operate providing the clock is set.
6. PYROLYTIC CYCLE
**Oven must have this function
The oven is equipped with a pyrolyser cleaning system, which destroys food residues at high temperature. The operation is carried out automatically by means of the programmer. The resulting fumes are rendered "clean" by passing over a Pyrolyser which starts as soon as cooking begins. As very high temperatures are required by the Pyrolyser, the oven door is fitted with a safety lock.
The pyrolyser can be stopped at any time. The door cannot be opened until the safety lock is displayed.
NOTE : If a hob has been fitted above the oven, never use the gas burners or the electric hot-plates while the Pyrolyser is working, this will prevent the hob from overheating.
TWO PYROLYTIC CYCLE are pre-set.
. ECO PYROCLEAN : Cleans a moderately stained oven.Operates for a period of 65 minutes.
. SUPER PYROCLEAN : Cleans a heavily stained oven.Operates for a period of 90 minutes.
Never use commercially available cleaning products on a Pyrolytic oven!
Tip : Carrying out Pyrolytic cleaning immediately after cooking allows you to take advantage of residual heat, thus saving energy.
Before carrying out a Pyrolytic cycle :
- Remove all accessories from the oven : They cannot withstand the high temperatures and would be damaged by pyrolytic temperatures.
- Remove any large spillages or stains as it would take too long to destroy them. Also excessively large amounts of grease could ignite when subject to the very high temperatures of the Pyrolyticcycle.
- Close the oven door
excess spillage must be removed before cleaning
Using the pyrolytic cycle :
1- Turn the function selector knob to "Pyrolytic Mode". "PYRO" will appear on screen. ECO mode flashes.
Remember : ECO - cycle of 65 minutes - moderately stained oven
SUP - cycle of 90 minutes - heavily stained oven
2- By using the central button select the required Pyrolytic mode, according the degree of staining : ECO or SUP.
- Your choice is confirmed after 3 seconds...
The oven starts the pyrolytic cycle. The pyrolytic mode selected flashes and the "time" and "stop" indicator lights will appear.
During the pyrolytic cycle, the locking oven door appears, it indicates that the door is locked. The cooling fan will operate.
The indicator light flashes until the temperature required is not reached and then it becomes fixed.
- The start of the pyrolytic cycle can be delayed by selecting an end of time. Turn the programmation control knob to the end of time and set the end of time required.
- During Sel-cleaning pyrolytic operation the surfaces may get hotter than usual and children should be kept away.
At the end of the pyrolytic cycle the oven will automatically switch off.
For 15 seconds, an audible signal lets you know that the cycle has ended and the "time" and "Stop" indicator lights will flash.
- Turn the function knob to stop. Unless you do this, the symbols will continue flashing. The symbol "Pyro" disappears on the Timer, the pyrolytic mode. The oven door will remain locked until the temperature is high. So, as the locking oven door is light, the oven can not be opened.
The cooling fan does not switch itself off until the temperature of the oven components is reasonable.
At the end of the cycle, the indicator flashes again, it will remain also turned on after having extinguished the oven and it will extinguish when the inside temperature of the oven is sufficiently low.
Pyrolysis leaves a white residue on the oven walls. Wait for the oven to cool completely then clean the inside of the oven with a damp sponge to wipe off the residue.
7. CHILD SAFETY
This function is essential, especially when children are around. It prevents children from switching the oven on or altering the preset programmes.
This safety system locks the oven control panel while it is operating.
There are two levels of safety :
LEVEL 1: Locking selector control knob and the central button.
- To activate : Turn the programmation control knob to child safety.
- Action : The control knobs are inactive.
- To deactivate : Turn the programmation control knob to 0 .
LEVEL 2: Locking function selector knobs
- To activate : Turn the function selector knob to child safety and keep the central button pressed in for 3 seconds.
Action : All the controls are inactive.
- To dactivate : the same procedure as for activating. Turn the function selector knob to child safety and keep the central button Pressed in for 3 seconds.
*Note : In all cases, for reasons of safety, even when the controls are locked, the oven can be switched off by turning the selector knob to 0.
PYRO - The oven takes care of the entire inside oven cleaning
- Two choices are possible ECO, SUPER
5.3 PROGRAMMAZIONE
2. PRO/EXP'R TECHNOLOGIE
2.1 VYBAVENI TROUBY
1.2 MEPbI INPEAOCTOPOXHOCTN
-ДуховkadoJIXha NcNoIb3ObaTbCToJbKO nO ee npramomy Ha3NaueHnIO, ToEcTb,ToJbKO dJa npriTOBJIeHnI Niu. JIObIe DpyrIe npImeHnI dyXOBKn, HapPIMep, NcNoJIb3ObaHnE ee dIy obOrpeBa NOMEseHnI, 3aPpeUaOTcR, TAK KAK OHN YBJIaOTcR ONaChbIMN.
-ПюиЗБоДиТь He HeceT OTBeTCTBeHHocTb 3a KaKne-JIb60 NOBpeXdEHn, Bbl3BaHHbIe HENpaBUNJbHbIM NcPOnJb3OBaHHeM dYxOBKn nII NbepeXhblm ObaJIeHNEM cHei.
Pn nCnOJb3OBAHm 3NeKTpOpi6OpOB CneJyET co6IHOaTb CneJyUoJIe OCHOBHbI npaBnIa TexHNI 6e3OnaChOCTn:
Pn n3BneHm BnKn Ka6eI nHTaHn I3 3NeKtpuecko po3etkn cnUdyet depKaTbCra 3a BnKy, a He 3a cam Ka6eIb.
He npikacaiTeCb K dyXOBKe MOKpbIMN JIN BnaJHbIMN pykamn HOrAMN.
He noIb3yItebc dyXOBKO,ecnHa BaInx Horax HET o6yBN.
He noIb3yItecb nepexoHnKamn, troHnKaMn n/nnuDInHHTeBhIMn shHypamn.
B clyuae noBpeKdEnH yXOBKn B pe3yIbTaTe ee naDeHn IIN NO dpYrO npUHNHe, BbIKJIOUHTe DXYOBKY, OTCOeDInHnTe Ka6JIb NITaHn O T 3JIeKTPOcETn H He DoTpaRNaBaiTecb Do DXYOBKn.
Bcnyae nobpejdehenka6eI nHTAHn erO Heo6xOIMo 3aMeHnTb DOJKNbIM o6pa3OM.
OTcoeHNHtKe Ka6eIb n 3aMeHnTe eTo HObIIM Ka6eJIem TIna H05RR
F, H05VVF, nnn H05V2V2-F. Ka6eIb dOJxKeH IMeTb DoCTaTOHyIO Harpy3OCHyIO cNoOC6HOcTb, YTO6bl npOnyCKaTb TOK, NOTpe6JIaEmbI yXOBKOI.
3aMeHa Ka6eIa D0JXHa BbIOnHЯTbCg KBaJIInΦnIupoBaHHbIM CneuaJIInCTOM.
ПобODЗa3eMненя(keJTO-3eJIeHbI)ДОЛжEN 6blt ha 10 MM dInnHee OCTaIbHbIX npOBoDOb Ka6eNIA.
Дя Bыноленя ремонт польтугсь услгам Толковутberжden Horo cepвс Horo uehtpa,и пocneinte 3a TeM,yTo6blncnoIb3OBaHnCb TOnbko Фирмehьie 3anachbie qactn.Ппнecobюдени ппвedeEHbIX Bblse Tpe6OBaHn Пpo3BODHTel HeМожет rapaHTnpOBaT b6ezonacHOCTb dYxOBKn.
-He n3mehnTe XapakTepncTNk DuyxOBKn PyTeM BBeDeHnB ee KOHCTpyKcIuO KaKx-JIbO MoDnΦnKaU.
-He xpaHnTe B dyXOBKe ropOHyMe MaTePnaJIbI, TaK KaK npi CnyaHOM BKJIIOUeHIn DyXOBKn OHN MOrY TBOCNJlAmEHNITbcra.
He pa3pewaIte DeTAM caNTbCra Ha DBepu y DyXOBKn IJIIN NOBnCaTb He Hei.
-ПризагузkeВдуховkyпициИиЗВлесениИЗ Heeпици ПользуITEcB3aцNTHBIMNперчтам.
1.3 PEKOMEHDAUIN
-После кадого Incрпьзовая духовки влллгайтесчку.
- He покрьави te bHytpeHHne NOBepxHOCtДуховки aHOMHnHeBOI
фыгои undpyIMN Ondopa3OBbIMN ynaKobOchbIMN MaTePnaJIaMn,
КOTOPbIe npOdaHTcB XO3ЯCTBeHHbIX Mara3INHax. AHIOMHnEBAJ
фыга Ипдуг罗 унakobOчы mATEpnaI npri KOHTAKTe C roряч
Змалрованнoor NOBepxHOCtBJ DyuXOBk MoKet paCPlaBntCBsI
ПОВpeДИТь bHyTpEHHIOЗмалрованHHIO NOBepxHOCtBJ dYxOBKn.
-Bo n36eKaHne Upe3MepHOrO 3aRpa3HeHnIaYXOBKn N BbIJeJIeHnIcNJIbHOrO DbIMa N 3aIaxOB He peKOMeHNyETcN CnOJIb3OBA TbDyXOBky C OueHb BlicOKoI TemnepaTpyo. LyuIe HemHoro yMeHbSHTb TEMnepaTpyu IyBeINuHTb BpEm aPNIroTOBJIeHnI pIuIi.
PacnoptnaTaa6nUyka
BdoonHeHne K NOCTaBJIeMbIM KOMNNEKTE
PnHnAdIeXHoCTaMn peKOMeHdyETcA NcIOb3OBaTb TOlbKO TepMOCTOkyo Nocydu N TepMOCTOkyne fOpMOChN dIy BIneKn.
1.4 YCTAHOBKA
OTBETCTBeHHOCb 3a yCTaHOBky DuyXOBKn HeceT NOIb3ObaTeNb. POni3BOdntEnb He o6ra3an BblONHryb UcTaHOBky 3neKtpoPnboOpa. Ecnn Notpe6yTeT NOMOuB POni3BODntEna DnA YcTpAnEHn HcNpApBHOCTe, Bbl3BaHbHx HnPaBnHbOH NcTaHOBKO, To 3a 3Ty pa60ty 6ydet BblCTabNeH Cuet, TAK KAK 3Ta pa60ta He BxOJNT B cpepy DeiCTBN TaPAHTIM.
CneuHaJIncT, BbIIOJHryUOUIy UcTaHOBky DuxOBKn, DoJIKeH COJIIOJaTb HInCTpyKlNi N OYCTAHOBKe. HenpabINbHaN yCTaHOBka MOKeT HaHEctn Bpe 3dOpOBbIO JIODei N KINBOTHbIX, a TAKKe PnIBeCTN K nopHe IMyIeCTBa. IpnI3BOIDNTb He HecET OTBeTCTBeHHOCTN 3a TaKne nOTepN.
MaTePnAbl, KOTOpbIMN OTDeNaHO NOMEseHne, B KOTOpOM yCTaHaBnIBaETcR dYxOBKa, DOJIKNbI BbIDepKINBaTb TempePaTy HnKe 70^
DyxoKa moKem ycmaHaBnueambc8 eepxHe yacmu cmouku unu npd pa6oeu noeepxHocmbio.
Ipeid Tem KAK 3akpenTb DxyOBky npOBepbTe, YTO B OTceKe, IDe yCTaHaBnBaETcra DxyOBKa, ObecneuBaETcH HOpMaIbHaar CnpKpyIaIyua Bo3dyxa; 3TO Heo6xOIMo dna OXJaXdEHH N DxyOBKn 3aIITbI ee DeTanei OT neperpeBa. CdenaIte OTBepCTn, Noka3aHbIe Ha nocJeDHe CTpaHnue daHnHO pyKOBOdCTBa, B COOTBETCTBm C TNIOM yCTaHOBKn.
1.5 ПОДКЛЮЧЕНЕ КЗLEКТPOCETN
IIOKJIIOUHNE K 3NEKTPOCETN IOJXHO BbIIOJHRTbcr COTPyDHNKOM YTBEPXDEHHO TCEPBNCHO TCEHTPA IIN CPEUNAJNCTOM, IMEIOUM COOTBETCTBYIOUYKBAINIΦIKALNIU.
IqdkJIOUeHne K3JIeKTPOCETn DOJXHO BbIIOJHrTbCBA COOTBETCTBm C DeJeCTByIOUzMMN 3JIeKTPOTEXHNUeCKMn IpaBUNaMn HOpMaMn.
ПОНЗВОДNTЕЛСHE HECET OTBETCTBEHHOCTN 3a NOВPEЖDEHЯ, BO3NHKUINe I3-3a TORO, YTO yCTaHOBKa 3JIeKTPoPnPbOpa He 6bla BbIIOJHeHa B COOTBETCTBnC NpabINaMn 3JIeKTPo6e3OnaCHOCTN.
DyXOBKa DOnJXHa NODKNKHOATbC K P03eTKe, CHa6KeHHo KOHTaKTOM 3a3emJIeHnI, IINI DOnJXHa NODKNKHOATbC Yepe3 MHorOONIOHChbI aBtOMaTHueCKN BblKJIuOHTeJIb, B COOTBETCTBnC C 3JIeKTPoTeXHnueCKMn IpaBnIaMn HOpMaMn, DeiCTByUOImn B cTpaHe, rIe BblOJHnEeTCraYCTaHOBKa 3JIeKTPoPnPb6opa.
Pn npoknueHm DyXOBKn k 3neKtpocetN DoJXhbl NcNoJb3ObaTbcr PnDxOJaIe npeoXpaHnteI IN npoboda doctaToHNO60JIbWoOr ceuHn.
IoiKIOUeyHNE:
2. TEXHOJIOΓNRA PRO/EXP'R
EcnBbI He MoXeTe cAmOCToTEnbHO onpeJeNtB npuHny HncnpaBHOCTn:
- OToeDInHnTe DuxOBky OT 3neKtpocEtN, He npKacaiTecb K Hei, n o6paTntEcB 3a NOMOsbIO B cepBnCbI YeHTp.
Ipeed Tem KAK N03BOHnTB B cepBnCHbI ueHTp 3aunHte cepnHbI Homep n3deJIny, yKa3aHHbI B erO naCnpTHoT a6nUKe.
EcnH He nCTek cPOK DeiCTBnra rapaHTn, yka3aHHbI B rapaHTnHOM TaIOHe, pemOH T3dJIInB CepBnCHom ceHTpe 6yTeT BblONHeH 6ecnHaTHo.

Данны举动 БаоТВETCTBиС ТрбоваяМИ, ИЗЛожЕНБIMИВ ДиpeКтИBE 2002/96/EC OTHOCITIELHOrу TYNIN3aUNI БалкгчecKOrO И ДелкгpoHORO obopудовая (WEEE).
YTo6bIyCTaHOBnTb Yacbl:
1-YctahOBInTe pykny nporpamMnpoBaHna Ha cmbON"CaCbI》
2 - YctaHOBInTe YacbI C NOMOuBIO NOBOPoTa CEHTpaIbHOI KHOIN B HnPaBLeHIn "-" INI " -, IOITBePdInTe YCTaHOBky C NOMOuBIO HaxKaTna 3ToI pyKn.
3-YctahOBInTe pyUkI npOrpaMMIOBaHnB I NOLOXeHne CTOpI.
5.2 KAK NOJb3OBATbcra DUXOBKOJ
-PyHOHPEXIM
MeTodbl npnroTOBneHn nIu BpyHOM pexHmpeHncHeB I npedCTabNeHHo HNKe Ta6nue. JnKaJdOro MeToDa npnroTOBneHn nIu TAKKe yKa3aHa peKOMeHdyEma Temnepatypa.Temnpatypa MoKeT MeHrTbcra Byka3aHHom dInana3OHe Temnepatyp.
IcnoJIb3yETcNoCToHnHaTeMnepaTpya 60 ^ C , TempepaTpya He perynpyetc.

TINLLA-B3tOMpeKmEbDyXOBKePONCxOaNTuPKyIaIaI
B03dyxa, yTO o6ecneuBaET npeBOcXoHbIe pe3yNbTaTbI npnnpriNTOBLeHNNTaKnx6JIoukKaKnUcaunlkeKC.

UmeetcIBAPEXIMA NIPOJIINTNUECKOYUCTKN.
2. TEHNOLOGIJA PRO/EXP'R
2.1 OPREMA PEČICE (odvisno od modela)
2. PRO/EXP'R TEHNOLOGIJA (ZAVISNO O MODELU)
2.1 OPREMA PEÇNICE (ZAVISNO O MODELU)
1.1 DECLARATION DE CONFORMITE:
2.1 EQUIPMENT DU FOUR
Applying torque more than needed to fix the screws can close the ventilation channels on both sides. Please be sure that, these ventilation channels are 2mm open after installation to furniture.
ATTENZIONE!
The manufacturer will not be responsible for any inaccuracy resulting from printing or transcript errors contained in this brochure. We reserve the right to carry out modifications to products as required, including the interests of consumption, without prejudice to the characteristics relating to safety or function.