
H 461 IX.1/1 - Range hood INDESIT - Free user manual and instructions
Find the device manual for free H 461 IX.1/1 INDESIT in PDF.
| Brand | INDESIT |
| Model | H 461 IX.1/1 |
| Product type | Wall-mounted extractor hood |
| Height (mm) | 210 (with telescopic 180+31) |
| Width (mm) | 598 |
| Depth (mm) | 300-455 (telescopic) |
| Evacuation diameter (mm) | 150 |
| Number of speeds | 3 |
| Lighting | LED, 2 x 2.5 W, socket E14 |
| Filtration type | Washable metal grease filter + charcoal filter (optional) |
| Grease filter maintenance | Monthly cleaning, dishwasher or manual |
| Charcoal filter replacement | Every 4 months maximum |
| Lamp replacement | LED 2.5W E14 only |
| Minimum distance (electric cooking) | 50 cm |
| Minimum distance (gas/mixed cooking) | 65 cm |
| Power supply | 220-240 V, 50/60 Hz |
| Evacuation mode | Extracting or recirculating (accessory kit required) |
| Noise level | Not specified |
Frequently Asked Questions - H 461 IX.1/1 INDESIT
User questions about H 461 IX.1/1 INDESIT
0 question about this device. Answer the ones you know or ask your own.
Ask a new question about this device
Download the instructions for your Range hood in PDF format for free! Find your manual H 461 IX.1/1 - INDESIT and take your electronic device back in hand. On this page are published all the documents necessary for the use of your device. H 461 IX.1/1 by INDESIT.
USER MANUAL H 461 IX.1/1 INDESIT
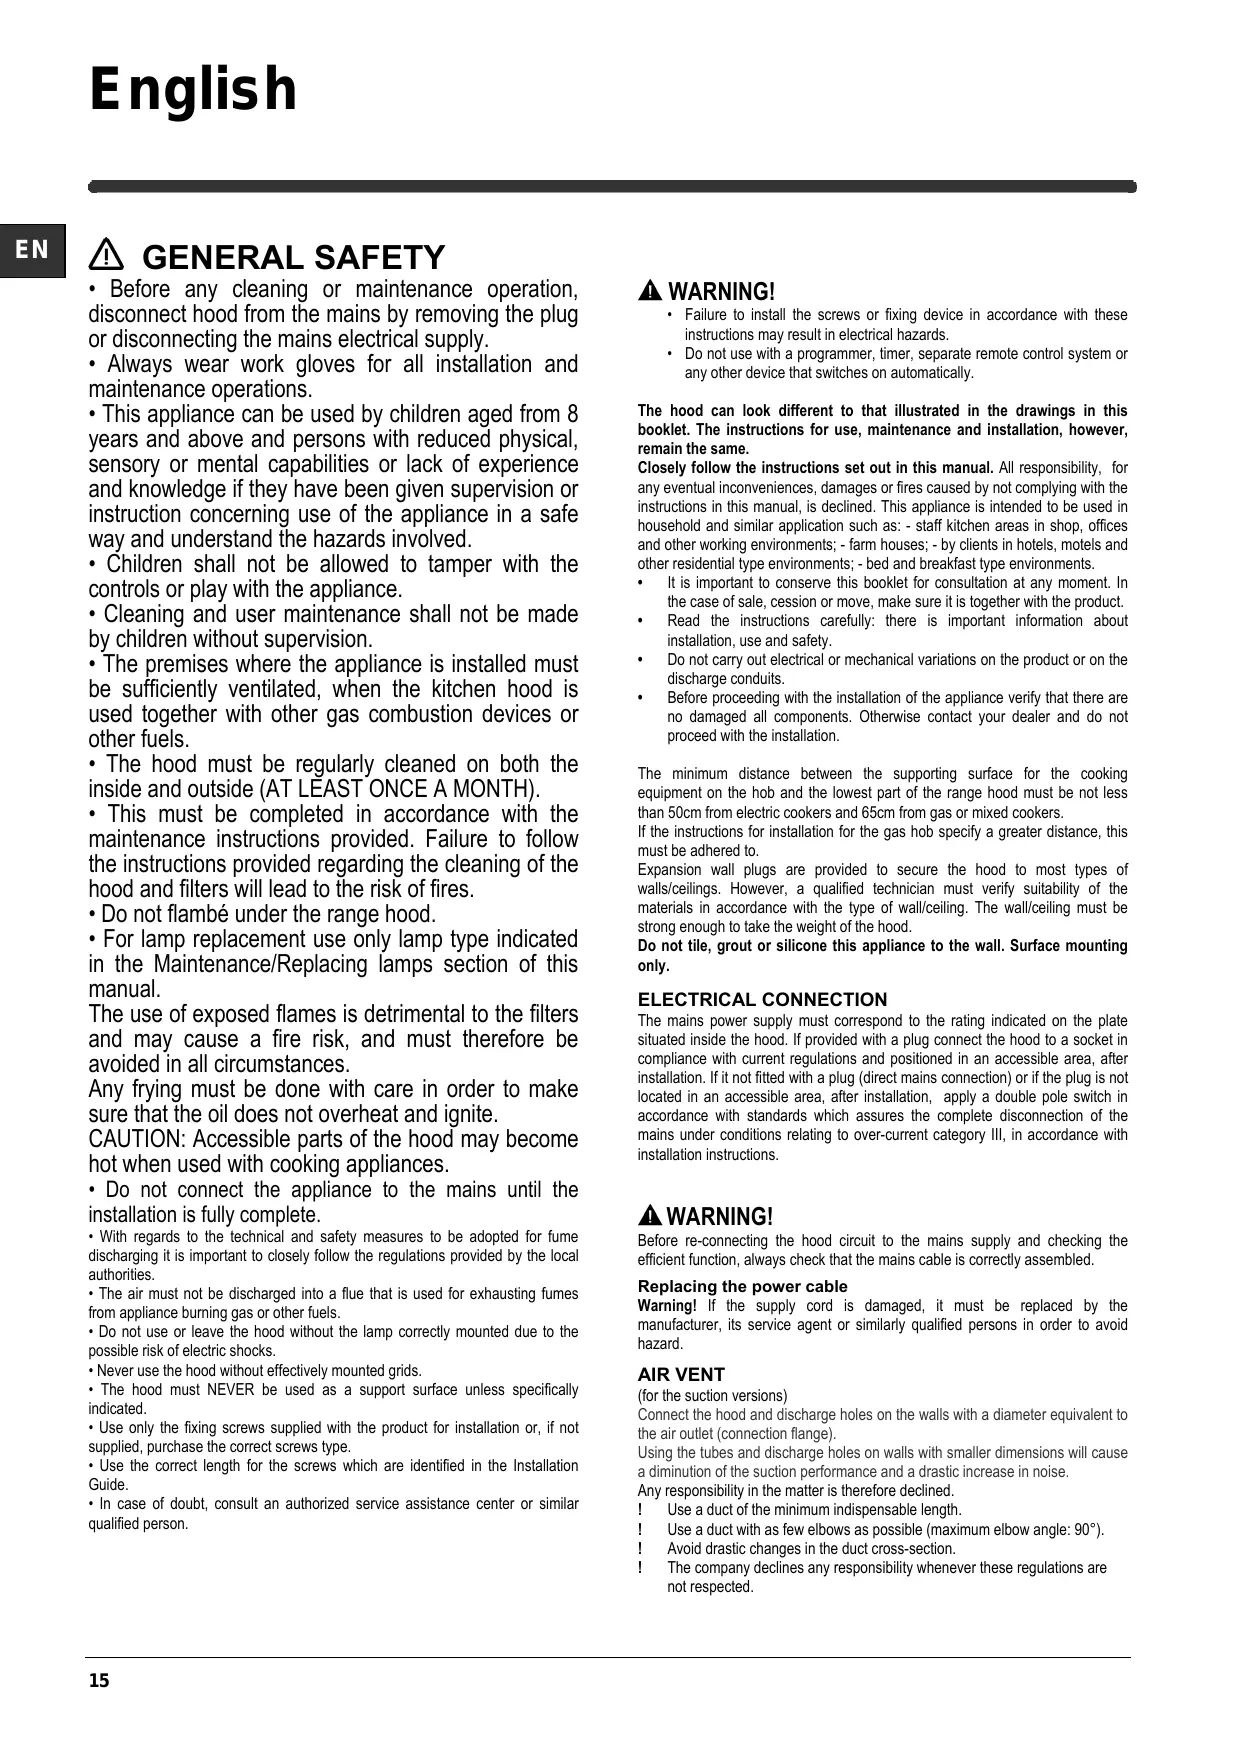
- Before any cleaning or maintenance operation, disconnect hood from the mains by removing the plug or disconnecting the mains electrical supply.
- Always wear work gloves for all installation and maintenance operations.
- This appliance can be used by children aged from 8 years and above and persons with reduced physical, sensory or mental capabilities or lack of experience and knowledge if they have been given supervision or instruction concerning use of the appliance in a safe way and understand the hazards involved.
- Children shall not be allowed to tamper with the controls or play with the appliance.
- Cleaning and user maintenance shall not be made by children without supervision.
- The premises where the appliance is installed must be sufficiently ventilated, when the kitchen hood is used together with other gas combustion devices or other fuels.
- The hood must be regularly cleaned on both the inside and outside (AT LEAST ONCE A MONTH).
- This must be completed in accordance with the maintenance instructions provided. Failure to follow the instructions provided regarding the cleaning of the hood and filters will lead to the risk of fires.
- Do not flambe under the range hood.
- For lamp replacement use only lamp type indicated in the Maintenance/Replacing lamps section of this manual.
The use of exposed flames is detrimental to the filters and may cause a fire risk, and must therefore be avoided in all circumstances.
Any frying must be done with care in order to make sure that the oil does not overheat and ignite.
CAUTION: Accessible parts of the hood may become hot when used with cooking appliances. - Do not connect the appliance to the mains until the installation is fully complete.
- With regards to the technical and safety measures to be adopted for fume discharging it is important to closely follow the regulations provided by the local authorities.
- The air must not be discharged into a flue that is used for exhausting fumes from appliance burning gas or other fuels.
- Do not use or leave the hood without the lamp correctly mounted due to the possible risk of electric shocks.
- Never use the hood without effectively mounted grids.
- The hood must NEVER be used as a support surface unless specifically indicated.
- Use only the fixing screws supplied with the product for installation or, if not supplied, purchase the correct screws type.
- Use the correct length for the screws which are identified in the Installation Guide.
- In case of doubt, consult an authorized service assistance center or similar qualified person.
WARNING!
- Failure to install the screws or fixing device in accordance with these instructions may result in electrical hazards.
- Do not use with a programmer, timer, separate remote control system or any other device that switches on automatically.
The hood can look different to that illustrated in the drawings in this booklet. The instructions for use, maintenance and installation, however, remain the same.
Closely follow the instructions set out in this manual. All responsibility, for any eventual inconveniences, damages or fires caused by not complying with the instructions in this manual, is declined. This appliance is intended to be used in household and similar application such as: - staff kitchen areas in shop, offices and other working environments; - farm houses; - by clients in hotels, motels and other residential type environments; - bed and breakfast type environments.
It is important to conserve this booklet for consultation at any moment. In the case of sale, cession or move, make sure it is together with the product.
- Read the instructions carefully: there is important information about installation, use and safety.
- Do not carry out electrical or mechanical variations on the product or on the discharge conduits.
- Before proceeding with the installation of the appliance verify that there are no damaged all components. Otherwise contact your dealer and do not proceed with the installation.
The minimum distance between the supporting surface for the cooking equipment on the hob and the lowest part of the range hood must be not less than 50cm from electric cookers and 65cm from gas or mixed cookers.
If the instructions for installation for the gas hob specify a greater distance, this must be adhered to.
Expansion wall plugs are provided to secure the hood to most types of walls/ceilings. However, a qualified technician must verify suitability of the materials in accordance with the type of wall/ceiling. The wall/ceiling must be strong enough to take the weight of the hood.
Do not tile, grout or silicone this appliance to the wall. Surface mounting only.
ELECTRICAL CONNECTION
The mains power supply must correspond to the rating indicated on the plate situated inside the hood. If provided with a plug connect the hood to a socket in compliance with current regulations and positioned in an accessible area, after installation. If it not fitted with a plug (direct mains connection) or if the plug is not located in an accessible area, after installation, apply a double pole switch in accordance with standards which assures the complete disconnection of the mains under conditions relating to over-current category III, in accordance with installation instructions.
WARNING!
Before re-connecting the hood circuit to the mains supply and checking the efficient function, always check that the mains cable is correctly assembled.
Replacing the power cable
Warning! If the supply cord is damaged, it must be replaced by the manufacturer, its service agent or similarly qualified persons in order to avoid hazard.
AIR VENT
(for the suction versions)
Connect the hood and discharge holes on the walls with a diameter equivalent to the air outlet (connection flange).
Using the tubes and discharge holes on walls with smaller dimensions will cause a diminution of the suction performance and a drastic increase in noise.
Any responsibility in the matter is therefore declined.
Use a duct of the minimum indispensable length.
Use a duct with as few elbows as possible (maximum elbow angle: 90^ ).
! Avoid drastic changes in the duct cross-section.
The company declines any responsibility whenever these regulations are not respected.
FILTERING OR DUCTING?
Your cooker hood is ready to be used in suction version.
To use the hood in filtering version the special ACCESSORY KIT must be installed.
Check on the first pages of this manual if the ACCESSORY KIT is furnished or must be bought separately.
Note: If furnished, in certain cases, the additional activated carbon filtering system may be installed on the hood.
Information about the conversion of the hood from suction version to filtering version is present in this manual.

Ducting version
In this case the fumes are conveyed outside of the building by means of a special pipe connected with the connection ring located on top of the hood.

CAUTION!
The exhausting pipe is not supplied and must be purchased apart.
Diameter of the exhausting pipe must be equal to that of the connection ring.

CAUTION!
If the hood is supplied with active charcoal filter, then it must be removed.

Filter version
The aspirated air will be degreased and deodorised before being fed back into the room.
In order to use the hood in this version, you have to install a system of additional filtering based on activated charcoal.
CONTROLS
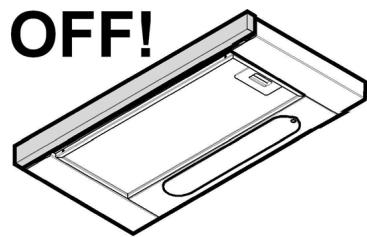
The hood is fitted with a control panel with aspiration speed selection control and a light switch to control cooking area lights.
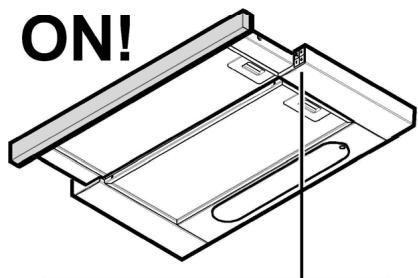
a. ON/OFF light switch
b. Speed 1/OFF switch
c. 2-speed selection
d. 3-speed selection
MAINTENANCE
Cleaning
Clean using ONLY a cloth dampened with neutral liquid detergent. DO NOT CLEAN WITH TOOLS OR INSTRUMENTS. Do not use abrasive products. DO NOT USE ALCOHOL!
Maintenance of the anti-grease filters
Traps cooking grease particles.
The grease filter must be cleaned once a month using non aggressive detergents, either by hand or in the dishwasher, which must be set to a low temperature and a short cycle. When washed in a dishwasher, the grease filter may discolor slightly, but this does not affect its filtering capacity.
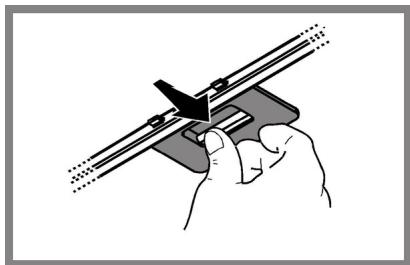
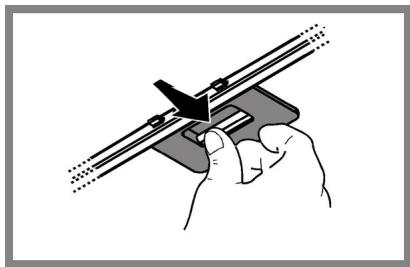
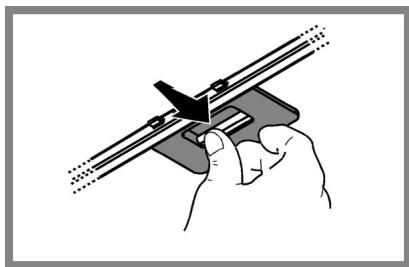
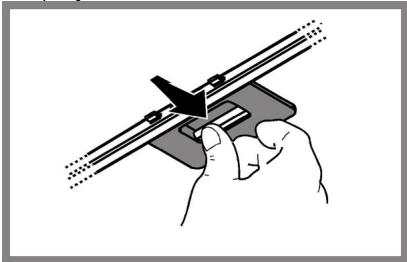
To remove the grease filter, pull the spring release handle.
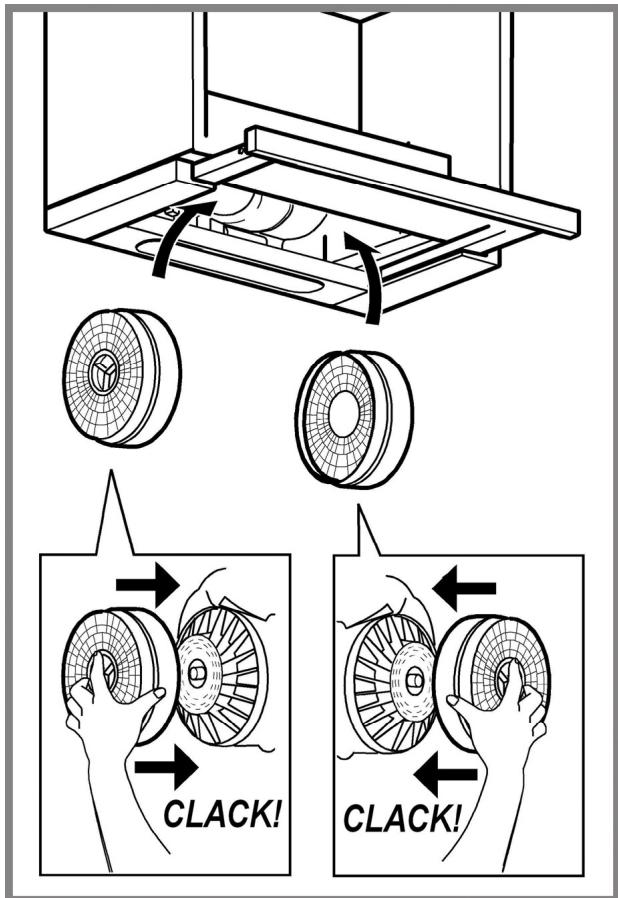
Maintenance of the charcoal filter
It absorbs unpleasant odors caused by cooking.
The saturation of the charcoal filter occurs after more or less prolonged use, depending on the type of cooking and the regularity of cleaning of the grease filter.
In any case it is necessary to replace the cartridge at least every four months.
The charcoal filter may NOT be washed or regenerated.
Remove the grease filters.
Apply one charcoal filter each side and hook in onto the hood.
Refit the grease filter.
Replacing lamps
Disconnect the appliance from the electricity.
Warning! Prior to touching the light bulbs ensure they are cooled down.
Extract the drawer completely.
Remove the suction grill to access the lamp area.
Replace the damaged lamp.
Use E14 2,5W max LED lamps only. For more details, check enclosed leaflet "ILCOS D" (alfanumeric position "1e").
DISPOSAL
- This appliance is marked according to the European directive 2012/19/EC on Waste Electrical and Electronic Equipment (WEEE).
- By ensuring this product is disposed of correctly, you will help prevent potential negative consequences for the environment and human health, which could otherwise be caused by inappropriate waste handling of this product.

- The symbol on the product, or on the documents accompanying the product, indicates that this appliance may not be treated as household waste. Instead it should be taken to the appropriate collection point for the recycling of electrical and electronic equipment. Disposal must be carried out in accordance with local environmental regulations for waste disposal.
- For further detailed information regarding the process, collection and recycling of this product, please contact the appropriate department of your local authorities or the local department for household waste or the shop where you purchased this product.
Appliance designed, tested and manufactured according to:
Safety: EN/IEC 60335-1; EN/IEC 60335-2-31, EN/IEC 62233.
- Performance: EN/IEC 61591; ISO 5167-1; ISO 5167-3; ISO 5168; EN/IEC 60704-1; EN/IEC 60704-2-13; EN/IEC 60704-3; ISO 3741; EN 50564; IEC 62301.
- EMC: EN 55014-1; CISPR 14-1; EN 55014-2; CISPR 14-2; EN/IEC 61000-3-2; EN/IEC 61000-3-3. Suggestions for a correct use in order to reduce the environmental impact: Switch ON the hood at minimum speed when you start cooking and kept it running for few minutes after cooking is finished. Increase the speed only in case of large amount of smoke and vapor and use boost speed(s) only in extreme situations. Replace the charcoal filter(s) when necessary to maintain a good odor reduction efficiency. Clean the grease filter(s) when necessary to maintain a good grease filter efficiency. Use the maximum diameter of the ducting system indicated in this manual to optimize efficiency and minimize noise.
MALFUNCTIONS
If something appears not to be working properly, do the following simple checks before calling Technical Service:
If the hood is not working:
Check that:
- The power has not been disconnected.
- A speed has been selected.
If the hood performs inefficiently:
Check that:
- The motor speed selected is sufficient for the amount of smoke and vapours released.
- The kitchen is sufficiently ventilated to allow air intake.
- The charcoal filter is not worn (hood in filtering version).
If the hood has turned off during normal functioning:
Check that:
- The power has not been disconnected.
- the omnipolar disconnection device has not tripped.
If the hood fails to operate correctly, briefly disconnect it from the mains power supply for almost 5 sec. by pulling out the plug. Then plug it in again and try once more before contacting the Technical Assistance Service.
TECHNICAL DATA
| Model | Height (cm) | Width (cm) | Tiefe (cm) | Ø of exhaust tube (cm) |
| H 461 IX.1/1 | 18 (+3,1)+ | 59,8 | 30-45,5 | 15 |


Components not provided with the product
FR
SÉCURITÉ GÉNÉRALE
BbOHa Tpy6a He BXoNT B KOMPNeKT N DoJxHa 6bIT npNo6peTeHa OTdJIbHO.
ДиamETp BblOdHOn Tpy6bI D0JIxEH COOTBeTCTBOBaTbДиamETpy COeINHITelbHOrO KOJIbua.

BHIMAHME!
EcnBbTgKca ChabkeHa yroIbHbIM fNtPOM,TOy6epntero.

IcnoJIHeHne C OTBOOM BO3dyxa
PoiHocbIy BbIbTe BblBnKHyI NaHeIb.
CHIMITE BBITXHYO peWETKY, YTO6bI IMETb DOCTyn K JIAmnoKam NOCBETKN.

3amehnTe nOBpeKdHnyIaMny.
Icnoj3yTe ToJIbKO CBToIOHOHbIe IaMnbl MaKc. MoUHOCTbO 2,5 Bt, c QoKoIem E14. IJra IOnJuEHHaNIOpO6HoINHΦOpMauIM CMOTpITe npInarapaemyIO nIcTObKy "ILCOS D" (6yBBeHHO-UNPpOBoi KOD "1e").
YTNIN3AUIN
UcpoCTBO pa3pa6oTaHO, nCnblTaHO n 13roTOBHeO B COOTBETCTBn C:
- Bezonaachoctb: EN/IEC 60335-1; EN/IEC 60335-2-31, EN/IEC 62233.
- 3KcnpyatauHbIe xapakTepeNtkn: EN/IEC 61591; ISO 5167-1; ISO 5167-3; ISO 5168; EN/IEC 60704-1; EN/IEC 60704-2-13; EN/IEC 60704-3; ISO 3741; EN 50564; IEC 62301.
EMC:EN 55014-1; CISPR 14-1; EN 55014-2; CISPR 14-2; EN/IEC 61000-3-2; EN/IEC 61000-3-3. Празлобеня дд павиьною среду:Вкночite Bblтжho колпak Ha MNHIMaJIbHон ckopocstn, KOrda NaHmHaTe rTOBtB, N octabte erO pa6OtaTb B TceHne HeCKOBKIN MHNy Tocne TOrO, KAK 3aOKHnTE rTOBtB. YBeHInBaIte ckopocTb TOnkBO CcYueae BoJboro KOnJIeCTBa DbIMa n npapa, n Pn6beraTe KcNcONb3OBaHHIO NOBIIeHHbIX CKOpocTe TOnkBO B 3KcTpeMaJIbHbIX cTMyaunx. 3Amehny TeYOrbHIbI ΦnIbTp(b), KOrda 3To Heo6XODIMO, dnn PoJIdEpxAHn XopoWee 3ΦΦeKTHBHOCTn UMeHbSeHn3Zanaxob.OChUaTe JxpoBovIbeФnIbTp(b), KOrda 3To Heo6XoHMo, dnn PoJIdEpxAHn XopoWee 3ΦΦeKTHBHOCTn XkpOBoroФnIbTa. IVcnlon3yIte MaKcIMaJIbHbI dIaMETP CSNTEmbl BO3dYXOBoD, Yka3aHHbI B DaHHom pyKOBoDCTBe, dIЯ ONTmIMa3aUnn 3ΦΦeKTHBHOCTn MmHIMm3aUnn yOboHry Shyma.
AHOMAJINB PABOTE
Ecnn yto-to He pa6oTaet DoJnxHbIM o6pa3OM, npeed TEM kak o6paTntbcra B Cnyk6y ITO texHnueckomy 06cIyKbAHIO, BblONHInTe cJeDyUOJIne npocTbe npOBePK:
Ecnn BbItaXka He pa6oTaet:
PpOBepnB:
- yTo 6bl He 6blna npepbana noa Ta.
- yTO 6bl 6blna Bbl6paHa CkopoocTb.
- EcIN BbITJXKa nIOxo pa60Taet:
IpoBepntb:
- YTO BbIbpaHHa NcKOpOCTb DnVrAteJIa DoCTaToUHa dIy BbIpa6oTaHHoro KOnHecTBA DbIMa n npa.
- YTO KXYHЯ DOCTaTOUHO NPOBETpeHa DnToro, YTObbl BbITJkKa MOrJa BblONHHTb 3a6Op BO3dYxa.
-
YTO yTOnbHbI ΦnIbTp He Otpa6OtaH (BbITJgKa BpeKIme CpeUrkpIyIaueM EBO3Dxa).
-
EcIN BbITaKKKa BbIKJIouHnIacb B XOe HOpMaJIbHOI pa60TbI: IpoBepNTb:
-
YTO He npepbaha Naodaça ToKa.
- YTO He cpa6oTaJ ODNHOONIOHcBb BYIKNIOUaOuI aIINapA.T.
B clyuae Bo3MOKbIbIX aHOMaJIIN B pa6Ote, npeI TEM KAK o6paTnTcBcRA Cnyk6y TeXHnueCKOrO 6CNYKBAHnI OTKIIOnHTb OT 3eKTPoNITAHnI Annapa MTNHmym Ha 5 ckyI, BbIHMaJ BNIky I NOTOM IOdCoEHNITb erO cHOBA. EcIn aHOMaJIIN B pa6Ote pIoDoJIkaET cyIeCTBOBaT b6paTnTcBcRA B clyx6by Tex06cnykBAHnI.
TEXHNUECKNE DAHHbIE
Extrair completeness a gaveta
Tirar a grehla de aspiracao para ter accesso a zona das lampadas.
Substituir a lampada danificada.
EnavaauvoeTo qIATPO IInous.

AVTikataoTaon TwV luxviow
AToouvEoTe Tov atoppoqnTnpa aTo to nAektpko eua.
Ipoedotoin! Ipiv akoumuTne TIC a e 8ebaWte iEiiv kpuC. ByaTe TEAEiwTo uptapi.
ByaTe TnV OxaP aTnoppoqnoNc Vla va EIOEeOe TOnV Xwpo OTou Bpiokovtai oI Aumec.
AvikataaotnoTe Tov kaevo laantippa.
Xpnoiotoinote movoauiptnecsLED E14 ews2,5W. Tia ppiopoe pes Aetiopeies, ououboueuteite to etiouvattóevo puaaaio "ILCOS D" (aIpaipntikn thon "1e")
ANOPPIPH
Autn ouoKEun opei snuavon ouuwa u Eupwntaikn obnyia 2012/19/EC oxETiKa u Ta ATooppITTOeva nEKTPIKA kai nEKTpovika aptntmuata (WEEE).
Egaaiizovtac ot npoiov auto atoppinietai owta, 8a bontheta otny npolnun thava apvntikuv etttwoeuv yia to pepiabalov kai nty avpowittuv uyia, oi otoies 8a mtopoouav va dnoiuopynbouv aTOV akatallnlo xeiipio autou To npoiovtoc wc atoppmu.

To Tavw OTO Tpoiov, n OTA Eyypa Taou uovoeuv To Tpoiov, utoBekvE oT autn n ouakeun 6eV mtoepi va eWnpthe iokiako atoppmu.Avi ia auto TaPtei va npadoeoi aKataaNo anueio TEPsiuauoyns yia tv avakukwnTwv Nktpikuw kai Nktpovikwv Eapntmuw. H atoppiou Tou Ptei va payatotoeitai Tnpwtaq Tny toTK vuo0eia yia tv dAeon twv atoppmuatuv.
TIA TIO LEETIOUEPEI TANPOPOIEC OXETIKA TE NTV ETEEpyaia, TNY TEPIAUALLOYN KAI TNY AVAKUKAWAUTO TU TPOIOVTO, TIPAKALOUE ETTIKOIVWVNOTE ME TO apoio ypaapeio TNY TOTIKNS autoIOIKNCS, TNY TOTIKN OAS UNTpeia atOKOIIDc oikiaKWv AToppimuATwN To KAATAOTnJA OTOU ayopaoate auto To TPOIOV.
H oukeun exi oxediaote,doikuaote kai kataoakeuaote oumpwva tnv: Aogaaia: EN/IEC 60335-1; EN/IEC 60335-2-31, EN/IEC 62233.
- Eπίδοση: EN/IEC 61591; ISO 5167-1; ISO 5167-3; ISO 5168; EN/IEC 60704-1; EN/IEC 60704-2-13; EN/IEC 60704-3; ISO 3741; EN 50564; IEC 62301.
EMC: EN 55014-1; CISPR 14-1; EN 55014-2; CISPR 14-2; EN/IEC 61000-3-2; EN/IEC 61000-3-3. Ipotaoei yia ia owtn xpnoan outw osote va eiothovoi tepiabalovtkec etttiwaeic: Eevpyoioate to vatoppopqnnpa otny Exaiotn taxutnta otav apxioete to paiepejka kai apnoote to avamuevo ia liya letna meta to teoc tou yapeipetacoc. Auogote nTv taxutma npovoe TEPiTTWANyAALNS oukyktpwnoc kantvou kai atuou kXpnoiIOOTNOte nTv etitaxuvoeyn taxutnta mOvo oe akpaies kataoaeic. Avikataohtote to qiltpo evypauovbpaoka otav tha pTeTne iva diatponenq iKaN aTdoon nC meiownc tsns oosn. KaBapote to qiltpo limouc otav tha pTeTne iva diatponenBei iua kAn atdoon Tou piltpauLIOUC. XpnoiIOOTNE t neyioTN diaqetoTOU ouatmatoC twv owanywoewu TO UTODEIKVUEAI OTO EYEXEIPIDIO auto, outwc wote va baleiTOTIOINthe i antoooon kai va eaxiototoine o hopuboc.
AYEAIETOYPRIE
Av paivetai Oti UTIAPxei KATI TIOU DEV AIEITOUPEYi, TPIV KAeOeTe TIV UTINpeia TeXVIKns UTOOTNIPIGcE KETEAEOTous EENs ATALOUs EeEyxouc:
(for utsugsversioner)
aalal aalaa jaiy jally Jao yall gall jgsy jay aalall caiill lla Lj 1
1 1 1 1 1 1 1 1 1 1 1 1 1 1 1 1 1 1 1 1 1 1 1 1 1 1 1 1 1 1 1 1 1 1 1 1 1
a aal llll llll llll llll llll llll llll llll llll llll llll llll llll llll llll llll llll llll llll llll llll llll llll llll llll llll llll llll llll llll llll llll llll llll
1
J 150000000000000000000000000000000000000000000000000000000000000000000000000000000
1
J 1 1 1 1 1 1 1 1 1 1 1 1 1 1 1 1 1 1 1 1 1 1 1 1 1 1 1 1 1 1 1 1 1 1 1 1 1 1 1 1 1 1 1 1 1 1 1 1 1 1 0
1
y j 100000000000000000000000000000000000000000000000000000000000000000000000
1
:cliaiyla jyj yaiyall) cIolizilny jn nn Sao Jd Jai yu jyip 90
.90
.
1
1
#
1 !
1
1
1
1
1
1
1
1
aee
#
a511 12 b111 11 a111 a111 a111 a111 a111 a 11
P
j 8 8
jIgJyI gJyI yIgJyI aIgJyI JyI aIgJyI 1yI yI aIgJyI
1ie aai 5 jill jls aai 5 aai ggi jgi b
Jzll Jzglg 8o 8o 8o 8o 8o 8o 8o 8o 8o 8o 8o 8o 8o 8o
J 1 J 1 J 1 J 1 J 1 J 1 J 1 J 1 J 1 J 1 J 1 J 1 J 1 J 1 J 1 J 1 J 1 J 1 J 1 J 1 J 1 J 1 J 1 J 1 J 1 J 1 J 1 J 1 J 1 J 1 J 1 J 1 J 1 J 1 J
Ji j i j i j i j i j i j i j i j i j i j i j i j i j i j i j i j i j i j i j i j i j i j
y
Jill a Jie c no Lai
2jg jai aaii i 10000000000000000000000000000000000000000000000000000000000000000
Laiall yIyR 1Jy JyAeS yS uS yS uS yS uS yS uS yS uS yS uS yS uS yS uS yS uS yS uS yS uS yS uS yS uS yS uS yS uS yS uS yS uS yS uS yS uS y S uS y S uS y S uS y S uS y S uS y S uS y S uS y S uS y S uS y S uS y S uS y S uS y S uS y S uS y S uS y S uS y S uS y S uS y S uS y S uS y S uS y S uS y S uS y S uS y S uS y
Lill aac lal y laaay gll ayall jlll alal .
Aalaal alal allall alal all alal alal
aiy
i
- 81 Jauu Jauu Jauu Jauu Jauu Jauu Jauu Jauu Jauu Jauu Jauu Jauu Jauu Jauu Jauu Jauu Jauu Jauu Jauu Jauu Jauu Jauu Jauu Jauu Jauu Jauu Jauu Jauu Jauu Jauu Jauu Jauu Jauu Jauu
1 1
Jusipis 1abilS algo gic ayisall cialiial
jooa
0 0 0 0 0 0 0 0 0 0 0 0 0 0 0 0 0 0 0 0 0 0 0
.
jgl jgl jgl glll jgl all jgl jgl jgl all jgl jgl l i
la 1
ailllll lallll aalldy

y
a a a a a a a a a a a a a a a
a 1
Jusu Jusu Jusu Jusu Jusu Jusu Jusu Jusu
a a a a a a a a a a a a a a a a a a a a a a
A( 1,2)
0000 1
ailll lal jol 1000
14

1/2 1

a
a a a a a a a a a a a a a a a a a a a a a
a + b + c = 3
:la y blaal jS 13
aai jia jia
S_ OBC = 12 · CO · BC = 12 × CD × 3
aJjai
aiaiaia bilaill olaic uilS lil
AD = AQ, 在 BAD 和 CAE 中
oJusall oJisIg palaal aasI aqssOjiaaal cyaalac
eall
(2015年全国春季学业考试)
Aii joo
- 20 & 若 x > 0 10 & 若 x < 0 . x = 1
jie jie jie ball jial jie ball jie
aJglllglal gllll aai 1s sgs jg lal al gllll Jbll aall glll g. 1234567890123456789012345678901234567890123456789012345678901234567890123456789012345678901234567890123456789
aill p aill 2021 1 1 j j j j j j j
A
- WARNING!
- ELECTRICAL CONNECTION
- Replacing the power cable
- AIR VENT
- (for the suction versions)
- FILTERING OR DUCTING?
- Ducting version
- CAUTION!
- Filter version
- CONTROLS
- MAINTENANCE
- Cleaning
- Maintenance of the anti-grease filters
- Traps cooking grease particles.
- Maintenance of the charcoal filter
- It absorbs unpleasant odors caused by cooking.
- Replacing lamps
- DISPOSAL
- MALFUNCTIONS
- TECHNICAL DATA
- FR
- SÉCURITÉ GÉNÉRALE
- BHIMAHME!
- IcnoJIHeHne C OTBOOM BO3dyxa
- YTNIN3AUIN
- AHOMAJINB PABOTE
- AVTikataoTaon TwV luxviow
- ANOPPIPH
- AYEAIETOYPRIE
- 1
- #
- aee
Brand : INDESIT
Model : H 461 IX.1/1
Category : Range hood