
MUM59343 - MUM5934D - Food Processor BOSCH - Free user manual and instructions
Find the device manual for free MUM59343 - MUM5934D BOSCH in PDF.

| Product type | Food processor |
| Brand | Bosch |
| Model | MUM59343 / MUM5934D |
| Power supply | Mains powered (standard plug) |
| Power | Not specified (robust motor for domestic use) |
| Number of speeds | 7 speeds + pulse (M) |
| Main functions | Mixing, kneading, whisking, grating, slicing, blending (with optional attachment) |
| Included tools | "Profi" whisk, "Profi Flexi" whisk, dough hook, reversible grating/slicing discs, blender (depending on version) |
| Mixing bowl | Plastic, capacity up to 750 g flour + ingredients |
| Blender jar | Plastic, max capacity 1.25 L (0.5 L for hot/frothing liquids) |
| Optional accessories | Citrus press, meat grinder, coulis kit, additional discs, stainless steel bowl, multi-mixer, etc. |
| Safety | Anti-tangle safety, anti-re-start safety, overload protection, swivel arm lock |
| Maintenance | Bowl and accessories dishwasher-safe; wipe base with a damp cloth |
| Quick blender cleaning | Possible without disassembly: add water + dish soap, run for a few seconds at speed M |
| Storage | Includes accessory pouch; stores in the bowl |
| Warranty | According to distributor conditions (check with retailer) |
| After-sales service | Bosch customer service: spare parts and repairs available via national contact |
| Cord length | 1 meter maximum (retractable) |
| Swivel arm | "Easy Armlift" function for lifting assistance |
Frequently Asked Questions - MUM59343 - MUM5934D BOSCH
User questions about MUM59343 - MUM5934D BOSCH
0 question about this device. Answer the ones you know or ask your own.
Ask a new question about this device
Download the instructions for your Food Processor in PDF format for free! Find your manual MUM59343 - MUM5934D - BOSCH and take your electronic device back in hand. On this page are published all the documents necessary for the use of your device. MUM59343 - MUM5934D by BOSCH.
USER MANUAL MUM59343 - MUM5934D BOSCH
Register your new Bosch now: www.bosch-home.com/welcome
MUM59...

BOSCH
de Gebrauchsanleitung
en Instruction manual
fr Mode d'emploi
it Istruzioni per l'uso
nl Gebruiksaanwijzing
da Brugsanvisning
no Bruksanvisning
sv Bruksanvisning
fi Käytöohje
es Instrucciones de uso
pt Instruções de serviços
el O8nyiecxphonc
tr Kullanim kilavuzu
uk Ihctpykui 3 ekcnnyatauiii
ru Hnctpykui np 3Knnyatau
kk PnIaIaNHy Hcykayblfbl
ar
| de | Deutsch | 3 |
| en | English | 17 |
| fr | François | 30 |
| it | Italiano | 45 |
| nl | Nederland | 59 |
| da | Dansk | 73 |
| no | Norsk | 86 |
| sv | Svenska | 99 |
| fi | Suomi | 112 |
| es | Espanol | 125 |
| pt | Português | 140 |
| el | Еλληνικά | 154 |
| tr | Türkçe | 170 |
| uk | Украійсьka | 186 |
| ru | Русккий | 201 |
| kk | Казakша | 220 |
| ar | الترجمة | 247 |
Congratulations on the purchase of your new Bosch appliance.
In doing so, you have opted for a modern, high-quality domestic appliance.
You can find further information about our products on our web page.
Contents
For your safety. 17
Safety systems 19
Overview. 20
Operation 21
Bowl and tools 22
Cleaning and servicing 25
Storage 25
Troubleshooting 25
Application examples. 26
Disposal 28
Guarantee. 28
Optional accessories 28
For your safety
Before use, read these instructions carefully in order to become familiar with important safety and operating instructions for this appliance. If the instructions for correct use of the appliance are not observed, the manufacturer's liability for any resulting damage will be excluded. This appliance is designed for processing normal household quantities in the home or similar quantities in non-industrial applications. Non-industrial applications include e.g. use in employee kitchens in shops, offices, agricultural and other commercial businesses, as well as use by guests in boarding houses, small hotels and similar dwellings. Use the appliance for processing normal quantities of food and for normal amounts of time for domestic use. Do not exceed permitted maximum quantities (see "Application examples"). This appliance is suitable for mixing, kneading and beating food. It must not be used for processing other objects or substances. Other applications are possible if the accessories approved by the manufacturer are used. Use the appliance with original accessories only. When using the accessories, follow the enclosed operating instructions. Please keep the operating instructions in a safe place. If passing on the appliance to a third party, always include the operating instructions.
General safety instructions
Risk of electric shock!
The appliance must not be used by children. The appliance and its power cord must be kept away from children. Appliances can be used by persons with reduced physical, sensory or mental capabilities or lack of experience and knowledge if they have been given supervision or instruction concerning use of the appliance in a safe way and if they understand the hazards involved.
Children shall not play with the appliance. Cleaning and user maintenance must not be performed by children unless they are supervised.
Do not leave the running appliance unattended. Connect and operate the appliance only in accordance with the specifications on the rating plate. Only use the appliance indoors at room temperature and up to 2000 m above sea level.
Always disconnect the appliance from the supply if it is left unattended and before assembling, disassembling or cleaning.
Do not place the power cord over sharp edges or hot surfaces. Do not use the appliance if the power cord and/or appliance are damaged. To prevent injury, a damaged power cord must be replaced by the manufacturer or his customer service or a similarly qualified person. Only our customer service may repair the appliance.
Safety instructions for this appliance
Risk of injury!
Risk of electric shock!
Do not insert the mains plug until all preparations for working with the appliance are complete. When the appliance is not in use, pull out the mains plug. Before eliminating a fault, pull out the mains plug. Never immerse the base unit in liquid or hold under running water. Do not use a steam cleaner. Use only the rotary switch to switch the appliance on or off.
Risk of injury from the rotating tools!
Before replacing accessories or additional parts, which move during operation, switch off the appliance and disconnect from the power supply. When the appliance is switched off, the drive continues running briefly and stops in the tool change position. Do not adjust the swivel arm while the appliance is switched on. Wait until the drive has come to a standstill.
Keep hands clear of rotating parts. While the appliance is operating, never place fingers in the mixing bowl. Do not reach into the feed tube. Do not operate the appliance without the lid.
For reasons of safety the appliance cannot be operated unless unused drives are covered with drive guards.
Risk of injury from sharp blades!
Do not grip the sharp blades or edges of the cutting discs. Take hold of cutting discs by the edge only. Do not touch blender blades with bare hands.
Risk of injury from sharp blades/rotating drive!
Never place fingers in the attached blender! Operate the assembled blender only and with the lid attached.
Risk of scalding!
If processing hot liquids, steam escapes through the funnel in the lid. Add a maximum of 0.5 litres of hot or frothing liquid.
Important!
Use the appliance with original accessories only. When using the accessories, follow the enclosed operating instructions. Use only one tool or accessory at any one time.
Explanation of the symbols on the appliance or accessory

Follow the instructions in the operating instructions.

Caution! Rotating blades.

Caution! Rotating tools.
Do not place fingers in the feed tube.
Important!
It is essential to clean the appliance thoroughly after each use or after it has not been used for an extended period. → “Cleaning and servicing” see page 25
Safety systems
Start lock-out
See "Operating positions" table.
The appliance can be switched on in position 1 and 3 only:
- when the bowl (11) has been inserted and turned until it locks into place and
the blender drive cover has been attached (8).
Restart lock-out
If the power is interrupted, the appliance remains switched on but the motor does not start running again when the power is restored. To switch the appliance on again, turn the rotary switch to 0/off, then switch on.
Overload protection
If the motor switches itself off while the appliance is being used, the overload protection feature has been activated. A possible cause may be that too much food was processed at one time.
If a safety system is activated, see "Troubleshooting".
The operating instructions describe several models, see also overview of models
(Fig. M). The appliance requires no maintenance.
Overview
Please fold out the illustrated pages.
Fig. A:
Base unit
1 Release button
2 Swivel arm
"Easy Armlift" function to support the upward movement of the arm (see "Work positions").
3 Rotary switch
When the appliance has been switched off (position 0/off), the appliance runs automatically to the optimum position for changing the tools.
M = Instantaneous switching at maximum speed, hold switch for required blending duration.
Settings 1-7, Operating speed:
$$ \begin{array}{l} 0 / o f f = S t o p \ 1 = \text {l o w s p e e d - s l o w}, \ 7 = \text {h i g h s p e e d - f a s t}. \ \end{array} $$
4 Operating indicator
Is lit while the appliance is operating (rotary switch on M or 1-7). Flashes if the appliance has been operated incorrectly, the electronic fuse has tripped or the appliance is defective - see section "Troubleshooting".
5 Drive cover
To remove the drive cover, press on the rear area and remove cover.
6 Drive for
- continuous-feed shredder and
- citrus press (optional accessory*).
When not in use, attach the drive cover.
7 Drive for tools
(stirrer, whisk, kneading hook) and mincer (optional accessory*)
8 Blender drive cover
9 Drive for blender
(optional accessory*)
When not in use, attach the blender drive cover.
10 Automatic cord winder
Bowl with accessories
11 Stainless steel stirring bowl
12 Lid
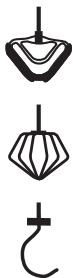
Tools
13 Professional flexi stirring whisk
14 Professional beating whisk
15 Kneading hook with dough deflector
16 Accessories bag
For storage of the tools and cutting discs.
Continuous-feed shredder
17 Pusher
18 Cover with filling shaft
19 Cutting discs
a Professional Supercut reversible disc - coarse / fine
b Reversible shredding disc - coarse / fine
c Grating disc - medium-fine
d Grating disc - coarse*
20 Disc holder
21 Housing with outlet opening
Blender*
22 Blender jug
23 Lid
24 Funnel
- If an accessory is not included in the product package, it can be purchased via the trade or customer service.
Operating positions
Figure 3:
Attention:
Before operating the appliance, attach the tool / accessory to the correct drive and in the correct position and place in the operating position according to this table.
The swivel arm must be engaged in every operating position.
Note:
The swivel arm features an "Easy Armlift" function which supports the upwards movement of the swivel arm.
Selecting the operating position:
Press the Release button and move the swivel arm. Support movement with your hand.
- Move the swivel arm until it engages in the required position.
| Position | Drive | Tool / Accessory | Operating speed |
| 1 | 7 | ↑ | 1-5 |
| 1-7 | |||
| 1-3 | |||
| 2 | 7 | - | |
| 3 | 6 | ↓ | 3-7 |
| 3-5 | |||
| 4 | 9 | ↓ | 5-7 |
| 7 | ← | 5-7 |
- Insert / remove whisk, stirrer or kneading hook. Add large quantities of ingredients
Operation
Risk of injury!
Do not insert mains plug until all preparations for working with the appliance are complete.
Attention!
Do not operate the appliance without an accessory / tool in the operating position. Do not operate the appliance empty. Do not expose appliance or accessories to heat sources. Parts are not microwave-safe.
Before operating the appliance and accessories for the first time, clean thoroughly; see "Cleaning and servicing".
Important information
These operating instructions contain a sticker with reference values for the operating speed of the appliance when using the tools or accessories. We recommend attaching this sticker to the appliance (Fig. ⑥).
Preparation
- Place the base unit on a smooth, clean surface.
Pull out the cord in one go to the required length (max. 100cm ) and slowly release; the cord is locked (Fig. D). - Reducing the cord length: Pull gently on the cord and allow it to roll up to the required length. Then gently pull the cord again and slowly release; the cable is locked.
Warning!
Do not twist the cord when inserting it. If the appliance features an automatic cord winder, do not insert the cord manually. If the cord jams, pull out the cord all the way and then allow it to wind up.
Insert the mains plug.
Bowl and tools
Risk of injury from rotating tools
While the appliance is operating, never place fingers in the mixing bowl. Attach the cover (12) before operating the appliance! Do not change tools until the drive has come to a standstill - when the appliance is switched off, the drive continues running briefly and stops in the tool change position. Do not move the swivel arm until the tool has come to a standstill. For reasons of safety the appliance may only be operated when unused drives have been covered with drive guards (5, 8).
Attention!
Use bowl with this appliance only.
Professional flexi stirring whisk (13)
for stirring dough, e.g. cake mixture
Professional beating whisk (14)
for whisking egg whites, cream and light dough, e.g. sponge mixture
Kneading hook (15)
for kneading heavy dough and mixing ingredients that ought not be cut (e.g. raisins and chocolate chips)
Important information concerning the use of the whisk
Figure 3:
The whisk should almost touch the bottom of the bowl to ensure that the ingredients are optimally mixed. If not, adjust the height of the whisk as follows:
Remove mains plug.
Press the Release button and move the swivel arm to position 2.
Insert the whisk into the drive until the whisk locks into position.
Hold whisk in place and loosen nut clockwise using open-ended wrench (size 8).
- Set the whisk to the optimum height by rotating the whisk:
- Turn clockwise: Raise
- Turn anti-clockwise: Lower

Press the Release button and move the swivel arm to position 1.

-
Check the height of the whisk and, if required, correct.
-
When the height has been set correctly, press Release button and move the swivel arm to position 2.

Hold whisk in place and tighten nut anticlockwise using open-ended wrench (size 8).
Working with the bowl and the tools
Figure 1:

Press the Release button and move the swivel arm to position 2.
Insert the bowl:
Tilt the bowl forwards and then set it down. Turn anti-clockwise until it locks into place.
Depending on the processing task, insert the stirrer, whisk or kneading hook until it locks into position.
Note:
If using the kneading hook, rotate the dough deflector until the kneading hook can lock into position (Fig. E-4b).
Put the ingredients to be processed into the bowl.
Press the Release button and move the swivel arm to position 1.
- Attach the cover.
- Set the rotary switch to the desired setting.
Our recommendation:
- Professional flexi stirring whisk: First mix at setting 1-2, then setting 3-5 as required
Professional beating whisk: setting 7, mix in at setting 1 - Kneading hook: first stir in at setting 1, knead at setting 3
Adding more ingredients
- Switch off the appliance with the rotary switch.
- Add more ingredients through the feed tube in the cover.
or
Remove lid.
Press the Release button and move the swivel arm to position 2.
Add ingredients.

After using the appliance
- Switch off the appliance with the rotary switch.
Remove mains plug.
Remove lid.
Press the Release button and move the swivel arm to position 2.
Take the tool out of the drive.
Remove the bowl.
Clean all parts, see "Cleaning and servicing".

Continuous-feed shredder
Risk of injury
Do not grip the sharp blades or edges of the cutting discs. Take hold of cutting discs by the edge only. Before attaching / removing the continuous-feed shredder, wait until the drive has come to a standstill and pull out the mains plug. Do not reach into the feed tube.
Warning!
The continuous-feed shredder must be completely assembled before use. Never assemble the continuous-feed shredder on the base unit. Operate the continuous-feed shredder in the indicated operating position only.
Predetermined breaking point
Figure 6:
The built-in predetermined breaking point protects the drive of the appliance. If an overload occurs, the drive shaft of the continuous-feed shredder breaks. However, the drive shaft can easily be replaced.
A new disc holder with drive shaft is available from customer service.
Professional Supercutreversible disc – coarse / fine

for slicing fruit and vegetables.
Process at setting 5.
Designation on the reversible slicing disc: "Grob" for the coarse cutting side
"Fein" for the fine cutting side
Warning!
The reversible slicing disc is not suitable for slicing hard cheese, bread, rolls or chocolate. Slice boiled, waxy potatoes only when they are cold.
Reversible shredding disc - coarse / fine

for shredding vegetables, fruit and cheese, except for hard cheese (e.g. Parmesan).
Process at setting 3 or 4.
Designation on the reversible shredding disc:
"2" for the coarse shredding side
"4" for the fine shredding side
Warning!
The reversible shredding disc is not suitable for shredding nuts. Shred soft cheese with the coarse side only at setting 7.
Grating disc - medium-fine

for grating raw potatoes, hard cheese (e.g. Parmesan), cooled chocolate and nuts.
Process at setting 7.
Warning!
The grating disc is not suitable for grating soft cheese and cheese slices.
Grating disc - coarse

for grating raw potatoes, e.g. for potato pancakes or dumplings.
Process at setting 7.
Working with the continuous-feed shredder
Figure H:
Press the Release button and move the swivel arm to position 2.
Insert the bowl: Tilt the bowl forwards and then set it down. Turn anti-clockwise until it locks into place.
Press the Release button and move the swivel arm to position 3.
Remove drive cover from the drive of the continuous-feed shredder (Fig. H-5a).
Hold disc holder at the lower end, ensuring that the two tips are face up.
Carefully place the required slicing or shredding disc onto the tips of the disc holder (Fig. H-6a). In the case of reversible discs, ensure that the required side is face up.
Grip disc holder at the upper end and insert into the housing (Fig. H-6b).
- Attach the cover (note mark) and turn all the way in a clockwise direction.
- Place continuous-feed shredder on the drive and rotate all the way in a clockwise direction, as illustrated in Fig. H-8.
- Turn rotary switch to recommended setting.
Put food to be processed in the feed tube and push down with the pusher.
Warning!
Prevent the cut ingredients from building up in the outlet opening.
Tip: To ensure even cutting results, process thin ingredients in bunches.
Note: If the food to be processed sticks in the continuous-feed shredder, switch food processor off, pull out mains plug, wait until the drive comes to a standstill, remove cover from the continuous-feed shredder and empty feed tube.


After using the appliance
- Switch off the appliance with the rotary switch.
Rotate the continuous-feed shredder in an anti-clockwise direction and remove. - Rotate the lid in an anti-clockwise direction and remove.
- Remove disc holder with disc. To do this, press finger from below against the drive shaft (Fig. 1).
Clean parts.
Blender
Risk of injury from sharp blades / rotating drive!
Never place fingers in the attached blender! Do not remove / attach the blender until the drive is at a standstill! Operate the assembled blender only and with the lid attached.
Risk of scalding!
If processing hot liquids, steam escapes through the funnel in the lid. Add a max. 0.5 litres of hot or frothing liquid.
Warning!
Blender may be damaged. Do not process deep-frozen ingredients (except ice cubes). Do not operate blender when empty.
Working with the blender
Figure K:
Press the release button and move the swivel arm to position 4.
Remove the blender drive cover.
- Attach blender jug (mark on the handle on mark on the base unit) and turn all the way in an anti-clockwise direction.
Add ingredients.
Maximum capacity - liquid = 1.25 litres; maximum capacity frothing or hot liquids max. 0.5 litres; optimal processing capacity - solids = 50-100 g;
- Attach the cover and turn anti-clockwise all the way into the blender handle. The cover must be locked in position.
- Set the rotary switch to the desired setting.

Adding more ingredients
Figure K-8:
- Switch off the appliance with the rotary switch.
Remove the lid and add ingredients.
or
remove the funnel and gradually add solid ingredients through the refill opening.
or
- pour liquid ingredients through the funnel.
After using the appliance
- Switch off the appliance with the rotary switch.
- Rotate the blender in a clockwise direction and remove.
Tip: It is recommended to clean the blender immediately after use.
Cleaning and servicing
Attention!
Do not use abrasive cleaning agents. Surfaces may be damaged.
Cleaning the base unit
Risk of electric shock!
Never immerse the base unit in water or place under running water. Do not use a steam cleaner.
Remove mains plug.
Wipe the base unit and drive cover with a damp cloth. If required, use a little detergent.
Then dry the base unit.
Cleaning the bowl and tools
The bowl and tools are dishwasher-proof. Do not wedge plastic parts in the dishwasher, as they could be permanently deformed during the washing process!
Cleaning the continuous-feed shredder
All parts of the continuous-feed shredder are dishwasher-proof.
Tip: To remove the red film after processing e.g. carrots, pour a little cooking oil on a cloth and rub the film off the continuous-feed shredder (not the cutting discs). Then rinse the continuous-feed shredder.
Cleaning the blender
Risk of injury from sharp blades!
Do not touch blender blades with bare hands.
The blender jug, lid and funnel are dishwasher-proof.
Tip: After processing liquids, it is often sufficient to clean the blender without removing it from the appliance. Pour a little water and washing-up liquid into the attached blender. Switch on the blender for several seconds (setting M). Pour out the water and rinse out the blender with clear water.
Important information
If required, clean accessories bag. Follow care instructions in the bag.
Storage
Risk of injury!
When the appliance is not in use, pull out the mains plug.
Figure L:
Store tools and cutting discs in the accessories bag.
- Keep accessories bag in the bowl.
Troubleshooting
Risk of injury!
Before eliminating a fault, pull out the mains plug.
Note:
The Operating indicator flashes if the appliance has been operated incorrectly or the electronic fuse has tripped or the appliance is defective.
The swivel arm must be engaged in every operating position.
Initially try to eliminate the problem which has occurred with the help of the following information.
Troubleshooting
Appliance does not start.
Remedial action
Check the power supply.
Check the mains plug.
- Check swivel arm. Correct position? Engaged?
Screw on blender or bowl as far as possible.
- Attach the blender cover and screw on as far as possible.
- Attach drive cover to unused drives.
The safety lock is active. Switch appliance to 0/off and then back to the required setting.
Troubleshooting
Appliance switches off during use. The overload protection feature has been activated. Too much food was processed at one time.
Remedial action
Switch off the appliance.
- Reduce processing quantity. Do not exceed permitted maximum quantities (see "Application examples").
Troubleshooting
While the drive was running, the release button was inadvertently pressed. The swivel arm moves up. The drive switches off, but does not stop in the tool change position.
Remedial action
Set the rotary switch to 0/off.
Move swivel arm to position 1.
Switch on appliance (setting 1).
- Switch off appliance again. Tool stops in tool change position.
Troubleshooting
Blender does not start working or stops during use, the drive is "humming". Blade is blocked.
Remedial action
- Switch off the appliance and pull out the mains plug.
- Detach the blender and remove the obstruction.
Re-attach the blender.
Switch on the appliance.
Important information
If the fault cannot be eliminated, please contact customer service.
Application examples
Whipped cream
- 100 g-600 g
Whip cream with the whisk for 1 12 to 4 minutes at setting 7 - depending on the quantity and properties of the cream.
Egg white
- 1 to 8 egg whites
Beat egg white with the whisk for 4 to 6 minutes at setting 7.
Sponge mixture
Basic recipe
- 2 eggs
- 2-3 tbs. hot water
- 100 g sugar
- 1 packet of vanilla sugar
- 70 g flour
- 70 g cornflour
- Baking powder if required
Beat the ingredients (except flour and cornflour) with the whisk for approx. 4-6 minutes at setting 7 until frothy. - Rotate switch to setting 1 and spoon in the sifted flour and cornflour within approx. 12 to 1 minute.
Maximum quantity: 2 × basic recipe
Cake mixture
-6 eggs
- 500 g sugar
- 1 pinch of salt
- 2 packets of vanilla sugar or peel from 12 lemon
- 500 g butter or margarine (room temperature)
- 1000 g flour
- 1 packet of baking powder
- 250 ml milk


Mix the eggs, sugar, salt and vanilla sugar or lemon peel with the stirrer for approx. 10 seconds at setting 1.
Set to setting 5 and process for approx. 120 seconds.
- Add butter and process for approx. 60 seconds at setting 3.
- Add flour and baking powder and process for approx. 2 minutes at setting 1.
- Set to setting 3 and gradually add the milk within 2 minutes.
Maximum quantity: 1 x basic recipe
Short pastry
Basic recipe
- 125 g butter (room temperature)
- 100-125 g sugar
-1 egg - 1 pinch of salt
- A little lemon peel or vanilla sugar
- 250 g flour
- Baking powder if required
Mix all ingredients with the stirrer for approx. 12 minute at setting 1, then for approx. 2-3 minutes at setting 3.
From 500g flour:
- Knead the ingredients with the kneading hook for approx. 12 minute at setting 1, then for approx. 3-4 minutes at setting 3.
Maximum quantity: 2 × basic recipe
Yeast dough
Basic recipe
- 500 g flour
-1 egg - 80 g fat (room temperature)
- 80 g sugar
- 200-250 ml lukewarm milk
- 25 g fresh yeast
- or 1 packet of dried yeast
- Peel of 12 lemon
- 1 pinch of salt
Mix all ingredients with the kneading hook for approx. 12 minute at setting 1, then for approx. 3-6 minutes at setting 3.
Maximum quantity: 2 × basic recipe


Pasta dough
Basic recipe
- 300 g flour
- 3 eggs
- 1-2 tbs. (10-20 g) cold water as required
Process all ingredients for approx. 3-5 minutes at setting 3 until a dough forms.
Maximum quantity: 1.5 × basic recipe
Bread dough
Basic recipe
- 1000 g flour
- 3 packets of dry yeast
- 2 tsp. salt
- 660 ml warm water
Mix all ingredients with the kneading hook for approx. 12 minute at setting 1, then for approx. 4-5 minutes at setting 3.
Mayonnaise
- 2 eggs
- 2 tsp. mustard
-1/4 oil - 2 tbs. lemon juice or vinegar
- 1 pinch of salt
- 1 pinch of sugar
Ingredients must be at the same temperature.
Process the ingredients (except the oil) in the blender for several seconds at setting 3 or 4.
- Switch the blender to setting 7 and slowly pour the oil through the funnel and mix until the mayonnaise emulsifies.
Eat the mayonnaise immediately, do not store.


Disposal

Dispose of packaging in an environmentally-friendly manner. This appliance is labelled in accordance with European Directive 2012/19/EU concerning used electrical and electronic appliances (waste electrical and electronic equipment - WEEE). The guideline determines the framework for the return and recycling of used appliances as applicable throughout the EU. Please ask your specialist retailer about current disposal facilities.
Guarantee
The guarantee conditions for this appliance are as defined by our representative in the country in which it is sold. Details regarding these conditions can be obtained from the dealer from whom the appliance was purchased. The bill of sale or receipt must be produced when making any claim under the terms of this guarantee.
Changes reserved.
Optional accessories
| MUZ5ZP1 Citrus press | For squeezing oranges, lemons and grapefruits. | |
| MUZ5CC1 Dicer | For cutting fruit and vegetables into equally sized cubes | |
| MUZ5FW1 Mincer | For cutting fresh meat for steak tartare or meat loaf. | |
| 0.3 | MUZ45LS1 Perforated disc set fine (3 mm), coarse (6 mm) | For the mincer MUZ5FW1. Fine disc for pasties and spreads, coarse disc for sausages and bacon. |
| MUZ45SV1 Viennese whirl attachment | For the mincer MUZ5FW1. With metal template for 4 different pastry moulds. | |
| MUZ45RV1 Grater attachment | For the mincer MUZ5FW1. For grating nuts, almonds, chocolate and dried bread rolls. | |
| MUZ45FV1 Juicer attachment | For the mincer MUZ5FW1. For pressing soft fruit, except raspberries, tomatoes and rose hips, to a pulp. At the same time e.g. currants are automatically stemmed and pitted. | |
| MUZ45PS1 Chipper disc | For the continuous-feed shredder MUZ5DS1. For slicing raw potatoes for chips. | |
| MUZ45AG1 Asian vegeta- ble disc | For the continuous-feed shredder MUZ5DS1. Slices fruit and vegetables into fine strips for Asian vegetable dishes. | |
| MUZ45RS1 Grating disc coarse | For the continuous-feed shredder MUZ5DS1. For grating raw potatoes, e.g. for potato pancakes or dumplings. | |
| MUZ45KP1 Potato fritter disc | For the continuous-feed shredder MUZ5DS1. For grating raw potatoes for rostis and potato fritters, for cutting fruit and vegetables into thick slices. | |
| MUZ5ER2 Stainless steel stirring bowl | Up to 750 g of flour plus ingredients can be processed in the bowl. | |
| MUZ5KR1 Plastic mixing bowl | Up to 750 g of flour plus ingredients can be processed in the bowl. | |
| MUZ5MX1 Plastic blender attachment | For blending drinks, for pureeing fruit and vegetables, for preparing mayonnaise, for cutting fruit, nuts, for crushing ice cubes. | |
| MUZ5MM1 Multi-mixer | For chopping herbs, vegetables, apples and meat, for shredding carrots, radishes and cheese, for grating nuts and cooled chocolate. |
If an accessory is not included in the product package, it can be purchased via the trade or from customer service.
Prudence! Lames rotatives.

Prudence! Accessoires rotatifs.
Sécurité anti-surcharge
(ACCESSOR EN OPTION*).
"2" for den grove riverside
4" for den fine riverside
OBS!
A Fare for skolding!
Ved bearbeiding av varme mikseprodukter, kommer det damp ut gjennom tractken i lokket. Det må maksimal fylles på 0,5 liter varm eller skummende væske.
Obs!
Akoouohte Tc oyniecs Twv oyniw xpnoans.

Ppoox! PepioTpeoEv a paiaipia.

Ppoooxn! PepioTpeoEv a Epyaia. Mnv TIAVEt OTo avoiya oumpi npwns uikwv.
∑ημαντικό!
$$ 0 / o f f = \sum T O T T $$
PuroiOn Tns θeons εpyaiaε:
PntnoTe To PAnkTpo aTnOaPaiOns KAI etakivnoTe To oTpeoEvo BpaXiova. YTOOTnpIeTo nV kInon e To EVA xepi.
MetakivnoTe to OtpefoEvo bpaxiova otnv EITiOUnTn θEon, mExpi va aopaaIoiεI.
www.bosch-home.com/tr
www.bosch-yetkiliservisi.com
He Topka'TeC8 roctpnx HOxIB i pixyunx KpaIOK dNcKIB dIa Ioppi6HeHn. DnCKI dIpyoDpi6HeHn MOxHa 6paTn TiIbKn 3a KpaI! He Topka'TeC8 HOxIB 6IeHepa rOJIIMn pykAmn.
He6e3neKa nopaHeHnI roCTpIMN HOXAMN/npINBOJOM, 0o o6epTaεTbca!
Hikon He BCTpomJype pyKn Do BCtAHOBJeHoro 6neHepa!
3axnct BiD yBIMKHeHHa
INB. Ta6JnIuO «Po6oQi nIoJxKeHHa>.
Y noIoxeHHx 1 i 3 npIpaBmkaetbcra,JIiue:
■ KOLI YaHa (11) BCTaBNeHa NOBepHyTa B 3aΦiKCoBaHe NIOXeHn Ta
3axncha KpnuKa npNbOda 6neHepa (8) 3akpuTa.
TayokdnyamiybaHHa (15)
Дязamiyubahньвaxkoro ticTa Ta nidi muybahn iHrpeiEHTIB,Як He nobunHHI NOpri6HOBaTnC8 (HanpnKlaI,po3INHOK,woKoNAdHnx pIac
BaxknaBa Bka3iBka 0do 3acToCyBaHHa BInuKh-3bNbaKn (MaJ. E)
Дя ONТIMаьного перemiшувань IHrpeiHbI BInuK-3bUBAJIka MaE MaJxe TopKaTnCЯ Дна чaSi.ЯкsoZe He TAK, BIDperyNIOte BucOTy BInuKa-3bUBAJIKN,ЯK ONICAHO HIXKHe.
BnIMtB wTeNceIbHy BnIky 3 pO3eTkn.
HaTnchTy NkHOnKy po3bNoKyBaHHa Ta nepeBecTe nOBOpOTnBaxijb y noJoxKeHHra 2.
BCTABTe BInuOK-3bUbaNky y npuBoD do φikcaui.
MiUHO BTPMMyTe BiHNUOK-36BuaJIky Ta BiIDNyCTIb rAky 3a IOnHHNKOBIO CTpiJKOIO rAikOBIM KJIIOyem (po3mip 8).
■IobepTaIe BiHcyok-36BbAlky, uO6 BipeYIOBaTn ONTImaJIbHy BNCOTy. IobepTaHHra rOINHHNKOBIO CTpiIKOIO: NiJIOm. IobepTaHHra npOTn rOINHHNKOBIO CTpiIKN:OnyckAHH.
HaTnchTy NkHOnKy po3bNoKyBaHHa Ta nepeBecTe nOBOpOTnBaxjIb y noLoXeHHa 1.
IpepeBipTe BnCOTy BiHnUka-3bBaJIKn, 3a notpe6n BiDperyIouTe.
KIO BnCOTy BiIpeRyIbOBAHO npaBnIbHO,HaTNCHITb Ha KhoNkpyo36NoKyBaHnTa TnepeBeiTp nobOpOtHn BaxJIb y nOJoxHenr 2.
MiCuHO BTPmMyOuN BiHnOcK-3bBaNKy, 3aTgHiTb raiKy npOTn roDHHNKOBoi CTpiKn raiKObIM KJIIOHeM (po3Mp 8).
.
y,
1
(2)


Po6ota 3 yaueTo Ta HacaKamn (MaI. B)
HaTnchTy KhoNkPy po3bIokyBaHnTa nepeBecTe nOBOpOTnBaxijb y noIOnKeHHn 2.

YcTaHOBka qa: yCTaHOBiTb qa, HaxINnBUn II Bnepei, a Notim NoCTabTe pIBHO; NOBepHITb npOTn roDHHNKOBoI CTpiKN Do fikcaii.
3aJIeJxHO BiM MeTn nepepo6Kn BCTaBte y npINBOd IO φiKcaui BInHouK-MiuaNkY, BiHouK-3bUbaNkY nn rauok dIy 3amiuBaHHra.
Bka3iBka
Po6ota 3 HacKpi3HOO waTkIBHnueHO Man. H:
HaTnchTy KhoNkPy po3bNoKyBaHHa Ta nepeBecTu NOBOPOTnBaxijb y noIOnKeHHra 2.
UcTaHOBka yau: yCTaHOBiTb uauy, HaxINnBun II Bnepei, a Notim NoCTaBte pIBHO; NObepHiIb npOTn roDHHNKOBoI CTpiKn Do fikcaii.
HaTnchTy KhoNkPy po3bNoKyBaHHa Ta nepeBecTu NOBOpOTnBaxijb y noIOnKeHHa 3.

3HimItb 3axnchy KpnuKy 3 npBoDa HacKpi3HOI WaTkIBnCi (MaI. H-5a).
MiUHO TpImaIe Te TpIMaU dNcKIB 3a HnKHi KIneCb; NiJ uac UboO ObUBa BnCTyPi NOBHHI BkA3yBaTN Bropy.
- ObepexHo NOKnaIITb 6aKaHnI DNCK IaHapi3aHHa 6o HATnpaHHa H BvCTyPiu TpIMaHa DNCKIB (MaI. H-6a).
JaKuo IeTbcra npo Dbo6iHn DnCK, notpiHn biK Mae BkazBAtn Bropy.
BibMItb TpMaay DnckiB 3a BepxHi KHeCb i BCTaBe B Kopnyc (MaJ. H-6b).
YcTaHOBIb KpUkKy (INB. PO3HaKy) Ta NOBepHiTb 3a rOdHHNKOBIO OCTPIJIKOIO Do yNOpy.
UcTaHOBITb 6araToOpyHKIOHaJIbHy
WATKIBHNUO Ha npBOi, YK NOKa3aHO Ha
MaJ. H-8, i NOBepHiT b II 3a RoDINHHKOBOHO CTPIIKOIO Do yNopy.
I NobepnItb noBopOTnH npeMnKa y peKOMeHDoBaHe NOJoxKeHHa.
3aBaHTaXTe npOdykTn IJyIpepeo6Kn y npInMaJIbHnB 6yHKepe, nDITOBxUOu nn X UTOBXaUeM.
ybaral
He donyckaIte HAKONHcHnHaI3AHnx npOyKTIB y BInyckHOMy OTbopi.
Iopada: pibipHomipHoro Hapi3aHHa TOHKi npOdykTN CJIiD CKJaDaTN BCTOci.
Bka3iBa: y pa3i 3aTnCHeHH nepepo6nIO-BAHnx npOdyKtIB y HAcKpi3Hni 7aTkIBnUcIi D BmKHyTN KxyoHHN KOM6aH, BnHrTn BnIKy 3 pO3eTKN, DOneKaTnc 3ynHKn npNBOda, 3HrTn 3 HAcKpi3HOi 7aTkIBnUcIkpuHKy Ta cnyCToUHTN npMmaNbHn 6bYhKeP.
Picjra po6otn
Bumkhitb npnla3a donomoro noBOpoTHoro nepemkaqa.
IIOBepHiTb HacKpi3Hy 7aTkBnHcIIO npOTn RoINHHNKOBoI CTpJIK Ta 3HIMiTb II.
IIOBepHiTb KpUkky npOTn rOdHHNKOBoi CTpiJIK Ta 3HimiTb II.
BnmiTb TpMaay DnCKiB pa3OM i3DnCKOM. IJIaIyOro HATNCiTb NaIbCeM 3Hn3y Ha npINBOHm BAn (MaN J).
Ouictbte Detani.
Бленьер
He6e3neka npaHennr roctpmm HOxamn/npuBOdom, 0o o6epTaetbca!
Hikon He BCTpOMJIte pyKn Do BCTa-HOBJIeHO 6JIeHJepa! BJIeHJep MOXHa 3HIMATN/BCTaHOBJIIOBaTn TIIbKn NICJIA 3yINHKn IprBOda! BJIeHJep MOXHa BVKO-pNCtOByBaTn TIIbKn B 3i6paHOMy CTaHI Ta 3 yCTaHOBJIeHOIO KpiuKIOI.
IcHyc He6e3neka oniKy!
Пид усаперрбкгарячн npodkykTB y ьендери воронки в кшицi вихODNTb napa.Залвайтмakсиму0,5литра rapячоi abo piinctoipidinH.
ybara!
Бленир може 6утnoшкджени. He nepeperблайтшвдкозамороженин hrpeДiEHTN (3a BnHЯTKOM KyбкIB JbOу). He ekcnnyatуte 6ленир поожим.
Po6ota 3 6JHeHepom
MaJ. K:
HaTnCihb Ha KhoNk y po36NokyBaHHa i npeBedeiNb NobopoTHm BaxjIb y noJoxKeHHa 4.
3HimItb 3axnchny KpnuKny npnbOda 6neHepa.
UcTaHOBt bAuy 6IeHepa (no3HaUka Ha pyuCi MaE 6yTu HABnPoTn no3HaUkn Ha OCHOBHOMy 6Iooi) i NOBepHiTb npOTn RoDINHHKOBoI CTPIKN Do ynpOy.
3aBaHTaXTe iHrpeDiEHTn. MakcImaIbHa KInbKicTb: piDHa = 1,25 n; NiHnCTi a6o rapayi piDnHn = 0,5 n; ONtMaIbHa KInbKicTb TBepdNx npOdyk-TiB: 50-100 r.
UcTaHOBITb KpnuKy i BkpyiTb II npOTn roDHHNKOBOI CTPIIKN Do yNOpY B pyKy 6neHepa. Kpnka Mae 6ytn 3aqiKCObaHOIO.
YcTaHOBIb NOBOPOTHNIpePMKaH a6axaHn CTyniNb.

IobaHTaxeHH hIhrpeiEHTIB
MaJ. K-8:
Bumkhitb npnla3a donomoroo nobopotHoro nepemkaqa.
3HIMITb KpnuKy 3aBaHTaxTe iHrpeiEHTn a6o
BIMMiTb BOPOHky NocTyNoBO 3acnnaTe TBepdi iHrpeiEHTN uepe3 3aBaHTaKyBaJIb-HnO OTBip
a60
3aIITe piiki iHrpdeiEHTn Chepe3 BOpOHky.
Picna po6oTu
Bumkhitb npnila3a donomoroo nobopotHoro nepemkaqa.
■IOBepHITb 6JIeHdep 3a rOJHHNKOBHO CTpiIKoTO Ta 3HIMiTb NOrO.
Iopada: 6JIeHdep 6aKaHO YnCTnTo OJpa3y nICsRA BVKOpNCtAHN.
OuHcHnTaI0gJr
ybara!
He 3actocobyte a6pa3nBhi 3ac06n dnyuHenn. Ha noBepxHx MOkyTb BUNKHyTN NOKKoJKeHH.
OuHHeHH OCHOBHOro 6Ioky
He6e3neKa ypaXeHHra eJeKTpnuHm cTpyMOM!
Y kOJHOMy pa3i He 3aHypIouTe OCHOBnIbIOK B VOy Ta He TpIMaIte NOro NiIDnpOTouHO BOIOU. He KopncTyItecnapooCHNkOM.
BnmiTb wTeNceIbHy BnIky 3 po3eKn.
IpoTpiO OCHOBHm 6bOK i 3axnchy KpNtKpy npNBOda BONOrO raHupkoIO. 3a Notpe6n ckOpncTaayTeca HeBeNkoHO KJIbKicTTO MmHoro 3ac06y.
■Пияцboro npotpiТпрILAн acyxo.
Ouichiennhaaishi HacaDOK
Uauy Ta Hacaikn MoKHa MNTB NocyDomNHi MaunHi. He 3aTnckaTe nlaactMaCoBi eIeMeHTn B nocydomnHi MaunHi;Ce MOKe np3BecTn Do ix 6e3noBopOTHOI deOpMauii Ni dac MTTT!
OuHsEHHaHckpi3HoI WAtKIBHnCi
Yci Detani HacKPi3HOI WaTkiBHNi MoKHa MNTN B NOCyDOMnHi MaUNHi.
Iopada:ДлЯВидаленичервого нальOTуNICЯперрбкМорКВиabo IHиХПОдIOHINРODУKTIBСIDHAJIHTN ТROXOnONIIHa raHчIPKу Ta npOteTpN HeU HACKpi3Hy WATKIBHnICU (3a BUNYTKOM DnCKiB ДлЯ ПОДPI6HHeHЯ).ПICЯ CBORO npOMnTe HACKpi3Hy WATKIBHnICU.
Ouichienhna 6JIeHdepa
He6e3neka nopahehnra roctpmm HOxamn!
He TopkaiTeCn HOXiB 6IeHepa roIIMn pykam.
UaSy 6JIeHepa, KpiuKy Ta BOpOHky MoXHa MNTI B NocyDOMnHi MaunHi.
Iopapa: nicn nepepo6kn piinu h qacto doCTaTHbO npocTo nOuNCTtN 6IeHdep, He 3Himaoun Ioro 3 npunaNy. Iy Icboro haJIInTe TPOXn BOIN 3 MmHm 3ac0bom do BCTaHOBJeHOrO 6IeHepa. YbIMKnHt b 6IeHdep Ha KJIbKa cekyHd (piBeHb M). BInIte BOY nCn mTTra Ta npomnTe 6IeHdep YnCTOIO BOHOJ.
BaxJInBa Bka3iBka
Cymky npnlaqra cni d ouhatau B pa3i notpe6n. DotpmytecBkazibok i3 doTny,po3taowabnx y cymui.
36epiraHnHa
Ybara! IChyec He6e3neka TpaBMByaHHI
JaKIO npnlaH He BnKOpncTOByeTbCry, BnIMiTb WTeNceIbHy BNkky 3 pO3ETKn.
MaJI. L:
■PoklaIb HacaIaKn Ta IuCKn Iy npdiHHeHHaO CymKn Ipynpua.
36epiraitecymkyIpynpaandByaani.
YcyHeHHa HecnpaBHOCTeH
Ybara! IChyE He6e3neKa TpaBMvBaHH!
BnMItb wTeNCelbHy BnIky 3 po3eTkn, nepH hIX nouHaTu ycHeHHa HecnpabHoCTi.
BaxJINBa Bka3iBka
Y pa3i Henonlaikn NiJ uac ynpabInHn npIaIOM, cnpaIIObAHN eNEKtpOHoro 3ano6ixhNka abo depekTy npuNay 6bnMae iHNkatop pobOHoro cTaNy.
Iobopothn Baxjlb y koxhomy po60yomny nooKeHHi Ma 6ytu 3aikcoBaHn y na3i.
Cnoouatky cnpo6ynte ycyHytn npo6nemy, 10 BnuHnKla, 3a DOnOMOrO HacTyHnX BkazBok.
HecnpabHicTb
Прилад He 3anyskaetbca.
yCyHeHHa
IpebeipTe eNeKtpnHe KINBneHHra.
■IpepeBipTe wTeNcEnbHy BnIKy.
■IpebeipTe NOBOpOTnB BaxJIb. YnpaBnJIbHe NpOKeHHr?Yn 3aΦikCoBaHO ue enemEnT?
■Поверніт bбпендерaboууdoуnpу.
YcTaHOBITb KpNtKy 6IeHepa Ta 3aKpyTITb Do ynpy.
3aKpNTe 3axNCHMn KpNUkAmn npNBODn, rKi He BKNOPNCOTBOYTOBcR.
AKTINBOBaHe 6IOKyBaHHnIOBTOpHOrOBBIMKHeHH. IOBepHiTb nepemKaU npIaNy B IonoJKeHHr O/off, a Notim Ha3ad Ha 6axaHnI CTyniHb.
HecnpabHicTb
PpnaBnMnKaetbCnIac BnKopnCTaHn. CnpaBobyc 3axnt BiD nepeBaHTaxKeHH. 3aHaTo 6arato npOdyktibnepepo6JIncs OndohocHo.
YcyHeHHa
BvMknHtbpnna.
3MeHtTe KJIbKicTb nepepoBnOBaHnx npoDyKtIb.
He nepeBnuyTe MaKcImaJIbHO DOnyCTmMy KInbKiCtB npOdyKTIb (INB. «PpNKpaDN BnKOpNCtAHHRA»)!
HecnpabHnicTb
Плчac роботи првоба 6уна вираков Натисуна Кнога розлкуваши. Пов- poТни вадль рухаettingа bropy. Ппвор ВIMNKaetбя,ОДнak He 3упняettingа B ПОLOЖЕНД ДЯ 3MiHn HacaDOK.
UcyeHH
YctaHObITb NOBOPOTnI nepeMnKaU y nOLOXeHH 0/off.
IpebeiTb noBopOTnBaxjNb y nOJKeHHa 1.
YBIMKHiTb npuiad (CTyniHb 1).
3HOBByBIMKHiTb npnla.i.
HacaKa 3yinnHЯeTbcB B NOLOKeHHI dny 3MiHN HacaDOK.
HecnpabHicTb
BneHep He nouHaec npaioBoatn a6o 3ynn HaeTcBnPiJ uac BnKOpncTaHHn, pInBOd rye. Hix 3abIOKOBAHn.
UcHHeHHa
Bumkhitb npnlaDi BmMiTb wTeNceIbHy BNkky 3 pO3eTK.
3HimiTb miKcep i yCyHbTe nepeWkoNy.
3HOBy BCTaHOBITb 6IeHep.
YBimKHiTb npnla.
BaxJINBa Bka3iBka
JaKuo yCyHyTu HecnpaBHiCTb BOnncAHn cnOciO He BdaeTbcra, 3BepHiTbcra Do cepBicHOi Cnyk6n.
IhrpeiEHTM McyTb MaTN OHaKOBy TemnepaTpy.
Kilbka cekyHnepepo6nIte ihrpeiEHTN (kpim onii) y 6JIeHepi Ha CTyneni 3 (2) afo 4 (3).
Ipeemkhitb 6neHep Ha cTyniHb7 (4)i NobiInbHO 3aINBaIte ONIIO uepe3 BOpOHky;3bINBaITe,DOKN IJIAXOM emyJb- rYBaHHHe yTBOpNTbcMaHOe3.
Maiohe3 cniD cnoXHTn kHaIWBnDiSe, 36epiratn Ioro He moxha.
YtNiI3aCi

Lcien npinlaam MapkipoBaHO 3rIINO nOIOXeHb EBponeiCboi DnpeKTHBn 2012/19/EU cTocOBHO eJeKTPoHNHX ta eJeKTPoPnpnlaID, uO 6yIn y BVKOpNCtAHHi (waste electrical and electronic equipment - WEEE). DnpeKTHBOO BN3NaUToTBcra MOKlnBOCti, kki E dIiChmN y MexaX EBponeiCbKO rO3y, zuoD npniHnTTaHa3ad Ta yTuJI3aui 6ByuNX y BVKOpNCtAHHi npnlaID. Pno akTyalbHI MOKlnBOCTi dIra BnuJaIeHHaMOXHa Di3HaTncB CneiaJIi3OBAHOMy Maar3NIH.
YMOBn rapaHTii
CTOCOBHO zuIbO npnAdy DiOTb yMOBN rapaHTi, 0o6 6yIIN ONY6NIKOBaHI HaIIM KOMPeTeHTHm IpEcdTcABHnTbOM B kpaIH, B YkI B npuB6aII npnIad. Bn MoKeTe B 6yIb-kynn qac OdepxaTI y MOBN rapaHTiY cneCiIaI3OBAHOM Mya3uHi, B yKOmy B npuB6aII npnIad, a6o 6e3nocepEnbO B HauOMy npedctabHnTbI y Bac B kpaIH. YMOBN rapaHTiДЯ HiMeUynTa aDpeCn Bn 3HaJDeTe Ha octaHHix QOTnpbOx CTopInkax 1eIbpoUpyn. Kpim TORO, yMOBN rapaHTiP03MIeHI TAKOX I B lHTepHeTI 3a 3a3NaueHO aDpeCIO.ДЯ kopncTyBaHnRApaHTiHmN Pocnyramn Heo6xIDHO B 6yIb-kaOMy BnnaKy nokaatn KBNTAHIO npo ONnATy.
MozkniBi 3MiHn.
CpeiaIbHe npIaIaIaI
| MUZ5ZP1 Пос дд цитrucови | Д�� ВИЧАЛЮВАнHAуСКУЗЕЛСИВ, ЛIMоHIVI гразиФРуТВ. | |
| MUZ5CC1 Насада дд нарizаннay Кубikamn | Д�� НAPIЗАнHAуСКУЗЕVIОМУБИВКУБИКAMN OДнAKOBORO розміру | |
| MUZ5FW1 M'ясорубka | Д�� поэдненя СВіЖОТОМ'яСа 3 МToEОпriГOTУВANHA Тakих Stрав, як Тартабо M'яснii рулET. | |
| 03 | MUZ45LS1 Компleck ДиSCIB 3 OTBOPAMN Дрибни OTbIP (3 MM), Вelenki OTbIP (6 MM) | Д�� м'ясорубки MUZ5FW1. Mani OTbOPR - Д�� пaштетв i Бутербюнх mac, Вelenki - Д�� кOBбасok i cana. |
| MUZ45SV1 Насада дд пechиBa | Д�� м'ясорубки MUZ5FW1. 3 MeTaleBIM Shablonom dдя 4 pi3нix Форm пechиBa. | |
| MUZ45RV1 Hacad- ka-ТерTKA | Д�� м'ясорубки MUZ5FW1. Д�� НATINРANHЯ ropixib, мrigдалю, shOKОаду та сухи Булочok. | |
| MUZ45FV1 Hасада-пес дд ФрктВ | Д�� м'ясорубки MUZ5FW1. Д�� пriROTOvBAHNA ПЮpe 3 ягID, okprIM малини, nomid- pib i shinshini. 3 takиягID, як сморODиHa, abTomatuHNo BVIDaJI- Юься чeredшki ТА КICTОчК. | |
| MUZ45PS1 ДиSCдд наhi- зання karptonlì coJOMKOIO | Д�� НACKРИЗHOДШATKIBHUNI MUZ5DS1. Д�� НAP3ANHЯ сロпОй karptONlI coJOMKOIO 3 MeTOJO пriroTOvBAHNA karptonlI ФрI. | |
| MUZ45AG1 Дибдддддддддддддддддддддддддддддддддддддддддддддддддддддддддддддддддддддддддддддддддддддддддддддддддддд徴 ПО-азiatedькову | Длг Наскп�но'шаткibицi MUZ5DS1. Ріже Фруktи' овочі тонкимсмужкам дя пriюту- Вання OBOчевх STрав aziaatcboкі кухни. | |
| MUZ45RS1 Дибдддддддддддддддддддддддддддддддддддддддддддддддддддддддддддддддддддддддддддддддддддддддддддддд徴 Потурпань Нотурпань | Длг Наскп�но'шаткibицi MUZ5DS1. Длг Натурпань сiroо' karтолі 3 метою пriютувань, наршилад, degунов чу ratушок. | |
| MUZ45KP1 Дибдддддддддддддддддддддддддддддддддддддддддддддддддддддддддддддддддддддддддддддддддддддддддддддд Дерунов МуЗER2 Чаши з неся- вiocу остani | Длг Наскп�но'шаткibицi MUZ5DS1. Длг Натурпань сiroо' karтолі 3 метою пriютувань, нерунов та iншин вiocib karтолаянх оданok, дя hapi- Зання Фруktiv i OBOчIB TOBCTIMN CKNБКAMN. | |
| MUZ5ER2 Чаши з неся- вiocу остani | У чаш можна поегоблamentи до 750 р бороча та iншин inhpe di'eHTB. | |
| MUZ5KR1 Чаши з плacructмас | У чаш можна поегоблamentи до 750 рбороча та iншин inhpe di'eHTB. | |
| MUZ5MX1 Hасад- ka-бленьдар i3 плacructmас | Длг 3Miшувань налоов, пriютувань пюpe 3 Фруktiv i OBOчIB abо майонецу; дя поordіненя Фруktiv i ropixiv; дя наkonювань льody. | |
| MUZ5MM1 Багатофунь- цioнальни бленьдар | Длг поordінень зелени, OBOчIB, яблukі m'яca; дя натурпань моркви, рedingу, ropixiv i oxolodжe- Horo shokona'dy. |
IeTani, kI He BXOJaTb Do KOMPJIeKTy NOCTaBKn, MoXHa npUd6aTu B Mara3Hax a6o cepBicHi cnYk6i.
OT BCero cepnda no3dpabJrEm Bac c nokynkO HOBOr npnbopa qnpmb Bosch. DOnonHnTeIbHyIO uHΦopMauHO O haWei npodykU Bbl HaJeTe HaHaWei CtpaHnue BVHTepHeTe.
OrnaBHeHne
ДяВашевбezоносости 201
CnCTembl 6e3oNaCHOCTN. 204
KomnJIeKTHbI 063op .204
Pabochne noIoxeHnra 205
3Kcnpnyatauia 206
YncTka u yxo.. 210
Xpahene 210
POMOuB npu yCTpaHenn HeNCnPaBHOCTeI 210
PpimepbI nCnoJIb3OBAHnI. 211
ytni3a.. 213
YcIobnra rapaHTnHOro o6cIyKbHaHn..213
CneuaJIbHbIe npHaadJeKHOCTn 214
Для Вашиьеозонocти
Ipeep nCNoJIb3OBAHnEM BHNMaTeJbHO npOuTnte 3Tu INHCTpyKcNIO DnI IOnyuEHHaBX Yka3aHnI NO TexHnKe 6e3ONaChOCTN I 3KcPJIyatauIN DaHHoro npBopAp. PpON3BOAnTeJb He HecET OTBeTCTBeHHoCTN 3a IOBpeXdEHHa, BO3HnKUme B pe3yJbTaTe HECO6JIHODeHHaYka3aHnI NO npaBnJIbHOMy npImMeHeHIO npBopAp.
ДанныnpиборпpeднэчehДЯДOMaшHEROИСПОЛь3OBAHNYB OБьemax,харakTeрныДЯДOMaшнxXO3ЯNTВ.ПрIMeHneВ 6byTOBbIX yCIOBnIX BKJIQUaet,HaNPIMep,IcNoJIb3OBaHNe B KUxHAX DЯ COTpydNHKOB MaRa3INHO,OФиСOB,CeIbCKOXO3ЯNTBeHNBix IN DpyrNIX npOMblIeHHbIXпpeДрпraTи,a TAKKe IcNoJIb3OBaHNe RocTAMn NaHCNOHOB,He6OJIbShNX OTeJeN I NOIo6HbIX 3aBeDeHNI. Пибор можно ИсNoJIb3OBaTb TOJbKO ДЯпepa6OTkn TAKORO KOJINUYeCTBaПрODyKTOBИВТeЧЕНeТAKOTOВРemeH,NKOTOpbIe XapakTePbIДЯДOMaшHEROXO3ЯNTBa.He npeBblaTbMaK-CmmaJIbHo DoNYcTlMoe KOJINUYeCTBOПрODyKTOB(CM.«「PpUmEpbI UcNoJIb3OBAHua»)!
Данныnpиборпиroedenдяперemeшваня,3amewinba纳иИ B36иваня npodyKTOB.He nCnoIb3OBAtBдяперap6OTkn dpyrnx npedmetOB nIIN BeueCTB.Пр nCnoIb3OBAHn pa3peweHHbIX npoIN3BOdnteMe npINAdJIeXHoCTeB O3MOxHbI dpyrIe BapnaHTbl npimHeHn.Прбop moKHO nCnoIb3OBAtB TOIbKO C opINHaJIb- HbIMn pInHaJdJeXHoCTaMn. Пр nCnoIb3OBAHn npINAdJIeXHoCTe pyKOBoDCTBOBaTbC8 COOTBeTCTByUOuIMM INHcTpYKcIyAMN NO 3KcPnyatauIN, BXODaUIMN B KOMPNeKT noCTaBKn. CoxpaHnte INHcTpYKcIuO NO 3KcPnyaTaUaN. Пр=npededaye npi6opa TpeTbeMy INuCy Heo6xoDIMO TAKke npedeABy Emy INHcTpYKcIuNO NO 3KcPnyaTaUaN.
Оьше уka3aHHЯ NO Textнke 6e3ONaChoctn
Onachoctb nopaxeHnay TOKOM!
Co6nIaTb yKa3aHnB INHCTpyKcHn N O 3KcnJIyataCnN.

OcToPoJxHo! BpaIaIouIueScra HOxN.

OctopoJHo! BpaaHouIeScn HacaIKn. He onyckaTb pyky B 3arpy30uHoe OTBepCTne.
BaxHo!
BCTaBNTb BnIky Bpo3eTky.
Cmecntelbna YaSha n HacaKn
OnachOCTb TpaBMnpoBaHnBpaauoUmmncHaCaDkamn
Bo Bpem 3KcnpyaTaun HN B KOEM cnlyae He onyckaTb pykn B CMEcntelbHyu qaay. Pa6oTaTb TOnbKO C yCTAHOBnEHNO KpbIshko (12)! HacaKn MOxH O3MeHrTb TOlbKO Nocne OCTaHOBKN PrnBOda- npVBOD DBXkETcE ue HeKOTOpoe BpeM IOCSJe BbIKNoeHn I OCTaHaBnBaETC B NOLOKeHN DJIa CmHbI HacaDOK. N3MeHrTb NOLOKeHne NOBOPOTHO KPOHHTeHa MoXHO TOlbKO Nocne OCTaHOBKn HacaDN. N3 COo6paKeHn 6eOonacHoCTn Pn6op MOxHO NCNoB3OBA Tb TOnbKO PnYcNOBN, YTO HeNCNoJb3YeMbI PnVBODbl 3aKpblTb 3aUnTHbIMN KpbIshKaMn (5,8).
BHMaHne!
CmecnteIbHyU qaUy nCnOlb3OBaTb TOnbKO dIpa6oTbI cDaHHbIM npu6Opom.
PpoceccnoHaJIbHbI yHbEpcaJIbHbI BeHcNK dJIЯ nepemeunBaHn (13)
UcTaHOBnTb KpbIuKy.
YCTaHOBtB NOBOPOTbI BblKIOUaTeNb Ha HxKbIpeKIM.
Haupa pekomendaця:
-ПюрофесноHaьнунВерсальны
Вechик ДдяпевшИваня:
Счала 3amEuTaB b peЖime 1-2,
Затem пepeКЛIOUHTb Ha peKIM 7
-Професноалььов ВсчндяВ36иВаня:peЖIM7,пОмMuTaBВpeЖIMe1
-MecnIbHnaHa cHaJana 3aMeuTaBpeKIme1,3aTeM BbIMecITbBpeKIme3
OchOBHO6nOK HN B KOEM Cnyuae He norpykataB B OBOy N He DEpXaTb NOI npOTouHOb BOIo. He IcNoIb3ObaTb napoouchTeIb.
N3BJIeYb BUNKy N3 pO3eTKN.
IpoTepeTb OCHOBHO6LOK 3aunTHbIe KpbIuKN DnIg PnIBOIOB BnaXHO MATEpnei. Pn Heo6xOJIMOCt NcNoJIb3OBaTb He6oJIbWoE KOINueCTBO CpeDCTBa dJIaMbITbIPOCyDbI.
B 3aeknueHne BbItepeTb npu6op hacyxo.
YnCTka CmecnteJbHOJ YaSHIN HacaIOK
CmeintelbHyu yaSu y hacaKm MOxHOMbITb B NOCyDoomeUHO MaUNHe.
IJaactMaCCOBbie DeTaNI He 3aXkMAtb B NOCyDoomeUHO MaUNHe, TAK KAcB IpoCeCE Mblb BO3MOxHa INx HeycTpaHIMaJdeOpmaZn!
YnCTka yHnBepcaIbHOJ pe3KJ
BceIeTAnyHnBepcAebHOpe3KMOxHOMbITbNOCyDOMOeHNOMaUNHe.
Pekomeha:JyUcTaPaHeHnKpaCHOro Hane Ta Nocne nepepa60TK, HapnpMeR, MOPKOBn, CMOHTb MaTePNIO He6OJIbShIM KOJINUeCTBOM pACTNTeJIbHOrO Macna I npOTepb YHNBePcaJIbHyIO pe3Ky (HeIIN-ImbHInTeIN).Piocne 3TOrO npOMbITb YHNBePcaJIbHyIO pe3Ky.
UcTka 6JIeHdepa
AnachocTb TpaBMnpoBaHnOCTpbIMN JIe3BnMn HOxa!
He Tporatb Hoxn 6neHepa roIbIMnypkam.
Ctakan 6IeHepa, KpbIuKy I BOPOHky MoXHO Mblb B NocydomoehHm MaunHe.
Pekomehdau: nocne nepepa60TknnkIOKcTe 3aacCTyIO DOCTOHTO ONUCTNb6JIeHep, He cHmMa erO C npbOpa. IJNA3TOO 3aIINb B yCTaHOBHeHHbI 6JIeHepHEMHORO BObl CO CpeDCTBOM IJMA MbITbIPOcybl. BKNIOHTb 6JIeHep Ha HeCKoJIbKOceKYnd (pexIM M). BblNTbMbIbHyO BDOUYnpOMbT b6JIeHep YnCTOBIODOI.
BaxHoe yka3aHne:
Pn HeNCNoB3OBAHnn Pnpo#a3BneYb WTeNcJIbHyU BnIky n3 pO3eTkn.
PncyHOK
UIOKHTb HacaIKN I NsCKN-N3MeJIbHTeIN B CymkyIJIpINHaNDKeHOCTeI.
Cymky DnI npHaIeKHOCTe XpaHITb B CmecHTeBHO YAWe.
IobopothbIKPOHHTeHHdoJXeH6bITb 3aKcnpoBaH BKaJdO mpa6ooyem nOIOKeHH.
Bhaaane cneyet nonbtaTcra yctpaHtB BO3NkUO np6JIeMy c nOMoIbIO cNeIyo- uix yka3AHn.
HeincnpaBHOctb
Пибор He Вклочаетя.
YcTpaHHeHne
IpoBepuTb Hauuue 3JeKtpoCah6KeHnA.
IpoBepuTb wTeNCeHbHyIO BnIKy.
IpoBepntbIOBOPOTbIKKPOHHTeH. B npabINbHOM NIOJXeHN? 3aФИКСИРОВАн?
IpnkpyTntb 6JIeHdep nII IN CMEcNTeBHyU qauy do ynpa.
YcTaHOBnTb KpbIuKy 6IeHepa I npKpyTnTb Do ynpa.
HaKpbIb 3aUHTbIMN KpbIuKaMn npuBO-DoB HEnCNoJb3yEmbl E npuBObl.
BkIIOUeHa 6JIOKINPOBka NOBTOPHO BkIIOUeHn. YCTaHOBNTb nepeKJIIOUaTeNb npIbopa B nIoJooKeHne O/off, a 3aTeM CHOBa Ha HUxKbI pExIM.
HeincnpaBHOctb
Pn6bop BbIKIOaEcTc BO BpeM IcNoIb3OBAHnCpaBaTbIaBET 3aunTa OTpeRpy3Kn. OndOBpeMeHHo NepepaBaTbIaNocCbINsKOM 60JIbWoE KOJNUeCTBO IpOdyKTob.
YcTpaHHeHne
OTKJIHOnuTb npn6Op.
UMeHbIHTb KOINueCTBO npepaBaIbAeMbIX pOdyKTOB.
He npebbIaTb MaKcIMMaJIbHO DoNyCTHMOE KOJIuYeCTBO PPOdYKTOB (CM. «PpImepbI NcONJIb3OBAHnra»)!
HencnpaBHOctb
BoBpempa6oTbI npuBoJa cnyaHNo 6bln Haxkata KhoNka pa36nokipobAHn. NOBopOThBi kPoHwTeH npeDnBaetc BBepx. PpNbOd OTKnHouaETc, Ho He octaHaBnBaEeTcB NIOJKeHN dJI CMeHbI HacaDOK.
YcTpaHHeHne
IpebeCTn noBOpTHbI nepeKJIouaTeIb BnoJIOxHeHc «0/off>.
IpeBecTnIOBOPoTHbIKpOH- WTeH B NOJoxHe1e 1.
BknHouTb np6op (peKm1).
CHOBA BbIKHouHTb npn6op.
HacaKa octaHaBnBaetcB IIOJoxKeHHI DnA CMeHb HacaDOK.
HeinpabHoctb
EcnTakIM o6pa3oM He ydaIocb yctpaHnTb HEnCnpaBHOCTb, 6paTntecb B cepBnCHyO cnyx6y.
PpimepbI nCnoJb3OBaHnIa
B36ntbIe CJNIBKN
-100r-600r
CINBnpepebaTaBaTbOT 12 Do4MnHyTBpeKmme7B3aBN CnMOCTNOT KOJNUeCTBaN CBOICTB CINBOKCNOMOUsbEOBeHUnKa DnA B3bNAHn.
Янные белки
-OT1do8yinhby6eIKOB
■BeIKN B36BbAtb B TeueHne 4-6 MInHyT Ha CtUpeHn 7 C NOMOuBIO BEHUnKa DJIa B36BbAHna.
BnCKBnTHoe TECTO
OchOBHO peceNT
-2yua
-2-3 CT.л. гораячев Вобл
- 100 r caxapa
-1 NaKeTnK BaHnJIbHO r caxapa
-70rmykn
-70rKpaXmana
- ecnnoTpe6yetyra, HEmHOro nekapcKOro nopoWka


IINHrpEaHeNTbI (KpOMe MyKn i KpaxMaJia) B36nBaTbB TeueHne npImepHo 4-6 MInHyT BpeXIMe 7 C NOMOUsb BOHcYka DnB36nBaHnJa Oo6pa3OBaHnJa neHbl.
UcTaHOBnTB NOBOpOTbI NpeKluOaTeNb Ha pexIM 1 IN B TeueHne PpImepHo 1 / 2 - 1 MInHyTbI IOdMeuINBaTb IIO CTOnIOBOJ JIOxke IpocceHHyO MyKy I KpaXMaJ.
MaKcMmaJIbHoe KOJIuYeCTBO: 2-KpaTHoe KOJIuYeCTBO IpOdYkTOB I3 OCHOBHOro peIeNTa
CdoHoe TeCTO OchOBHO peeNT
-6yina
- 500 r caxapa
-1 uenotka coJI
-2 naketika BaHnIbHoro caxapa nIu ZeJa pC 1/2 NIMOHa
- 500 r cInbOuHOro MacJa nIi MaprapHa
- (KOMHaTHoI TEMnepaTpybl)
-1000rmykn
- 1 naKeTnK nEkapcKOro nopOuKa
-250MmMOnoka
Ia, caxap, coJIb I BaHInIbHbIcaxap nnIeDpy IIMoHa CMeIaTb BeHnKOM IJIpeMeWunBaHnB TteHne np6J. 10 cekyHd B pexime 1.
UcTaHOBnTbHapeKIM5npepepaTbIBaTbBTeueHne npu6n.120cekyHd.
IIO6aBnTB CInBouHoe MacNo I nepepa-6aTbIBaTB B TeueHne npu6n. 60 cekyHd B peKmE 3.
IIO6aBnTb Myky n nekapcKn IopoWok n IpepepaBaTBaBATb B TeueHne np6n. 2 MInHyT b peXmme 1.
UcTaHOBtB Ha pexIM 3 n B TeueHne 2 MInHyT NocTeENHNO Do6aBnTb MoJOKO.
MaKcMmaJIbHoe KOJIuYeCTBO:1-KpaTHoe KOJIuYeCTBO IPOdYKTOB 13 OCHOBHOro peCenTa

| KHEECK, OMO=37ydu, 426057, B. CnKBoAyn, d.152, ran (3417) 77-10-10, dacs. (3411) 24-95-13 |
| KIAA0008, OMO=37ydu, 426057, B. CnKBoAyn, d.152, ran (3417) 77-10-10, dacs. (3411) 24-95-13 |
| KIAA0008, OMO=37ydu, 426057, B. CnKBOyoAyn, d.152, ran (3417) 77-10-10, dacs. (3411) 24-95-13 |
| MUKIAPK, ILOU=37ydu, 426057, B. CnKBoAyn, d.152, ran (3417) 77-10-10, dacs. (3411) 24-95-13 |
| MUKIAPK, ILOU=37ydu, 426057, B. CnKBoAyn, d.152, ran (3417) 77-10-9, dacs. (3411) 24-95-13 |
| MUKIAPK, ILOU=37ydu, 426057, B. CnKBoAyn, d.152, ran (3417) 77-10-9, dacs. (3411) 24-95-13 |
| MUKIPKC, ILOU=37ydu, 426057, B. CnKBoAyn, d.152, ran (3417) 77-10-9, dacs. (3411) 24-95-13 |
| MUKIPKC, ILOU=37ydu, 426057, B. CnKBoAYN, d.152, ran (3417) 77-10-9, dacs. (3411) 24-95-13 |
| KAKA3Hb, OMO=37ydu, 426057, B. CnKBoAyn, d.152, ran (3417) 77-10-9, dacs. (3411) 24-95-13 |
| KAKA3Hb, OMO=37ydu, 426057, B. CnKBoAyn, d.152, ran (3417) 77-10-9, dACS. (3411) 24-95-13 |
| KAKA3Hb, OMO=37ydu, 426057, B. CnKBoAyn, d.152, ran (3417) 77-10-9, dACS. (3411) 24-95-13 |
| KAKA3Hh, OMO=37ydu, 426057, B. CnKBoAyn, d.152, ran (3417) 77-10-9, dACS. (3411) 24-95-13 |
| KAKA3Hh, OMO=37ydu, 426057, B. CnKBoAYN, d.152, ran (3417) 77-10-9, dACS. (3411) 24-95-13 |
| KAKA3Hh, OMO=37ydu, 426057, B. CnKBoAYN, d.152, ran (3417) 77-10-9, dAC. (3411) 24-95-13 |
| KAKA3Hh, OMO=37ydu, 426057, B. CnKBoAYN, d.152, ran (3417) 77-10-9, dAC. (3411) 24-95-13 |
| KAKA3Hb, OMO=37ydu, 426057, B. CnKBoAYN, d.152, ran (3417) 77-10-9, dAC. (3411) 24-95-13 |
| KAKA3Hb, OMO=37ydu, 426057, B. CnKBoAY, d.152, ran (3417) 74-27-17, dACS. (3411) 24-95-13 |
| KAKA3Hb, OMO=37ydu, 426057, B. CnKBoAY, d.152, ran (3417) 74-27-17, dACS. (3411) 24-95-13 |
| KAKA3HPK, ILOU=37ydu, 426057, B. CnKBoAYN, d.152, ran (3417) 74-27-17, dACS. (3411) 24-95-13 |
| KAKOB, OMO=37ydu, 426057, B. CnKBoAYN, d.152, ran (3417) 74-27-17, dACS. (3411) 24-95-13 |
| KAKOB, OMO=37ydu, 426057, B. CnKBoAYN, d.14-116A, bn. (3417) 54-40-42, dACS. (3411) 53-55-13 |
| KAKOB, OMO=37ydu, 426057, B. CnKBoAYN, d.152, ran (3417) 74-27-17, dACS. (3411) 53-55-13 |
| KAKAPBDAH, ILOU=37ydu, 426057, B. CnKBoAYN, d.152, ran (3417) 79-23-81, bn. (3417) 42-26-17, dACS. (3411) 24-95-13 |
| KAKEMPO, OMO=37ydu, 426057, B. CnKBoAYN, d.152, ran (3417) 79-23-81, bn. (3417) 42-26-17, dACS. (3411) 24-95-13 |
| KAKEMPO, OMO=37ydu, 152, ran (3417) 79-23-81, bn. (3417) 42-26-17, dACS. (3411) 24-95-13 |
| KHEJIUMA, OMO=37ydu, 426057, B. CnKBoAYN, d.152, ran (3417) 79-23-81, bn. (3417) 42-26-17, dACS. (3411) 24-95-13 |
| KHEJIUMA, OMO=37ydu, 426057, B. CnKBoAYN, d.152, ran (139), bn. (3417) 31-26-90, bn. (3417) 31-26-90, bn. (3417) 31-26-90, bn. (3417) 31-26-90, bn. (3417) 31-26-90, bn. (3417) 31-26-90, bn. (3417) 29-40-42 |
| KHEKOB, OMO=37ydu, 426057, B. CnKBoAYN, d.152, ran (3417) 77-10-10, dACS. (3411) 24-95-13 |
| KHEKOB, OMO=37ydu, 426057, B. CnKBoAYN, d.152, ran (3417) 77-10-10, dACS. (3411) 24-95-13 |
| KHEKOB, OMO=37ydu, 426057, B.CnKBoAYN, d.152, ran (3417) 77-10-10, dACS. (3411) 24-95-13 |
| KHEKOB, OMO=37ydu, 426057, B.CnKBoAYN, d.152, ran (3417) 77-10-9, dACS. (3411) 24-95-13 |
| KHEKOB, OMO=37ydu, 426057, B.CnKBoAYN, d.152, ran (3417) 77-10-9, dACS. (3411) 24-95-13 |
| KHEKOB, ILOU=37ydu, 426057, B. CnKBoAYN, d.152, ran (3417) 77-10-9, dACS. (3411) 24-95-13 |
| KHEKOB, ILOU=37ydu, 426057, B. CnKBoAYN, d.152, ran (3417) 77-10–9, dACS. (3411) 24-95-13 |
| KHEKOB, ILOU=37ydu, 426057, B. CnKBoAYN, d.152, ran (3417) 77-10-9, dACS. (3411) 24-95-13 |
| KHEKPCHD, ILOU=37ydu, 426057, B. CnKBoAYN, d.152, ran (3417) 77-10-9, dACS. (3411) 24-95-13 |
| KAPCHD, ILOU=37ydu, 426057, B. CnKBoAYN, d.152, ran (3417) 77-10-9, dACS. (3411) 24-95-13 |
| KAPCHD, ILOU=37ydu, 426057, B. CnKBOyoAYN, d.152, ran (3417) 77-10-9, dACS. (3411) 24-95-13 |
| KAPCHD, ILOU=37ydu, 426057, B. CnKBoAYN, d.152, ran (3417) 77-10-9, dn. (3417) 35-20-63, bn. (3417) 25-50-20, bn. (3417) 25-50-20 |
| KAPCHD, ILOU=37ydu, 426057, B. CnKBoAYN, d.152, ran (3417) 77-10-9, dn. (3417) 35-20-63, bn. (3417) 25-50-20 |
| KAPCHD, ILOU=37ydu, 426057, B. CnKBoAYN, d.152, ran (3417) 77-10-9, dn. (3417) 35-20-63, bn. (3417)25-50-20 |
| KAPCHD, ILOU=37ydu, 426057, B. CnKBoAYN, d.152, ran (3417) 77-10-9, dn. (3417) 35-20-63, bn. (3417) 25-50-20, bn. (3417)25-50-20 |
| KAPCHD, ILOU=37ydu, 426057, B. CnKBoAYN, d.152, ran (3417) 77-10-9, dn. (3417) 35-20-63, bn. (3417)25-50-20 |
| KAPCHD, ILOU=37ydu, 426057, B. CnKBoAYN, d.152, ran (3417) 77-10-9, dn. (3417) 35-20-63, bn. (3417)25-50-20 |
| PCCN |
| BAEAKH, IJ Koubunhouni POMah CepBeeBhu, 655010, Topocbayn, n.15, ren.(392) 26-65-64, dacq. (390) 222-6564 |
| AHAHAN, IJ Koubunhouni POMah CepBeeBhu, 655010, Topocbayn, n.15, ren.(392) 26-65-64, dacq. (390) 222-6564 |
| AHAHAN, IJ Koubunhouni POMah CepBeeBhu, 63450, KLehenyn, n.18a, ren.(392) 357-17-89, 329-22.1, dacq. (390) 37-17-89 |
| AHMBETBECKC, OOc AImBeBumCepBecBencHentI, 423450, Hespinbohnyn, n.37, ren.(392) 38-38-43, 221-270, dacq. (390) 38-38-43, 434400, APhatpmbuyn, n.39, ren.(392) 63-69-8, 99-81-215-5775 |
| ANTHTBt, IJ Kopenahan Anor Hopt BopBu, 184209, n.3, HnoBobouyn, d.22a, ren.(392) 38-38-43, 434400, APhatpmbuyn, n.39, ren.(392) 63-69-8, 99-81-215-5775 |
| AP3AMAC, IJ AboAschmab MurnenAneKlembauBopBn, 607224, 9e Manyn, n.4, ren.(391) 41-42-7, 70-77-82, dacq. (391) 7-7-73, 70-77-82 |
| APAMAB, IJ Kopenahan CepBeeBubn, 352900, KomComBoBuayn, n.115, ren.(391) 38-38-43, 38000 |
| APAAHEBcC, OOc JInBaBemCepBencLentH, 163000, CaboBunyn, d.21, ren.(391) 38-38-43, 38000, CaboBunyn, d.21, ren.(391) 38-38-43, 38000, CaboBunyn, d.21, ren.(391) 38-38-43, 38000, CaboBunyn, d.21, ren.(391) 38-38-43,38000, CaboBunyn, d.21, ren.(391) 38-38-43, 38000, CaboBunyn, d.21, ren.(391) 38-38-43, 38000, CaboBunyn, d.21, ren.(391) 38-38-4, 38000, CaboBunyn, d.21, ren.(391) 38-38-43, 38000, CaboBunyn, d.21, ren.(391) 38-38-43, 38000, CaboBunyn, d.21, ren.(391) 38-38 |
| APAXAEHbC, OOc JInBaBemCepBencLentH, 163000, CaboBunyn, d.21, ren.(391) 38-38-43, 38000, CaboBunyn, d.21, ren.(391) 38-38-43, 38000, CaboBunyn d.21, ren.(391) 38-38-43, 38000, CaboBunyn d.21, ren.(391) 38-38-43, 38000, CaboBunyn d.21, ren.(391) 38-38-43, 38000, CaboBunyn, d.21, ren.(391) 38-38-43, 38000, CaboBunyn d.21, ren.(391) 38-38-43, 38000, CaboBunYN, 2000, TApmaHyr, d.21, ren.(391) 38-38-43, 38000, CaboBunyn d.21, ren.(391) 38-38-43, 38000, CaboBunyn d.21, ren.(391) 38-38-43, 38000, CaboBunYN, 2000, TApmaHyr, d.21, ren.(391) 38-38-43 |
| APAXAEHbC, OOc JInBaBemCepBencLentH, 163000, CaboBunyn, d.21, ren.(391) 38-38-43, 38000, CaboBunyn d.21, ren.(391) 38-38-43, 38000, CaboBunyn d.21, ren.(391) 38-38-43, 379-47, 97-100, dacq. (390) 22-65-64 |
| APAXAEHbC, OOc JInBaBemCepBencLentH, 163000, CaboBunyn, d.21, ren.(391) 38-38-43, 38000, CaboBunyn d.21, ren.(391) 38-38-43, 3800D, CaboBunyn d.21, ren.(391) 38-38-43, 3800D, CaboBunyn d.21, ren.(391) 38-38-43, 3800D, CaboBunyn d.21, ren.(391) 38-38-43, 3800D |
| APAXAEHbC, OOc JInBaBemCepBencLentH, 163000, CaboBunyn, d.21, ren.(391) 38-38-43, 3800D, CaboBunyn d.21, ren.(391) 38-38-43, 3800D, CaboBunyn d.21, ren.(391) 38-38-43, 3800D, CaboBunynd.21, ren.(391) 38-38-43, 3800D, CaboBunyn d.21, ren.(391) 38-38-43, 3800D, CaboBunyn d.21, ren.(391) 38-38-43, 3800D, CaboBunyn d.dacq. (390) 22-65-64 |
| APAXAEHbC, OOc JInBaBemCepBencLentH, 163000, CaboBunyn, d.21, ren.(391) 38-38-43, 3800D, CaboBunyn d.21, ren.(391) 38-38-43, 38000, CaboBunyn d.21, ren.(391) 38-38-43, 3800D, CaboBunyn d.21, ren.(391) 38-38-43, 3800D, CaboBunynd.21, ren.(391) 38-38-43, 3800D |
| APAXAEHbC, OOc JInBaBemCepBencLentH, 163000, CaboBunyn, d.21, ren.(391) 38-38-43, 3800D, CaboBunynd.21, ren.(391) 38-38-43, 3800D, CaboBunynd.21, ren.(391) 38-38-43, 3800D, CaboBunynd.21, ren.(391) 38-38-43, 3800D, CaboBunynd.dacq. (390) 22-65-64 |
| APAXAEHbC, OOc JInBaBemCepBencLentH, 163000, CaboBunyn, d.21, ren.(391) 38-38-43, 3800D, CaboBunynd.21, ren.(391) 38-38-43, 38000, CaboBunynd.21, ren.(391) 38-38-43, 3800D, CaboBunynd.21, ren.(391) 38-38-43, 3800D, CaboBunynd.21, ren.(391) 38-38-43, 3800D |
| APAXAEHbC, OOc JInBaBemCepBencLentH, 163000, CaboBunyn, n.11, ren.(391) 38-38-43, 3800D, CaboBunyn d.21, ren.(391) 38-38-43, 3800D, CaboBunyn d.21, ren.(391) 38-38-43, 3800D, CaboBunyn d.22, ren.(391) 38-38-43, 3800D, CaboBunyn d.22, ren.(391) 38-38-43, 3800D, CaboBunyn d.22, ren.(391) 38-38-43, 3800D, CaboBunyn d.22 |
| APAXAEHbC, OOc JInBaBemCepBencLentH, 163000, CaboBunyn, n.4, ren.(391) 38-38-43, 3800D, CaboBunyn d.21, ren.(391) 38-38-43, 3800D, CaboBunyn d.21, ren.(391) 38-38-43, 3800D, CaboBunyn d.21 |
| APAXAEHbC, OOc JInBaBemCepBencLentH, 163000, CaboBunyn, n.4, ren.(391) 38-38-43, 3800D, CaboBunyn d.21, ren.(391) 38-38-43, 3800D. CaboBunyn d.21, ren.(391) 38-38-43, 3800D, CaboBunyn d.21, ren.(391) 38-38-43, 3800D, CaboBunyn d.21, ren.(391) 38-38-43, 3800D,CaboBunyn d.21, ren.(391) 38-38-43, 3800D, CaboBunyn d.21, ren.(391) 38-38-43, 3800D, CaboBunyn d.21, ren.(391) 38-38-43, 3800D, CabotBubnyn, n.17, ren.(391) 38-38-43, 3800D, CabotBubnyn d.21, ren.(391) 38-38-43, 3800D, CabotBubnyn d.21, ren.(391) 38-38-43, 3800D, CabotBubnyn d.21, ren.(391) 38-38-43, 3800D, CabotBubnyn d. dacq. (390) 22-65-64 |
| APAXAEHbC, OOc JInBaBemCepBencLentH, 163000, CaboBunyn, d.21, ren.(391) 38-38-43, 3800D, CaboBunyn d.21, ren.(39) 38-38-43, 3800D, CaboBunyn d.21, ren.(391) 38-38-43, 3800D, CaboBunyn d.21, ren.(391) 38-38-43, 3800D, CaboBunyn d.21, ren.(391) dacq. (390) 22-65-64 |
| APAXAEHbC, OOc JInBaBemCepBencLentH, 163000, CaboBunyn, d.21, ren.(391) 38-38-43, 3800D, CaboBunyn d.21, ren.(389) 22-65-64 |
| APAXAEHbC, OOc JInBaBemCepBencLentH, 163000, CaboBunyn, d.21, ren.(391) 38-38-43, 3800D, CaboBunyn d.21, ren.(391) 38-3 8-7-65-64 |
| APAXAEHbC, OOc JInBaBemCepBencLentH, 163000, CaboBunyn, d.21, ren.(391) 38-38-43, 3800D, CaboBunyn d.21, ren.(391) 38-38-43 |
| APAXAEHbC, OOc JInBaBemCepBencLentH, 163000, CaboBunyn, d.21, ren.(391) 38-38-43, 3800D, CaboBunyn d.21, ren.(391) 38-38-43, 3800 D, CaboBunyn d.21, ren.(391) 38-38-43, 3800D, CaboBunyn d.21, ren.(391) 38-38-43, 3800D, CaboBunyn d.21, ren.(391) 38-38-43, 3800 D, CaboBunyn d.21, ren.(391) 38-38-43, 3800D, CaboBunYN, 2000, TApmaHyr, d.21, ren.(391) 38-38-43, 3800D, CaboBunYN, 2000, TApmaHyr, d.21, ren.(391) 38-38-43, 3800D, CaboBunYN, 2000, TApmaHyr, d.21, ren.(40) 22-65-64 |
| APAXAEHbC, OOc JInBaBemCepBencLentH, 163000, CaboBunyn, n.4, ren.(391) 38-38-43, 3800D, CaboBunyn d.21, ren.(391) 38-38-43, 3800D, CaboBunyn d.21, ren.(391) 38-38-43, 3800D, CaboBunyn d.21, ren.(391) 38-38-43, 3800D, CaboBunyn d.21, ren.(391) 38-38-43, 3800D,CabotBubnyn, n.17, ren.(391) 38-38-43, 3800D, CabotBubnyn d.21, ren.(391) 38-38-43, 3800D, CabotBubnyn d.21, ren.(391) 38-38-43, 380 |
| APAXAEHbC, OOc JInBaBemCepBencLentH, 163000, CaboBunyn, n.4, ren.(391) 38-38-43, 3800D, CaboBunyn d.21, ren.(391) 38-38-43, 3800D CabotBubnyn d.21, ren.(391) 38-38-43, 3800D, CabotBubnyn d.21, ren.(391) 38-38-43, 3800D, CabotBubnyn d.21, ren.(391) 38-38-43, 3800 D, CabotBubnyn d.21, ren.(391) 38-38-43, 3800D, CabotBubnyn d.21, ren.(391) 38-38-43, 3800D, CabotBubnyn d.21, ren.(391) 38-38-43, 3 8-7-65-64 |
| APAXAEHbC, OOc JInBaBemCepBencLentH, 163000, CaboBunyn, d.21, ren.(391) 38-38-43, 3800D, CaboBunyn d.21, ren.(391) 38-40-65 |
| APAXAEHbC, OOc JInBaBemCepBencLentH, 163000, CaboBunyn, d.21, ren.(391) 38-38-43, 3800D, CaboBunyn d.21, ren.(391) 38-38-43, 3800 |
| APAXAEHbC, OOc JInBaBemCepBencLentH, 163000, CaboBunyn, d.21, ren.(391) 38-38-43, 3800D, CaboBunyn d.21, ren.(391) 38-38-43, 3800 D, CaboBunyn d.21, ren.(391) 38-38-43, 3800D, CaboBunyn d.21, ren.(391) 38-38-43, 3800D, CaboBunyn d.21, ren.(391) 38-38-43, 3800D, CabotBubnyn d.21, ren.(391) 38-38-43, 3800D, CabotBubnyn d.21, ren.(391) 38-38-43, 3800D, CabotBubnyn d.21, ren.(391) 38-38-43, 380 |
| APAXAEHbC, oOc JInBaBemCepBencLentH, 163000, CaboBunyn, n.4, ren.(391) 38-38-43, 3800D, CaboBunyn d.21, ren.(391) 38-38-43, 3800D, CaboBunyn d.21,ren.(391) 38-38-43, 3800D, CaboBunyn d.21, ren.(391) 38-38-43, 3800D, CaboBunyn d.21, ren.(391) 38-38-43, 3800D, CaboBunyn d.21, ren(391) 38-38-43, 3800D, CaboBunyn d.21, ren(391) 38-38-43, 3800D, CaboBunyn d.21, ren(391) 38-38-43, 3800D, CabotBubnyn, n.17, ren.(391) 38-38-43, 3800D, CabotBubnyn d.21, ren.(391) 38-38-43, 3800D, CabotBubnyn d.22 |
| APAXAEHbC, OOc JInBaBemCepBencLentH, 163000, CaboBunyn, n.4, ren.(391) 38-38-43, 3800D, CaboBunyn d.21, ren.(391) 38-38-43, 40-65 |
| APAXAEHbC, OOc JInBaBemCepBencLentH, 163000, CaboBunyn, n.4, ren.(391) 38-38-43, 3800D, CaboBunyn d.21, ren.(391) 38-38-43, 3800D,CabotBubnyn, n.17, ren.(391) 38-38-43, 3800D,CabotBubnyn d.21, ren.(391) 38-38-43, 3800D,CabotBubnyn d.21, ren.(391) 38-38-43, 3800D,CabotBubnyn d.21, ren.(391) 38-38-43, 3800D,CabotBubnyn d dacq. (390) 22-65-64 |
| APAXAEHbC, OOc JInBaBemCepBencLentH, 163000, CaboBunyn, n.4, ren.(391) 38-38-43, 3800D, CaboBunyn d.21, ren.(391) 38-3 8-7-65-64 |
| APAXAEHbC, OOc JInBaBemCepBencLentH, 163000, CaboBunyn, n.4, ren.(391) 38-38-43, 3800D, CaboBunyn d.21, ren.(391) 38-38-43, n.4 |
| APAXAEHbC, OOc JInBaBemCepBencLentH, 163000, CaboBunyn, n.4, ren.(391) 38-38-43, 3800D, CaboBunyn d.21, ren.(391) 38-38-43, n.4 |
Инфорmaцяо 6бытobоу ТхнIKE, пОНЗБЕDEHNO* NOД KOНТРОЕМ KOнцерна BCX XaycrepeTe Гм6X, KapI-Bepи-шtp. 34, 81739 Мюнхeн, Герmaши B COOTВETCTBи C Tpeбованямп ФeDEрально 3akona PФ OT 23 HOЯбра 2009 r. № 261-Ф3, зakондаTeльста O ТхнчecКOM peryларobahи И зakондаTeльста O зашиte павnotpeбпелей Россий КОд paциN
Ipoodykui: cokobbljxImaJIKN, MmKcepbI, 6neHepbl, pe3Kn, KxohhbIe KOMbAHbI, Kofoemolkn, Mscopy6Kn, n3MeIbHTeTI
TOBAPHbI 3HaK Bosch
BH/MAH/HE! ACCOTIMETN pOyduKTHIO NOBHTIRCTC. THeYXnHexeX XapaKTpeTNI KPODyKTHIN, B TOM NCHTE 3HEpRTO4FKeITNBOCTHOTN, NOCTHO HOBCTHOTN.
PPOyduKTHIO pOpyrAHO pOxOHTIH BOIaTeBHyIO pOLOEuyDPNO TcNEBpERKHO COOTBETBTH COrnACHO DEIEHYOEM 3AKOHODATEBCTBY. INHOpMaHIO O pEKbIHTAX AOKAYLbIX CEPNTHkATOB COOTBETBTH I cPOCKHX IAEDETBTH, AKTYAByHyo IHOPOMAAIO O KTAACC E XAPKTpeTNI KTOHcEeX PEO4FKeTNI HOCTBTHOTN pOyduKTHIO NHCOPMAAIO N O kAETBHOH cMOKHO NOnUYHt Y oprAHsAIu, BInONHIOeUe FHyKUNu MIOCTPAHNORI H3OTOBTENAE HA TepRTTOPMI PocckCNKO FePeapauo OOO eECX bTOBAJ TEXHKHA), MockBa, 119071, yN. Mana KaNYXKCA8, d.15, teneFOH (495) 737-2777, faoK (495) 737-2798.
KOMANHAI OOCX BbTbOaBnTeKHKAA, 19107, MCKBa, YN. Manja KanyKcKa, d.15 oceCTbnBET CBOoDeTBeHbCtno NOoTBeDpKHeHNO COBTCTBNIPOyDKUONIOT HEMHN PONMOB3BDHnA h ENOH TAMKOEXHOH TEPRTOPINTO TAMOKEOHCOIO3 B COOTBETCBNc DcEHTQIOOMM TEmNXHEKMMI PERITAMEHAMi, BA KCHTEBEYNOHOMOHOHMI IaTOBtENTEN NIIa, a TAOKE BbIOnHNeT Rpe6OBaHn, npDCYMOTPENHbE 3aOHOMo PΦ N814-Φ3 «O TXeHNECKOM peryNJPOBOAHmI JnI INaIa, BbIOnHNIKeOEO FyHNCHINOTPAHNO IHOCTOPAHNO IHOATROBNTEN h TaTepPTIPON PoCCNkOe DEPeauao.
IpoDyKU npEHaaHaueKa IcnoIb3ObaHnIO BycIOBmX TemnepaTpyb BiIe 0°C N OTHOCITbeHO BlaxHoCTn, He npeBbIaHooJe 93%.
Pepa h aonm 0k n pnoDyKIN, dntnHbOe Bpemr HauoBueCIOI NO3dEHTBcMEO TPOUATELHOB TMNEPAtpy, Heo6xIDMo bIepKaTb e y CNOBHX KOMTHAHN TEMNEPATyB HEONKIO BAocH.
Ppabnla peanl3aun npdykun onpeJeHOTc npepnpnTmPo3HmHnTOptOBn B COOTBETCTBN C Tpe6oBaHmN DeIctByuOero 3aKHOdaTeNbctBa.
Yka3aHnno yTnnnaa m npOyKm coepkcatc B nHCTpyKm no 3Kcnnyatau m Moryt bby MyHnuaIbIbx opraHOB nONHTelhoBnactM.
I npDyuknHpeAINIOBAHNOH 8 THeNcE cPOK dKHTBnCepTNDKATO COTBCTBnH, 30T cETDmKATdCTBNTENe npe e noctabke, npoDKaHE HnpOJIb3OBaHn (pHmIEHn) B TeHne cPOK cnykBo, yctAHOBtHBO CO BTOCTBnH co CTbE 18 3aKaHO Ph o 3aHne pnaB nptopeBteHne. Cpok cyjXbHa npDyuknU kyaahnnpO3BDHnB E NtTOBKe YHOpMAuN h NTROBITONe r oapAHTHOM I cEPBCMHOC b6NYKBaHN).
PpOyKuMn MoKet BtBbIeHdNHOHMOOb03aHHeNIO (noe kE-Nr.) anpoBaIOIOHMOH TNY (nope 'Typeo) I TOBAHOH HaeKy BOSch, HaneceHbHM na PnpOyoIOU, yNkoBOKY u (HIN) cOepKaAIOXcB X C BOPODJIENTBOH DOOKMeHTAAU.
B Coctab 3KcnjpataunmHbNk DOKemHTO, npeyCMOTPBHeN bI IROTNI HPODNTH MORYT BXODHT hAORTUIA HFOOPMAUA, IHCTPCKU (pyKOBODCTBO) NO 3KnCPTAYAU, IHOPMFAU6 oYcONBUNR aRpHINTHO N e CEBPNCHORO OCBNLYKBAHNA.
MapKroBhAne npoDycknU oCtEbnTETcR 3IOTROBENTEN H TNIIOBTO TaNIOBHO tNIOBHOH NIOBHOH NIOBHOH NIOBHOH NIOBHOH NIOBHOH NIOBHOH NIOBHOH NIOBHOH NIOBHOH NIOBHOH NIOBHOH NIOBHOH NIOBHOH NIOBHOH NIOBHOH NIOBHOH NIOBHOH NIOBHOH NIOBHOH NIOBHOH

PdOyuknK, KOpora PpOJNA pOoJeDpy NOpTeBpeKEnaOCBTOCTBNrCOnAHO TpeBOaHmN TeXnHeckxN PerAmteHOB TaMOxEHORO Co03a, MapKHyETcR EHNHIM OBaOpEHHN pOPOyKINu HpaNBKeROcYAPCR- YNEHOB TAMOxEHORO CO03a.

IpoDyuknki, KOTOPA 6bIa BlyPunEHa yINIOHMOENHBMIM TAMOEXEHBMIM OPRAMAH M CBO6DHOe oBpaUeHHe HA TEPPIOTPM TAMOXEHORO COO3a Do 15.03.2015 N COOTBETCTBNE KOTOPO 6bIa BmK TPOEBAOMHIOI NOTeBpEKJHO POCCMI KCMM CPTNOKATAMM B CNTTEMFOCT P, NIO6 EDHMIM DOKYMHTAMN TAMOXEHORO COO3A, MOKET BoTb MApKIROBAA 3HAOK COMTOBTCTBN.
3KcnnyatauOHbIe doyMeHTbHa npDyUHIO bblNOHnHOCTa HpyCCKOM 3bIke.3KnnyatauOHbIe doyMeHTbHa roCyDApCTBEHbIX 3bIKxAocrydAPCTB- YneHOB TAMOEXHOHRo C03O3,OTNHXbTO pCCKo, npHnHmIO COOTBETCYOHX TpeBOBaHIN B AkoHOATAEJCTBE MOKOHO 6eB03Me3DIO NOIyUHTy BtopRyOeH OprnHA3a- mN-PE32HNTA COOTBETCYOHO rOEOUACD7A -ueHNA ToAMoEXHOHRo C03O3
INHOPMAA O KOMNPKTAUINPOYKUNI PNOCTABNEHA T BOROBX 3ANAX,MOKET 6bty 3ANPOEA H NO TEPEOHY 6BNTNAH NTOKTHNIA A TOKAE DCTYNHA INHTEPHE HA CATEP NO PBOADHTENH I http://www.bosch-bt.ru.
- 09.02.2015 BCX Bovu Nd CmMecx Xaycrepete Tm6X, Kapn-Bepn-Itp. 34, 81739 MioHxen, TepMaHnA, nepeMeMoBaHa B KcMnAHHo BCX Xaycrepete Tm6X, Kapn-Bepn-Itp. 34, 81739 MioHxen, TepMaHnA.
| Мо德尔 | АлгорбатоньийTNи | Сергейникат COOTВЕТБИЗ | Сtrпан- Изrogenытèle | ||
| Релострацоньий homор | Дата вiocуни | Дeйстуев对接 | |||
| Соковский | |||||
| MCP3000 | CNZP3 | C-DE.AR46.B.01025 | 12.11.12 | 11.11.17 | Словеня |
| MES25A0 | CNC.J03 | C-DE.AR46.B.62431 | 27.02.14 | 26.02.19 | Китай |
| MES25C0 | CNC.J03 | C-DE.AR46.B.62431 | 27.02.14 | 26.02.19 | Китай |
| MES25G0 | CNC.J03 | C-DE.AR46.B.62431 | 27.02.14 | 26.02.19 | Китай |
| MES3500 | CNC.J03 | C-DE.AR46.B.62431 | 27.02.14 | 26.02.19 | Китай |
| MES4000 | CNC.J04 | C-DE.AR46.B.62431 | 27.02.14 | 26.02.19 | Китай |
| MES4010 | CNC.J05 | C-DE.AR46.B.62431 | 27.02.14 | 26.02.19 | Китай |
| Реки | |||||
| MAS4201N | CNAS11ST1 | C-DE.AR46.B.63040 | 31.03.14 | 30.03.19 | Турши |
| MAS4601N | CNAS11EV1 | C-DE.AR46.B.63040 | 31.03.14 | 30.03.19 | Турши |
| MAS6200N | CNAS12 | C-DE.AR46.B.63040 | 31.03.14 | 30.03.19 | Турши |
| MAS9101N | AS9ST | C-DE.AR46.B.63040 | 31.03.14 | 30.03.19 | Турши |
| Минерсы, беничы, Искеничы | |||||
| MFQ3010 | CNHR19 | C-DE.AR46.B.63982 | 11.06.14 | 10.06.19 | Словеня |
| MFQ3020 | CNHR19 | C-DE.AR46.B.63982 | 11.06.14 | 10.06.19 | Словеня |
| MFQ3520 | CNHR17 | C-DE.AR46.B.63982 | 11.06.14 | 10.06.19 | Словеня |
| MFQ3030 | CNHR19 | C-DE.AR46.B.63982 | 11.06.14 | 10.06.19 | Словеня |
| MFQ3555 | CNHR18 | C-DE.AR46.B.63982 | 11.06.14 | 10.06.19 | Словеня |
| MFQ4070 | CNHR22 | C-DE.AR46.B.63982 | 11.06.14 | 10.06.19 | Словеня |
| MFQ4020 | CNHR22 | C-DE.AR46.B.63982 | 11.06.14 | 10.06.19 | Словеня |
| Мо德尔 | Албашаонь Тип | Сергшкоат сооветсь | Сtrал- нз�отовпь | ||
| Релострацонь homор | Дата вдочи | Демстуевatro | |||
| Мійсөрь, бүнөдөрь, Илмөдүлөн | |||||
| MFQ4080 | CNHR22 | C-DE.AR46.B.63982 | 11.06.14 | 10.06.19 | Слобеня |
| MFQ36480 | CNHR27 | C-DE.AR46.B.63982 | 11.06.14 | 10.06.19 | Слобеня |
| MFQ36440 | CNHR27 | C-DE.AR46.B.63982 | 11.06.14 | 10.06.19 | Слобеня |
| MFQ36460 | CNHR27 | C-DE.AR46.B.63982 | 11.06.14 | 10.06.19 | Слобеня |
| MFQ36GOLD | CNHR27 | C-DE.AR46.B.63982 | 11.06.14 | 10.06.19 | Слобеня |
| MMB1001 | CNSM03ST | C-DE.AR46.B.66627 | 21.11.14 | 20.11.19 | Туци |
| MMB2001 | CNSM03EV | C-DE.AR46.B.66627 | 21.11.14 | 20.11.19 | Туци |
| MMR1501 | CNCM13ST2 | C-DE.AR46.B.61496 | 17.01.14 | 16.01.19 | Слобеня |
| MMR08A1 | CNCM13ST1 | C-DE.AR46.B.61496 | 17.01.14 | 16.01.19 | Слобеня |
| MMR15A1 | CNCM13ST2 | C-DE.AR46.B.61496 | 17.01.14 | 16.01.19 | Слобеня |
| MSM6B100 | CNHR11 | C-DE.AR46.B.62888 | 21.03.14 | 20.03.19 | Слобеня |
| MSM6B150 | CNHR11 | C-DE.AR46.B.62888 | 21.03.14 | 20.03.19 | Слобеня |
| MSM6B300 | CNHR12 | C-DE.AR46.B.62888 | 21.03.14 | 20.03.19 | Слобеня |
| MSM6B700 | CNHR12 | C-DE.AR46.B.62888 | 21.03.14 | 20.03.19 | Слобеня |
| MSM67PE | CNHR13 | C-DE.AR46.B.65723 | 18.09.14 | 17.09.19 | Слобеня |
| MSM6700 | CNHR9EV | C-DE.AR46.B.65723 | 18.09.14 | 17.09.19 | Слобеня |
| MSM6B500 | CNHR12 | C-DE.AR46.B.62888 | 21.03.14 | 20.03.19 | Слобеня |
| MSM6B250 | CNHR11 | C-DE.AR46.B.62888 | 21.03.14 | 20.03.19 | Слобеня |
| MSM66050RU | CNHR25 | C-DE.AR46.B.62888 | 21.03.14 | 20.03.19 | Слобеня |
| MSM66150RU | CNHR25 | C-DE.AR46.B.62888 | 21.03.14 | 20.03.19 | Слобеня |
| MSM67140RU | CNHR26 | C-DE.AR46.B.62888 | 21.03.14 | 20.03.19 | Слобеня |
| MSM67160RU | CNHR26 | C-DE.AR46.B.62888 | 21.03.14 | 20.03.19 | Слобеня |
| MSM66130 | CNHR25 | C-DE.AR46.B.62888 | 21.03.14 | 20.03.19 | Слобеня |
| MSM67170 | CNHR26 | C-DE.AR46.B.62888 | 21.03.14 | 20.03.19 | Слобеня |
| MSM67SPORT | CNHR26 | C-DE.AR46.B.62888 | 21.03.14 | 20.03.19 | Слобеня |
| MSM66155 | CNHR25 | C-DE.AR46.B.62888 | 21.03.14 | 20.03.19 | Слобеня |
| MSM67160 | CNHR28 | C-DE.AR46.B.62888 | 20.08.13 | 19.08.18 | Слобеня |
| MSM67165 | CNHR28 | C-DE.AR46.B.62888 | 20.08.13 | 19.08.18 | Слобеня |
| MSM67180 | CNHR28 | C-DE.AR46.B.62888 | 20.08.13 | 19.08.18 | Слобеня |
| MSM68190 | CNHR29 | C-DE.AR46.B.62888 | 20.08.13 | 19.08.18 | Слобеня |
| MSM64035 | CNHR24 | C-DE.AR46.B.62888 | 21.03.14 | 20.03.19 | Слобеня |
| MSM66020 | CNHR25 | C-DE.AR46.B.62888 | 21.03.14 | 20.03.19 | Слобеня |
| MSM66110 | CNHR25 | C-DE.AR46.B.62888 | 21.03.14 | 20.03.19 | Слобеня |
| MSM67130 | CNHR28 | C-DE.AR46.B.62888 | 20.08.13 | 19.08.18 | Слобеня |
| MSM67140 | CNHR28 | C-DE.AR46.B.62888 | 20.08.13 | 19.08.18 | Слобеня |
| MSM64155RU | CNHR24 | C-DE.AR46.B.62888 | 21.03.14 | 20.03.19 | Слобеня |
| MSM67165RU | CNHR26 | C-DE.AR46.B.62888 | 21.03.14 | 20.03.19 | Слобеня |
| MSM67190 | CNHR26FP | C-DE.AR46.B.65723 | 18.09.14 | 17.09.19 | Слобеня |
| MSM67150RU | CNHR26 | C-DE.AR46.B.62888 | 21.03.14 | 20.03.19 | Слобеня |
| MSM671XO | CNHR24 | C-DE.AR46.B.62888 | 21.03.14 | 20.03.19 | Слобеня |
| MSM671XO | CNHR26FP | C-DE.AR46.B.62888 | 21.03.14 | 20.03.19 | Слобеня |
| MSM671X1 | CNHR26FP | C-DE.AR46.B.62888 | 21.03.14 | 20.03.19 | Слобеня |
| MSM681X1 | CNHR29 | C-DE.AR46.B.59536 | 20.08.13 | 19.08.18 | Слобеня |
| MSM681X2 | CNHR29 | C-DE.AR46.B.59536 | 20.08.13 | 19.08.18 | Слобеня |
| MSM68400 | CNHR12 | C-DE.AR46.B.62888 | 21.03.14 | 20.03.19 | Слобеня |
| Кухонны комбайы | |||||
| MCM2050 | CNCM11ST | C-DE.AR46.B.60779 | 26.11.13 | 25.11.18 | Слобеня |
| MCM2150 | CNCM11ST1 | C-DE.AR46.B.60779 | 26.11.13 | 25.11.18 | Слобеня |
| MCM4000 | CNCM20 | C-DE.AR46.B.60779 | 26.11.13 | 25.11.18 | Слобеня |
| MCM4100 | CNCM20 | C-DE.AR46.B.60779 | 26.11.13 | 25.11.18 | Слобеня |
| MCM4200 | CNCM21 | C-DE.AR46.B.60779 | 26.11.13 | 25.11.18 | Слобеня |
| MCM4250 | CNCM21 | C-DE.AR46.B.60779 | 26.11.13 | 25.11.18 | Слобеня |
| MCM62020 | CNCM30 | C-DE.AR46.B.60779 | 26.11.13 | 25.11.18 | Слобеня |
| MCM64051 | CNCM30 | C-DE.AR46.B.60779 | 26.11.13 | 25.11.18 | Слобеня |
| MCM64085 | CNCM30 | C-DE.AR46.B.60779 | 26.11.13 | 25.11.18 | Слобеня |
| MCM68840 | CNCM30 | C-DE.AR46.B.60779 | 26.11.13 | 25.11.18 | Слобеня |
| MCM68885 | CNCM30 | C-DE.AR46.B.60779 | 26.11.13 | 25.11.18 | Слобеня |
| MUM4406 | CNUM5ST | C-DE.AR46.B.60779 | 26.11.13 | 25.11.18 | Слобеня |
| MUM4427 | CNUM5ST | C-DE.AR46.B.60779 | 26.11.13 | 25.11.18 | Слобеня |
| MUM4657 | CNUM5ST | C-DE.AR46.B.60779 | 26.11.13 | 25.11.18 | Слобеня |
| MUM4855 | CNUM5ST | C-DE.AR46.B.60779 | 26.11.13 | 25.11.18 | Слобеня |
| MUM4856EU | CNUM5ST | C-DE.AR46.B.60779 | 26.11.13 | 25.11.18 | Слобеня |
| MUM4880 | CNUM5ST | C-DE.AR46.B.60779 | 26.11.13 | 25.11.18 | Слобеня |
| MUM52131 | CNUM50 | C-DE.AR46.B.60779 | 26.11.13 | 25.11.18 | Слобеня |
| MUM54240 | CNUM51 | C-DE.AR46.B.60779 | 26.11.13 | 25.11.18 | Слобеня |
| MUM54251 | CNUM51 | C-DE.AR46.B.60779 | 26.11.13 | 25.11.18 | Слобеня |
| MUM56S40 | CNUM51 | C-DE.AR46.B.60779 | 26.11.13 | 25.11.18 | Слобеня |
| MUM57830 | CNUM51 | C-DE.AR46.B.60779 | 26.11.13 | 25.11.18 | Слобеня |
| MUM57860 | CNUM51 | C-DE.AR46.B.60779 | 26.11.13 | 25.11.18 | Слобеня |
| MUMXL20C | CNUM70 | C-DE.AR46.B.60779 | 26.11.13 | 25.11.18 | Слобеня |
| MUMXL40G | CNUM70 | C-DE.AR46.B.60779 | 26.11.13 | 25.11.18 | Слобеня |
| Кофемолik | |||||
| MKM6003 | KM13 | C-DE.AR46.B.62081 | 14.02.14 | 13.02.19 | Слобеня |
| MKM6000 | KM13 | C-DE.AR46.B.62081 | 14.02.14 | 13.02.19 | Слобеня |
| Мэсубуши | |||||
| MFW1501 | SFW1 | C-DE.AR46.B.61421 | 13.01.14 | 12.01.19 | Слобеня |
| MFW1545 | CNFW2 | C-DE.AR46.B.61421 | 13.01.14 | 12.01.19 | Слобеня |
| MFW1550 | CNFW5 | C-DE.AR46.B.59504 | 16.08.13 | 15.08.18 | Ктей |
| MFW45020 | CNFW5 | C-DE.AR46.B.59504 | 16.08.13 | 15.08.18 | Ктей |
| MFW45120 | CNFW5 | C-DE.AR46.B.59504 | 16.08.13 | 15.08.18 | Ктей |
| MFW66020 | CNFW6 | C-DE.AR46.B.59504 | 16.08.13 | 15.08.18 | Ктей |
| MFW67440 | CNFW7 | C-DE.AR46.B.59504 | 16.08.13 | 15.08.18 | Ктей |
| MFW67600 | CNFW7 | C-DE.AR46.B.59504 | 16.08.13 | 15.08.18 | Ктей |
| MFW68640 | CNFW8 | C-DE.AR46.B.59504 | 16.08.13 | 15.08.18 | Ктей |
| MFW68660 | CNFW8 | C-DE.AR46.B.59504 | 16.08.13 | 15.08.18 | Ктей |
| MFW68680 | CNFW8 | C-DE.AR46.B.59504 | 16.08.13 | 15.08.18 | Ктей |
Bosch qnpmacbHbH JkaHa 6yibIMbH caTbI aIFaHbIb36eH KytTbIKTaMbI3. Bi3iH 6yibIMdapbIMbI3 TypaJI KocbIMwa maniMeTTepdi Be6-caTbIMbI3da Ta6a aIacbl3.
Ma3MyHbI
Kayincizik shapapanapbl 220
Kayincizik kyneci 223
Kannbl məniMeTep. 223
Kymbic kyinepi 224
KoIdany. 224
Ta3anay xhe Kyty 228
CaKtay. 229
AkaYbIKTap opbl anfaH
KaFdaIdaftbI KEMek 229
KoIdaHyMbICanapbl 230
KoKbIcKa Tactay 231
KeiIndk shapTTapbl 232
KocalkbI Kepek-kaPakTap 232
Kayincizik shapaapanby
Бул 6уиьIM yшIN MaHbI3dbI kayinci3dIK ке He KOLdaHy HycKaynapbIn any yushiN OcbI KOJIaHy TpyaIbI HcCKayIbIbIH TOIbIbIMeH MyKnIaT OKbI IN ShbIFbIHbI.БуИbIMdbI NaIbIKTbI Typde KOLdaHy TpyaIbI HcCKaynapra caN apekET etiImereHde OcbI apekeTTepDeH ShbIFaTBiH ShbIFbIHap yushiN eHdIPywi TapaNbIHan KeniINik bepiImeiDi.
Бул 6уиьIM TpyMbICTbIK JxafDAInapda a3bIK-TyJIK eHIMdepHIn TpyMbICTbIK KeJIeMDEpde Hemece TyPmbICTbIK JxafDAInapra YKcac BeiKOMMeRupnAByIK MaKcATTapDa eHNeY yushi In apHaflaH. TyPmbICTbIK JxafDAInapRa YKcac KOLdaHy KaTApBHa, MbcIaBl,
6yIbIMDbI dyKeHNep, KeHcEneP, ayblIwapyaWbIBIK JxHe backa KOMMeRupnAByIK eHdIPicTepeDeri KbI3MeTKepeLep acXaHaNapBbIHda KOLdaHy Hemece NaHCNOHdApda, WafBIn KOHaK YJlepeDe Hemece OcbIaPra YKcac Jepnepde KOLdaHy XaTaDbI. ByIbIMdbI Tek TpyMbICTbIK KeJIeMDEp MeH yaKbITTapDa eHNeY yushi N KOJIaHaBbI3. PyKcat etinreH MaKcMaJNbIK KeJIeMDEpDen («KoJaHy MbicaDapbl» MaKaIaCsbIH KapaNbIB) acbIpMaHbI3!
Бул 6уиьIM a3bIK-TyJIK eHIMdepHIn apaIaCTbIPy, nJey JxHe KaFyfa apHaIIFaH. Onbl BaCa hOpceIepdi Hemece 3aTTapDbI eHNeY yushi N KOJIaHyFA BoImaNbl. Ohdipywi pyKcAT etKeH KEmekwi KypaIaDpbl KOLdaHfAH Ke3De Ke6ipeK apekeTTep opbIHdayFa BOnaBl. ByIbIMdbI TEK KaHa TYNHcKaNbIK KEmekwi KypaIaDpMeH BiPRe KOLdaHbINbl3. KEmekwi KypaIaDapbl KOLdaHfAH Ke3De OhblMeH BiPRe BepiInRe H KOJIaHy TpyaIbI HycKayNbIKTbI CaKTan KoJIbIHbIB. ByIbIMdbl Bocka adamapra FbeprEHi3de OhblMeH BiPRe KOJIaHy TpyaIbI HycKayNbIKTbI da bepiHi3.
Kajnbl kayinci3ik HycKayapbl
3JleKTp KyaTbHa Tycy Kayni 6ap!
Булбуныды балаларга колдануfa Беругоьогмайы.БуныдыЖэп онын Кабелин салалардан aiшak Зердс calkay Kepek.
Бул Биьмдар DeHe, ce3im XэHe aKbI-N-о Ka6iJIeTepi ŠeKTeyЛi, coHbIMen bIpRe Təxipn6eci XэHe 6iImi XeTkIikci3 aadamdap TapaBHaH TeK bakIay acTbIHda 6oJFaHdapbIHda, Hemece
6yibIMbl Kayinc3 Tpyde KOJdaHy boBihwa MJIImeTTepiH e3depine KayaantbI Tyfapdah aIbIn, Ocbl 6yibIMbl KOJaHydaH naJa da Bona aanaTbIH KayinTePdi TyciHReHdepiH de fHa KOJdaHbJa aJaDbI.
BaIaIapra ocbI 6yIbIMMeH OIHayFa pyKcT eTneHi3. Ta3anay XeHe XeHDey XyMbICTapbl 6aKbIayCbI3 KaIdbIpblfAn 6aIaIap apKbIbI Jxprizimeyi Tnic. BvIbIMDbI KaIdaFamayCbI3 KOnDaHbAHyI3.
Буныдь Teк KaHa Фирmaльбт TaКТашада Керсeтгн Мэл IMETepi БОйВИsha icke KOCbIN KОДaHbIbI3. Крblfbl 6eJMe TempeTpyacbIbI iшki Кайларda faHa XeHe TeHiz DeHreinHe 2000 M DeiHri BiNtIKTe KОДaHyfa apHaJIraH.
BvibIMbl, OHb 6aKbIaycbl3 KaIbIbPfahblHbI3da, KypacTbIPbIN OphATkaHbIbI3da, 6eJIweKtereHiH3de Hemece Ta3aJaFaHbIHbI3da ePKaShah JeJIiDeH aXbIpaTbIHbI3.
BiyibIM Ka6eJIiH oTKiP Hemece bICTbIK JepIep apKbIbI TapTnHaI3. Erep 6yibIM Hemece OHbIH KyaT cbIMbI 3aKbIMdaJCa, OHbl
naindaanha6aHb3. Ocbi 6yibIMhIH Ka6eJI 6y3blbIN 3aKbIMDaHFaH Kynde bOJca, KayinTepdiH naJa 60nybIH 60IbIpMay ywiH, OHbIH eHdipywi Hemece TexHNkaIbIK KbI3MeT KepcETy OPTaIbIFbIH, MaMaHbI apKblbl, Hemece ocblnapfa YKcac apHaBbI biNimi bap aadam TaPAnBaH aybICTbIPbIybl KaKeT. BybIMdbI JeHDey JyMbICTapbl TEK KaHa TexHNkaJIbIK KbI3Met KepcETy OPTaIbIFbIH, MaMaHbI apKblbl eTKi3iJyi KaKeT.
Бул 6уньIMRE apHaJIfAH kayinci3ДiK HycKayapbl
JKapaKaTTaHy kayni 6ap!
3NeKtp KyaTbHa Tycy Kayni 6ap!
JKei aWacbIH TeK 6yIbIMMeH XyMbIC iCTey yUwIH KaXeTTI epeKeTTep
etk3iIN JxHe eHIMdep MeH 3aTTap DaBbHdaJIbIN KOyblfHaDa fHa
3JeKtp po3ETkacbHa XaIFaHbI3. BybIMdbI KOJaHbAfAH Ke3De
aShaHbI po3ETKaAdH ShIFapbHbI3. AkayNbIKTbI KOIO aJDbIHDa aShaHbI
po3ETKaAdH ShIFapbHbI3. Heri3ri 6yIbIMdbI eWkaaHa CBybIKTBIK
iWiHe 6aTbIPMaHbI3 XHe aFbIHDbI Cy actbIHDa YCTaMaHbI3.
EwkaHdaB cy Ta3anaIbIbIN naIdaIaHa6aHbI3. BybIMdbI TEK KaHa aHaJMaIbI aXbIpaTkblI apKbIbnI KocbIn oWipiHi3.
AinHaImaJIbI KypaIJaH XapaKaTTaHy Kayni 6ap!
Kymbic icTeiinre H Kemeki KpaH He Kocalkb6eJlweKepdi
aImaCTbipy aIdbIHda, bYbIMdbI eWipin, JcJIeH aXbipaTy KepeK.
KeTek oIipinrenHe KeyH bpa3 yaKbIT KymbIC icTeH TypaDbI XHe
KypaNbIaImacbipy KyHne TpyaDbI. BybIM Kocybl6oNfAH
Ke3de, aHaJIMaJIbI TYKaHbI peTTMeHi3. XeTEK ToIbIFbIMeH
TOkTaFaHwa KytHi3. AHaJIbIN TpyaBbH 6eJlweKtePi YCTamaHbI3.
KoJaHy bapbcihda bIDbICTbYCTamaHbI3. KyfblSi iWiHe
KoJIbHbI3dbI caImaHbI3. Tek JaBILnFAH KaKnakneH KymbIC icTeHi3!
Kayinci3dk c6BeNTepine BaJnAhbICTb IyBIMdbI KOJaHaBjIMFaH
XeTEK KOpFaHbIC KaKnafbIMeH Xa6blnfaH Ke3De fHa HymbIC icTeTyre
BoJaDbI.
OTKip nbIwaKaTah JkapaKaTTaHy Kayni 6ap!
Maɪdaɪaflbɪw dɪnckiHɪN Θtɪkɪp nbɪwaɪkTapbl MeH JxneKTepiH yCTaMaHbI3. Maɪdaɪaflbɪw dɪnckiJIepre TK 6yɪipɪHeN Kɔŋ TɪrɪzhiH3! ApaɪaCTbIPfblW nbɪwaɪkKa JxəlaH KɔJmEHTImeHɪ3.
OTkip nbIshaKa/aHHaMaJIbI JeTeKTeH JapaKaTTaHy Kayni!
OphatbIinfaH apanaactbIpfbIwTbI yCTamaHbI3! ApaIactbIpfbIwTbI TeK XnHaKaTaNfAH Kynde XeHe Xa6blfAH KaKnakneH naJaIaNbHbI3.
Kyuin kany kayni 6ap!
bICTbIK apanaactbIPbIaTbIH eHimDi eHdey Ke3iHne KaKaNaKTaFbl KMyfblHTan6by bIaIbI. EHNKe6i0,5IITp bICTbIK He Kcnipwireh CyNbIKTBk TOITbIPbIHbI3.
MaHbI3dbl!
БуньIMы TEK KaHa TynHcKaIbI KEmekIi KypaIapMeH bIpRe KOnDaHbIHbI3.КemekIi KypaIapIbI KOnDaHfA HKe3De OHyIMeH bIpRe bepinre H Kondahy TpyaIbI HcKayIbIKbI YCTaHbIHbI3. Bip yaKbITTa TEK bip KypaI He KEmekIi KypaI KOnDaHbIHbI3.
БуньIMДаFы He KOMeKwI KypaJaFbI 6enrIepdIn TyciHikTemeci

KoIaHy TypaJIbI HcCKayJIbIKTaFbl HcCKayJaPdbI OpbIHdaHbI3.

A6aB 60JbIbI3! AHaJImaJIbI nbIshaK.

A6aB 60IbIbI3! AInHaImMaJIbI KypaI. ToITbIpy caHbIaybIH yCTAmaHbI3.
MaHbI3dbl!
Kурьлфыны ор пайдалиан coh Неме сак уakсыт пайдалибай куpresнда сбден таразалныз. → «Таразалу кэн Куму» Мына Semmi Kapaиьз: 228
Kayinci3dkxyneci
KeheT icke KocbIyuaH KopFaHbIC
1-7 kaIaMbI, KymbIC KblIaMdbIfI:
1 = TeMeH aHaNy XbIJaMdbIbI - 6aay,
7=KoFapbl aHany XbIaMdbIfbl -XbIaM.
4 Kymblc INHdkaTopbI
Kymbic 6apbICbIHda xHaHbI (aHaMaJIb IAxblpaTkbl M Hemece 1-7 KyiHne). BMyBIM KymbicbIHda KaTeIep opbl AH aJFaHda, 3NeKTPOHdbIK CaKaTahDbIPfblw AxblpaTblnFaHda XHe 6yblM 6yInHReH XaFdaJaXblNbIKTaIbI, «AkaYbIKTap opblh aJFaH XaFdaaDaftkEMeK» MaKaJacbIH KapaHbI3.
5 XeTeKtiH KopfaHbIC KaKaNaFbI
KTeKTiH KOpFaHbIC KaKaNaBbIaNbIn Tactay yuH, apTKbl KaFbIH 6acbIn, KaKaNaTbI aNbIN TACTaHbI3.
6 XeTeK:
- acyNilk MaiaJaNaFbIiX He
- IbipbIH CbIKkbIi (apHaaijXa6dbIK*).
BiyibMbI KoJIaHbFaH Ke3Je XeTeKTIH
KopFaHbIC KaKaNaFbIH opHaTbIHbI3.
7 Kypanra aphanfah XeTeK
(6yflaybIi,KaKbIi,nIerIi)XaHe eTTapTkbIi (apHaBj KabDblk)
8 ApaJnactbIipfblI WKeTeRIH KopFaHbIC KaKnaFbl
9 ApaJaTbIpFbIiKa apHaIraH xeTeK (apHaIbI Ka6DbIK)
KoJdaHbIImFaH Ke3e apaJaCTbIPfblW
KeTeRiHiH KopFaHbIC KaKnafblH
OpHaTbIHbI3.
10 KaebJIbI opay aTOMaTKKaCbI
Kemekwi Kypanbl6ap bIdbc
11 Tot 6acnaiTbIH 60JaTTaH apanaactbipfbiw bIdbc
12 KaKa
Kypaapanap
13 PpoececcnoHaIdbi nIImeJI 6yIrfaybI
14 PpOeCCNoHaJIbI KaKKBiW
15 KaMbip KAnKbIbIb6ap nJIerii
16 Kemeekui Kypan Dopba
KypaIap MeH MaIaIaFbIw IuCKJIepDi caKaTayra apHaIraH.
Acyuik Maandaarbi
17 Urepriu
18 KyfblbIb6apKaKnaK
19 Maɪdaɪaɪfbiʌnɪckɪnep
a PpOpeccnOHaIbI Supercut 6ypamaJIbI DnCKI - KaJIbIH /KyKa
b Ykkii 6ypaMaIbI NnCKiMeH - depeki / MaJa
C YIkeJIme DnCK - opTaSha
d Kapton KymaftbHbH Dnckici*
20 Dnck yctaftbbl
21 Wbifbc caHbIaayb6ap Kopnyc
Apaanactbipfbiw
22 ApaJaTbIpFbIi CayBt
23 KaNaK
24 Kyrfbiw
*Kocankb6eIweKkeTki3iIm6yMaCbHda 6oJMaHaH KafdaJa, oFaH caYda OPhb MeH Kb3MeT KepeTy opTaBbIfbHaH TaNCbIPbIC 6epyre 6oNaDb.
Kymblc Kynlepi
3cypeti:
Ha3ap ayadpaBnbl3!
BiybIMdbI TeK KpaJI/KeMeKUJI KpaJI OcbI KeCTere caI dypbIC KteTEKTe KHe DYpbIC Kynde KOJaHbJIFaH Ke3De KHe KYMbIC KyiHde BofHaHa fAHa KOJaHaBbIbI3. AInaImabI TyTKa ap6ip KymbIC KyiHde eHri3iJyKepek.
Hyckay
AinHaMaIbI TyTkA «Easy Armlift'
fYHKUcBImE JkAbIKTaJFaH, OJ
aHaMaIbI TyTkAHbIH KblKyBaHa KOJaay
KepcTeJI.
Kymblc KyinH petTey:
Bocaty TuYmecin BacbIn, aHajMaIbI TyTKaHbI XbJIbXbITbIbI3. XbIINKydbl6ip KOJMeH opbIHdaHbI3.
AHaHaMaMbI TyTkAbHb TipenReHwe KaayMbI KYIe XbJIbITbIHbI3.
| Кун | Жетек | Аспаптар/Жабдыктар | ЖуmbicЖыл dam-Дыfbl |
| 1 | 7 | 1-5 | |
| 1-7 | |||
| 1-3 | |||
| 2 | 7 | * | - |
| 3 | 6 | 3-7 | |
| 3-5 | |||
| 4 | 9 | 5-7 | |
| 7 | 5-7 |
*KaKbI,6yNfaybI,InneriTi opHaTy/ anbln tacTay; yNKeH eHdJeTeH KeNemepdi Kocy.
KoIaHy
KapaKaTTaHy kayni 6ap!
JKei aWacbIH TeK 6yNbIMMeH XyMbIC icTeY yuH KaXeTTI apKeTETep ETKi3iIN JxHe eHIMdep MeH 3aTTap daYbIHdaJIbIKoYbIJFaHa fHa 3JeKTP pO3ETKaCbHa KAnFaHbI3.
Ha3ap ayadpaBnbl3!
BiybIMdb TeK KEMekui Kypal/KypalMeH Kymbc KyiHde KOJdaHbHb3. BiybIMdb 6oc KyiHde KOnDaHbHb3. BiybIM MeH Kocankb6eJWeKTepre Kblny Ke3depH TycipMeH3. BeJWeKTe pMkpoTOnkbHdb neWtepre apHaJMaFaH.
BiyibmbljKHe KEMeKuIypaanapdbla anfaaw pet kondahy aanbIHda KaKcbIan Ta3aIan aIbHb3, «Ta3aIay JxHe KyTu» TapaybIH OKbIHbI3.
MaHbI3DbI HycKay
Byn kondahy TpyaIbHyckaynbkTa Kypan He KeMeKwI KypaIbbl KOnDaHraH Ke3de 6yibIMapdbH XyMbIC XbJnAmDbIbI bOyBuHwa WamaIbMHaNepMeH 3aT6enri 6epinre. Bi3 ocbl 3aT6enrhi BynbImfa Xaancbipydbly CbIHAmbI3 (C cyperi).
DaibIhday
Herizbi BybIMDbI Teric JHe Ta3a 6eTKe KOblHbI3.
Katapdaftb Ka6eIbdi KaIayIbI y3bIHbIKKa DeiH (MaKC. 100 cm) WbIFapbl, 6aY 6ocatblHbI3; Ka6eJIb TOKTaTbIJaDbI (D cypeti).
KaBeNbDiH JxMbIC y3bIHDbIbIH a3aIbIbIbI3: KaBeNbDi CcI TaPbIb, KaIayIbIy3bIHDbIKKa DeiH KaaBbIbI3. Coan KeiH KaBeNbDi KaItaJaH TaPbIb, 6aay 6ocatbIbI3; KaBeNb TOKTaBJnaIbI.
Ha3ap ayadpaBnbl3!
Ka6eJIb Kblcblfah Ke3de, OHbl TOJIbIbIMeH 1blFapbln, KaibJyblHa MymkiHdk 6epiH3.
AshaHbipo3eTKaFaKaJFaHbI3.
blbcxhe KypaI
AinHaMaJIbI KypaJIdaH XapaKaTTaHy Kayni
KoIdaHy bapbIcblHa bIbIcTbI YCTaMaHbI3. Tek JaaBbIraH KaKnakneH (12) Kymblc icTeHi3!
KypaIdb/KeMeKuI KypaIdb JKeTeK TOkTaTbIrfaH KyiHDe 6oNfHaDa fHa aJMaCTbIpbIbI3-JeTeK eWipIInReHHe KeiH bpa3 yaKbIT Kymblc icTeT TpyaBl JxHe KypaIdb aJMaCTbIpy KyiHDe TpyaBl. AHaJMaIbTyTKaHbI aIbIMeH KypaIdb H6oc xypic KyiHe XblNxblTbIbI3. Kayinc3dik ce6bentepiHe baiNaHbICTbl 6yBIMdb KOJaHaBImFaH JeTeK KopraHbIC KaKaPaBImeH (5,8) Ja6bIInfah Ke3de fHa KaMblic iTte 6oJaDbI.
Ha3ap aydpabibIbI3!
blIbICTbI TEK OcbI 6yIbIMMeH XyMbIC icTeReH Ke3e faHa KOnJaHbIHb3.
PpocecnoHaanbniinMeJI 6ynfaybiu (13)
Kamblpbl 6yflayra apHaIraH, MbIcIbl, KEKC KaMbIpbI
PpocecnoHaIbKaKkbIa (14)
KyMbipTk akybl3bH, KInereiNi KaFy
KHe XeHJn KaBipDbl 6yIrayfa
apHaJIFaH, MbCaJIbl, BnCKBNT KaMbipbl


Uneri (15)
aybipKaMbipDblIneyKHe MaJdaanah6aBtBn INHrpdeNeHTTepdi apanaactbipyra aphanFaH (MbicaBbl, Ky3IM, WOKOJa KOHKacbl)

KaKbIUtBtI naJaIaHy 6oNbIH MaHbI3DbI HycKay (cypET E):
KaKbIbIbIc TybiHe a3 TIOi Kepek, OcbIaI nHrpeJeHHTep ONTImaIbI apaIacAdI. BoIMaca, KaKbIbI bNikTiirH TeMeHdIeIe peTey KepeK:
AshaHbIpo3eTKaDaHuIfapbIHbI3.
Bocaty TuMecin 6acbln, aHaMaJIbI TuTKaHbI 2 KyiHe XblJXblTbIHbI3.
KaKbI He nIerIiTi XeTeKke TipeTReHwe eHri3iH3.
KaKbIbIyCTan COMbIHbI COMbIH KJIITIme (eIwemi 8) cafT tINime6ypaHbI3.
KaKbIi6bnikTirih KaKbIiHTbl ONTMnIbI 6niKTikke bypan petTeHi3: cafat tiImen 6ypaHbI3: KETepiHi3: Cafat tiInHe KapcbI 6ypaHbI3: Tycipy
Bocaty TuMecin 6acbln, aHaMaJIbI TuTKaHb1 KyniHe XblJXblTbIHb3.
Kakkblsbiikiriin Tekepin,KepeK 6oIraHa dypbICTaHb3.
Erep6nikiri dypbic peTteIreH 60Jca,6ocaty nepheciH 6acbln KaBipy TytKbIbIH 2 KyiHe anapbIbI3.
KaKbIbTIyCTan COMbIHbI COMbIH KJIITimeH (eIWeMi 8) caFAT TiInHe KapcbI TapTbIN KOiBiHbI3.


blbicnEH XeHe KypaJImeH XyMbIC icTeY (E cypeTI):

Bocaty TuMecin BacIn, aHaMaJIbI TuTKaHbI 2 KyiHe XblJXblTbIHb3.
■bldbicbI opHaTy: Anfa kapaenEkeTilreH bldbcTbEhr3in TipeH3,coan KeHH caFt 6aftbItbHa KapcblipeTReHwe 6paHbI3.
Hny TaNcbipMacbHa 6aJnHaNbICTbl 6yflaybIi, KaKbIi He nJIeIiTi JKeTeKKe tipenreHne eHri3iH3.
HycKay:
InneriXkaTaNbIHdaKaMbpXaKbIbTbInneriE hriizreHne 6paH3
(4-4b cpei).
EHeIeTeIH INrpeDnEHTepDi bIDbICa caJIbIH3.
Bocaty TuMecin BacbIn, aHaMaJIbI TuTKaHbI 1 KyiHe XblJXblTbIHb3.
KaKaNaKbI opHaTbHb3.
AHaJaMaJIbI aKbIpaTKblTbI KaJAYbl KaJaAMFa KOJIbHbI3.

B3dIn ycbHbC:
- PpoececcnoHaanbniinmei6yfaybi: andbimeh 1-2-bacbIHTa apalactbipin, coaH KeiH 7-bacbIHTb TaHdaHb3
-ПрофессноHaJIbI KaKKbIi7-KaIam,1-KaIamda apaJnactbIPbIbI3 - Nneri: andbimEn 1-6ackbIHTa apajactbipIN, 3-6ackbIHTa KaftbIHb3
IhrgpeJeHnTepMeH ToTbIpy
BvibIMblaHaMaJIbI aXbIpaTKblw apKblbl eWipiH3.
IHHpeDneHHTepDi KaKaNaKaTaBfI KyIbIaW apKblbl TOnTbIpBih3. Hemece
KaKnaKTbI anbl TactaHbI3.
Bocaty TuMecin BacbIn, aHaMaJIbI TuTKaHbI 2 KyiHe XblJXblTbIHb3.
INHpeIeIeHTepDi TOnTbIpbIHbI3.
KymbICTaH KeiH
BvibMbblaHaMaJIbI axbipatKbIw apkblbl eWipiH3.

AshaHbipo3eTkaDah WbIfrapbIbI3.
KaKnaKtbl anbIn TactaHbI3.
Bocaty TuMecin 6acbIn, aHaMaJIbI TuTKaHbI 2 KyiHe XblJXblTbIHb3.
KyaapanbljXeTeKTeH UblfapbIbI3.
bldbictblaibinTaCTaHbI3.
BapnbK 6eTepi Ta3aJahbI3, «Ta3anay KHe KYTu» TapaybIH OKbIHbI3.
AcyNJik MaJdaNaIbIa
Kapakat any kayni
MaJdaJafblI DnckiHIn ETkip NbIaKTapbl MeH XKeTepIH YCTamaHb3.
Maɪdənʌfəbɪs ᶂnckɪjæp re TeK ŠyɪpɪHeN Kɔŋ Tɪrɪzɪhɪz!
Acnyiik MaiaanafbltBe KKaHa 6yibIM JeTeRi TOKTan TyphaHbIHda Kahe KaBenI 3JeKtp po3eTKacbIHah WbIFapbINFaHbIHda eHri3IH3/WbIFapbIH3.
KyIbIi iWiHe KOJIbIbI3DbI caImaHbI3.
Ha3ap aydpabibIbI3!
Acynik MaJdaNafblTb TEK TOnblfBIMeH
XnHaKTaIFaH KyIHne KOnDaHbIHb3. AcyniK
MaJaNafblTb eWkaHaH Herizr 6yblMfa
KypactbIpMaHb3. Acynik MaJdaNafblTb
TEK KypactbIpblfAH KyMbIC KyIHde
KoJdaHbIb3.
ApTbIK KxKTeMeDeH Kopfay
cypeTi:
Acynik MaJdaNafbIuKa apTKbl KyKTeMe TycipyDeH 6yBIMhIH aybIP 3aKbIMDaHybIH 6oJbIpMaYwIH, acyniK MaJdaNafbIuTbIH KTeKuBi 6inirihde Keptik (6aFapnamAnaHan 6y3bly opHbI) 6ap. AptbiK KyKTeMe TycKeH XaJaDaJa XeTeKuBi 6inokocbXepDeH 6y3blnAbI. XeTeKuBi 6iniri 6pa KaHa DnCK YcTaBfUbI KbImET KepCteTy OpTaJIbIFbIH Da KonKeTImDi.
Pnpoeccnohnb Supercut 6ypamabI dNcKi - KaIbH / KyaKa

JEMIC PEN KekHicTi Typayra apHaIraH. 5-6ackbIHTa eHdey.
AHaHaImaIbI KeckiU dNcKiDi er 6eJIr: KaIbIH KeckiU JkaFbI yuHIn «Grob» KiiHlUke KeckiU JkaFbI yuHIn «Fein»
Ha3ap aydapbHbI3!
AHaHaMaNbI KeckiD NcK KaTbI ipIMiK, HAn, 6eJKe HAn MeH WOKoJaTbI TypayFa apHaJaMaFah. IicipinreH, KaTbI niCpiInreH KapToNTbI TeK cybIK KyiHHe TpyaHbI3.
AinHaMaJIbI yKKiU dNcK - YJKeH/ShaftH

Kekhic, Xnemic nen ipimukti yurye apHaJfah, KaTbipimukTeH baca (MbicaJIb, napMe3aH).
3-6acKbIHTa Hemece 4-6acKbIHTa EHdey.
Ainmalbly Kkiu DnckiDi eri 6eIri: YJKeH YKkU XaFbY WIn H «2» WafbH YKKU XaFbY WIn «4»
Ha3ap ayadpaBnbl3!
AHaHMaJIbI yKlI WINCKKaHFaKTapDbI yryre apHaJMaFAH. KymcaK ipIMiIKTi yIKeH KaFBImeH 7-6aCKbIwTa yriH3.
YiKeJIme DnCK - opTaWa

UWKI KapTON, KaTbI ipIMuIK
(MbicaJIbI,napMe3aH),CybITbIJFaH WOKOJaD neH XaHaKaTapDbI yryre apHaJIFaH.
7-6acKbISta eHney.
Ha3ap ayadpaBnbl3!
YiKeMe DnCK KymCaK KHe TiIm ipimuikTi yIyre aPhaMaFaH.
Kapton KyMaftbHbH Dnckici

KyImak neh KapTOn KyIMaFbI ywiH
WNI KAPTONtBi yry, KeKeHic neh JnndeKTi
KaJIbIH DnCKiMeH TypayFa apHaJFaH.
Yry: 7-6ackbllTa eHnDEy.
Kecy: 5-bacbIwTa eHdey.
Acynik MaiaaIaFbIuHxMblc icTey Cypet H:
Bocaty TuMecin 6acbln, aHaMaJIbI TuTKaHbI 2 KyiHe XblJXblTbIHbI3.
■bldbictbOpHaTy: Anfa kapaenkeinTInreH bldcTb eHriin TipeH3,coaH KeiH cafat 6afbltHa KapcbI TipeReHwe 6paHb3.
Bocaty TuMecin 6acbIn, aHaMaJIbI TuTKaHbI 3 KyiHe XblJXblTbIHbI3.
XeTeKTIH KOPraHbIC KaKnFaBbH acyMmaJaNafBbUbIH XeTeRiHeH aNbItnTacTaHb3 (H-5a cypetj).

NcK YCTaftbIbIH actbHfbl WeiTeHEYCTaHbI3, ON yWiH eki yWtBx KOFapbI KapaTy Kepek.
KanaynbKeckiH He YkkiDnCKHI DnCK YCTaBbIbHbIH YWTabbHa MyKNrT opHaTbIb3 (H-6a cypeti).
AHaHMaMaBb DnckInepDe KaIayNbI XaRbI XOfapbI KapaTbIINFaHbIHa Ke3 JeKTeKi3iHi3.
■ДИСК YCTaftbIbIH XOFaPbI YeTlHEH YCTaN, KOpNyCTbI OPhaTbIHbI3 (H-6b cypeTi).
KaKnaKtbl opHaTbIn (6enriHi KaDafraJahbI3), caraT 6aftbIme TipeJIreHwe bypaHbI3.
Acy mai dan afbIHTbI H-8 cypeIHne KepcetinreHde JxTeKke opHaTbIn, cafTa 6aftbIme TipeIReHwe 6paHb3.
AHaJaMaJbI aKbIpaTkblTbI YcblHblfAH KaDaMfa KOblHbI3.
EhneTih a3bIK-TyNik eHIMIH KyfblIka caBn, KAnKbIUnne HkblXkbItbHb3.
Ha3ap ayadpaBHy3!
TypaIaNbIH eHIMHI bIbIFbc CaHbIaNaybIHda KaIyBaHa JON bepMeHi3.
Kehe: Bipkeki Tpyay Hetnkeine XetyuH jhiKe typanaTbH eHimdi baiNamboiHua eHdeH3.
Hyckay: Θнделетин a3bik-Tynik eHimdepi acnylrik MaДanafbltsa 6itelenkTce, acynlrik KOM6aHnDbl eUipiH3, a7aHbI pO3eTKaHaH WbIFapblHbI3, JTeK TKtaFaHwa KyTIH3, acynlrik MaДanafbltBn KaKnaFbIH aJIbIN TactaHbI3 KHe KyfbltB1 6OcaTbIHbI3.
KymbICTaH KeiH
BiyibMbiaaHaImaIbIaXbipaTkblw apKblbEuipiH3.
AcyNilik MaJdaIaNbIUtbl caFat 6afblTbHa Kapcbl 6ypan, anbln TactaHb3.
KaKnaKTbI cafat 6aftbHa KapcbI bypan, anbl TactaHb3.
■ДИСК YСТаftышн ДИСКIMЕн БIPRE anbIN TACTaHbI3. ON yuIH CaycaKNeH actbIHah JxTeKшi 6Iiikke Kapcbl 6acblbI3 (U cypeti).
BenweekTeepiTa3anaHbI3.
ApanacTbipfblw
A Tkip nbiwaik/aHnblin TypaTbIH KTeKTeH JapakatTaHy Kayni!
OphatbɪnfaH apaɪaɪctbɪpflbɪtBɪ yCTaɪməhɪ3!
ApanaɪctbɪpflbɪtBɪ TEK kaHa 6yɪbɪm JxTeeri
TOKTAN TYPfA hɪnDa eHri3ɪH3/ʌbɪFapbɪhɪ3!
ApanaɪctbɪpflbɪtBɪ TEK xɪnHaɪkTaɪnfaH Kɪnde
XæHe Xa6bɪnfaH KaKnaɪkneH naɪdaɪaɪnHbɪhɪ3.
KeHec: ApaIacTbIpFbIuTbI KOJaHaH coH 6ipDeH Ta3AnaHbI3.
Ta3aJay KHe KyTy
Ha3ap aydpabib3!
Ew6ip Kbipa anatbIH Ta3aJay 6yIbIMapbIH KOJaHa6aHbI3. YcTinepdiH 6y3blbn KeTyiHe anapbyMymKiH.
Heri3ri 6yIbIMblTa3aJlay
3Jektp KyaTbHa Tycy kayni 6ap!
Herizri 6yibimdbeewkaanh cy iwihe
baTbipMaHb3 XaHE afbHdbCy actbIHda
ycTaMaHb3.EwKaHda by Ta3anaFbIbH
naiDanaH6aHb3.
AshaHbpo3eTkaDaHbIfaPbIbI3.
Herizri 6yibim MeH XeTeKTH KOPraHBIC KaNaftbIH bIrlaIbI WYbepKePNHe CypTHi3. KaXet 6oIca, 6ipa3 bIbIC KByfBk Kypan KOJaHaHbIbI3.
CoiHaN KeiH 6yIbIMdbI KypfKaTaN cyptiHi3.
blbc nen KypaIbI Ta3aJay
bldbic khe KypaI bIdbc-ak KyaTbIh MaunHada kyy ywiH xapamdbI. INaCTNK 6bnweKteprdi bIdbc-ak KyaTbIH MaunHaDa kbicnabI3, ce6ebi waio bapbcihda KaIdbikTap naJa bOJybl MymKiH!
AcyNilik MaIdaIaftbIUtBt Ta3aJaly
Acnylki MaJdaJafbIbTbIH bapblk
6eJnweKtepi bIbIC-aak XyaTbIH MaunHaada
Xyy yuH japaMdbI.
Kehec:MbicaIbI, c6i3 eHdeyDen KeiHa KaIaTbIH KbI3bl Tyn6aHbI KeTipy yuH, uSybepeke bipazecimik MaibH JkafbIn, acyMaJaIaNafBIsbH (MaJdaNafBIsdNckijepdi emec) cyptiH. Codah KeiHa acyJIK MaJaIaNafBIsWtB1 WauBih3.
ApanactbipfbiwTbTa3anay
A Tkip nbIwaKaTah JapaKaTTaHy Kayni! ApanactbIpBbIw nbIwaKaJanaH KOJImeH TImeHi3.
ApanactbipfblbIDbcIHKaKnaKTbJxHe KnyfblITbIbIDc-aK Jyy MaunHaCbIHda Jyyfa 6oanaBl.
KeheC: CytbIKTbIaTpbl EHeDeHHeN KeiH eTe apanaCTbIPfblTb Ta3anay ywiH OHb 6ybiMHaH anbln Tactay kaxet emc. On yuih bipaa cyblx Kypalmeh bipre opHaTBInFaH apanaCTbIPfblka KybHb3. ApaJaCTbIPfblTb 6ipHewe ceKynkKa Kocblb3 (M backblb). WlaOfa KondaHbInFaH cybl Teir, apanaCTbIPfblTb Ta3a cyMeH waiBhl3.
MaHbI3dbIHyckay:
Kemekwi Kypan Dop6acbH KaxetinHe Ta3anaHbI. Dop6aDaFb KyTy 6oBbIHwa HcaynapdbOpbIHdaHbI3.
CaRTay
KapaKaTTaHy kayni 6ap!
BiyibIMdbKOJdaH6aFaH Ke3de aHaHbI p03eTKaDaH WbIFapbIHbI3.
Cyper L:
Kypanap MeH MaJdaJafBIs DnCKJIepDi KEMekwi Kypan dop6acbHa caNbIb3.
Kemekwii KypaI Iop6acbIH bIDbc iHHe caKaTah3.
AkaayIbIKTap opbIH aJFaH XaFdaIJaRbI KEMeK
KapaKaTTaHy kayni 6ap!
AkaayIbIKtI KOIO aIbIHda aIshaHbI p03eTKaHaH IbIFapbIHb3.
MaHbI3dIbHyckay:
BiybIMHbIH XyMbICbIHdAfbI KaTe, 3JeKTPoHDbIK CaKaTHDbIPfBiWtApDbIH axkbpaTbInybl HeMece 6yibIM 6yliHyi Kymbic INHdINKaTOpbIH HxblbIKTaybl apKbIbI KepcetiiJIe.i.
AHaMaIbI TyTkA eP6ip KymbIC KyiHDe eHri3iJy KepeK.
Bipinien naia 6onfah Mcesenei TeMeHderi HcyaynapdbI KOJdaHbIN WcWyre TbIPbICbl3.
AkaayIbIK
Биьим icke kocbiMaI Typ.
Uewim
Tok KeziH TekepeiH3.
AshaHbI TekcepiH3.
AHaJaMaJbI TyTkAHaBkaDaFaJaNbI3. Kyi dypbc opHaTbInfah 6a? Ehrizin In Typ Ma?
ApanaactbipfblH He bIbICTbI tipenreHwe 6ypan 6ekitih3.
ApanaactbipfbiKKaNaftbHOpHaTbIN, tipenreHwe 6ypan 6ekitih3.
KeTeKtiH KopFaHbIC KaKaNaFbIH KOJaHaBbIMaFaH KeTeKke OpaTaBbI3.
KaetaickeKocbinydAnKopfahbc6eNdi.ByibIMdb0/off KyiHeOpHaTbHb3da,CodaHKeinKaanayblKaadamKaaTapbIHb3.
Akaaybik
Буйым колдану keziнde ewipinкалды.
ApTbIK KxyKTeMeDeH KopFaHbIC 6eJIceHdi.
Bip yaKbTTa TbIM KeN a3bIK-TyNilk eHimdepi eHneJIreH.
Uewim
BvIbIMdbIeWipiH3.
- Θnkey KeJemH a3aNtBtHbI3.
PyKcat etiIreH MaKcMaIaIbI KeIeMdepeH(«KoJIaHyMbIcaIaIapbl MaKaIaCbIH KapaHbI3)acbIpMaHbI3!
Akaaybik
Ketek icke Kocynb ke3iHne 6ocaty Tymeci KaTe bacbl. AHaIImaIbI TyTKa Kofapbl Kapai XblXblTbIbI.KeTeK TOkTaBilFaH, 6ipak Kypalbl aIIMactbIpy KyiHde KaImaIbI.
Uewim
AHaHaJaMaJIbI aKbIpaTkblUThbl 0/off KaDaMbHaKaOblHbI3.
AиHaJaMaJIbI TyKaHbI 1 KyiHe XblJXblTbIHbI3.
BiyibMbI KOcbHb3 (1 kaambl).
BvibMbKaTadaH ewiipiH3. KypaJI KypaIbIa anMaCTbIpy KyinHe Typ.

AkaayIbIK
ApanactbipfbiX Kymbc ic tEme bactaIbI Hemece kondaHy bpbcihDa TypbIn KaIaNbI, JTeK «DipinDen» Typ. PbIwak 6JOKtanFaH.
Uewim
BvibIMdbI eWipiH3 JkHe aHaHbipo3eTKaDaH WbIFapbHbI3.
Apajactbipfbltbl anbltnTacTaHb3XaHe 6eretti ketipiH3.
ApanaTbipfBtB KaTadaH opHaTbIb3.
BvibIMbI KOcbIHbI3.
MaHbI3DbI HycKay
ErepakaynbiktbE3betiHweXOARIMacHbI3, KbI3MeT KepeTy opTaNbIFbHa xa6apJiacbHbI3.
KoJaHyMbIcaJIapbl
WanKaJFaH KJIerEi
-100r-600r
■Kinereni1½-4 MNHT iuiHne 7-6ackbIHTa KinereriH MEnIepi MeH KacneTepine BaIIaHbICTbl KaKKbIuINeH eHDeHi3.
KymblpTk akybl3bl
-1-8 kMbipTk akybl3bl
KyMbIpTKa akybI3bH 4-6 MNHyT iwiHne 7-KaJaMaKaKKblIiNeH eHdeH3.


БиCKBNT KaMbIPbl
Herizri pecent
-2KymblptKa
-2-3 ac KaCbIK bICTbIK CY
-100rKaHT
-1 naket BaHnHH Wkepei
-70rYH
-70rKpaxman
- KONcbITKbIiW (KOCbIMUa)
IHHpeJeHHTepDi (YH MeH KpaXMaJdaH 6aKa) WAM.4-6 MInHyT iWInHe7-KaJaMaDa KaKKbIuHne KeNipTin KaFbIHbI3.
AHaHaMaJbI aKbIpaTkbIuTb1-KaJaMaFa opHaTbI, eNEHReH yH MeH KpaxMaJIbI Iwam. 1 / 2 - 1 MInHy tIiHne KaCbIKNeH apaNaCTbIpBih3.
MakcmaIbI meIsep: 2 x Heri3ri peueNT
Kekcke apHaJFaH kambip
Herizri pecent
-6KymbIpTkA
-500rKaHT
-1caJbIM T3
-2 naket BaHnJIIn HeKepi Hemece 1 / 2 NIMOH Ka6blfbl
-500rmaHneMaprapnH
- (6eIme TeMnepaTypacbl)
-1000rH
-1 naket KaMbIP KONcbITKblUbl
-250MnCyt
KymbipTKa, KaHT, T36en BaHnIb 1wekepiH Hemece JIMOH Ka6fbIH 1wam. 10 ckynd iuiHne 1-Kaamda 6ynfaybiuHep apanaactbipbHb3.
5-kaamfopaOpHaTbIn,waM.120cekyHdiwiHde eHdHi3.
Mai KocbI, IaM. 60 ckyHd iuiHde 3-Kaamda eHneHi3.
MaM MeH KOncbIrkblKocBIn, WAM. 2 MmHT iwiHne 1-kaamda eHndeH3.
3-KaamfopHaTbIn,2MnHyT iuHHe cyTTi 6iptiHden KocbIHbI3.
MaKcImaIbI MeJIseP: 1 x Heri3ri peuert


Yrilmeni Kambip Herizri pecent

-125rmai(6eMaTeMnepaTpaCbI)
-100-125rkaHT
-1KyMbIPTKa
-1caJbIM T¥3
- KiIiKeHe JIMMOH KaobfIb He BaHnJIb Iekepi
-250rYH
jlll 1y jlll jlll o no
aol gall glba jglal lla aill
a/19/2012
ai ≤ bi
ai + 1bi = i · i
(waste electrical and electronic equipment - WEEE).
gall jll 1234567890
()
sole!
gall jgo o Juiuui yos .
aill lll aiei iiaii iia
S ADB = S COD + S BDO = S ADB + S COD + S BDO
jia jie
Lilao jao jao jao jao jao jao jao jao jao jao jao jao jao jao jao jao jao jao jao jao jao jao jao jao jao jao jao jao jao jao jao jao jao jao jao jao jao jao jao jao jao jao
J 1
Joo b ool 0o Jooal jle Jooa
jia 2. jie ai aji jai j
5j j 1 J 1 J 1 J 1 J
julal all ibis
iiydi aie 1
Jlll 2 1
A

auiuui 1
500 -
1
(a)j8 80
80
200-250
1 25
S_ OBC = 12 · CO · BC = 12 × CD × 5
a1g 1/2 a
1
1/2 1/2
6-3 1
. 125 3
J 2
A

aigall
auiuui 1
300
3
10-20 1-2 all
山
5 3 2019
- i.e. c < 0 即 3 ≤ c^2 - 1 ≤ 0
Jusla 1.520 :
aoww

m = 311
auiuui 1
1000 -
S_ OBC = 12 · CO · BC = 12 × CD × 5
2 -
660
a12 1/2 1/2 a12
4-5 1
. 125 3 4

a
auiuui 1 auiu gll
6
500 -
1
2
[\therefore \frac{1}{2}g = \frac{1}{2}]
(a)j500
1000 -
1
250
S S = 12 · CD · CM
10 12d jaoall
1 4
120 5 jlll
山
60 60 60
.3
a
- a > 0 且 a^2 - 2a + 3 = 0 恒成立
12 3 2
2 2
jlll 1 1
A


#
auiuui 1 auiu gll
(a)j125
100-125
1
Cull 1
Lulilj Ssw jn jn jn eo
250
Jy
a 1/2 all 2d all
2-3 1
.
| x - 2| = 100
12
3-4 1
1
#
1 1
Juaaia
b1b2·s b_n
jie 1
pa a
ellizao Juaillil jall icill jiai!
. e^2x^2 + 1 ≤ ( x) f ≥ 0
auiuui 1

S_ OBC = S_ COD + S_ BOC
100-600 - 1234567890
ai L ai = min a_i - k : k I
Lgsgogd

#
J8 1 64
7a 的一个

= ( x_1,y_1) , = ( x_2,y_2)
auiuui 1
2
jLw oL jc2-3
100
1
70
0 70 -
Jy
(1) all yall
6 4 2d j
Cuaia 1 yuul 1ydu 7 a jull
A
1 1
afooloo
1品 = 12
dd = 0
Jlll 2 1
w
J 1
C. ( x,y) 1 ≤ y ≤ 3 , ( x,y) 2
Jaaal 1a Jaaai G a Jaaal
Jaa Jaa Jaa Jaa Jaa Jaa
.
Jusio Juswll
aJis jil g w dLc! g bldll plaiiui 1:
i 1
jie jie jie jie jie jie jie jie jie jie jie jie jie jie jie jie jie jie jie jie jie jie jie jie
eLg Cllal 1o Jell 1o 1
blll llll llll llll
y (M 2015)
clalblllcbpiipcblllo
:pda
ailll lalll 5 5 jill
a=glallglc gldall ylll clll jdo
S OBC = S COD + S_ BOC
jieai jieai
!Lla!gj
jglal lglal
y
:
S
ailll
aill lal
.
Jbcj 11j6eLwcl
!iuaia
jglal jr! jlll all j!
a
PA = PA
j111 111 111 111
Jbc 2g jic g jgi jil jolal
j 1
Jilllll lalol giall jll
aagaa 1jiaaa aai jg jglj
g
aikaiill allj! alg 1g g j sio
ai = 12( ai - 1 + a_i - 2)
j_a = x( 1 - x)
e 1y sll y i j 1i j 1
S ACD = S COD + S_ CDA
yj
1pda 4
aia 15sla aibii 1go 1daii iie
a
wulwJgai
jll jall
jglal jlll jll l l
wlaia ciai jai yicai lll
jgl jgl jgl jgl jgl jgl jgl jgl jgl jgl jgl jgl jgl jgl jgl jgl jgl jgl jgl jgl jgl jgl jgl jgl jgl jgl jgl jgl jgl jgl jgl jgl jgl jgl jgl jgl jgl jgl jgl jgl jgl jgl jgl jgl jgl jgl jgl jgl jgl jgl jgl
.
1
gill bll gll
ii 1i j. aIio iiaiaia
aJ 10
ab > ac > a_d > 0
Jaaal 1gale gai
Jucic aiesLg Jusieil alq Jozll cgl gclc g
a a a a a a a a a a a a a a a a a a a a a
aal
a aal alal alal alal alal alal
.
b_1b_2·s b_n
1
a:Sl a jlll al lal ll l
1
1pala 4
()()
JgBdDj
ai a ai 分母最小值为 k .
K

jL 11
golglc jlljall glljjll
.4
aalil 1y1 yol gll lall
billy
jss jolr
aaiiaaa aiee
pia (gulw) jgl 1c sgs gao
aellw yjz jyol jil 0s
aalil
CllSall 2
j1 1.25 = a111111111111
j 10g jll afoa dlilu do go aasll
ailllal 12y 1 ays jol 0.5 = aia
100 50 =
i j 1
Jaa 1
Aa 1
aal llll aol clall
cill
:K-8 3
jglal 1aaiabw jglal
cilll l 100
aai jia jia jia jia jia jia jia jia jia jia jia jia jia jia jia jia jia jia jia jia jia jia jia jia jia jia jia jia jia jia jia jia jia jia jia jia jia jia jia jia jia jia jia jia jia jia jia jia jia jia jial
aaiial ciisall jyjial aaii
ii 11 i 11 i 11 i 11
g
g
aall 12n aalll aalss
Jaa Jaaeg
jglal 1aaiabw jglal
a clll 1e ool
A
18a bdlll 18j1 Jd
Aoluiiui i o eliiiy
a a a a a a a a a
l//12
jia 1521
121 123 124 125
.
!pa
olall jllj l 1
1
Ji jiyaiyia cai yjai jai jai jai
4k = 0
1.03
a a a a a a a a a a a a a a a
a
A
.7 251 16 Jauu:
.5 a joll gl Jaoell
a
H

pksj o jzdi j j bia pi
a
.2
12 = 0. 12 = 0 12 = 0
4i j! i! 1
aal alg aell w jsc jol aljil
gill 1aia gaa

pksj o jzdi jbiia pi
a
3 1
aalil ydy sglg ygl gll alll
.(H-5a)
a
jnnnnaa nannn nn nnnn nnnn nnnn nnnn nnnn nnnn nnnn nnnn nnnn nnnn nnnn nnnn nnnn nnnn nnnn nnnn nnnn nnnn nnnn nnnn nnnn nnnn nnnn nnnn nnnn nnnn nnnn nnnn nnnn nnnn nnnn nnnn nnnn nnnn
i 1
aill 4 4 4 4 4 4
(H-6a oJgall) Jolj
J 1 J 1 J 1 J 1 J 1 J 1 J 1 J 1 J 1 J 1 J 1 J 1 J 1 J 1 J 1 J 1 J 1 J 1 J 1 J 1 J 1 J 1 J 1 J 1 J 1 J 1 J 1 J 1 J 1 J 1 J 1 J 1 J 1 J 1 J

aegill bua gia - j
a a a a a a a a a
yJyJyJyJyJyJyJyJyJyJyJyJyJyJyJyJy
. 《G」. jgll. gjjll
7^ is jolli 6^ is lalali
clicsll
jglal jglal
aiai aiai dlaia iiai aiai
alboll gdo ygal colgall
g
| b - 1| = | d - 1|

( 0,1) 或 = - 1
a
2 1
Jaa Jaa
jglal 2laalabw jglal
1
| x^ | = 1| x| · | r1^2 + r2^2 + r_3^2| ≤ 34| x| ^2

jLdYl pks! 6 jzjj jbbnpi
gai jia jia jia jia jia jia jia
2
.0j0j1 0j0j0j0j0j0j0j0j0j0j0j0j0j0j0j0j0j0j0j0j0j0j0j0j0j0j0j0j0j0j0j0j0
.0e
jia jai jia jia jia jia jia jia jia jia jia jia jia jia jia jia jia jia jia jia jia jia jia jia jia jia jia jia jia jia jia jia jia jia jia jia jia jia jia jia jia jia
aalalalalalalalalalalalalalal
jIbJy jn JgBaaill Jal jil Jll
!b
a a a a a a a a a a a a a a a a a
aaii abl jaiipjiaipjie
4 15c uusuaal lue wllg y 2y
0.000000000000000

a
a jbjbiiai aai
S OBC = S COD + S BOC - S BOC
2.2 gajgl gl! aajjialg jll
111 111 111 111 111 111
(SW8)
Acllll jac oljolololsc
:(E oall) 1g ggl

p^a x1,y1
y
.2
:1e
4j1j1 jaii1j1 jiyj 100
aal alg aell al
aill 4 aie gao jai
yI yIyIyIyIyIyIyIyIyIy
j 1 j j j j j j j j j
4
iill gill aen go jaiu d n
边
Jnll 1s Jnll nnnn nn nnnn nn nnnn nn nnnn nn nnnn nn nnnn nn nnnn nn nnnn nn nnnn nn nnnn nn nnnn nn nnnn nn nnnn nn nnnn nn nnnn nn nnnn nn nnnn nn nnnn nn nnnn nn nnnn nn nnnn nn nnnn nn nnnn nn nnnn nn nnnn nn nnnn
(-4b)
.
152! 0j j j j j j j j j j j j j j j j j j j j j j j j j j j
1
.111 1
i 1
A( 1,2)
:lll bai j
:3jglal aylal gjjlalg j
2-1 2
7 1
:Jgdu
1 a.b.c.d.e.f. 7 9 10 11 12
:
1 1
3 a jll jll jll jll jll jll
1
jzll 1z! jzlil g2! cgl gld l
bod

jglalai jllgjjlglj
(13)
jusell 1g jio jusell
aill

(14)
iaill j 1
ySswll jncc Jia (a)
(15)
lll lll lll ll lll
jia jil jil jil)
(2) S ACD = 13S CDE = 12 × 12 × 3 × 4 = 3
:(国)
e
al j. 1yjglall blae Jauai
aaiiie iiaii
L
1

pksj jzbs jbsa
y
.2
a a 1
i 1
alalall aljg kcl yzll all
(SW8)
aLl 1
a
ailll llll 1
acllll jae jaojol oai jw

pksj o jzdi j j bia pi
a
1
jaii jbi i jui jai li jia
pala 1
aie Igdo lao o jao aiai ciai i 1 1 1 1 1 1 1 1 1 1 1 1 1 1 1 1 1 1 1 1 1 1 1 1 1
( G的( x) = f( x) - g( x) )
j4 ÷ 21 = 8( 2)
aaiiigaiinai jie jieall
i 1
100) 100
J 11 J 11 J 11 J 11 J 11
.
JooJI 1gJgEg
Jaaal Cgld Jldn caglaa a Jz 1
J 1 J 1
(12)
Jaaal 1a Jaa 8 a
J 12 J 12 J 12 J 12 J 12 J 12
Jglj gla oLl, jolly
i 1
.8(5)
| 1 | 7 | ↑ | 1-5 |
| 1-7 | |||
| 1-3 | |||
| 2 | 7 | * | - |
| 3 | 6 | ↓ | 3-7 |
| 3-5 | |||
| 4 | 9 | ↓ | 5-7 |
| 7 | ← | 5-7 |
i j 1j j j j
alall
gill
jLg21 p1.3i
!
y 1
Joulll 10000000000000000
!pA
/Je 11 j 11 j 11 j 11 j 11 j 11 j 11 j 11 j 11 j 11 j 11 j 11 j 11 j 11 j 11 j 11 j 11 j 11 j 11 j 11 j 11 j 11 j 11 j 11 j 11 j 11
aall jg jaiuulauu 1
aillgilllll 1
《
19
- jlll lal lal a
a
/ 1111 - niai111n i
pli/111 - niiipj w jn jn jn jn b
aogill bsio - jlll s j
c
*ublll lssd d
Jal20
gj! aagai p 21
bly
ygl 22
el23
g24
jLlAe klll clall all jls 1la ll g
oJ Lk nn Jie ic yrril clliaiaiaiaiaiaiaiaiaiaiaiaiaiaiaiaiaiaiaiaiaiaiaiaiaiaiaiaiaiaiaiaiaiaiaiaiaiaiaiaiaiaiaiaiaiaiaiaiaiaiaiaiaiaiaiaiaiaiaiaiaiaiaiaiaiaiaiaiaiaiaiaiaiaiaiaiaiaiaiaiaiaiaiaiaiaiaiaiaiaiaiaiaia
Jl 4
jlll jlll jlll jlll jlll jlll jlll jlll jlll jlll jlll jlll jlll jlll jlll jlll jlll jlll jlll jlll jlll jlll jlll jlll jlll jlll jlll jlll jlll jlll jlll jlll jlll jlll jill l l l l l l l l l l l l l l l l l l l l l l l l l l l l l l l l l l l l l l l l l l l l l l l l l l l l l l l l l l l l l l l l l l l l l l l l l l l l l l l l l l l l l l l l l l l l l ll
jlll jlll jlll jlll jlll jlll jlll jlll jlll jlll jlll jlll jlll jlll jlll jlll jlll jlll jlll jlll jlll jlll jlll jlll jlll jlll jlll jlll jlll jlll jlll jlll jllI J I I I I I I I I I I I I I I I I I I I I I I I I I I I I I I I I I I I I I I I I I I I I I I I I I I I I I I I I I I I I I I I I I I I I I I I I I I I I I I I I
jlll jlll jlll jlll jlll jlll jlll jlll jlll jlll jlll jlll jlll jlll jlll jlll jlll jlll jlll jlll jlll jlll jlll jlll jlll jlll jlll jlll jlll jlll jlll jlll jll! J
jill! J
jill! J
jill! J
jill! J
jill! J
jill! J
jill! J
jill! J
jill! J
jill! J
jill! J
jill! J
jill! J
jill! J
jill! J
jill! J
jill! J
jill! J
jill! J
jill! J
jell! J
jill! J
jill! J
jill! J
jill! J
jill! J
jill! J
jill! J
jill! J
jill! J
jill! J
jill! J
jill! J
jill! J
jill! J
jill! J
jill! J
jill! J
jill! J
jill! J
jIll! J
jill! J
jill! J
jill! J
jill! J
jill! J
jill! J
jill! J
jill! J
jill! J
jill! J
jill! J
jill! J
jill! J
jill! J
jill! J
jill! J
jill! J
jill! J
jill! J
jILL11111111111111111111111111111111111111111111111111111111111111
!pala
yulssll plalol jie yuyl ayusill clll al 21 jlgll plalil pae yuall uasll uasill gals lal yuill cialaia ola yuall uaiy gals gals gals gals gals gals
Jaiui Jui Caijie

jll jll jll jll jll jll jll jll jll jll jll jll jll jll jll jll jll jll jll jll jll jll jll jll jll jll jll jll jll jll jll jll jll jll jll jll jll jll jll jll jll jll jll jll jll jll
Joo Joo o0 000
Jll Jll
a jj jlll aai i 1la all g
albi jia iiic aaii eai jn jnrall j
Allac! jbl ai d n jy dl jll Jauill sia Jauill
aallao g pai ai g dai jkay laaiall
aIg aIg aIg all gall no o yS ayS
L 11111111111111111111111111111111111111111111111111111111111
jglal iq: aolz aoLw clgii
1
iY
Jzll bgl 1y j 1 y! y! y! y! y! y! y! y! y! y! y! y! y! y! y! y! y! y! y! y! y! y! y! y! y! y! y! y! y! y! y! y! y! y! y! y! y! y! y! y! y! y! y! y! y! y! y! y! y! y! y!
AE United Arab Emirates,
all
BSH Home Appliances FZE
Round About 13.
Plot Nr MO-0532A
Jebel Ali Free Zone – Dubai
Tel.: 048814401
mailto:service.uae@bshg.com
www.bosch-home.com/ae
AL Republika e Shqiperise, Albania
ELEKTKRO-SERVIS sh.p.k
Rr: "Ferit Xhajklo" Ish Markata
Tirana
Tel.: 42278130, -131
Fax: 4 2278 130
mailto:info@elektro-servis.com
ELEKTKRO- SERVIS sh.p.k
Kulla B Nr.223/1
Kodi Postar 1023
Tirana
Tel.: 4 480 6061
Tel.: 42274941
Fax: 4 227 0448
Cel: +355 069 60 45555
mailto:info@expert-servis.al
HEATHERTON, Victoria 3202
Tel.: 1300 368 339
mailto:bshau-as@bshg.com
www.bosch-home.com.au
BA Bosna i Hercegovina, Bosnia-Herzegovina
"HIGH" d.o.o.
Gradačačka 29b
71000 Sarajevo
Info-Line: 061 100 905
Fax: 033 213 513
mailto:delicnanda@hotmail.com
BE Belgique, Belgie, Belgium
BSH Home Appliances S.A.
European Trade Center Building, 5th floor
1784 Sofia
Tel.: 02 892 90 47
Fax: 02 878 79 72
newsletter:informacia.servis-bg@
bshg.com
www.bosch.home.bg
BH Bahrain,
Khalafat Est.
P.O.Box 5111
Manama
Tel.: 017400553
mailto:service@khalaifat.com
BY Belarus, Benaapycb
OOO"ECX BbITOBaTexHnka"
TeJ.: 495 737 2961
mailto:mok-kdhl@bshg.com
CH Schweiz, Suisse, Svizzera, Switzerland
BSH Hausgeräte AG
Werkskundendienst fur
Hausgeräte
Fahrweidstrasse 80
8954 Geroldswil
+7snt/min (alv 24%
To arrange an engineer visit, to
order spare parts and accessories
or for product advice please visit
www.bosch-home.co.uk
or call
*Calls are charged at the basic rate, please check with your telephone service provider for exact charges
GR Greece, Eλλας
BSH Ikiakes Siskeves A.B.E.
Central Branch Service
17 km E.O. Athinon-Lamias &
Potamou 20
14564 Kifisia
Unit 1 & 2, 3rd Floor
North Block, Skyway House
3 Sham Mong Road
Tai Kok Tsui, Kowloon
Hong Kong
Tel.: 2565 6151
Fax: 2565 6681
mailto:bosch.hk.service@bshg.com
www.bosch-home.cn
HR Hrvatska, Croatia
BSH kučni urežaji d.o.o.
Kneza Branimira 22
10000 Zagreb
Tel.: 01 640 36 09
Fax: 01 640 36 03
mailto:informacije.servis-hr@
bshg.com
www.bosch-home.com/hr
www.bosch-home.com/hu
IE Republic of Ireland
BSH Home Appliances Ltd.
Unit F4, Ballymount Drive
Ballymount Industrial Estate
Walkinstown
Dublin 12
Service Requests,
Spares and Accessories
Tel.: 01450 2655*
Fax: 01450 2520
www.bosch-home.co.uk
*0.03 € per minute at peak.
Off peak 0.0088 € per minute
IL Israel,
C/S/B/ Home Appliance Ltd.
1, Hamasger St.
North Industrial Park
Lod, 7129801
Tel.: 089777222
Fax: 089777245
mailto:csb-serv@csb-ltd.co.il
www.bosch-home.co.il
IN India, Bharat,
BSH Household Appliances
Mfg. Pvt. Ltd.
Arena House, 2nd Floor, Main Bldg,
Plot No. 103, Road No. 12, MIDC,
Andheri East
Mumbai 400 093
Toll Free 1800 266 1880
www.bosch-home.com/in
IS Iceland
Smith & Norland hf.
Noatuni 4
105 Reykjavik
Tel.: 0520 3000
Fax: 05203011
www.sminor.is
IT Italia, Italy
www.bosch-home.com/it
KZ Kazakhstan, Ka3akCTah
IP Turebekov Yerzhan
Nurmanovich
Jangeldina str. 15
Shimkent 160018
Tel.: 0252 31 00 06
mailto:evrika_kz@mail.ru
LB Lebanon,
Teheni, Hana & Co.
Boulevard Dora 4043 Beyrouth
P.O.Box 90449
Jdeideh 1202 2040
Tel.: 01 255 211
mailto:Info@Teheni-Hana.com
LT Lietuva, Lithuania
Senuku prekybos centras UAB
Jonavos g. 62
44192 Kaunas
Tel.: 0372 12146
Fax: 0372 12165
www.senukai.It
LU Luxembourg
General Serviss Limited
Bullu street 70c
1067 Riga
Tel.: 07424137
mailto:bt@olimpeks.lv
Elkor Serviss
Brivibas gatte 201
1039 Riga
Tel.: 067 0705 20; -36
mailto:domoservice@elkor.lv
www.servisacentrs.lv
MD Moldova
S.R.L. "Rialto-Studio"
yn. LycceBa 98
2012 KuniHneB
TeJ./paKc: 022 23 81 80
mailto:bosch-md@mail.ru
ME Crna Gora, Montenegro
Elektronika komerc
UI.Slobode 17
84000 Bijelo Polje
Tel./Fax: 050 432 575
Mobil: 069324812
mailto:ekobosch.servis@
t-com.me
MK Macedonia, Makedonna
GORENEC
Jane Sandanski 69 lok.3
1000 Skopje
Tel.: 022 454 600
Mobil: 070 697 463
mailto:gorenec@yahoo.com
MT Malta
Oxford House Ltd.
Notabile Road
Mriehel BKR 14
Tel.: 021 442 334
Fax: 021 488 656
www.oxfordhouse.com.mt
MV Raajeyge Jumhooriyyaa, Maledives
Lintel Investments
Ma. Maadheli, Majeedhee Magu Malé
Tel.: 0331 0742
mailto:mohamed.zuhuree@
lintel.com.mv
NL Nederland, Netherlands
Unit F 2, 4 Orbit Drive
Mairangi Bay
Auckland 0632
Tel.: 094770492
Fax: 094772647
mailto:bshnz-cs@bshg.com
www.bosch-home.co.nz
PL Polska, Poland
SA Kingdom Saudi Arabia,
a_ij ij = all i all
Abdul Latif Jameel Electronics
and Airconditioning Co. Ltd.
BOSCH Service centre,
Kilo 5 Old Makkah Road
(Next to Toyota), Jamiah Dist.
P.O.Box 7997
Jeddah 21472
Tel.: 800 244 0043
mailto:kunnumalsp@alj.com
www.aljazeera.com.sa
SE Sverige, Sweden
BSH Hushàllsapparater AB
Landsvagen 32
169 29 Solna
Tel.: 0771 11 22 77 local rate
mailto:Bosch-Service-SE@
bshg.com
www.bosch-home.se
SG Singapore, 新加坡
BSH Home Appliances Pte. Ltd.
TECHPLACE I and
Mo Kio Avenue 10
Block 4012 #01-01
569628 Singapore
Tel.: 6751 5000
Fax: 6751 5005
mailto:bshsgp.service@bshq.com
www.bosch-home.com.sg
SI Slovenija, Slovenia
BSH Hišni aparati d.o.o.
Litostrojska 48
1000 Ljubljana
Tel.: 01 583 07 01
Fax: 01 583 08 89
www.bosch-home.com/tr
BSH Home Appliances Private Limited
台北市內湖區洲子街80號11樓
11F., No.80, Zhouzi St., Neihu Dist.
Taipei City 11493
Tel.: 0800 368 888
Fax: 02 2627 9788
mailto:bshtzn-service@bshg.com
我們期盼您不斷的鼓勵與指導
任何咨询或服务需求,
歡迎洽詢客服專線
gama-electronics.com
XS Srbija, Serbia
BSH Kućni aparati d.o.o.
Milutina Milankovica br. 9ž
11070 Novi Beograd
Tel.: 011 205 23 97
Fax: 011 205 23 89
mailto:informacije.servis-sr@
bshg.com
www.bosch-home.rs
ZA South Africa
BSH Home Appliances (Pty) Ltd.
15th Road Randjespark
Private Bag X36, Randjespark
1685 Midrand - Johannesburg
Tel.: 086 002 6724
Fax: 086 617 1780
mailto:applianceserviceza@
bshg.com
www.bosch-home.com/zai
| M | M/1...7 | STEEL | |||
| MUM59S81DE | ✓ | ✓ | ✓ | ✓ | |
| MUM59N37DE | ✓ | ✓ | ✓ | ✓ | |
| MUM59343 | ✓ | ✓ | ✓ | ✓ | ✓ |
| MUM59363 | ✓ | ✓ | ✓ | ✓ | |
| MUM59M54 | ✓ | ✓ | ✓ | ✓ | |
| MUM59M55 | ✓ | ✓ | ✓ | ✓ | |
| MUM59S81DE | ✓ | ✓ | ✓ | ✓ | ✓ |
| MUM59N37DE | ✓ | ✓ | ✓ | ||
| MUM59343 | ✓ | ✓ | ✓ | ||
| MUM59363 | ✓ | ✓ | ✓ | ||
| MUM59M54 | ✓ | ✓ | |||
| MUM59M55 | ✓ | ✓ | |||
| MUM59S81DE | ✓ | ✓ | ✓ | ✓ | ✓ |
| MUM59N37DE | |||||
| MUM59343 | |||||
| MUM59363 | ✓ | ✓ | ✓ | ✓ | |
| MUM59M54 | ✓ | ✓ | ✓ | ✓ | |
| MUM59M55 | ✓ | ✓ | ✓ | ✓ | |