
CARDGUARD 2.0 - Laptop Accessories DICOTA - Free user manual and instructions
Find the device manual for free CARDGUARD 2.0 DICOTA in PDF.
Questions des utilisateurs sur CARDGUARD 2.0 DICOTA
0 question sur cet appareil. Repondez a celles que vous connaissez ou posez la votre.
Poser une nouvelle question sur cet appareil
Download the instructions for your Laptop Accessories in PDF format for free! Find your manual CARDGUARD 2.0 - DICOTA and take your electronic device back in hand. On this page are published all the documents necessary for the use of your device. CARDGUARD 2.0 by DICOTA.
USER MANUAL CARDGUARD 2.0 DICOTA
Multi-Plus Cardreader with 3 Port USB 2.0 HUB
deutsch
Bedienungsanleitung
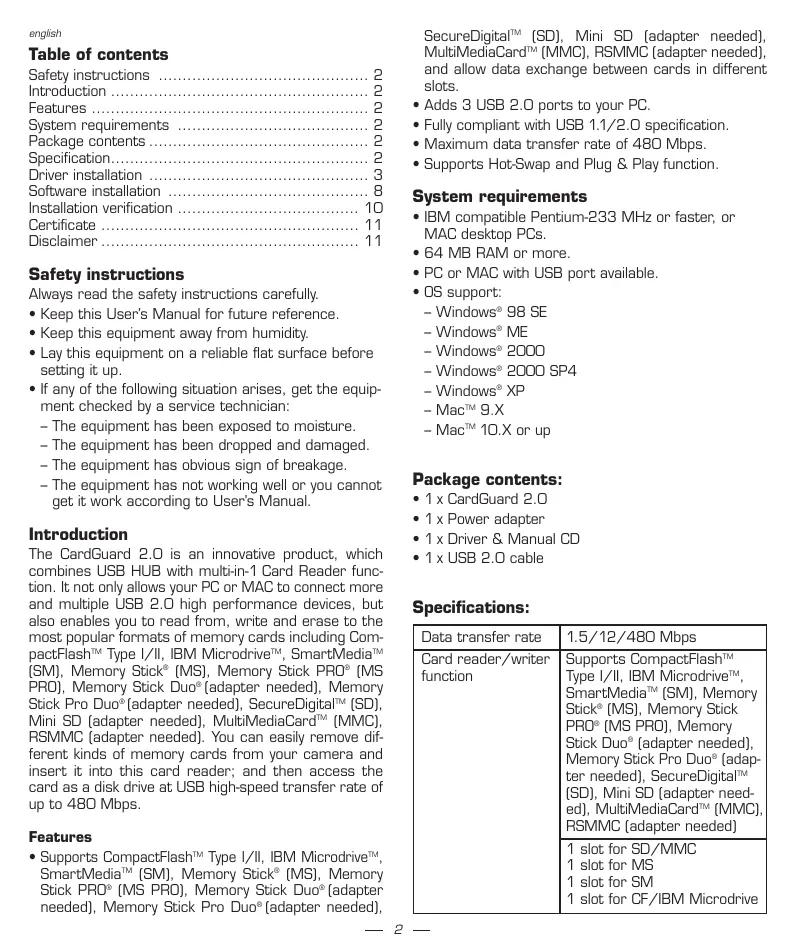
Safety instructions 2
Introduction 2
Features 2
System requirements 2
Package contents 2
Specification 2
Driver installation 3
Software installation 8
Installation verification 10
Certificate 11
Disclaimer 11
Safety instructions
Always read the safety instructions carefully.
- Keep this User's Manual for future reference.
- Keep this equipment away from humidity.
- Lay this equipment on a reliable flat surface before setting it up.
-
If any of the following situation arises, get the equipment checked by a service technician:
-
The equipment has been exposed to moisture.
- The equipment has been dropped and damaged.
- The equipment has obvious sign of breakage.
- The equipment has not working well or you cannot get it work according to User's Manual.
Introduction
The CardGuard 2.0 is an innovative product, which combines USB HUB with multi-in-1 Card Reader function. It not only allows your PC or MAC to connect more and multiple USB 2.0 high performance devices, but also enables you to read from, write and erase to the most popular formats of memory cards including CompactFlash™ Type I/II, IBM Microdrive™, SmartMedia™ (SM), Memory Stick® (MS), Memory Stick PRO® (MS PRO), Memory Stick Duo® (adapter needed), Memory Stick Pro Duo® (adapter needed), SecureDigital™ (SD), Mini SD (adapter needed), MultiMediaCard™ (MMC), RSMMC (adapter needed). You can easily remove different kinds of memory cards from your camera and insert it into this card reader; and then access the card as a disk drive at USB high-speed transfer rate of up to 480 Mbps.
Features
Supports CompactFlash™ Type I/II, IBM Microdrive™, SmartMedia™ (SM), Memory Stick® (MS), Memory Stick PRO® (MS PRO), Memory Stick Duo® (adapter needed), Memory Stick Pro Duo® (adapter needed),
SecureDigitalTM (SD), Mini SD (adapter needed), MultiMediaCard™ (MMC), RSMMC (adapter needed), and allow data exchange between cards in different slots.
- Adds 3 USB 2.0 ports to your PC.
- Fully compliant with USB 1.1/2.0 specification.
Maximum data transfer rate of 480 Mbps.
Supports Hot-Swap and Plug & Play function.
System requirements
- IBM compatible Pentium-233 MHz or faster, or MAC desktop PCs.
- 64 MB RAM or more.
- PC or MAC with USB port available.
- OS support:
-Windows®98SE
-Windows®ME
-Windows®2000
-Windows®2000SP4
-WindowsXP
- Mac™ 9.X
- Mac™ 10.X or up
Package contents:
- 1 x CardGuard 2.0
- 1 x Power adapter
- 1 x Driver & Manual CD
- 1x USB 2.0 cable
Specifications:
| Data transfer rate | 1.5/12/480 Mbps |
| Card reader/writer function | Supports CompactFlash™ Type I/II, IBM Microdrive™, SmartMedia™ (SM), Memory Stick® (MS), Memory Stick PRO® (MS PRO), Memory Stick Duo® (adapter needed), Memory Stick Pro Duo® (adapter needed), SecureDigital™ (SD), Mini SD (adapter needed), MultiMediaCard™ (MMC), RSMMC (adapter needed) |
| 1 slot for SD/MMC 1 slot for MS 1 slot for SM 1 slot for CF/IBM Microdrive | |
| Data exchange allowed between cards in different slots No driver needed under Windows ME/2000 SP4/XP | |
| USB HUB function | 3-Port USB 2.0 HUB |
| Connects up to 127 USB devices through daisy-chain | |
| Over-current detection and protection |
Driver installation
- Windows 98 SE
Step 1: Insert the Driver CD to your CD-ROM and connect the CardGuard 2.0 to an USB port of your PC.
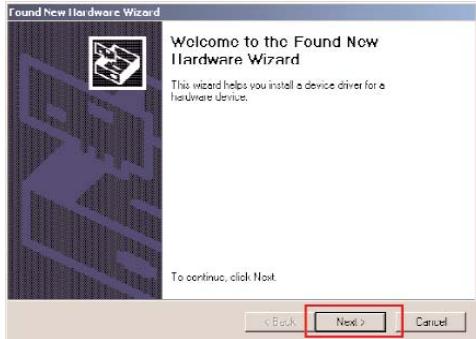
Step 2: Click Next to follow the wizard to install the driver for USB HUB.
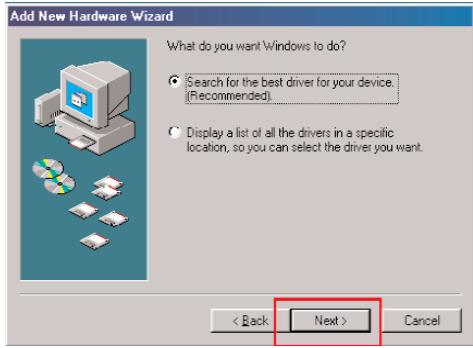
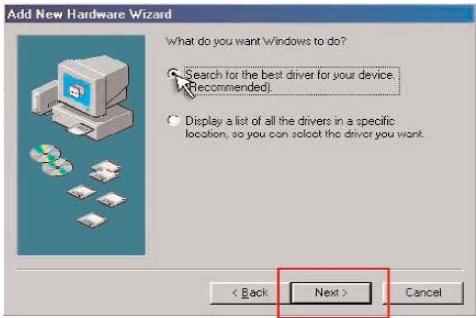
Step 3: Select Search for the best driver for your device and click Next to continue.
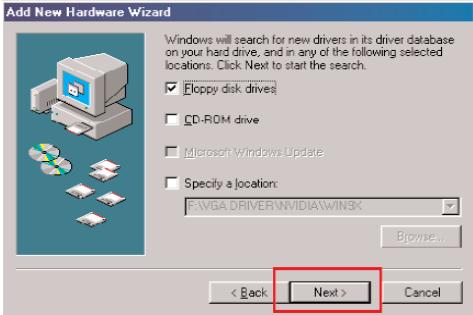
Step 4: Select Floppy disk drives and click Next to continue.
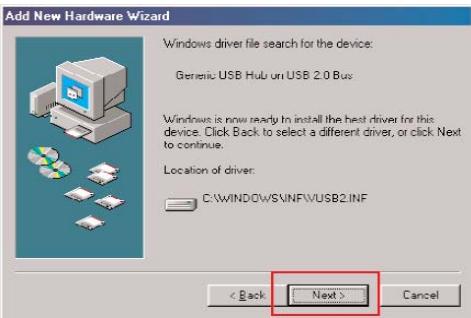
Step 5: Click Next to finish the driver installation for USB HUB.
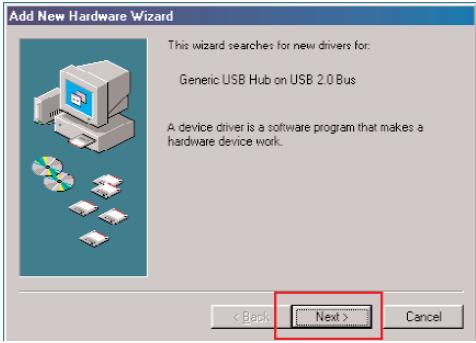
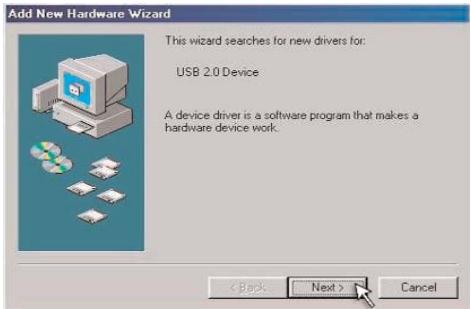
Step 6: The pop-up window shows This wizard searches for new drivers. Click Next and follow the wizard to locate the driver for USB Card Reader.
Step 7: Select Search for the best driver for your device, and click Next to continue.
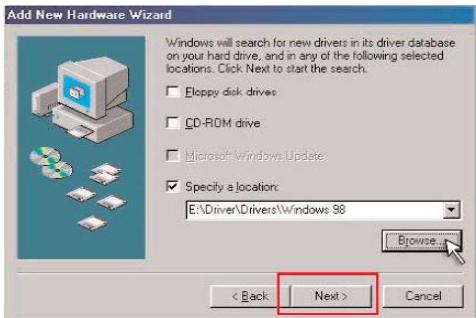
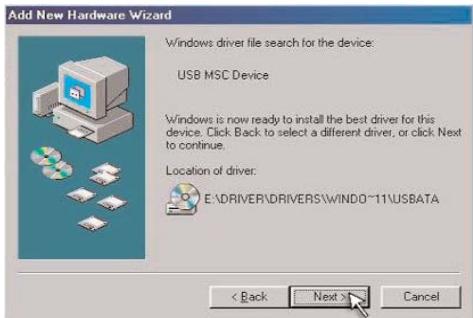
Step 8: Select Specify a location, click Browse to locate the driver shown as the below image, and click Next to continue.
Step 9: Click Next to install.
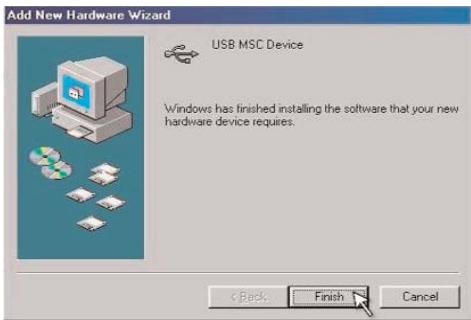
Step 10: The system shows Windows has finished installing the software that your new hardware device requires. Click Next to completely finish the installation.
Windows 2000
Step 1: Insert the Driver CD to your CD-ROM and connect the CardGuard 2.0 to an USB port of your PC.
Step 2: Click Next to follow the wizard to install the driver for USB HUB.

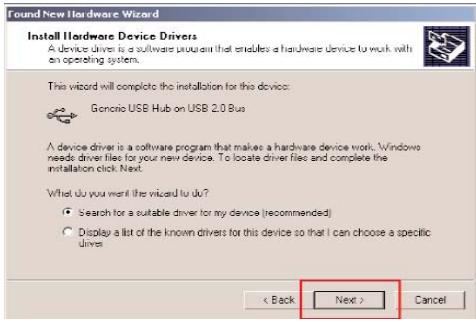
Step 3: Select Search for a suitable driver for my device and click Next to go.
Step 4: Select Specify a location and click Next to continue.
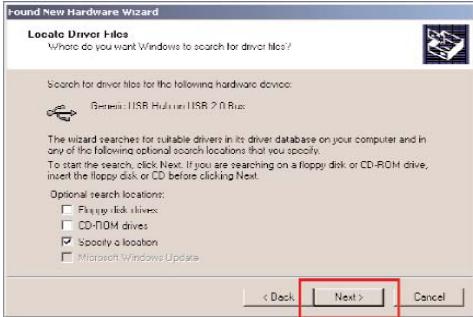
Step 5: Click Browse to locate the driver shown as below image and click OK.
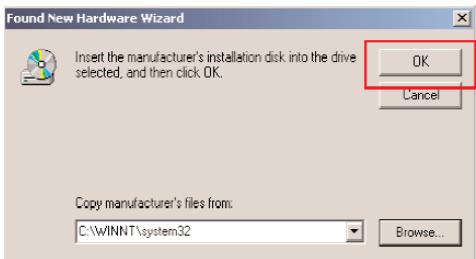
Step 6: Click Next to continue.
Step 7: Click OK.
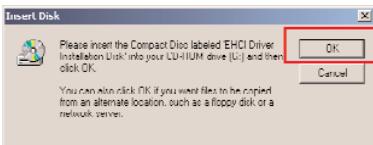
Step 8: Click Browse to locate the driver shown as below image and click OK to continue.

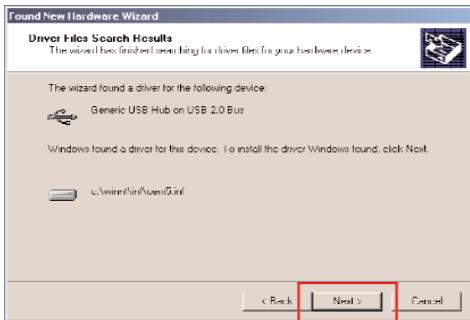
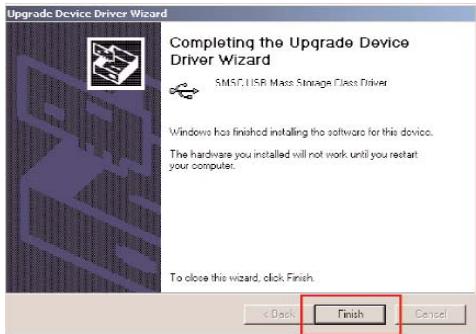
Step 9: Click Finish to finish the driver installation for USB HUB.
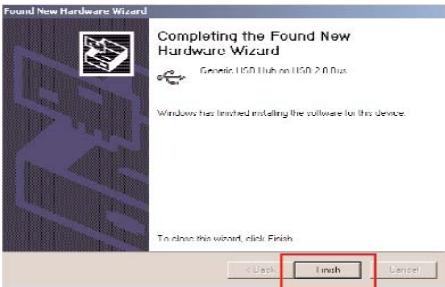
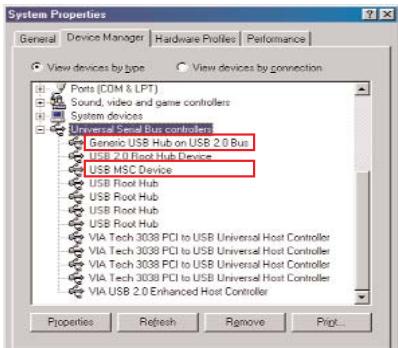
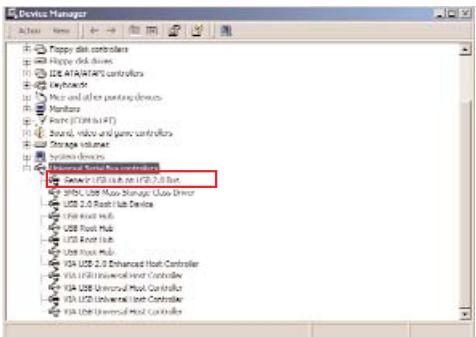
Step 10: Go to System Properties in Control Panel of your system, and click Device Manager in Hardware directory.
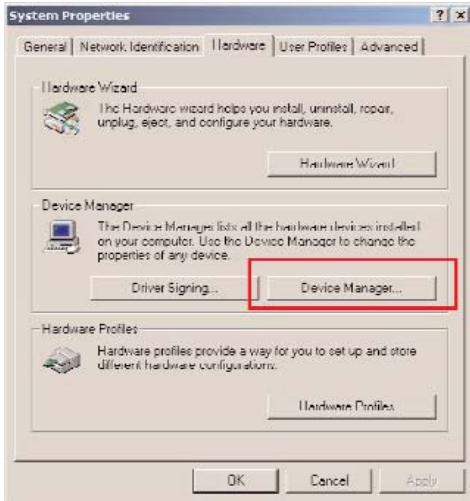
Step 11: Double-click USB Mass Storage Device in the Universal Serial Bus Controllers directory.
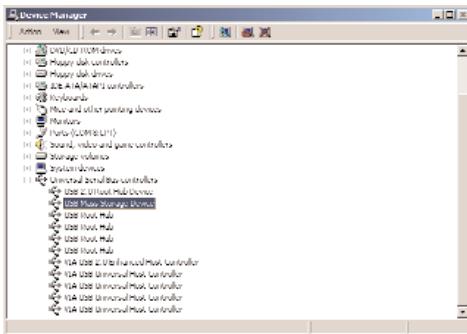
Step 12: Click Update Driver to install the driver for USB Card Reader.
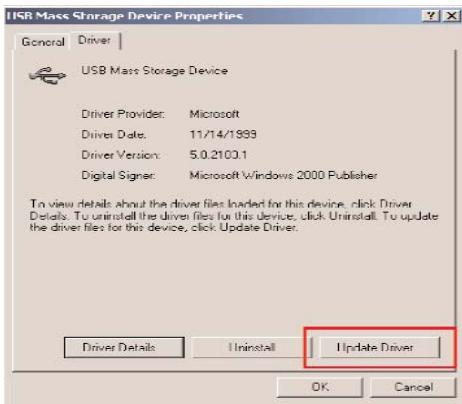
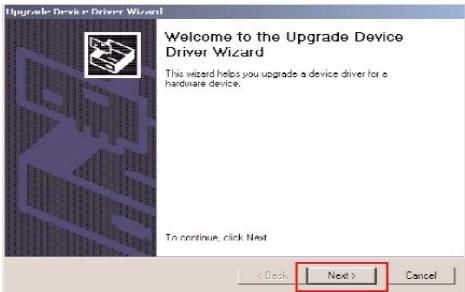
Step 13: Click Next to follow the wizard.
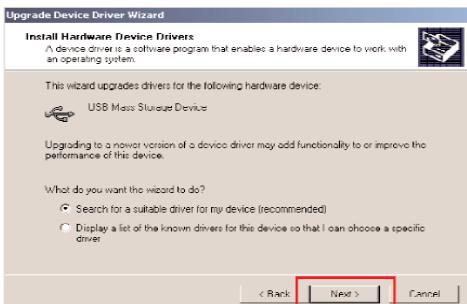
Step 14: Select Search for a suitable driver for my device and click Next to continue.
Step 15: Select Specify a location and click Next to continue.
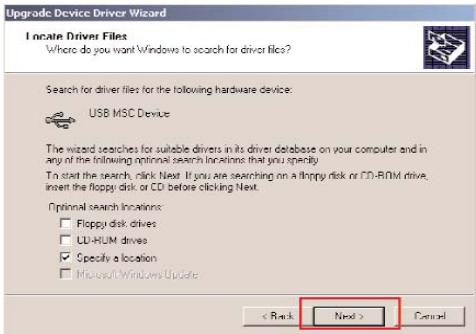
Step 16: Click Browse to locate the driver shown as the below image, and click OK to continue.
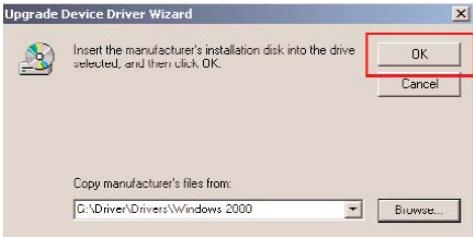
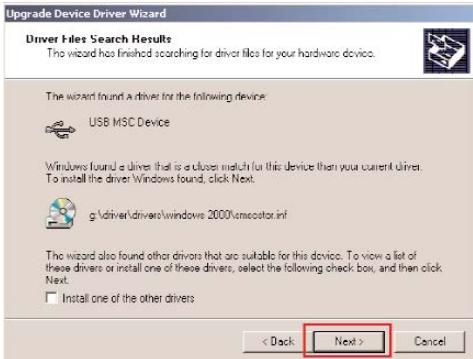
Step 17: Click Next to continue.
Step 18: Click Finish, then restart the system to completely finish the installation.
- Windows ME/2000 SP4/XP
The CardGuard 2.0 is fully compliant with Plug & Play capability under Windows ME, 2000 SP4 and XP system.
Software Installation (for Windows 98 SE, ME, 2000 and XP)
There is an user-friendly software in the attached CD for the driver and custom icon installation. Please follow the instruction as below step by step. The procedure for all supported OS is the same. Please do not connect the CardGuard 2.0 with your system before the software has been installed.
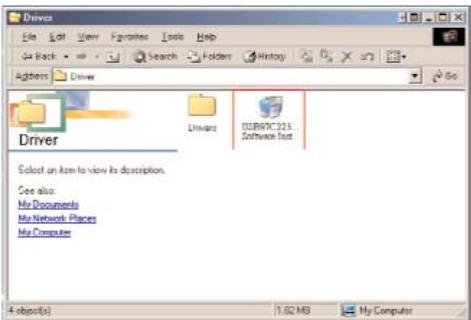
Step 1: Browse and double-click the USB97C223 Software Installer.exe file in the driver CD.
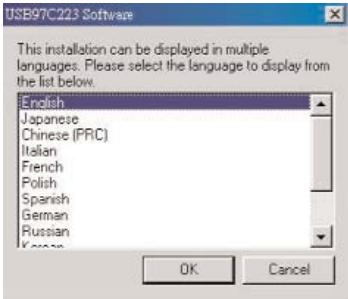
Step 2: Select the language to display from the list below.
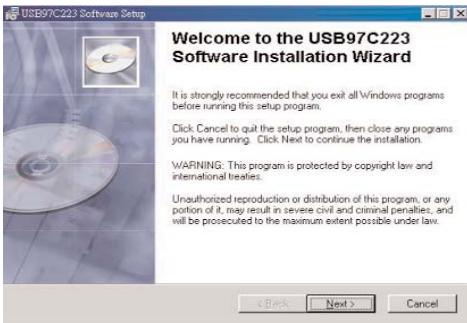
Step 3: The pop-up window shows Welcome to the USB97C223 Software Installation Wizard. Click Next to follow the wizard.
Step 4: The window shows Ready to Install the Application. Click Next to continue.

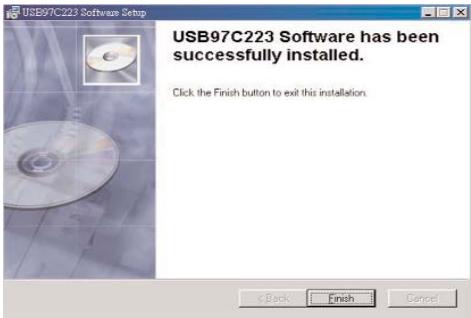
Step 5: Click Finish to finish the installation.
MAC installation
- MAC 9.X
Step 1: Execute the Driver\Drivers\MacOS 9.X\210+223 Mac OS 8-9.sit file in the driver CD.
Step 2: Click Continue to start the installation.

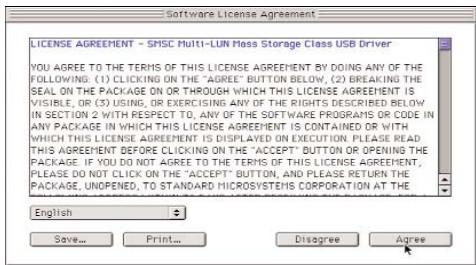
Step 3: The system shows the Software License Agreement. Click Agree to continue.
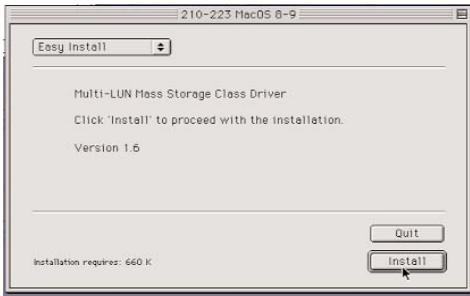
Step 4: Click Install to proceed.
Step 5: The window shows Installation was successful. Click Restart to restart your system and finish the installation.

MAC 10.X
Step 1: Execute the SMSC 223 Mac OS X pkg.sit file in the directory of Driver\Drivers\Max OS X-Required for Custom Icons Only in the driver CD to extract the SMSC 223 Mac OS Xpkg file.
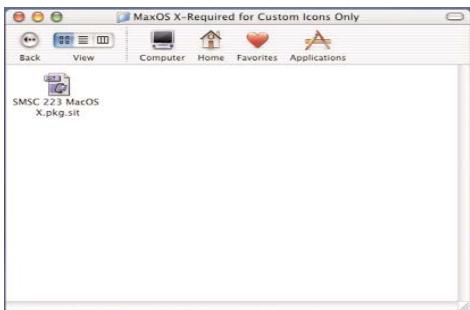
Step 2: Double-click the file to install.

SMSC 223 MacOS X pkg
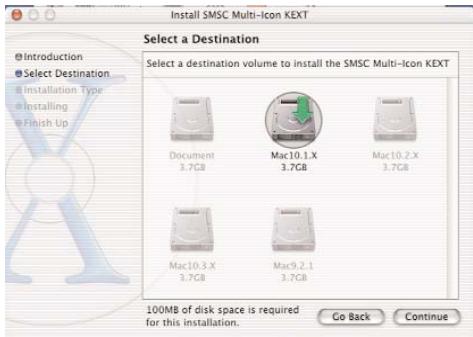
Step 3: Click Continue to install.

Step 4: Click Continue to install.
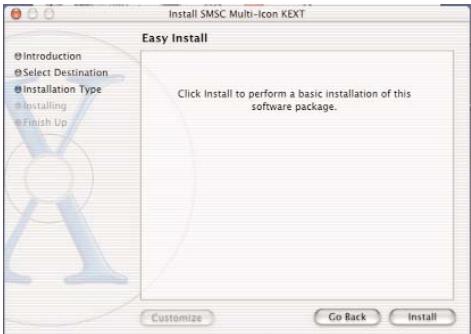
Step 5: Click Install to follow the Easy Install.
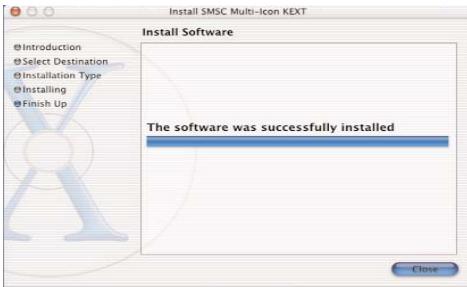
Step 6: Click Close to finish the installation.
Installation verification
- Windows 98 SE
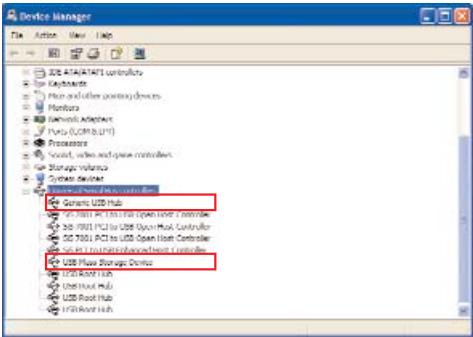
- Windows ME

- Windows 2000 - 2000 SP4
- Windows XP
- Custom icons in Win 98SE/ME/2000/XP
Please enter My Computer to check the icons.

31 / 2 Floppy (A)

Removable Disk(F:)

Memory Stick Drive (H:)

SDMMC Drive (3):

CD Drive (E:)

Compact Flash Drive (G:)

Smart Media Drive (I):
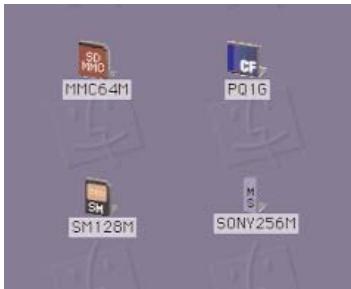
Mac 9.X/ Mac 10.X
When the memory cards are inserted into the Card-Guard 2.0, you can find the icons appear on the screen as below:
Cerificate
FCC
This equipment has been tested and found to comply with Part 15 of the FCC rules. Operation is subject to the following two conditions:
- this device may not cause harmful interference
- this device must accept any interference received. Including interference that may cause undesired operation.
CE-Certificate
This equipment is in compliance with the requirements of the following regulations: EN 55 022:CLASS B.


Disclaimer
Information in this document is subject to change without notice. The manufacturer does not make any representations or warranties (implied or otherwise) regarding the accuracy and completeness of this document and shall in no event be liable for any loss of profit or any commercial damage, including but not limited to special, incidental, consequential, or other damage. No part of this document may be reproduced or transmitted in any form by any means, electronic or mechanical, including photocopying, recording or information recording and retrieval systems without the express written permission of the manufacturer.
Inhaltsverzeichnis
- Custom icons in Win 98SE/ME/2000/XP
Memory Stick Drive (H:)

SDMMC Drive (3):

CD Drive (E:)

Compact Flash Drive (G:)

Smart Media Drive (I:)
Mac 9.X/ Mac 10.X
Memory Stick Drive (H:)

SDMMC Drive (3):

CD Drive (E:)

Compact Flash Drive (G:)

Smart Media Drive (I:)
Mac 9.X/ Mac 10.X
This wizard searches for new drivers for:
Generic USB Hub on USB 2.0 Bus
A device driver is a software program that makes a hardware device work.
<Back
Next>
Cancel
What do you want Windows to do?

Search for the best driver for your device. (Recommended).

Display a list of all the drivers in a specific location, so you can select the driver you want.
<Back
Next>
Cancel
- Custom Icons in Win 98SE/ME/2000/XP
Memory Stick Drive (H:)

SDMMC Drive (3):

CD Drive (E:)

Compact Flash Drive (G:)

Smart Media Drive (I:)