
MONET - Digital photo frame AIPTEK - Free user manual and instructions
Find the device manual for free MONET AIPTEK in PDF.
| Product type | Digital photo frame |
| Brand | AIPTEK |
| Model | MONET |
| Screen size | 8 inches (diagonal) |
| Display technology | LCD TFT |
| Screen resolution | 800 x 480 pixels (16:9) |
| Internal memory | 16 MB Flash |
| Supported photo formats | JPEG (up to 12 megapixels) |
| Supported video formats | MJPEG, MPEG-1, MPEG-2, MPEG-4 (DivX/Xvid) |
| Maximum video resolution | 720 x 560 pixels |
| Supported audio formats | MP3, WMA |
| Speaker | Built-in stereo |
| Compatible storage media | USB Flash, CF, SD, MMC, MS Pro (max 2 GB each) |
| Main functions | Photo display, video playback, background music, slideshow, calendar, alarm, file manager |
| Power supply | Power adapter 5V DC, 1.8A (AC input 110-240V) |
| Power consumption | 5V, 1.8A (9W) |
| User interface | 4-direction navigation buttons, Enter, Escape, Power LED |
| Connectivity | USB 1.1 (host for USB key), USB 2.0 (slave for PC) |
| Weight (estimated) | Approximately 0.5 kg |
| Care and cleaning | Wipe with a dry cloth, avoid water and solvents |
| Safety | Do not expose to water, high temperatures, direct sunlight; do not disassemble; keep out of reach of children |
| Spare parts and repairability | Only the power adapter supplied by the manufacturer is recommended; no information on repair |
| General information | Manual available in multiple languages on the manufacturer's website |
Frequently Asked Questions - MONET AIPTEK
User questions about MONET AIPTEK
0 question about this device. Answer the ones you know or ask your own.
Ask a new question about this device
Download the instructions for your Digital photo frame in PDF format for free! Find your manual MONET - AIPTEK and take your electronic device back in hand. On this page are published all the documents necessary for the use of your device. MONET by AIPTEK.
USER MANUAL MONET AIPTEK
Many thanks for buying this product. We have invested much time and effort in its development in order that you may enjoy many years trouble-free with your digital photo frame.
Safety Notice
- Do not drop, puncture or disassemble the digital photo frame, otherwise the warranty will be voided.
- Avoid all contact with water and dry hands before using.
- Do not expose the photo frame to high temperature or leave it in direct sunlight. Doing so may damage it.
- Use the photo frame with care. Avoid pressing hard on it.
- For your own safety, avoid using the photo frame when there is a storm or lightning.
- Use only accessories supplied by the manufacturer.
- Keep the photo frame out of the reach of infants.
Environment

Do not throw the appliance away with the normal household waste at the end of its life, but hand it at an official collection point for recycling.
By doing this you will help to preserve the environment.
Getting Started
Monet is an easy-to-use digital photo frame. It makes it possible to show high resolution photos and films, play MP3 as mood music and combine different photos to a slideshow. It supports USB Flash drive, CF, SD, MMC and MS Pro.
Package content
8" digital photo frame
- Frame Stand
- AC to DC Switching Power Adapter
USB cable ( to PC) x1
USB cable ( to Pen Drive) x1
- User Manual
- Software CD
Buildup
Before you can start using the digital photo frame you have to fix the stand and connect the photo frame with the provided power supply to a power point.
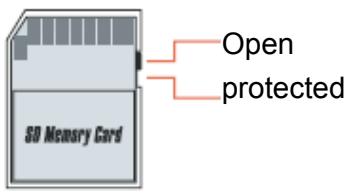
Using memory cards
Additionally to the already existing Internal memory you can use different Memory cards as well as USB sticks. The photo frame is compatible with USB Flash drive, CF, SD, MMC and MS Pro. Just put the memory card into the card port at the bottom of the device.

Front Panel
- Screen
- Adorning
- Front frame
- Stand
- Front-rear frame button
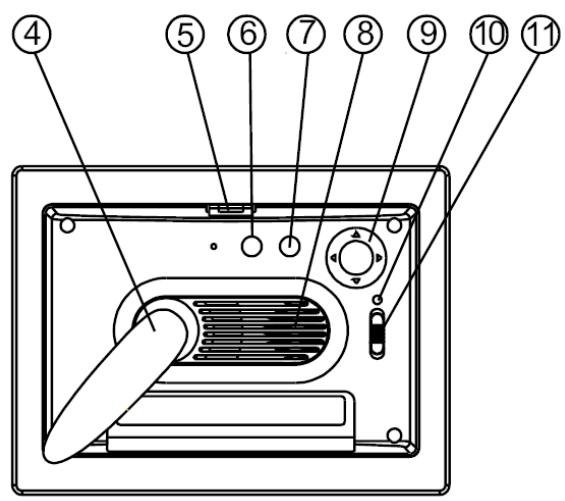
Rear Panel
- Esc button
- Enter button
- Speaker
- Circle button
10.Power LED
11.Power/LED switch
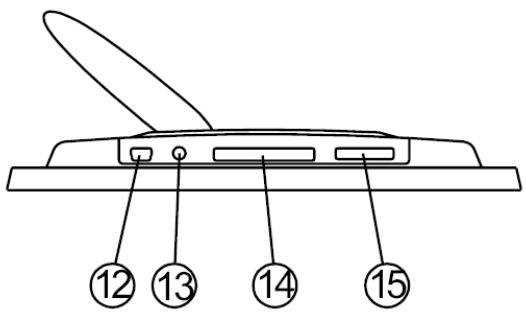
Bottom Panel
- USB port
- DC 5V jack
14.CF card port - SD/MS Pro/MMC port
After Power on
Before powering on, make sure the power adapter is correctly plugged in and the photo frame switched on.
After powering on, the Start interface shown on screen is according to the "StartUp Set" setting. User can choose calendar, picture, music, movie, file list in the start up interface.
The factory default setting is "Picture". When the "Picture" setting is selected, the photo frame will automatically start picture slide show from the memory card /USB stick or NAND.
When the "StartUp Set" setting is "Music", the photo frame can automatically play the audio file from the memory card /USB stick or NAND after powering on
When the "StartUp Set" setting is "Video", the photo frame can automatically play the video file from the selected memory card /USB stick or NAND after powering on
When the "StartUp Set" setting is "PlayList", the photo frame will automatically enter the filemanager screen after powering on
When the "StartUp Set" setting is "calendar", the start up screen will show the calendar (Fig. 6.1). Press the ENTER button in calendar mode and the photo frame will enter the card interface (Figure 6.2).
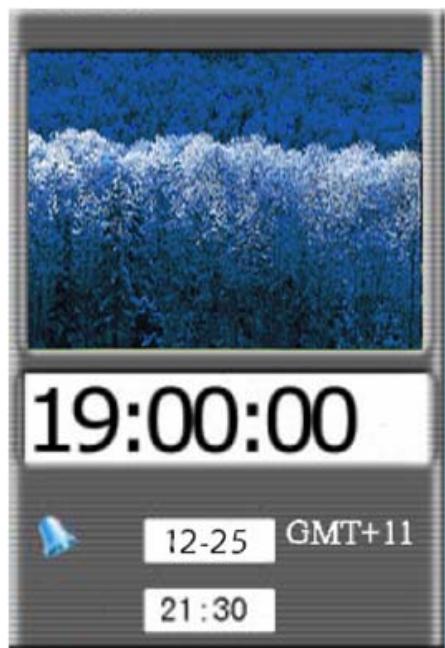

Figure 6.1
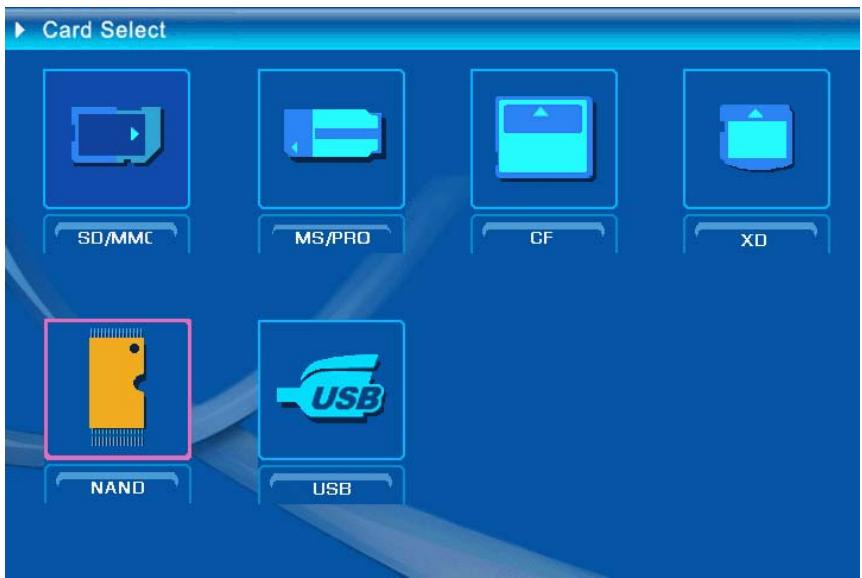
Figure 6.2
Functions of the digital photo frame
On the following pages the different functions and menus of the photo frame will be presented.
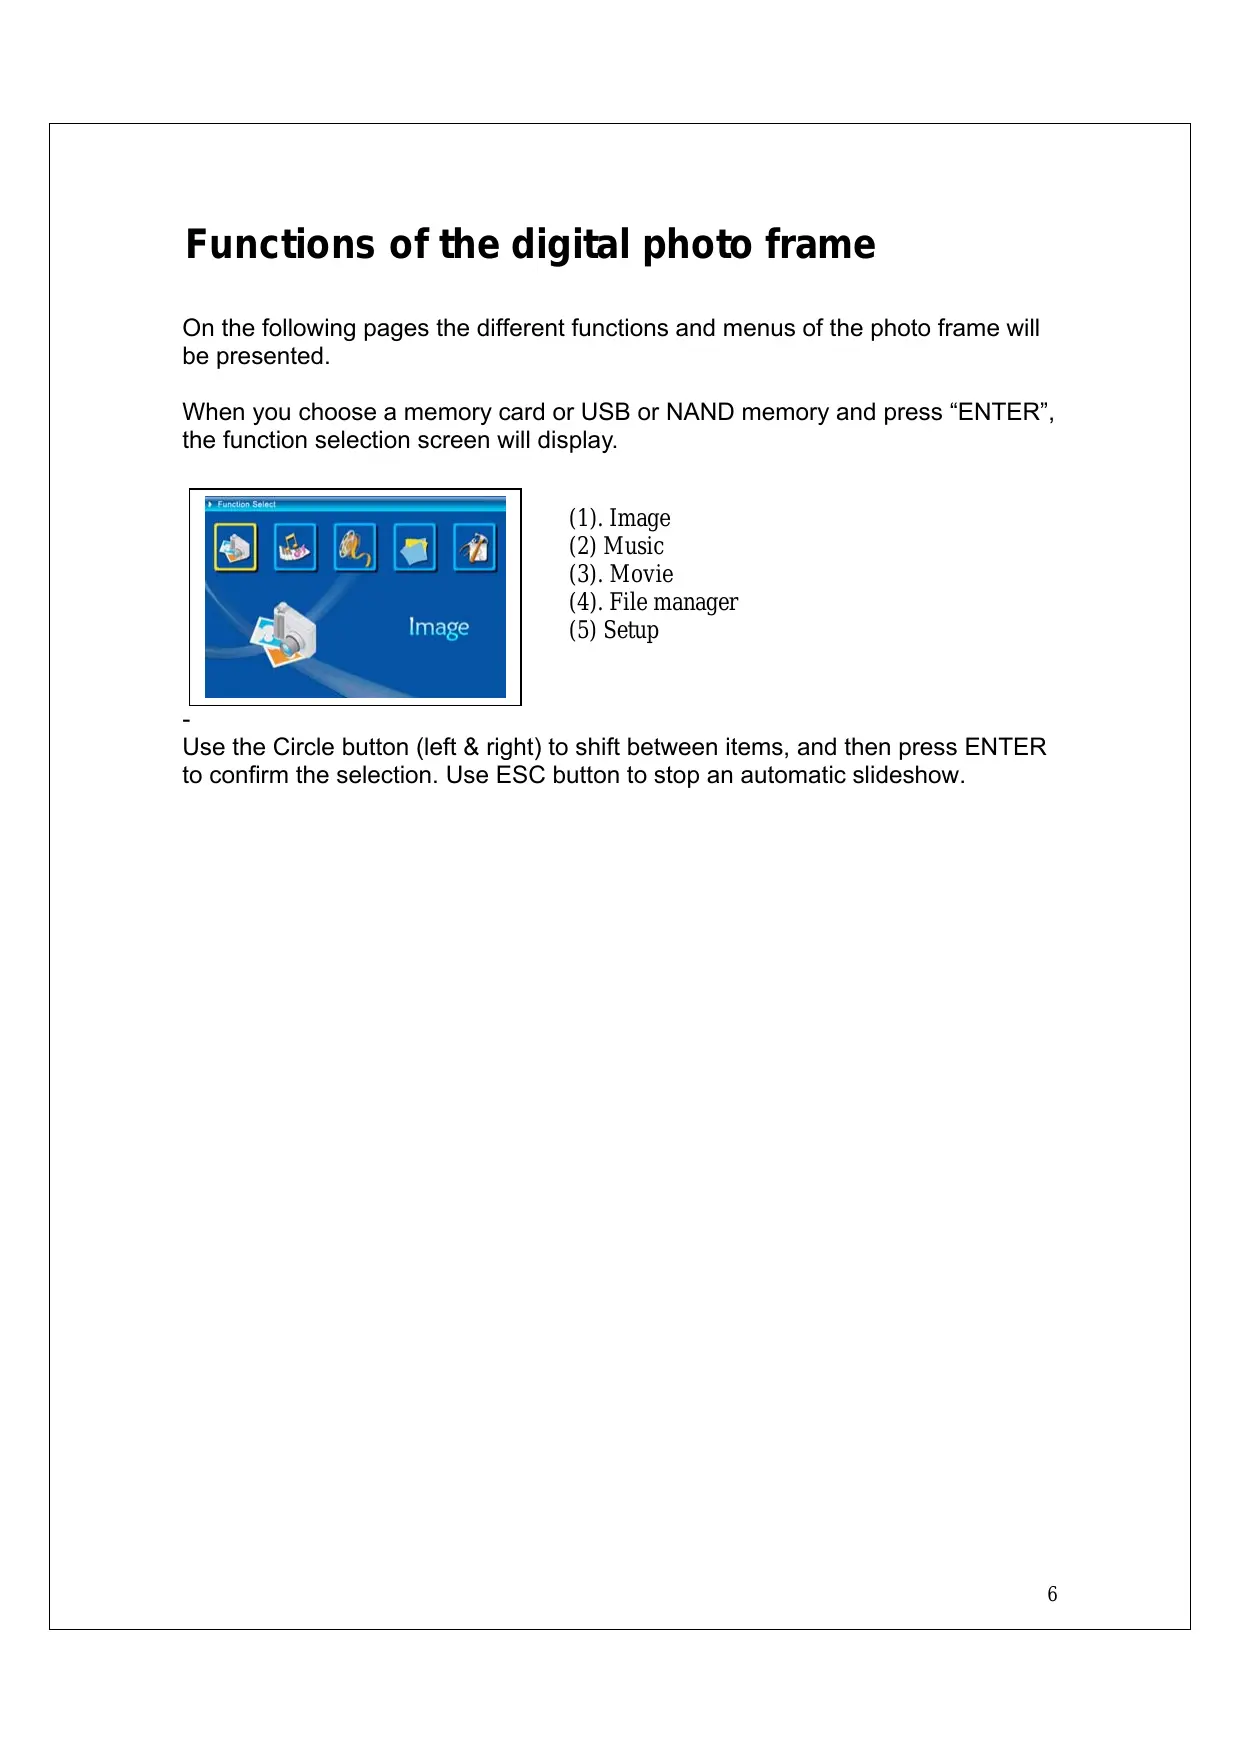
When you choose a memory card or USB or NAND memory and press "ENTER", the function selection screen will display.
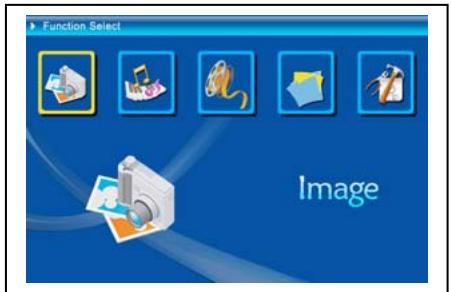
(1). Image
(2) Music
(3). Movie
(4). File manager
(5) Setup
Use the Circle button (left & right) to shift between items, and then press ENTER to confirm the selection. Use ESC button to stop an automatic slideshow.
The Setup

Next you should make yourselves familiar with the possible settings. Select the Item "Setup" and confirm your choice with the ENTER button.
The following window will appear now and you can see the options mentioned below.
At the function select interface, press the Circle button leftward to select the "Setup" item, and then press the ENTER button to enter the system setup menu. (figure 6.20).

Figure 6.20
At the Setup interface use below buttons' definition to operate.
Circle button (Up & Down): shift between items or choose parameters.
Circle button (right) or "ENTER" button: ENTER the selected item, confirm the setup result.
Circle button(left) or "ESC" button : Back to the up-level item/the previous picture or forward to the next picture.
The setup icons are shown as below :

: Language set.

: Picture setup, it includes “slide show mode”, “picture play mode” two In the item “slide show mode” user could set the speed of the slide show, it
includes "Fast" "Middle" and "Slow". In the item "t picture play mode", it includes 13 effects of the slide show.

: Clock set: Circle button (left & right) to shift between items; Circle button (Up & Down) to change digits.

: Alarm setup: The photo frame has 3 rings in system, in alarm setup, it has two modes, "once" and "every day"

: Start Up Set: Up start interface. User could setup image, music, movie, file list and calendar as start interface, default setting is picture.

: Video set: To setup Screen brightness, contrast and color setups.

: Default setup: Recover the factory default setup.

: Display current firmware version.
The image menu
When you select Image and press "Enter", you will have an overview about the available photos. With the circle button and the ENTER button you can select any photo to start the slideshow on the complete size of the display by pressing "Enter".
During display picture, through Circle button(left & right) to display the previous picture or the next picture; Circle button(Up) open the brightness menus of screen (figure 6.5a), Circle button(Down) open volume menu (figure 6.5b), then use Circle button(left & right) adjust parameters. Press "ENTER" button to save parameters, press "ESC" button to close the menu (not save parameters), it also will be closed in 5s if no operation.


(a)
(b)

Figure 6.5 If you push the ENTER button again, you can make different settings for the photo.
Figure 6.6
The functions of picture control bar are shown as below figure 6.7.
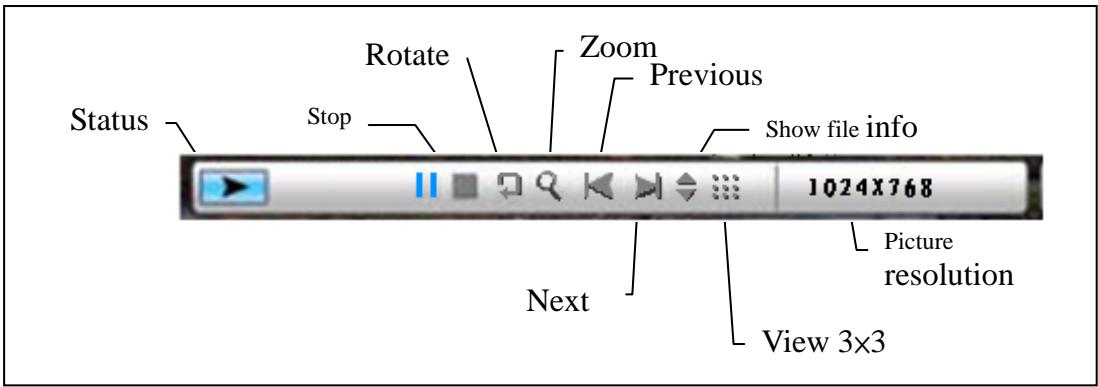
Figure 6.7 Press STOP key at control bar back to function select interface ; Press "ESC" button at picture view menu back to 9-picture thumbnail.
While picture control bar shown, Press Circle button(Up and down)to switch music control bar and picture control bar, user could press "ENTER" to play back music when display pictures. Press "ESC" button to close the menu, it also will be closed in 10s if no operation.
When you press "ESC" button again and again to back to "Function Select" Menu, you also STOP the picture slideshow and music functions.
The music menu
The next icon you see is the music part. To listen to your favorite music in a media player, select the icon with the circle button and confirm your selection with the ENTER button.
You will see the following window.
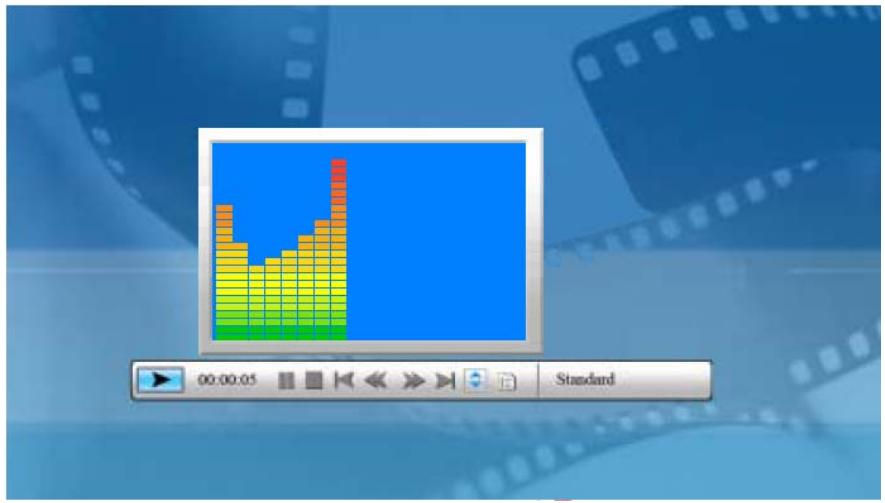
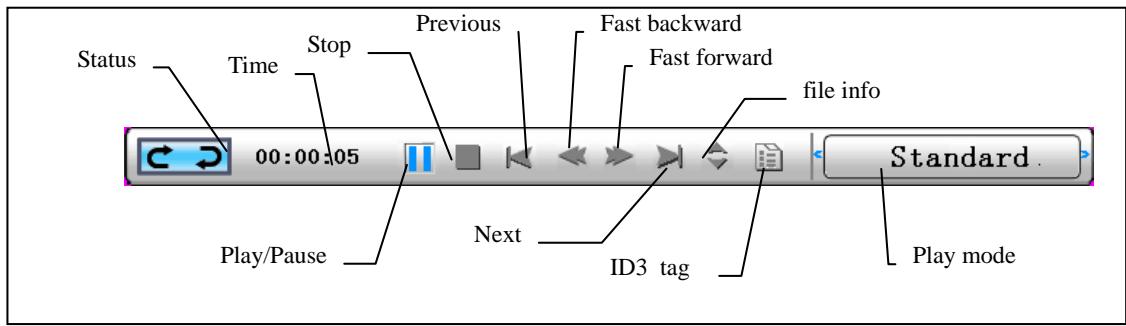
System search music files in the current memory equipment and play them automatically. During music playing, uses the control bar to perform control operation, the functions are shown as figure 6.9. Press Circle button(right)to move the option to "play mode", there are three modes in this option, "standard", "repeat one" and "dir. repeat", press "ENTER" to choose one of them.
Press Circle button (Down) to open Volume menu. Circle button (Left & Right) to adjust the volume, press "ENTER" button to save parameters, press "ESC" button to close the menu(not save parameters).

Figure 6.10
Press "ESC" button or press STOP key back to function select interface at control bar.
The movie menu
To get to this menu choose the icon movie and confirm with the ENTER button. The system will search the video files in the current memory equipment and play them automatically. During movie playing, press Circle button(Up) to open the volume menu (Operation as same as 1-1). Press “ENTER/ESC” button to open/close video control bar (figure 6.11).
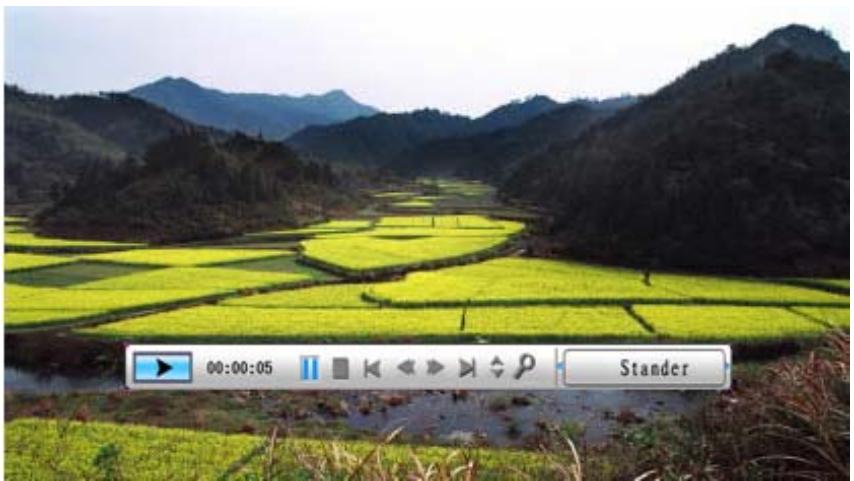
Figure 6.11
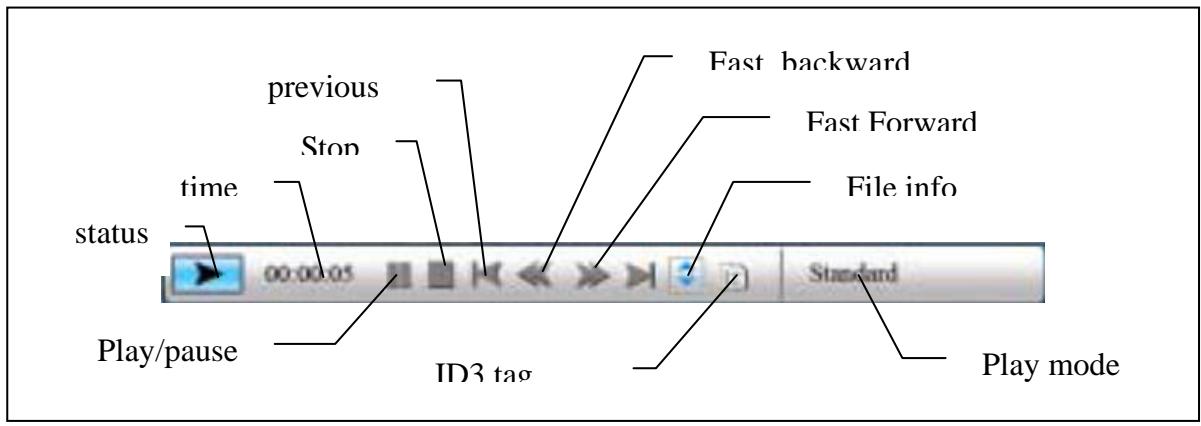
The video control bar is shown as figure 6.12. While the control bar is active, you can use the Circle button (left & right) to shift between function items. When the "Function switch" item is highlighted, you can use the Circle button (left & right) to switch between "subtitle on/off", "video format information" and "play mode". When "play mode" is being selected, you can press ENTER to switch between "standard play", "repeat one" and "dir repeat" options.

Figure 6.12
Press "ESC" button or press STOP key back to function select interface at control bar.
NOTE: To ensure the fluency of video play back, the max bit-rate of the video is 8Mbps, and the max resolution of the video is 720^*560 .
The Filemanager
The item before last is the Filemanager item.

After use Circle button (Right) to choose memory equipment, press "ENTER" button or Circle button (Right to view the content (figure 6.14), picture files could preview on the right side. If a folder has both picture and music, when display picture, the music will play.
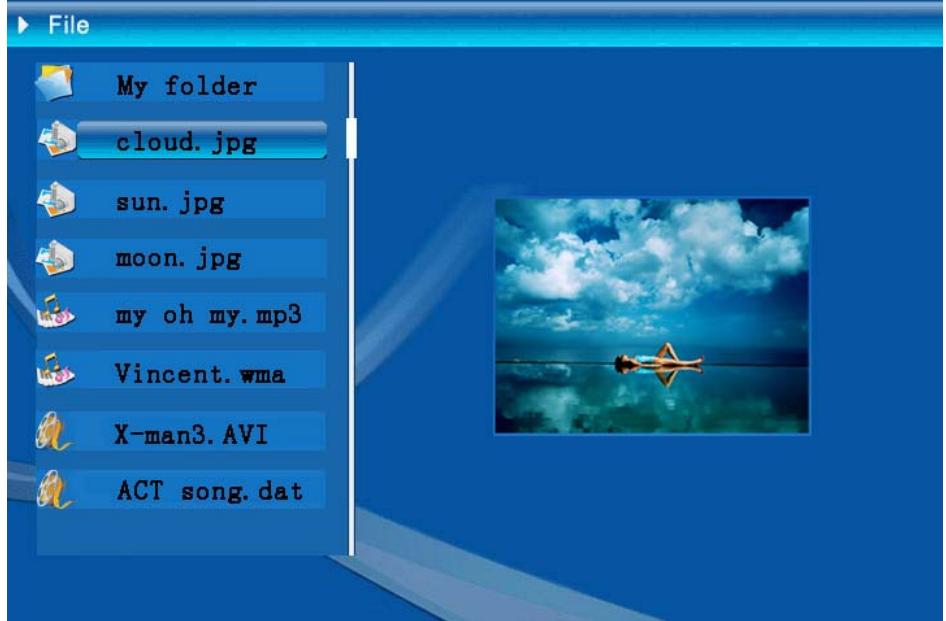
Figure 6.14
You can select files at the files for delete or copy .files at the list.
Select files :
Use Circle button (up & Down) to shift cursor to target file , press Circle button
(right) the left of file name will appear the selected symbol
(figure6.15), press Circle button (right) again to cancel the selection.
User can choose multi-files to operate. (Figure 6.16)
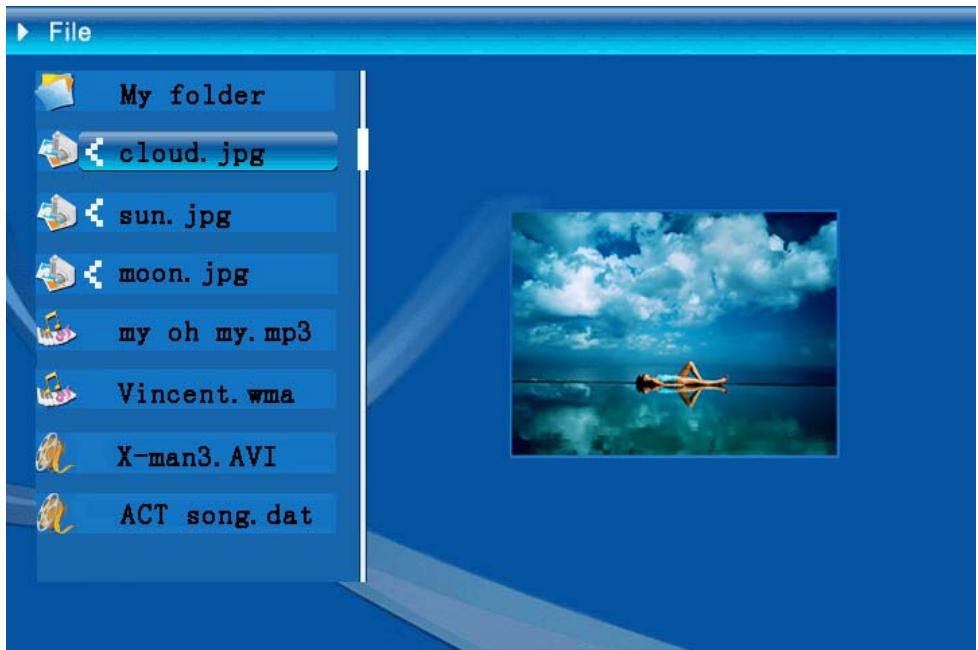
Figure 6.16
Delete : After you select file, long press “ENTER” button to open operation menu. (Figure 6.17) .Press Circle button (up & Down) and shift cursor to icon

, press "ENTER" button to confirm, the selected files will be deleted.
(figure 6.18) Press “ENTER” button return to file management menu.
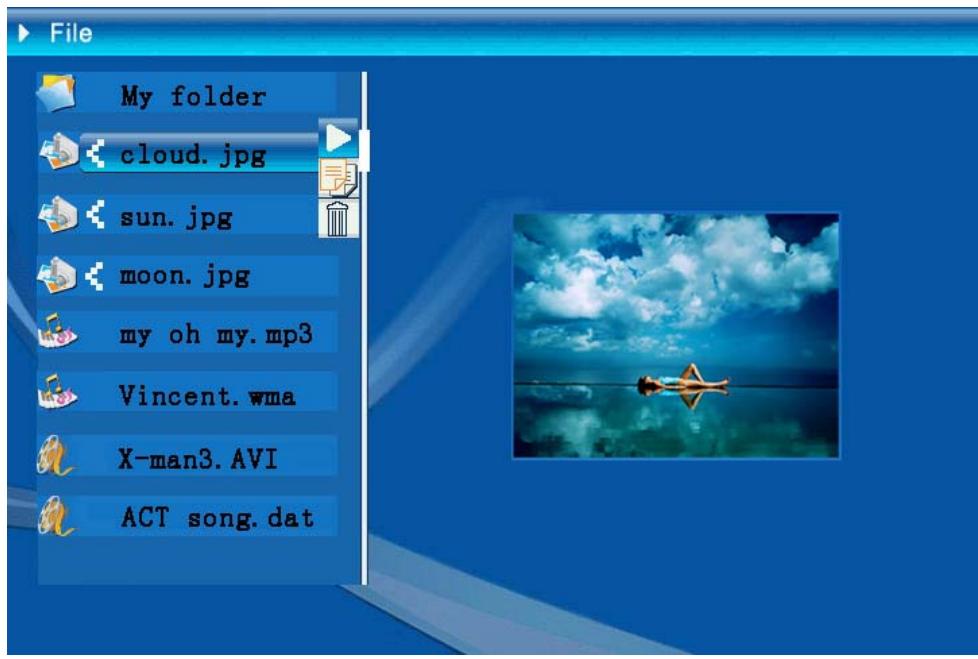
Figure 6.17
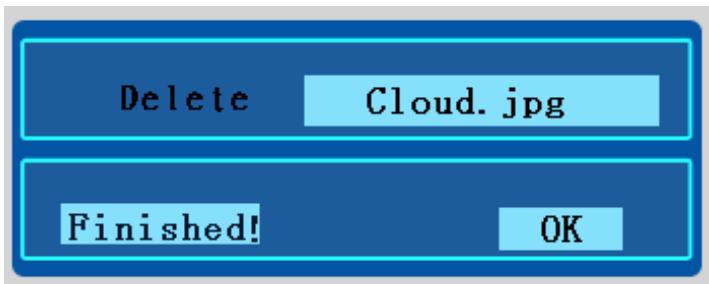
Figure 6.18
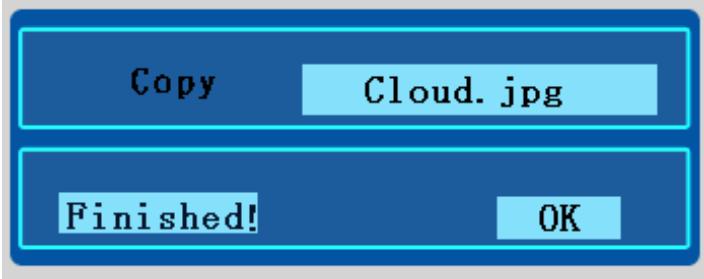
Copy file : After you select file, shift to the target folder and press "ENTER" button to open file management menu, long press "ENTER" button to open operation menu. and Press Circle button (up & Down) to shift cursor to icon , the selected file will be copy to the target folder (figure 6.19) . If the space of the memory device is not enough, error information will be shown, copy operation unsuccessful.
| Technische Daten / Specifications | ||
| Model Code | ||
| LCD Display | LCD Display | 8-inch TFT LCD, 158 x 99.36mm |
| Resolution | 800RGB x 480 | |
| Aspect ratio | 16:9 | |
| Photo Playback | Format | JPEG(YUV Code) |
| Max. resolution | 12M | |
| Auto slide show | Yes | |
| function | With time, calendar & alarm clock | |
| function | Alarm voice | Can use MP3 music to set up (in May FW) |
| Calendar picture | Can change by user (in May FW) | |
| Video Playback | Format | MJPEG, MPEG-1 (*.mpg,*.mpeg,*.dat) MPEG-2 (*.mpg,*.mpeg), MPEG-4 (AVI file of divx or xvid code) |
| Max. resolution | 720 x 560 | |
| Audio Playback | Format | MP3, WMA |
| Background music | Supported | |
| Speaker | Stereo | |
| Memory Support | Internal memory | Flash 16MB |
| USB Flash drive | Yes | |
| CF Card | Max. card capacity 2GB | |
| SD/MMC Card | Max. card capacity 2GB | |
| MS Pro Card | Max. card capacity 2GB, | |
| Power Supply | AC Input | 110-240V +/- 10%, 50/60 Hz |
| Power Consumption | 5V, 1.8A | |
| Interface | Operating Button | 4-way navigating button, Esc, Enter, LED (To be confirmed) |
| Blue LED Light | On/Off, optional | |
| USB | USB 1.1, flash drive plug-and-play, as master mode USB 2.0, when connected to PC, as slave mode | |
Einleitung
Cable USB (al Pen Drive) x1
