
IS-DV2 - Camcorder AIPTEK - Free user manual and instructions
Find the device manual for free IS-DV2 AIPTEK in PDF.


| Product type | Digital camcorder with still camera, MP3 player, voice recorder, and PC camera |
| Sensor resolution | 3.1 megapixels (2048 x 1536) |
| Maximum image resolution | 5.0 megapixels (2560 x 1920) via interpolation |
| Video resolution | VGA (640 x 480) at 30 fps, QVGA (320 x 240) at 30 fps |
| Internal memory | 32 MB DDR RAM for processing, 16 MB flash (8 MB for storage) |
| External memory | SD/MMC slot supporting up to 1 GB |
| Digital zoom | 4x |
| LCD screen | 1.8-inch LTPS panel, rotatable up to 180 degrees |
| Power source | NP60 Li-ion rechargeable battery (3.7 V, 850 mAh) |
| Charger included | Yes, AC adapter and charger stand |
| Connectivity | USB 2.0 |
| TV output | NTSC / PAL via AV cable |
| Built-in microphone | Yes |
| Built-in speaker | Yes |
| Flash | Built-in flash strobe (auto, on, off) |
| Video stabilization | Yes (electronic) |
| PC camera function | Yes, requires driver installation |
| MP3 playback | Yes, files must be placed in "MP3" folder |
| Voice recorder | Yes, built-in |
| Dimensions (approx.) | 90 x 60 x 30 mm |
| Weight (approx.) | 130 g with battery |
| Safety precautions | Avoid water, high temperature, and direct sunlight; use only supplied accessories |
| Battery care | Fully discharge and recharge once a year if not used for long periods |
Frequently Asked Questions - IS-DV2 AIPTEK
User questions about IS-DV2 AIPTEK
0 question about this device. Answer the ones you know or ask your own.
Ask a new question about this device
Download the instructions for your Camcorder in PDF format for free! Find your manual IS-DV2 - AIPTEK and take your electronic device back in hand. On this page are published all the documents necessary for the use of your device. IS-DV2 by AIPTEK.
USER MANUAL IS-DV2 AIPTEK
Dear user, thanks for purchasing this product.
Much investment in time and effort has gone into its development, and it is our hope that it will give you many years of trouble-free service.
Safety Notice
- Do not drop, puncture or disassemble the camera; otherwise the warranty will be voided.
- Avoid all contact with water, and dry hands before using.
- Do not expose the camera to high temperature or leave it in direct sunlight. Doing so may damage the camera.
- Use the camera with care. Avoid pressing hard on the camera body.
- For your own safety, avoid using the camera when there is a storm or lightning.
- Do not use batteries of different specifications. Doing so may lead to the potential for serious damage.
- Remove the battery during long periods between usage, as a deteriorated battery may affect the functionality of the camera.
- Remove the battery if it shows signs of leaking or distortion.
- Use only the accessories supplied by the manufacturer.
- Keep the camera out of the reach of infants.


Table of Contents
Welcome 1
Safety Notice .... 1
Table of Contents 2
Getting Started 4
Knowing your camera parts 4
Installing the battery 5
Using the charger 6
Inserting a memory card (optional) 7
Attaching the wrist strap (optional) 8
Basic Operations 9
Turning on your camera 9
Turning off your camera 9
Using the LCD monitor 10
Reading LCD indicators 11
Setting time and language 12
Recording a video clip 13
Taking a still picture 15
Recording a voice clip 16
Playing back your recordings 17
Playing MP3 music 18
Connecting the camera to a TV 20
Advanced Operations 21
Menu operation 21
Menu illustration 21
Menu items in Camera mode 22
Menu items in Playback mode 25
Menu items in MP3 mode 26
Menu items in Voice mode 26
Menu items in Setting mode 27
Copying Files to Your PC 29
Installing the driver to your PC 29
Connecting the camera to your PC 31
Copying files to the PC 32
Viewing/Playing files on your PC 34
File location 35
Table of Contents
Using PC Camera 36
Installing the software 36
Starting the application 36
Using IS-DV PC Camera 39
Addenda 42
Troubleshooting 42
Flicker Settings 45
Battery Life Indicator 45
Storage Capacity 46
System Message 47
Specifications 48
Getting Started
- Knowing your camera parts


- Installing the battery
1 Open the battery compartment cover.
Slide the battery compartment cover open as indicated.

2 Install the battery.
Place the accessory Li-ion battery into the compartment. Note that the metallic contacts must be aligned with the contacts in the compartment.

3 Replace the cover.
After the battery is properly installed, replace the battery compartment cover.
Treat the Li-ion battery with care:
- Keep the battery away from fire or high-temperature environment (over 140°F or 60°C ).
- Do not drop the battery or try to disassemble it.
- If the battery is not used for long periods, fully discharge and charge the battery at least once a year to maintain its lifecycle.
Upon using the battery for the first time, you are recommended to fully discharge and then charge the battery to ensure its lifecycle.
- Using the charger
When the battery pack is out of power, you can use the accessory charger to recharge the battery pack.
1 Connect one end of the supplied AC adapter to the charger stand and the other end to a wall outlet.
2 Place the depleted battery pack into the charger. Note that the metallic contacts must be aligned with the contacts in the charger.

3 The charging indicator turns red and the charge starts. 4 When the charging indicator turns green, the battery pack is fully charged.
This charger can only be used to charge the accessory battery pack. Do not use it to charge other unknown batteries.
When in use, do not place the charger near fire or in an enclosed area that retains heat.
- Inserting a memory card (optional)
In addition to the built-in flash memory, your camera can store data on a Secure Digital (SD) card or a MultiMedia card (MMC). To insert a memory card, gently push the card as indicated until the card reaches the bottom of the slot. To remove the memory card, gently push the card and it will pop up. Then pull the card out of the slot.

The SD card comes with a write-protect switch. When the write-protect switch is set to the Lock position, the card will become non-writable. To ensure that the camera can operate normally, you should set the write-protect switch to the Unlock position before inserting the SD card.

Do not remove the memory card while the camera is processing data (when the LED is blinking). When a memory card is inserted, the camera will use the card as the main storage medium. Files stored in the camera's built-in memory will become inaccessible until the card is removed.
- Attaching the wrist strap (optional)
1 Attach the lens cap to the strap.
Thread the string on the side of the strap through the cap, and then thread the strap through the string loop to fasten the cap.


2 Attach the strap to the camera.
Thread the end of the strap through the hook on the camera, and then thread the strap through the string loop.


Basic Operations
- Turning on your camera
Press and hold down the power button for 1 second to turn on the camera.

If the camera is not turned on after pressing the power button, please check:
- The battery pack is well installed in the camera.
- The battery pack has enough power left.
- Turning off your camera
Press and hold down the power button for 1 second to turn off the camera.
OR
If the camera stays inactive for a long period of time, it may automatically shut down due to the Auto-Off setting. See page 28 for more information.
- Using the LCD monitor
The LCD monitor can be used to compose image settings for shooting, to review recorded files, or to change menu options.
The LCD panel can be rotated to the following positions:
1 Normal position.
Normally, the LCD panel is not rotated for the user to get a clear preview on the screen.

2 Rotate the LCD panel.
The LCD panel can be rotated up to 180 degrees as indicated. You can position the panel at any angle to serve your filming purpose.

When the LCD panel is flipped over, the previewed image on the LCD will be automatically adjusted.
- Reading LCD indicators
Digital Camcorder mode:
*1 This icon will change according to the storage medium you are using: : internal memory. : memory card.
Playback mode:
- Setting time and language
When you power on the camera for the first time, you are recommended to adjust the time and language settings.
1 Turn on the camera. 2 Press the Mode button and use the joystick to select the Setting ( ) mode. Then press the center of the joystick to enter. 3 Use the joystick to select the Date & Time (30) item. 4 Press the joystick or move the joystick toward right to enter the sub-menu. 5 Move the joystick left or right to shift between items. Move the joystick up or down to adjust the value. Press the center of the joystick to confirm the setting. 6 After returning to the menu, use the joystick to select the Language (ABC) item. 7 Press the joystick or move the joystick toward right to enter the sub-menu. 8 Use the joystick to select a suitable language and press the center of the joystick to confirm.
- Recording a video clip
1 Adjust the focus.
Set the Focus Switch to an appropriate setting. Normally, you should set the focus to ( ) for most filming conditions. Select ( ) only for close-ups. The focus is adjustable during recording.

2 Use the joystick to zoom in or zoom out the screen. Adjust other settings if necessary.
For details on the white balance options, see the "Advanced Operations" section.

The zoom function is also available during recording. Adjust other advanced settings if necessary. See the section "Advanced Operations" for more information.
- Recording a video clip (continued)
3 Press the Record button to start recording.

4 Press the Record button again to stop recording.
Taking a still picture
1 Adjust the focus.
Set the Focus Switch to an appropriate setting. Normally, you should set the focus to ( ▲ for most filming conditions. Select ( ) only for close-ups.

2 Use the joystick to zoom in or zoom out the screen. Adjust other settings if necessary.
For details on the flash mode and white balance options, see the "Advanced Operations" section.

Adjust other advanced settings if necessary. See the section "Advanced Operations" for more information.
3 Press the Shutter button to take a still picture.

- Recording a voice clip
1 Press the Mode button and use the joystick to select the Voice ( ) mode. Then press the center of the joystick to enter.
2 Press the Record button to start recording.

Avoid blocking the microphone
Before or during recording, you can move the joystick toward left or right to adjust microphone sensibility, thus setting the sound volume of the recording.
3 When you are done, press the Record button again to stop recording.
- Playing back your recordings
1 Press the Mode button and use the joystick to select the Playback ( ) mode. Then press the center of the joystick to enter.
2 Operations in playback mode:
| File type How to... Action | ||
| - | Shift between index mode and full-screen mode | In index mode, press the center of the joystick to switch to full-screen mode. In full-screen mode, press the Menu button to switch to index mode. |
| - Shift between files | 1. In index mode: Use the joystick to move the highlight box.2. In full-screen mode: Use the joystick to move left or right. | |
| Picture (○) | Zoom in/out Use the joystick to move up or down. | |
| Lock/Release zoom ratio | When the zoom ratio is greater than 1.0x, press the center of the joystick. | |
| Browse the enlarged picture | When the zoom ratio is locked, use the joystick to browse the picture. | |
| Video (≡) & Audio (≦) | Start playing | When selected (in full-screen mode), the file automatically starts playing. |
| Pause/Resume playing | During playing/While paused, press the center of the joystick. | |
| Adjust sound volume | During playing, use the joystick to move up or down. | |
| Stop playing | During playing, press the Menu button. | |

When reviewing a picture, if you move the joystick down when the zoom ratio is 1.0x, the screen will switch to index mode.
- Playing MP3 music
Copy MP3 files to the camera
Before you can play MP3 music, you need to copy MP3 files to the camera first.
1 Connect the camera to your PC.
Connect the camera to a PC using the USB cable. For details on connecting the camera to your PC, see page 31.
2 Copy files to the camera.
After the camera is connected to the PC, double-click on My Computer and you will find a removable disk. Create a "MP3" folder in the removable disk, and then you can copy MP3 files into the folder for playing.

MP3 files must be placed in the "MP3" folder for playing. To take advantage of the removable disk function, Windows 98SE users may need to install the accessory driver. See page 29-30 for details on the installation.
- Playing MP3 music (continued)
Playing music in MP3 mode
1 Press the Mode button and use the joystick to select the MP3 ( ) mode. Then press the center of the joystick to enter.

MP3 mode
2 Operations in MP3 mode:
| How to... Action | |
| Shift between tracks | Use the joystick to move up or down. Or press the Forward ( ▶) button or Backward ( ) button. |
| Start playing | Press the center of the joystick or the Play/Pause ( ▶) button. |
| Pause/Resume playing | During playing/While paused, press the center of the joystick or the Play/Pause ( ▶) button. |
| Adjust sound volume Use | Use the joystick to move left or right. |
| Stop playing | During playing, press the Menu button. |
Connecting the camera to a TV
Connect your camera and TV via the accessory AV cable for real-time display. You can display your video clips, still pictures, and audio recordings directly on your TV, sharing them with your friends and family.

1 Turn on your TV and switch the TV to AV mode. 2 Connect the audio and video ends of the AV cable to the TV. 3 Open the TV-out port cover. 4 Connect the other end of the AV cable to your camera. 5 Turn on the camera.
Advanced Operations
- Menu operation
The menu items provide several options for you to fine-tune your camera functions. The following table gives details on menu operations.
| How to... Action | |
| Bring up the menu | Press the Menu button. |
| Move the highlight bar Use | the joystick to move up or down. |
| Enter sub-menu/Confirm an item | Press the center of the joystick. |
| Exit menu/Go back to upper menu | Press the Menu button (when in sub-menu). |
- Menu illustration

- Menu items in Camera mode
Power-on → Press the Menu button.
| Item Option Description | ||
| Resolution |  1M 1M | Set picture resolution to 1280x960.Print up to 3x5 in. photos or display on PC. |
 3M 3M | Set picture resolution to 2048x1536.Print 4x6 in. or 5x7 in. photos. | |
 5M 5M | Set picture resolution to 2560x1920.Print up to 6x8 in. photos. | |
| Date Stamp |  On On | Print a date mark on each picture. |
 Off Off | Disable date mark. | |
| Stabilizer |  On On | Minimize blur caused by hand shake. |
 Off Off | Disable stabilizer. | |
- Menu items in Camera mode (continued)
| Item Option Description | ||
| WB |  Auto Auto | The camera automatically adjusts white balance. |
 Sunny Sunny | This setting is suitable for outdoor recording in sunny weather. | |
 Cloudy Cloudy | This setting is suitable for recording in cloudy weather or shady environments. | |
 Fluorescent Fluorescent | This setting is suitable for indoor recording with fluorescent lamp lighting, or environments with high color temperature. | |
 Tungsten Tungsten | This setting is suitable for indoor recording with incandescent lamp lighting, or environments with low color temperature. | |
 Histogram Histogram | On Image | histogram displays on the screen. |
| Off | Disable histogram. | |
| Flashlight |  Auto Auto | The flash automatically fires when the lighting is insufficient. |
 On On | The flash is forced to fire in every shot. | |
 Off Off | The flash is disabled. | |
- Menu items in Camera mode (continued)
| Item Option Description | ||
| Effect |  Normal Normal | Make recordings in natural color. |
 B&W B&W | Make recordings in black and white. | |
| [TEYC]Classic | Make recordings in sepia-toned color. | |
 Exposure Exposure | -2~+2 | Manually adjust the exposure to gain better effect when the preview image appears too bright or too dark. A positive value indicates the image will be brighter than usual; while a negative value makes the image dimmer. |
| Selftimer |  On On | Enable the selftimer. After the selftimer is turned on, the camera will have ten seconds delay before recording when the Shutter button is pressed. |
 Off Off | Disable selftimer. | |
 Icon Icon | On | Enable OSD (on screen display) icons to display on the screen. |
| Off | Disable OSD icons. | |
| Video |  VGA VGA | Set the video resolution to VGA (640x480 pixels). |
 QVGA QVGA | Set the video resolution to QVGA (320x240 pixels). | |
- Menu items in Playback mode
Power-on → Press the Mode button → Enter the Playback ( ) mode → Press the Menu button.
| Item Option Description | ||
 Delete Delete | One Delete current file. | |
| All | Delete all pictures and video/audio files stored in the memory. | |
| Cancel Cancel action. | ||
 Slide Show Slide Show | - | The camera displays images in sequence. Only JPEG pictures and the first frames of MPEG files will be displayed. You can press the Enter button to stop the slide show. |
 Print Print | One | Print current image when connected with a PictBridge-ready printer. |
| All | Print all images when connected with a PictBridge-ready printer. | |
| Cancel | Cancel action. | |
Before using the Print command in the menu, you need to connect the camera to a PictBridge compatible printer via the
accessory USB cable. Consult the user guide of the printer for details on operations.

- Menu items in MP3 mode
Power-on → Press the Mode button → Enter the MP3 ( ) mode → Press the Menu button.
| Item Description |
| Delete One Delete current track. |
| Cancel Cancel action. |
- Menu items in Voice mode
Power-on → Press the Mode button → Enter the Voice ( ) mode → Press the Menu button.
| Item Description | |
| Delete One Delete current voice recording. | |
| Delete All | Delete all voice recordings. |
- Menu items in Setting mode
Power-on → Press the Mode button → Enter the Setting (✗) mode → Press the Menu button.
| Item Option Description | ||
 Date & Time Date & Time | - | Set date and time. |
| Beep |  On On | Enable beep sound. |
 Off Off | Disable beep sound. | |
| Flicker |  50Hz 50Hz | Set flicker frequency to 50Hz. For settings reference, see page 45. |
 60Hz 60Hz | Set flicker frequency to 60Hz. For settings reference, see page 45. | |
| TV-out |  NTSC NTSC | Set TV system compatibility to NTSC. This option is suitable for America, Taiwan, Japan, and Korea areas. |
 PAL PAL | Set TV system compatibility to PAL. This option is suitable for Germany, England, Italy, Netherlands, China, Japan, and Hong Kong. | |
 Icon Icon | On | Enable OSD icons to display on the screen. |
| Off | Disable OSD icons. | |
 LCD Bright LCD Bright | -2~+2 | Set LCD brightness. A positive value makes the LCD brighter; while a negative value makes the LCD dimmer. |
 Format Format | Yes | Format the storage medium. Note that all files stored in the medium will be gone. |
| No | Cancel action. | |
- Menu items in Setting mode (continued)
| Item Option Description | ||
| Auto Off |  Off Off | Disable Auto-off function. |
 1 min 1 min | The camera automatically shuts down when staying inactive for over 1 minute. | |
 3 min 3 min | The camera automatically shuts down when staying inactive for over 3 minutes. | |
 5 min 5 min | The camera automatically shuts down when staying inactive for over 5 minutes. | |
 Language Language | - | Lets you select the language used for OSD. |
 Default Default | Yes | Restore factory defaults. Note that your current settings will be overridden. |
| No | Cancel action. | |
 USB Mode USB Mode | Menu | When connected to a PC, the camera displays a menu for you to choose a desired connection mode. |
| Camera | When connected to a PC, the camera automatically enters Camera (PC camera) mode. | |
| Disk | When connected to a PC, the camera automatically enters Disk (removable disk) mode. | |
| Printer | When connected to a PC, the camera automatically enters Printer mode. | |
Copying Files to Your PC
- Installing the driver to your PC
You need to install the camera driver to ensure that video clips can be played back on your PC. To install the software:
1 Insert the driver CD.
Turn on your computer. Then place the accessory CD into the CD-ROM drive.

Do not connect the camera to your computer at this stage. Shut down all other applications running on your computer. If the autorun screen does not appear automatically, double-click on My Computer and then the CD-ROM drive. Then start the Setup.exe program manually.
2 Start the installation.
Click on the icon to launch the installation of the driver.
Notice for Windows 2000 users:
During the installation process, a warning message regarding digital signature may appear twice or more. Please click on Yes to continue the process. The software is fully compatible with Windows 2000 operating system.
- Installing the driver to your PC (continued)
3 Install the driver.
The Install Shield Wizard will then appear and automatically install the program. Click on Next and follow the on-screen instructions to complete the installation.
4 Install codecs.
After the driver installation is completed, the program will prompt you to install Windows Media Player Codecs. If you are not sure whether the codecs have been installed in your computer, please click on Yes and follow the on-screen instructions to complete the installation.
5 Install Direct X 8.0 or above.
After the codecs installation is completed, you will be prompted to install Direct X 8.0 or above if the program is not yet installed in your computer. Please click on Yes to continue.
Windows Media Player Codecs and Direct X 8.0 or above are necessary for viewing the video clips recorded by the camera.
6 Restart the computer.
After the installation is completed, you may need to restart your computer for the driver to take effect.
- Connecting the camera to your PC
1 Connect the USB cable to your computer.
Turn on your computer, and then connect the accessory USB cable to the USB port of your computer. Make sure the cable and the port are correctly aligned.

2 Connect the USB cable to your camera.
Connect the other end of the USB cable to your camera.

3 Turn on the camera and switch to Disk mode.
Turn on your camera. Use the joystick to select the Disk item and press the center of the joystick to confirm. Note that if the camera automatically enters Camera (PC camera) mode, you can press the Menu button to bring up the options menu.
Notice for Windows 2000/XP/ME users:
If you want to disconnect the camera from your computer, please follow these steps:
- Double-click in the system tray.
- Click (USB Disk), and then click Stop.
- Select the camera when the confirmation screen appears and click OK.
- Follow the on-screen instructions to safely disconnect the camera from your computer.
- Copying files to the PC
1 This step varies depending on your operation system:
For Windows XP users:
After the camera is connected to your computer, a dialogue window will appear automatically. Please select the item Open folder to view files using Windows Explorer and click OK.

For Windows 2000/ME/98SE
users:
Double-click on My Computer. Then double-click on the icon of the removable disk that has just appeared.

Some users may find two removable disks appear in My Computer. That is because the OS detects two storage media in the camera (the internal memory and the SD/MMC card). If you have two removable disks and cannot find your files in one of the disks, try to find them in the other disk.
- Copying files to the PC (continued)
2 Double-click on the DCIM file folder.

Windows XP

Windows 2000/ME/98 SE
3 Double-click on the 100MEDIA file folder.

Windows XP

Windows 2000/ME/98 SE
4 Drag the target file into My Documents or the destination folder.

- Viewing/Playing files on your PC
1 Double-click on My Documents or any other folder that stores your files.

2 Double-click on the desired file, and the file will be opened by the program matching the file type.

File location
After connecting the camera to your computer, a removable disk will appear in your computer. The removable disk actually represents the storage medium of your camera. In the disk you can find all of your recordings. Refer to the figure below to see where the files are stored.

Using PC Camera
- Installing the software
The PC camera software is included in the camera driver, and therefore you should install the driver before using the PC camera function. If you have not yet installed the driver, see page 29 for details on the installation.
- Starting the application
1 Connect the camera to your computer.
Connect the camera to your computer using the accessory USB cable.

2 Turn on the camera and switch to Camera mode.
Turn on your camera. Use the joystick to select the Camera item and press the center of the joystick to confirm. Note that if the camera automatically enters Disk (removable disk) mode, you can press the Menu button to bring up the options menu.
If you want to use the Video Conferencing function, please install programs such as Netmeeting to serve the purpose.
Notice for Windows ME users: When the indicated screen appears, please select Automatic search for a better driver and click Next to continue.

- Starting the application (continued)
Notice for Windows 98SE users:
- Click Next when the following screen appears.

- When the following screen appears, select "Search for the best driver for your device" and click Next to continue.

- During installation, some users may need to insert a licensed Windows 98SE CD into the CD-ROM drive for copying the needed files.
- Follow the on-screen instructions to complete the installation.
Notice for Windows 2000 users:
When using the PC camera function for the first time, the warning message regarding digital signature may appear twice or more. Please click Yes to continue the installation. The camera is fully compatible with Windows 2000 operating system.
- Starting the application (continued)
3. Launch IS-DV program.
Double-click the IS-DV icon ( ) on the Desktop to start the program. After the program starts, you can begin to use the PC camera function.
If you cannot find the program shortcut on the desktop, you can start the program from the Programs menu.
• Using IS-DV PC Camera

1. Start recording a video clip 2. Stop recording 3. Snapshot 4. Format * 5. Source *
6. Start/Stop preview window 7. Setting * 8. Open album 9. Select video source
* Sub-menu available.
To view pictures taken by IS-DV PC Camera, please click on to open the photo album. Or, as an alternate option, go to the "Work Temp" folder to find the files. The full path is as follows:
- Using IS-DV PC Camera (continued)
Recording an AVI movie
- Click on the icon.
- Press to specify the path and name of the AVI file.
- Set the frame rate and recording time according to your needs.
- Press the Start to Record button to begin recording.
- To stop recording, click on the icon.

Taking a snapshot
Click on the icon to take a snapshot.
Configuring Format options
Color Space:
Select one of the following functions according to your needs.
- RGB 24: This item is for retaining better quality.
- I420: This item indicates the AVI movie will be more compressed to gain the advantage of faster processing speed.
Output Size:
Set output size to change the size of the preview window. The default size is 320x240. Select larger pixels when you need a larger preview window.

- Using IS-DV PC Camera (continued)
Configuring Source options
Device Control:
- Brightness: You can check the "Auto" item and let the program adjust image brightness for you, or uncheck the "Auto" item and slide the bar to adjust image brightness manually.
- Quality: If the network bandwidth is congested when using PC Camera, slide the bar toward "Faster Video" to avoid this problem.

Configuring Flicker options
If you take your camera abroad, and find the screen of your computer flickers when using PC Camera function, please check the Cancel Flicker item to prevent noises from appearing on the screen. Or, you can refer to the Flicker Settings table for proper flicker value that suits the country you are staying.

Addenda
Troubleshooting
| When using the camera: | ||
| Problem Cause Solution | ||
| The camera can not be powered on normally. | The batteries are out of power. | Replace the batteries. |
| The batteries are incorrectly installed. | Re-install the batteries. | |
| The camera is still powered on, but the LCD screen does not display. | If the camera stays idle for over one minute, the LCD screen will automatically shut down to save power. | Press any button except the power button to reactivate the display. |
| Can not take pictures or video clips when pressing the Shutter or Record button. | Out of memory. | Free some space from the SD/MMC card or the internal memory. |
| The camera is recharging the flash strobe. | Wait until the flash strobe is fully charged. | |
| Using a “protected” SD card. | Set the SD card to be writable. | |
| The LCD screen displays “MEMORY ERROR” or “CARD ERROR” message. Or the camera cannot read the memory card. | The format of the memory card is not compatible with the camera. | Use the camera “Format” function to format the card. |
| The memory card is corrupted. | Replace the memory card with a new one. | |
Addenda
| When using the camera: | ||
| Problem Cause Solution | ||
| I did not delete the pictures and video clips, but can not find them in the memory card. | The lost recordings are saved in the internal memory. | It happens when you insert a memory card after taking a few pictures or video clips. You can access those files after removing the memory card. |
| Cannot use the flash strobe. | If the battery life icon indicates low battery, the flash strobe may be disabled due to insufficient voltage. | Replace the batteries. |
| The camera does not respond to any action during operation. | The camera encounters software failure. | Remove the battery pack and replace it into the compartment. Then power on the camera. |
| The recorded pictures appear too blurred. | The focus is not correctly set. | Adjust the focus to an appropriate position. |
| The recorded pictures or video clips appear too dark. | The environment of shooting or recording does not have adequate light. | Use flash strobe when taking pictures. Add extra light sources when recording video clips. |
| Noises occur when viewing images on the LCD screen or on the computer. | The flicker setting does not match the standard of the country you are staying. | Adjust the flicker setting. For more information, please refer to the “Flicker Settings” table on page 45. |
Addenda
| When connecting the camera to the computer or TV: | ||
| Problem Cause Solution | ||
| I cannot view the video clips on my computer. | Driver or software is not installed on the computer. | Install Direct X 8.0 or above and Windows Media 9.0 Codecs to solve this problem. See page 29 for details on installing the software, or go to http://www.microsoft.com to download the required files. |
| Driver installation failed. | The installation is terminated abnormally. | Remove the driver and other related programs. Follow the installation steps in the manual to re-install the driver. |
| The camera has been connected to the PC via the USB cable before installing the driver. | Install the driver before plugging in the USB cable. | |
| The TV screen does not display after connecting the camera to the TV. | The camera is not correctly connected to the TV. | Reconnect the camera to TV correctly. |
| A conflict with other installed camera or capture device occurred. | The device is not compatible with the camera. | If you have any other camera or capture device installed in your computer, please completely remove the camera and its driver from the computer to avoid the conflict. |
| Noises occur on my computer screen when using Video Conferencing. | The flicker setting does not match the standard of the country you are staying. | Adjust the flicker setting. For more information, please refer to the “Flicker Settings” table on page 45. |
Addenda
Flicker Settings
| Country | England | Germany | France | Italy | Spain | Netherlands | ||
| Setting | 50Hz | 50Hz | 60Hz | 50Hz | 50Hz | |||
| Country | Portugal | America | Taiwan | China | Japan | Korea | ||
| Setting | 50Hz | 60Hz | 60Hz | 50Hz | 50/60Hz | 60Hz |
Note: The flicker setting is based on the frequency standard of your local power supply.
Battery Life Indicator
| Icon Description | |
 | Full battery life |
 | Moderate battery life |
 | Low battery life |
 | Empty battery life |
Note: To avoid sudden outage of power supply, you are recommended to replace batteries when the icon indicates low battery life.
Addenda
Storage Capacity
| Memory | Video | Audio | |
| VGA QVGA | Maximum | ||
| Flash memory (8MB for storage) | 45 sec. 180 | sec. 180 sec. | |
| SD/MMC card (128MB) 450 sec. | 1800 sec. 2400 | sec. | |
| SD/MMC card (256MB) 900 sec. | 3600 sec. 4800 | sec. | |
| SD/MMC card (512MB) 1800 sec. | 7200 sec. 9600 | sec. | |
| SD/MMC card (1GB) 3600 sec. | 14400 sec. 19200 | sec. | |
| Memory | Still picture | ||
| 5M 3M 1M | |||
| Flash memory (8MB for storage) | 12 20 100 | ||
| SD/MMC card (128MB) 140 240 1000 | |||
| SD/MMC card (256MB) 280 480 2000 | |||
| SD/MMC card (512MB) 560 960 5000 | |||
| SD/MMC card (1GB) 1120 1920 10000 | |||
Note: The actual value of capacity may vary (up to ± 30%) depending on the color saturation and complexity of your subject and surroundings.
Addenda
System Message
| Message Description | |
| Recording The camera is recording a file. | |
| Please Unlock SD Card | If you insert a SD card and the card is set to “Protected”, this message will show up when the camera tries to write data into the card. |
| No Files To Play | When the camera is set to Playback mode without any existing file to play, this message will show up. |
| Please Change Batteries | The battery life of the camera is low. You should replace the batteries with new ones immediately. |
| Memory Full | The storage memory is full and can not store any more files. Please change the SD/MMC card or delete some files to free some memory space. |
| Card Error | The inserted card is not compatible with the camera. Please change the card or try formatting the card. |
| Memory Error | The camera can not access data in the internal memory.Please format the medium to solve this problem. |
| Strobe Is Charging The flash strobe is charging. | |
| File Format Error The file being played is not compatible with the camera. | |
| Deleting The camera is performing file deletion. | |
| Formatting The camera is formatting the storage medium. | |
| Setting The camera is performing a setting action. | |
Addenda
Specifications
Main Functions
- Digital Video Camcorder (Video Resolution):
• VGA (640 x 480 pixels) / up to 30 fps
• QVGA (320 x 240 pixels) / up to 30 fps
- Digital Still Camera (Hardware Resolution):
• 5.0 Mega (2560 x 1920 pixels)
• 3.1 Mega (2048 x 1536 pixels)
• 1.3 Mega (1280 x 960 pixels)
- MP3 Player: Full Function MP3 Player
- Digital Voice Recorder
- PC Camera:
• VGA (640 x 480 pixels)
• QVGA (320 x 240 pixels)
- Sensor Resolution: 3.1 Mega (2048 x 1536 pixels)
- Max. Output resolution: 5.0 Mega (2560 x 1920 pixels)
- Internal Memory: 32MB DDR RAM (for Processing) 16MB Flash memory (8MB for Storage)
- External Memory: Built-in SD/MMC slot (Max: 1GB)
- Digital Zoom: 4X
- F/N: 2.8/5.6
- TV-Out: Support NTSC/PAL TV System
- Interface: USB 2.0
- Built-in Microphone
- Built-in Flash Strobe
- Built-in Speaker
- Battery: NP60 Li-ion Rechargeable Battery (3.7V 850mAh)
- Includes Battery Charger
- 1.8" LTPS panel
- MPEG4 VGA 30fps
- Video Stabilization
- Direct Connect to Printer
Note: Specifications are subject to change without notification.
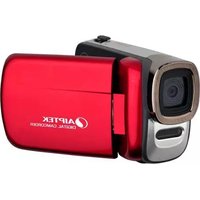
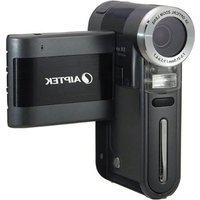

- SAFETY NOTICE
- TABLE OF CONTENTS
- WELCOME
- GETTING STARTED
- BASIC OPERATIONS
- ADVANCED OPERATIONS
- COPYING FILES TO YOUR PC
- USING PC CAMERA
- ADDENDA
- KNOWING YOUR CAMERA PARTS
- INSTALLING THE BATTERY
- OPEN THE BATTERY COMPARTMENT COVER
- INSTALL THE BATTERY
- REPLACE THE COVER
- USING THE CHARGER
- INSERTING A MEMORY CARD (OPTIONAL)
- ATTACHING THE WRIST STRAP (OPTIONAL)
- ATTACH THE LENS CAP TO THE STRAP
- ATTACH THE STRAP TO THE CAMERA
- TURNING ON YOUR CAMERA
- TURNING OFF YOUR CAMERA
- OR
- USING THE LCD MONITOR
- NORMAL POSITION
- ROTATE THE LCD PANEL
- READING LCD INDICATORS
- SETTING TIME AND LANGUAGE
- RECORDING A VIDEO CLIP
- ADJUST THE FOCUS
- USE THE JOYSTICK TO ZOOM IN OR ZOOM OUT THE SCREEN. ADJUST OTHER SETTINGS IF NECESSARY
- RECORDING A VIDEO CLIP (CONTINUED)
- PRESS THE RECORD BUTTON TO START RECORDING
- PRESS THE RECORD BUTTON AGAIN TO STOP RECORDING
- TAKING A STILL PICTURE
- PRESS THE SHUTTER BUTTON TO TAKE A STILL PICTURE
- RECORDING A VOICE CLIP
- PLAYING BACK YOUR RECORDINGS
- OPERATIONS IN PLAYBACK MODE
- PLAYING MP3 MUSIC
- COPY MP3 FILES TO THE CAMERA
- CONNECT THE CAMERA TO YOUR PC
- COPY FILES TO THE CAMERA
- PLAYING MP3 MUSIC (CONTINUED)
- PLAYING MUSIC IN MP3 MODE
- OPERATIONS IN MP3 MODE
- CONNECTING THE CAMERA TO A TV
- MENU OPERATION
- MENU ILLUSTRATION
- MENU ITEMS IN CAMERA MODE
- MENU ITEMS IN CAMERA MODE (CONTINUED)
- MENU ITEMS IN PLAYBACK MODE
- MENU ITEMS IN MP3 MODE
- MENU ITEMS IN VOICE MODE
- MENU ITEMS IN SETTING MODE
- MENU ITEMS IN SETTING MODE (CONTINUED)
- INSTALLING THE DRIVER TO YOUR PC
- INSERT THE DRIVER CD
- START THE INSTALLATION
- NOTICE FOR WINDOWS 2000 USERS
- INSTALLING THE DRIVER TO YOUR PC (CONTINUED)
- INSTALL THE DRIVER
- INSTALL CODECS
- INSTALL DIRECT X 8.0 OR ABOVE
- RESTART THE COMPUTER
- CONNECTING THE CAMERA TO YOUR PC
- CONNECT THE USB CABLE TO YOUR COMPUTER
- CONNECT THE USB CABLE TO YOUR CAMERA
- TURN ON THE CAMERA AND SWITCH TO DISK MODE
- NOTICE FOR WINDOWS 2000/XP/ME USERS
- COPYING FILES TO THE PC
- THIS STEP VARIES DEPENDING ON YOUR OPERATION SYSTEM
- FOR WINDOWS XP USERS
- FOR WINDOWS 2000/ME/98SE
- USERS
- COPYING FILES TO THE PC (CONTINUED)
- DOUBLE-CLICK ON THE DCIM FILE FOLDER
- DOUBLE-CLICK ON THE 100MEDIA FILE FOLDER
- DRAG THE TARGET FILE INTO MY DOCUMENTS OR THE DESTINATION FOLDER
- VIEWING/PLAYING FILES ON YOUR PC
- FILE LOCATION
- INSTALLING THE SOFTWARE
- STARTING THE APPLICATION
- CONNECT THE CAMERA TO YOUR COMPUTER
- TURN ON THE CAMERA AND SWITCH TO CAMERA MODE
- STARTING THE APPLICATION (CONTINUED)
- NOTICE FOR WINDOWS 98SE USERS
- LAUNCH IS-DV PROGRAM
- USING IS-DV PC CAMERA
- USING IS-DV PC CAMERA (CONTINUED)
- RECORDING AN AVI MOVIE
- TAKING A SNAPSHOT
- CONFIGURING FORMAT OPTIONS
- COLOR SPACE
- OUTPUT SIZE
- CONFIGURING SOURCE OPTIONS
- DEVICE CONTROL
- CONFIGURING FLICKER OPTIONS
- TROUBLESHOOTING
- FLICKER SETTINGS
- BATTERY LIFE INDICATOR
- STORAGE CAPACITY
- SYSTEM MESSAGE
- SPECIFICATIONS
- MAIN FUNCTIONS
Brand : AIPTEK
Model : IS-DV2
Category : Camcorder