USER MANUAL SPS 650W KRESS
Original instructions "Jig saw"
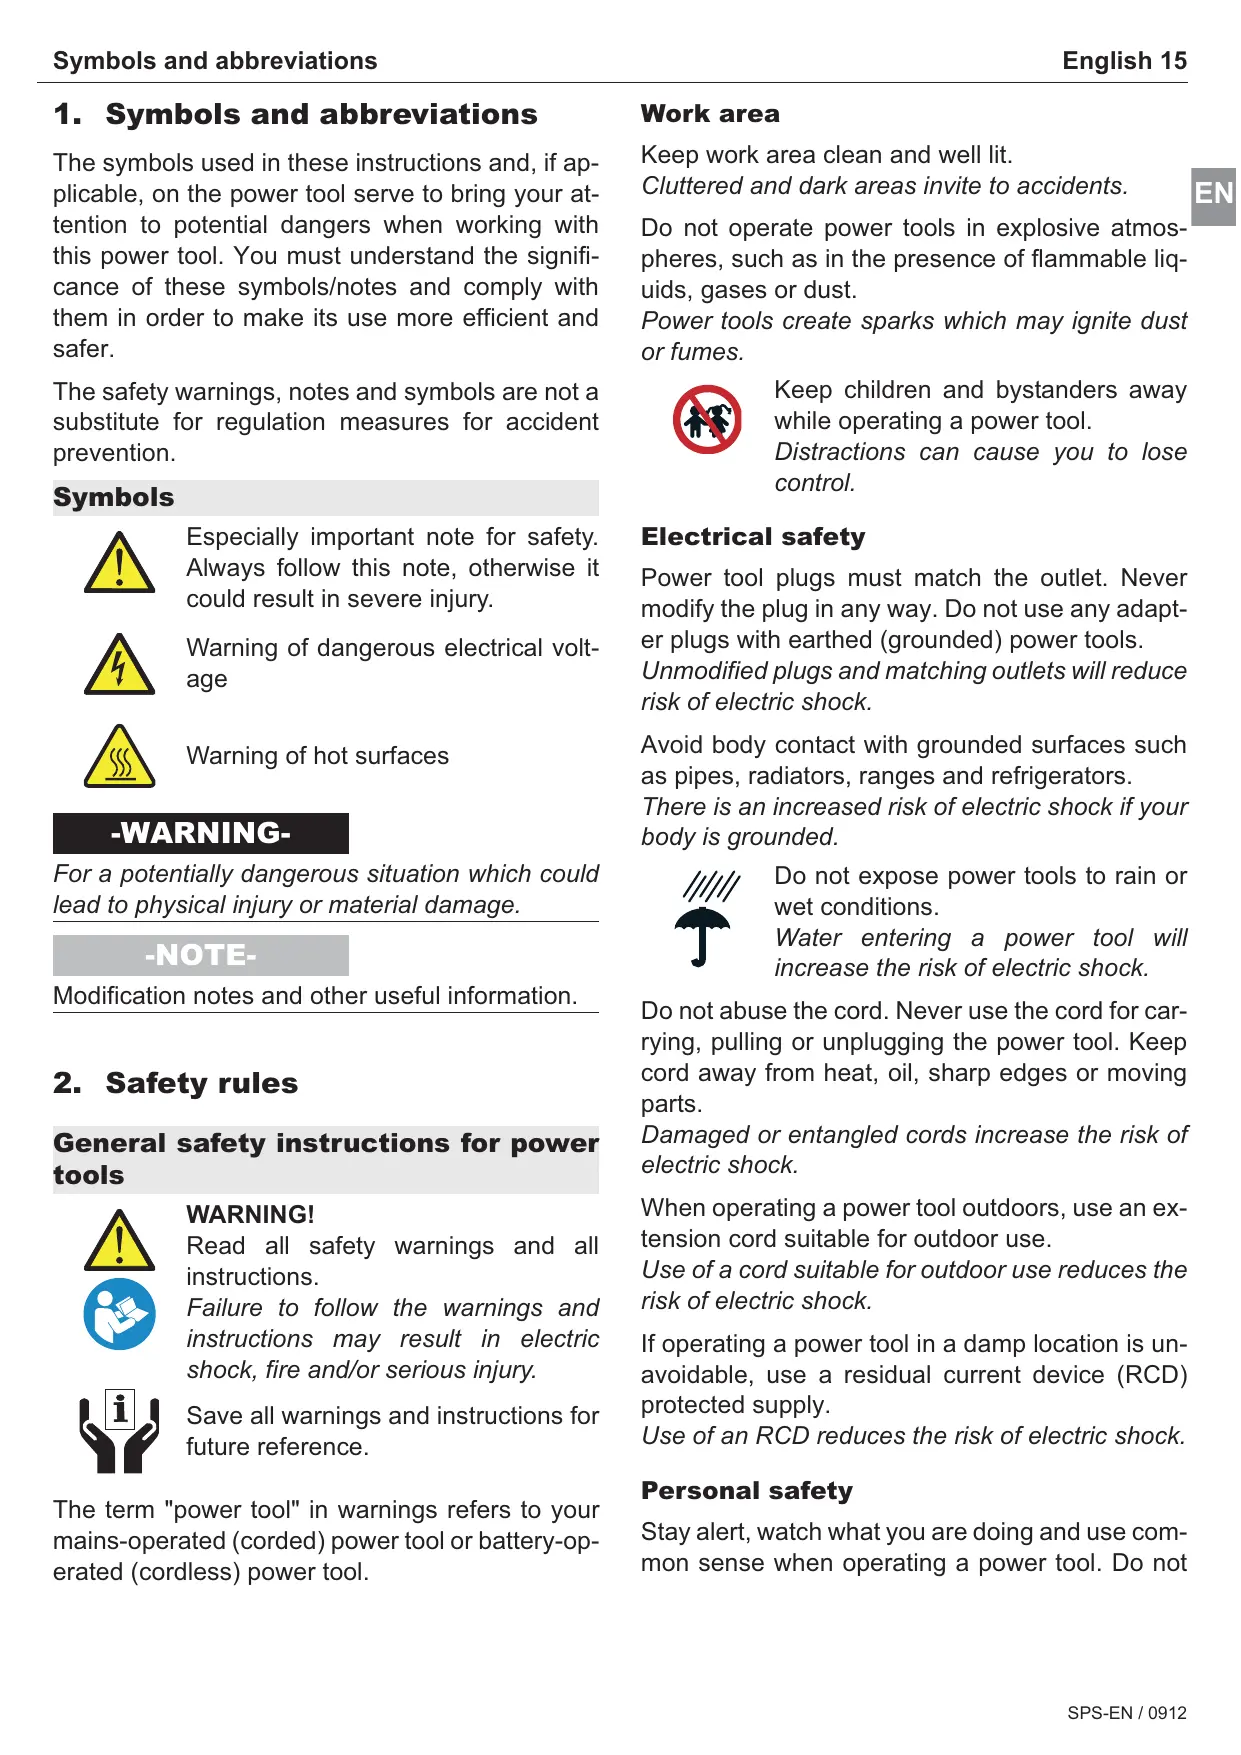
1. Symbols and abbreviations
The symbols used in these instructions and, if applicable, on the power tool serve to bring your attention to potential dangers when working with this power tool. You must understand the significance of these symbols/notes and comply with them in order to make its use more efficient and safer.
The safety warnings, notes and symbols are not a substitute for regulation measures for accident prevention.
Symbols

Especially important note for safety. Always follow this note, otherwise it could result in severe injury.

Warning of dangerous electrical voltage

Warning of hot surfaces
-WARNING-
For a potentially dangerous situation which could lead to physical injury or material damage.
-NOTE-
Modification notes and other useful information.
2. Safety rules

WARNING!
Read all safety warnings and all instructions.
Failure to follow the warnings and instructions may result in electric shock, fire and/or serious injury.

Save all warnings and instructions for future reference.

The term "power tool" in warnings refers to your mains-operated (corded) power tool or battery-operated (cordless) power tool.
Work area
Keep work area clean and well lit.
Cluttered and dark areas invite to accidents.
Do not operate power tools in explosive atmospheres, such as in the presence of flammable liquids, gases or dust.
Power tools create sparks which may ignite dust or fumes.

Keep children and bystanders away while operating a power tool.
Distractions can cause you to lose control.
Electrical safety
Power tool plugs must match the outlet. Never modify the plug in any way. Do not use any adapter plugs with earthed (grounded) power tools.
Unmodified plugs and matching outlets will reduce risk of electric shock.
Avoid body contact with grounded surfaces such as pipes, radiators, ranges and refrigerators.
There is an increased risk of electric shock if your body is grounded.

Do not expose power tools to rain or wet conditions.
Water entering a power tool will increase the risk of electric shock.
Do not abuse the cord. Never use the cord for carrying, pulling or unplugging the power tool. Keep cord away from heat, oil, sharp edges or moving parts.
Damaged or entangled cords increase the risk of electric shock.
When operating a power tool outdoors, use an extension cord suitable for outdoor use.
Use of a cord suitable for outdoor use reduces the risk of electric shock.
If operating a power tool in a damp location is unavoidable, use a residual current device (RCD) protected supply.
Use of an RCD reduces the risk of electric shock.
Personal safety
Stay alert, watch what you are doing and use common sense when operating a power tool. Do not

use a power tool while you are tired or under the influence of drugs, alcohol or medication.
A moment of inattention while operating power tools may result in serious personal injury.

Use safety equipment. Always wear eye protection.
Safety equipment such as dust mask, non-skid safety shoes, hard hat, or hearing protection used for appropriate conditions will reduce personal injuries.

Prevent unintentional starting. Ensure the switch is in the off-position before connecting to power source and/or battery pack, picking up or carrying the tool.
Carrying power tools with your finger on the switch or energising power tools that have the switch on invites accidents.
Remove any adjusting key or wrench before turning the power tool on.
A wrench or a key left attached to a rotating part of the power tool may result in personal injury.
Do not overreach. Keep proper footing and balance at all times.
This enables better control of the power tool in unexpected situations.
Dress properly. Do not wear loose clothing or jewellery. Keep your hair, clothing and gloves away from moving parts.
Loose clothes, jewellery or long hair can be caught in moving parts.
If devices are provided for connecting dust extraction and collection facilities, ensure these are connected and properly used.
Use of these devices can reduce dust related hazards.
Do not force the power tool. Use the correct power tool for your application.
The correct power tool will do the job better and safer at the rate for which it was designed.
Do not use the power tool if the switch does not turn on and off.
Any power tool that cannot be controlled with the switch is dangerous and must be repaired.

Disconnect the plug from the power source and/or the battery pack from the power tool before making any adjustments, changing accessories, or storing power tools.
Such preventive safety measures reduce the risk of starting the power tool accidentally.
Store idle power tools out of the reach of children and do not allow persons unfamiliar with the power tool or these instructions to operate the power tool.
Power tools are dangerous in the hands of untrained users.
Maintain power tools. Check for misalignment or binding of moving parts, breakage of parts and any other condition that may affect the power tools operation. If damaged, have the power tool repaired before use.
Many accidents are caused by poorly maintained power tools.
Keep cutting tools sharp and clean.
Properly maintained cutting tools with sharp cutting edges are less likely to bind and are easier to control.
Use the power tool, accessories and tool bits etc. in accordance with these instructions and in the manner intended for the particular type of power tool, taking into account the working conditions and the work to be performed.
Use of the power tool for operations different from those intended could result in a hazardous situation.
Service


Have your power tool serviced by a qualified repair person using only original spare parts.
This will ensure that the safety of the power tool is maintained.
Machine-specific SafetyWarnings
Keep hands away from the sawing range. Do not reach under the workpiece.
Contact with the saw blade can lead to injuries.
Apply the machine to the workpiece only when switched on.
Otherwise there is danger of kickback when the cutting tool jams in the workpiece.
Pay attention that the base plate rests securely on the material while sawing.
A jammed saw blade can break or lead to kickback.
When the cut is completed, switch off the machine and then pull the saw blade out of the cut only after it has come to a standstill.
In this manner you can avoid kickback and can place down the machine securely.
Use only sharp, flawless saw blades.
Bent or unsharp saw blades can break or cause kickback.
Do not brake the saw blade to a stop by applying side pressure after switching off.
The saw blade can be damaged, break or cause kickback.

Use suitable detectors to determine if utility lines are hidden in the work area or call the local utility company for assistance.
Contact with electric lines can lead to fire and electric shock. Damaging a gas line can lead to explosion. Penetrating a water line causes property damage or may cause an electric shock.
Hold the power tool only by the insulated gripping surfaces when performing an operation where the cutting tool may contact hidden wiring or its own cord.
Contact with a "live" wire will also make exposed metal parts of the power tool "live" and shock the operator.

Secure the workpiece.
A workpiece clamped with clamping devices or in a vice is held more secure than by hand.

Do not work on materials containing asbestos.
Asbestos is considered carcinogenic!
Take protective measures if there is danger of formation of combustible or explosive dust during operation that can be hazardous to health.
Example: Some dusts can be carcinogenic. Wear a dust mask and work with a dust/chip extraction unit, if possible to connect.
Always wait until the machine has come to a complete stop before placing it down.
The tool insert can jam and lead to loss of control over the power tool.

Tools not in use must be locked away safely in a dry place out of the reach of children.
EN
Keep your workplace clean.
Blends of materials are particularly dangerous. Dust from light alloys can burn or explode.
- Never use the machine with a damaged cable. Do not touch the damaged cable and pull the mains plug when the cable is damaged while working.
Damaged cables increase the risk of an electric shock.
Residual risk. Although this information sheet and the operating manuals for our electrical tools contain extensive instructions on safe working with electrical tools, every electrical tool involves certain residual risks that cannot be completely prevented through safety mechanisms. Therefore, electrical tools must always be operated with the necessary caution.
3. Device description


Read all the warnings and instructions before using the equipment. Failure to follow the warnings and instructions may result in electric shock, fire and/or serious injury.
While reading the operating instructions, unfold the graphics page for the machine and leave it open.
Device components
1 On/off switch
2 Electronic adjusting dial
3 Dust hood
4 Saw bench
5 Parallel fence (accessory)
6 Tension lever
7 Pendulum stroke adjusting knob
8 Saw blade
9 Suction connection piece 35mm
10 Stop lever
11 Mains cable module
12 Interlock button
13 Chip-flyoff guard (plastic)
14 Sliding block
15 Chip-flyoff guard (steel)
16 Plastic cap (insulated gripping surface)
17 Handle (insulated gripping surface)
Scope of supply
See packaging
Specified conditions of use
The machine is intended for making separating cuts and cut-outs in wood, plastic, metal, ceramic plates and rubber while resting firmly on the workpiece. It is suitable for straight and curved cuts with metre angles to 45^ . The saw blade recommendations are to be observed.
Requirements for the user
The tool must only be operated, maintained and serviced by authorised trained personnel. The personnel must be made aware of the relevant dangers.
| Technical data |
| Jig saw | | 650 SPS |
| Nominal voltage | V~ | 230 |
| Input power | Watt | 650 |
| Output power | Watt | 340 |
| Idling speed stroke number n0 | min-1 | 3200 |
| Standard stroke range | min-1 | 500...3200 |
| Stroke height | mm | 19 |
| Cutting capacity, max. in wood | mm | 110 |
| Cutting capacity, max. | non alloy steel mm light metal mm | 6 16 |
| Mitre cut | ° | 45 |
| Weight | kg | 2,3 |
| Your power tool is double-insulated in accordance with EN 60745; For this reason an earth wire is not required. |
The device is suppressed against radio and TV broadcasts, in accordance with EN 55014-1 and is immune to disturbances in accordance with EN 55014-2.
Noise levels
Measured values determined according to EN 60 745.
Typically the A-weighted noise levels of the machine are:
sound pressure level (L_pA) 84 dB (A)
sound power level (L_WA) 95 dB (A)
Measurement uncertainty K = 3 dB

The noise level can exceed 85 dB(A) during operation.
Wear ear protection!
Vibration
Triaxial vibration emission level determined in accordance with EN 60745.
650 SPS
Jig Saw
| Cutting wood; ah:
m/s2 | 9,5 |
| Measurement uncertainty K
m/s2 | 1,6 |
| Cutting sheet metal; ah:
m/s2 9,3
Measurement uncertainty K
m/s2 1,6 |

The vibration emission level given in this information sheet has been measured in accordance with a standardised test given in EN 60745 and may be used to compare one tool with another.
The vibration emission level will vary because of the ways in which a power tool can be used and may increase above the level given in this information sheet. This could lead to underestimation of vibration when the tool is used regularly in such a manner.
Note: To be accurate, an estimation of the level of exposure to vibration experienced during a given period of work should also take into account the times when the tool is switched off and when it is running but not actually when doing the job.
This may significantly reduce the exposure level over the total working period.
4. Operation

Before carrying out any work on the machine, pull the mains plug.

Putting into operation

Observe correct main voltage!
Before putting into operation, check that the mains voltage and frequency on the identification plate match the details of your mains supply.
Connect mains cable module

If using an extension cable: Only use extension cables specifically approved for the application with the required cross-section. Otherwise the power of the tool can be reduced and the cable can overheat. Replace damaged cables.
Mains cable

If the mains cable is damaged while working, pull the mains plug immediately.
Mains cable module

Mains cable module with Patent Quick Interlock.
Connect the mains cable module 12 to the handle. The plug must snap in.
Use the mains cable module 12 only for Kress electric tools. Do not attempt to operate other machines with the module.
Damaged mains cable modules must not be used. They must be replaced by a new Kress mains cable module immediately.
Push the two unlocking buttons 13 and remove the mains cable module 12 from the handle.
Use only an original Kress mains cable module and at least a heavy rubber tube cable (H07RN-F).
Operation
EN
Switching On and Off
Caution! Before switching on the sabre jig saw, the dust cover 3 in front of the tappet must be lowered again to the saw bench 4.
To switch on the device, slide the circuit closer/breaker 1 to the front.
Pressing the swung-out front edge of the circuit closer/breaker 1 will move it back to the Off position.
Restarting protection

The restarting protection feature prevents uncontrolled restarting of the machine after an interruption in the power supply.
To restart the operation, switch the On/Off switch 1 to the Off position and start the machine again.
Pendulum stroke setting
The change-over from the setting 0-3 is effected by means of the pendulum-stroke adjusting knob 7 (turning knob). The mark indicates the pendulum stroke selected.
Recommendations for pendulum stroke settings
Pos. 0 for glass, ceramics, soft steel, nonferrous metals, aluminium and pressed materials
Pos. 1 for plastics
Pos. 2 for plywood
Pos. 3 for hardwood, softtextured wood, chipboard
It should be noted that the values given are standard values which may vary according to thickness and hardness of material, grain direction, and also to the condition of the saw blade.
The optimal orbital action setting for the respective application can be determined through practical testing. The following recommendations apply:
Select a lower orbital action setting (or switch it off) for a finer and cleaner cutting edge.
For thin materials such as sheet metal, switch the orbital action off.
For hard materials such as steel, work with low orbital action.
For soft materials and when sawing in the di
rection of the grain, work with maximum orbital action.
Miter cuts up to 45^
Turn the stop lever 1090^ to release the saw bench 4 at the front. You can now push the saw bench 4 to the back (towards the suction connection piece) and bring it into the desired tilted position. Turn the stop lever 10 back to lock the tilted position.
You may need to regulate the tension by turning the lever 10 forwards again and tightening the tension wheel by turning it clockwise.
Turn the lever 10 back to lock the saw bench 4 into position. The angles 15^ , 30^ and 45^ can be securely locked into place on the saw bench 4.
Setting for rectangular cuts in 0^ position (vertical saw blade)
Turn the stop lever 1090^ to release the saw bench 4 at the front. Then the saw bench 4 can if necessary be released from the notches by pulling it backwards, then rotated into the 0^ position and locked in again. Lock the position of the saw bench 4 by turning the lever 10 back.
You may need to regulate the tension by turning the lever 10 forwards again and tightening the tension wheel by turning it clockwise. Turn the lever 10 back to lock the saw bench 4 into position.
Sliding block
To prevent the workpiece surface from being scratched, attach the sliding block 14 onto the saw bench 4 from the front.
Chip tearing protection
Depending on the intended use, one of the two means of stress corrosion protection can be used as follows:
for the saw bench 4
the plastic part 13 is pressed into the saw opening of the saw bench 4 from underneath (snaps into place).
for the sliding block 14
the sliding block 14 is attached on the saw bench 4 from the front, together with the steel part 15 inserted from the top into the saw opening.
The wood fibres are thus pressed against the stress corrosion protection 13 or 15 during sawing, which prevents the edges being torn.
The area of application is limited to right-angled (90^) cuts.
Dust suction
Insert the suction connection piece 9 into the saw bench 4 from the back. The jigsaw can now be connected to a commercially available vacuum cleaner.
To keep the cut free of shavings, insert the flexible suction hose into the opening of the suction connection piece.
Digital electronic control
The stroke speed can be adjusted stepless from 500 spm to the maximum stroke rate of 3200 spm, and thus adapted to the respective material requirements. When under load, the digital electronic control provides for more power. Regulation is carried out via the speed control dial 2 at the front of the handle.
Speed control range
Position 1 min. stroke rate
approx. 500 strokes/min
Position 6 max. stroke rate
approx. 3200 strokes/min
The digital electronic control is provided with a protection feature against restarting (no unintended starting, i.e. after a power outage or when the mains plug has been pulled). This feature is for your protection. The machine must be restarted intentionally.

The motor can become overheated as a result of sustained heavy usage and low speeds.

Disconnect the plug from the power source before making any adjustments, changing accessories, or storing power tools.
Such preventive safety measures prevent accidental start of the power tool.

Wear safety gloves for tool changing.
The tool insert can become very hot after working for long periods and/or the cutting edges of the tool insert are sharp.
EN
Clamping and unclamping the saw blades
The advantage of the clamping system is that saw blades can be changed without tools.
First push the cover 3 up. Turn the tension lever 6 to open the quick-change clamping system so that the saw blade 8 can be inserted. Make sure that it is pushed back as far as it can go.
By releasing the tension lever 6 and then pushing in the direction of the tappet, it is automatically fixed in position, and the tension lever 6 returns to the neutral position.
When unclamping the saw blade 8, it is released from the fixed position by turning the tension lever 6. It can then be removed from the tappet. The protection roller, which prevents the saw blade from moving and serves to unburden the mechanical parts (tappet), automatically produces a clamping angle of 90^ as a positive stop. Naturally, this only applies when original saw blades are used.
-WARNING-
Press jigsaw against saw blade tip on wooden board, until clamping lever 6 springs back to its starting position.
It is only by doing this that the secure clamping of the saw blade 8 can be ensured and the hood 3 can be closed.
-NOTE-
Check the tight seating of the saw blade.
A loose saw blade can fall out and lead to injuries.

Starting position
(=tense position)


Striking point

Clamping saw blade
- Rotate tension lever 6 as far as it will go and hold it fast.
Insert saw blade 8 as far as it will go.
Release tension lever 6.
Unclamping saw blade
- Rotate clamping lever 6 as far as it will go and hold in place.
Remove saw blade 8.
-NOTE-
Do not press back turned clamping levers as this makes it very difficult to remove the saw blade.
Operating tips
Operation of pendulum jigsaw
When sawing, make sure that the base plate is sitting securely on the workpiece. The jigsaw can now be easily operated by hand. To achieve clean cuts and optimal cutting performance, make sure the correct pendulum stroke for the material has been selected on the feed, which should also be adjusted for the material (e.g. pendulum stroke setting 0 and slow feed when sawing metals).
The built-in blower keeps the cut continuously free of chips for perfect visibility.
When sawing metals, put some oil onto the cutting line. Sheet metal should be clamped onto a sufficiently secure base (chip board or plywood board). This eliminates the risk of the material springing back.
Presetting the Stroke Rate
In devices with a setting dial 2, you can select the speed using the setting dial 2 depending on the area of application.
When under load, the digital electronic control provides for more power.
1-2: Low stroke rate
3-4: Medium stroke rate
5-6: High stroke rate
Recommended speeds
The optimal speed setting should be determined in tests at the beginning of the sawing job, as several factors such as material, thickness of material, condition of the saw blade, may influence the results of the job.
Low speed when sawing glass, ceramics, metal.
Medium-range speed when sawing plastic, pressed material and plywood.
High speed when working hardwood, softwood and chipboard.
-NOTE-
After longer periods of work at low stroke rate, the machine can heat up considerably. Remove the saw blade from the machine and allow the machine to cool down by running it for approx. 3 minutes at maximum stroke rate.
When sawing metal, coolant/lubricant should be applied alongside cutting line because of the material heating up.
Sheet metal is to be clamped to a suitably solid base (clamping plate or plywood plate). This eliminates as far as possible the risk of the material springing back and forth.
Cutouts/Pocket cuts
For cutouts, drill a hole i.e. a starting point where the saw can be inserted.
Plunge cuts into the material (only when working wood) is possible, but should only be attempted by skilled people. The jigsaw is switched on and placed on the work at an angle of 55 - 60^ to the front edge of the base plate and pushed down slowly and carefully.
Particular care is required at the start of these kinds of jobs: kickbacks and jerks will result if the jigsaw is started the wrong way, whilst excessively fast plunge cuts may result in broken blades. Only perform plunge cuts at the max. number of strokes.
Selecting a Saw Blade
Only original Kress saw blades as listed in the operating manual or in accordance with the following sketch with a max. thickness of 1.5mm may be used. This is the only way to guarantee that the saw blade is securely fastened and reduce as far as possible the risk of accidents caused by the jigsaw blades becoming loose.

The saw blade should not be longer than required for the intended cut.
Use a thin saw blade for narrow curve cuts.
Parallel fence (accessory)
For perfect results with parallel cuts use the graduated parallel fence 5.
The parallel fence 5 is inserted from the side through the clamping plate into the slot in the base plate according to the scale and is fixed with the wing bell.
Circular cutter (accessory)
For circular cuts a graduated circular cutter is available (assembly as for parallel fence). The threaded pin of the knobtype handle permits readjustment if a greater downward pressure is required according to material, or if the tip of the threaded pin has been re-ground. Make sure that the counter nut is always well-tightened.
Optional Accessory
Do not use accessories made by other manufacturers, as these are not tested by KRESS.
It can be dangerous to use such accessories.
To avoid injury and damage, use only accessories recommended by KRESS.
6. Maintenance and Service
Maintenance and Cleaning

Before carrying out any work on the machine, pull the mains plug.
Always keep the machine and ventilation slots clean.
Wipe off the accessible plastic parts regularly with a cloth without cleaning agent.
Always keep the tool holder clean.
The movable supporting roller for the saw blade should be given a drop of oil from time to time.
-NOTE-
In extreme working conditions, conductive dust can accumulate in the interior of the machine when working with metal. The protective insulation of the machine can be degraded. The use of a stationary extraction system is recommended in such cases as well as frequently blowing out the ventilation slots and installing a residual current device (RCD).
Replacing brushes
Worn carbon brushes should be replaced by an authorised customer service organisation.
Service


After heavy use over a long period, the machine should be taken to a Kress service location for inspection and thorough cleaning.
The relevant service centres are listed in the enclosed appendix "SERVICE" or on the website www.kress-elektrik.de.
Spare parts / exploded view
Exploded views and spare parts lists are available on our home-page
http://spareparts.kress-elektrik.de
Environmental Protection


Recycle raw materials instead of disposing them as waste. The machine, accessories and packaging should be sorted for environmental-friendly recycling.
The plastic components are labelled for categorised recycling.

Only for EC countries.
Do not dispose of electric tools together with household waste material!
In observance of the European Directive 2002/96/ EC for waste electrical and electronic equipment and its implementation in accordance with national law, electric tools that have reached the end of their life must be collected separately and returned to an environmentally compatible recycling facility.
Warranty
- This power tool has been carefully tested and has been subjected to a strict quality control process.
- We guarantee the free-of-charge repair of faults in the power tool that arise within 24 months from the date of purchase at the end user's premises and which can be attributed to a material or manufacturing defect. In certain countries there are special regulations concerning the warranty terms. We reserve the right to repair faulty components or to replace them. Replaced items become our property.
- Inappropriate use or handling and opening up the device by unauthorised repair centres leads to the warranty becoming void. The warranty does not cover: mechanical damage due to falls etc., damage caused by penetration of water or other fluids, cut and damaged cables, motor damage and mechanical damage caused by inappropriate overloading, wear parts e.g. carbon brushes, drill chucks, chuck keys, worn drilling spindles, motors, mains cables, batteries, saw blades, grinding discs, dust bags, accessories in general (drill bits, chisels etc.). Details of the various toll wear parts can be obtained from http:// spareparts.kress-elektrik.de or from one of our service centres.
- The warranty may only be enforced when defects are reported without undue delay (including shipping damage). Warranty implementation does not extend the warranty period.
- If you need to apply the warranty, send the original purchase receipt together with the device to us or to the relevant service centre.
- The warranty obligations assumed by us shall exclude any further claims on the part of the buyer, in
particular the right to cancellation of a sale, reduction and the assertion of damage claims.
- However, the buyer shall have the right to either a reduction (in the purchase price) or the cancellation of the sales agreement should we fail to eliminate any defects within a reasonable period of time.
- This does not exclude compensation claims in accordance with §§ 463, 480 Para. 2, 635 BGB caused by the failure of assured properties.
- The provisions defined in Items 7 and 8 only apply to the Federal Republic of Germany.

Technical modifications reserved
Recommendation cycle
La mezcla de diversos materiales es especially peligrosa. Las alecciones ligeras en polvoSEOSEOSEOSEOSEOSEOSEOSEOSEOSEOSEOSEOSEOSEOSEOSEOSEOSEOSEOSEOSEOSEOSEOSEOSEOSEOSEOSEOSEOSEOSEOSEOSEOSEOSEOSEOSEOSEOSEOSEOSEOSEOSEOSEOSEOSEOSEOSEOSEOSEOSEOSEOSEOSEOSEOSEOSEOSEOSEOSEOSEOSEOSEOSEOSEOSEOSEOSEOSEOSEOSEOSEOSEOSEOSEOSEOSEOSEOSEOSEOSEOSEOSEOSEOSEOSEOSEOSEOSEOSEOSEOSEOSEOSEOSEOSEOSEOSEOSEOSEO SEOEO SEOEO SEOEO SEOEO SEOEO SEOEO SEOEO SEOEO SEOEO SEOEO SEOEO SEOEO SEOEO SEOEO SEOEO SEOEO SEOEO SEOEO SEOEO SEOEO SEOEO SEOEO SEOEO SEOEO SEOEO SEOEO SEOEO SEOEO SEOEO SEOEO SEOEO SEOEO SEOEO SEOEO SEOEO SEOEO SEOEO SEOEO SEOEO SEOEO SEOEO SEOEO SEOEO SEOEO SEOEO SEOEO SEOEO SEOEO SEOEO SEOEO SEOEQ
Dermed sikres storst mulig maskinsikkerhed.
Aänenpaine (LpA) 84 dB(A)
Aäniteho (L_WA) 95 dB(A)

apxikn theon (theon ouoqiyEnC)


Bc0n 0epewns
Ppivakia - totoeTnO
3JIeKtpOHnHCTpyMeHTbI npOu3BOoJr T NCKpy, KOTopa MoKET BOCPNaMeHHTb PbIb IIN Napbl.

He donyckaiaTe npn 3KcNlyaTaunn 3neKtpOnHCTpyMeHTa HaxOxDeHnra PraDM DeTei NocToPOHHNX NiU.
OTBJIeKaJcB, MOXHO NOTepaTb KOHTpOJIb NaI 3JIeKTpOHCTpyMeHToM.
3JneKtpo6e3onacHocTb
IHTeKep 3JIeKtpOHnHCTpymeHTa DOJXeH IOxOHTb Kpo3ETke. 3aIpeUaetcB HOCHTb KaKne-JN6o N3MeHEnH B IHTeKep. He NCNoJb3yTe
NepexoHnK 7TeKepa JIJIa 3JIeKTPOnHCTpyMeHTOB C 3aUHTbIM 3a3EmJIeHNEM.
OpunHaBbHn 1I TeKeP I NOxOJaJ K HeMy po3eTka CHNJaOT pNCK IopaxEHNJ 3JIeKTPnuYeCKIM TOKOM.
He donyckaia Te KOHTaKaTe TaJa C TaKIMn 3a3eMJIeHHbIMN NOBepXHOCTaMn, KaTpy6bl, OTONITeJIbHbIe CNCTeMbI, KXYOHHbIe PINTbl, Neu IN XOJIOINbHNKn.
CyüeCTByET NOBbIeHHbI pNCK nopaxeHnna 3JIeKtpuYeCKm TOKOM, ecJI BaSe TeNo 6yJeT 3a3eMJIeHO.

ObeperaTe 3neKtpoHcTpymENT OTdoJnI nnonadaHnBnaI.
HapKOTnuecknx BeuEcTB, aJIKOToJIa JIN MeDnKamEHTOB.
MnHyTHa HeBHMateJIbHocTb npn 3KcNpyaTuIN 3JIeKTPoHHCTpymEHTa MOXET npNBecTN K cepBe3HbIM TpaBMam INIyBEychAM.

IcnoJb3yIte HndnBnDyaJIbHbIe cpeIcTBA 3aIITbl I BceIa HocNTe 3aIITNbIe OUKN.

Houhe HnTaKnx INHnBnDyaJIbHbIX cpeiCTB 3aunIb, KaK pecnnpaTOp, npouHa HeCKoJb3aIqAa 3aunTHa o6yBb, KacKa Nn HayuHnKn, B 3aBnCnMoCTn OT BnDa 3JeKtpOnHcTpymeHTa n Obnactn erO npimHeHn, ChnXaET pNCK IOnyuHn TpaBM.

He donyckaTe cnyaHoro BkIIOueHnMaunHb.IpeTe TM kA kI TeKeP BCTaBNTb B po3ETky NJIaKKymyIaTOp B MaunHy, y6eINTecb, YTO BBIKIIOUaTeJb HaxOJNTcB BOTKJIIOUeHHOM INoJoxEHN.
3aŋpeuæTcŋpeHocntb MaunHy, ydepKuBaee TaJIbCem 3a BbIKIouaTeIb, IIN NODKJIIOUaTb BKIOUeHHy MouHcy K cETn, TAK KaK 3TO MOKeT npNBecTu K HechactHOMy ClyuaO nn TpaBMe.
Ipeed Tem KaB KJIIOHTb 3JIeKTPoHnCTpymeHT ydaJInte INHCTpymeHTbl DJIa HAcTpoNk MaUNHbI IIN KJIIOU NaTPOHa.
HCTpymEnT JI HAcTpoN KJIIOU, BCTaBJIeHHbI BO BpaJauOuNcY3eJ MaunHbI, MOryt npNBecTn K yBeybu Nn TpaBMe.
He nepeoueHnBaIte CBOI CNIbI, npHmJa HeecTeCTBeHoe IJra TeLa nOLOKeHne. Bcerda BblupaIte yCTOnuHBoE nOLOKeHne n COxpaHnTe paBHOBeCne.
IcnoJIb3yIte cneuJaIbHyIO pa6Ouyo OeJdy. He Hocnte IpoCTOpHbIe IpeIMeTbI ODeJdbI NJIyUkpaSeHnIy. ObeperaIte BOJocbl, OeJdY INepUaTKN OT IOdBHXhBIX y3IOB IN DeTaJIeI.
Cbo6oHna oJexda, yKpaSeHnI nn DnHHbIE BOJIocbl MOyT 6bITb 3aTMyTb IIOBnXhIMN y3JaMn n DeTaJMaMHbI.
Ecni Ha 3JIeKtpOnHCTpyMeHTe npeDyCMOTpeHa BO3MOxHOCTb PODKJIIOUChENI PbIInecOca,
ybeintecb, yTO OH npabnIbHO NOKIOUeH I NOXODIT DnI OTCaCbIBaEMOR MaTePnaJa.
3JIeKtpOHnHCTpymeHT, KOtOpbI He BkJIIOuaETcra NJIH He BblIOuHaETcra, IpeIcTabJIaER ONaCHOCTb I DOJIxHe 6bITb OTpeMOHTnpOBaH.

Bcerda OTcoeHnYIte WTeKepe OToP03ETKn, NJIa AkKMyJrTOp OTMaunHbI, NepeTd TEM KAc PnCTuNtB KNaCTpOKe, perynipOBKe MaunHbI, 3aMeHe DeTaJeO ChAcTkn NJIe EcNIOTKlaDbIbAeTe MaunHy B CTOPOHy.
3TN Mepbl IpeIOCTOPOXHOCTN IppeTCTByOT ClyuahOMy 3ayncky MaunHbl.
HeNcNoB3yEmbIe 3JIeKTPoHnHCTpyMeHTbI XpaHnte B HeIOCTyHOM DnI DeTeMecTe. 3aIpeuaetc8 3KcPnyatauia 3JIeKTPoHnHCTpyMeHTa HeNOdROTOBJIeHHbIMN IIN HeO6yUeHHbIMN JInCaMN, He O3HaKOMNBUnMmCra C npabNJamaN 3KcPnyatauIN.
3JIeKtpOHCTpyMeHTbI npeiCTaBJIOT ONaCHOCTb
dIy HeONbIHbIX, Heo6yueHHbIX IINU.
CJIeIte yxaxnBaITe 3a COCTOHNHeM 3JIeKTPoINHCTpymEnTa. IpoBepaTe IOBvXhBiE DeTaN y3NbI Ha nx 6e3ynpueHyIO fYHKUHOHaJIbHyIO pa6OTocNOcO6HocTb - OHI He DOJXHbI 3aeDaTb, 6bITb IOBpeXdHbI NLI cLOMaHbI. IOBpeXdHbIe DeTaN, IpeD TeM KAK npInCTuNTb K pa6Ote C 3JIeKTPoINHCTpymENTOM, DOJXHbI 6bITb OTpeMOHTnPOBaHbI NLI 3AmHeHbI.
ПричноMHOrnx HeCuaCTHbIX cIyuaeBЯВЯETcI
ПLOXOITexHnueckn yxo3a
3JIeKTPoINHCTpyMeHTOM.
CJIeIte u yxaXnBaIte 3a coCToHnem BaInx pexyux HcTpymeHTOB! OHI DoJXhBi 6bITb BCErDa OCTpo 3aTOUeHHbIMN I YnCTbIMN.
Pexyüne nHcTpymeHTbI c octpbIMn pexuyuimn Kpomkamnpexe 3aklnHHBaet N NMn JereynpabTb.
IcnoJb3yIte 3JIeKTPoINHCTpymeHT, OCHaCTky I T.D. B COOTBETCTBnC 3TIMN npabINamN 3KcPnyatauNi IIO Ha3NaYeHIO, KaK ONICAHO B pyKOBoDCTBe DJa DaHHoro TnPa MaunHbl. YUHTbIBaTe PnI 3TOM ycNoBna pa6Otbl I o6pa6aTBiBaembl MaTePnAJI.
IcnoJb3OBAHnE 3JIeKTPoHnCTpymEnTa IJyRnx
ZeJeN,OTJInuHbIX OT npedUcMOTpeHHo Obnactn
IprmHeHnra, MoXET PnIBecTn K OnaChbIM
CnTyauZnM. 3aPpeUaetcB BVocHTb KaKne-Jn6o
IN3MeHnB B KOHCTpyKzUHO 3JIeKTPoHnCTpymEnTa,
HapUbaTb ZeIOCTHOCTb KOpnyCa, NblTaTbcra
camOCToAteNbHO BCKpbIBaTb IN pEmOHtnpOBaTb
3JIeKTPoHnCTpymEnT, 3aMeHrTa Ka6eJb, UcETKn,
UTeKeP, camOCToAteNbHO pa3bnpaTb IN Cma3bIBaTb
3JIeKTPoHnCTpymEnT. HapUseHnE BblIeYka3aHHbIX
ycNoBnI n Tpe6oBaHn MoXeT NOBLech 3a Co6oB
OTKa3 B yDObJIeTBOpEHn rapaHTnHBix npTeH3n.
CepBnC

Pemont 3JIeKtpOnHCTpyMeNTa OJKeH OCyUeCTBJIaTBcra TOJbKO CneuJaNtAmn cepBnCHOrO ceHTpa N TOJbKO C IcNoJIb3OBaHNEm OPINHaJIbHbIX 3aNaChbIX DeTaJIeN YuacteI.
ToIbKO B 3TOM cIyuae 6ydet o6ecneueHa 6e30nacHoctb 3JIekTpOuHcTpymHeTa.
CpeunalbHbIe npaBnla texhkn6e30napochtn
He npi6JInxKaIte pyKn K 3OHe DeiCTBnI NIIbHOro nOJIoTHa. 3aIpeucaeTcY yIepXkBaTb 3arOTOBky CHN3y pyKaMn.
При ВОЗнКHOBEHи KOHTaKTa C ПИьНыМ NOЛOTHOM cyIeCTbYeT ONaCHOCTb ПОЛуЧЕнЯ TpaBM n yBeuH.
3aROTOBky TOIbKO BO BKJIHOeHHOM COCTOHN.
B npOTNBHOM cIyuae cyIeCTByeT onaCHOCTb BO3HNKHOBEHNA OTdauN pRn 3aKJIINHBaHNI NJIbHOrO IIOJOTHa B 3aROTOBKe.
Cleinte 3a Tem, TTo6bI npn BbINOJIHeHn pacnna onOpHa nPiTa HndexKHO ynpaJnacB B 3aROTOBky.
3aKlnHnBWee NJI nepeKOWeHHoe NJIbHOe NOJIoTHO MOKeT nepeJOMHTbcr NJI npINBeCTN K BO3HNKHOBEHNO OTdauN.
OTKIOUHTe 3JIeKTPoINHCTpyMeHT NO OKOHNpa6Otbl N DOxDNITcB, NOKA PIIJbHOE NOJOTHOIOJIHOCTbIO He OCTaHOBNT CBOE DBNXKeHne.ToIbKO nocJe 3TOTO BbIHMaIte NOLOTHO I33aROTOBKN.
TakIM 6pa3OM MOXHO NCKIIOHTb BO3HnKHOBeHne OTdauN I NOJOKNTb 6e3 ONaACKN 3JIeKTPOINHCTpMEnT B CTOpOHy.
3anpezaetcncnoIb30BaTb nobpejdeHHbIe nn HekaueCTBeHHbIe NIIbHbIe NOJOTHa.
ДeфорМировыньie Илп ПLOXO 3aTOUeHHbIe IINJIbHbIe NOJOTHa MOryT O6IaMbIBaTbCЯ Ил NBl3blBaTb OTdauY.
3aIpeuaeTcra TopMo3nTb IJIu OCTaHaBnBaTb DVBJKeHHe NIIbHOrO PONOTHa DaBJIeHnEM C Topca IJIu c6OKy NocJe OTKJIUoyehnMaunHbl.
CKpbIToB HNX 3JIeKTpOpnpOBOdkN, Tpy6 ra30 - IN BOIOCha6JKeHnI nII NobpaTNTecb B MeCThbie
KOMMyHaJIbHbIe CnyX6bl.
KoHTaKT C 3JIeKTPoNpOBOdKOJ MOKeT CTaTB npUHHoB BO3HnKHOBeHnI NOXapa N IopaxeHnA 3JIeKTPuYeCKM TOKOM. TOBpeXdHeNe ra3OpPOBODHOJ MaRNCtpaJN MOKeT npINBeCTN K B3pbYb. IpopoBb BOoPpOBOdHOJ LInHn MOKeT HaHeCTN cepBe3HbIMaTePnaJIbHbI yUeP6.
HeIOCTyHOM IJIa ITeIe I
NocToPOHnX JIuC MeCTe!
Coepknte cboe pa6ooyee meCTO B uHCTOTE.
Cmecn MaTePnIOB OcO6eHNO ONaChbl.
O6pa3yUo7aJcR npn o6pa60TKe IeKnx CBeTHbIX MeTaJIIOB Nblb MOKeT BOCJIaMeHHTbcr NJI npuBecTI K B3pblBy.
KpOMKn INHCTpyMeHTa MOryT 6bITb
OCTpbIMN.
YctaHOBka N BblEMKa NJIKN
CnCTema KpePJIeHnI NMeET TO npEnMuyIeCTBO, UTO MeHrTb PIIKy MoXHo 6e3 IcNoJb3OBAHnI DOnOJIHNTeJIbHO rHCTpyMeHTa.
Cnauha NaBepx NODHmaeTc8 3aunTHbI KoxyX 3. Pn noBopote pbyara fNkcaun nnK6 do ynpa cncTeMa 6bictporo 3axnma OTkpBaetcny MOxHO yCTaHOBnTB nnKy 8. Pn 3tOM Heo6xoHMo CneiNb 3a TeM, YTO6bl nnJa 6blna BCTabHeHa Do ynopa.
IocJe OTnysckaHnpaBlyara 6 OH DOJIKeH BepHyTbCBA CBOE IcXoJHOe POLOJKeHne.

Ecnn 3Toro He npOn3oJNo, cNeDyET DoXaTb NINKU BOBHyTpB STOKa DO HAnExKHoN aBTOMaTnueCKO fNKCaUNI INIKN.
Для Вьемки ПИКК 8 Heo6xOДIMо NOBepHyть рычаг Фикcaци ПИКК 6do уnpа.Опорнь рОЛК п徝OTВрацael OTKLOHEHne ПИКи И обеспechиваET pa3rpy3kyMexaHueckоЧаCTN (ToIkaTeЯ).OH cIyЖNTВ kaucheTbe ynpa И abTomatnueckи obpa3yET yroI 3axIma B 90^ Pa3yMeetc,3TO OTHOCITc TOLbKO K Tem cIyuaM, KOrda NcPOnlb3yOTcR HaSHn OpINHaJIbHbIe ПИКN.
-празурждени-
JIo63nK Heo6xOdImO yIepeTb KOHcNkOM NIIKNB DepeBraHHyIO PINTU N HaDaBNTb TaK, YTO6bl pyIur NKcauIN NIIKN 6 BepHyIcB CBOE INCXODHO E NOLOXKeHne.
ToIbKO TaK NIIka 8 6yJeT HaJeXHO npaBnIbHO 3aKepeIeHa I 3aUHTbI Koxyx 3 3aKpoEtca.
-уka3aHne-
Пюверьт e Пильhoe nOЛOTHO (ПИКу) Ha npOчHOCt b NOcAkn.
1-2: Hn3Koe YncIoo XoIOB
3-4: CpeiHee YncIoo XoIOB
5-6: BbICOKoe YnCJNo XoJIOB
Pekomehdaun no BbIbopy Yncna XoIOB nnJKN
We declare under our sole responsibility that this product is in conformity with the following standards or standardization documents: see CE
Technical file at: see TF
FR
Quality & Process Representative

Wolfgang Auch
Technischer Leiter
Technical Director

KRESS-lektrik GmbH & Co. KG
Postfach 166
D-72403 Bisingen