Brainguard Pro S M - Bike accessory CECOTEC - Free user manual and instructions
Find the device manual for free Brainguard Pro S M CECOTEC in PDF.


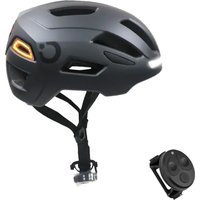
| Product type | Protective helmet for cyclists |
| Brand | Cecotec |
| Model | Brainguard Pro S M |
| Size | S/M (52-56 cm) |
| Intended use | Bike, scooter, roller skates |
| Weight | Approx. 300 g |
| Power supply | No power supply (non-electric accessory) |
| Main material | EPS foam and polycarbonate shell |
| Retention system | Chin strap with buckle |
| Adjustments | Adjustable straps for a secure fit |
| Main function | Head protection against impacts |
| Shock absorption | Deformation of the shell and lining |
| Cleaning | Warm water and mild soap |
| Maintenance | Avoid petroleum products, solvents, paints, adhesives |
| Safety | Replace after a violent impact |
| Lifespan | Replace if signs of wear appear |
| Warning | Do not modify the helmet |
| Protected area | Only covers the head |
| Restrictions | Do not use for climbing |
| Recycling | Recycle according to local regulations |
| Warranty | Legal warranty and after-sales service available |
Frequently Asked Questions - Brainguard Pro S M CECOTEC
User questions about Brainguard Pro S M CECOTEC
0 question about this device. Answer the ones you know or ask your own.
Ask a new question about this device
Download the instructions for your Bike accessory in PDF format for free! Find your manual Brainguard Pro S M - CECOTEC and take your electronic device back in hand. On this page are published all the documents necessary for the use of your device. Brainguard Pro S M by CECOTEC.
USER MANUAL Brainguard Pro S M CECOTEC
Safety instructions 8
-
Before use 56
-
Proper use 56
-
Cleaning and maintenance 59
-
Technical specifications 60
-
Recycling of electrical and electronic equipment 61
-
Technical support and warranty 61
-
Copyright 61
-
Declaration of Conformity 61
SOMMAIRE
EU01_124540 BrainGuard Pro S-M
EU01_122515 BrainGuard Pro L-XL
EN · The coding in this manual is generic and applies to all code variants of the appliance.
Read the following instructions carefully before using the product. Keep this instruction manual for future reference or new users.
- To ensure proper use of this helmet, familiarise yourself with its features and settings by reading this manual carefully before using your helmet.
- This helmet has been designed solely and exclusively to protect users of bicycles, electric scooters or roller skates. It must never be used for activities other than those indicated.
- Note that the protection provided by a helmet is limited and only affects the covered areas of the head. This helmet offers no protection against spinal or other bodily injuries. You are cautioned that wearing a properly fitted helmet does not guarantee that you will not suffer serious injury or death in the event of an accident.
- WARNINGS:
A No helmet can protect the wearer against all possible impacts.
B The helmet is designed to be fastened by a strap under the lower jaw.
C To be effective, the helmet must fit and be worn correctly. To check the correct fit, place the helmet on the head and make the necessary adjustments as indicated below. Secure the restraint system safely. Grasp the helmet and try to
rotate it back and forth. A properly fitted helmet should be comfortable and should not move forward to obstruct vision or backward to expose the forehead.
D No adjustments should be made to the helmet except those recommended by the helmet manufacturer in this instruction manual.
E The helmet is designed to absorb impacts through partial destruction of the housing and liner. This damage may not be visible. Therefore, if subjected to a severe blow, the helmet must be destroyed and replaced, even if it appears to be undamaged.
F The helmet can be damaged and rendered ineffective by petroleum products, cleaning agents, paints, adhesives, etc., without the user being able to detect the damage visually.
G A helmet has a limited service life and should be replaced when it shows obvious signs of wear.
H This helmet must not be worn by children while climbing or doing other activities where there is a risk of suffocation or strangulation if the child becomes trapped while wearing the helmet.
The helmet can only protect if it fits properly and the buyer should try on different sizes and choose the one that feels secure and comfortable on the head.
J The helmet should be adjusted to fit the wearer, for example, the straps should be positioned so that they do not cover the ears, the buckle should be positioned away from the jaw bone, and the straps and buckle should be adjusted so that they are comfortable and firm.
K The helmet should be placed on the head in such a way that it protects the forehead and is not pushed too far towards the back of the head, to ensure the intended protection.
L A helmet cannot always protect against injury.
M A helmet subjected to severe impact must be discarded and destroyed.
N It is dangerous to modify or remove any original part of the helmet except as recommended by the manufacturer. Helmets shall not be adapted to fit accessories in a manner not recommended by the manufacturer.
Battery instructions
- This appliance contains an irreplaceable battery.
- This appliance includes a Li-ion battery. Do not incinerate or expose it to high temperatures, as it may explode.
- Non-rechargeable batteries must not be recharged.
- Leaks from the battery or cells can occur under extreme conditions. Do not touch any liquid that leaks from the battery. If the liquid comes into contact with skin, wash immediately with soap and water. If the liquid gets into the eyes, wash them immediately with clean water for a minimum of 10 minutes and seek medical attention. Wear gloves to handle the battery and dispose of it immediately in accordance with local regulations.
- When the device is stored and not used for long periods of time, ensure that the battery pack is fully charged.
- Keep batteries out of the reach of children when there is a risk of ingestion.
- Battery ingestion can cause burns, soft tissue perforation and death. Severe burns may occur within two hours of ingestion.
- In case of battery ingestion, please seek medical help immediately.
-
Avoid contact between the batteries and small metal objects such as paper clips, coins, keys, nails, or screws.
-
You must remove the battery from the device before disposing of it.
- The device must be disconnected from the power supply when the battery is removed.
- The battery must be removed for safe disposal.
- The supply terminals must not be short-circuited.
INSTRUCTIONS DE SÉCURITÉ
TÜ V SÜD Certification and Testing (China) Co., Ltd.
Guangzhou Branch 5F, Communication Building,
163 Pingyun Rd, Huangpu West Ave. Guangzhou
510656P.R. China
AC Apeldoorn, The Netherlands.
Notified body No. 0063
- This appliance comes in a packaging designed to protect it during transport. Take the appliance out of its box and remove all packaging materials. You can keep the original box and other packaging materials in a safe place to prevent damage to the appliance if you need to transport it in the future. If you wish to dispose of the original packaging, make sure all items are recycled properly.
- Check that all parts and components are included and in good condition. If any of them are missing or damaged, please contact Cecotec's Official Technical Support Service immediately.
Box content:
- Helmet
- Charger
- Magnetic visor
- Remote control
- Instruction manual
- Do not remove the product's serial number in order to keep proper traceability if technical assistance is required.
NOTE:
The graphics in this manual are schematic representations and may not exactly match the product.
2. PROPER USE
Step 1:
The helmet fits properly when the adjustment pads hold it firmly but comfortably in place. Different thickness pads are provided for this purpose. The pads are held in place using Velcro fastenings.
Try different combinations with the thicknesses provided until the helmet fits firmly and comfortably.
Please note that all adjustments must be checked with the helmet in the correct position. Otherwise, the fit will be poor. If the fit is poor this could cause the helmet to move or come off in the event of an accident.
Step 2:
Always wear the helmet with the front positioned low to protect the forehead, as shown in Figure 1.
Step 3:
The front and rear straps should meet at a point situated slightly below and in front of the ears, as shown in Figure 2. To adjust the strap position, hold one end of the buckle with one hand and slide the adjuster up or down as required with the other hand positioned correctly. To adjust only the front strap or rear strap, hold the strap to be adjusted and slide the adjuster in the appropriate direction.
Step 4:
Always wear the helmet with the chin strap buckle fastened and the strap properly adjusted. Ensure the strap sits firmly against the throat, not on the chin. Straps positioned on the chin increase the possibility of the helmet coming off in the event of an accident.
Please refer to Figure 3 to see how to fasten and unfasten the buckle correctly.
Step 5:
Size adjustment system: Adjustment is carried out as shown in Figure 4:
Turn the adjuster counterclockwise to increase the size.
Turn the adjuster clockwise to reduce the size.
Hold the front end of the helmet and adjust the adjuster adjustment plate.
Ensure the loose end of the strap passes through the rubber "O" ring. Failure to do so may cause the strap to slip and the helmet to come off accidentally. See Figure 5.
Step 6:
Before using the helmet, make sure that it fits correctly, that the straps are properly adjusted and that the chin strap is sufficiently tightened. Put on the helmet in the correct position. Fasten the chin strap and pull it tight.
CHECK THE FIT:
Hold the helmet with both hands and turn it to the left and to the right. If the helmet fits properly, the skin on your forehead will move as the helmet moves. If not, the helmet is too loose, go back to step 1.
CHECK THE STRAPS:
Hold the helmet with both hands and try to move it by turning the helmet back and forth as far as possible. Use force. The helmet is not properly fitted if you can pull it completely off your head in any direction, move it forward so that it blocks vision, or move it backward so that it exposes your forehead. Repeat steps 3 and 4 until helmet movement is minimal.
WARNING: If you cannot adjust the helmet as instructed, DO NOT WEAR THIS HELMET. Change it for another size.
Step 7:
ENGLISH
Once you are sure that the helmet fits properly and that all straps are snug and tight, you can use the helmet.
Pay attention to the overall comfort and stability of the helmet whilst using it.
Make small adjustments to the padding and straps to improve stability and comfort.
Rear light control via button
Fig. 6
- Power button
- Charging port
To turn the helmet's rear light on and off, press and hold the main button for 1.5 seconds.
Mode selection
Once switched on, briefly press the main button to cycle between different lighting modes:
- Mode 1: The rear light remains constantly on; the front light is on. Duration: 3 hours.
- Mode 2: The rear light flashes slowly; the front light is on. Duration: 4 hours.
- Mode 3: The rear light flashes rapidly; the front light is on. Duration: 4.5 hours.
- Mode 4: The rear light flashes in SOS mode; the front light is on. Duration: 4.5 hours.
- Mode 5: The left and right rear lights flash alternately; the front light flashes slowly. Duration: 8 hours.
- Reset: When Mode 5 is reached, press again to return to Mode 1.
Remote control operation
Fig. 7
- L button: Activates the left turn signal (press again to cancel).
- R button: Activates the right turn signal (press again to cancel).
- M button: Changes the rear light modes (also cancels turn signals).
Turn signal effect
Turn signals: LED with flowing light effect.
Installing the remote control on the bicycle handlebars
- Identify the location on the handlebars where you wish to install the remote control. Ensure it is easily accessible while riding.
- Take the included rubber band and pass it around the handlebars.
-
Insert the end of the band into the remote control's hook. Ensure the band is securely fastened to prevent movement during use.
-
Check that the remote control is firmly attached to the handlebars. It must remain fixed and not move when touched.
- Once installed, test the remote control buttons to ensure the helmet control works correctly.
Following these steps, the remote control will be ready for use, allowing you to control the helmet's functions safely and efficiently.
Replacing the remote control battery
The remote control uses a CR2032 battery. To change it, follow these steps:
- Remove the 4 screws from the back of the remote control using a screwdriver.
- Open the plastic cover and replace the battery.
- Replace the screws.
3. CLEANING AND MAINTENANCE
Cleaning
Before storing the helmet, ensure it is cleaned properly.
- Clean the helmet interior with mild soap or shampoo. Do not use excessive force when cleaning the padding. Rinse soap or shampoo from the padding. Then remove excess water with a towel and allow the helmet to air dry. Do not use a hair dryer or other heat source as this will damage the padding and helmet.
- To clean the helmet shell, wipe with a soft, damp cloth, then dry with a soft towel. Mild detergent may be used if necessary. Do not use abrasive cleaners as this will damage the shell.
Inspection
Carry out a visual inspection of the helmet to ensure there is no visible damage, cracks or significant wear. If you encounter any problems, you must replace the helmet.
Safe storage
Find a dry, cool and safe place to store the helmet.
Avoid areas exposed to direct sunlight, moisture, or extreme temperature changes.
Excessive heat can damage the helmet. Keep the helmet away from high temperatures: the helmet may be damaged if exposed to temperatures above 40° C. As a result, the helmet may deform and blistering or irregularities may appear.
ENGLISH
Proper position
Place the helmet in a stable position, preferably with the opening facing upwards and ensuring there are no heavy objects on top that could deform it.
Impact protection
Avoid dropping or knocking the helmet during storage, as this could compromise its integrity and protective capabilities.
Periodic inspections
Although the helmet is stored, periodic reviews are recommended to ensure there is no hidden damage or deterioration to its structure.
4. TECHNICAL SPECIFICATIONS
Product reference: EU01_124540/ EU01_122515
Product:
BrainGuard Pro S-M
BrainGuard Pro L-XL
Input voltage: 5 V
Input current: 500 mA
Battery specifications: 602050, 600 mAh, 3.7 V, 2.2 Wh
Charging time: 1.5 h
Operating time: 2-8 h (varies according to functional modes)
Helmet service life: 5 years
To recharge the battery, it is recommended to use an adapter with the following characteristics:
Input: 100-240 V\~, 50/60 Hz
Output: 5 V =, 1 A
Remote control specifications
Voltage: 3 V
Battery capacity: 210 mAh
Technical specifications may change without prior notice to improve product quality.
Made in China | Designed in Spain
5. RECYCLING OF ELECTRICAL AND ELECTRONIC EQUIPMENT

This symbol indicates that, according to the applicable regulations, the product and/or battery must be disposed of separately from household waste. When this product reaches the end of its service life, you must remove the batteries/accumulators and take it to a collection point designated by local authorities.

For detailed information on how to properly dispose of electrical and electronic equipment and/or the corresponding batteries, consumers should contact their local authorities.
Information regarding national packaging recycling systems and their marking can be found on our website.
Compliance with the above guidelines will help protect the environment.
6. TECHNICAL SUPPORT AND WARRANTY
Cecotec shall be liable to the end user or consumer for any lack of conformity that exists at the time of product delivery under the terms, conditions and deadlines established by applicable regulations.
Repairs should be carried out by qualified personnel.
If you detect any incident with the product or have any query, please contact Cecotec's Official Technical Support Service on +34 96 321 07 28.
7. COPYRIGHT
The intellectual property rights over the texts in this manual belong to CECOTEC INNOVACIONES, S.L. All rights reserved. The contents of this publication may not, in whole or in part, be reproduced, stored in a retrieval system, transmitted, or distributed by any means (electronic, mechanical, photocopying, recording or similar) without the prior authorization of CECOTEC INNOVACIONES, S.L.
8. DECLARATION OF CONFORMITY
The helmets described in this manual are in accordance with Regulation (EU) 2016/425 on personal protective equipment.
The following harmonised standards have been applied:
EN 1078:2012 + A1:2012
ENGLISH
Information on the conformity assessment body: TÜ V SÜD Certification and Testing (China) Co., Ltd. Guangzhou Branch 5F, Communication Building, 163 Pingyun Rd, Huangpu West Ave. Guangzhou 510656 P.R. China
Information on the notified body: Kiwa Nederland B.V. with Wilmersdorf, 50 7327 AC Apeldoorn, The Netherlands. Notified body No. 0063
The full text of the EU Declaration of Conformity can be found on the following website:
https://cecotec.es
1. AVANT UTILISATION
8. DÉCLARATION DE CONFORMITÉ
ÜBERPRÜFEN SIE DIE PASSFORM:
AC Apeldoorn, The Netherlands.
Notified body No. 0063
https://storececotec.de
1. PRIMA DELL'USO
https://cecotec.pt/pt
1. VOOR GEBRUIK
TÜ V SÜD Certification and Testing (China) Co., Ltd.
Guangzhou Branch 5F, Communication Building,
163 Pingyun Rd, Huangpu West Ave. Guangzhou
510656 P.R. China
AC Apeldoorn, The Netherlands.
Notified body No. 0063
TÜ V SÜD Certification and Testing (China) Co., Ltd.
Guangzhou Branch 5F, Communication Building,
163 Pingyun Rd, Huangpu West Ave. Guangzhou
510656 P.R. China
AC Apeldoorn, The Netherlands.
Notified body No. 0063
163 Pingyun Rd, Huangpu West Ave. Guangzhou
510656P.R. Kíva
Guangzhou Branch 5F, Communication Building,
163 Pingyun Rd, Huangpu West Ave. Guangzhou
510656P.R. Xina
AC Apeldoorn, The Netherlands.
Notified body No. 0063
- SOMMAIRE
- BATTERY INSTRUCTIONS
- INSTRUCTIONS DE SÉCURITÉ
- BOX CONTENT
- NOTE
- PROPER USE
- STEP 1
- STEP 2
- STEP 3
- STEP 4
- STEP 5
- STEP 6
- CHECK THE FIT
- CHECK THE STRAPS
- STEP 7
- ENGLISH
- REAR LIGHT CONTROL VIA BUTTON
- FIG. 6
- MODE SELECTION
- REMOTE CONTROL OPERATION
- FIG. 7
- TURN SIGNAL EFFECT
- INSTALLING THE REMOTE CONTROL ON THE BICYCLE HANDLEBARS
- REPLACING THE REMOTE CONTROL BATTERY
- CLEANING AND MAINTENANCE
- CLEANING
- INSPECTION
- SAFE STORAGE
- PROPER POSITION
- IMPACT PROTECTION
- PERIODIC INSPECTIONS
- TECHNICAL SPECIFICATIONS
- RECYCLING OF ELECTRICAL AND ELECTRONIC EQUIPMENT
- TECHNICAL SUPPORT AND WARRANTY
- COPYRIGHT
- DECLARATION OF CONFORMITY
- AVANT UTILISATION
- DÉCLARATION DE CONFORMITÉ
- ÜBERPRÜFEN SIE DIE PASSFORM
- PRIMA DELL'USO
- VOOR GEBRUIK
Brand : CECOTEC
Model : Brainguard Pro S M
Category : Bike accessory