
SBS-TW-30C - Scale STEINBERG - Free user manual and instructions
Find the device manual for free SBS-TW-30C STEINBERG in PDF.
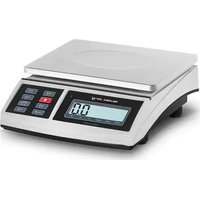


| Product Type | Kitchen Scale |
| Brand | Steinberg |
| Model | SBS-TW-30C |
| Maximum Capacity | 30 kg |
| Accuracy | 1 g |
| Measurement Units | kg, lb, oz |
| Tare Function | Yes |
| Display | LCD |
| Power Source | 2 AAA batteries (not included) |
| Auto-off | Yes, after a few minutes of inactivity |
| Platform Material | Stainless Steel |
| Dimensions (approx.) | 30 x 25 x 5 cm |
| Weight (approx.) | 800 g |
| Weighing Function | Yes |
| Counting Function | Yes (based on unit weight) |
| Hold Function | Yes (hold) |
| Cleaning | Damp cloth, do not immerse |
| Maintenance | Replace batteries when display is low |
| Safety | Do not exceed maximum capacity; avoid shocks |
| Spare Parts | User-replaceable batteries |
Frequently Asked Questions - SBS-TW-30C STEINBERG
User questions about SBS-TW-30C STEINBERG
0 question about this device. Answer the ones you know or ask your own.
Ask a new question about this device
Download the instructions for your Scale in PDF format for free! Find your manual SBS-TW-30C - STEINBERG and take your electronic device back in hand. On this page are published all the documents necessary for the use of your device. SBS-TW-30C by STEINBERG.
USER MANUAL SBS-TW-30C STEINBERG
Safety & Operating Instructions
1- Display
2- Weighbridge
3- Control panel
4- Main body
5- Foot
This User Manual has been translated using machine translation. We have made every effort to ensure the translation is accurate, but please note that automated translations are not perfect and are not meant to replace human translators. The official version of the User Manual is in English. Any differences between the translated version and the original English are not legally binding. If you have any questions about the accuracy of the translation, please refer to the English version, which is the official reference. More language versions are available upon request via info@expondo.com.
Technical data
| Parameter description | Parameter value | |||
| Product name | TABLE SCALE | |||
| Model | SBS-TW-3C | SBS-TW-6C | SBS-TW-15C | SBS-TW-30CSBS-TW-30CA |
| Min. weight [g] | 0.5 | 1 | 2.5 | 5 |
| Max. weight [kg] | 3 | 6 | 15 | 30 |
| Measurement accuracy [g] | 0.1 | 0.2 | 0.5 | 1 |
| Operating/storage temp. | 0°C ÷ 40°C/10°C ÷ 50°C | |||
| Operating/storage humidity | <85%/<85% | |||
| Battery type | 6V/4Ah | |||
| Power supply | 9V/300mA | |||
| Weighing platform dimensions [mm] | 210x270 | |||
| Dimensions [mm] | 270x335x115 | |||
| Weight [kg] | 2.9 | |||
| Product name | TABLE SCALE | |||
| Model | SBS-TW-3E | SBS-TW-6 | SBS-TW-15 | SBS-TW-30 |
| Min. weight [g] | 0.5 | 1 | 2.5 | 5 |
| Max. weight [kg] | 3 | 6 | 15 | 30 |
| Measurement accuracy [g] | 0.1 | 0.2 | 0.5 | 1 |
| Operating/storage temp. | 0°C ÷ 40°C/10°C ÷ 30°C | |||
| Operating/storage humidity | <85%/<85% | |||
| Battery type | 6V/4Ah | |||
| Power supply | 9V/300mA | |||
| Weighing platform dimensions [mm] | 210x270 | |||
| Dimensions [mm] | 270x335x1115 | |||
| Weight [kg] | 2.9 | |||
1. General description
The user manual is designed to assist in the safe and trouble-free use of the device. The product is designed and manufactured in accordance with strict technical guidelines, using state-of-the-art technologies and components. Additionally, it is produced in compliance with the most stringent quality standards.
DO NOT USE THE DEVICE UNLESS YOU HAVE THOROUGHLY READ AND UNDERSTOOD
THIS USER MANUAL.
To increase the product life of the device and to ensure trouble-free operation, use it in accordance with this user manual and regularly perform maintenance tasks. The technical data and specifications in this user manual are up to date. The manufacturer reserves the right to make changes associated with quality improvement. The device is designed to reduce noise emission risks to a minimum, taking into account technological progress and noise reduction opportunities.
Legend

The product satisfies the relevant safety standards.
Read instructions before use.
The product must be recycled.
WARNING! or CAUTION! or REMEMBER! Applicable to the given situation.
(general warning sign)
Only use indoors.

PLEASE NOTE! Drawings in this manual are for illustration purposes only and in some details may differ from the actual product.
2. Usage safety

ATTENTION! Read all safety warnings and all instructions. Failure to follow the warnings and instructions may result in electric shock, fire and/or serious injury or even death.
The terms "device" or "product" are used in the warnings and instructions to refer to: Table Scale.
2.1. Electrical safety
For battery charger
a) The plug must fit the socket. Do not modify the plug in any way. Using original plugs and matching sockets reduces the risk of electric shock. b) Avoid touching earthed elements such as pipes, heaters, boilers and refrigerators. There is an increased risk of electric shock if the earthed device is exposed to rain, comes into direct contact with a wet surface or is operating in a damp environment. Water getting into the device increases the risk of damage to the device and of electric shock. c) Do not touch the device with wet or damp hands. d) Use the cable only for its designated use. Never use it to carry the device or to pull the plug out of a socket. Keep the cable away from heat sources, oil, sharp edges or moving parts. Damaged or tangled cables increase the risk of electric shock. e) If using the device in a damp environment cannot be avoided, a residual current device (RCD) should be applied. The use of an RCD reduces the risk of electric shock. f) Do not use the device if the power cord is damaged or shows obvious signs of wear. A damaged power cord should be replaced by a qualified electrician or the manufacturer's service centre. g) ATTENTION! DANGER TO LIFE! While cleaning, never immerse the device in water or other liquids.
2.2. Safety in the workplace
a) If you are unsure about whether the device is operating correctly or if you find damage, please contact the manufacturer's service centre. b) Only the manufacturer's service centre may make repairs to the device. Do not attempt to make repairs yourself! c) In case of fire, use a powder or carbon dioxide (CO2) fire extinguisher (one intended for use on live electrical devices) to put it out. d) Regularly inspect the condition of the safety labels. If the labels are illegible, they must be replaced. e) Please keep this manual available for future reference. If this device is passed on to a third party, the manual must be passed on with it. f) Keep packaging elements and small assembly parts in a place not available to children. g) Keep the device away from children and animals.

Remember! When using the device, protect children and other bystanders.
2.3. Personal safety
a) The device is not designed to be handled by persons (including children) with limited mental and sensory functions or persons lacking relevant experience and/or knowledge unless they are supervised by a person responsible for their safety or they have received instruction on how to operate the device. b) The device is not a toy. Children must be supervised to ensure that they do not play with the device.
2.4. Safe device use
a) Do not overload the device. Use the appropriate tools for the given task. A correctly-selected device will perform the task for which it was designed better and in a safer manner. b) Do not use the device if the "ON/OFF" switch does not function properly (does not switch the device on and off). Devices which cannot be switched on and off using the "ON/OFF" switch are hazardous, should not be operated and must be repaired. c) When not in use, store in a safe place, away from children and people not familiar with the device who have not read the user manual. The device may pose a hazard in the hands of inexperienced users. d) Keep the device in perfect technical condition. Before each use check for general damage, especially check moving components for cracked parts or elements, and for any other conditions which may impact the safe operation of the device. If damage is discovered, hand over the device for repair before use. e) Keep the device out of the reach of children. f) Device repair or maintenance should be carried out by qualified persons, only using original spare parts. This will ensure safe use. g) Avoid situations where the device stops working during use due to excessive loading. This may result in overheating of the drive elements and damage to the device. h) Do not touch articulated parts or accessories unless the device has been disconnected from the power source. i) Do not move, adjust or rotate the device in the course of work. j) Clean the device regularly to prevent stubborn grime from accumulating. k) The device is not a toy. Cleaning and maintenance may not be carried out by children without supervision by an adult person. l) It is forbidden to interfere with the structure of the device in order to change its parameters or construction. m) Keep the device away from sources of fire and heat. n) Do not overload the device. o) Before making a measurement, make sure that the device is placed on a stable surface and is not exposed to vibrations and sudden temperature changes, which may adversely affect the measurement results. p) Do NOT leave load on the scale for long. This will decrease the scale's accuracy and shorten the load cell's life. q) Do NOT use the scale in thunder or rain. r) Avoid extreme temperatures. Do not place the unit in direct sunlight or near the air conditioning.
s) Do not use the scale close to large electrical appliances such as welding machines or large motors. Do not leave batteries in the device if you do not use it for a long time.
t) Avoid places where moisture can lead to condensation. Avoid direct contact with water.
u) Do not place the unit close to windows, doors, or fans that may cause unstable results due to air currents.
v) Keep your machine clean. Do not store products on the scale when it is not used.

ATTENTION! Despite the safe design of the device and its protective features, and despite the use of additional elements protecting the operator, there is still a slight risk of accident or injury when using the device. Stay alert and use common sense when using the device.
3. Use guidelines
The device is intended for measuring the weight of objects placed on the device's weighing platform.
The user is liable for any damage resulting from unintended use of the device.
3.1. Device description

1- Display
2- Weighing platform
3- Control panel
4- Main body
5- Foot
6- Charging indicator light
7- Power supply socket (not visible in the picture)
8- Spirit level bubble (not visible in the picture)
9- ON / OFF switch (not visible in the picture)
10- RS-232 port (not visible in the picture)
| BUTTON | DESCRIPTION |
| MODE | Selecting function |
| SET | Setting limit values |
| ? | Entering a numeric value |
| CALI | Weight calibration |
| UNIT | Choice of measurement units |
| ZERO | Scale zeroing / backlight |
| ENTER Confirming selection | |
| TARE | Tare / Delete tare |
3.2. Preparing for use
APPLIANCE LOCATION
The temperature of environment must not be higher than 40° C and the relative humidity should be less than 85%. Ensure good ventilation in the room in which the device is being used. There should be at least 10 cm distance between each side of the device and the wall or other objects. The device should always be used when positioned on an even, stable, clean, fireproof and dry surface, and be out of the reach of children and persons with limited mental and sensory functions. Position the device such that you always have access to the power plug. The power cord connected to the appliance must be properly grounded and correspond to the technical details on the product label.
3.3. Device use
NOTE: Before using the device, make sure that it is properly levelled.
3.3.1. USING THE DEVICE
NOTE: After starting the device, the scale will automatically go into weighing mode. "0" and "kg" will appear on the [1] display. To select a different operating mode, press the [MODE] button.
NOTE: To turn the display backlight on or off, press and hold the [ZERO / BL] button for a few seconds.
1. Weighing mode
Weighing an object.
a) Change of units:
- Press the [UNIT] button to change the unit of measurement kg > lb.
b) Tare acquisition:
- Place the container or weight on the [2] weighing platform.
- Wait for a while until the device stabilizes.
- Press the [TARE] button, the "1" display will show the "0" value and the "TARE" message.
After removing the weight, a minus value will appear on the [1] display.
- Press the [TARE] button again to end tare acquisition.
c) Reset:
- Set the weight on the [2] weighing platform.
- To zero the measurement value, press the [ZERO] button.
2. Counting mode
Counting the pieces according to the single piece weight.
a) Press the [SET] button to set the number of samples. The [1] display will show "SAP X" (where X is the number of samples).
b) Press the [t] button to change the number of samples.
Possible choices are 10, 20, 50, 100, 200.
c) Confirm the selection by pressing [ENTER].
d) "LOAD" will appear on the [1] display.
Place the selected number of samples, e.g., 10, on the [2] weighing platform and confirm by pressing [ENTER].
e) Place the total number of samples to be counted on the [2] weighing platform.
The device will count the number of samples, and the measurement result will appear on the [1] display.
f) Possible inaccuracy messages:
- “-LAC-” appears when the sample unit weight is less than 80% of the scale of the device. Counting the number of samples is possible in this case, but may be inaccurate.
- “-CSL-” appears when the sample unit weight is insufficient to perform the counting operation.
- Percentage mode
Counting the pieces according to the percentage value of the weighed objects.
a) Press the [SET] button. "LOAD-P" will appear on the [1] display. Put the samples on the [2] weighing platform. Press the [ENTER] button to make the measurement or.
b) press the [UNIT] button. “.000000” will appear on the [1] display. Press the [↑] and the [ENTER] button to enter the weight.
c) Possible inaccuracy messages:
- “-CSL-” appears when the sample unit weight is insufficient, i.e., it does not exceed 0.1% FS
- Setting the weight alarm
a) High alarm
- Press the [SET] button, the display will show "-HH-".
- Confirm your selection by pressing [ENTER].
- Press the [↑] button to set the first digit.
Confirm with the [ENTER] button and repeat the steps until the total desired value is set.
b) Low alarm
- Press the [SET] button, the display will show "-LL-". Proceed in the same way as for the high weight alarm.
c) Signalling modes. The signalling mode can be modified using the [↑] button.
- "IN" - the signal is activated when the measured value is within the accepted scale (between the "LL" and "HH" values).
- "OUT" - the alarm is activated when the measured value is outside the accepted scale (below the "LL" or above the "HH").
- "NO" - the alarm is deactivated.
3.3.2. MESSAGES
The [1] display shows the following messages:
- "—OF—" or "—ADC—" and a continuous beep. This means that the load on the [2] weighing platform has exceeded the measuring scale of the device. Remove the load from the weighing platform.
- “—Lo—” means there is no load on the weighing platform. This means that the battery is almost flat. Connect the power supply.
- “HHHH” or “LLLL” means the value exceeds the allowable measuring range during zeroing.
- “UNSTA” means the balance is not stabilized.
- “SYS-” means the scale must be recalibrated or needs servicing.
- "SET-" means incorrect alarm settings. The alarm must be reset.
3.3.3. RS-232 TRANSMISSION
- SETTING RS-232 STARTUP: During the startup procedure, press and hold [MODE] and [TARE] until a beep sounds.
WARNING: Once the device enters weighing mode, it is not possible to start RS-232 settings.
a) Transmission method
- Press the [SET] button to select the transmission method:
A. "Stb" – when the balance is stabilized, B. "Etb" – after pressing the [ENTER] button, C. "Ser" – continuous transmission, D. "CLOSE" - transmission disabled,
- Press the [↑] button to change the current transmission method. The method is selected in the following order:
![graph LR A["Stb"] --> B["Etb"] B --> C["SEr"] C --> D["CLOSE"] D --> E["↑"] E --> A B --> F["↑"] F --> C](/content/2026/06/1406945/images/d7cfb4eab23e7431c03adfc0f6eec995f75af573558acb3bc0d34ffff53c56ca.jpg)
- Press [ENTER] to confirm the selection and move to the next settings menu.
b) Transmission speed
- Press the [↑] button to select the transmission speed. The selection is made in the following order:
![graph LR A["9600"] --> B["4800"] B --> C["2400"] C --> D["1200"] D --> E["↑"] B --> F["↑"] C --> G["↑"] D --> H["↑"]](/content/2026/06/1406945/images/5d2b9925b2a6096acdfbf1bca336767e60cb41fb0ca6231047d801a5ea244eca.jpg)
• Press [ENTER] to confirm the selection.
- RS-232 interface
a) The balance has a standard RS-232 UART signal, 10bit.
b) Data format:
- D0 \~ D7 - OFFH
- D0 \~ D2 - decimal point D3 \~ D4 - current mode: 00 (weighing), 01 (counting), 10 (percent) D5 - 1 (negative weight), other (positive) D6 - 1 (stable), other (unstable) D7 - 2 (excessive weight), other (normal)
• 3. D0 \~ D7 - BCD1 (LSB)
• 4. D0 \~ D7 - BCD2 (MSB)
- D0 \~ D7 - BCD3 (HSB)
• 6. D0 \~ D7 - weight units: kg, lb
3.3.4. DEVICE CALIBRATION
- Starting Up and Self-Check:
- Turn on the device. During the self-check, simultaneously press "Enter" + "Cali."
- Once the display shows "xxxxxx" (indicating full capacity), press "个" + "Enter" to enter the password "090316". Then, press "Enter" to proceed.
- Selecting the Unit:
- On card 1, press "↑" (or 8) and then "Enter" to move to the decimal number selection.
- Decimal Number Selection:
- When the display shows a dot followed by X (indicating decimal numbers available: 0, 1, 2, 3, 4), press "个" to choose your preferred decimal setting and press "Enter" to confirm.
- Capacity Selection:
- The display will show xxx.xxx, with the first number flickering. Choose the required capacity (e.g., for 30kg, input 30) by pressing "↑" + "Enter". Confirm by pressing "Enter".
- Zero Track Range Selection:
- When "ZEX.X" appears on the screen (X indicates zero track range options: 1.0, 1.5, 2.0, 2.5, 3.0, 3.5), press "↑" to select and "Enter" to confirm. The display will then show "-0-", and subsequent presses of "Enter" will reveal the AD inner code and initiate the weight calibration mode.
- Calibration Process:
- The display indicating "Half" suggests placing half the full capacity weight on the platform.
For Option 1 ("1 LOAD..."): After the display shows "HALF", place half the full capacity weight. Wait for stability, then press "Enter". Once "FULL" is displayed, add the full capacity weight, wait for stability, and then press "Enter" to confirm and complete calibration.
For Option 2 ("2 LOAD..."): When entering this mode, the display will show xxx.xxx. Place the indicated weight, press "Enter", and the scale will confirm the weight entered. Calibration completes once the stability is confirmed and "Enter" is pressed.
Note: During calibration, use "↑" to select, "Enter" to confirm, and "Mode" to revert to the previous step.
Simple Calibration:
- With the display at 0.00, press "Cali." The scale will continue showing "CAL". Press "SET" to display full capacity, then "↑" + "Enter" to enter the weight. Place the same weight on the platform and press "Enter" to complete calibration.
Division, Zero, and Speed Setting:
- Turn on and in weighing mode, press "Enter" + "Cali." until "d xxxxx" (division value) appears.
- Select the desired division value (1, 2, 5, 10) using "↑", then confirm with "Enter". Following this, "ZE X" (zero track range) will display. Choose the desired speed setting (0, 1, 2) using "↑", then press "Enter" to finalize. The default speed value is 0.
3.4. CLEANING AND MAINTENANCE
a) Use only non-corrosive cleaners to clean the surface. b) After cleaning the device, all parts should be dried completely before using it again. c) Store the unit in a dry, cool place, free from moisture and direct exposure to sunlight. d) Do not allow water to get inside the device through vents in the housing of the device. e) The device must be regularly inspected to check its technical efficiency and spot any damage. f) Do not leave the battery in the device if it will not be used for a longer period of time. g) Use a soft, damp cloth for cleaning.
SAFE REMOVAL OF BATTERIES AND RECHARGEABLE BATTERIES
The devices are equipped with 9V / 300mA batteries. Recycle batteries with the appropriate organization or company.
DISPOSING OF USED DEVICES
Do not dispose of this device in municipal waste systems. Hand it over to an electric and electrical device recycling and collection point. Check the symbol on the product, instruction manual and packaging. The plastics used to construct the device can be recycled in accordance with their markings. By choosing to recycle you are making a significant contribution to the protection of our environment. Contact local authorities for information on your local recycling facility.

1- Display
2- Weighing platform
3- Control panel
4- Main body
5- Foot
1- Display
2- Weighing platform
3- Control panel
4- Main body
5- Foot
1- Display
1- Display
1- Display
2- Weighing platform
3- Control panel
4- Main body
5- Amplifier element
6- Charging indicator light
1- Display
2- Weighing platform
3- Control panel
PLACEMENT OF THE DEVICE
1- Display
2- Weighing platform
3- Control panel
4- Main body
5- Foot
1- Display
2- Weighing platform
3- Control panel
4- Main body
5- Foot
PLACEMENT OF THE DEVICE
1- Display
2- Weighing platform
3- Control panel
4- Main body
5- Foot
6- Charging indicator light
1- Display
PLACEMENT OF THE DEVICE
1- Display
1- Display
2- Weighing platform
3- Control panel
4- Main body
5- Foot
1- Display
1- Display
3.3.2. INSTRUCTIONS
1- Display
2- Weighing platform
1- Display
2- Weighing platform
3- Control panel
4- Main body
5- Peda
6- Indicator light
1- Display
1- Screen
Environmental and disposal information
Producer to customer
Dear Sir or Madam,
Let's take care of the environment! The product you own should not be disposed of with household waste. According to applicable regulations (Directive 2012/19/EU and other local regulations), used equipment must be taken to designated collection points for proper disposal and recycling.

How to Handle the Product at the End of Its Lifecycle?
- Electrical and Electronic Equipment: Products marked with the crossed-out wheeled bin symbol must not be disposed of with household waste. You can:
Take it to your local collection point for electrical and electronic equipment. Use the “one-for-one” system (returning the old device when purchasing a new one, if available in your region).
- Batteries and Accumulators: If the product contains batteries, remove them before recycling and take them to designated battery collection points.
- Packaging Materials: Packaging, such as cardboard or plastic, should be sorted and placed in recycling bins.
Why is This Important?
Proper disposal of equipment and packaging materials:
- Protects the environment from harmful substances.
- Enables the recovery of valuable resources.
- Reduces the amount of waste sent to landfills.
Where to Find Information?
Information about waste collection points can be found on local authorities' websites or through your recycling service provider. If needed, contact our customer service team, who will gladly provide further details.
Thank you for your care for the environment and commitment to recycling!
Contact
expondo Polska sp. z o.o. sp. k.


- SAFETY & OPERATING INSTRUCTIONS
- GENERAL DESCRIPTION
- DO NOT USE THE DEVICE UNLESS YOU HAVE THOROUGHLY READ AND UNDERSTOOD
- THIS USER MANUAL
- LEGEND
- USAGE SAFETY
- ELECTRICAL SAFETY
- SAFETY IN THE WORKPLACE
- PERSONAL SAFETY
- SAFE DEVICE USE
- USE GUIDELINES
- DEVICE DESCRIPTION
- PREPARING FOR USE
- APPLIANCE LOCATION
- DEVICE USE
- USING THE DEVICE
- WEIGHING MODE
- COUNTING MODE
- MESSAGES
- RS-232 TRANSMISSION
- DEVICE CALIBRATION
- SIMPLE CALIBRATION
- DIVISION, ZERO, AND SPEED SETTING
- CLEANING AND MAINTENANCE
- SAFE REMOVAL OF BATTERIES AND RECHARGEABLE BATTERIES
- DISPOSING OF USED DEVICES
- PLACEMENT OF THE DEVICE
- INSTRUCTIONS
- DISPLAY
- ENVIRONMENTAL AND DISPOSAL INFORMATION
- HOW TO HANDLE THE PRODUCT AT THE END OF ITS LIFECYCLE
- WHY IS THIS IMPORTANT
- WHERE TO FIND INFORMATION
- CONTACT
Brand : STEINBERG
Model : SBS-TW-30C
Category : Scale