
MC6MBK - Multi-cooker GORENJE - Free user manual and instructions
Find the device manual for free MC6MBK GORENJE in PDF.


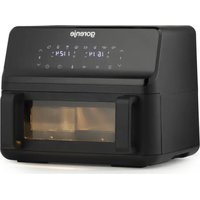
| Product Type | Multi-cooker |
| Brand | Gorenje |
| Model | MC6MBK |
| Capacity | 5 liters |
| Power | 900 W |
| Voltage | 220-240 V / 50-60 Hz |
| Dimensions (W x D x H) | 300 x 300 x 300 mm |
| Weight | 5.0 kg |
| Inner Pot | Non-stick coated aluminum |
| Lid | Tempered glass with steam vent |
| Display | LED with touch controls |
| Cooking Functions | Rice, stew, soup, steam, slow cook, saute, yogurt, cake, porridge, and more |
| Delayed Start | Up to 24 hours |
| Keep Warm | Yes, up to 12 hours |
| Timer | Adjustable up to 9 hours |
| Safety Features | Overheat protection, auto shut-off |
| Accessories | Steamer basket, rice paddle, measuring cup, soup ladle, recipe book |
| Cleaning | Inner pot dishwasher safe; wipe lid with damp cloth |
| Spare Parts Availability | Through Gorenje service centers or authorized dealers |
| Warranty | 2 years |
Frequently Asked Questions - MC6MBK GORENJE
User questions about MC6MBK GORENJE
0 question about this device. Answer the ones you know or ask your own.
Ask a new question about this device
Download the instructions for your Multi-cooker in PDF format for free! Find your manual MC6MBK - GORENJE and take your electronic device back in hand. On this page are published all the documents necessary for the use of your device. MC6MBK by GORENJE.
USER MANUAL MC6MBK GORENJE
MC6MBK
| Manual de instrucțiuni | RO |
| Instruction manual | EN |
| Navodila za uporabo | SI |
| Gebrauchsanweisung | DE |
| Brugsanvisning | DK |
| Käyttöuhjeet | FI |
| Bruksanvisning | NO |
| Instruktionshandbok | SV |
| Упатства за употреба | MK |
| Manual udhëzimi | AL |
| Návod k obsluze | CZ |
| Инструкции за употреба | BG |
| Használati utasítás | HU |
| Instrukcja obsługi | PL |
| Upute za uporabu | HR BIH |
| Uputstvo za upotrebu | SRB BIH MNE |
| Руководство по эксплуатации | RU |
| Návod na obsluhu | SK |
| ництрукція з експлуатаціїл | UA |
RO Instruction manual....2 GB Instruction manual....17 SI Navodila za uporabo ....31 DE Gebrauchsanweisung 48 DK Brugsanvisning....65 FI Käyttöohjeet 80 NO Bruksanvisning 95 SV Instruktionshandbok....110 MK Упатства за употреба......125 AL Manual udhëzimi....141 CZ Návod k obsluze....157 BG Инструкции за употреба......174 HU Használati utasítás....189 PL Instrukcja obsługi....204 HR BIH Upute za uporabu....221 SRB MNE Uputstvo za upotrebu....238 RU Руководство по эксплуатации....255 SK Návod na obsluhu 270 UA Інструкція з експлуатації .....286
RO
MC6MBK_737435
![graph TD A["Unlock State"] --> B["Usable Capacity"] B --> C["Lock State"] C --> D["Step 1: Unlock State is locked"] D --> E["Step 2: Lock State is locked"] E --> F["Step 3: Lock State is locked"]](/content/2026/06/1372092/images/712a73e1710e450986beebf9e202626784d615e7179b536b493e05da27c28554.jpg)
| Program | Original cooking time (min) | Delay time | Keep warm time | |
| Rice | 14-18 | 0:10-24:00 | 10h | |
| Multigrain | less | 20 | 0:10-24:00 | 10h |
| normal | 35 | |||
| more | 50 | |||
| Soup | less | 20 | 0:10-24:00 | 10h |
| normal | 30 | |||
| more | 40 | |||
| Meat/Stew | less | 25 | 0:10-24:00 | 10h |
| normal | 35 | |||
| more | 45 | |||
| Poultry | less | 10 | 0:10-24:00 | 10h |
| normal | 20 | |||
| more | 30 | |||
| Fish | less | 3 | 0:10-24:00 | 10h |
| normal | 5 | |||
| more | 8 | |||
| Steam | less | 5 | 0:10-24:00 | 10h |
| normal | 15 | |||
| more | 25 | |||
| Beans/Chili | less | 30 | 0:10-24:00 | 10h |
| normal | 35 | |||
| more | 40 | |||
| Porridge | less | 10 | 0:10-24:00 | 10h |
| normal | 20 | |||
| more | 30 | |||
| Manual | 30 (0-90) | 0:10-24:00 | 10h | |
| Yoghurt | 6:00h (4:00-8:00) | 0:10-24:00 | 10h | |
| Sear | 30 | / | / | |
| Slow Cook | 4:00h (2:00-12:00) | / | 10h | |
| Keep Warm | 2:00h (2:00-12:00) | / | 10h | |
MC6MBK_737435
IMPORTANT NOTE: Please read the manual carefully before operating your appliance. Retain the manual for future reference.
(Pictures are for reference only, actual product may differ from the picture shown.)
Important
Caution
- Read all instructions.
- This appliance is intended for household use only. Do not use it outdoors.
- This appliance is not intended for use by persons with reduced physical, sensory or mental capabilities, or lack of experience and knowledge, unless they have been given supervision or instruction concerning use of the appliance by a person responsible for their safety.
- This appliance may not be used by children. Keep the appliance and its power cord out of reach of children.
- Children should be supervised to ensure that they do not play with the appliance.
- This appliance is intended to be used in household and similar applications such as:
- staff kitchen areas in shops, offices and other working environments;
- farm houses;
- by clients in hotels, motels and other residential type environments;
- bed and breakfast type environments;
- If the supply cord is damaged, it must be replaced by the manufacturer, its service agent or a similarly qualified person, in order to avoid hazard.
- Please turn off and unplug the appliance before cleaning, maintenance or relocation, and whenever it is not in use.
- Do not immerse any part of the appliance in water or other liquid.
- The pressure regulator allowing the escape of steam should be checked regularly to ensure that it is not blocked.
- The container must not be opened before pressure has decreased sufficiently.
- There can be residual heat on the heating element surface after use. Do not touch it.
- Warning: avoid spillage on the connector.
- Warning: misuse may cause injury.
- The appliance is not intended to be operated by means of an external timer or a separate remote-control system.
- Do not put the pressure cooker into a heated oven.
- When the pressure cooker is under pressure, only move it with the greatest care. Do not touch hot surfaces. Use the handles and knobs. If necessary, use protection.
- Do not let children near the pressure cooker when in use.
- Do not use the pressure cooker for a purpose other than the one for which it is intended.
- This appliance cooks under pressure. Scalds may result from inappropriate use of the pressure cooker. Make sure that the cooker is properly closed before applying heat; see "instructions for use".
- Never force open the pressure cooker. Do not open before making sure that its internal pressure has completely dropped. See the "instructions for use".
- Never use your pressure cooker without adding water or food, as this would seriously damage it.
- Do not fill the cooker beyond 2/3 of its capacity. When cooking foodstuffs that expand during cooking, such as rice or dehydrated vegetables, do not fill the cooker to more than half of its capacity.
- Use the appropriate heat source(s) according to the instructions for use.
- After cooking meat with skin (e.g. ox tongue) that may swell under the effect of pressure, do not prick the swollen skin, as you might be scalded.
- When cooking doughy food, gently shake the cooker before opening the lid to avoid food ejection.
- Before each use, check that the valves are not obstructed. See the instructions for use.
- Never use the pressure cooker in its pressurized mode for deep or shallow frying of food.
- Do not tamper with any of the safety systems beyond the maintenance instructions specified in the instructions for use.
- Only use manufacturer's spare parts intended for your model. In particular, use the body and a lid from the same manufacturer, which are indicated as being compatible.
- KEEP THESE INSTRUCTIONS.
The appliance must not be disposed of with regular household waste. At the end of its service life, the appliance must be properly delivered to a collection point for recycling of electrical and electronic equipment. By collecting and recycling old appliances, you are making an important contribution to the conservation of our natural resources and providing for environmentally sound and healthy disposal.
This equipment is labelled in compliance with the European Directive 2012/19/EC on waste electric and electronic equipment – WEEE. The Directive specifies the requirements for collection and management of waste electric and electronic equipment effective in the entire European Union.
Product structure
Tips:
- Please move the product by holding the handle of the cooker body.
- Please wipe any water from the housing cover using a cloth.
Note:
① Exhaust valve: Pull out the exhaust valve from the lid. Clean the internal side of the exhaust valve and the exhaust valve and float valve of the lid with a brush and cloth at least once a month. ② Sealing ring: Please remove oil and dirt from the sealing ring with detergent and brush. ③ Water box: After cooking, there may be some steam condensate left in the water box of the external pot. This water (condensate) should be removed from the box in order to avoid bad odour. Please wipe any water with a clean cloth.
Disassemble and install the block proof cover and the seal ring


- Before each use, check if the seal ring and block proof cover are correctly installed in the upper cover.
- After use, please clean the seal ring and the area around the block proof cover to avoid jamming the cover, to keep it clean, and to avoid bad odour.
Disassemble and install the seal ring
Disassemble Install
Pull it out upwards Press it down to install
Seal ring


- Please do not pull the seal ring, as a distorted seal ring may affect the seal and pressure effect.
- Do not use a damaged seal ring. Please replace it at the authorized repair office.
Use and maintenance of the inner pot
- Do not empty If the inner pot is empty for a long time, it may become yellowish and spotted, or the bottom may be distorted.
- Do not use it to store acid, alkali and preserved foods for a long time Although the inner pot has excellent anti-corrosion performance, it may cause corrosion of certain degree. Suggested time for keeping food warm shall not exceed 2h.
- Keep it clean to prolong the service life Do not immerse it in water for a long time. Clean the inner pot with soap, mild detergent or warm water to remove dust, oil and dirt.
- Do not use a metal spatula or any other hard tool, as this may damage the inner surface of pot.
Preparation for cooking
- Opening the lid correctly.
Hold the handle of upper cover, turn it anticlockwise for about 30° until the lid is in the unlock state, and then lift the upper cover.
- Check if the lid parts and accessories are correctly installed.
Check if the floater valve and exhaust valve are jammed, and check if the sealing ring and block proof cover are correctly installed.
- Take out the inner pot, add the food and water to the inner pot.
Total amount of food and water may not exceed the Max marking on the inner pot.
- Put the inner pot into the cooker.
Wipe clean the external surface of inner pot. Make sure there are no foreign objects or water on the inner surface of electric pressure cooker. Turn the inner pot to left and right to ensure good contact with the heating plate.
- Safely close the lid.
Before closing the lid, check if the sealing ring is correctly installed.
Hold the handle of the upper cover. Set the lid to "unlock state". Place the top cover horizontally onto the cooker body and turn the upper cover clockwise by about 30° to the lock position ("Lock State").
- Correctly place the exhaust valve.
During operation, please turn the exhaust valve to the sealing position. In this position, the electric pressure cooker will operate in the sealed mode.
For manual exhaust, please turn the exhaust valve handle to the exhaust position. The electric pressure cooker will operate in the exhaust mode.
![graph TD A["Unlock State"] --> B["Usable Capacity"] B --> C["Lock State"] C --> D["Step 1: Unlock State is locked"] D --> E["Step 2: Lock State is locked"] E --> F["Step 3: Lock State is locked"]](/content/2026/06/1372092/images/ed2ed6c7485d9f286b0b3ea02deb2c14610925016bd41d616d15e5e33839603c.jpg)
While the steam is being released, do not keep your hands or face above the exhaust opening.
- Check if the floater valve drops down before operating the cooker (before heating, the floater valve is down).

General function
- Switch on the pressure cooker. If the buttons are inactive, please make sure the lid is closed correctly. If the lid is not closed correctly, the buttons are inactive.
- After cooking, the cooker may automatically enter into the keep warm state. In this case, the indicator will display "0H (0 hours), 1H (1 hour), 2H (2 hours) ..." or "L0:00 (0 min), L0:01 (1 min)."
Tips:
When the cooker is operating, it is normal that it makes a "cluck" sound. This is not cause for concern.
When cooking a small amount of food, the inner pot may be lifted when you open the lid. In this case, please shake the lid to drop the inner pot back into the cooker body, and then remove the lid.
Safely open the lid
- Cut off power supply or remove the power plug.
- Exhaust method
A. Quickly open the lid (for non-fluid foods).
Turn the exhaust valve to the exhaust setting. In some units, you can also press the steam release button " " and hold it until the float valve drops down.
B. Standard method for opening the lid
Let the electric pressure cooker cool naturally until the float valve drops down.
- Open the lid
Turn the upper cover anticlockwise with the left hand until it is in the open position. Then, lift the upper cover with the right hand to open the lid.
Do not open the lid before the pressure in the pot has been completely released. Do not open the lid forcibly if it is difficult to open.
Do not pull out the exhaust valve when turning it.
After cooking fluid foods (porridge and soup), do not turn the exhaust valve or press the steam release button. Rather, please cut off power supply, let the pressure cooker cool naturally until the float drops, and then open the lid.
Technical data
| Model | Capacity | Power supply | Rated power | Operating pressure | Keep-warm temperature | |
| MC6MBK | 5.7 L | 220–240 V~ 50/60 Hz | 1000 W | 80 kPa | Around 70 °C | |
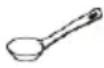
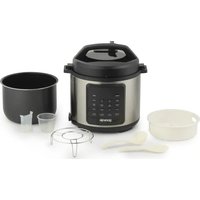
| Accessories | Spoon Soup Spoon User Manual Measuring cup Power cord | |||||
 |  |  |  |  | ||
Product structure

| No. | Description |
| 1 | Exhaust valve handle |
| 2 | Upper cover handle |
| 3 | Sealing ring |
| 4 | Control box |
| 5 | Exhaust opening |
| 6 | Float valve |
| 7 | Sealing ring |
| 8 | Block proof cover |
| 9 | Inner pot |
| 10 | Cooker body handle |
| 11 | Cooker body |
Operation Part
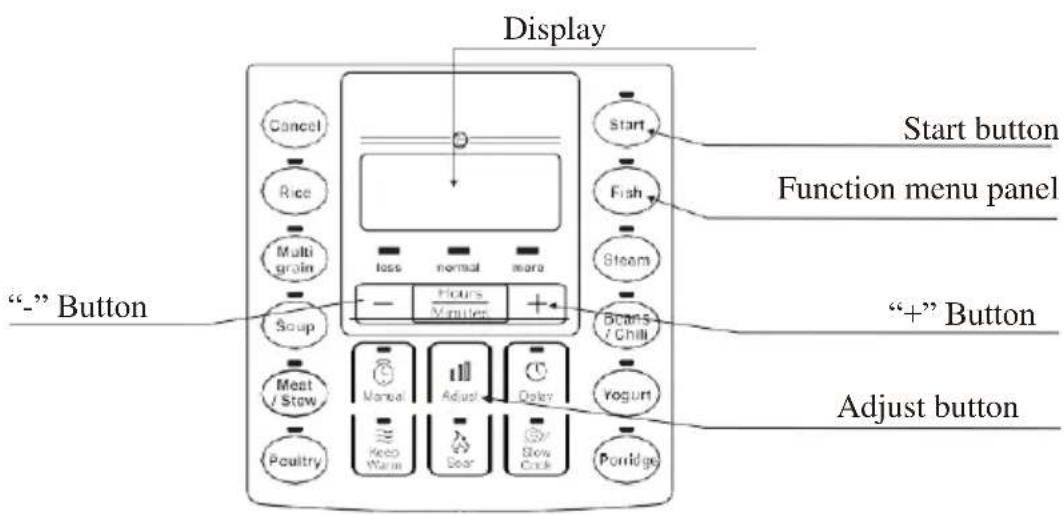
Operation guidelines
| Function | Operation guidelines |
| Function | Operation guidelines |
| Cancel | In any state or operating mode, press the "Cancel" button to cancel the current operation and return to standby mode. |
| Warm | In standby mode, press the "keep warm" button to enter the keep warm mode. The "keep warm" indicator will light up and the default operating time will appear on the display. Press the "+" or "-" button to adjust the operating time. |
| Sear | When in standby mode, press the "Sear" button. The indicator will light up and " " will appear on the display. If no button is pressed within the next 10 seconds, or if you press the "Start" button, the product will automatically Start counting down and it will enter the standby mode when it finishes cooking. |
| Slow Cook/Yogurt | In standby mode, press the function button. The indicator will light up and the default working time will be shown on the display. Press the "+" or "-" button to adjust the operating time. Press the "Hours/minutes" button to change cooking duration (hours and minutes). If no button is pressed within the next 10 seconds, or if you press the "Start" button, the pressure cooker automatically starts cooking. Countdown will start on the display, and the unit will enter the keep warm (slow cook) or standby mode (yogurt) when it finishes cooking. |
| RiceMultigrain soupMeat/Stew Poultry FishSteamed beans/ chili porridge | In standby mode, press the function button. The indicator will light up and " " will appear on the display. If no button is pressed within the next 10 seconds, or if you press the "Start" button, the pressure cooker automatically starts cooking. Countdown will start on the display as soon as the actual pressure in the pot reaches working pressure. The pressure cooker will enter keep warm mode when it finishes cooking. |
| Manual | In standby mode, press the "Manual" button. The indicator will light up and the default pressure cooking time will be displayed. Press the "+" or "-" button to adjust the pressure cooking time. If no button is pressed within the next 10 seconds, or if you press the "Start" button, the pressure cooker automatically starts cooking. Countdown will start on the display as soon as the actual pressure in the pot reaches working pressure. The pressure cooker will enter keep warm mode when it finishes cooking. |
| Delay | Delay cooking: before the program starts, press the "Delay" button. The screen shows the preset delay time. Press "+" or "-" to adjust the delay time. Then use the "Hours/minutes" button to change the delay time (hours and minutes). After 10 seconds, or when you press the "Start" button, the unit starts the delay time countdown. When the countdown is complete, the program starts to operate.Note: the delay timer cannot be set for the yogurt, slow cook, sear and keep warm modes. |
| Adjust | Before the program starts, you can press the "Adjust" button to change the food flavour. Choose between "less", "normal", and "more". Note: flavour cannot be adjusted for the rice, yogurt, slow cook, sear, keep warm and manual modes. |
Programs
| Program | Original cooking time (min) | Delay time | Keep warm time | |
| Rice | 14-18 | 0:10-24:00 | 10h | |
| Multigrain | less | 20 | 0:10-24:00 | 10h |
| normal | 35 | |||
| more | 50 | |||
| Soup | less | 20 | 0:10-24:00 | 10h |
| normal | 30 | |||
| more | 40 | |||
| Meat/Stew | less | 25 | 0:10-24:00 | 10h |
| normal | 35 | |||
| more | 45 | |||
| Poultry | less | 10 | 0:10-24:00 | 10h |
| normal | 20 | |||
| more | 30 | |||
| Fish | less | 3 | 0:10-24:00 | 10h |
| normal | 5 | |||
| more | 8 | |||
| Steam | less | 5 | 0:10-24:00 | 10h |
| normal | 15 | |||
| more | 25 | |||
| Beans/Chili | less | 30 | 0:10-24:00 | 10h |
| normal | 35 | |||
| more | 40 | |||
| Porridge | less | 10 | 0:10-24:00 | 10h |
| normal | 20 | |||
| more | 30 | |||
| Manual | 30 (0-90) | 0:10-24:00 | 10h | |
| Yoghurt | 6:00h (4:00-8:00) | 0:10-24:00 | 10h | |
| Sear | 30 | / | / | |
| Slow Cook | 4:00h (2:00-12:00) | / | 10h | |
| Keep Warm | 2:00h (2:00-12:00) | / | 10h | |
Daily check and maintenance
In order to use the product safely with a longer service life, please carefully check and maintain it.
| If the following occurs: | Solution: |
| Power cord and plug are expanded, deformed, damaged, or their colour has changed.One part of the power cord and plug are hotter.Power cord is flexible and the power supply is occasionally interrupted.The electric pressure cooker is heating abnormally and it is generating bad odour.There is abnormal noise or vibration during power supply. | Stop using the pressure cooker and have it repaired it by an authorized repair centre. |
| There's dust or dirt on the plug or socket. | Remove the dust or dirt. |
Safety precautions
To avoid personal injury and property loss, be sure to observe the following safety precautions.
• Meanings of the symbols:
| Prohibited | General prohibition | Do not disassemble | Do not touch with wet hands |
| Prohibited contact (do not touch) | Do not expose to water spray | ||
| Mandatory | Mandatory action | Remove the power plug |
- The danger caused by mistaken use if following warnings are neglected includes to two grades

Warning
Risk of death or serious injury if the warning is not observed.

Caution
Risk of physical injury or property damage if the warnings are not observed.
Warning
 | Use a correct power outlet (refer to the label)Failure to use correct electricity can cause fire or electric shock.Danger of fire if an unsuitable socket is used.  |
 | Use a dedicated socketUse a dedicated grounded socket rated for current of over 10 A.If the socket is shared with other electrical appliances, the socket may cause abnormal heat and result in fire.  |
 | It is strictly prohibited to use any other lid than the one supplied with the pressure cookerIt is strictly prohibited to use any other lid for heating or during the process of switching on the appliance. Only use the original lid.Use of any other lid may cause electric shock or safety hazards.  |
 | Stop using if the power cord is damagedReplace a damaged power cord with a special soft cord or replace it with the special assembly purchased from the manufacturer or an authorized repair centre.  |
 | Do not put foreign objects into the applianceIt is prohibited to insert metal shavings, needles and any other foreign objects into the gaps or slots on the appliance.Doing so may cause electric shock or movement anomalies.  |
 | Keep the appliance out of reach of infantsKeep the appliance out of reach of infants, in order to avoid electric shock and scalding.  |
 | Modification is prohibitedModification of the appliance or repair by non-professionals is prohibited.Violation may cause fire or electric shock.Only a designated service centre may repair or replace parts of this appliance.  |


Warning regarding opening the lid
- When the electric pressure cooker is not operating, there isn't any increased pressure in the pot and the float valve is down.
- When the electric pressure cooker is operating, pressure in the cooker rises and the float valve ascends. In this case, do not try to forcibly open the lid before the pressure has been completely released;
- If it is difficult to open the lid, please do not open it forcibly, as this may cause scalding or physical injury.


Check periodically
- Be sure to periodically check the block proof cover and exhaust valve core to make sure that they are not blocked;
- Do not cover the exhaust valve with a heavy object or replace it with another object.
Caution
 | Never pull the plug with a wet handTo avoid electric shock.  |
 | When pulling the plug, hold the plug, not the power cordWhen pulling the plug, always hold the plug with your fingers.Do not pull the power cord, as this will damage the cord, causing electric shock and short circuit.  |
 | Unplug the appliance when not in useOtherwise, it may produce leakage, fire or failure.  |
 | During operation, never move your hands too close to the exhaust port.During cooking, never move your hands too close to the exhaust port to avoid burns.During cooking, do not cover the vent with a cloth or any other item.  |
 | Do not touch the lid while the cooker is operatingWhen the cooker is operating, the lid is very hot.Therefore, do not touch it, as this may result in scalding. |  |
 | Total amount of food and water may not exceed the "max" markingThe total amount of food and water may not exceed the "max" marking, otherwise food may not cook or a malfunction could occur. | |
 | Do not use a pot other than the dedicated potIf there are any foreign objects on the bottom of the pot or on the heating plate surface, remove such foreign objects before use.Otherwise, the cooker may overheat or operate abnormally. |  |
 | Do not use the inner pot with any other heating applianceIn order to avoid deformation or fault.Please use the special inner pot. |  |
 | When moving the product, please hold the handle of cooker bodyIn order to avoid dropping the cooker, do not hold it directly by the lid handle when moving it around. |  |
| Do not use in the following locationsDo not use on unstable surfaces.Do not use near water and fire.Do not use near walls and furniture.Do not use in locations exposed to direct sunlight and oil splatter.Do not use near a stove, in order to avoid fire. |  | |
Environment for storing the product
• Periodically clean the cooker and remove oil and dirt if it is stored on the table. - Keep the electric pressure cooker 30 cm away from other kitchen appliances.
Clean after use
- Clean after each use.
- Before cleaning and maintenance, please unplug the power cord and wait until the product cools down.
- Remove the lid and the inner pot. Clean with detergent first, then rinse well with water and wipe dry with a soft cloth.
- Clean the internal side of the lid with water. The seal ring, block-proof cover, exhaust valve core and float valve can be removed for washing. Correctly re-install them after washing and then dry the internal side of lid with a cloth.
- Wipe clean the cooker body with a cloth. Do not soak or immerse the cooker body in water or spray water on it.
Troubleshooting
When the followings occurs, it may not necessarily be a cooker fault or error. Please carefully check once before sending the appliance for repair.
| S/N | Problem | Reason | Solution | |
| 1 | Difficult to close the lid | Sealing ring not installed properly. | Position the sealing ring correctly. | |
| The floater valve clamps the push rod. | Lightly push the push rod. | |||
| 2 | Difficult to open the lid | Float valve in the popped-up position. | Lightly press the float valve with a chopstick. | |
| There is pressure exists inside the cooker. | Open the lid after the pressure is completely released. | |||
| 3 | Steam leaks from the lid | Sealing ring installed incorrectly. | Correctly install the sealing ring. | |
| Food residue attached to the sealing ring. | Clean the sealing ring. | |||
| Sealing ring damaged. | Replace the sealing ring. | |||
| The lid is not closed correctly. | Close the lid correctly. | |||
| 4 | Steam leaks from float valve | Food residue on the float valve gasket. | Clean the float valve gasket. | |
| Float valve gasket worn-out. | Replace the float valve gasket. | |||
| 5 | Float valve unable to rise | Too little food and water in the inner pot. | Add water and food according to the recipe. | |
| Steam leaks from the lid or exhaust valve. | Send to the service centre fo repair. | |||
| 6 | Steam continuously coming out from exhaust valve | Exhaust valve not in sealing position. | Turn the exhaust valve to the sealing position | |
| Pressure control fails. | Send to the service centre for repair | |||
| 7 | Power indicator doesn’t light up | Bad power socket contact | Please check the power socket. | |
| 8 | All indicators flash | E1 on the display | Bottom sensor fault | Send to the service centre for repair |
| E2 on the display | ||||
| C1 on the display | High temperature because there isn’t any water in the inner pot. | Add the required amount of water. | ||
| High temperature because there isn’t any water in the inner pot | Insert the inner pot correctly. | |||
| E8 on the display | Pressure switch fault | Send to a service centre for repair. | ||
| 9 | Rice half-cooked or too hard | Too little water | Add the required amount of water | |
| Lid opened prematurely | After the cooking cycle completes, leave the lid on for 5 more minutes. | |||
| 10 | Rice too soft | Too much water | Reduce the amount of water accordingly. | |
WARRANTY AND REPAIR
For more information or in case of problems, please contact the Gorenje Call Centre in your country (phone number listed in the International Warranty Sheet). If there is no such centre in your country, please contact the local Gorenje dealer or Gorenje's small domestic appliance department.
For personal use only!
GORENJE
WISHES YOU A LOT OF PLEASURE IN USING YOUR APPLIANCE.
SI
MC6MBK_737435
① Exhaust valve: Pull out the exhaust valve from the lid. Clean the internal side of the exhaust valve and the exhaust valve and float valve of the lid with a brush and cloth at least once a month. ② Sealing ring: Please remove oil and dirt from the sealing ring with detergent and brush. ③ Water box: After cooking, there may be some steam condensate left in the water box of the external pot. This water (condensate) should be removed from the box in order to avoid bad odour. Please wipe any water with a clean cloth.

Preparation for cooking
| Program | Original cooking time (min) | Delay time | Keep warm time | |
| Rice | 14-18 | 0:10-24:00 | 10h | |
| Multigrain | less | 20 | 0:10-24:00 | 10h |
| normal | 35 | |||
| more | 50 | |||
| Soup | less | 20 | 0:10-24:00 | 10h |
| normal | 30 | |||
| more | 40 | |||
| Meat/Stew | less | 25 | 0:10-24:00 | 10h |
| normal | 35 | |||
| more | 45 | |||
| Poultry | less | 10 | 0:10-24:00 | 10h |
| normal | 20 | |||
| more | 30 | |||
| Fish | less | 3 | 0:10-24:00 | 10h |
| normal | 5 | |||
| more | 8 | |||
| Steam | less | 5 | 0:10-24:00 | 10h |
| normal | 15 | |||
| more | 25 | |||
| Beans/Chili | less | 30 | 0:10-24:00 | 10h |
| normal | 35 | |||
| more | 40 | |||
| Porridge | less | 10 | 0:10-24:00 | 10h |
| normal | 20 | |||
| more | 30 | |||
| Manual | 30 (0-90) | 0:10-24:00 | 10h | |
| Yoghurt | 6:00h (4:00-8:00) | 0:10-24:00 | 10h | |
| Sear | 30 | / | / | |
| Slow Cook | 4:00h (2:00-12:00) | / | 10h | |
| Keep Warm | 2:00h (2:00-12:00) | / | 10h | |


IMPORTANT NOTE: Read the entire user manual carefully before using the appliance.
WE WISH YOU GOOD LUCK WITH YOUR NEW APPLIANCE.
![graph TD A["Unlock State"] --> B["Usable Capacity"] B --> C["Lock State"]](/content/2026/06/1372092/images/2ba584352277209aef6851b515d10df77ff572cc3434a440f99c2372f476df84.jpg)
IMPORTANT NOTE: Please read this user manual carefully before starting use. Keep the user manual with instructions, as you may need it later.
(Images are for informational purposes only. The actual product may differ from the product shown in the image.)
Attention

Removing and fitting the sealing ring Removing Fitting Pull upward Press downward Sealing ring


| Br. | Opis |
| 1. | Ručica ispušnog ventila |
| 2 | Drška gornjeg poklopca |
| 3 | Brtveći prsten |
| 4 | Nadzorna ploča |
| 5 | Otvor za ispuh/ispuštanje pare |
| 6 | Plutajući (podizni) ventil |
| 7 | Brtveći prsten |
| 8 | Anti-blokirni poklopac (koji sprječava blokiranje) |
| 9 | Unutarnja posuda (lonac) |
| 10 | Drška kućišta ekspres lonca |
| 11 | Kućište ekspres lonca |
Control panel with control buttons

IMPORTANT NOTE: Please read this user manual carefully before starting to use the appliance. Keep the user manual with instructions, as you may need it later.
Removing and fitting the rubber seal
Removing Fitting
Pull upward Press downward
Rubber sealing ring


- Before each use, check that the rubber seal and the protective anti-blocking cover are correctly positioned on the top cover.
- After use, clean the rubber seal and the area around the anti-blocking cover to prevent the cover from jamming, keep it clean, and prevent unpleasant odors.
- Do not pull the round rubber seal, as a deformed rubber seal may seal worse and thus prevent pressure from building up in the pot. 2. Do not use a damaged rubber seal. Please replace a damaged seal at an authorized service center.
Use and maintenance of the inner pot

Pull upward
Press downward

![graph TD A["Unlock State"] --> B["Usable Capacity"] B --> C["Lock State"] C --> D["Assembly Step 1"] C --> E["Assembly Step 2"]](/content/2026/06/1372092/images/755d5cd7d67633d533eeee13d89ac4a5b7e175aa03937c0f431b744d3564290d.jpg)
11

5
![graph TD A["Unlock State"] --> B["Usable Capacity"] B --> C["Lock State"] C --> D["Step 1: Unlock State is locked"] D --> E["Step 2: Lock State is locked"] E --> F["Step 3: Lock State is locked"]](/content/2026/06/1372092/images/aec7e32894a3a10f350aeff454fd7a18a8e9eae3a5bf3584b42d228f99f9c9f4.jpg)

- IMPORTANT
- CAUTION
- PRODUCT STRUCTURE
- TIPS
- NOTE
- DISASSEMBLE AND INSTALL THE BLOCK PROOF COVER AND THE SEAL RING
- USE AND MAINTENANCE OF THE INNER POT
- PREPARATION FOR COOKING
- GENERAL FUNCTION
- SAFELY OPEN THE LID
- OPERATION PART
- DAILY CHECK AND MAINTENANCE
- SAFETY PRECAUTIONS
- WARNING
- WARNING REGARDING OPENING THE LID
- CHECK PERIODICALLY
- ENVIRONMENT FOR STORING THE PRODUCT
- CLEAN AFTER USE
- TROUBLESHOOTING
- WARRANTY AND REPAIR
- GORENJE
- WISHES YOU A LOT OF PLEASURE IN USING YOUR APPLIANCE
- WE WISH YOU GOOD LUCK WITH YOUR NEW APPLIANCE
- ATTENTION
- CONTROL PANEL WITH CONTROL BUTTONS
Brand : GORENJE
Model : MC6MBK
Category : Multi-cooker