
F-306 - Electric fryer FAGOR - Free user manual and instructions
Find the device manual for free F-306 FAGOR in PDF.

| Product type | Electric deep fryer |
| Brand | FAGOR |
| Model | F-306 |
| Tank capacity | 3 liters |
| Power | 2100 W |
| Voltage / Frequency | 230 V / 50 Hz |
| Adjustable temperature | Yes, via thermostat |
| Temperature range | 160 °C to 190 °C (recommended) |
| Recommended oil type | Vegetable oil for high-temperature frying |
| Safety - Thermal cut-off | Yes, thermal safety switch |
| Safety - Microswitch | Prevents operation if the control box is not properly in place |
| Removable parts | Tank, basket, lid, control box with heating element |
| Cleaning the tank and basket | Dishwasher safe or washable with soapy water |
| Cleaning the control box | Do not immerse; clean with a damp cloth |
| Basket handle | Foldable, easy assembly |
| Lid | With viewing window |
| Cable storage | Compartment at the back of the appliance |
| Weight (approx.) | 2.5 kg |
| Dimensions (L x W x H) (approx.) | 35 x 25 x 30 cm |
Frequently Asked Questions - F-306 FAGOR
User questions about F-306 FAGOR
0 question about this device. Answer the ones you know or ask your own.
Ask a new question about this device
Download the instructions for your Electric fryer in PDF format for free! Find your manual F-306 - FAGOR and take your electronic device back in hand. On this page are published all the documents necessary for the use of your device. F-306 by FAGOR.
USER MANUAL F-306 FAGOR
The manufacturer reserves the right to modify the models described in this User's Manual
1.DESCRIPTION DEL PRODUCTO (Fig 1
1.PRODUCT DESCRIPTION (Fig 1)
- Fryer lid
- Display window
- Basket handle
- Basket
- Control panel
- On/off button
- Element
- Oil pan
- Outer housing
- Thermostat control
- Fryer ON/OFF pilot light
- Thermal safety system override
- Cable and cable housing
2. TECHNICAL CHARACTERISTICS
Voltage - Frequency: 230V - 50 Hz
Power: 2100W
Capacity: 3L
3. IMPORTANT SAFETY WARNINGS
- Before using the appliance for the first time, read all the instructions and keep them for future reference.
After removing the packaging, make sure the product is in perfect condition. If in doubt, do not use the appliance and contact an authorised Technical Assistance Centre. - The packaging elements (plastic bags, polystyrene foam, etc.) should be kept out of the reach of children, since they may be hazardous.
- Before using for the first time, check that the voltage in your domestic mains network coincides with that indicated for the appliance.
- The electrical safety of the appliance is guaranteed only when connected to an efficient earth installation, as stipulated in current electrical safety regulations. The manufacturer accepts no responsibility for damage derived from a failure to connect the appliance to an earth installation. If in doubt, contact a qualified professional.
- In the event of the socket being incompatible with the appliance plug, have the socket
replaced by a qualified professional.
- We recommend that you do not use adaptors or extension cables. If the use of said elements is unavoidable, only use adaptors and extension cables that comply with current safety regulations, and take care not to exceed the power limit indicated on them.
- If the appliance stops working, contact an authorised Technical Assistance Centre only. In the event of failure and/or improper working, turn the appliance off and do not attempt to repair it. Contact an authorised Technical Assistance Centre and request that they use original replacement parts and accessories.
- The appliance is designed for domestic use only, as described in this Manual. Any other use is considered inappropriate and therefore dangerous.
- The manufacturer accepts no responsibility for any damage caused by the improper, incorrect or irresponsible use of the appliance, or by repairs carried out by unqualified persons.
When using electrical appliances, a series of basic safety regulations should be respected in order to reduce the risk of fire, electrical shocks and/or personal injury: PARTICULARLY
- Do not use the appliance if your hands or feet are damp or wet, or if you are barefoot.
- To protect against electric shocks, do not submerge the control panel and element in water or hold them under a running tap.
DO NOT TOUCH THE HOT SURFACES. USE THE HANDLES PROVIDED.
WARNING: WHEN THE APPLIANCE IS SWITCHED ON IT REACHES VERY HIGH TEMPERATURES. TAKE ALL NECESSARY MEASURES TO AVOID THE RISK OF BURNS, FIRESS AND OTHER DAMAGE TO PEOPLE OR PROPERTY.
DO NOT MOVE THE APPLIANCE DURING USE OR WHILE THE OIL IS COOLING. - Do not forget that the oil may deteriorate and even catch fire if heated for too long at a high temperature. If the oil were to catch fire, unplug the appliance immediately and place the lid on the pan. This will cut off the oxygen supply, thereby smothering the fire.
For your own safety, never use water to put out the fire.
- Unplug the appliance while not in use or before carrying out any maintenance or cleaning operation.
- To switch the appliance off, first turn the switch to its '0' position and then unplug the cable from the mains.
- Do not leave the appliance unattended while in use. Switch the appliance off whenever you leave the room, even if it is only for a brief moment.
- Let the oil cool before cleaning and storing the appliance.
- Do not use the appliance if the power cable or plug are damaged, or in the event of breakdown or improper functioning. Regularly check the power cable for damage.
- The user should never try to replace the appliance's cable. If the cable were to become damaged or need replacing, take the appliance to a Technical Assistance Service authorised by the manufacturer for examination, repair or adjustment.
- Do not let the cable hang over the edge of the table or worktop, or come into contact with hot surfaces.
- Never pull on the cable to unplug the appliance.
- Do not leave the appliance on or near a gas burner or electric hotplate, or inside or near a hot oven or a microwave oven.
- Never use the appliance outside or expose it to the elements (rain, sun, frost, etc.).
- When you decide to dispose of the appliance definitively, unplug it and render it unserviceable by cutting the power cable, for example.
- This appliance should not be used by physically, sensorially or mentally handicapped people or people without experience or knowledge of it (including children), unless they are supervised or instructed in the use of the appliance by a person responsible for their safety.
- Children should be watched to ensure they do not play with the appliance.
- For greater protection, we recommend installing a residual current device (RCD) with an operational residual current not exceeding 30mA . Ask your installer for advice.
4. RECOMMENDATIONS FOR USE
- We recommend that you use vegetable oil suitable for frying at high temperatures. You can also use liquid or solid fat. If you use solid fat, take the necessary precautions to prevent the element from overheating (see 'Using with solid fat').
- Do not use the fryer with too little oil/fat or with no oil/fat. The oil/fat level should be between the minimum and maximum marks indicated on the pan (8). Before switching the fryer on, make sure the oil level is correct.
Safety
- This fryer is equipped with a thermal safety device which switches it off in the event of overheating. This generally occurs when there is no (or too little) oil or fat in the pan; the appliance may also overheat while solid fat is melting. If the thermal device cuts off the power supply, proceed as follows:
- Unplug the fryer and wait for the oil or fat to cool.
- Press the switch (12) located in the cable housing at the back of the control panel (5). The fryer will now work once again (Fig. 7).
The appliance is also equipped with a microswitch that prevents it from working if the control panel is not correctly in position.
5. USING WITH SOLID FAT
If you use solid fat for frying, make sure you take the following precautions:
- Melt the fat in a pan over a low heat.
- Carefully pour the melted fat into the fryer, taking care not to exceed the MAX level mark.
See 'Instructions for use'. - If you are going to use the solid fat left over in the fryer from earlier cooking operations, make several holes in it using a fork. When doing this, take care not to damage the element.
Next, set the thermostat (10) to 160^ , leave to heat for a minute and then
return the thermostat to '0'. Repeat this operation at intervals of various minutes, until the fat has melted completely. This will prevent the build up of excessive heat which may damage the element.
6. BEFORE USING FOR THE FIRST TIME
-
Remove the basket (4) and place the handle (3) in its working position (Fig. 2). To assemble the basket handle:
-
Press the two ends and insert them into the two housings in which they will turn. See (Fig. 2 a).
-
Turn the handle towards the outside of the basket (Fig. 2 b) by pressing it against the 'U' shaped fixer until it is firmly fixed in place. See (Fig. 2 c).
-
Remove the control panel and element and place in a safe, dry place (Fig. 3).
- Remove all packaging material from inside the pan.
Clean the basket and pan with soapy water. Rinse and dry well before reassembling (See the section entitled 'Cleaning').
Warning: Do not submerge the control panel and element in water.
7. INSTRUCTIONS FOR USE
- Place the appliance on a flat, stable, horizontal surface well away from the edge, and make sure that the cable is not hanging over the side of the table or worksurface and is not touching any hot surfaces.
- Remove the cable from its housing at the back of the fryer.
- Remove the lid (1), holding it by the handle.
- Before filling the fryer with oil or fat, all the parts should be assembled and completely dry.
- Pour oil or fat into the pan up to between the maximum and minimum level marks etched on the inside. If using solid fat, melt it first in a separate pan before pouring into the fryer (See 'Using with solid fat').
-
Do not mix different types of oil or fat.
Do not add new oil or fat to used oil or fat. -
Plug the fryer into the mains.
- Turn the appliance on by pressing the on/off button (6)
- Select the required temperature using the temperature control knob. The pilot light will come on. When selecting the temperature, be guided by the information given on the packaging of the food to be fried. If no such information is available, then the table given at the end of these instructions can be used as a guideline. Do not exceed the maximum quantities indicated on the table.
- When the pilot light switches off (10-15 minutes), this indicates that the oil/fat has reached the selected temperature. The pilot light will continue to switch on and off in keeping with the thermostat cycles throughout the entire cooking period. If you wish to carry out a number of continuous frying operations, wait until the pilot light has switched off before placing the next item of food in the oil/fat.
- Place the basket with the food slowly into the oil to prevent any water in the food from causing the oil to bubble up over the sides of the pan.
- Keep a close eye on the whole frying process.
After frying
- Remove the basket from the pan, shake a little and then hook into the draining position (Fig. 4). Place the food on a tray over a piece of absorbent kitchen paper. While you are doing this, the oil will have time to reach the right temperature for the next frying operation (the pilot light will switch off once again).
- Use a strainer to remove any loose particles of fried food that may have come off the main pieces and are floating in the oil. Leaving them to toast will have a negative effect on the quality of the oil.
- When you have finished frying, turn the thermostat switch to the '0' position, switch off the appliance and unplug the appliance from the mains. If the fryer is used often, submerge the basket in the oil and place the lid over the top for protection.
-
Wait for the oil to cool completely before disassembling and cleaning the fryer.
-
If you are not going to use the fryer for a while, we recommend that you store the oil or liquid fat in airtight recipients, either in the fridge or in a cool place. Fill the recipients by straining the oil or liquid fat through a fine sieve to eliminate any leftover particles of food.
- If you have used solid fat, leave it to solidify in the pan and then store the fryer with the fat still in it. (See 'Using with solid fat').
8. MAINTENANCE AND CLEANING
- Before cleaning, unplug the fryer and wait for it to cool.
- Remove the basket and disassemble the handle (Fig. 5)
- Disassemble the control panel and if necessary, clean with a damp cloth. Do not submerge in water.
- Remove the pan from its housing (Fig. 6) and empty before cleaning. To remove used oil or liquid fat, pour the contents of the pan into the original recipient. If you have used solid fat, wait for it to solidify and then empty the pan using a spatula.
- Clean the lid, the basket and handle, the pan and the outer housing in warm soapy water. Rinse thoroughly and dry well. These elements can also be washed in the dishwasher.
- Do not use solvents, abrasive detergents or metal scourers to clean the fryer.
-
Place the power cable into its housing and reassemble the fryer in the following order:
-
Pan
- Control panel + element
- Basket with mounted handle
-Lid
- Store the fryer with the lid on to keep the inside clean and free from dust.
9. PRACTICAL ADVICE
Oils and fats
Always use oils/fats appropriate for frying at a high temperature. In other words, use
oils that contain polyunsaturated acids or vegetable margarines.
- Replace the oil or fat regularly. Never add new oil to used oil.
- Do not leave the oil/fat at a high temperature for any longer than necessary. If you have to wait for a long time between two frying operations, turn the control knob to a low temperature, otherwise you will have to change the oil/fat more frequently.
In general, the oil/fat will darken in colour more quickly when frying protein-rich food (meat or fish). - If used for frying potatoes, the oil can be reused between 10 and 12 times, providing you remove all loose particles after each frying operation. Never, under any circumstances, use the same oil for more than 6 months. After this period, the oil should be thrown away.
Always replace the oil if it starts to bubble when heated, smells or tastes rancid, has darkened or has lost its fluidity. - If you do not use the fryer often, we recommend that you keep the oil or fat in air-tight glass recipients, preferably in the refrigerator. It is not a good idea to leave the oil in the fryer for long periods of time.
Chips
Follow the instructions given below for flavoursome and crunchy chips:
- Do not use very new potatoes (new potatoes generally give poor results). Cut the potatoes into sticks.
- Rinse the cut potatoes under the cold tap. This will stop them sticking together when fried.
- Dry with a clean cloth or absorbent kitchen paper.
- The chips should be fried in two stages:
- Stage 1: 160^ for 10-15 minutes.
- Stage 2: 190^ for 5-8 minutes.
- If the chips are frozen, fry in accordance with the instructions given on the packet.
Frozen foods
-
Frozen foods significantly lower the temperature of the oil when inserted into the pan. Therefore, you should never fry large quantities at the same time.
-
Let the appliance heat up once again to the optimum frying temperature before adding another portion of deep frozen food.
- Adjust the thermostat control in accordance with the instructions given on the packet. If no such instructions are given, turn the control knob to the highest temperature (190°C).
-
These instructions should also be followed in the case of some types of food which require special treatment, such as croquettes, for example.
-
Deep frozen foods often contain an excessive amount of ice, which should be removed before frying.
Other foods
- The table below gives some guidelines for obtaining optimum results. Do not exceed the maximum quantities of food indicated below.
- If the information in the table differs from that given on the packet of the food to be fried, always follow the instructions on the packet.
| Temp. ℃ | FOOD | MAXIMUM QUANTITY OF FOOD | TIME IN MINUTES | ||
| Fresh | Frozen | Fresh | Frozen | ||
| 160°C | Chips (first cycle) | 1000grs | 12÷15 | ||
| 170°C | Croquettes | 8 units | 5 units | 4÷5 | 6÷7 |
| Mushrooms | 10 units | 2÷3 | |||
| 180°C | Squid in batter | 12 units | 8 units | 3÷4 | 4÷5 |
| Mussels | 15 units | 12 units | 2÷3 | 3÷4 | |
| Meatballs | 8-10 units | 6 units | 3÷4 | 4÷5 | |
| 190°C | Chips (second cycle) | 1000grs. | 5÷6 | ||
| Frozen chips | 600grs | 6÷8 | |||
| Fritters | 4-5 units | 5÷6 | |||
| Ham and cheese scallops | 4 piezas | 4÷5 | |||
10. INFORMATION FOR THE CORRECT DISPOSAL OF ELECTRICAL AND ELECTRONIC APPLIANCES
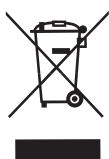
At the end of its working life, the product must not be disposed of as urban waste. It must be taken to a special local authority differentiated waste collection centre or to a dealer providing this
service. Disposing of a household appliance separately avoids possible negative consequences for the environment and health deriving from inappropriate disposal
and enables the constituent materials to be recovered to obtain significant savings in energy and resources.
To remind you that you must collaborate with a selective collection scheme, the symbol shown appears on the product warning you not to dispose of it in traditional refuse containers.
For further information, contact your local authority or the shop where you bought the product.
1.DESCRIPTION DU PRODUIT (Fig.1)
6. IPIN ANO TH IN ΩTH XPHSE
ByaIeTo kala(4) kal yupioTe tn xiepoalae (3) oE thon nou va mnpoeite va tnv niavte (Fig. 2).Tia va tooetnoeTe nn lah tonkalaoiou:
3. MEPbI INPEIOCTOPOXHOCTN
Jaaai Jaaai Jaaai Jaaai Jaaai
a1 = 2,an + 1 = 12( an + an + 1)
aaiisall a jiall jaii
L
1 1
[\text{解得}A \subseteq B]
Jjall jlll jn 251 jlll Jj
jgl jie iie 1iie jie jie jie jie jie jie jie jie jie jie jie jie jie jie jie jie jie jie jie jie jie jie jie jie
aaii i 1
a
a3 = 32a2,a4 = 32a3.
a real a nonreal
y1 y 1000
L
all 1 jj jll 1 j all bai a
a + b = 19.
Jus jus Jus Lss b 1j all Jus wu paas jg
i
j_4 = 76
yj yj
aaiyall aaiiall cglg jj g jg jgi
a 1111111111111111111
jll jil jil jil jil jil jil jil
ai a j ai
alall 12y y bai y gllgall all aalll
j 1
m = 311
J0 1
1
a a a a a a a a a a a a a a
aiil wall colal wall 20 b jll
J 1
10.128
a
aui
Jg 1
Clelll lal 1y
aaii
aii 4ai18

-
L a Lac 1 Sla y wlll p wll g y j laoi
y
S OBC = S COD + S BOC - S BOC
a a
i 1
LgDj
alallie 10
a a a a a a a a a a a a a
jblal 12,10
6 6
juyu lai yai lyao ic yiyai laic jill
4.13.2.2.2.2.2.2.2.2.2.2.2.2.2.2.2.2.2.2.2.2.2.2.2.2.2.2.2.2.2.2.2.2.2.2.2.2.2.2.2.2.2.2.2.2.2.2.2.2.2.2.
all jll jai jai lal jai laic
bi 1000
b1 = b2 = 2
a
a.sai bai jiy 1ai li bai jai
C. l1l2 与 e1e2
3 1
1
y = 10^x
1510s160
a = 1
5 155 190
Lus Lgul
all
a baaabaaal all
a aiee 1
190 1
Jia 1
法一. 实变
gall y
(20
J 1
- 1.DESCRIPTION DEL PRODUCTO (Fig 1
- 1.PRODUCT DESCRIPTION (Fig 1)
- TECHNICAL CHARACTERISTICS
- IMPORTANT SAFETY WARNINGS
- When using electrical appliances, a series of basic safety regulations should be respected in order to reduce the risk of fire, electrical shocks and/or personal injury: PARTICULARLY
- RECOMMENDATIONS FOR USE
- Safety
- USING WITH SOLID FAT
- BEFORE USING FOR THE FIRST TIME
- INSTRUCTIONS FOR USE
- After frying
- MAINTENANCE AND CLEANING
- PRACTICAL ADVICE
- Oils and fats
- Chips
- Frozen foods
- Other foods
- INFORMATION FOR THE CORRECT DISPOSAL OF ELECTRICAL AND ELECTRONIC APPLIANCES
- 1.DESCRIPTION DU PRODUIT (Fig.1)
- IPIN ANO TH IN ΩTH XPHSE
- MEPbI INPEIOCTOPOXHOCTN
- aii 4ai18
Brand : FAGOR
Model : F-306
Category : Electric fryer