
FSW-505E - Heating HONEYWELL - Free user manual and instructions
Find the device manual for free FSW-505E HONEYWELL in PDF.


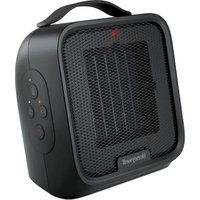
| Brand | Honeywell |
| Model | FSW-505E |
| Product Type | Space Heater |
| Power Supply | 220-240 V, 50/60 Hz |
| Heating Power | 1500 W / 750 W (two levels) |
| Dimensions (L x H x D) | 25 × 30 × 15 cm approx. |
| Weight | Approx. 1.5 kg |
| Heating Type | Forced Convection (Fan Heater) |
| Thermostat | Built-in, adjustable |
| Safety Features | Frost protection, automatic shut-off in case of overheating, tip-over protection |
| Filter | Washable air filter |
| Heating Levels | 2 (low/high) + fan only |
| Adjustable Temperature | Yes, variable thermostat |
| Control Type | Dial and mechanical buttons |
| Maintenance | Clean the filter regularly; dust the grille |
| Operating Indicator | Indicator light |
| Spare Parts | Contact Honeywell customer service |
| Repairability | Repairability index not available |
| Included Accessories | User manual |
| Recommended Use | Medium-sized rooms (20-30 m²) |
Frequently Asked Questions - FSW-505E HONEYWELL
User questions about FSW-505E HONEYWELL
0 question about this device. Answer the ones you know or ask your own.
Ask a new question about this device
Download the instructions for your Heating in PDF format for free! Find your manual FSW-505E - HONEYWELL and take your electronic device back in hand. On this page are published all the documents necessary for the use of your device. FSW-505E by HONEYWELL.
USER MANUAL FSW-505E HONEYWELL
OM_FSW-505E_PD.qxd 11/8/06 9:16 AM Page U6


KAZ Hausgeräte GmbH
Westerhaar 54
D-58739 Wickede
Phone: +49 2377 9289-0
www.kaz.com
The Honeywell trademark is used by
Kaz, Inc. under licence from Honeywell
Intellectual Properties, Inc.
FSW-505E-OM//1//2006-05-18
||
GB WALL-MOUNTED ANTIFREEZE MONITOR User instructions
FSW-505E
CONTENTS 5 ENGLISH
OM_FSW-505E_PD.qxd 11/8/06 9:16 AM Page U5
FSW-505E
ENGLISH
IMPORTANT SAFETY INFORMATION
Before starting to use the heater, read through all the instructions and keep this user manual in a safe place for future reference.
-
Supervision is necessary when the heater is used in the vicinity of children.
-
Do not use the heater outdoors.
-
Only use the heater after it has been correctly mounted according to this user manual. Mount the heater vertically on a straight wall. Safety distances must be observed, as shown in Fig. 1 and 2. Observe your local safety regulations. Do not mount the heater on flammable or unstable surfaces (e.g. wooden or plastic surfaces) or under the ceiling. Fire hazard!
-
Unwind the power cord completely. An incompletely unwound power cord can lead to overheating and cause a fire. Do not touch the power cord with wet hands. Make sure that no objects are resting on the power cord and that nothing can come in contact with hot parts. Deploy the power cord in such a way that nobody can trip over it and so that the power plug is easily accessible.
-
Do not use an extension cord, a multi-way connector or a continuously variable speed controller. This can cause overheating, fire or electric shock.
-
Connect the heater only to a single-phase power socket with the current as stated on the type plate of the appliance. The heater has double electric insulation (Class II) and does not therefore need to be earthed.
-
Always switch the heater off with the thermostatic slide switch and always remove the power plug from the socket when the heater is not in use. Allow the heater to cool for at least 20 minutes before you move, handle or clean it. Do not tug at the cord to pull the plug out. Only handle the heater with dry hands.
-
Do not use the heater near easily flammable gases or materials such as solvents, lacquers, glues, etc.
-
Do not mount the heater immediately below a power socket.
-
Do not mount or use the heater in close proximity to a bathtub, a shower or a swimming-pool (Fig.1).
-
Do not use the heater in any kind of vehicle (e.g. portacabins, lifts, caravans, cars, sheds) or similar enclosed spaces.
-
The use of a heater in small, enclosed spaces requires particular caution, especially if the heater does not have a thermostat. We recommend you to control the room temperature frequently.
-
Caution: the heater gets very hot during use. Keep flammable materials such as cushions, pillows, duvets, furniture, paper, curtains and clothing at least 100cm away from the heater.
-
Keep the heater clean. Make sure that the air intake and outlet vents are open before starting to use the heater. Do not allow any objects to get into the air intake and outlet vents.
- Do not cover the heater up. (Symbol ☑ on the heater). This can lead to overheating, fire or electric shock.
- Do not plunge the heater into water or any other liquids and do not pour water or any other liquids over the appliance or into the air intake and outlet vents.
- Clean the heater regularly by following the cleaning instructions.
- The heater may only be used according to the instructions in this user manual. Non-observance of these instructions could result in injuries, a fire, an electric shock or faults in the appliance.
- The appliance is intended only for private use indoors and not designed for commercial use.
- If the power cord of the heater is damaged, it must be replaced by a manufacturer-approved service centre or by similarly qualified persons, so as to avoid damage.
- Do not use this heater if it is damaged or shows signs of damage, if it has fallen over, or does not function properly. Pull the plug out of the power socket.
CONSTRUCTION
- Power control lamp
- Thermostatic slide switch
- MIN (✗) room temperature approx. + 5 °C
- MAX room temperature approx. + 30 °C
- Air intake vent
- Air outlet vent
- Power cord with power plug
- Wall bracket
- Screws for wall bracket
- Wall spacer
FIRST TIME OF USE
- Before starting to use the heater, read through all the instructions.
- Unpack the heater and the power cord. Remove all the packaging materials and dispose of them for recycling.
- Mount the heater according to the instructions under 'wall mounting', before you start to use it.
ENGLISH
WALL MOUNTING (Fig. 1, 2, 3)
- The heater must only be mounted vertically on a straight wall. Be sure to observe the prescribed safety distances, as shown in Fig. 1 und 2, and observe your local safety regulations. Never mount the heater on flammable or unstable surfaces (e.g. wooden or plastic surfaces) or under the ceiling. Fire hazard!
- Loosen the two screws (9) of the wall bracket (8) on the sides of the heater and remove the wall bracket from the heater. Using the wall bracket as a stencil, mark the positions on the wall for the bore holes.
- Bore two holes of 6mm diameter into the wall. Push a plug into each hole. Screw the wall bracket firmly to the wall with the two screws. Make sure that the wall bracket is mounted securely. (Fig. 3)
- Mount the heater onto the wall bracket and fix it to the wall bracket with the two side screws. Make sure that the heater is firmly fixed to the wall bracket so that it cannot become loose and fall off. (9)
INSTRUCTIONS FOR USE
- Check that the thermostatic slide switch (2) is on the lowest position MIN (✗) (3). Insert the power plug into the socket. Do not touch the cord with wet hands.
- Make sure that the air intake vent (5) and air outlet vent (6) are not covered up and that no objects have got inside. The air intake and outlets vents must always be free.
- Push the thermostatic slide switch (2) downwards to the highest position MAX (4). The power control lamp lights up (1). The heater operates with 500 W current.
- When the desired room temperature has been reached, push the thermostatic slide switch (2) upwards until you hear it click. Now the heater is switched off. The power control lamp (1) goes off.
- Now push the thermostatic slide switch (2) downwards a little. The heater will now automatically switch the heating operation on and off and maintain the desired room temperature. The power control lamp (1) goes on and off respectively.
- The further down you push the thermostatic slide switch, the higher to room temperature will be. The highest position MAX (4) corresponds to a room temperature of approx. 30 °C. The lowest position MIN (★) (3) corresponds to a room temperature of approx. 5 °C.
- It is normal that the thermostat does not switch on at a room temperature of above 30°C.
-
If the room temperature is lower than 5 °C, the heater will heat until the room temperature rises to more than 5°C and the desired temperature.
-
Before handling, moving or cleaning the heater, push the thermostatic slide switch (2) to the lowest position MIN (✗) (3), pull the plug out of the socket and allow the heater to cool for at least 20 minutes.
Overheating shut-off for the heater
- The heater is equipped with overheating shut-off, which automatically switches the heater off if the temperature in the appliance exceeds the normal operating temperature. The protective device applies only to the appliance and does not affect the regulation of the room temperature.
- When the overheating shut-off is activated, the appliance will not function, but the power control lamp (1) is on.
- Push the thermostatic slide switch (2) to the lowest position MIN (✗) (3) and pull the plug out of the socket.
- Allow the heater to cool for at least 20 minutes.
- Remove any objects from inside or in front of the vents for air intake (5) and air outlet (6), or clean the vents which have caused the faulty running or overheating with a vacuum cleaner. If, in addition, a lot of dust is visible inside the heater, please get the appliance cleaned at a service centre.
- Resume using the heater as described under 'instructions for use'.
ENGLISH
CLEANING, MAINTENANCE AND DISPOSAL
We recommend you to clean the heater regularly. So as not to impair the functioning of the heater, please follow the instructions for cleaning and maintenance.
Cleaning
- Before starting to clean the heater, push the thermostatic slide switch (2) to the lowest position MIN (✗) (3) and pull the power plug out of the socket. Allow the heater to cool for at least 20 minutes.
- Clean the air intake vent (5) and air outlet vent (6) with a vacuum cleaner, in order to remove the dust from the motor and heating element.
- Clean the outside of the heater with a soft, damp cloth.
- Resume using the heater as described under 'wall mounting' and 'instructions for use'.
Disposal

This symbol on the product or its packaging indicates that the appliance cannot be treated as normal domestic trash, but must be handed in
at a collection point for recycling electric and electronic appliances.
Your contribution to the correct disposal of this product protects the environment and the health of your fellow men. Health and the environment are endangered by incorrect disposal.
Further information about the recycling of this product can be obtained from your local town hall, your refuse collection service, or in the store at which you bought the product.
This regulation is valid only in EU member states.
CONDITION OF PURCHASE
As condition of purchase the purchaser assumes responsibility for the correct use and care of this KAZ product according to these user instructions. The purchaser or user must himself or herself decide when and for how long this KAZ product is in use.
WARNING: IF PROBLEMS ARISE WITH THIS KAZ PRODUCT, PLEASE OBSERVE THE INSTRUCTIONS IN THE GUARANTEE CONDITIONS. DO NOT ATTEMPT TO OPEN OR REPAIR THE KAZ PRODUCT YOURSELF, AS THIS COULD LEAD TO TERMINATION OF THE GUARANTEE AND CAUSE DAMAGE TO PERSONS AND PROPERTY.
Technical modifications reserved
DEUTSCH
MANUAL DE INSTRUÇÕES
RENSNING, PLEJE, BORTSKAFFELSE
PUHDISTUS, HUOLTO, JÄTEHUOLTO
OLULISED OHUTUSJUHISED

- KAZ HAUSGERÄTE GMBH
- ENGLISH
- IMPORTANT SAFETY INFORMATION
- CONSTRUCTION
- FIRST TIME OF USE
- WALL MOUNTING (FIG. 1, 2, 3)
- INSTRUCTIONS FOR USE
- OVERHEATING SHUT-OFF FOR THE HEATER
- CLEANING, MAINTENANCE AND DISPOSAL
- CLEANING
- DISPOSAL
- CONDITION OF PURCHASE
- DEUTSCH
- MANUAL DE INSTRUÇÕES
- RENSNING, PLEJE, BORTSKAFFELSE
- PUHDISTUS, HUOLTO, JÄTEHUOLTO
- OLULISED OHUTUSJUHISED
Brand : HONEYWELL
Model : FSW-505E
Category : Heating