
kMix AX910 - Kitchen appliance KENWOOD - Free user manual and instructions
Find the device manual for free kMix AX910 KENWOOD in PDF.


| Product type | Stand mixer |
| Dimensions (W x H x D) | Approx. 41 x 38 x 24 cm |
| Weight | Approx. 7.5 kg |
| Power supply | 220-240V, 50-60Hz |
| Power consumption | 1000 W |
| Bowl capacity | 5 L (stainless steel) |
| Main functions | Mixing, kneading, whisking, beating |
| Included attachments | Dough hook, whisk, flat beater |
| Variable speed | 6 speeds + pulse function |
| Planetary mixing action | Yes, for thorough mixing |
| Safety features | Locking head, overload protection, non-slip feet |
| Cleaning | Bowl and attachments dishwasher safe; body wipe with damp cloth |
| Spare parts & repairability | Attachments, bowl, and gears available via Kenwood service |
| General information | Color: Silver/Black; 134-page manual included |
Frequently Asked Questions - kMix AX910 KENWOOD
User questions about kMix AX910 KENWOOD
0 question about this device. Answer the ones you know or ask your own.
Ask a new question about this device
Download the instructions for your Kitchen appliance in PDF format for free! Find your manual kMix AX910 - KENWOOD and take your electronic device back in hand. On this page are published all the documents necessary for the use of your device. kMix AX910 by KENWOOD.
USER MANUAL kMix AX910 KENWOOD
natural_image
Diagram showing a circular component with evenly spaced dots next to three parallel wires (no text or symbols)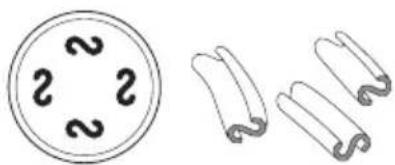
natural_image
Simple line drawings of a cell nucleus with chromosomes and corresponding ribosomes (no text or labels)Casarecce (AT910003) Bigoli (AT9100
natural_image
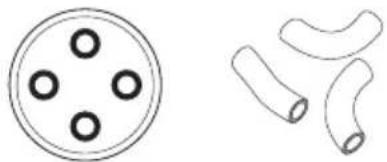
Two simple line drawings: a circular component with four circular holes and a cluster of curved shapes (no text or symbols)Maccheroni Lisci (AT910004)
natural_image
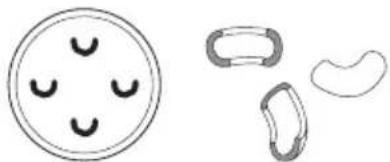
Simple line drawings of a smiling face, four rounded shapes, and a curved object (no text or symbols)Spaccatelli (AT910005)
natural_image
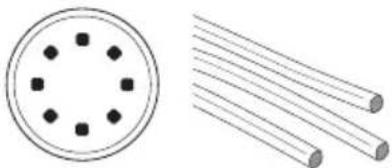
Diagram showing a circular component with four black dots and three parallel cylindrical rods (no text or symbols)Spaghetti Quadri (AT910006)

natural_image
Simple line drawing of a circular symbol with three horizontal lines inside, next to three parallel curved lines (no text or symbols)Pappardelle (AT910007)
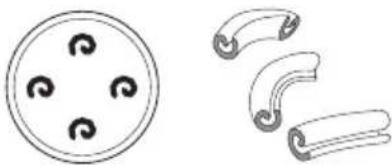
natural_image
Simple line drawings of a circular object with four swirls and three curved, segmented shapes (no text or symbols)Silatelli (AT910008)

natural_image
Diagram showing a circular component with four dots and three parallel lines, no text or symbols present.Linguine (AT910009)

natural_image
Simple line drawings of a cell nucleus and its corresponding cross-sections (no text or labels)Fusilli (AT910010)
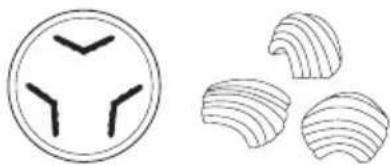
natural_image
Simple line drawings of a circular object with three vertical lines and three curved shapes (no text or symbols)Conchigliette (AT910011)

natural_image
Diagram showing a circular component with four black dots and three parallel lines of wires (no text or symbols)Bucatini (AT910012)

natural_image
Two abstract line drawings: a circular symbol with three curved crescent-like shapes and a pair of ear-shaped loops (no text or symbols)Orecchiette (AT910013)

natural_image
Simple line drawing of a cylindrical object with circular elements and star symbols (no text or labels)Biscuit Maker (AT910014)
Kenwood Limited, New Lane, Havant, Hampshire PO9 2NH, UK
www.kenwood.co.uk
KENWOOD

natural_image
Technical line drawing of a mechanical tool or feeding component (no text or symbols present)AX910
English 2 - 8
Nederlands 9 - 15
Français 16 - 22
Deutsch 23 - 30
Italiano 31 - 37
Português 38 - 44
Español 45 - 51
Dansk 52 - 58
Svenska 59 - 65
Norsk 66 - 72
Suomi 73 - 79
Türkçe 80 - 86
Česky 87 - 93
Magyar 94 - 100
Polski 101 - 108
Русский 109 - 116
Ελληνικά 117 - 124
عربي 151-071


natural_image
Diagram showing a device connected to a cable with a connector, no text or symbols present
natural_image
Illustration of a hand holding a medical device with a pen, showing a curved arrow indicating motion (no text or symbols present)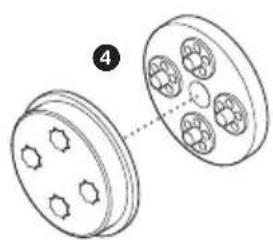
natural_image
Diagram of a mechanical component with four holes and a cross-section view (no text or symbols)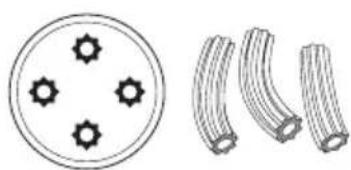
natural_image
Simple line drawings of a circular component with four small gears and three curved cylindrical objects (no text or symbols)Maccheroni Rigati
before using your Kenwood attachment
- Read these instructions carefully and retain for future reference.
- Remove all packaging and any labels.
safety
- Pasta mix made too dry or fed through too quickly can break your pasta maker and/or mixer. Make your pasta mix following a recipe supplied.
- Do not place your fingers or any other item, except the spanner/pusher supplied, down the feed tube.
- Only use the spanner/pusher handle to push dough down the feed tube. And don't push too hard.
- Never attach or remove the pasta maker whilst the mixer is in operation.
- Feed the dough small amounts at a time and at a steady rate. Don't allow the feed tube to fill up.
● Take care when handling or cleaning as the cutting assembly blade will be sharp.
- Switch off and unplug: - before fitting or removing parts - after use - before cleaning.
- Ensure the attachment is secured in position before switching on.
- Never leave the machine on unattended.
● To avoid electric shocks, never let the power unit, cord or plug get wet.
- Never use a damaged machine. Get it checked or repaired: see 'Service'.
- Never use an unauthorised attachment.
- Never let the cord hang down where a child could grab it.
- This appliance is not intended for use by persons (including children) with reduced physical, sensory or mental capabilities, or lack of experience and knowledge, unless they have been given supervision or instruction concerning use of the appliance by a person responsible for their safety.
● Children should be supervised to ensure that they do not play with the appliance. - Only use the appliance for its intended domestic use. Kenwood will not accept any liability if the appliance is subject to improper use, or failure to comply with these instructions.
before using for the first time
- Wash the parts see 'care and cleaning'
key
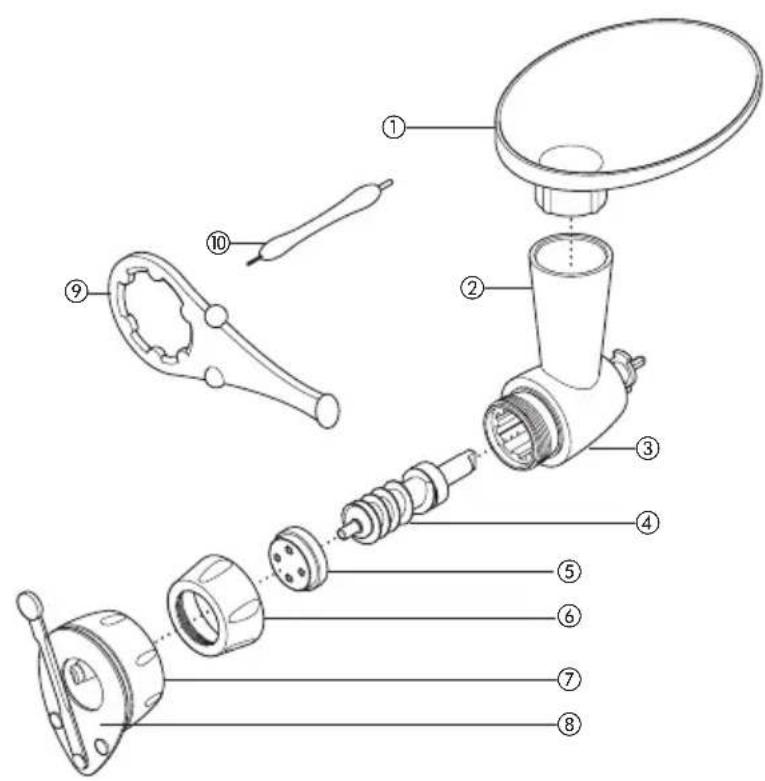
① hopper
② feed tube
③ body
④ scroll
⑤ die*
⑥ securing nut
⑦ clamp ring of cutting assembly
⑧ cutting blade
⑨ spanner/pusher
⑩ cleaning tool
*Included in your pack is the Maccheroni rigati die shown on the illustration page. To purchase any of the additional dies shown on the back page of this booklet, please call 0870 241 3653 or contact the shop where you purchased the attachment.
to assemble
1 Optional: for easier pasta making, warm the body, die and ring nut in hot water, then dry.
2 Fit the scroll inside the pasta body.
3 Fit the die.
4 Fit the securing nut and tighten. (Don't use the spanner/pusher as this is to assist with removal only).
- Make sure the securing nut is almost flush against the body of the attachment.
5 Remove the outlet cover by pressing its top then lifting off ①.
6 With the pasta maker in the position shown ②, locate in the outlet, then rotate into position.
7 Fit the hopper.
Optional: The cutting assembly can be fitted to the assembled pasta maker to assist with cutting the pasta into the desired lengths.
1 With the handle of the cutting blade uppermost, unscrew the clamp ring slightly. Place over the securing nut and twist if necessary until fully home on the attachment. The die should fit flush with the front of the cutting assembly.
2 Hold the edge of the cutting assembly and at the same time tighten the clamp ring by turning away from you ③.
Note – Whenever you remove the cutting assembly, always hold the feed tube in one hand and unscrew the clamp ring with the other by turning towards you.
to use your pasta maker
1 Make your pasta mix following a recipe supplied.
IMPORTANT
- Don't make the mix too dry as it could break your pasta maker or mixer. It should resemble coarse breadcrumbs or a coarse crumble texture. The particles should be separate but if squeezed together it should form a clump which bonds together.
2 Switch the mixer onto speed 2-3.
3 Place some of the mix onto the hopper. Feed a small amount of mix into the feed tube at a time. Allow the scroll to clear before continuing. If the feed tube becomes clogged use the end of the spanner/pusher handle to push the mix onto the scroll (don't use anything other than the spanner handle and don't push too hard). Never let the feed tube fill up.
4 When the pasta is long enough, move the handle on the cutting assembly back and forth to cut the pasta into the desired length. Alternatively if the cutting assembly is not fitted use a knife to cut the pasta.
- To change dies remove the cutting assembly. Always hold the feed tube in one hand and unscrew the clamp ring with the other by turning towards you. Remove the securing nut (use the spanner/pusher to loosen the securing nut if necessary) and switch briefly to speed 1 to eject the die. Remove the die and any visible excess pasta and then fit the desired die. Replace the securing nut and cutting assembly.
warning
The pasta maker will get hot in use – this is normal and is caused by the pasta being compressed in the attachment.
cleaning
Don't wash any part in the dishwasher.
dismantle the attachment
- Always hold the feed tube in one hand and unscrew the clamp ring with the other by turning towards you. Remove the securing nut, use the spanner/pusher to loosen the securing nut if necessary. Remove the attachment from the mixer by sliding the catch and pulling off the attachment. Dismantle the parts.
dies
The Maccheroni rigati, Maccheroni lisci and Bucatini dies can be pulled apart to assist with the cleaning process 4.
- Clean immediately after use, otherwise the pasta will dry and be extremely difficult to remove. Use the cleaning tool to remove all the pasta from the dies. The thicker end of the tool is ideal for cleaning the larger holes on the Maccheroni rigati die, whilst the thinner end is suitable for cleaning other dies. Wash in hot soapy water, then dry thoroughly.
scroll
- Do not immerse in water.
- Wipe clean, then dry.
hopper, ring nut, body, spanner, cutting assembly.
- Remove any pasta dough and if necessary wash in hot soapy water, then dry thoroughly.
recipe for plain pasta mix
We recommend using 00 flour, but if this is not available, use All Purpose Plain Flour. Measure the ingredients carefully as too dry a mix could break your attachment and/or mixer. However, if the mixture forms a ball of dough then too much liquid has been added.
200g 00 flour
100g beaten egg (approximately 2 medium sized eggs)
Method
Place the flour into the bowl and with the K beater fitted, add the beaten egg on minimum speed increasing to speed 1, mixing for a total of approximately 30 seconds. Scrape down the bowl and beater. Switch on and continue mixing on speed 1 for approximately a further 15 seconds. The mixture should resemble coarse breadcrumbs or a coarse crumble texture. The particles should be separate but if a small amount is squeezed together it should form a clump which remains bonded together.
to make flavoured pasta
herb pasta
Use the above recipe but add 20ml washed and finely chopped herbs such as parsley to the beaten egg,
wholemeal – replace the flour with ordinary plain wholemeal flour
tomato – Replace 15ml beaten egg with 15ml tomato puree
verdi - Replace 30ml beaten egg with 30ml finely pureed spinach.
eggless pasta
200g 00 flour
pinch salt
25ml virgin olive oil
approximately 100ml water
Follow the method for plain pasta mix adding the salt to the flour and replacing the egg with the oil and water.
Japanese Soba Buckwheat Noodles
- Ideal for people who require a gluten free diet.
300g buckwheat flour
150g beaten egg
Follow the method for plain pasta mix.
Pass the mix through the pasta maker fitted with the Bigoli screen and cut into suitable lengths. Cook in boiling water.
udon noodles
350g All Purpose Plain flour
140ml cold water
20g salt
Stir the salt into the water until dissolved.
Follow the method for plain pasta mix replacing the beaten egg with the salt water.
Pass the mix through the pasta maker fitted with the Bigoli screen and cut into suitable lengths. Cook in unsalted boiling water for approximately 5 minutes, the noodles should be firm but tender.
Drain immediately and rinse in cold water. Serve immediately with a sauce of your choice.
to cook your pasta
Before cooking, pasta can be dried for short periods - up to an hour before cooking. This will vary according to the type of pasta produced.
1 Bring a pan three quarters full of water to the boil. Add salt to taste.
2 Add your pasta and boil stirring occasionally. Cook until the pasta is al dente. It should be tender but yet still firm to bite. As a guide this will take 1 - 10 minutes but will vary on the type of pasta and the texture desired. Always check the texture regularly as the pasta will continue to cook a little after being removed from the heat.
● Never add oil to your water as it makes the pasta slippery, preventing the sauce from sticking properly.
choosing a sauce for pasta
Selecting the pasta to the sauce can make a difference. Tubular shapes trap bits of food in thick sauces, wheras long strands are good for absorbing juices of tomato sauces and seafood sauces without going soft, whilst thicker pasta usually goes with strong flavoured sauces.
biscuit maker (AT910014)
See back page for illustration of the biscuit maker.
1 Make up one of the following biscuit recipes and chill in the fridge to allow the mix to firm.
- Use small eggs otherwise the mix will be too soft.
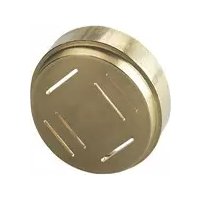
2 Remove the shaper from the biscuit die. Assemble the pasta maker with the biscuit die, making sure the slots in the die end up on either side. Fit the attachment to the mixer. (The cutting assembly should not be fitted.)
3 Slide the shaper into the slots either side of the die and move until the desired shape is in the centre of the hole.
plain biscuits
150g softened butter
150g caster sugar
2 small eggs, beaten
300g plain flour, sieved
lemon essence optional
Cream the butter and the sugar in the bowl using the K beater until the mixture is light and fluffy. Beat in the egg, then fold in the sifted flour and essence. Pass the mixture through the attachment, having selected the desired shape and cut into suitable lengths. Place onto a greased baking sheet and bake in the centre of a hot oven 190°C, 375°F, gas mark 5 for approximately 10 minutes or until cooked. Cool on a wire rack.
chocolate biscuits
125g softened butter
200g caster sugar
2 small eggs, beaten
250g plain flour 25g cocoa powder } sieved together
Follow the method for plain biscuits, replacing the essence with the cocoa powder.
After the biscuits have cooled, they can be decorated by dipping in melted chocolate or dusted with icing sugar.
trouble shooting
| Question Answer/Hint | |
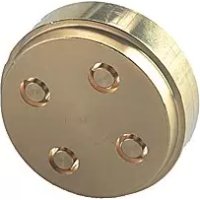
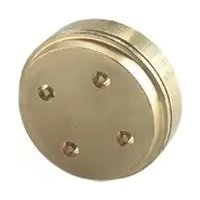
| The appearance of the pasta is rough | ● The screens/dies are specifically made of bronze. A feature of the bronze die is that it gives the pasta a rough surface which is preferred as it allows any accompanying sauce to stick |
| The quality of the extruded pasta varies throughout the mix by:- | ● This is normal, but can be minimised-ensuring the mix is of a fairly even consistency to start with.- adding the mix to the pasta maker at a steady rate.- ensuring that all the mix is extruded in one batch.- ensuring the mix is not allowed to dry out. |
| Pasta doesn’t come out the holes | ● Ensure the dies are clean before starting, any dried pasta in the holes will prevent extrusion.● Check that the feed tube is not blocked.● Use the spanner/pusher to help feed the pasta onto the scroll. |
| The dies are difficult to clean | ● Always clean immediately after use, do not allow the mix to dry onto the die.● Use the tool provided. The thicker end of the tool is ideal for cleaning the larger holes on the Maccheroni rigati die, whilst the thinner end is suitable for cleaning other dies. |
| Pasta shapes are ragged | ● Sometimes the first pasta extruded is slightly ragged. Add the pasta mix in a constant steady rate, try adjusting the rate at which the mix is added. Warm the body, die and ring nut in hot water and dry thoroughly before using. |
| The die doesn’t fit onto the scroll | ● Check that the centre hole in the die is cleared of any dry mix from previous tests.● Check that if you are changing dies during operation, there is no mix between the die and scroll preventing it from fitting flush. |
| The feed tube keeps blocking | Add small amounts of pasta at a time in a steady rate and only add more when the feed tube is clear.The mix is too wet.Use the end of the spanner/pusher to push the mix down the feed tube.(Removing the hopper will enable the spanner to reach lower down the feed tube).Vary the speed of adding the mix. |
| The cutting assembly is difficult to remove for approximately 30 minutes. | Leave the attachment to cool down |
| The cutting assembly is difficult to fit partially unscrewed from the plastic | Make sure the metal clamp ring is inner before pushing onto the attachment. |
koekjesmaker (AT910014)
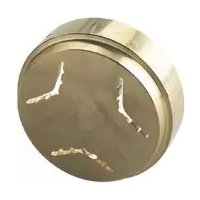
- KENWOOD
- before using your Kenwood attachment
- safety
- before using for the first time
- key
- to assemble
- to use your pasta maker
- warning
- cleaning
- Don't wash any part in the dishwasher.
- dismantle the attachment
- dies
- scroll
- hopper, ring nut, body, spanner, cutting assembly.
- recipe for plain pasta mix
- to make flavoured pasta
- herb pasta
- eggless pasta
- Japanese Soba Buckwheat Noodles
- udon noodles
- to cook your pasta
- choosing a sauce for pasta
- biscuit maker (AT910014)
- plain biscuits
- chocolate biscuits
- koekjesmaker (AT910014)
Brand : KENWOOD
Model : kMix AX910
Category : Kitchen appliance